It’s easy to create a beautiful and functional garden pathway from pallets! Here’s how to create a DIY pallet path, step by step!
A few years ago, I set out to transform a bare patch of our property into a beautiful garden area for my perennial plants and medicinal herbs. The catch: I wanted to completely develop the garden area without spending hardly any money! Outside of plants, I wanted to source everything else from repurposed materials!
Why? Because I wanted to demonstrate that you don’t need money to create a beautiful garden space! All you need is some creativity and resourcefulness! After all, gardening is for everyone. Access to healthy food is for everyone. And I wanted to demonstrate that firsthand! I also wanted to show how repurposed materials could be utilized in creating a beautiful and functional garden space!
If you haven’t already figured this out about me, I absolutely love to give new to life items that would otherwise be wasted or discarded! If you need more proof, check out my post all about how we use Craigslist to find cheap and completely free items to use on and around our homestead!
Pallets have become all the rage in the last few years for all the right reasons. They are easy to find and they can be endlessly repurposed! So, whether you love or hate the pallet trend, there truly are some wonderful things you can make with pallets. We’ve created everything from nesting boxes to wall decor using pallet wood!
So, when I wanted to create a special garden path, I knew exactly what to make: a pallet path!
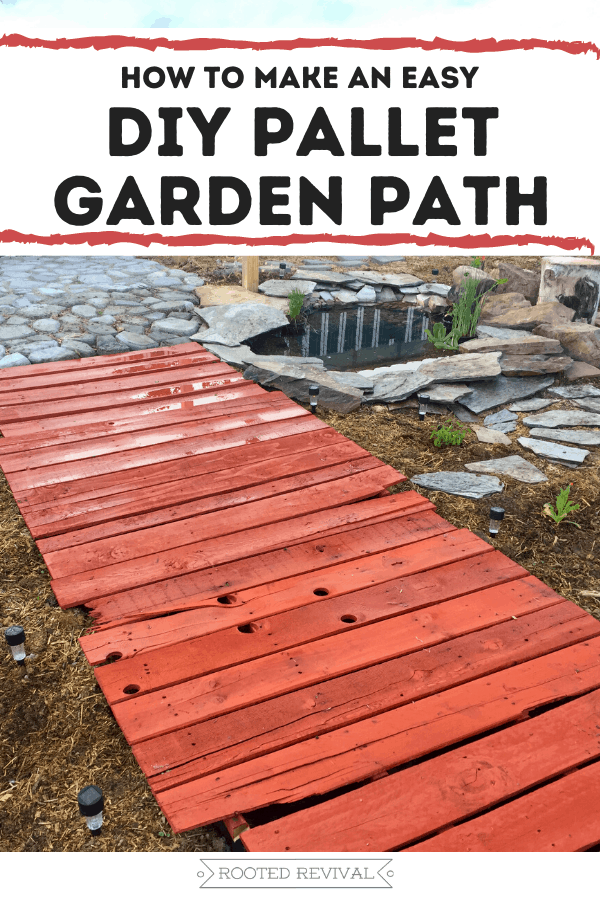
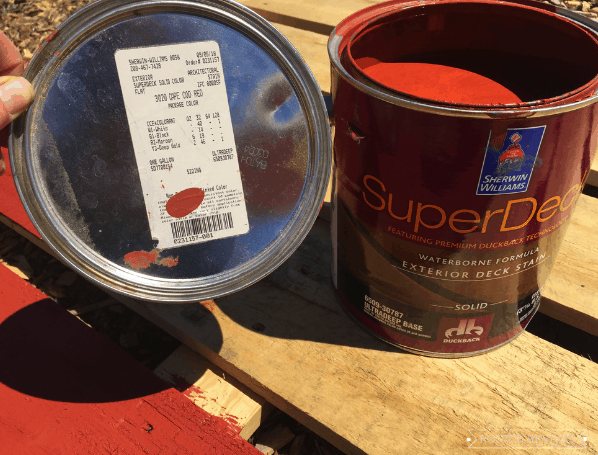
Luckily, pallets are easy to find on the curb outside of commercial manufacturing buildings around our town. I used four pallets to create the structure of the pathway. Then, I grabbed some tinted deck stain (that we had gotten for free from – no surprise here- Craigslist!) to complete the look and make it a bit more durable.
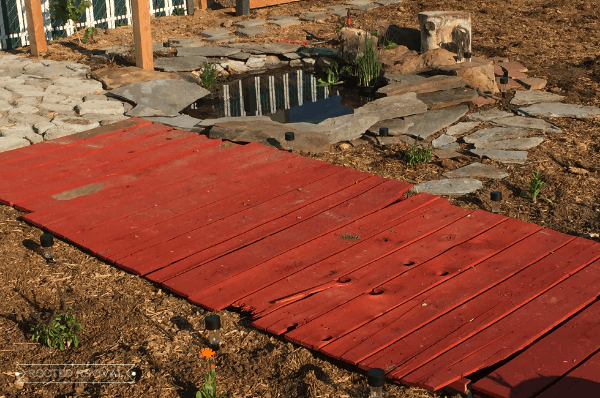
Not bad, right? And all for free dollars and free cents! (That joke never gets old, does it?!)
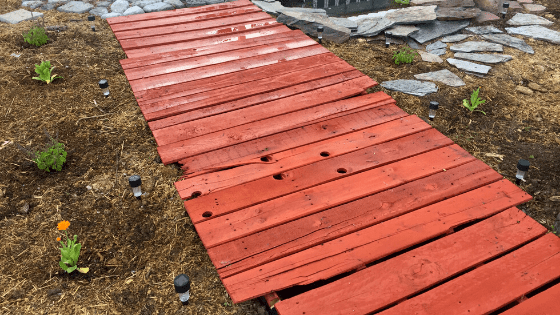
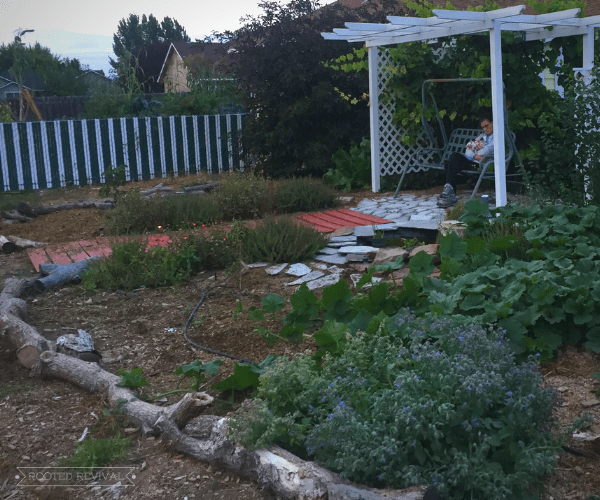
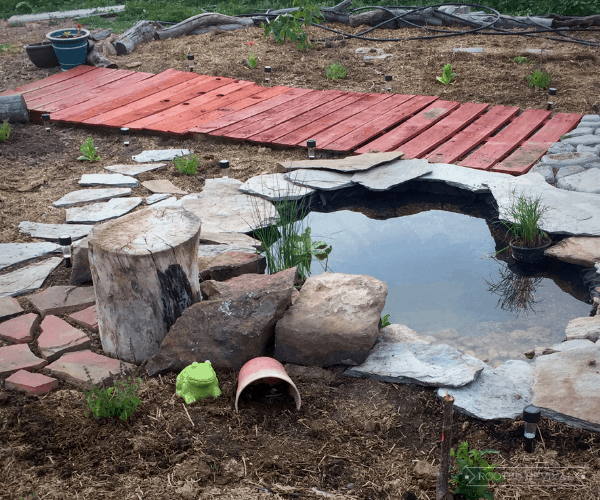
I love how it looks a little bit like a dock or a boardwalk. It certainly gave the space a pop of color and some great definition! The path was sturdy too! It was also much easier to roll the wheelbarrow over the pallet path compared to a dirt/mulch path or spaced stepping stones.
How to Create a DIY Pallet Path!
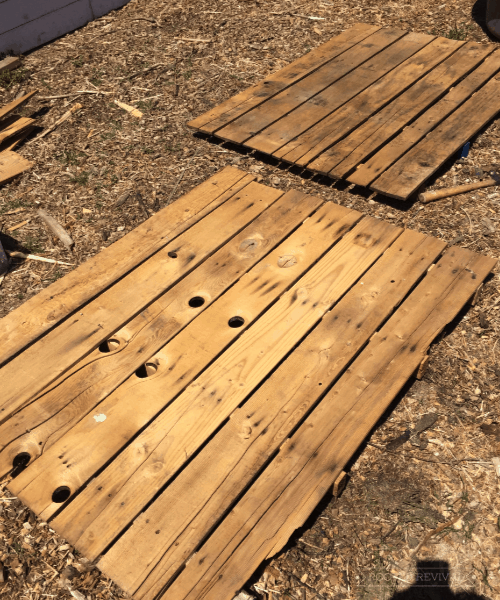
Step 1: Source the right kind of pallets.
Pallets come in all shapes and sizes, so it’s important to find ones that are consistently sized. It’s also important to make sure that the wood is heavy-duty so that it doesn’t crack or break when it’s walked on. I chose pallets that had wide boards rather than skinny ones for a more cohesive look.
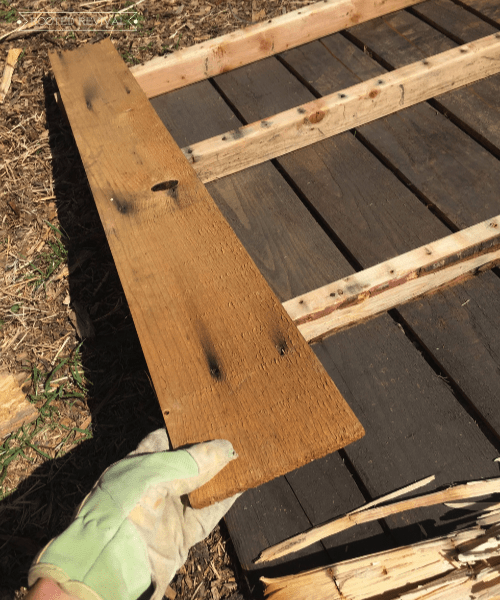
Step 2: Prep the pallets.
Once you have your pallets, you will need to prep them. Begin by removing the wood planks on what will be the underside/bottom of the pallet so that the support boards are exposed. You may want to add an additional support board or two to make your pathway more sturdy underfoot. Hint: Try to remove the wood slats carefully so that they aren’t damaged. We usually use a pry bar and hammer to do this. You can use undamaged boards in the next step!
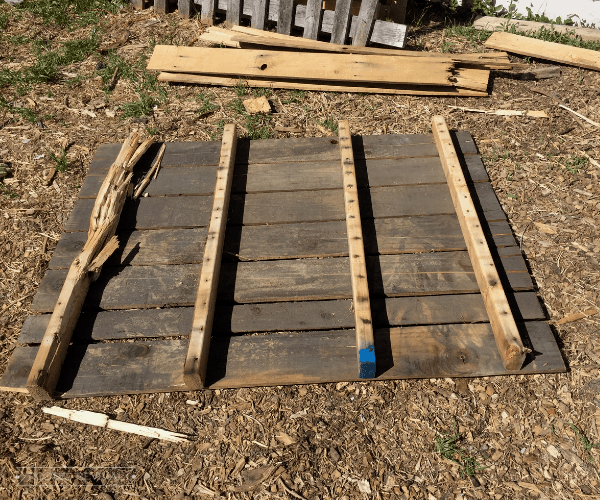
Step 3: Arrange pallet board slats.
Next, you will need to arrange and possibly re-arrange the boards on the “top” side of the pallet to meet your specifications. I choose to have mine closely spaced, with very little gaps between the boards so that it was easier to walk on. To do this, I had to remove some of the boards and rearrange them to get the spacing I desired. I also added additional boards that were removed from the bottom-side of the pallet to fill in any gaps.
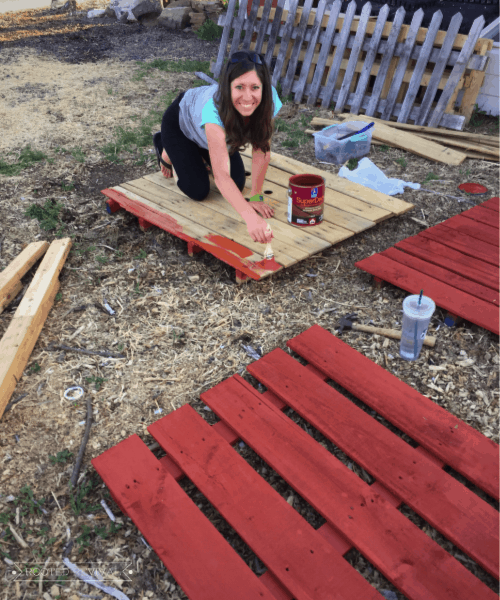
Step 4: Paint or stain the pallets, if desired.
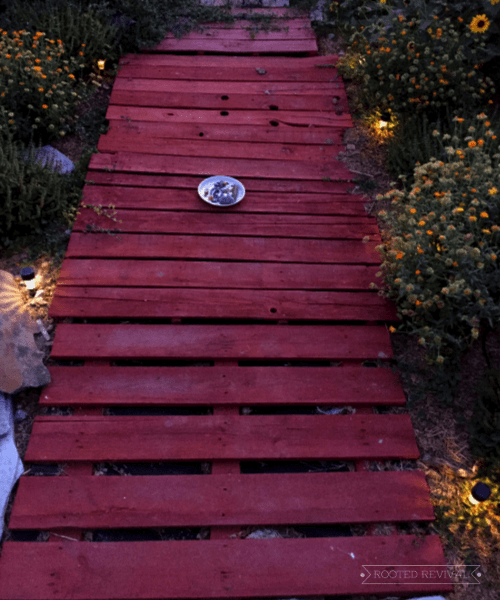
Now that your pallets are ready, you can paint or stain them if you want. I happened to have some deck stain in “Cape Cod Red” laying around (another Craigslist find!), so I applied two coats to each of the pallets. It instantly transformed them from boring old pallets!
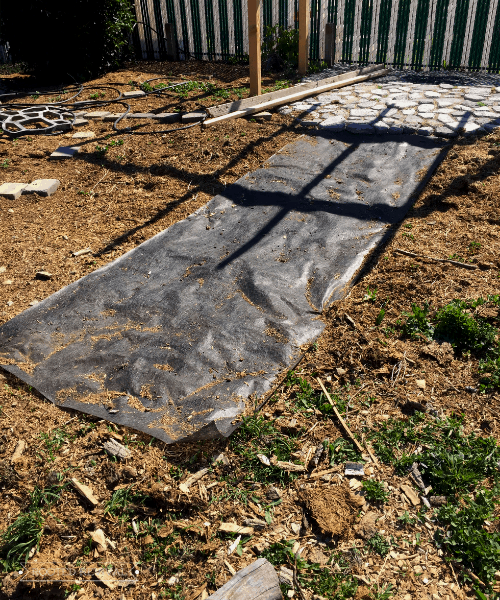
Step 5: Prep your pathway area.
While the paint or stain dries, you can begin prepping the pathway. You will want to weed the area, level the dirt as much as possible, and remove any large rocks or debris. I also rolled out some landscape fabric that we had on hand. If you lay down landscape fabric, wait to pin it down until after you level the dirt (in the next step). The weed barrier really helped to keep the weeds from popping up through the cracks of the pallets!
Step 6: Lay out your pallets.
Now that your space is prepped, it’s time to set the pallets in place! Begin by simply placing them in a row to form the desired pathway. You may notice that the pallets are uneven or may even shift underfoot. To correct this, you will need to level them by digging down to create shallow furrows for the support beams to sit in. This will help to hold them in the proper place when walked on and will make each of the pallets level with the next pallet. I laid a long board with a level on top on the pallets to make sure that they were all consistently level.
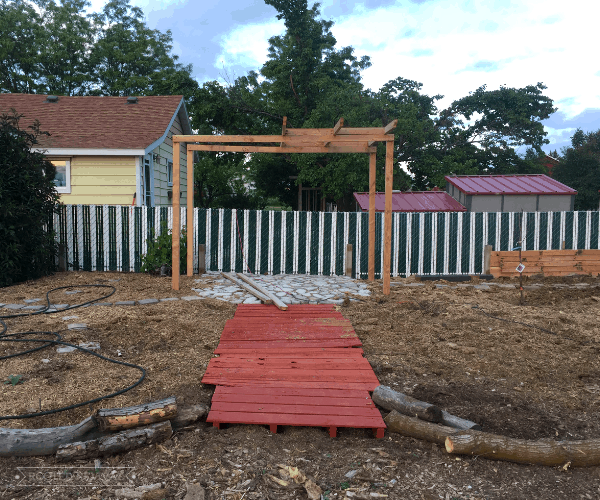
Step 7: Enjoy your new pathway!
That’s it! You can further accent the pathway with plants and solar lights. We found that the pathway actually held up really well and we enjoyed it for years until we moved away from our Idaho property.
Pin this idea for later!