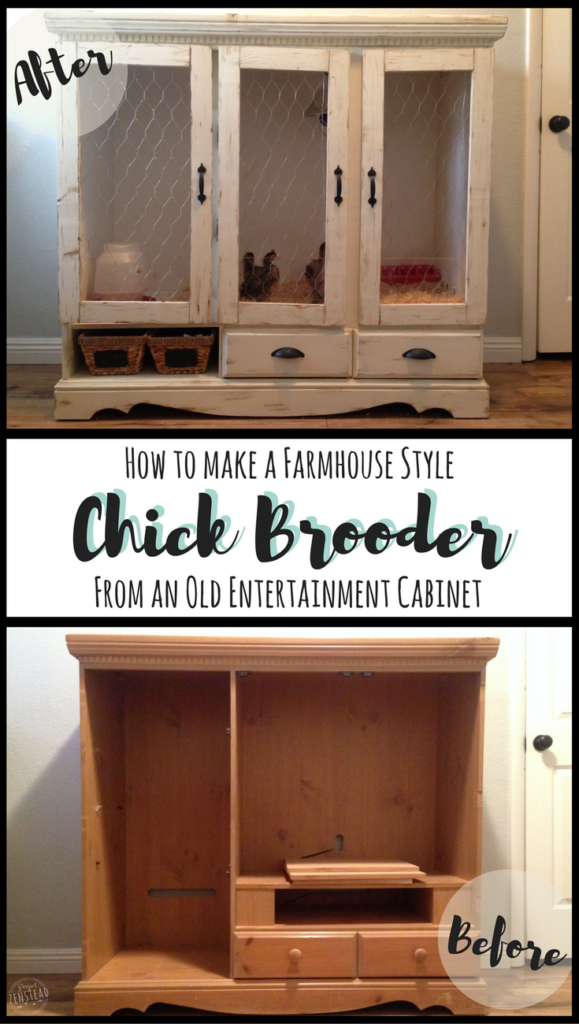
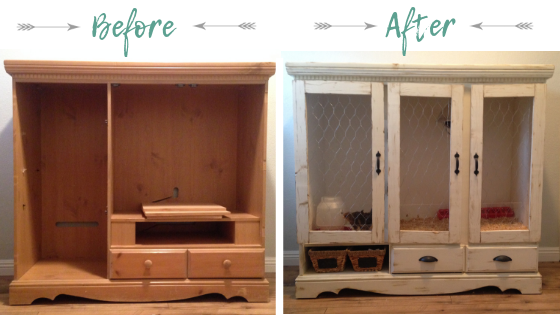
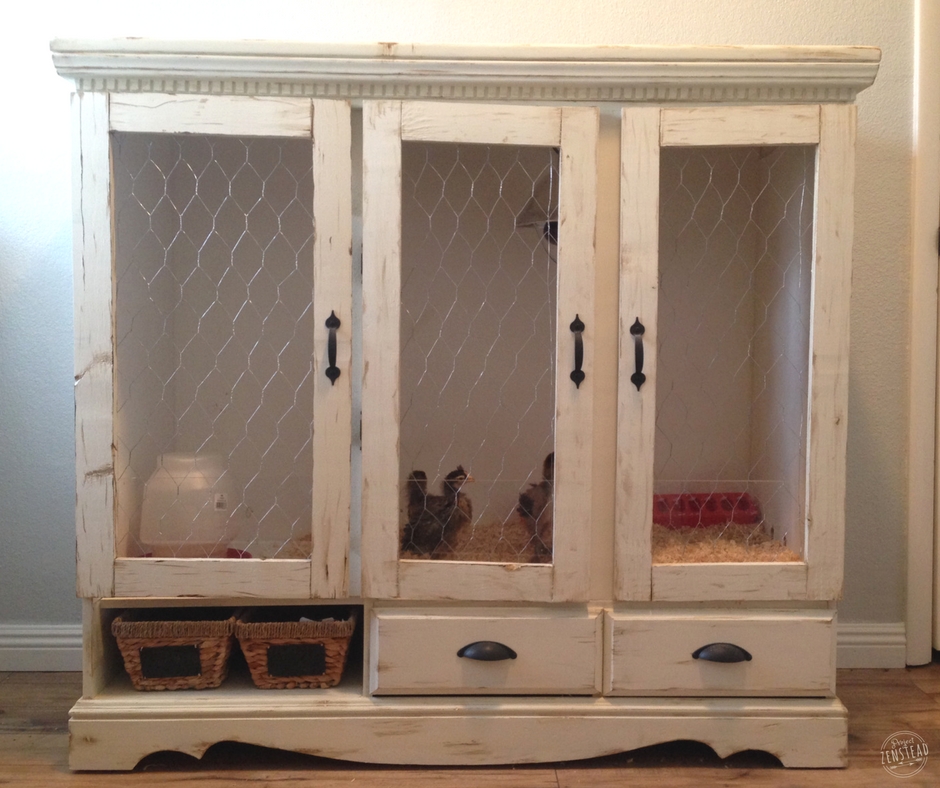
From trash to treasure: We upcycled an entertainment cabinet to create a one-of-a-kind DIY chick brooder (with farmhouse flare!) that would meet all of our needs!
Do you ever wonder if you have become a crazy chicken person? A great test is to ask yourself “Am I creating custom furniture for my chickens based on their needs and comfort?”.
If the answer is “yes”, then congratulations and welcome to the club! We don’t have a cool handshake yet, but you do need to know the secret cluck to get into the clubhouse. 😉
All joking aside, we recently decided that it was time to upgrade our brooder! We wanted a more permanent brooder set-up because we fully expect to have expand our backyard chicken flock every year, which means that we will have baby chicken roommates in the house every Spring. We also wanted a brooder that would be more functional.
In the past, we have used a homemade pallet wood brooder. It worked well, but it was extremely heavy and bulky. It took up a lot of space in our home and was hard to store when it wasn’t in use. Now that we have a smaller home, we wanted a brooder solution that was both functional for the chicks and fit with our home decor. Yes, I admit it – I wanted a “pretty” brooder to fill with little chicks that would poop all over it! Well, mission accomplished!
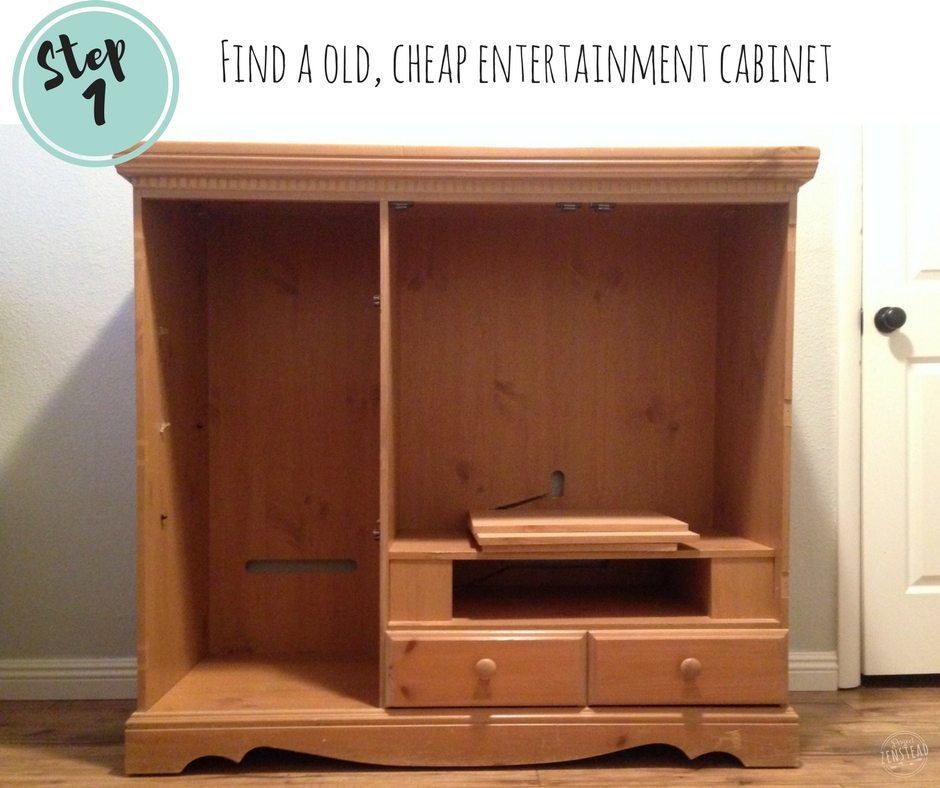
We decided that the easiest and best option was to upcycle an old entertainment cabinet to create a one-of-a-kind chick brooder that would meet all of our needs. We started watching Craigslist and it didn’t take long to find exactly what we were looking for. The entertainment cabinet wasn’t beautiful to look at, but it was real oak and was the perfect size and shape. It was also free, which was a major bonus!
If you don’t regularly check out the free section on Craigslist, you really should! We have found tons of items on it, including lumber, work benches, firewood, and garden items. It’s like a treasure hunt – it takes some patience and persistence, but it is well worth the effort! (Here’s more about how to score amazing finds for your homestead on Craigslist!)
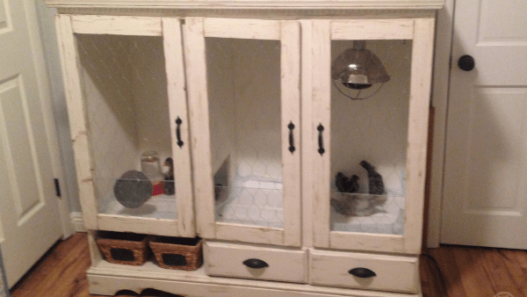
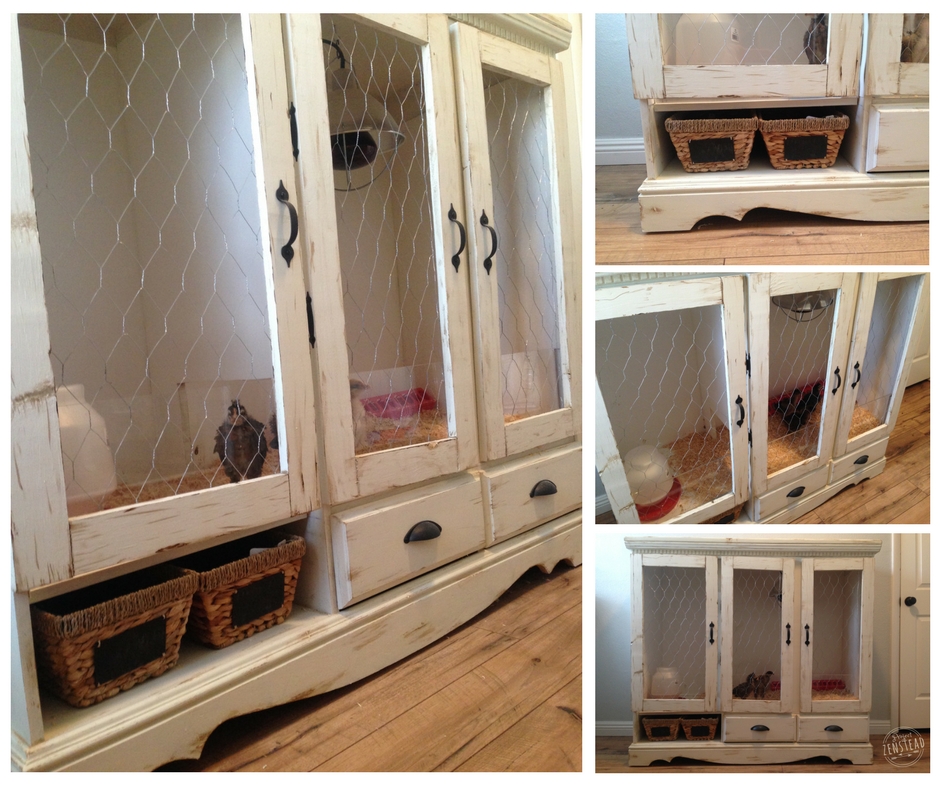
I love the way that our chick brooder turned out and the chicks certainly haven’t complained either! It’s wonderful to have a functional brooder that isn’t a giant eye-sore. We painted and aged it so that it had farmhouse flair… because nothing says “farmhouse” quite like chickens living in your house!
The paint was a bit pricey, but I think it was well worth it to get the look that I wanted. One of my other favorite features is the plastic waterproof lining that we installed on the floors and walls. It makes cleaning a breeze and it protects the wood from moisture. I love that this brooder is a permanent solution and we will be able to use it for years to come!
Supplies We Used to Create our DIY Chick Brooder:
- Entertainment cabinet in need of some love
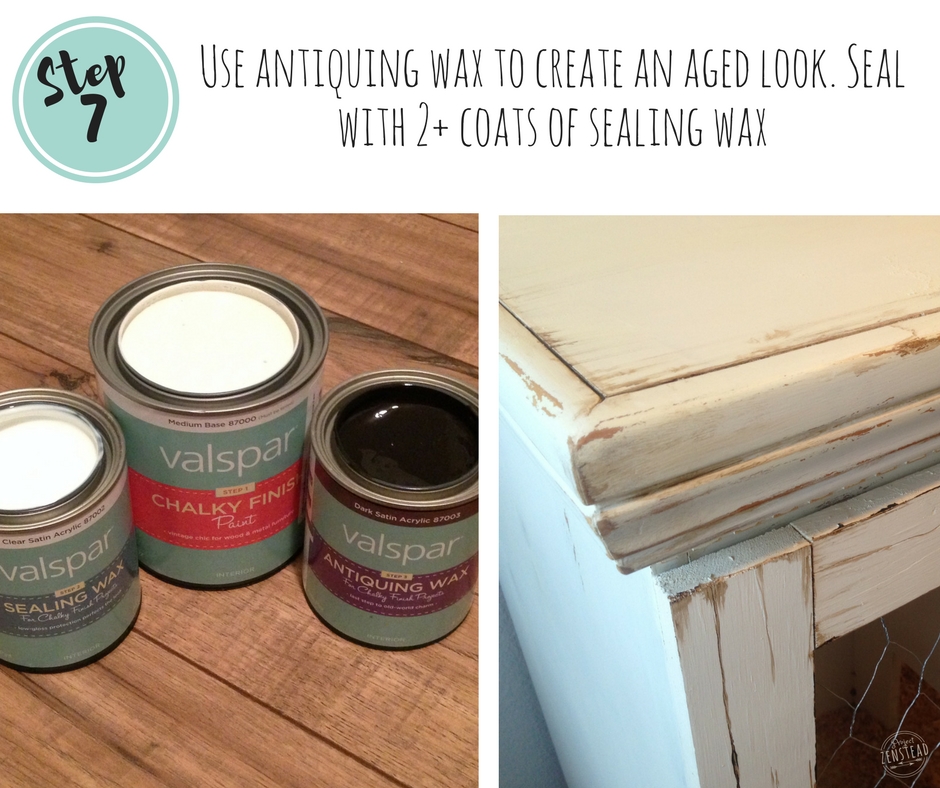
- Paint – we used Valspar Chalky Finish Paint (color: Her Dainties), Valspar Antique Wax and Valspar Sealing Wax
- Paintbrushes
- Sandpaper
- Polywall waterproof utility panel
- Loctite PowerGrab Panel & Foam adhesive
- Silicone caulk
- Caulk gun
- Chicken wire
- Staple gun and staples
- 1×2 boards (to make door frames)
- Plexiglass
- Metal track to hold plexiglass in place
- Hinges for doors
- Handles and drawer pulls
- Eyebolt screws, s-hook and chain (for heat lamp)
- Drill and circular hole saw drill-bit
How to Make a DIY Chick Brooder in 10 Steps:
Step One: Find an entertainment cabinet
Check Craigslist and thrift stores. We got ours for free on Craigslist. Try to find one that is made of real wood and is high quality, if possible. The higher the quality, the longer it will last!
Step Two: Prep the cabinet
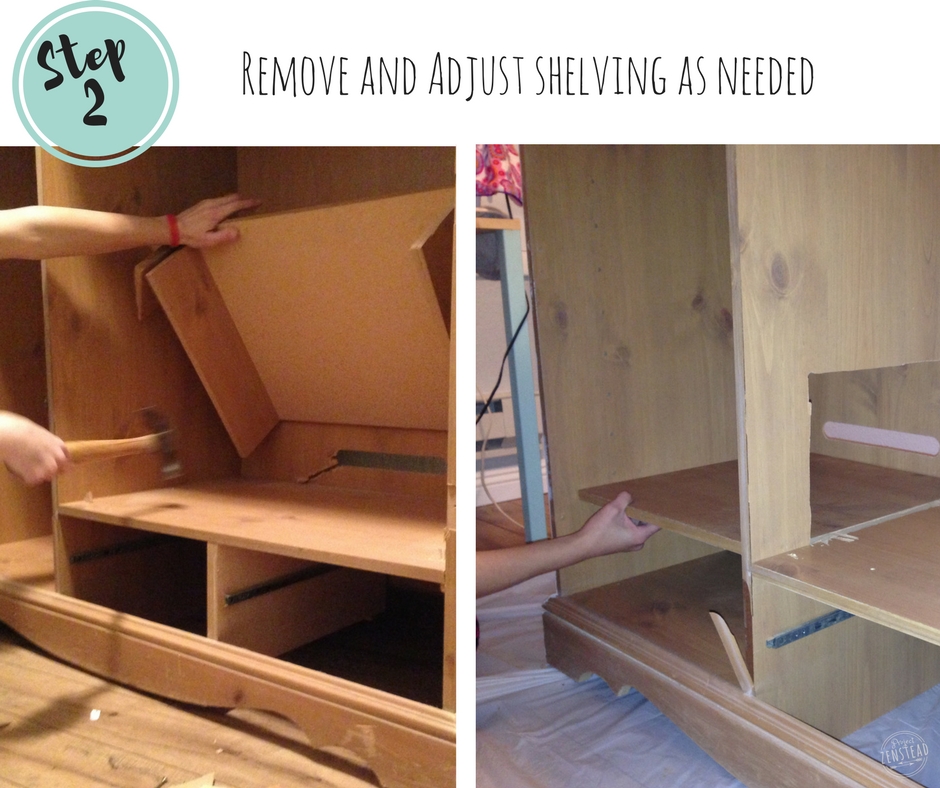
To prep the cabinet, we removed the media shelf and cut a hole in the divider wall in order to let the chicks have access to the full length of the brooder. We decided to keep it this way so that we could separate it if we ever needed to (in case we have chicks that don’t play well together). In order to complete the floor, we screwed a shelf into place on the smaller side of the cabinet.
Step Three: Build door frames
Depending on the type of cabinet, you may need to build doors for your brooder. We used 1×2 boards to build three simple door frames. (Sorry – I forgot to get pictures for this step!)
Step Four: Paint and sand
I lightly sanded the cabinet to remove some of the finish before I began painting. I applied two coats of the chalky finish paint to the cabinet and the door frames, letting it dry overnight in between coats. (We will get to the antiquing and sealing wax in later steps.)
Step Five: Apply waterproof utility panel
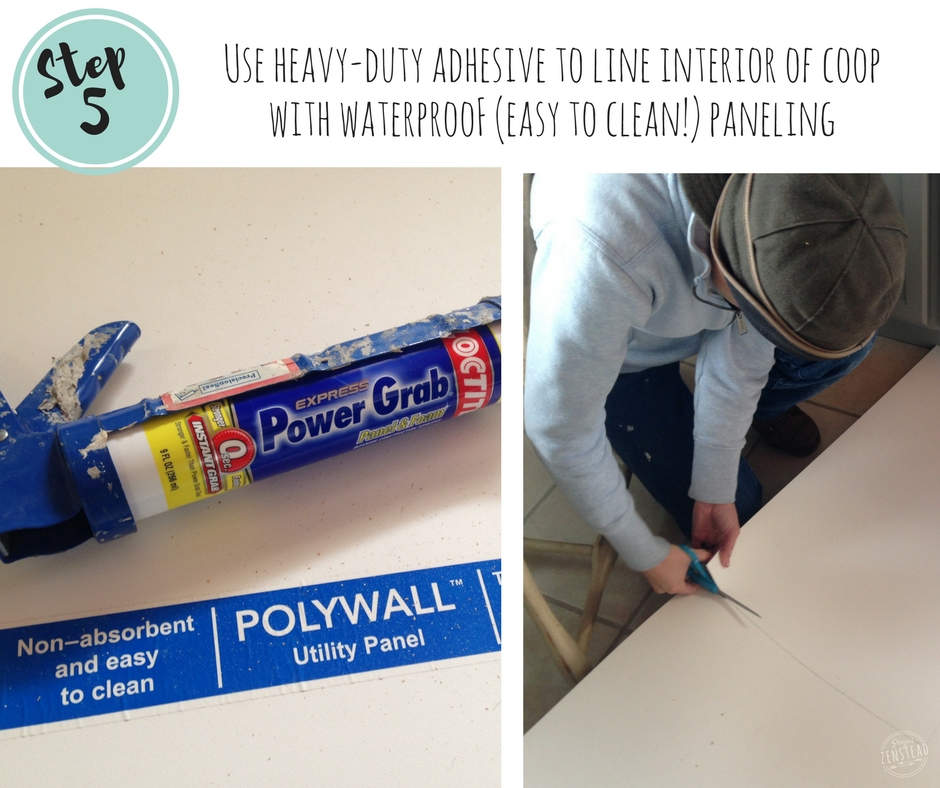
Once we had the two coats of paint applied, we lined it with the waterproof paneling. This stuff is seriously awesome! It’s thin enough to be cut with regular scissors and it is very lightweight. We used Loctite PowerGrab adhesive (specially made for paneling and foam) to adhere it to the walls and floor of the brooder. In hindsight, it would have been better if we had applied it to the back of the paneling and then spread it evenly with a foam paintbrush. Ours has now bubbled up in certain spots since we didn’t properly spread out the adhesive. But I am still very happy with the product and how easy it makes cleaning the brooder. After applying the paneling, we sealed all the seams with silicone caulking.
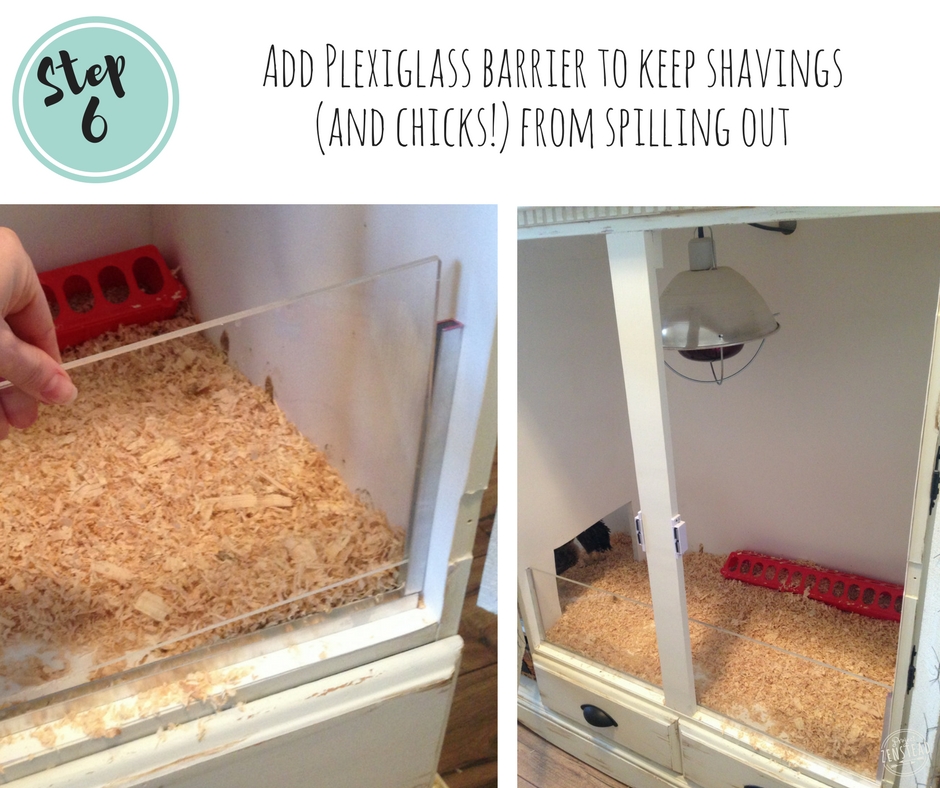
Step Six: Attach metal U-frames to hold plexiglass in place
We screwed metal U-frames to the brooder to form a track for the plexiglass to hold it in place. We had our plexiglass cut down to size at the hardware store to make life easier. Once the track was in place, we just had to slip it in. It’s easily removable so that it can be cleaned and sanitized. Also, I have no idea if those things are actually called “metal U-frames” so please don’t blame me when the hardware store clerk looks at you like you are crazy.
Step Seven: Add antiquing wax and sealing wax
This is the fun part! I used sandpaper to scratch off the paint in select areas to create an aged look for the brooder. I finished it off by using a small paint brush to apply the antiquing wax in certain areas. The antiquing wax creates a darker aged look in the places where it is applied. After that dried, I applied two coats of the sealing wax and let it dry overnight between coats.
Step Eight: Attach chicken wire, doors, handles and hinges
Once the sealing wax had completely dried, we attached the chicken wire to the door frames using a staple gun. Then, we attached the handles to the doors and screwed them to the cabinet using hinges. We also added some fancy handles to the cabinet drawers.
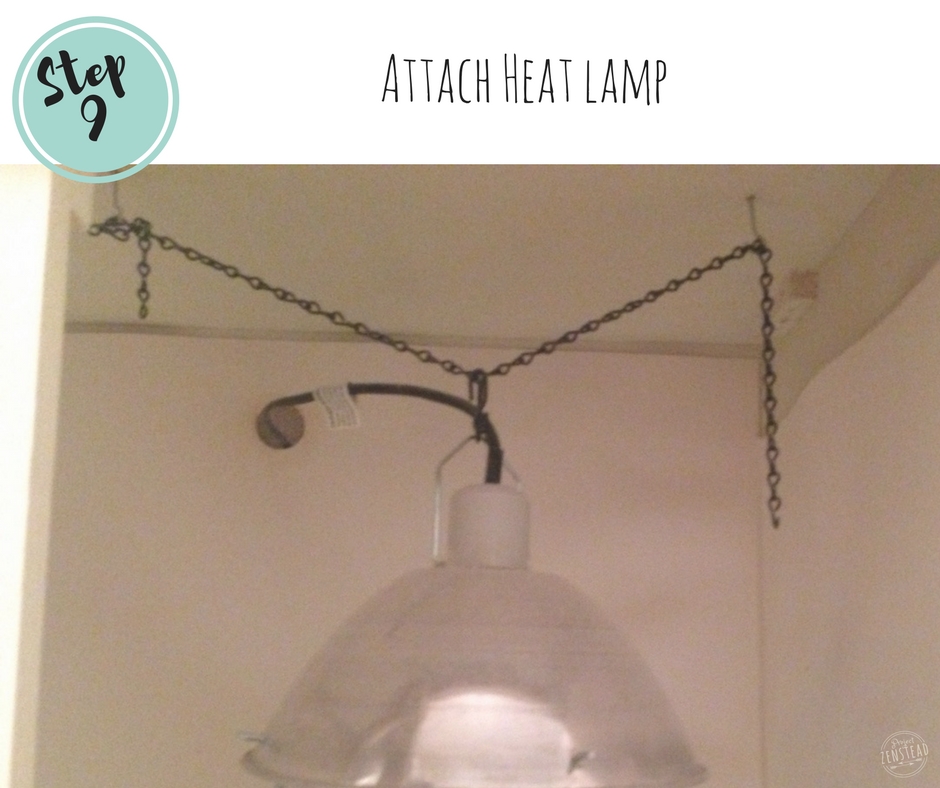
Step Nine: Attach heat lamp
To attach the heat lamp, we cut a hole in the back wall of the cabinet using a circular hole saw drill bit. We installed two eyelet screws to suspend a chain. We then attached the heat lamp to the chain using an s-hook. Using the chain has allowed us to easily raise or lower the head lamp depending on the age and height of the chicks.
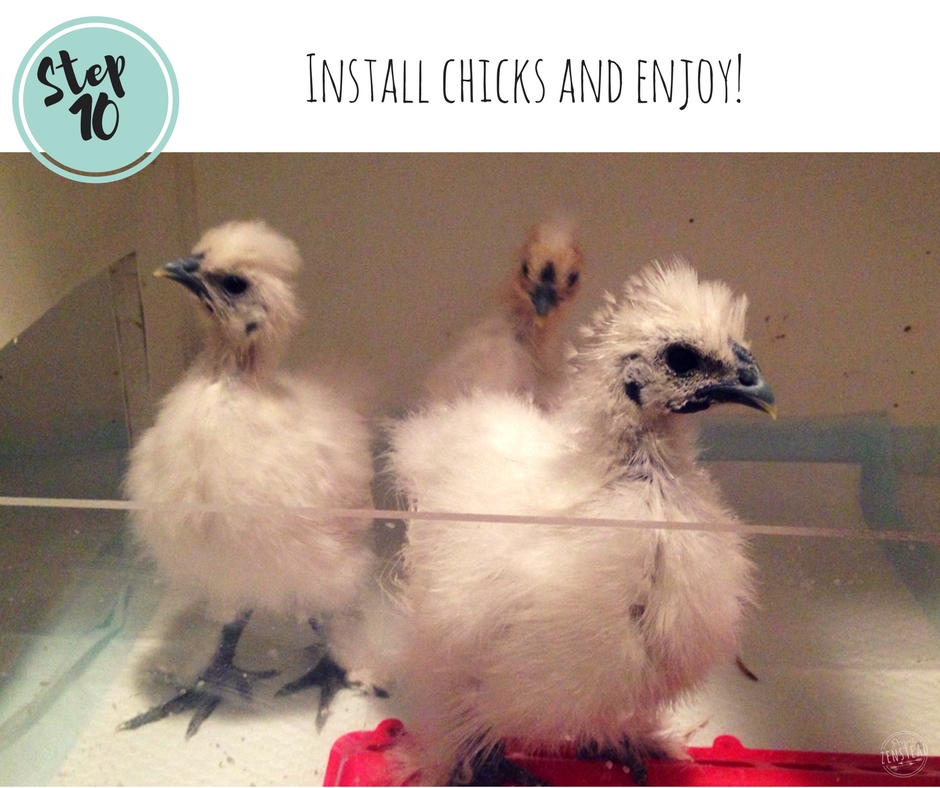
Step Ten: Add chicks!
This is obviously the best step! We have used the brooder for two batches of chicks now and it has worked great! For the first batch, we decided to give pine shavings a chance to see if we liked using them in the brooder. Never again!! Everything in the room was covered in a thick layer of dust within a couple days. Eek! We have now switched back to using either puppy training pads or old towels like we have done in previous years.
And that’s it! Overall, this project was a very easy DIY! It can be done in just about a weekend – depending on how long you let the paint dry! We have been so happy with how easy it has been to clean and we love having a permanent brooder that is ready at a moment’s notice – because you just never know when those chicks are going to jump into your cart when you’re shopping at Tractor Supply Company 😉
If you liked it then you better put a pin on it!
