
Moving is hard. Moving a homestead is even harder! I’ve got tips and trick to help you with packing and moving your homestead!
In February, we moved our homestead 500+ miles from Southwest Idaho to the South Sound area of Washington State! It was… an interesting experience! I’m thrilled with the way that things turned out, but mistakes were made, folks!
We thought that we were prepared. And, honestly, we really were! But moving is stressful and terrible no matter how prepared you are! Frankly, we just did our best based on the fact that we didn’t know what to expect!
Let’s face it: moving an entire homestead is very different from your run-of-the-mill move!
I googled a lot of things like “how to move a homestead” trying to look for advice and help. There’s a lot of info on moving to a homestead. But what if you already have an established homestead and are moving? Frankly, there just isn’t much info out there!
Because of that, I swore to myself that once we got settled, I would share as much info as I possibly could to help everyone else who might need it! So, here it is: How to Move a Homestead! There’s a lot of info, so I’ve broken it into a mini-series of posts so that I can properly cover everything. Feel free to jump from post to post depending on what info you need.
How to Move a Homestead!
In this series 4-part series, we will cover:
- Selling your Homestead Property
- The Nitty-Gritty Details of Selling our Homestead
- Prepare for Selling Your Homestead
- Staging Your Homestead
- Tips for Showings
- Choosing a Moving Company for your Belongings
- Professional Moving Services: Pros & Cons
- Moving Container Services: Pros & Cons
- Rental Moving Trucks: Pros & Cons
- Why We Decided to Rent a Moving Truck
- How to Move with Animals & Livestock
- Moving Day: Tips for Packing & Moving – The Post you are reading now
. . . . . . . . . .
Tips for Packing & Moving:
Boxes & Packing Material
We’ve moved several times over the past decade, but this was by far our biggest move! In the past, we spent a lot of money to buy plastic storage containers to store our items. Plastic storage tubs are definitely the most ideal for items that have to be stored in places where there might be moisture or rodents (like sheds, barns, garages, etc.). However, I’ve found that they are far less durable and that they don’t stack as well as your classic cardboard box!
We packed all of our indoor items in cardboard boxes. Most of our outdoor and seasonal items (that are stored in our shed) were already packed in plastic tubs. And, not surprisingly, they didn’t fare nearly as well in the move! A lot of the tubs ended up cracking or breaking due to the weight of being stacked in the moving truck. The cardboard boxes stacked much easier in the moving truck – especially the ones that were all consistent sizes and shapes. Sadly, we now have a handful of broken plastic tubs which ultimately end up in the landfill where they will never break down. ?
Another advantage of cardboard boxes is that you can easily find them for free on sites like Craigslist and Facebook Marketplace. Thanks to Facebook Marketplace, we got all of our boxes (probably 100+) for free! We even got tons of free packing paper and bubble wrap. Now that we are mostly unpacked, we have passed on about half of the boxes to other people who are moving. We are keeping the other half to use as liners for the bottom of garden boxes.
Plastic wrap was another helpful (although not very environmentally friendly) item. We bought a big roll of it in the moving aisle and used it to wrap shut drawers on night stands and small containers. This allowed us to leave most of the items inside the drawers which saved us time. The plastic wrap was also helpful for wrapping and containing odd-shaped items… like our little faux Christmas tree!
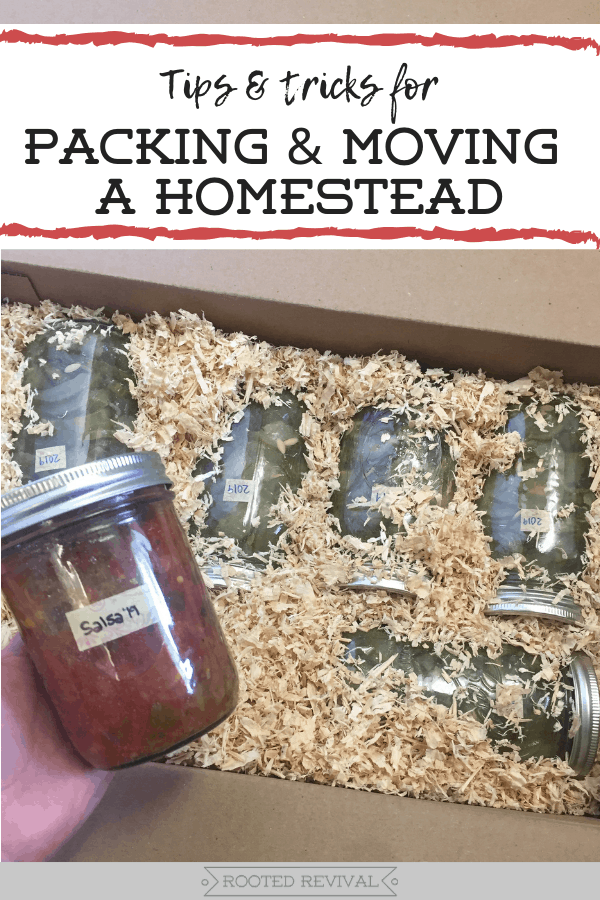
Packing & Moving Canned Goods
One of the most stressful parts of planning our move was figuring out how to take our food supply with us. As I discussed in this earlier post, we largely chose to rent a truck for our move expressly for the purpose of being able to pack and move our canned goods ourselves. I honestly didn’t trust anyone else to pack them, load them, move them or unload them!
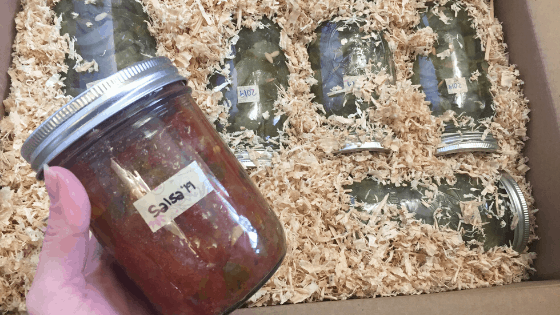
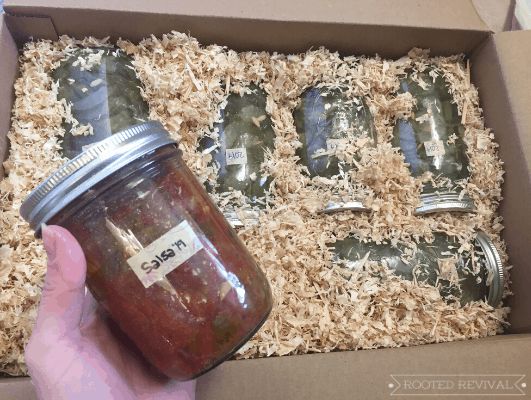
After a lot of brainstorming, we decided that we would use pine shavings to pad our highly prized supply of home-grown canned foods. These were the exact same pine shavings that we use for bedding in our chicken coop and goat barn! Which, meant that the packing material was not only extremely affordable, but that it would be endlessly recyclable! After the move, we reused it in our animal stalls and then composted it after that. The compost will go into our new garden beds once we build them. It was the perfect zero-waste solution!
We ended up with 11 large boxes of canned foods. There was also another six or so boxes of empty mason jars. We used sturdy boxes that were all identical in size and shape so that they could be stacked easily and steadily in the moving truck. And, I am so very happy to report that (almost unbelievably!) we did not have a single broken jar! ?
Packing & Moving Frozen Foods
The other half of our homegrown food supply was in our chest freezer. To move the freezer and its contents, we began by unloading all the frozen food and moving the empty freezer into the back of the truck. We did this the night before our move, once the truck was almost completely packed. Then, we refilled the freezer with the frozen food and about 6 bags of ice. We ran an extension cord from the freezer to the house so that we could keep it plugged in until we were ready to leave.
Once we got to Washington, we plugged it back in using the extension cord until we were able to unload it and move it into the house. Everything stayed nice and cold and we didn’t loose any food. Our move was only 10 hours, but with the ice in the freezer, I think that we could have probably gone at least 2 days leaving it unplugged.
Don’t Pack Your Essentials
When you are packing, remember to plan for your needs on the days leading up to the move, during the move and immediately after you arrive. Know where your bathroom items, paper towels, snacks and any other essential items are packed and make sure they are easy to get to. We left out sleeping bags and blankets just in case we needed them. And I am so glad that we did! We ended up spending our last night in Idaho sleeping on the living room floor huddled around the wood stove! And, even though we thought we would have time to unpack the mattresses, we ended up spending our first night in Washington on the floor as well.
Cleaning supplies will also be important to keep out. After Lindy left with the moving truck, I finished packing and cleaning. We left out a few boxes and bags so that I could pack all of the cleaning supplies once the final cleaning was finished. Better yet (if you are able to), hire a cleaning crew to do the final cleaning so that you have one less thing to worry about!

Tips to Make Moving Day Better:
Recruit Helpers for Packing & Moving
If possible, recruit help! We are people who hate asking for help, but I really can’t stress how important it is! Selling your home, buying another one and pulling off a large move is a very very stressful time in anyone’s life! Getting help from someone who knows you and that you can trust makes a big difference in keeping your sanity!
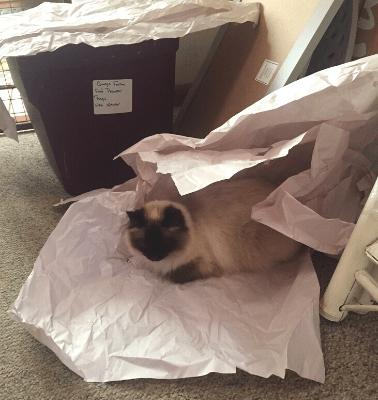
Our best friend, Danielle, came up from California for a week to help us with the move. I honestly don’t know how we would have done it without her! She drove our car (loaded with the crazy cats!) which freed us up so that I could drive our truck (loaded with the dogs) and Lindy could drive the moving truck (loaded with our stuff). Most importantly, she was the voice of reason when we were losing our minds and she was the driving force that kept us going when we felt like we had nothing left. I will never be able to thank her enough for being there when we needed her most! We are very lucky to have friends like that!

I will note that whomever is helping you should be someone you can fully trust to not strangle you when you’re at your worst. Because you are going to be exhausted, stressed out, tired and hungry at least 90% of the time. Sad, but it’s true! ?
Create Packing Staging Areas
Just before moving day, we began to creating “staging areas” for our packed things. Basically, we separated items based on how they would need to be packed into the truck. This helped save tons of time once the truck arrived and it was time to load everything! We had all of our indoor boxes separated and stacked in two rooms in the house. One room had the fragile and breakable boxes that needed to be packed in a certain way. The other had all the random boxes that didn’t need to be packed as carefully.
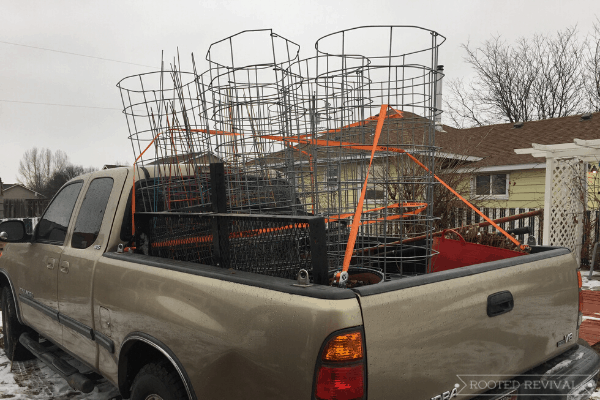
Outside, we emptied the storage shed, barns, garden area and all the other outdoor areas. We moved everything into our hay barn and condensed things as much as possible. This kept everything in close proximity to the moving truck and reduced the number of loads we needed to make to get everything into the truck.
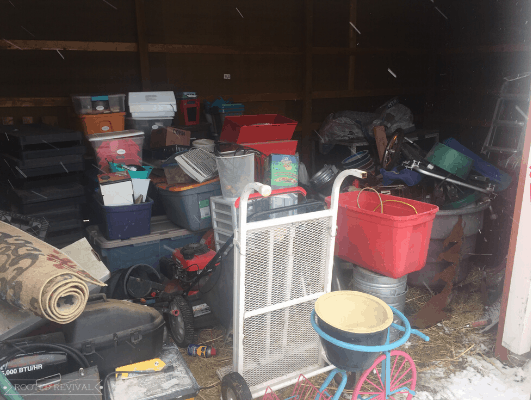
We also weren’t sure exactly how much of our outdoors stuff we would be able to take. So, when we organized it all into the staging location, we separated it based on how important the things were. The non-negotiable items were located on one side of the barn. The other items that weren’t as important were located on the other side. Luckily, we ended up being able to take just about everything (thanks to Lindy and Danielle’s amazing “Moving Truck Tetris” skills!)
Packing the Moving Truck
Speaking of “Moving Truck Tetris”, Lindy and Danielle were the best packers I’ve ever seen! My extremely organized brain was shuttering at the whole thing because it looked like chaos! But, they definitely had a system! They left no wasted space in that 32-ft moving truck! It was completely packed to the roof from front to back by the time they finished!
Lindy and Danielle began by packing all the like-sized boxes together, one row at a time. They packed the first row all the way to the ceiling and then roped it in place using bailing twine. They continued packing this way until all the uniform boxes were in place (about 3-4 rows all the way to the ceiling). Next, they started packing lower rows of odd sized boxes and furniture items. Then, they placed light-weight odd-shaped items on top and roped everything in place.
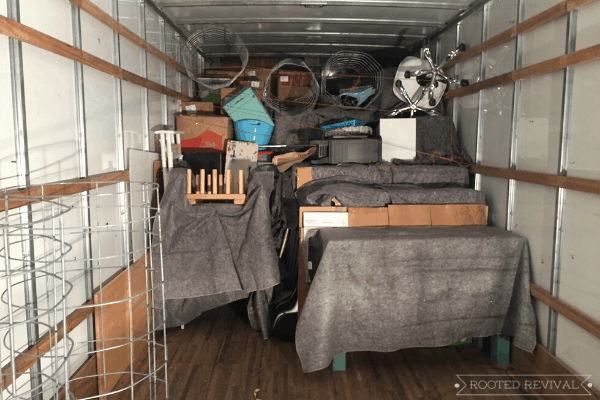
We actually don’t have a lot of indoor items. All of our boxes and furniture only took up about a 1/3 of the truck. So, once all of our indoor items were packed and securely tied off, we started on the outdoor items. This got a bit tricky because most of it was odd-shaped. Primarily, we put the more sturdy, heavy items on the bottom and the lighter items stacked on top.
The real key was tying everything off with bailing twine to prevent movement during the drive. We went through our entire supply of bailing twine and had to get more from the neighbor. Folks, that was a lot of bailing twine! But, it worked extremely well! When we arrived in Washington and opened the truck, there was very little movement of our items. And, so far, we’ve only found one small broken item (a glass picture frame).
Make the trip as enjoyable as possible
Like I said earlier, you are going to be stressed, hangry and exhausted at least 90% of the time during a big move. Taking a few extra steps to make it as enjoyable as possible is worth it! I packed goodie bags of snacks and drinks for each person to have while they were driving since I knew we wouldn’t have time to stop and eat. This definitely helped with the hangry issue!

If you have a long drive (ours was about 10 hours), make sure you take frequent stops! Of course, if you have animals with you, you’ll be required to stop more often. But, getting out of the car and stretching every few hours will help you stay alert. This is so important when you are already stressed and tired!
Stay Safe While Traveling!
Finally, if you are at all able to control the timing of your move, try to move during good weather. We had to move in February, and I’m not going to lie: it was terrible! We packed up in the snow and we unpacked in torrential rain. But the drive was the worst. The highway passes were closed the day before we moved which was super stressful because the only other route added an additional 4 hours to the trip.
We were lucky that the roads reopened just long enough for us to drive through! However, they closed again only 6 hours later due to extreme weather and flooding. There was water all over the roadways, the wind was so strong it literally pushed waves from the Columbia onto the highway and the fog was so thick in some passes that you could hardly see.
It was honestly the scariest, most stressful drive I’ve ever done! And to know that Lindy was doing it in a giant moving truck was even worse! We are so grateful that we all arrived safely. And we have now sworn to never again move during the winter! Stay safe on your move and take your time. There is nothing more important than everyone arriving safely!
Have you moved your homestead? Share your packing & moving tips in the comments!
Pin for later!

Erin
Sunday 27th of June 2021
I’m having flashbacks reading this. I’m new to the blog and we moved from Utah to the South Sound area of Western Wa in 2019. We were moving to our forever homestead. We had very little furniture and so many tools and a our two pups. So much of this reminds me of this. Truckers in southern Idaho were insane and I had few moments like you described.
Project Zenstead
Monday 28th of June 2021
Oh my goodness! I feel so strongly for you and I completely understand the flashback feeling! I honestly had such a hard time even writing this series purely because it was so miserable ? Luckily it was soooo worth it! Are you enjoying being in the South Sound area? We absolutely love it here! It's beautiful and such a pleasant change from the high desert climate of Idaho and Utah!
Kim
Wednesday 3rd of June 2020
So glad that you made it to Washington safely and as a team. I am "catching up" after spending the last couple months in overwhelm. Have you posted any info on your layout at the new homestead? Now the weather has warmed up you must be in full swing!
Stay safe and stay well.
Project Zenstead
Thursday 11th of June 2020
Thank you so much! It's been quite the adjustment but we absolutely love it now that the crazy stressful part is over! Shortly after we arrived, I started my Permaculture Design Certification and I just completed it earlier this week! So I will have lots of design layout ideas to share! And now that I am finished with the coursework, I can get back to focusing more on blog posts so I will have some new posts up soon! :) Thank you again for stopping by and reading - it really means a lot!