Dinner has stopped being a place for experiments. After work, errands, and regular fatigue, you don’t want to impress — you just want to eat calmly and normally. That’s exactly why this article brings together recipes without flashy techniques, without long ingredient lists, and without the feeling that you’re cooking another “project” instead of dinner.
Here you’ll find sheet pan meals, quick skillet options, slow braises for weekends, and a few recipes that save you when there’s almost no time.
All of these dishes are clear and straightforward, don’t take much time, and fit into real life without forcing you to rebuild your day around the kitchen.
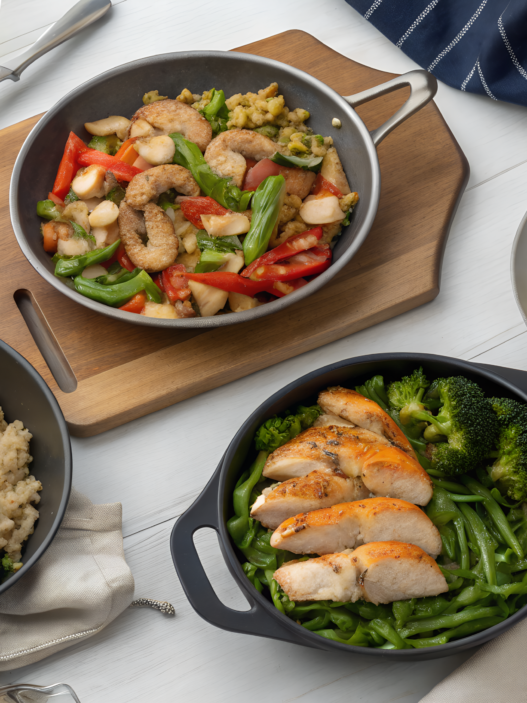
1. Weeknight Garlic Butter Shrimp with Rice
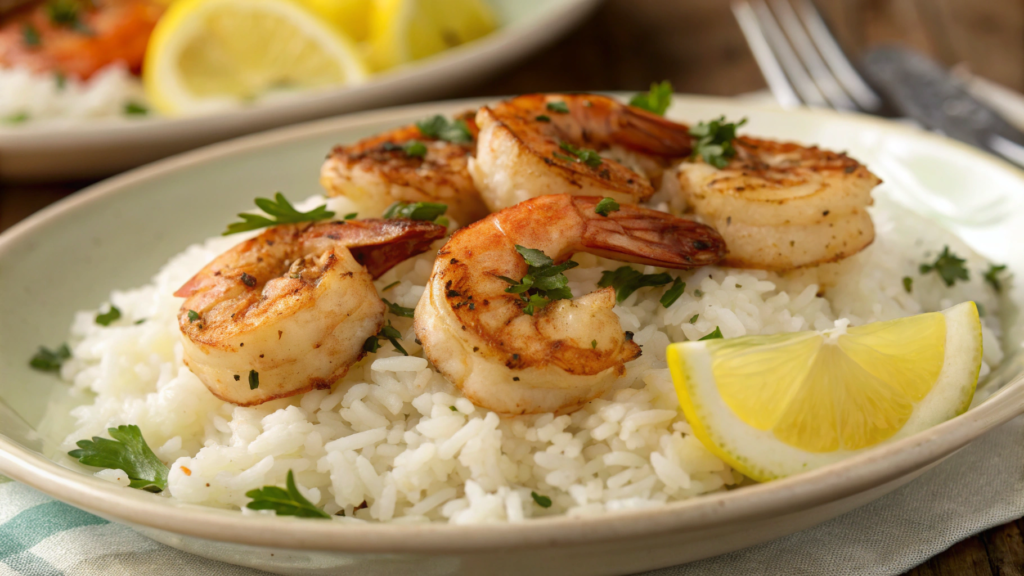
This Weeknight Garlic Butter Shrimp with Rice is fast, predictable, and always works. I’ll show exactly how I make it, what I pay attention to, and why the small details really matter here.
Ingredients (for 2–3 servings)
For the shrimp:
- 1 lb raw shrimp, peeled and tails removed (about 450 g)
- 4 tbsp butter (about 60 g)
- 4–5 garlic cloves, finely minced
- 1 tbsp olive oil
- ½ tsp chili flakes (to taste)
- Salt and freshly ground black pepper
- 1 tbsp lemon juice
- 2 tbsp finely chopped parsley
For the rice:
- 1 cup long-grain rice (about 180 g)
- 2 cups water or broth (about 480 ml)
- A pinch of salt
How I cook it
- I cook the rice in advance.
I rinse the rice until the water runs clear, add broth or water with salt, bring it to a boil, then lower the heat and leave it covered. While it finishes cooking, I calmly work on the shrimp. - I prep the shrimp.
I always pat them dry with paper towels. It takes one minute, but it seriously affects the result — the shrimp should sear, not steam. - I heat the pan and the fats.
In a wide skillet, I combine olive oil and butter. When the butter melts and starts to lightly foam, I add the garlic and keep it on the heat for just a few seconds, until the aroma becomes noticeable.
By the way, garlic texture matters here. I’ve been using the Kuhn Rikon Epicurean press for a long time because it gives an even, fine mince without turning the garlic into paste. I ordered it on Amazon, and it’s one of those tools that genuinely makes cooking easier. - I sear the shrimp.
I lay the shrimp out in a single layer, immediately season with salt, pepper, and chili flakes, and cook for about one and a half to two minutes per side. I don’t overcook them. As soon as they change color and become firm, I take them off the heat. - I finish the flavor.
I add lemon juice and parsley and quickly toss everything to keep the freshness and aroma.
Serving. I place the rice on the plate, spread the shrimp on top, and always spoon some of the garlic butter from the pan over everything. Sometimes I add green onions, sometimes I leave it as is. There’s no need for a complicated side — the rice already does its job.
Why this dinner shows up on our table so often
- Shrimp cook fast and don’t require complicated prep
- Ingredients are simple and easy to substitute
- The recipe is reliable and not seasonal
- Perfect for a weeknight without planning
I’ve tried adding sauces or extra spices, but most of the time I come back to this version. It’s comfortable, clear, and free of unnecessary steps.
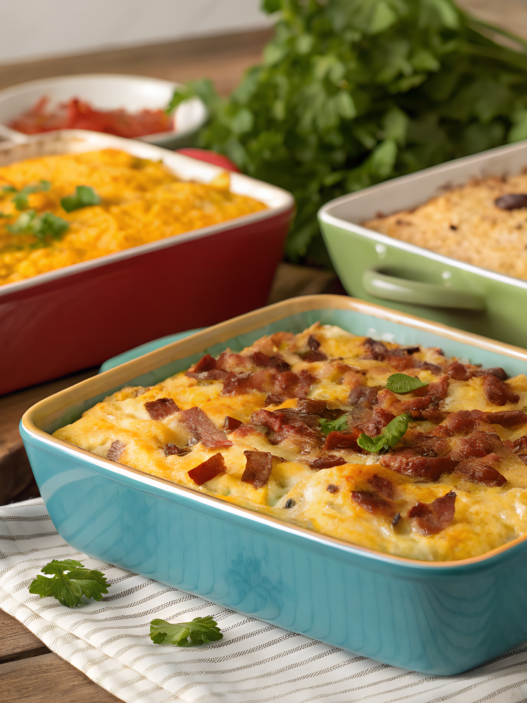
2. 5-Ingredient Baked Ziti for Quick Meals
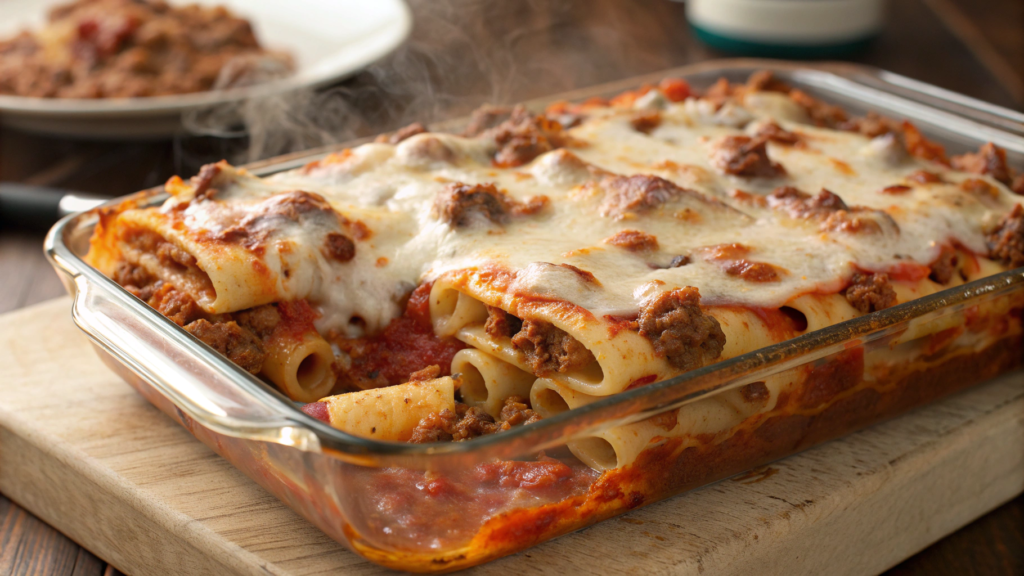
This recipe is a way to remove the extra, keep only what actually works and delivers flavor. I make this ziti when I need to feed the family fast and well. And here it is — 5-Ingredient Baked Ziti for Quick Meals, at your service.
Ingredients (for 4–6 servings)
- 1 lb ziti or penne pasta (about 450 g)
- 3 cups prepared tomato sauce (about 700 ml)
- 2 cups shredded mozzarella (about 200 g)
- 1 cup ricotta (about 240 g)
- ½ cup grated Parmesan (about 50 g)
Salt for the pasta water — I don’t count it as an ingredient, it’s a given here.
How I cook it
- I boil the pasta until al dente.
It’s important not to overcook it. The pasta finishes cooking in the oven, and if it’s already soft at this stage, the result won’t be a baked dish — it’ll be mush. - I prep the baking dish.
I use a ceramic or glass baking dish of medium size. Sometimes I lightly grease the bottom with olive oil, especially if the sauce is thick. - I mix the pasta with the sauce.
I drain the water, return the pasta to the pot, and add the tomato sauce. I mix gently so every tube is coated, but not drowned. - I assemble the ziti in layers.
I spread half of the pasta on the bottom of the dish, then evenly distribute the ricotta and sprinkle part of the mozzarella. I repeat the layers and finish with Parmesan on top. - I bake it.
I place it in an oven preheated to 375°F (about 190°C) for 25–30 minutes. For the last 5 minutes, I sometimes turn on the top heat so the cheese lightly browns.
A few practical notes
- The sauce matters more than it seems. I choose a simple tomato sauce without sugar or flavorings. The shorter the ingredient list, the better the result.
- Ricotta shouldn’t be replaced with cottage cheese. The texture will be different, and the dish will lose its balance.
- If I prep it ahead of time, I assemble the dish, cover it, and refrigerate it. I bake it right before dinner, adding 5–10 minutes to the cooking time.
For baking, I’ve been using a Pyrex Deep Baking Dish for years — it holds heat well and doesn’t overcook the edges. I ordered mine on Amazon, and it has survived more dinners than I can remember.
This baked ziti doesn’t require salads or complicated sides. Sometimes it’s just a spoon of green salad with lemon dressing. Sometimes — nothing at all.
It reheats well the next day, and honestly, sometimes I like it even more on day two.
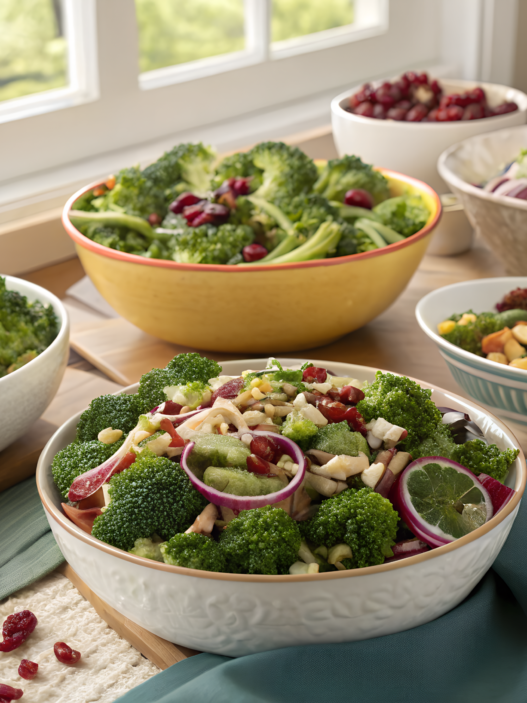
3. Grilled Veggie Bowls with Chef-Approved Dressing
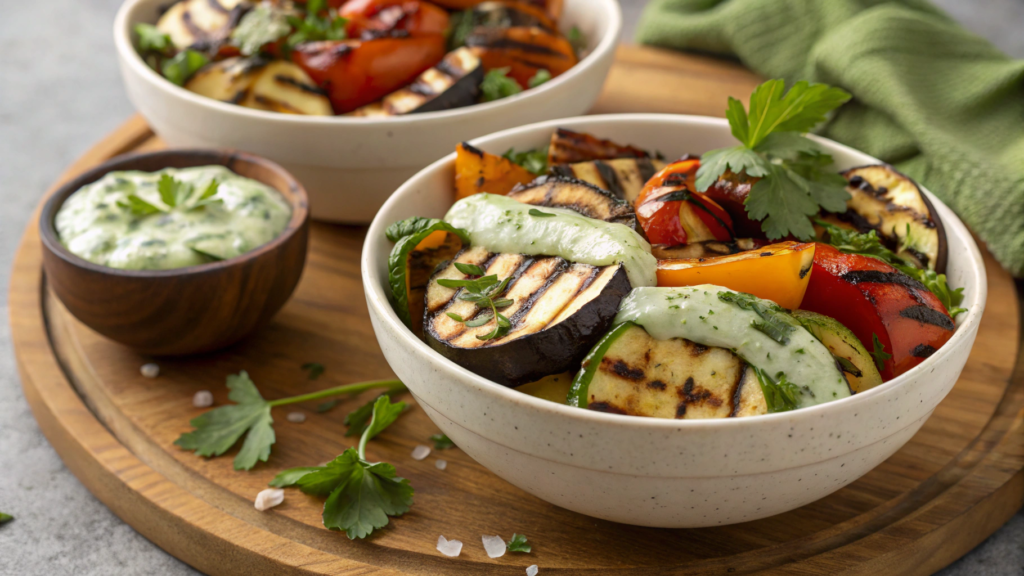
Grilled Veggie Bowls with Chef-Approved Dressing are all about contrast: hot vegetables with charred edges, a cold dressing, and a solid, noticeable texture.
And yes, I didn’t start making these bowls because of trends. At some point, we just had too many vegetables, and I needed a way to cook them so people actually wanted to eat them.
Vegetables for the bowl (for 3–4 servings)
I don’t stick to a strict set, but most often I use:
- 2 zucchini, cut into large strips (about 400 g)
- 1 red bell pepper, roughly chopped
- 1 small red onion, cut into wedges
- 1 cup cherry tomatoes (about 150 g)
- 1 cup mushrooms, halved (about 100 g)
- 2 tbsp olive oil
- Salt and freshly ground black pepper
Sometimes I add eggplant or broccoli if they’re on hand. The key thing is not cutting too small. The vegetables should hold their shape on the grill, not fall through the grates.
Chef-approved dressing (that exact dressing)
I picked up this dressing from a chef in Portland when we were talking about vegetables, not restaurants. He waved his hand and said that a good sauce doesn’t steal attention, it just ties everything together on the plate. That explained a lot.
Ingredients:
- ⅓ cup Greek yogurt (about 80 g)
- 2 tbsp olive oil
- 1 tbsp Dijon mustard
- 1 tbsp lemon juice
- 1 small garlic clove, very finely minced
- Salt to taste
I whisk everything until smooth. The dressing comes out thick but pourable. If the yogurt is very dense, I add just one tablespoon of water.
How I cook it
- I prep the vegetables.
I cut them into large pieces, toss with olive oil, salt, and pepper. That’s it. No spices. They’re not needed here. - Grill or grill pan.
I heat it well. I lay the vegetables in a single layer and don’t touch them until grill marks appear. Then I flip. It takes just a few minutes, but it creates the right texture. - I make the dressing ahead of time.
It needs at least 10 minutes to rest. The flavor smooths out, and the garlic loses its sharp edge. - I assemble the bowl.
I place the vegetables in a bowl, add one spoon of dressing, and gently toss. I don’t drown them. This matters.
Sometimes I add boiled quinoa, chickpeas sautéed with paprika, a soft-boiled egg, or pieces of feta.
But even without extras, the bowl works on its own. The vegetables don’t feel like a side dish, and the dressing turns them into a complete meal.
For grilling, I often use a Lodge cast iron grill pan from Amazon. It’s heavy, heats evenly, and gives consistent results.
This bowl fits well between heavier dinners. It doesn’t feel light, but it doesn’t overload you either.
And most importantly, it’s easy to build from what you already have, without forcing yourself to follow a strict recipe.
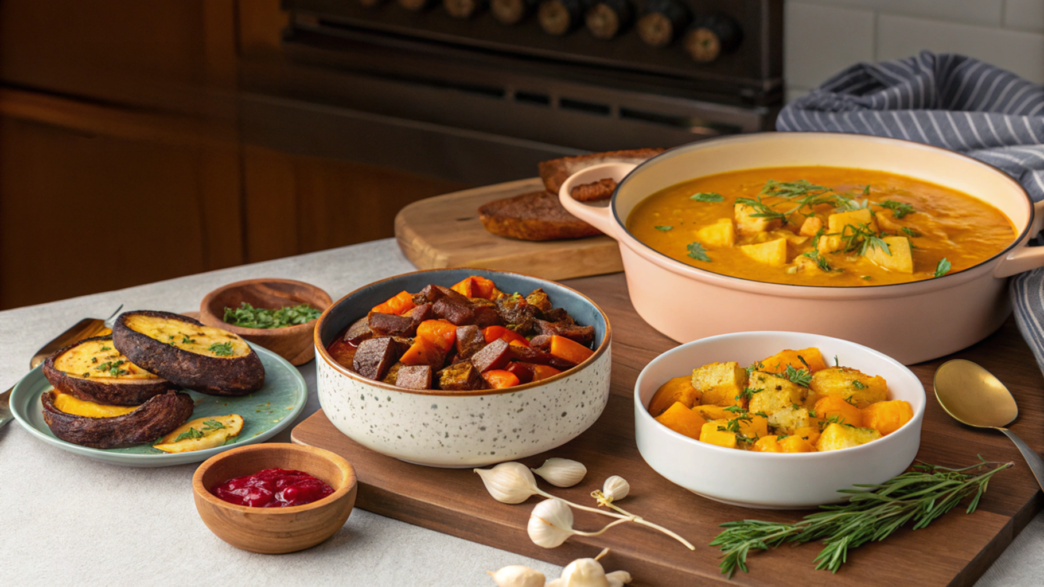
4. Fall Pumpkin Risotto with Nutty Parmesan
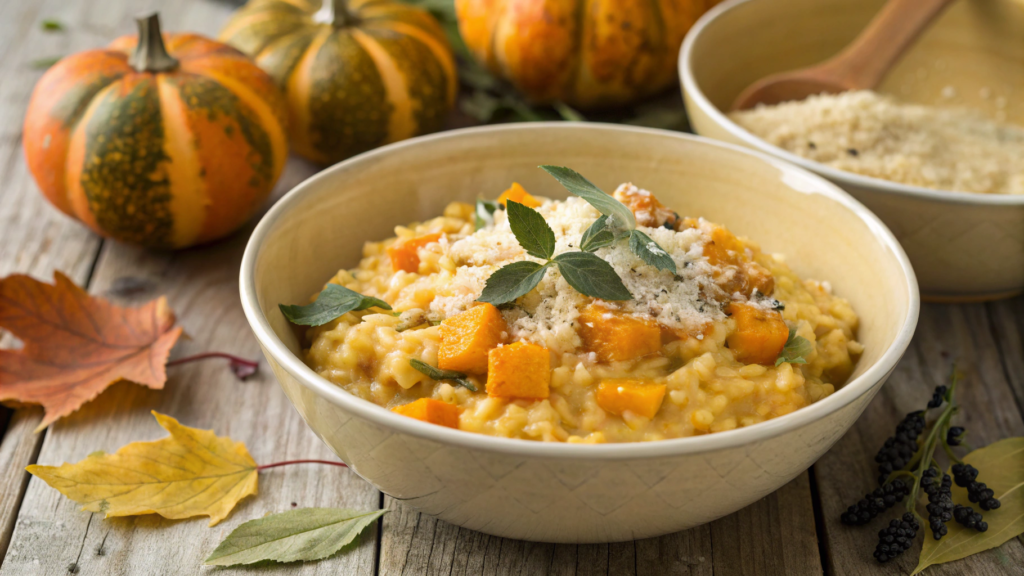
I make Fall Pumpkin Risotto with Nutty Parmesan in the fall, when pumpkin stops feeling like décor and becomes a normal part of the kitchen. We’ve cooked pumpkin in different ways — roasted, in soups, in sauces — it’s all been done. But in risotto, it gives texture, a soft sweetness, and doesn’t fall apart.
Ingredients (for 3–4 servings)
- 1 cup arborio rice (about 200 g)
- 2 tbsp olive oil
- 1 small onion, finely chopped
- 2 garlic cloves, finely minced
- 1½ cups plain pumpkin purée (about 360 g)
- 4–5 cups hot vegetable broth (about 1–1.2 l)
- ½ cup dry white wine (about 120 ml, optional)
- ¾ cup grated Parmesan with a pronounced nutty flavor (about 70 g)
- Salt and freshly ground black pepper
- A pinch of nutmeg
If I don’t have fresh pumpkin, I use Farmer’s Market Organic Pumpkin Purée from Amazon. It’s thick and doesn’t have excess moisture.
How I cook it
- I prep the base.
In a wide pot, I heat the olive oil, add the onion, and cook it over medium heat until translucent. The onion should not brown. This is an important detail. - I add the garlic and rice.
I keep the garlic on the heat for about 30 seconds, then add the rice and stir well so every grain is coated with oil. The rice warms up and becomes slightly translucent around the edges. - I pour in the wine or the first ladle of broth.
If I use wine, I let it evaporate almost completely. If not, I move straight to the broth. From this point on, I don’t leave the stove. - I cook the risotto gradually.
I add the broth one ladle at a time, waiting until the liquid is almost fully absorbed before adding more. I stir regularly, but without overdoing it. The whole process takes about 18–20 minutes. - I add the pumpkin purée.
When the rice is almost done, I stir in the pumpkin, salt, pepper, and nutmeg. The mixture becomes thicker and more uniform. - I finish with Parmesan.
I remove the pot from the heat, add the grated Parmesan, mix well, cover with a lid, and let it rest for 2–3 minutes.
A few observations from experience
- The broth must always be hot. Cold broth breaks the texture of risotto.
- Parmesan is best finely grated and added off the heat. That way it melts evenly.
- If the risotto feels too thick, I add a couple of spoons of broth right before serving.
This is a dish without heavy sauces or complicated combinations. It’s not fast, but it’s not exhausting either. And honestly, it’s one of those dinners after which no one asks about dessert right away.
5. Sheet Pan Salmon with Autumn Vegetables
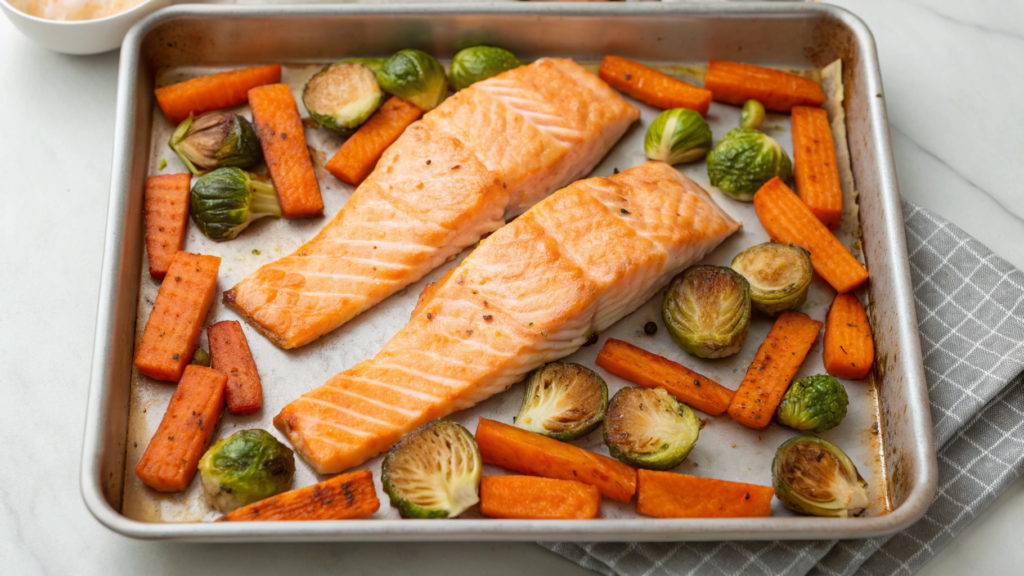
One pan, clear ingredients, and a clean, logical process. I often make Sheet Pan Salmon with Autumn Vegetables in the middle of the week, when the day has been heavy and the kitchen needs to stay decent after dinner — not look like a battlefield.
This recipe shows how salmon and seasonal vegetables can work together when you don’t overload them with spices and don’t complicate the process.
Ingredients (for 3–4 servings)
- 1½ lb salmon fillet, skin-on or skinless (about 700 g)
- 2 cups butternut squash, cubed (about 300 g)
- 1 cup Brussels sprouts, halved (about 200 g)
- 1 red onion, cut into wedges
- 2 tbsp olive oil
- 1 tsp Dijon mustard
- 1 tbsp maple syrup
- Salt and freshly ground black pepper
- A few sprigs of thyme or rosemary
How I cook it
- I preheat the oven and prep the pan.
I set the oven to 400°F (about 205°C). I line the sheet pan with parchment paper — it saves cleanup time and gives more even roasting. - I start with the vegetables.
In a bowl, I toss the squash, Brussels sprouts, and onion with olive oil, salt, and pepper. I spread the vegetables on the pan and roast them for 15 minutes, just to get them softening. - I prep the salmon.
While the vegetables are roasting, I mix the mustard and maple syrup. I lightly season the salmon with salt and pepper, then brush the mixture over the top. - I add the salmon to the pan.
I take the pan out, push the vegetables toward the edges, and place the salmon in the center. I add the herb sprigs on top and around the fish. - I finish cooking.
I return the pan to the oven for 12–15 minutes. The salmon should flake easily with a fork, and the vegetables should hold their shape with nicely browned edges.
What matters here
- Vegetables start before the fish. They cook at different speeds, and this timing matters.
- Maple syrup doesn’t make the dish sweet. It balances the mustard and highlights the salmon’s flavor.
- Don’t overcook the salmon. It’s better to pull it a bit early than dry it out.
This is a weeknight-friendly dinner. It doesn’t require morning prep and easily adapts to whatever vegetables you already have in the fridge.
6. Spicy Chickpea Curry in 20 Minutes
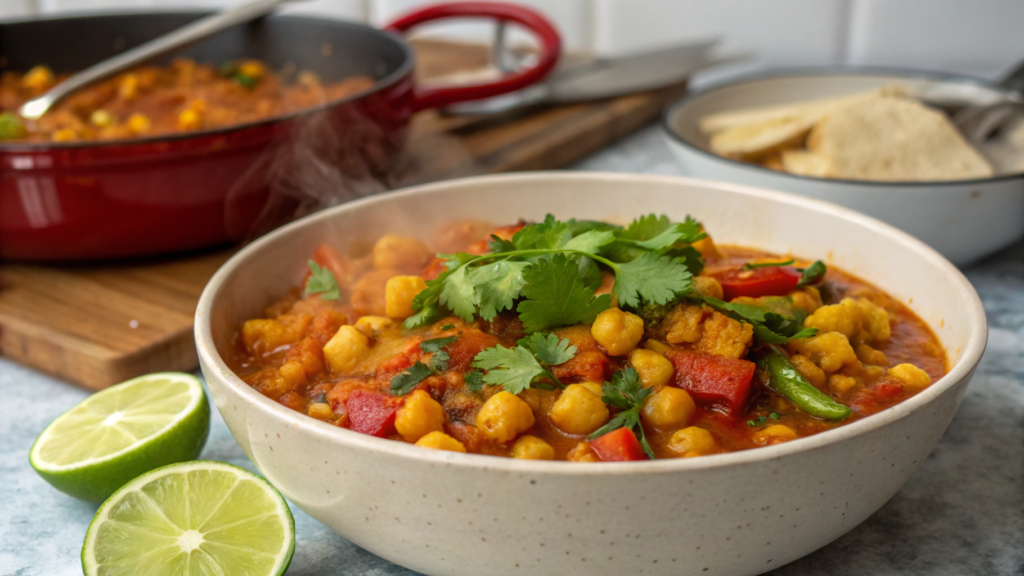
Spicy Chickpea Curry in 20 Minutes keeps well, cooks fast, and feels like a complete meal, not a compromise.
I make this curry most often at the end of the week, when the fridge is almost empty and my head is no longer ready for complex decisions.
Ingredients (for 3–4 servings)
- 2 cans chickpeas, drained and rinsed (15 oz each, about 425 g)
- 1 tbsp olive oil
- 1 medium onion, finely chopped
- 3 garlic cloves, finely minced
- 1 tbsp freshly grated ginger
- 1½ tbsp curry paste or curry powder
- 1 can coconut milk (13.5 oz, about 400 ml)
- 1 cup crushed canned tomatoes (about 240 g)
- Salt to taste
- Fresh cilantro, for serving
How I cook it
- I prep the base.
In a deep skillet or saucepan, I heat the olive oil over medium heat. I add the onion and cook it for a few minutes until soft and translucent. It’s important not to rush here — well-cooked onion sets the flavor of the whole dish. - I add garlic and ginger.
I stir in the garlic and ginger and keep them on the heat for about a minute. They should release their aroma but not start browning. If the garlic darkens, the flavor turns sharp. - I add the spices.
I add the curry paste or powder and mix it well with the onion. I let the spices heat for 30–40 seconds. This is when they deepen and spread evenly through the oil. - I add the chickpeas and tomatoes.
I add the chickpeas and crushed tomatoes, stir, and let everything warm through for a couple of minutes. The chickpeas should absorb some of the spices before any liquid goes in. - I pour in the coconut milk.
I lower the heat and add the coconut milk. I stir, lightly salt, and let the curry gently simmer for 8–10 minutes. The sauce thickens, and the flavor becomes more focused. - I check the balance.
I taste. If needed, I add more salt or a bit more spice. If the sauce feels too thick, I add a couple of tablespoons of water.
Most often, I serve this with plain white rice or basmati. Sometimes — with flatbread, or just with a spoon of yogurt on top.
It keeps calmly in the fridge for a couple of days and reheats well, which is exactly what I want from a week-ending dinner.
7. Creamy Mushroom Stroganoff Without the Heavy Cream
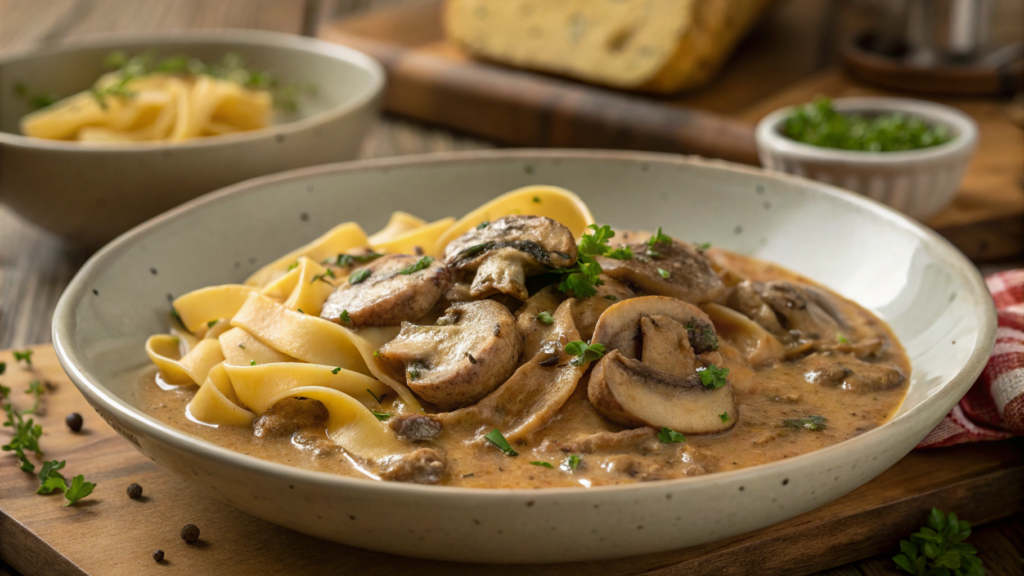
Creamy Mushroom Stroganoff Without the Heavy Cream didn’t appear for dietary reasons. It’s simpler than that. The classic version with cream is too dense and too rich.
In this version, mushrooms take the lead. Not as a meat replacement, but as the actual center of the dish. And when they’re handled carefully, no heavy cream is needed.
Ingredients (for 3–4 servings)
- 12 oz mushrooms (cremini, button, or a mix), roughly chopped (about 340 g)
- 1 tbsp olive oil
- 2 tbsp butter
- 1 small onion, finely chopped
- 2 garlic cloves, finely minced
- 1 tbsp flour
- 1 cup vegetable broth (about 240 ml)
- ½ cup sour cream or thick Greek yogurt (about 120 g)
- 1 tsp Dijon mustard
- Salt and freshly ground black pepper
- A bit of fresh thyme or parsley
How I cook it
- I sear the mushrooms separately.
In a wide skillet, I heat the olive oil and add the mushrooms in a single layer. I don’t stir for the first couple of minutes, letting them start browning. This is key for flavor and texture. Once they release moisture and begin to set, I remove them from the pan and set them aside. - I build the sauce base.
In the same skillet, I add the butter, then the onion. I cook over medium heat until soft and translucent. The onion shouldn’t brown — here it acts as a background. - I add the garlic and flour.
I stir in the garlic briefly, then sprinkle in the flour and mix quickly. I let it cook for about one minute so the sauce doesn’t taste raw. - I pour in the broth.
I add the broth in a thin stream, stirring constantly. The sauce thickens almost immediately. It’s important not to rush and to watch for lumps. - I return the mushrooms.
I add the mushrooms back to the pan, then the mustard, salt, and pepper. I stir and let everything warm through for a couple of minutes. - I add the sour cream or yogurt.
I lower the heat to minimum and gently stir in the sour cream. The sauce becomes smooth and even. At this stage, it must not boil — boiling ruins the texture.
A few important observations
- Mushrooms are better cut large. Small pieces make the dish feel flat.
- The broth should be warm. Cold broth slows everything down and breaks the consistency.
- I choose plain, full-fat yogurt. Low-fat versions behave unpredictably.
Serving
Most often, I serve it with wide egg noodles or mashed potatoes. Sometimes — with buckwheat, when I want a calmer flavor.
It holds its structure well and doesn’t separate when reheated, which really matters for weeknight dinners.
8. Slow-Braised Short Ribs with Modern Flair
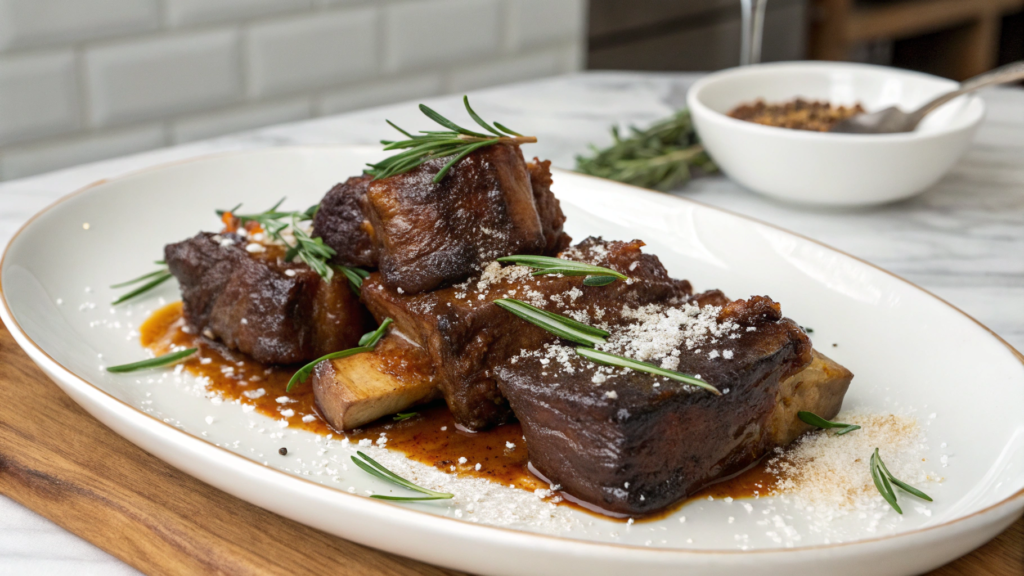
This version came after several attempts to make short ribs without heavy sauces and excess sweetness. Here, the meat speaks for itself, and everything else simply supports the flavor.
Slow-braised short ribs take time, but they don’t require fuss. That’s exactly what I like about them.
Ingredients (for 4 servings)
- 3 lb beef short ribs, bone-in (about 1.3 kg)
- Salt and freshly ground black pepper
- 2 tbsp olive oil
- 1 large onion, roughly chopped
- 2 carrots, cut into large pieces
- 2 stalks celery, chopped
- 4 garlic cloves, smashed
- 2 tbsp tomato paste
- 2 cups beef broth (about 480 ml)
- 1 cup dry red wine (about 240 ml)
- 2 bay leaves
- A few sprigs of thyme or rosemary
How I cook it
- I prep the meat.
I take the ribs out of the fridge ahead of time so they can warm slightly. I season them generously with salt and pepper on all sides. This isn’t cosmetic — it’s the foundation of the flavor. - I brown the ribs.
In a heavy, thick-bottomed pot, I heat the olive oil. I sear the ribs in batches until they develop a deep crust on all sides. I don’t rush this step. This is where depth of flavor is built. - I build the vegetable base.
I remove the ribs and add the onion, carrots, and celery to the same pot. I scrape up everything stuck to the bottom. Once the vegetables soften, I add the garlic and tomato paste and cook for a couple of minutes. - I deglaze and assemble the sauce.
I pour in the wine and let it reduce slightly. Then I add the broth, bay leaves, and herbs. I return the ribs to the pot. The liquid should come up about halfway up the meat. - I braise slowly.
I cover the pot and place it in an oven preheated to 325°F (about 165°C) for 2½–3 hours. I check once halfway through, just to make sure everything is moving calmly. - I let it rest.
I take the pot out of the oven and let it sit for 15–20 minutes. During this time, the sauce stabilizes and the meat becomes even more tender.
A few important notes
- The ribs should be mostly submerged, but not floating in the sauce.
- Don’t raise the temperature to speed things up. The meat won’t forgive it.
- This dish gets even better the next day.
For dishes like this, I use a cast iron Dutch oven from Amazon. It holds heat evenly and lets me cook without constantly monitoring the process.
This is a meal made for weekends, long conversations at the table, and evenings when food is part of the experience — not just the background.
9. Stuffed Sweet Potatoes Packed with Healthy Protein
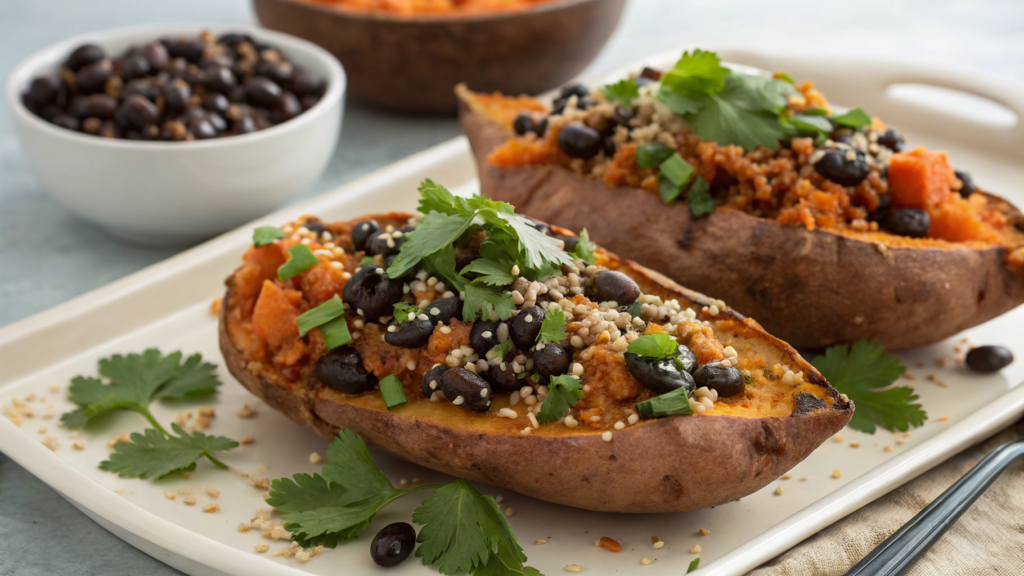
Stuffed Sweet Potatoes Packed with Healthy Protein showed up in our kitchen during a period when I was actively looking for dinners without complicated assembly. Bake, fill, serve. No extra steps.
Ingredients (for 4 servings)
- 4 medium sweet potatoes (about 250–300 g each)
- 1 tbsp olive oil
- Salt and freshly ground black pepper
For the filling:
- 1 cup cooked quinoa (about 170 g dry)
- 1 can black beans, drained and rinsed (15 oz, about 425 g)
- 1 tsp smoked paprika
- ½ tsp ground cumin
- 1 cup grated cheese (cheddar or a blend, about 100 g)
- 2 tbsp olive oil
- Fresh cilantro or green onions, for serving
How I cook it
- I roast the sweet potatoes.
I preheat the oven to 400°F (about 205°C). I wash and dry the sweet potatoes, lightly rub them with olive oil, season with salt, and place them directly on the rack or on a sheet pan. I roast them for 45–50 minutes, until they’re soft when pierced with a knife. - I prepare the filling ahead of time.
While the sweet potatoes are in the oven, I mix the quinoa, black beans, smoked paprika, cumin, olive oil, salt, and pepper. I stir gently to keep the bean texture intact. - I prep the sweet potatoes for stuffing.
I take them out of the oven and let them cool slightly. Then I make a lengthwise cut and gently fluff the inside with a fork, without removing the flesh completely. Keeping the skin intact matters. - I fill and return them to the oven.
I divide the filling between the sweet potatoes, sprinkle cheese on top, and return them to the oven for 10–12 minutes, until the cheese melts. - Final touch.
Before serving, I add fresh herbs. Sometimes — a spoon of thick yogurt or sour cream, if I want a softer, rounder flavor.
A few practical details
- Sweet potatoes should be roughly the same size so they roast evenly.
- Quinoa can be swapped for lentils or finely chopped chicken if you want a different protein profile.
- The filling is easy to make ahead. It keeps well in the fridge and speeds up dinner assembly.
This dish works well on busy weeknights, when you want something complete without hours of cooking. It scales easily, adapts to different fillings, and reheats calmly the next day.
10. Chef’s Choice: Quick Stir-Fried Udon with Seasonal Greens
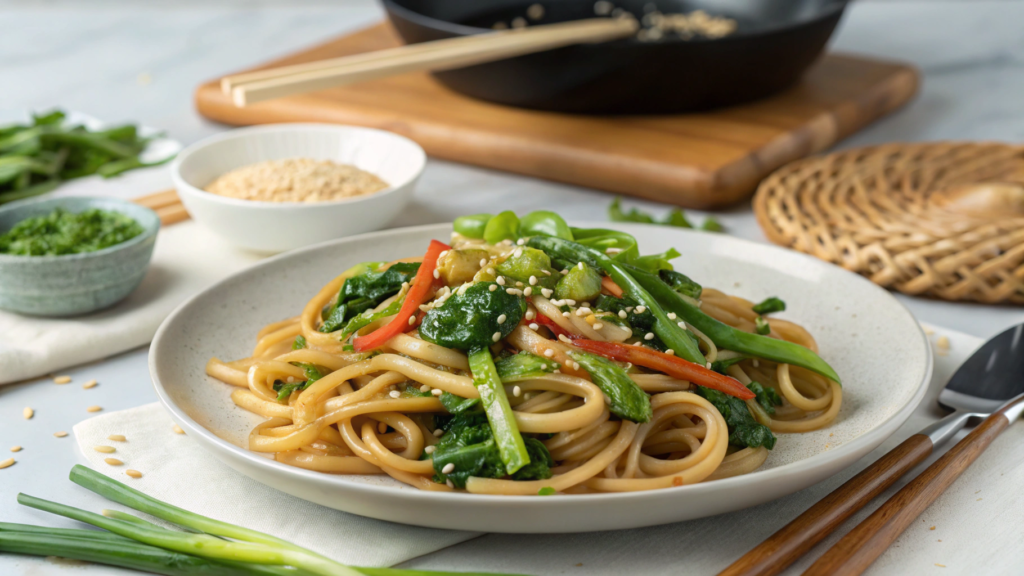
Chef’s Choice: Quick Stir-Fried Udon with Seasonal Greens is the dinner I save for last on purpose. If someone knows how to cook udon without turning it into a sticky mass, it means they understand the product.
What matters here is temperature control, order of actions, and a clear understanding of what goes into the pan and why.
Ingredients (for 2–3 servings)
- 14 oz fresh udon noodles (about 400 g)
- 2 tbsp neutral oil for frying
- 1 tbsp sesame oil
- 2 garlic cloves, thinly sliced
- 1 tsp freshly grated ginger
- 4 cups seasonal greens, roughly chopped
(bok choy, spinach, kale, young cabbage — about 120–150 g) - 2 tbsp soy sauce or tamari
- 1 tbsp rice vinegar
- 1 tsp honey or maple syrup
- Freshly ground black pepper
- Sesame seeds or green onions, for serving
How I cook it
- I prep the noodles in advance.
If the udon is fresh, I simply separate it by hand. If it’s vacuum-packed, I drop it into hot water for one minute to loosen it. There’s no need to fully cook it — it finishes in the pan. - I heat the pan to high temperature.
This is the key moment. The pan must be properly hot. I add the neutral oil and let it heat through, but not smoke. - I work quickly with the aromatics.
I add the garlic and ginger and keep them moving with a spatula. This takes 20–30 seconds. They should open up, not darken. - I add the greens.
I add all the greens at once. They shrink fast, so there’s no need to worry. I toss them, let them settle, and soften slightly while keeping their structure. - I add the noodles.
I add the udon and mix carefully but confidently, lifting from the bottom up. The goal is to separate the noodles, not crush them. - I build the flavor.
I add soy sauce, rice vinegar, honey, and sesame oil. I toss everything quickly and keep it on the heat for 1–2 minutes. The sauce should coat the noodles, not pool at the bottom.
A few observations that make a real difference
- Greens should be cut large. Small pieces disappear and turn into background.
- Sesame oil always goes in at the end. It’s aromatic and doesn’t like high heat.
- If the pan isn’t hot enough, the udon absorbs the sauce instead of stir-frying.
This dish clearly shows how simple ingredients can work together without complicated prep. There’s no baking, no waiting, no long pauses. Everything happens here and now.
Your quick dinners
Of course, I don’t expect anyone to cook all ten dishes in a row. Usually, two or three are enough to settle in and start showing up on the table without thinking. These are the recipes that eventually become “yours” — not because they’re perfect, but because they’re comfortable and reliable.I’d love to know which ones resonated with you, what you already cook in a similar way, and which quick dinners you consider truly workable.
Share in the comments — those conversations always give more than any list ever could.