
Preserved lemons are one of those ingredients that completely change familiar dishes. They bring brightness, depth, and balance that are hard to achieve with regular lemon juice.
This collection includes 10 recipes we’ve cooked dozens of times — from pasta to stewed chickpeas and yogurt sauce. They are all simple, straightforward, and each one shows preserved lemon in its own way: sometimes it adds freshness, sometimes a soft salty note, sometimes it becomes the main accent.
Here you’ll find recipes suitable for any moment — for lazy weekends or for those days when you want something new in the kitchen without extra fuss.
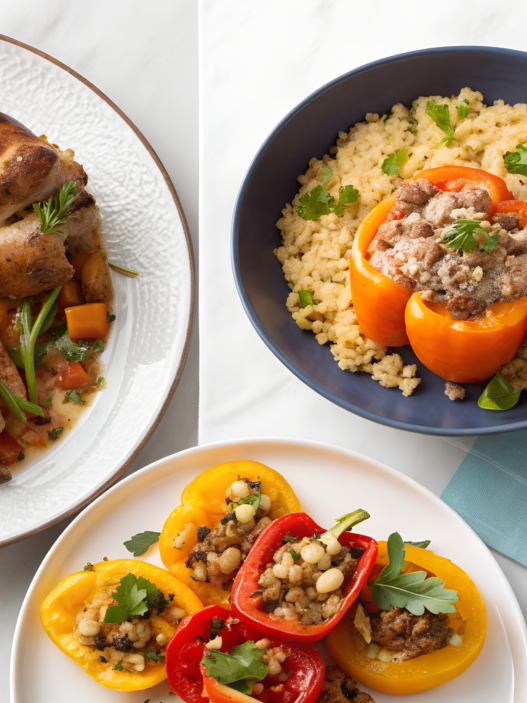
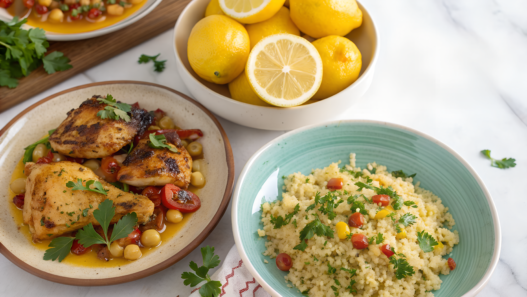
1. Moroccan Chicken with Preserved Lemons

Surprisingly, Moroccan chicken with preserved lemons is easier to make than it seems. And the result gives us a balance of bright saltiness, warm spices, and juiciness.
And yes, if you don’t have a good tagine — no problem. A heavy cast-iron pan with a lid will work. Although… if you ever want to try a real one, there’s a great option on Amazon: Le Creuset Enameled Cast Iron Tagine.
Ingredients
(For 4 servings)
- 1 whole chicken, cut into 8 pieces (about 1.3–1.5 kg)
- 2 tbsp olive oil
- 1 large onion, thinly sliced
- 3 cloves garlic, minced
- 1 preserved lemon, rind only, sliced thin
- 1 cup chicken broth
- 1 tsp ground turmeric
- 1 tsp ground ginger
- ½ tsp cinnamon
- 1 tsp paprika
- ½ cup green olives
- Salt & pepper to taste
- A handful of fresh cilantro for serving
How to make it
- Prepare the spices and chicken. Mix turmeric, ginger, cinnamon, and paprika in a small bowl. Rub the chicken with salt, pepper, and half of this mixture.
I remember how the first time I didn’t have enough paprika and thought, “Oh well, it’ll be fine.” Don’t repeat my mistake — paprika is important here. - Brown the chicken. Heat the olive oil, place the chicken pieces skin-side down, and let them brown for 5–7 minutes. The less you touch them, the better the crust.
- Add the onion and garlic. Transfer the chicken to a plate. Add the onion to the same pot so it absorbs the aroma of the spices. After a couple of minutes, add the garlic — not earlier, otherwise it will burn.
- Assemble everything in one pot. Return the chicken to the pot, add the remaining spices, olives, thin strips of preserved lemon, and pour in the broth.
This is where that combination of flavors begins — the one we’re waiting for. - Simmer for 40–45 minutes. Heat should be medium or slightly lower. The chicken will become soft, juicy, and the aroma will be very tempting.
- Serve properly. The best sides are couscous or rice. Sprinkle fresh cilantro for brightness.
Tip. If you’ve never worked with preserved lemons, try removing a little salt before cooking: simply rinse the peel under cold water. But don’t overdo it — this saltiness is what makes the flavor so recognizable.
2. Pasta with Preserved Lemons and Fresh Herbs
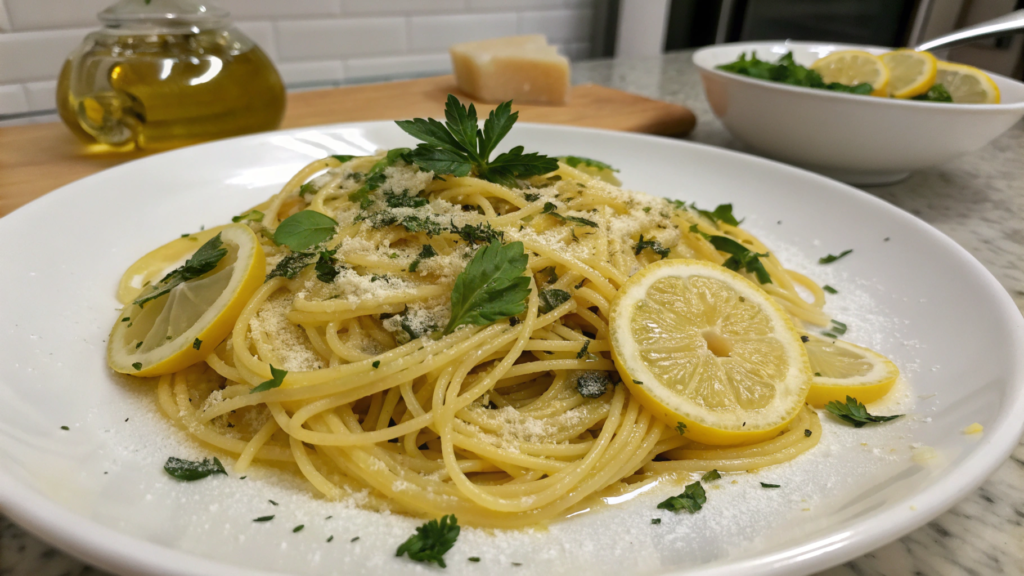
We first made this pasta in our new kitchen in the PNW, when we still didn’t even know where half of our spoons were stored. Preserved lemon completely saved us that day: no need to think too much — everything naturally falls into a bright, fresh flavor.
The pasta absorbs lemon juice, olive oil, and fresh herbs, and the result is a dish that’s hard not to repeat. Sometimes we eat it two days in a row — and nobody complains.
Ingredients
(For 2–3 servings)
- 8 oz spaghetti or linguine (225 g)
- 1 preserved lemon, finely chopped
- 3 tbsp olive oil
- 2 cloves garlic, thinly sliced
- 1 tbsp butter
- ½ cup pasta water (or a bit more if needed)
- A handful of fresh parsley, chopped
- A handful of fresh basil or mint
- Black pepper to taste
- A little Parmesan for serving
How to make it
- Cook the pasta. Just bring water to a boil, salt it generously, and once it’s bubbling — drop in the pasta.
Don’t go far: pasta overcooks easily, especially if you drift into thought.
I usually keep a mug nearby so I don’t forget the pasta water — we’ll need it later. - Prepare the lemon and herbs. Rinse the preserved lemon and chop it very finely.
I like removing the seeds and using only the soft peel — that’s what gives the bright flavor.
Chop the herbs however you like: larger pieces for a more “garden” feel, finer for an “Italian” vibe. - Sauté the garlic in oil. In a large pan, heat the olive oil and add the garlic.
Sauté for just a minute, until the aroma becomes soft and warm.
If the garlic starts darkening, lower the heat. I often adjust the dial back and forth — our gas loves surprises. - Add the preserved lemon. Add it straight into the oil with the garlic. Let it warm for a minute.
The lemon becomes softer, less sharp — exactly what the pasta needs. - Combine the pasta with the sauce. Transfer the cooked pasta into the pan, add the butter and a bit of pasta water.
Toss with tongs — the sauce will cling and become creamy (yes, without cream).
Sometimes I add a little more water — depends on the pasta and the mood. Completely normal. - Finish it. Add the herbs and black pepper. I never add salt at this stage — preserved lemon already does the job.
Mix again. If you want, sprinkle some Parmesan — it softens the lemon flavor. - Serve immediately. This pasta is one of those dishes best eaten hot. After 10 minutes it’s still good, but the aroma of herbs and lemon starts to fade.
And if there are leftovers — the next day you can just add a little oil and warm it in the pan.
Tip. If you want a softer flavor, remove the pulp of the preserved lemon and use only the peel. It’s more delicate and almost floral in aroma.
3. Preserved Lemon and Olive Couscous
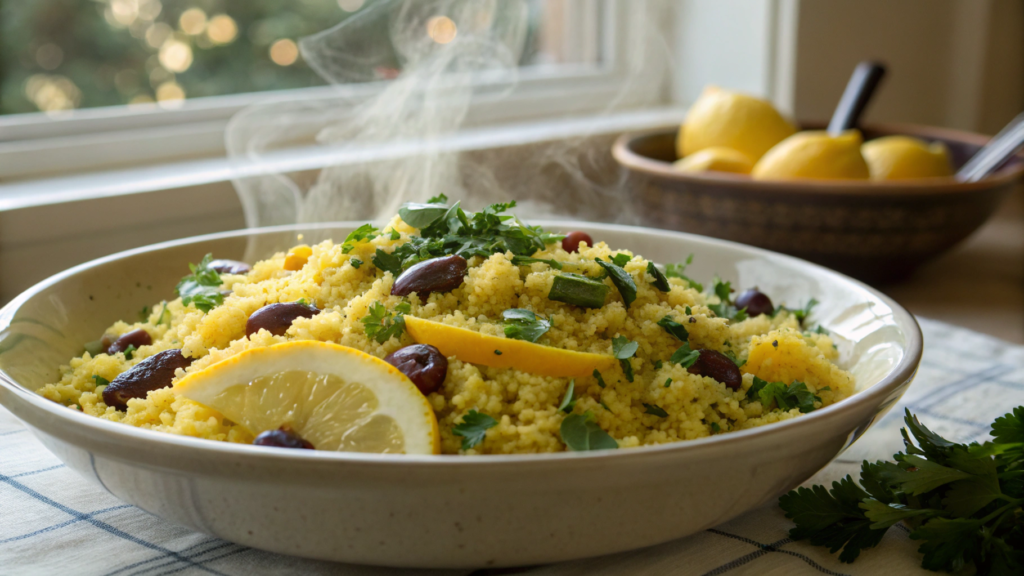
I first mixed preserved lemon, olives, and herbs simply because… well, it was pouring rain on our property, and going to the store was the last thing I wanted.
And it turned out surprisingly bright — that citrus spark of preserved lemon plus the soft, oily saltiness of the olives.
It cooks in just a few minutes (the way we love).
Ingredients
(For 3–4 servings)
- 1 cup couscous (180–190 g)
- 1 cup boiling water or broth (240 ml)
- 1 preserved lemon, finely diced
- ½ cup green olives or kalamata, chopped (80–100 g)
- 2 tbsp olive oil
- 1 small handful parsley, chopped
- 1 tbsp lemon juice
- Salt & pepper to taste
How to make it
- Prepare the couscous. Pour the couscous into a large bowl. If you’re using Near East, just follow the instructions, but I always add slightly less water so it stays fluffy.
Pour in the boiling water (or hot broth), cover with a lid or plate, and leave for 5 minutes.
During this time I usually manage to chop the herbs and lemon — the perfect interval. - While the couscous absorbs, chop the lemon and olives. Rinse the preserved lemon to remove excess salt. Dice it very finely — into tiny cubes.
Chop the olives however you prefer: larger pieces for more pronounced bites, smaller if you want a softer, more even flavor. - Fluff the couscous with a fork. Once it has absorbed the water, run a fork through it to loosen it.
If there are clumps — no worries, that’s normal. Just break them apart with your fingers while the couscous is still warm. - Add everything else. Add the preserved lemon, olives, and parsley. Drizzle with olive oil and lemon juice.
Sometimes I add a spoonful of olive brine — if I want a deeper flavor. - Mix and taste. Here’s the important part: taste first, then salt.
Preserved lemon and olives can add plenty of salt on their own. I’ve oversalted it a couple of times just out of habit. - Serve warm or chilled. Warm, it’s softer and more aromatic; chilled, it’s the perfect side dish for grilled fish or chicken.
We often take it in containers to the property when working in the garden — light, filling, and no reheating needed.
Tip. If you want a richer flavor, replace the water with hot vegetable or chicken broth. Even a small change can make the dish completely different.
4. Salmon with Preserved Lemon Butter
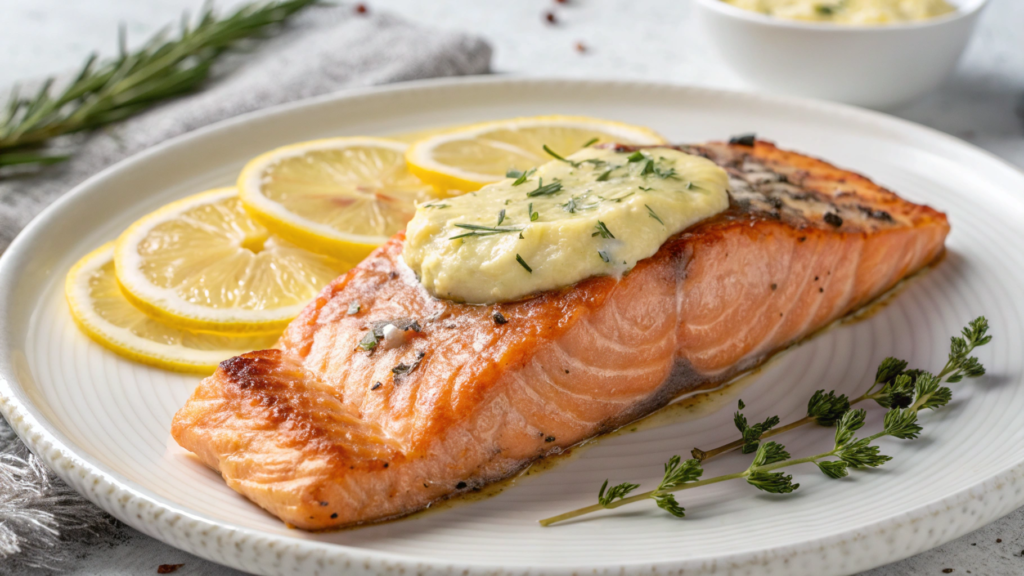
Salmon is basically made for simple recipes, and preserved lemon does all the work here — it adds a gentle brightness you can’t get from regular lemon.
If you want, you can use high-quality butter — on Amazon, for example, there’s the very good Kerrygold Pure Irish Butter. It makes the flavor deeper, even when the recipe is extremely simple.
Ingredients
(For 2–3 servings)
- 1 lb salmon fillet, cut into 2–3 pieces
- 2 tbsp butter
- 1 preserved lemon, very finely minced
- 1 tbsp olive oil
- 1 clove garlic, minced
- Black pepper to taste
- Pinch of chili flakes (optional)
- Fresh dill or parsley for serving
How to make it
- Preheat the oven and prep the salmon. Set the oven to 400°F (200°C). Pat the salmon dry with paper towels — this helps it brown better.
I sometimes trim the thin “tails” so they don’t dry out — a small detail, but it helps. - Make the lemon butter. In a small skillet or saucepan, melt the butter over low heat.
Add the garlic and the very finely chopped preserved lemon.
Stir and let it warm for 1 minute — just to let everything blend together.
If the lemon is too salty, you can rinse the peel beforehand, but I usually don’t — I like the bold flavor. - Assemble everything on the sheet. Place the salmon on parchment and drizzle with olive oil.
Spread the lemon butter generously on top.
I usually tuck a little spoonful under the fillet as well — my small trick for a more even flavor. - Bake for 12–15 minutes. Time depends on thickness. Thicker pieces may need 17 minutes.
The salmon is done when it flakes easily with a fork but stays juicy inside.
If you wait too long, it will dry out — so check early. - Add herbs before serving. Fresh dill or parsley works beautifully with the preserved lemon, and I always add a generous amount.
Sometimes I sprinkle extra pepper or chili flakes — depends on the mood. - Serve with a simple side. Salmon pairs well with any grains. We often serve it with quinoa or jasmine rice, because they absorb the leftover lemon butter perfectly.
Tip. If you want a deeper flavor, add half a teaspoon of honey to the butter — yes, honey. It softens the acidity of the preserved lemon and makes the flavor richer.
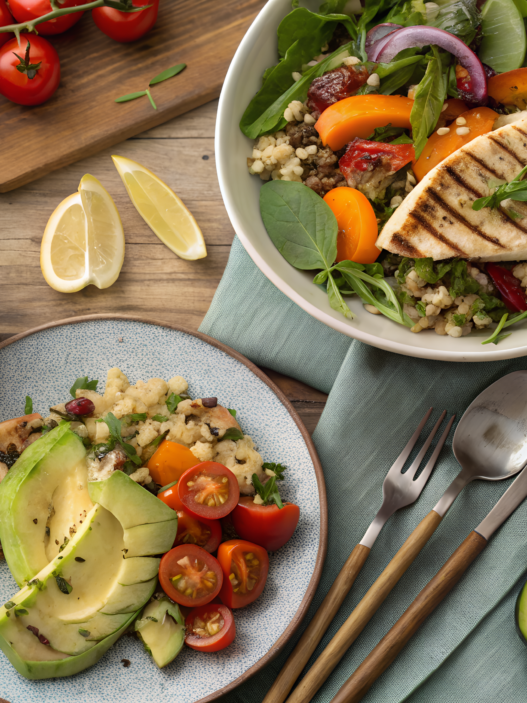
5. Ottolenghi-Inspired Preserved Lemon Salad
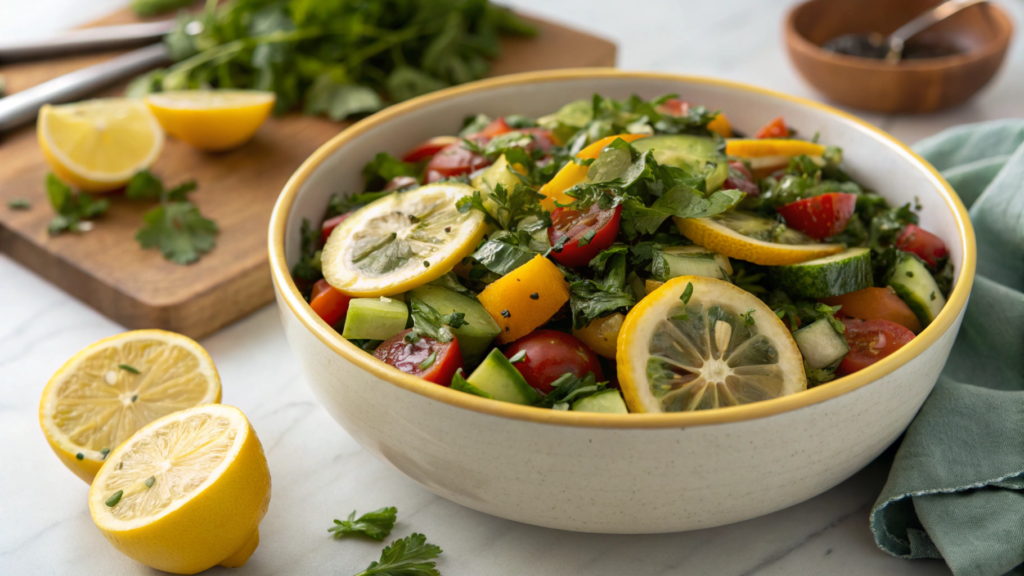
When we first saw Ottolenghi’s salads and checked the ingredient lists… we realized we didn’t have half of those ingredients and probably never would. But one thing we knew for sure: preserved lemon can elevate even the simplest salad.
This version doesn’t try to recreate the original — it’s more of an inspiration: lots of herbs, texture contrasts, acidic accents. It’s the perfect way to use preserved lemon when you want to actually taste it, not just hide it inside a dressing.
Ingredients
(For 2 large or 3 medium servings)
- 1 large cucumber, sliced thin
- 1 cup cherry tomatoes, halved
- ½ red onion, very thinly sliced
- 1 preserved lemon, finely diced
- ½ cup fresh parsley, chopped
- ½ cup fresh mint, chopped
- 2 tbsp olive oil
- 1 tbsp almond oil or more olive oil
- 1–2 tbsp lemon juice
- Black pepper to taste
- Small handful of toasted almonds or pine nuts (optional)
How to make it
- Prepare the vegetables. Slice the cucumber into thin half-moons. If it’s too watery, sprinkle with a little salt and leave for 10 minutes — it will release excess moisture and the salad will feel more structured.
Halve the tomatoes, slice the onion very thinly. You can briefly soak the onion in cold water — it softens the flavor. - Prepare the preserved lemon. Rinse it under cold water, especially if the brine was very salty. Remove the pulp if it feels too intense, and dice the peel into very small cubes.
I remember the first time we cut the pieces too big — and Lindy kept picking them out because the flavor was too concentrated. Small pieces make all the difference. - Mix the herbs. Chop the parsley and mint fairly large — that’s exactly what gives Ottolenghi-style salads their “alive” look.
If you prefer cilantro — that works too. We sometimes use it when we forget to buy parsley. - Assemble the salad. In a large bowl, combine the cucumber, tomatoes, onion, herbs, and preserved lemon. Add olive oil, almond oil, and lemon juice.
Toss gently so you don’t turn everything into a vegetable mash. Use tongs or two spoons — it gives better control. - Add texture. Toast the nuts on a dry pan for a couple of minutes, just until fragrant.
Sprinkle them on top right before serving.
Sometimes we use pine nuts, sometimes almonds — both work beautifully. - Taste and adjust. This salad depends on the balance of acidity, salt, and freshness. Sometimes it needs a bit more lemon juice, sometimes a drop of oil.
The key is to taste before serving. Preserved lemon behaves differently depending on how long it’s been sitting in the jar.
Tip. If you want the salad to feel a bit more filling, add chunks of avocado or roasted eggplant. It’s not classic Ottolenghi, but it works so well that we do it all the time.
6. Roast Vegetables with Preserved Lemon Dressing
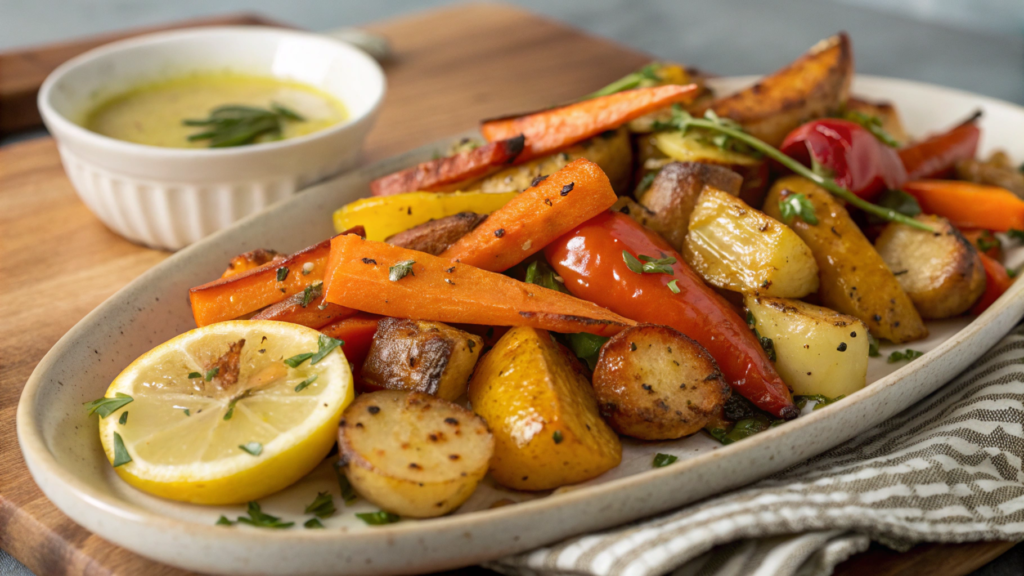
When I added a preserved lemon dressing to ordinary roasted vegetables… well, let’s just say this: simple vegetables became something completely different.
If you want a deeper, more rounded flavor, you can add a little smoked salt or use a good olive oil. On Amazon, for example, there’s California Olive Ranch Global Blend Extra Virgin Olive Oil — mild, versatile, and excellent for vegetables.
Ingredients
(Serves 4)
For the vegetables:
- 2 carrots, sliced into sticks
- 1 zucchini, sliced into half-moons
- 1 red bell pepper, cut into strips
- 1 yellow bell pepper, cut into strips
- 1 small red onion, cut into wedges
- 2 tbsp olive oil
- Salt & pepper to taste
For the preserved lemon dressing:
- 1 preserved lemon, finely minced
- 2 tbsp olive oil
- 1 tbsp honey or maple syrup
- 1 tbsp lemon juice
- 1 tsp Dijon mustard
- Black pepper
How to make it
- Prepare the vegetables. Cut everything into roughly equal pieces so they roast more evenly.
I usually spread everything on a large sheet of parchment right on the baking tray — less cleanup, always a win.
Add oil, salt, and pepper, then toss with your hands to coat everything evenly. - Roast until golden. Preheat the oven to 425°F (220°C). Spread the vegetables in a single layer — if they’re piled up, they’ll steam instead of caramelizing.
Roast for 20–25 minutes, stirring once halfway through.
Sometimes I leave them a couple of minutes longer when I want more browned edges. - Make the dressing. While the vegetables roast, mince the preserved lemon very finely — texture matters here.
In a small bowl, combine the lemon, olive oil, honey (or syrup), lemon juice, and mustard.
Mix with a fork until smooth.
I like pressing the lemon gently with the back of the spoon — it releases more aroma. - Combine everything. Remove the vegetables from the oven and let them cool for a minute.
Transfer to a serving bowl or platter.
Pour the preserved lemon dressing over the top and toss gently.
If the vegetables look a little dry, add a splash of extra oil — though that’s rarely needed. - Serve warm. Warm temperature brings out the bright preserved lemon flavor best.
Though… we’ve taken this as a chilled salad in containers the next day, and it was excellent in a totally different way.
Tip. If you want even more brightness, add a little whole-grain mustard or chopped fresh herbs (like parsley). We do this whenever there’s even a small bunch of something green at home.
7. Preserved Lemon and Yogurt Sauce
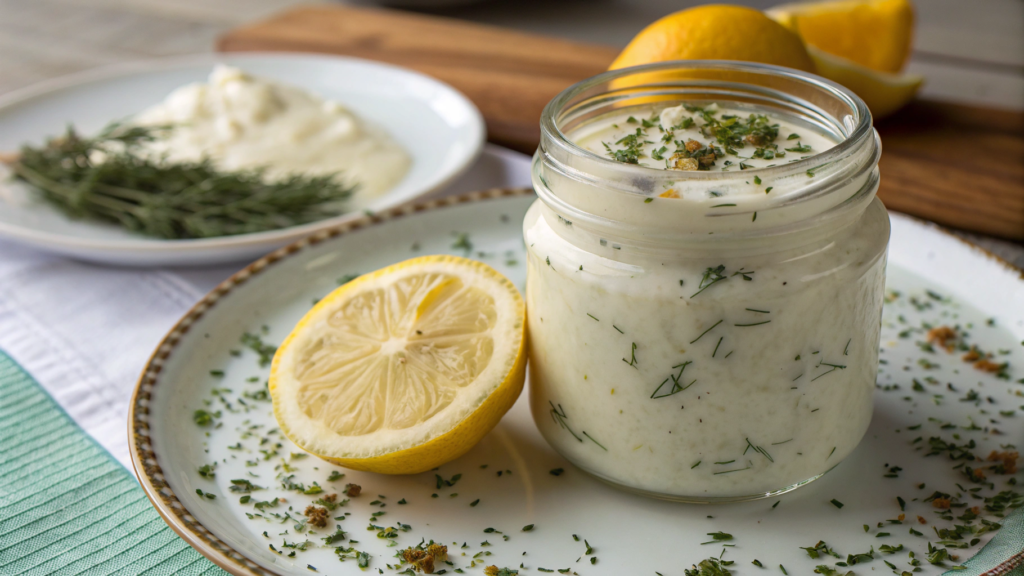
A jar of yogurt, a piece of preserved lemon, and a bit of herbs — I decided to mix everything just as it was (simply so I wouldn’t have to eat dry chicken).
And it turned out to be one of the most universal sauces that I’ve been making constantly ever since. It’s fresh, creamy, slightly citrusy, and so simple that it comes together very quickly.
Ingredients
(Enough for 4–6 servings depending on how much you love sauce)
- 1 cup plain Greek yogurt (240 ml)
- 1 preserved lemon, very finely minced
- 1 small garlic clove, grated or mashed
- 1 tbsp olive oil
- 1 tbsp lemon juice
- 2 tbsp chopped fresh dill or parsley
- Black pepper to taste
How to make it
- Prepare the preserved lemon. Rinse the peel to remove excess salt.
Remove the pulp if its flavor is too sharp for you.
Mince the peel very finely — the smaller the pieces, the more delicate the sauce becomes.
The first time I chopped it larger and Lindy kept picking the pieces out, so yes — it matters. - Mix the yogurt and lemon. Combine the yogurt and minced lemon in a medium bowl.
If the yogurt is too thick, add a teaspoon of water or lemon juice — slowly. It’s easy to overdo it. - Add the garlic. It’s best to grate the garlic finely or mash it into a paste.
Raw garlic pieces can dominate the flavor, so add gradually.
I always start with half — then add more if I want extra sharpness. - Stir in the oil, juice, and herbs. Olive oil makes the texture slightly more creamy, and lemon juice boosts the flavor of the preserved lemon.
Chop the herbs however you prefer: larger pieces for a “garden-style” feel, finer for a smoother sauce. - Taste and adjust. Add pepper. Be careful with salt — preserved lemon may already add more than you expect.
Sometimes I add a touch more lemon juice, especially when serving the sauce with roasted vegetables or fish. - Let the sauce rest. After 10–15 minutes, the flavor becomes deeper.
But honestly, we often eat it right away… patience is near zero when hot vegetables are waiting.
How to use it
- Drizzle it over roasted vegetables or fish.
- Spread on flatbread or a tortilla for a quick lunch.
- Use as a dip for carrots or cucumbers.
- Add to grilled chicken, kebabs, or meatballs.
- Thin with water to make a light salad dressing.
Tip. If you want a deeper flavor, add a teaspoon of tahini. It gives a gentle nutty note without overpowering the lemon.
8. Grilled Lamb with Preserved Lemon Marinade
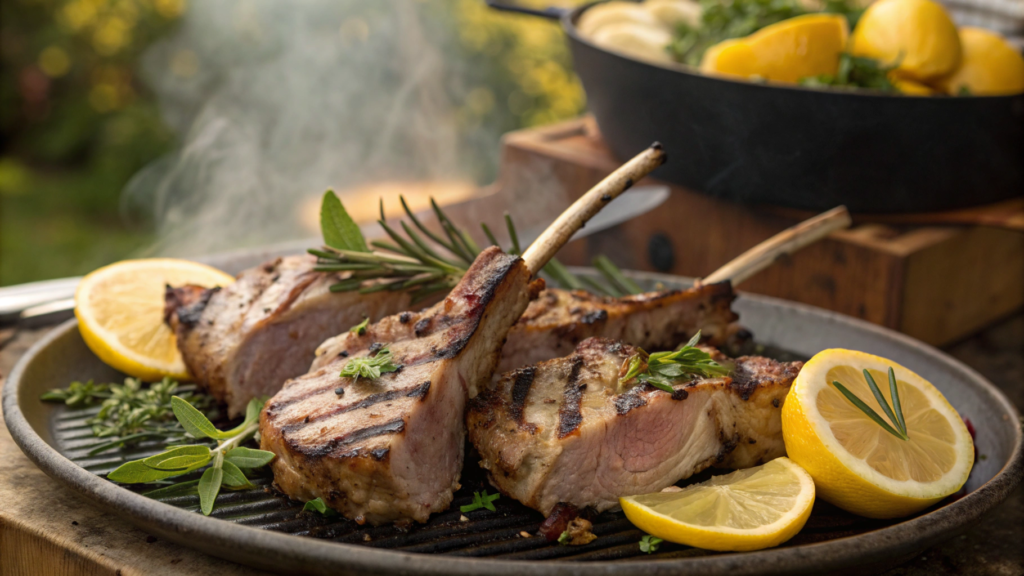
We were planning to grill chicken, but the only thing in the freezer was lamb — and honestly, I didn’t think preserved lemon would fit so perfectly.
The result smelled like summer, herbs, smoke — and it was incredibly delicious.
Ingredients
(For 2–3 servings)
The marinade:
- 1 preserved lemon, finely minced
- 3 tbsp olive oil
- 2 cloves garlic, minced
- 1 tbsp lemon juice
- 1 tsp dried rosemary or 1 sprig fresh
- ½ tsp dried oregano
- Black pepper to taste
The meat:
- 1 lb lamb chops or lamb steaks
- Salt — just a little before grilling
How to make it
- Prepare the marinade. Rinse the preserved lemon, remove excess salt, and mince the peel finely.
Mix the lemon, olive oil, garlic, lemon juice, rosemary, and oregano in a bowl.
Stir with a fork, lightly pressing the lemon — this makes the aroma brighter.
The marinade is thick — that’s normal. It should cling to the meat. - Marinate the meat. Lay the lamb in one layer and massage the marinade in with your hands (yes, hands are better).
I usually flip the pieces 2–3 times so everything distributes evenly.
Let it sit for at least 30 minutes — but 2 hours makes a huge difference if you have time. - Prepare the grill. Heat the grill to medium. If you’re cooking in a pan — also fine. Get it hot so the meat sears immediately.
I always lightly oil the grate to avoid that dance of sticking and tearing. - Grill the lamb. Lightly salt each piece before grilling. Grill for 3–4 minutes per side (depending on thickness).
If you want a deeper sear — go up to 5 minutes.
Don’t flip too early: let the crust form. It took me a while to learn this. - Let the meat rest. Remove from the grill and let it rest for about 5 minutes. The juices will redistribute and the flavor becomes deeper.
Sometimes we eat too fast and skip this step — but when I wait, the difference is noticeable. - Serve with something simple. This lamb is flavorful on its own: it pairs perfectly with a simple salad, potatoes, or couscous.
Tip. If you want a brighter smoky note, add a pinch of smoked paprika to the marinade. It won’t make the flavor “smoky” in a bad way, but adds a warm note that suits lamb beautifully.
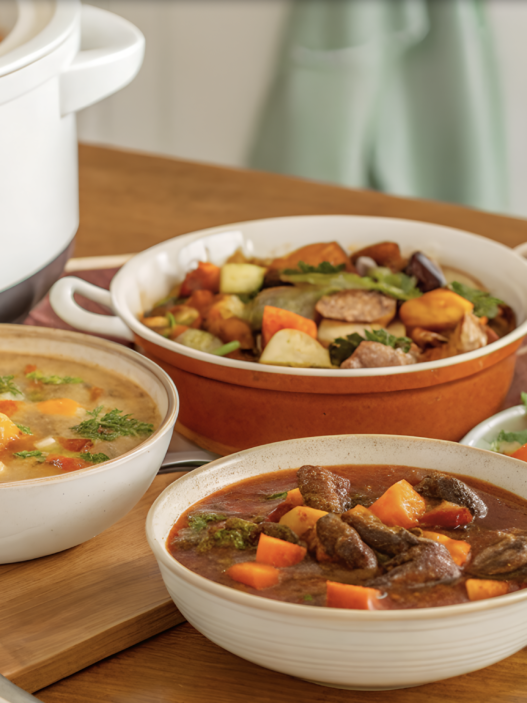
9. Preserved Lemon and Chickpea Stew
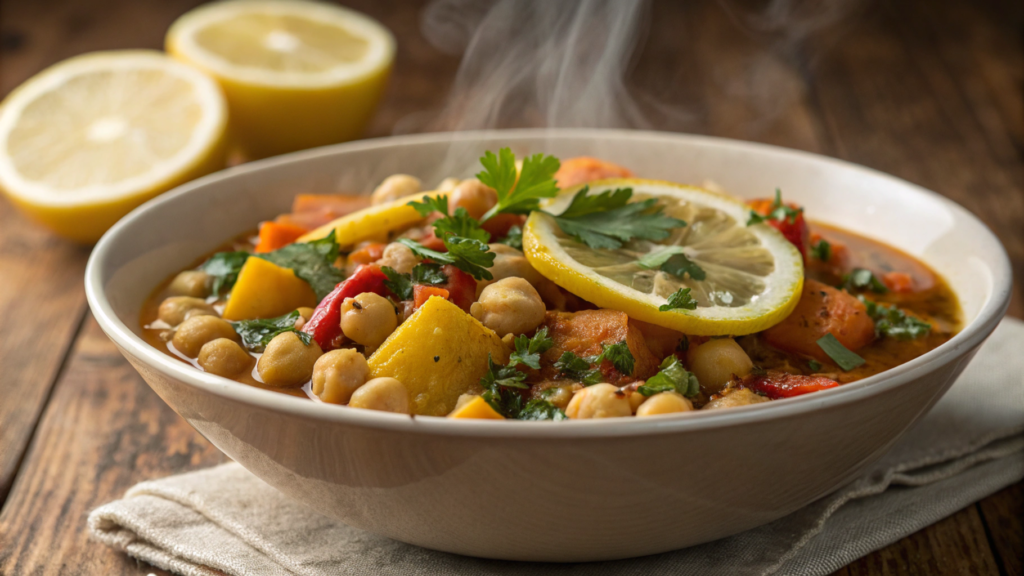
I simply mixed what I had on hand: chickpeas, a few vegetables, garlic, and preserved lemon. And I didn’t expect it to turn out so delicious.
It’s simple yet vibrant — and it feels like it gives you your energy back after a long day.
Ingredients
(For 3–4 servings)
- 2 tbsp olive oil (2 ст.л.)
- 1 onion, diced (1 луковица)
- 2 carrots, diced (2 моркови)
- 3 garlic cloves, minced (3 зубчика)
- 1 can chickpeas, drained and rinsed (15 oz / 425 г)
- 1 preserved lemon, finely chopped (1 солёный лимон)
- 2 cups vegetable broth (480 мл)
- 1 tsp cumin (1 ч.л.)
- ½ tsp smoked paprika (½ ч.л.)
- ½ tsp turmeric (½ ч.л.)
- Salt & pepper to taste
- Fresh cilantro or parsley for serving
How to make it
- Heat the oil and sauté the onion. Pour olive oil into a pot and heat it over medium heat.
Add the onion and cook until soft — about 5 minutes.
I always add a pinch of salt at this stage: it helps the onion release moisture faster and become sweeter. - Add the carrots and garlic. Cut the carrots however you like — it’s a homey stew, not a restaurant plate.
Cook for a couple of minutes.
Add the garlic later so it doesn’t burn. If it browns too much, the flavor becomes bitter. - Stir in the spices. Add the cumin, smoked paprika, and turmeric. Stir and let the spices warm for about 30 seconds — the aroma becomes deeper and richer.
- Prepare the preserved lemon. Rinse it, remove excess salt, and chop the peel finely.
You can keep a little of the pulp if it isn’t too sharp — but I usually use only the peel. - Add the chickpeas and lemon. Add the chickpeas to the pot and stir.
Add the preserved lemon — it slowly releases its flavor throughout the stew. - Pour in the broth and simmer. Add 2 cups of broth and bring to a gentle boil.
Lower the heat and simmer for 15–20 minutes, until the carrots soften.
If you want a thicker consistency, mash a few chickpeas directly in the pot. - Taste and adjust. Salt carefully: preserved lemon already brings a lot of saltiness.
Sometimes I add a bit more smoked paprika — especially in winter when I want warmer notes. - Serve with herbs. Fresh cilantro or parsley brightens the dish noticeably.
You can add a spoonful of yogurt on top — it creates a soft, creamy contrast.
How to serve it
These options are always at the top for us:
- With rice or couscous (they’re the perfect base to absorb the sauce).
- With warm pita.
- As a standalone dish with a spoon of yogurt sauce (your Preserved Lemon and Yogurt Sauce works perfectly here).
We’ve even eaten this stew cold on the property, straight from a container — and it was still wonderful.
Tip. If you want a thicker, heartier texture, add a couple of handfuls of finely chopped spinach at the end. It softens quickly and makes the stew denser.
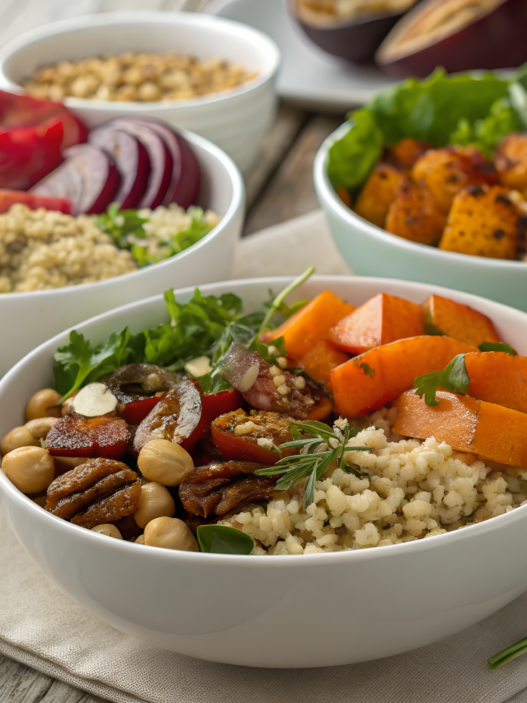
10. Quinoa Bowl with Preserved Lemon Topping
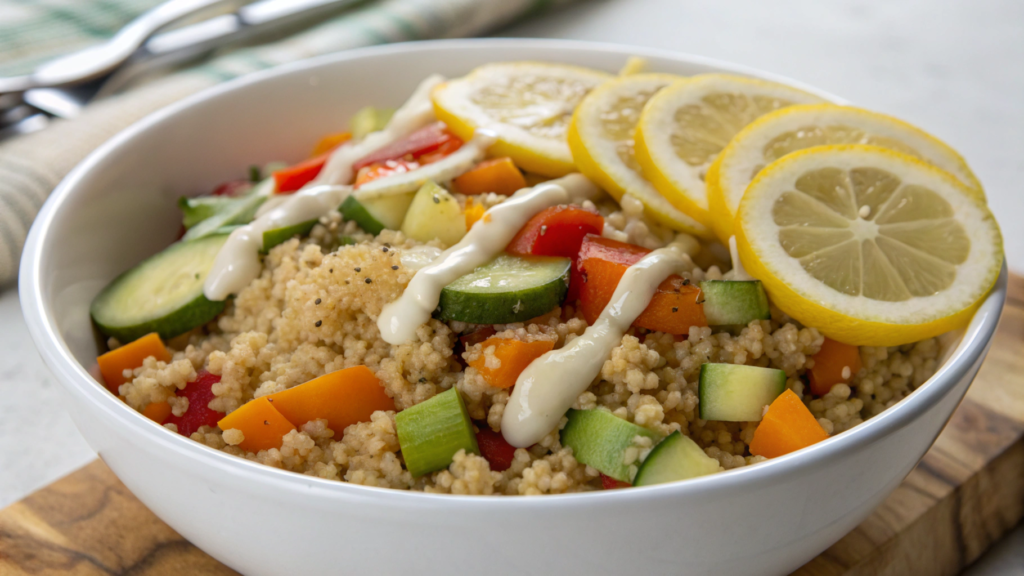
When our active garden-work season begins, I’m constantly looking for dishes I can assemble “on the go”: fresh vegetables, a bit of protein — all with zero extra fuss.
And this bowl is exactly that — a warm base, crunchy vegetables, a creamy dressing, and that bright, salty-citrusy note of preserved lemon.
Ingredients
(For 2–3 servings)
The base:
- 1 cup quinoa (180–190 г)
- 2 cups water or broth (480 мл)
- Salt — a pinch
Topping:
- 1 preserved lemon, finely chopped (1 солёный лимон)
- 1 cucumber, diced (1 огурец)
- 1 cup cherry tomatoes, halved (150–170 г)
- ¼ red onion, finely sliced (¼ красной луковицы)
- Fresh parsley or mint — a small handful
Creamy dressing:
- ½ cup Greek yogurt (120 мл)
- 1 tbsp olive oil (1 ст.л.)
- 1 tsp lemon juice (1 ч.л.)
- Black pepper to taste
How to make it
- Cook the quinoa. Rinse the quinoa in a fine sieve — otherwise a slight bitterness will remain. Add it to a small pot, pour in the water and a pinch of salt.
Bring to a boil, then reduce the heat and cook covered for 12–15 minutes.
When the water is absorbed, turn off the heat and let the quinoa rest for 5 more minutes.
I always fluff it with a fork — the grains become light and airy. - Prepare the preserved lemon. Rinse the peel to remove excess salt.
Chop it very finely — this helps the flavor distribute evenly.
If you leave large pieces, the taste will feel too sharp. - Chop the vegetables. Dice the cucumber into small cubes, halve the tomatoes, slice the onion thinly.
If the onion feels too sharp, you can soak it briefly in cold water. This tiny step helps a lot. - Make the yogurt dressing. Just mix the yogurt, olive oil, and lemon juice.
Add pepper.
If you prefer a thinner dressing, add a teaspoon of water.
I like it a bit thicker — so it clings to the quinoa instead of sinking to the bottom. - Assemble the bowl. Add the warm quinoa to deep bowls. Arrange the cucumbers, tomatoes, onion, and herbs on top.
Sprinkle the chopped preserved lemon — it works here as an aromatic accent, a bit salty, a bit citrusy.
Spoon the yogurt dressing on top. - Taste and adjust. Sometimes it needs a little olive oil or an extra drop of lemon juice.
Sometimes — more lemon (which is what we do most of the time).
And sometimes the bowl is perfect as is.
How to serve
- Hot — especially great after a long, heavy day.
- Cold — an excellent lunch-box option.
- With pieces of roasted chicken or salmon — if you want more protein.
We often take this bowl with us to the garden. It’s one of those dishes that stays delicious even after 2 hours — which is honestly rare.
Tip. If you want a more filling bowl, add a bit of avocado or canned chickpeas. When you need quick energy — it works perfectly.
A question for you
Preserved lemons can change so many dishes — sometimes almost too easily. And the more recipes you try, the quicker you realize that this ingredient works nearly everywhere: in hot dishes, salads, marinades, and even quick everyday sauces.
But everyone has their favorite — that one recipe that stays in the “I make this all the time” list.I’m curious: which one will be yours? Which recipe from this collection will you try first?
And do you want more quick weekday ideas or more substantial weekend dishes?
Tell me in the comments — and if you give me a direction, I’ll create a new collection or adapt any recipe to your cooking style.