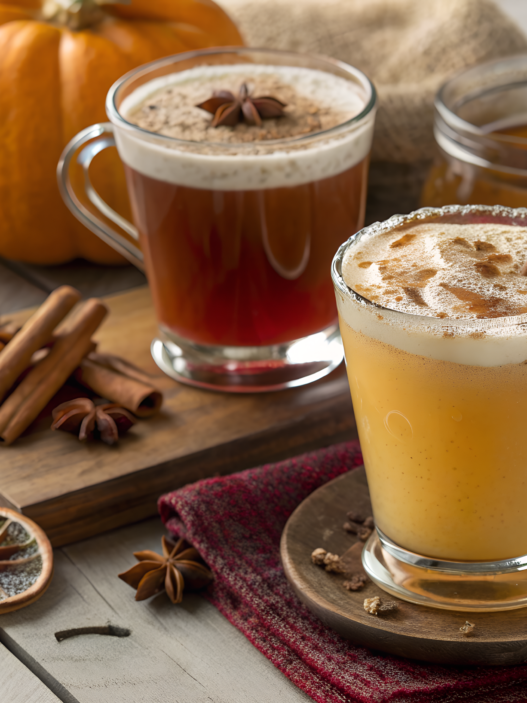

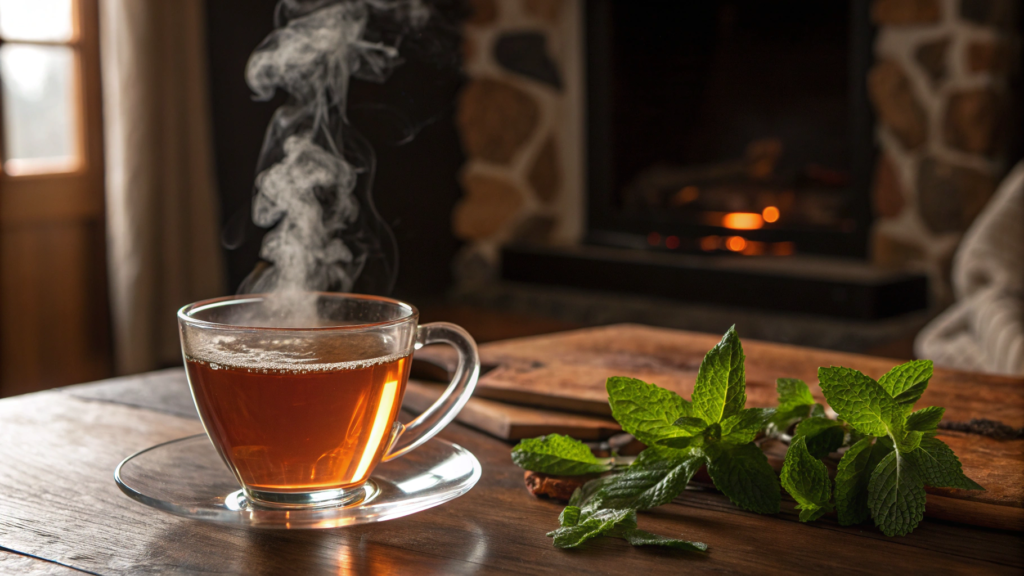
Nothing warms you up like homemade herbal teas. Lindy and I joke that we have our own little “tea season,” which starts in November and ends sometime after the first warm days of spring.
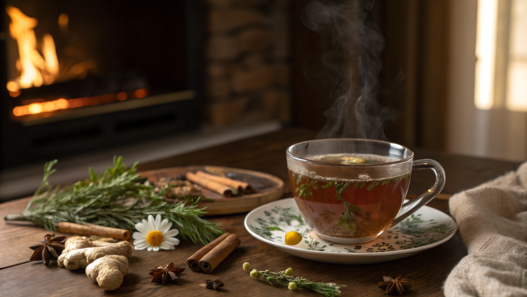
And if in Idaho we brewed tea just to warm up, here on our land in the Pacific Northwest, it has become more of a quiet ritual. A cup of hot infusion after working in the greenhouse. A cup in the moment when you need to recover after a rainy day. Every blend in this list isn’t just a recipe — it’s a small piece of self-care.
I’ve gathered here 10 winter herbal tea mixes that we make most often. Some help warm you up, some give a fresh lift, some help you relax. All of them are simple, very homey, and tested by our long, sometimes not easy, but always beloved winters.
1. Classic Ginger Lemongrass Comfort Mix
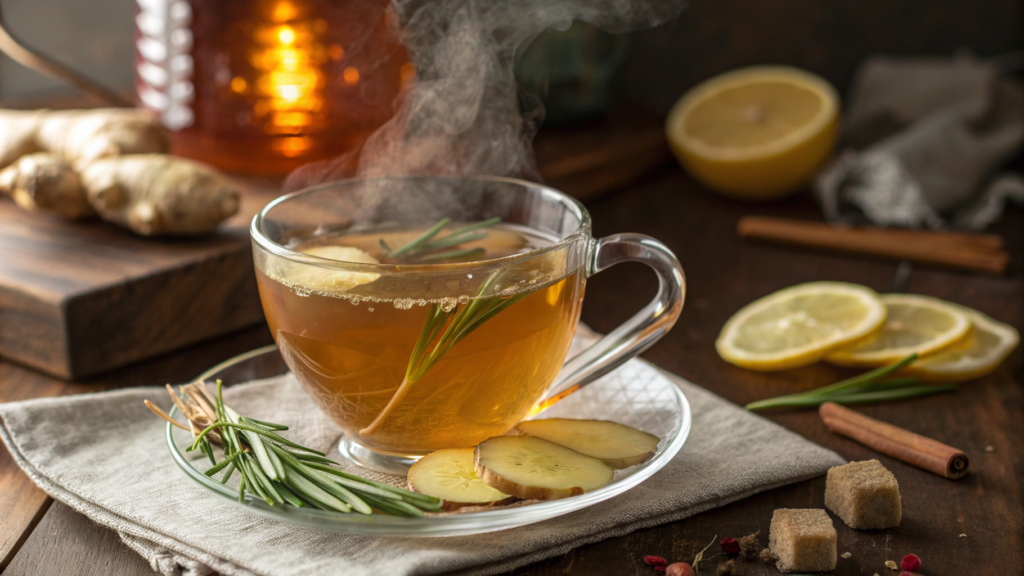
When the cold arrives, ginger tea with lemongrass is what I reach for almost instinctively. We make it when we need something “hot and strong,” and this tea has really become our winter favorite.
Ginger is a powerful warming root, and lemongrass adds a little bit of freshness. And this combination gently supports the body in winter. Not some kind of “magical effect” — just reliable herbs we’ve tested through many winters.
Ingredients
(For 1 large mug.)
- 1 tbsp fresh grated ginger (12–15 g)
- 1 tbsp dried lemongrass
- 1 tsp honey or maple syrup — optional
- 8–10 oz water (240–300 ml)
- A slice of lemon — optional
How I make this tea in winter
- I grate fresh ginger. I usually take a piece the thickness of a big thumb — juicy, firm, without wrinkled edges. I grate it right over the mug or teapot so not a drop of juice is lost. The ginger aroma literally fills the kitchen at this moment. It’s a small thing, but it makes the process pleasant.
- I add lemongrass. If I use dried, I take a generous tablespoon. We once experimented, reduced the amount — the flavor immediately drops and becomes uninteresting. Lemongrass gives that refreshing note, not sour but soft. I gently mix it with the ginger so the herbs combine well before pouring water.
- I pour hot water (90–95°C). I try not to use boiling water — it makes the taste harsh. I heat the water until it’s just about to boil. I pour it in, cover the mug with a saucer or lid, and set it aside. Let it sit for 7–10 minutes. After that, the tea already smells as if it was gently simmered on the stove.
- I add honey or maple syrup. Here intuition steps in. If the day was tough — I use honey, it makes the flavor softer. If I want a bit more brightness — I add a drop of maple syrup. I stir slowly and give the drink a moment to settle.
- Sometimes I toss in a slice of lemon. This is more about the mood. On especially foggy or damp days, lemon gives the needed spark of freshness. On freezing days — I skip it so it doesn’t override the warmth of the ginger.
A small tip. Don’t cut ginger into chunks — grate it. It releases heat and aroma twice as actively. This is a little secret behind all good winter teas.
In the end, you get a steady, deep, warming tea that gently relaxes the body and gives the feeling that the day is falling back into place. In those moments when you know the whole winter is still ahead, a mug like this works as a small support you can make in 10 minutes.
2. Immune-Boosting Elderberry Sage Brew
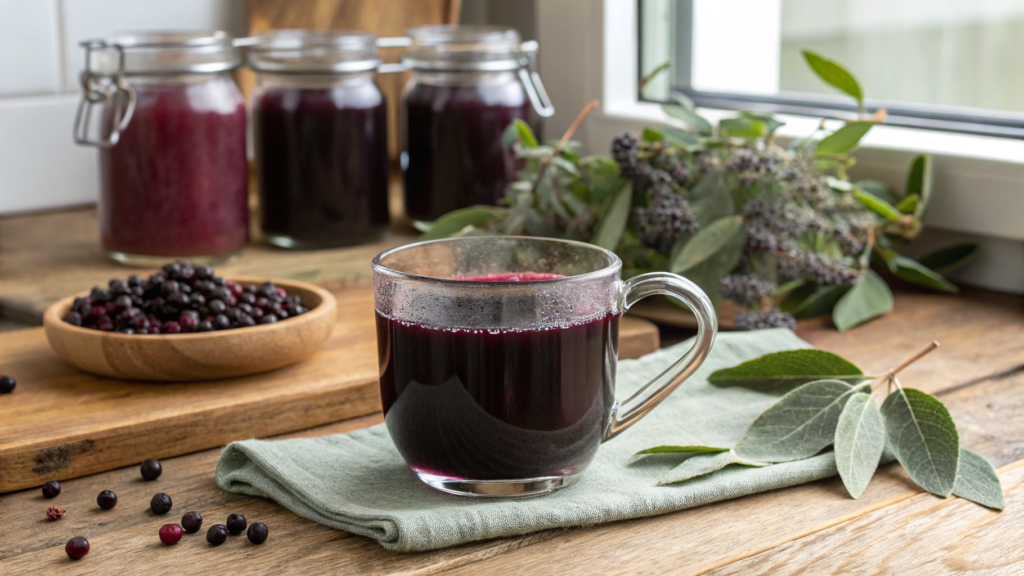
Elderberry — this small dark berry has been standing in jars on our top kitchen shelf for many years. This is one of those herbs that I can really speak about confidently. In studies (for example, data from Nutrients and a clinical review in the Journal of International Medical Research) it’s noted that elderberry extracts may support the immune system during the season of viral load.
But sage — that’s a different story. It grows here as a huge bush that we’ve almost stopped trying to transplant: every time we try to trim it, it’s like it says, “oh come on, I’ll grow again.” And it grows! Its warm, deep flavor makes the tea feel more nourishing, somehow.
Ingredients
(For one large mug)
- 1 tbsp dried elderberries
- 1 tsp dried sage
- 8–10 oz water (240–300 ml)
- 1–2 tsp honey — optional
- A small slice of orange — if you want brightness
How I brew Elderberry Sage Brew in winter
- I soak the elderberries for about 5 minutes. This is my personal trick — if you pour the berries immediately, the flavor turns out weaker. I just cover them with slightly warm water for a couple of minutes. They start to swell and become softer, and the aroma becomes deeper.
- I add sage. And here it’s important not to overdo it. If you add too much, the flavor will taste medicinal. I take exactly a teaspoon and gently crush it with my fingers to release the essential oils.
- I pour hot water (but not boiling!). Elderberry is better not poured with boiling water so that part of its beneficial properties isn’t destroyed. I let the water cool for about 30 seconds and only then pour it in. I cover it with a lid or a saucer — so the blend can “breathe” and reach the right temperature.
- I let it steep for 10–12 minutes. This is the time when elderberry releases its color, and sage releases its soft essential notes. And the flavor becomes thick, rich, wintery. During this time I usually go out to put food in the bird feeders — and when I come back, the aroma of elderberry is already drifting through the kitchen.
- I add honey. Sage loves honey. Truly loves it. With it, the tea becomes more full-bodied. Sometimes I use our local dark honey — it fits this blend perfectly.
A short tip. If you want the drink to turn out even thicker and darker — let the elderberries simmer for literally one minute on the lowest heat. Not longer. This strengthens the flavor and makes the tea similar to a light berry decoction.
You get a strong, warm, rich tea that you feel with your whole chest. It has an amazingly beautiful color — deep, almost ruby-like. It gently supports the body in the cold months, helping you recover after damp walks.
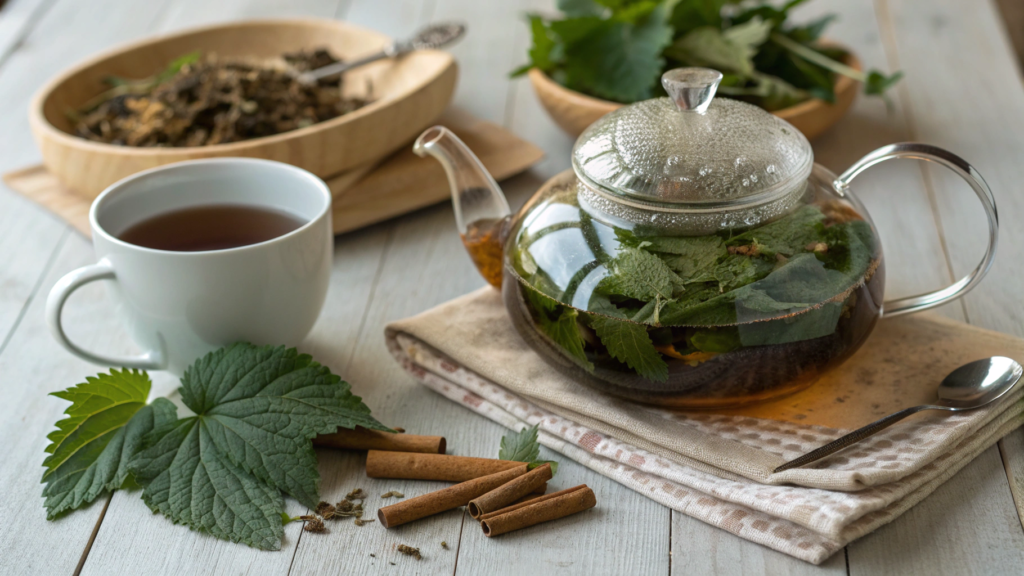
3. Smooth Vanilla Rooibos & Mint Blend
Rooibos, vanilla, and mint — a soft, warm, very “homey” combination.
Rooibos on its own is a drink with an amazingly gentle flavor. It’s not astringent like black tea, not sour like many herbs, it’s… steady. Calm. Vanilla adds depth, and mint makes the sip fresh but not cold.
If we speak a bit more professionally, rooibos really has a good polyphenol profile. There are reviews in Antioxidants and studies in the Journal of Food Science that explain which antioxidant compounds it contains. Nothing “miraculous,” just a natural characteristic of the plant. But in winter, drinks like this feel especially pleasant — both in flavor and in the general feeling in the body.
Ingredients
(For one large mug.)
- 1 tbsp rooibos (Davidson’s Organic Rooibos)
- ½ tsp dried mint
- ¼ tsp natural vanilla powder or a small piece of vanilla pod “core”
- 10 oz water (300 ml)
- 1 tsp honey — if you want sweetness
- A pinch of cinnamon — optional
How I brew this tea in winter
- I warm the teapot. Yes, it’s a small thing — but it makes a difference. I simply pour hot water into the empty teapot, rinse it, and pour it out. This helps rooibos open up warmer and deeper.
- I add rooibos and vanilla. Vanilla gives that soft, sweet cloud. Sometimes I use powder, sometimes the inside of a pod if we have leftover pieces from baking. I crush it with my fingers so the aroma releases immediately.
- Mint — small but important. I don’t toss mint in by the handful, otherwise the tea becomes “toothpaste.” A teaspoon is perfect. If the mint is homegrown and very aromatic, you can use even less.
- I pour hot water (95°C). Rooibos loves hot water but not boiling. I pour it in and cover with a lid. I usually steep it for 7–8 minutes — then the flavor becomes exactly what we love in winter: soft, warm, slightly sweet.
- I add honey — but only after the tea cools a bit. Honey loses part of its active compounds at high temperatures, so I let the tea cool for a minute.
A small tip. If you want the vanilla flavor to be more intense — shake the teapot before serving. Yes, literally. Rooibos is light, and vanilla is heavy — shaking makes the flavor more even.
You get a very soft, steady evening tea that relaxes but doesn’t make you sleepy.
Rooibos gives a sense of calm, vanilla — depth, and mint — a light breath, as if the air in the house became just a little cleaner.
4. Zesty Orange Peel and Rosemary Revival
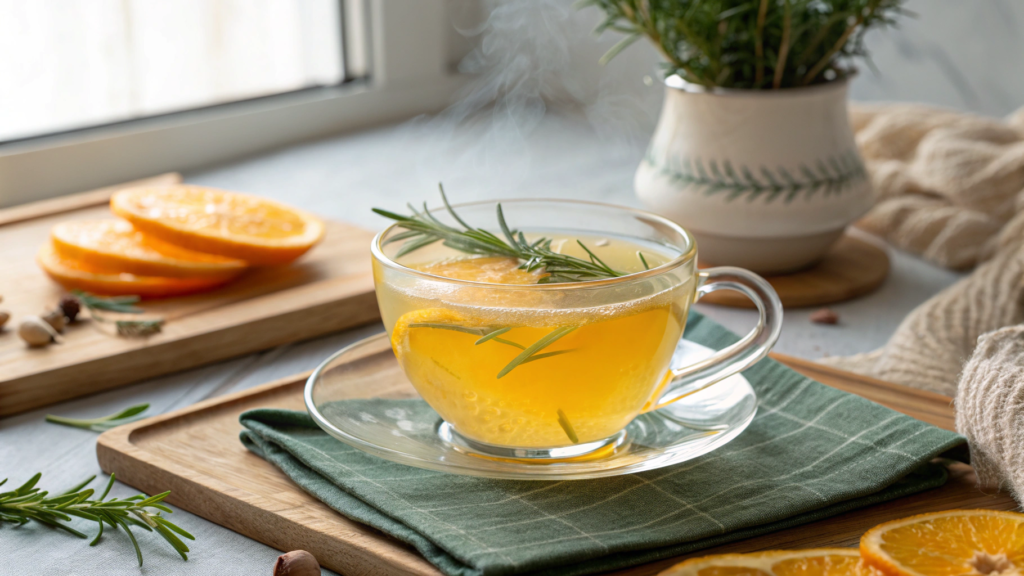
This is a citrusy, bright, herbal tea — soft and calm. A kind of small energy boost, but without caffeine.
Orange peel gives natural sweetness and a bright aroma that almost always helps lift your mood. In the Journal of Ethnopharmacology there are works where citrus essential oils are linked with reduced feelings of tension — and in my experience this really is felt in a cup of hot tea.
Rosemary adds depth — warm, tart, rich. In winter this is especially pleasant. In reviews like Phytotherapy Research you can find mentions that rosemary may support mental clarity, and I often remember this when I feel like I’m “lagging” in the middle of the day, like our old laptop in 2016.
Ingredients
(For one large mug)
- 1 tbsp dried orange peel
- 1 tsp dried rosemary
- 10 oz water (300 ml)
- 1 tsp honey or syrup — optional
- A small piece of cinnamon — optional for warmth
How I brew this tea in winter
- I mix the peel and rosemary directly in the teapot. I love this moment — the aroma comes out right away. I gently crush the peel with my fingers so more essential oils release. I add exactly a teaspoon of rosemary — otherwise the taste will be too bitter.
- I pour hot water but not boiling. The temperature is about 95°C. That’s enough for both the peel and rosemary to open up but not become sharp. I cover the mug with a lid so the essential oils don’t escape into the air but stay in the drink.
- I steep for 8–10 minutes. And here it’s important not to rush. Orange opens up quite quickly, and rosemary needs a little more time. In the end they meet exactly where they should. During this time I usually wipe down the counter, turn on a small light by the sink — and just calm down.
- I add honey. If I want a bit of sweetness. Sometimes I don’t add anything at all — the peel gives natural softness on its own.
- Sometimes I add a piece of cinnamon. Not always, only if the day is especially cold or if I’m making the tea in the evening. Cinnamon slightly “softens” the rosemary and makes the flavor calmer.
A small tip. If you want the peel to give even more brightness — use granulated peel instead of strips. It releases aroma faster and richer, especially in a short winter steep.
You get a bright, fresh, invigorating winter tea that doesn’t overload the body but gives the feeling that the air became a bit cleaner and the mind a bit clearer. Sometimes I pour it into a thermos and take it with me when I go to check the greenhouse or collect late branches for mulch.
5. Peppermint Eucalyptus Breath of Fresh Air
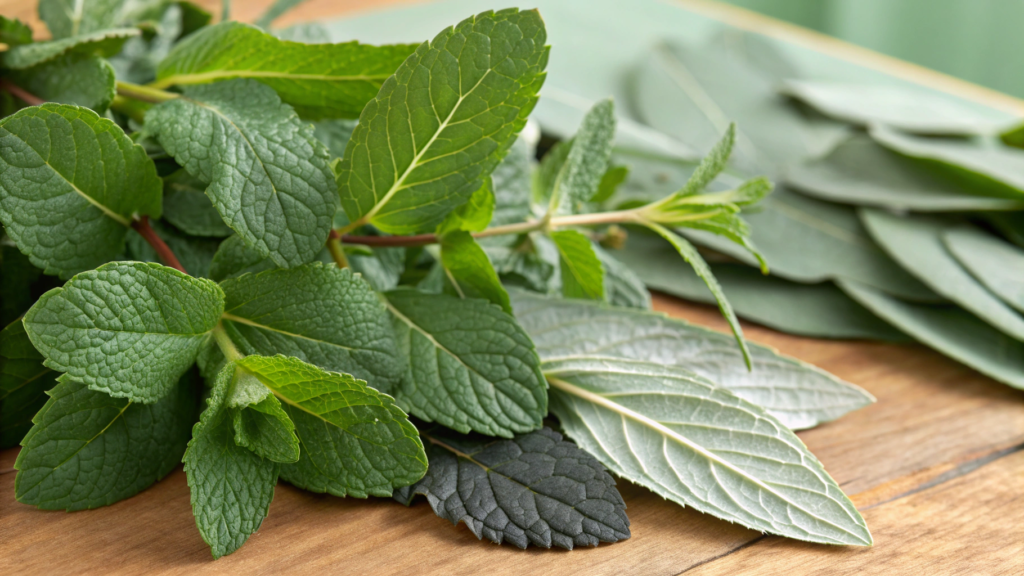
Mint on its own gives a clean clarity of flavor. It’s a plant that works instantly — the aroma, the taste, the feeling of coolness.
Eucalyptus is a more “serious” companion. Its leaves are rich in essential oils, and in reviews in the Journal of Ethnopharmacology it’s often mentioned for its traditional use in easing breathing and reducing the feeling of congestion. I’m not talking about medicine here — just sharing how it feels in everyday life.
And together mint gives freshness, and eucalyptus adds depth that you can feel almost in the chest.
Ingredients
(For one large mug)
- 1 tbsp dried mint
- ½ tsp dried eucalyptus leaves (Frontier Co-op Eucalyptus Leaf)
- 10 oz water (300 ml)
- 1 tsp honey — optional
- A small piece of ginger — if you want extra warmth
How I brew this tea in winter
- I add mint into the teapot and gently crush it with my fingers. When mint is fresh and aromatic, it opens up the moment you touch it. This smell always reminds me of our first garden beds in Idaho, where mint grew so wildly it took over half the working area.
- I add eucalyptus — just a little, literally half a teaspoon. Here it’s important not to overdo it. If you add more, the flavor becomes too sharp. Half a teaspoon is enough to get a deep, refreshing inhale.
- I pour hot water (around 95°C). The water should be hot but not boiling. I pour it in and immediately cover the mug with a lid or saucer so the essential oils don’t escape.
- I steep for 6–8 minutes. Mint opens quickly, and eucalyptus makes the flavor a bit denser. This is the balance that gives the feeling of “breathing with a full chest.”
- I add a little honey. If I drink this tea in the morning, I sometimes leave it unsweetened. If in the evening — honey makes the flavor softer and helps you relax before sleep.
A small tip. If you want the drink to be even more refreshing, add a small strip of citrus peel — lemon or orange. It doesn’t overpower the mint and eucalyptus but makes the flavor more “alive.”
You get a clean, bright, invigorating tea that helps you literally “reset your breathing.” It works especially well in the morning when the house is still dark and you’re just getting out from under the blanket.
6. Calming Lavender Chamomile Relief
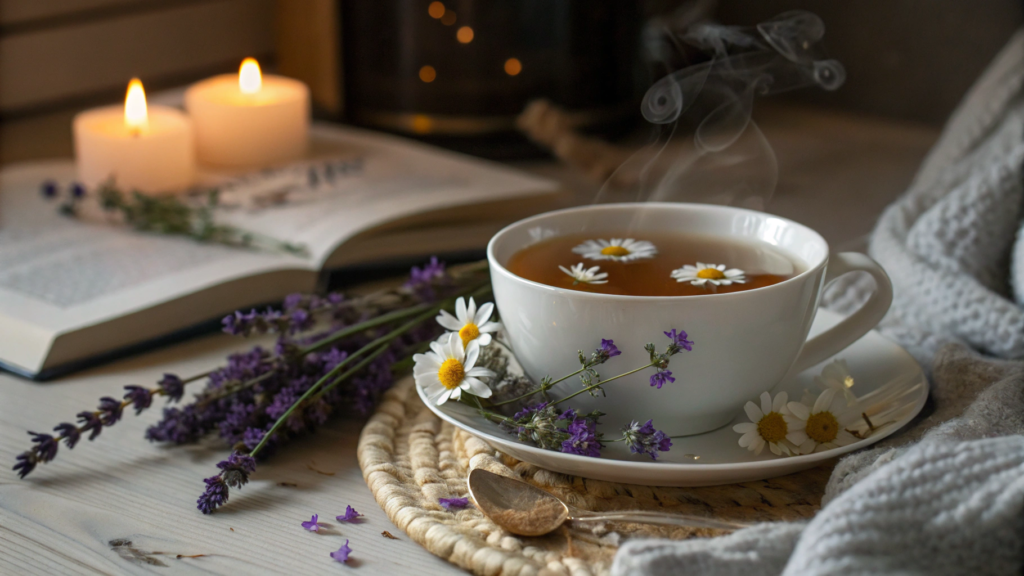
There are teas you drink for flavor. And there are teas you drink for yourself, for the calm that sometimes is hard to find in the winter rush. And for me, this tea — a mix of lavender and chamomile — is exactly that.
Why lavender and chamomile work so well together
Chamomile is one of the gentlest plants we use in winter. In Molecular Medicine Reports and Phytomedicine you can find mentions of its calming effect. It helps the body relax and release internal tension after a long day.
Lavender is a different story. It is aromatic, deep, almost meditative. Its essential notes create that warm, peaceful feeling when you take a sip and as if return to a more balanced state.
Ingredients
(For one large mug)
- 1 tbsp dried chamomile
- 1 tsp dried culinary-grade lavender
- 10 oz hot water (300 ml)
- 1 tsp honey — optional
- A small piece of dried apple — if you want sweetness and a soft aftertaste
How I brew this tea in winter
- I mix chamomile and lavender in the mug. Sometimes I add a small piece of dried apple — it makes the aroma warmer and more home-like. If the lavender is very aromatic, I take slightly less than a teaspoon so it doesn’t overpower the blend.
- I pour hot water (but not boiling). The temperature is about 90°C — this way chamomile opens more softly, and lavender doesn’t become sharp. After pouring, I immediately cover the mug with a lid. A couple of drops of essential oils stay inside — the flavor becomes richer.
- I steep for 7–8 minutes. During this time I usually do a small “evening round” around the house: turn off extra lights, check the herb drying rack, put things back in place… and it feels like I’m gradually shifting into a calmer mode myself.
- I add honey. If the tea is for the evening, I almost always add it. It gives that soft, “enveloping” flavor. But on cold early mornings you can leave it unsweetened so the flavor stays clean.
A small tip. So that lavender doesn’t “take over” the flavor, don’t mix the herbs too aggressively. Let them open the way they want. Lavender releases aroma very quickly, and chamomile needs a bit more time.
And here it is — a calm, soft, relaxing tea that’s good to drink before bed or simply in those moments when the evening asks for quiet.
Sometimes I take it with me to the bedroom, place the mug on the windowsill, open the small vent window, and listen to the wind. And every time I take a sip, I realize that caring for yourself is also part of home work. Sometimes the most important part.
7. Detox Dandelion Leaf and Lemon Balm Fusion
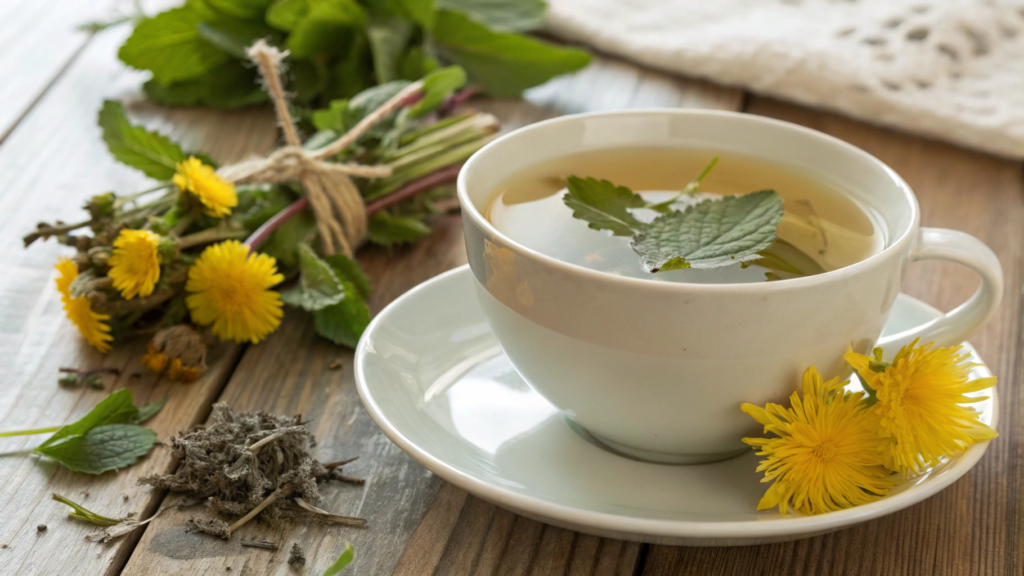
Dandelion leaves are often underestimated, although in the Journal of Pharmacognosy and Phytochemistry and Clinical Nutrition Research they mention their light digestive-supporting effect. Their flavor is earthy, herbal, yet clean.
Lemon balm brings softness and lemony notes. In studies like Phytotherapy Research it’s associated with reducing internal tension and creating a more balanced state.
Together dandelion and lemon balm give a calm, gentle tea that helps the body gradually release excess tension.
Ingredients
(For one large mug)
- 1 tbsp dried dandelion leaves (Starwest Botanicals Organic Dandelion Leaf)
- 1 tsp dried lemon balm
- 10 oz hot water (300 ml)
- 1 tsp honey — optional
- A few drops of lemon — if you want freshness
How I brew this tea in winter
- I mix the dandelion and lemon balm in the teapot. I gently crush the herbs with my fingers — this helps them open faster. Dandelion has a slightly earthy aroma, lemon balm a lemony one, and already at this stage they start working together.
- I pour hot water (about 95°C). It’s important to cover the mug immediately. Lemon balm is an aromatic plant, and if left uncovered, part of its essential compounds will escape into the air. A covered mug gives a deeper, richer flavor.
- I steep for 8–10 minutes. Dandelion needs a bit more time to open up. And during the steeping the flavor becomes more even, and the aroma softer.
- I add honey. If the tea is for morning — I sometimes skip it. If for the evening — honey makes the flavor softer and slightly sweeter.
- You can add a couple of drops of lemon. This is an option if you want to “highlight” the lemon balm. Lemon boosts the citrus notes and makes the tea fresher.
A small tip. If you want the drink to be a bit denser and deeper, try adding a couple of dried nettle leaves. No more than two. It won’t spoil the flavor but will add a gentle green softness.
You get a clean, gentle, cleansing tea that helps the body recover in the winter season. It’s not heavy, not sharp — on the contrary, warm and very calm.
Sometimes I drink it after long days of garden work — those evenings when you feel you’ve done too much and your body needs to “exhale.” And every time this tea reminds me that winter isn’t only about frost and rain — it’s also a time for taking care of yourself.
8. Spiced Cranberry Hibiscus Cheer
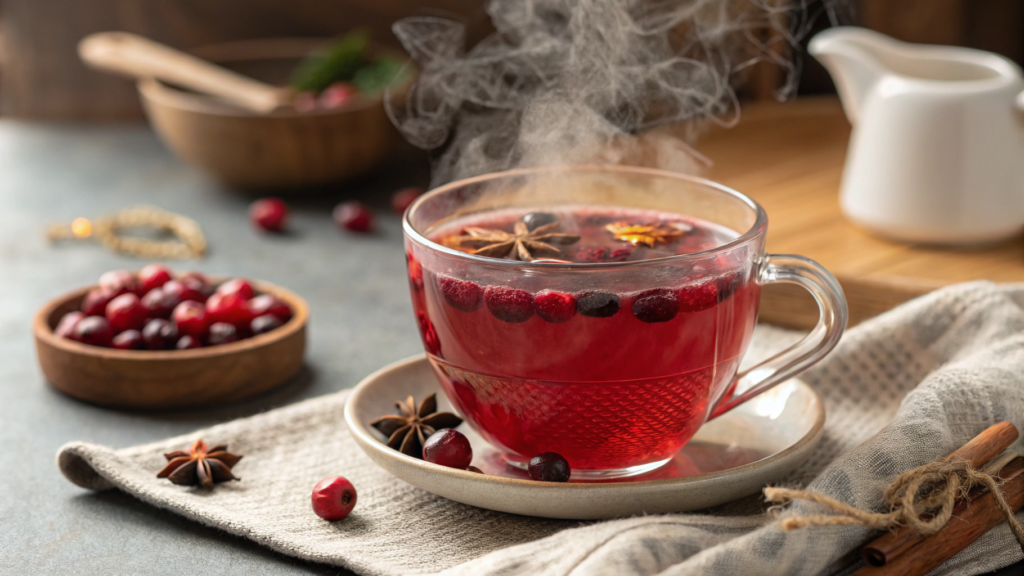
There are drinks that are simply delicious. For me, this is tea with cranberry, hibiscus, and spices. It is bright red, slightly sour, warm…
Why cranberry, hibiscus, and spices work so well together
Cranberry gives natural tartness and brightness. It’s that very spark that makes the tea “alive.”
Hibiscus adds depth and richness of color. It is slightly tart, slightly fruity — and together with cranberry it creates a very festive flavor.
Spices — cinnamon, cloves, cardamom — give warmth. Exactly what is missing in short winter days.
By the way, in reviews in the Journal of Traditional and Complementary Medicine they write that hibiscus contains a large amount of plant polyphenols. You can feel it: the drink turns out rich, full, but not heavy.
Ingredients
(For one large mug)
- 1 tbsp dried hibiscus
- 1 tbsp dried cranberries or 2 tbsp fresh
- 1 small piece of cinnamon
- 1–2 cloves — optional
- 10 oz hot water (300 ml)
- 1 tsp honey or warm syrup — to taste
How I brew this tea in winter
- I mix hibiscus, cranberry, and spices in the teapot. Hibiscus smells slightly fruity, cranberry — bright, fresh, almost “frosty.” When all of this meets in one place, the aroma is noticeable even before water touches the herbs.
- I pour hot water around 95°C. Hibiscus loves hot water — this is when it releases its saturated color and flavor. The spices begin to open almost immediately, especially cinnamon.
- I steep for 8–12 minutes. This is one of those rare teas that is not afraid of long steeping. It only becomes brighter. Sometimes I go check if I closed the chicken coop and come back to a full, rich drink.
- I add honey. Especially if the winter is dry and cold — honey makes the tartness softer. Sometimes I use dark honey, it adds more depth to the flavor.
- Sometimes I add a couple of fresh cranberries to the finished tea. They float beautifully on top and make the drink even more festive.
A small tip. If you want the drink to become a bit more warming, add a small piece of ginger. It doesn’t overpower the hibiscus but makes the aftertaste warmer.
You get a bright, juicy, festive winter tea that lifts your mood almost instantly. It reminds me that celebration isn’t about dates or schedules. It’s about the small rituals we create ourselves.
9. Earthy Licorice Root Digestive Soother
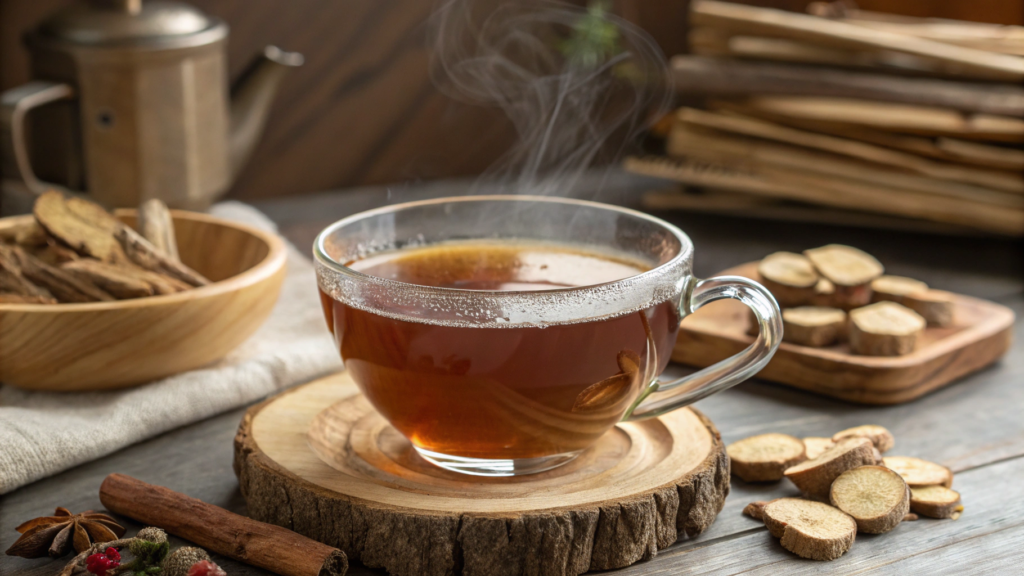
Licorice root is not loved by everyone. But in winter, especially after heavy food, after work on the property, or simply on those evenings when the stomach “speaks up,” this tea takes first place for us.
Why licorice helps digestion so well
Licorice root truly has a long history of use, and in the Journal of Ethnopharmacology and Phytotherapy Research they mention its possible support for gastrointestinal comfort.
Licorice makes the tea’s flavor warm and thick, and in winter this feels especially good. To balance the sweetness, I usually add a bit of fennel or mint — they make the flavor smoother and cleaner.
Ingredients
(For one large mug)
- 1 tsp crushed licorice root
- ½ tsp fennel seeds or a pinch of dried mint
- 10 oz hot water (300 ml)
- 1 tsp honey — optional
- A small piece of ginger — optional
How I brew this tea in winter
- I place licorice and fennel in the teapot. If you use mint — that works too. Fennel gives a light anise aroma that pairs beautifully with licorice. Already at this stage the smell is pleasant and slightly sweet.
- I pour hot water around 95°C. Licorice loves high temperature. It starts releasing flavor almost immediately. I cover the mug so the fennel’s essential notes stay inside and make the drink more aromatic.
- I steep for 8–10 minutes. Licorice becomes full and rich closer to the 10-minute mark. The tea turns thick in flavor but not heavy.
- I add honey. Sometimes I skip it because licorice itself is already slightly sweet. But a drop of honey helps round out the flavor.
- Sometimes I add a small piece of ginger. This strengthens the warming effect. It works especially well in the evening before bed, when you want soft warmth inside.
A small tip. Licorice is very strong in flavor, so never add more than a teaspoon. Otherwise the tea will turn too sweet and heavy. And one small teaspoon — that’s the perfect balance.
You get a warm, thick, deep tea that gently supports digestion and creates a feeling of calm. When you sit in the kitchen, hear the rain sliding down the windowsill, and feel your body finally relax. And these are exactly the evenings that matter most. When you just want to recover. And let the body rest the way it asks to.
10. Nettle and Cinnamon Strength Tea
There are herbs that I respect especially. The kind that feel… strong, reliable, “working.” Nettle is exactly one of those. And in winter it doesn’t remind me of stings on my hands — it reminds me of a sense of inner stability.
Cinnamon — that’s about warmth, comfort, calm. And when these two meet in the same teapot, you get a drink that gives more strength than you’d expect from the ingredient list.
Why nettle and cinnamon are such a strong pair
Nettle contains many beneficial minerals — especially iron and magnesium, which are often mentioned in reviews in the Journal of Herbal Medicine and Plant Foods for Human Nutrition. And what’s interesting: you really feel this after a cup of nettle tea.
Cinnamon adds warmth and depth. It’s not just aromatic — it creates that feeling of soft internal comfort. Especially in winter, when the body often reacts to cold with small “tightnesses.”
And together they give strength. Soft, calm, winter strength.
Ingredients
(For one large mug)
- 1 tbsp dried nettle
- ½ tsp cinnamon (stick or pinch of ground)
- 10 oz hot water (300 ml)
- 1 tsp honey — optional
- A small piece of ginger — if you want a warming effect
How I brew this tea in winter
- I mix nettle and cinnamon right in the mug. Nettle smells like fresh grass, even when dried. Cinnamon immediately gives a warm, spicy aroma that literally “wraps around” the herbal note. At that moment the tea already smells as if you have a tiny herbal apothecary at home.
- I pour hot water around 95°C. Nettle loves hot water — it opens deeper when the temperature is slightly below boiling. I cover the mug with a lid or saucer so the heat stays in and the cinnamon releases its flavor fully.
- I steep for 8–10 minutes. During this time nettle becomes soft in flavor, and cinnamon becomes more restrained. The drink gets a warm, even, herbal taste that feels surprisingly pleasant on cold evenings.
- I add honey. Especially if the tea is drunk after dinner — honey makes the flavor deeper. Sometimes I skip sweetness if I want a clean herbal taste.
- You can add a small piece of ginger. This boosts the warmth and makes the tea a bit more invigorating. On freezing days this is exactly what you need.
A small tip. If you want to increase the strengthening effect, add a couple of dried sage leaves or a pinch of St. John’s wort. Just a little. They add depth but won’t spoil the flavor.
We enjoy a deep, steady, strengthening tea that works very well in the off-season, when the body gets tired faster than usual. It doesn’t promise miracles, but it gives what really matters in winter: a bit more stability, calm, and inner strength. And this tea is one of the most reliable.
Winter Herbal Tea
These ten blends are our working winter set. We make them regularly and know that each one does its job: warming, supporting breathing, helping digestion, giving energy, or — on the contrary — calming.
If you want to make your winter evenings easier, choose one or two blends and simply keep the needed herbs on hand. When everything is already on the shelf, tea becomes a quick, clear tool — not a long process.
Write in the comments which recipe turned out the most useful for you or which one you want to adapt to your own herbs. We can go through your situation and choose a blend more precisely.