With the arrival of fall, we start making more warm drinks. Not for the atmosphere, but because it’s a convenient way to gather guests, take a break between tasks, or simply replace another coffee shop run with something homemade.
Over the past few years, Lindy and I have collected a set of drinks that have proven themselves well. In this article, I gathered the recipes that settled best in our home — both because they are practical and because they’re easy to adapt to different tastes. Each one can be prepped ahead of time, stored in the fridge for several days, or made right before serving.
1. Classic Mulled Cider with Cinnamon Sticks
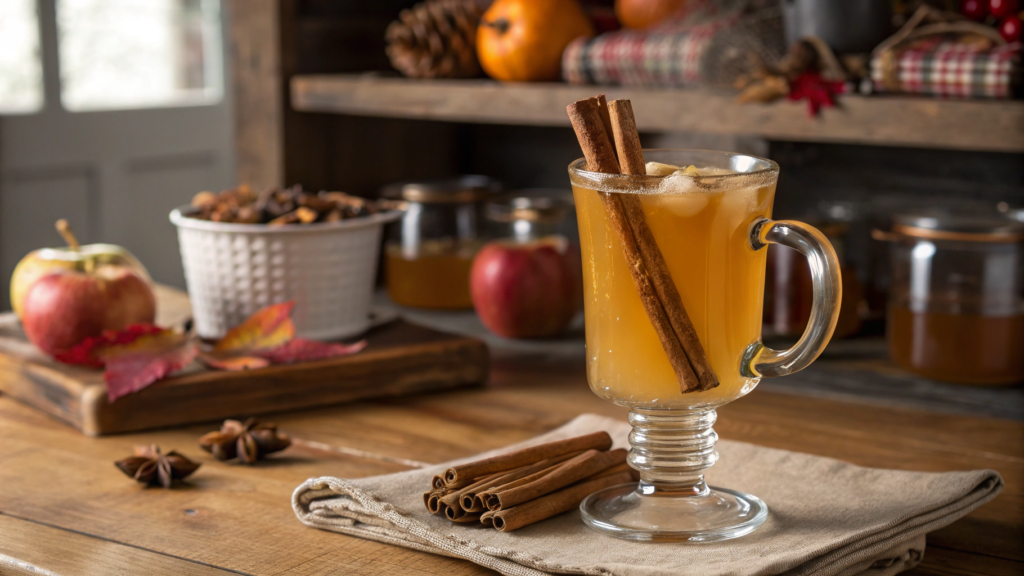
For me, this is the perfect way to “use up” apple cider after a farmers market trip — we always drag home more than we need. So hot cider turns out not only atmospheric but also a practical solution: simple ingredients, minimal fuss, and the result is excellent every time.
This is an old, simple, almost rustic drink that we somehow like more than many complicated cocktails. And yes, you can set it to warm while you do other things — it can handle that.
What You’ll Need:
Ingredients:
- 1 gallon apple cider (3.7 liters)
- 3–4 cinnamon sticks
- 6–8 whole cloves
- 1 orange (sliced into rounds)
- 1/4 cup brown sugar (50 g), optional
- 1/2 tsp nutmeg
- 1 tbsp honey — if you want a slightly softer sweetness
If you want to save time on spices, the McCormick Whole Mulling Spices set on Amazon helps a lot and works great for drinks like this.
How to Make It:
- Pour the cider into a large pot. A pot with a thick bottom works best — the cider won’t burn even if you get distracted for ten minutes.
- Add the cinnamon, cloves, and orange. You can gently press the orange slices with a spoon — they’ll release their aroma faster.
- Add the sugar and nutmeg. If the cider is already sweet, use half the amount — the flavor will stay more “apple” and less dessert-like.
- Keep it over low heat for 30–40 minutes without boiling. Boiling makes the flavor flat, so keep the temperature just below — tiny bubbles around the edge are enough.
- Remove from heat, add the honey. In hot cider, honey dissolves smoothly, leaving a light caramel note.
- Let it sit for 10 minutes. The spices open up better, and the color gets a little deeper. You can leave it covered even longer — the flavor only improves.
But that’s the dry version. In reality, everything is always a bit livelier.
I like to let the cider simmer on the stove a little longer, especially if someone is running late to our house. The smell gets so rich that the neighbors have asked more than once if we’re baking an apple pie.
And here’s another small trick: you can lightly toast the orange slices in a dry skillet before adding them — the aroma becomes brighter and warmer.
And of course, you can play with spices as much as you want. Black peppercorns are perfect for those who like a more “grown-up” flavor. And if you want a warming depth, just add a slice of fresh ginger.
2. Homemade Hot Chocolate Mix for Gifts
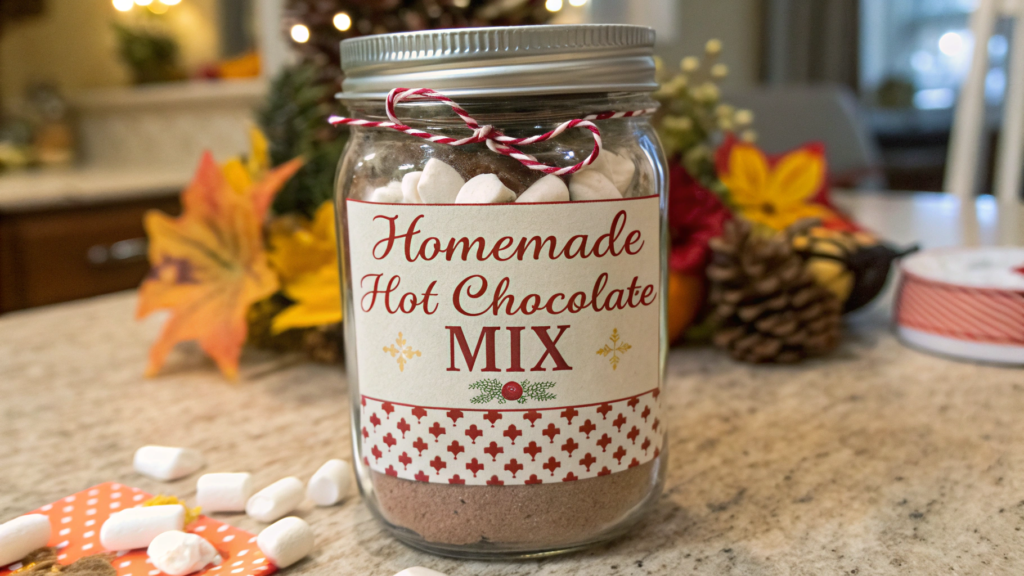
This hot chocolate mix became our go-to option with Lindy for fall gifts: quick to prepare, easy to store, simple to adapt to taste. No complicated steps — just dry ingredients that mix well. And when someone stops by, a jar of this mix always saves the day.
Ingredients (for 12–14 servings):
- 1 cup unsweetened cocoa powder (100 g)
- 1 cup dry milk (120 g)
- 1 cup powdered sugar (110 g)
- 1/2 cup mini marshmallows
- 1/2 tsp salt
- 1 tbsp cornstarch
- 1/2 cup mini chocolate chips
For cocoa, it’s better to use something high-quality — for example, Ghirardelli Premium Baking Cocoa from Amazon. It gives a richer flavor and doesn’t turn into a “dusty” taste.
How to Make It
- Sift the cocoa, dry milk, and powdered sugar into a large bowl.
Sifting is an important step: cocoa almost always contains small lumps. If you don’t break them now, they’ll float in the finished drink and dissolve poorly. Lindy and I used to skip this step, and the drink came out with “spotty islands” of cocoa. After sifting — the problem disappeared. - Mix the dry base with a whisk for at least 30–40 seconds.
A whisk works better than a spoon: it adds air and makes the mixture more uniform. This affects how quickly the powder will dissolve in milk. - Add the salt and cornstarch, mix again.
Salt enhances the flavor — it doesn’t make it salty, but highlights the chocolate taste.
Cornstarch is needed to make the drink slightly thicker. Without it, the texture will be more watery even if the milk is rich. - Add the chocolate chips and mix with a spatula, not a whisk.
A spatula doesn’t break them but gently distributes them through the mixture.
The chips provide a “real” chocolate flavor — they melt slowly, give soft thickness, and a pleasant sweetness. - Add the marshmallows at the very end and mix only 2–3 times.
If you mix too actively, they’ll start sticking together and turning into big clumps, especially during storage.
Light mixing keeps them whole and pretty in the jar. - Pour the mix into a dry glass jar with a tight lid.
The jar must be dry — the mixture is sensitive to moisture. We just write on the lid: “hot chocolate, 2–3 tsp per mug.” That’s enough.
To enjoy the drink, simply stir the mix into hot milk until smooth. If you want it thicker and richer — increase the amount of mix to taste.
Tip. If the mix will be stored for a couple of weeks, you can place one cinnamon stick inside. It adds a light aroma, and the mixture becomes slightly richer in flavor without adding extra spices.
3. Chai Spiced Latte From Scratch
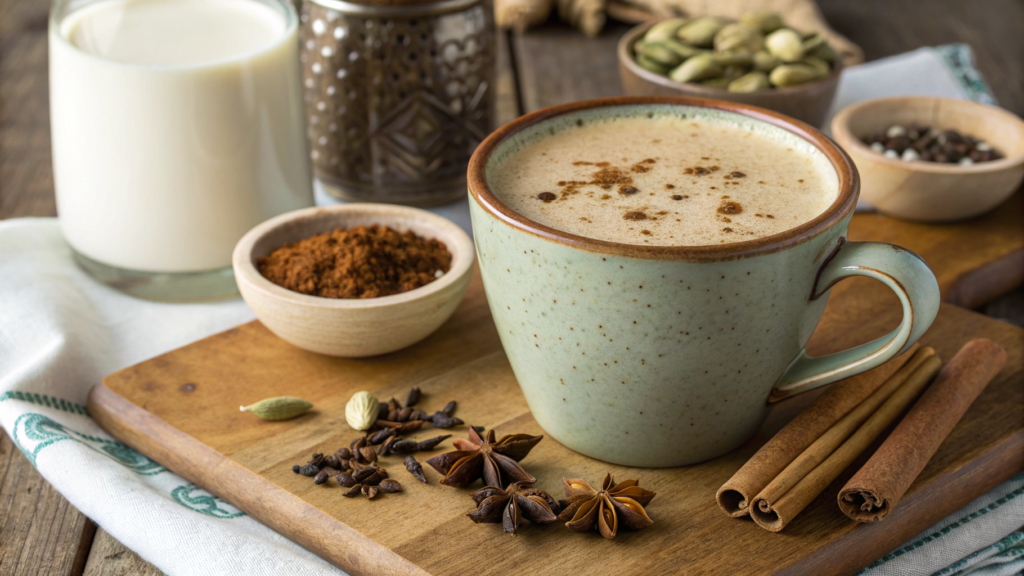
Most store-bought options are concentrates with flavorings and sugar that practically fills half a cup. The homemade version is simpler, cheaper, and gives you full control over the flavor.
Plus, you can adjust the spices however you want: a bit more ginger, less cardamom, or the opposite. There’s no need to chase perfection here — everything adjusts to your mood and to the person you’re making it for.
And if you buy spices of good quality, the flavor turns out bright, without “dustiness” and without extra bitterness.
Ingredients (for 2 servings)
- 2 cups water (480 ml)
- 2 bags black tea (or 2 tsp loose leaf)
- 1 cup milk (240 ml) — regular or plant-based
- 1 cinnamon stick
- 4–5 cardamom pods (lightly crushed)
- 3–4 cloves
- 3–4 thin slices of fresh ginger
- 1/4 tsp ground black pepper (adds warmth and depth)
- 1–2 tbsp honey or maple syrup
How to Make It (detailed and practical)
- Bring the water to a light boil and add all the spices.
Don’t drop the spices into cold water — the aroma opens better in hot water. Cardamom is best lightly crushed with a knife so the seeds open up. Slice the ginger thinly so it releases flavor faster. - Reduce the heat and simmer the spices for 8–10 minutes.
This is the step you can’t rush. If you simmer for less time, the spices will be weak and the tea will taste like “water with aroma.” If you simmer too long, you may get extra bitterness and sharpness, especially from the cinnamon. - Add the black tea and steep for 3–4 minutes.
Lindy and I tried steeping it longer — the tea becomes too strong and overwhelms the spices. Three minutes is optimal, especially if you’re using loose leaf tea. - Add the milk and heat until hot, but don’t boil.
If the milk boils, the flavor becomes flat and sometimes forms an unpleasant film. Just heat it until it starts steaming and becomes hot. - Strain the drink through a fine sieve.
A small metal sieve works best: spices don’t slip through and the drink turns out smooth, without bits. - Add the honey or maple syrup and stir.
Honey is better added to the finished drink, not boiling water — this keeps its softer natural flavor. Sometimes we swap honey for brown sugar if we want a slightly more caramel-like note. - Froth a little milk on top for serving.
Not required, but it looks and feels much nicer. Sometimes we just shake a small jar with milk — works like a mini frother.
Tip. If you want to make a larger batch at once, double the spices and water, but don’t double the tea. Black tea becomes sharp and metallic during storage. Lindy and I prepare a spice concentrate separately and add the tea only right before serving — this way the flavor stays stable for a couple of days in the fridge.
4. Bourbon Maple Old Fashioned
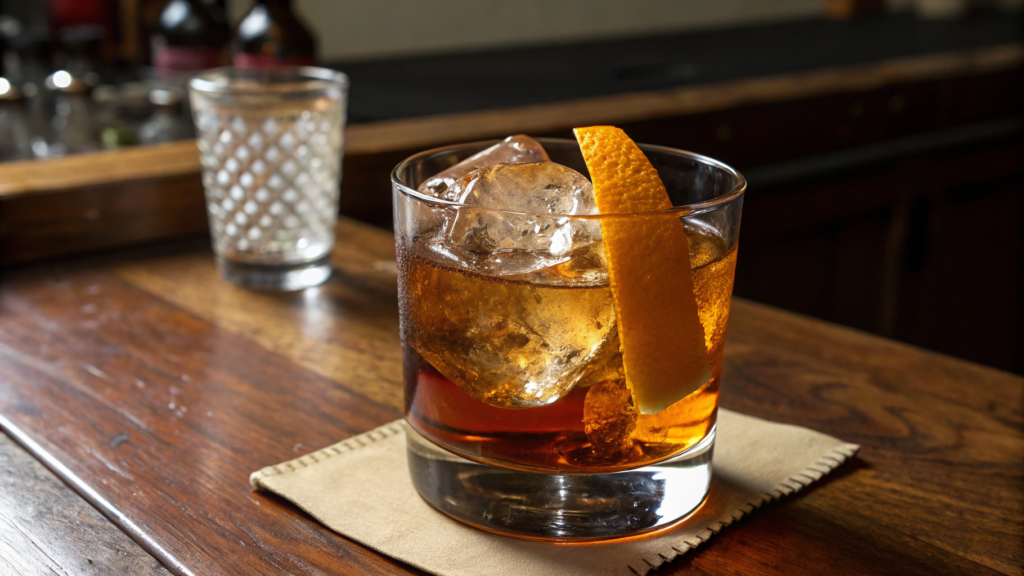
Lindy and I are pretty relaxed about cocktails — we drink rarely, but when we make one, we want the flavor to be clean and clear. Bourbon Maple Old Fashioned is exactly that kind of option. Minimal ingredients, no white sugar, no artificial stuff. The maple syrup gives a softer flavor, the bourbon stays bourbon, and the orange aroma ties everything together.
And if you make it properly, you get a drink that doesn’t need to be “improved” with ten tricks. Everything works on its own.
Ingredients (for 1 serving)
- 2 oz bourbon (60 ml)
- 1 tsp maple syrup (or a bit more if you like it softer)
- 2–3 dashes Angostura bitters
- Ice (a large cube or sphere)
- Orange zest or a thin strip of peel
How to Make It
- Choose a glass with a thick bottom.
An old fashioned glass works best. A thick bottom holds the cold longer, and the cocktail dilutes more slowly. - Add the ice — one large cube or sphere.
This matters: small ice melts faster and waters down the flavor. A large cube melts slowly and lets you control the balance. - Pour the maple syrup into the glass.
Don’t pour it onto the ice — it sticks. Pour it on the bottom of the glass so it spreads more evenly. - Add the bourbon.
Syrup first, then bourbon — it makes it easier to mix the cocktail and get a clear, not cloudy, consistency. - Add the Angostura bitters.
Usually 2–3 dashes. Bitters aren’t for bitterness — they add aroma and link the sweetness with the alcohol base. - Stir the cocktail for 15–20 seconds with a long spoon.
Stirring is important — don’t shake. Stirring gives the right cooling and slight dilution without breaking the drink’s structure. - Remove a strip of orange peel and gently squeeze it over the glass.
This releases the essential oils. Lindy always rubs the peel along the rim — the aroma lasts longer. - Place the peel inside the cocktail or leave it on the rim.
Inside — the flavor becomes richer; on the rim — the aroma is softer. For two people, you can do it differently — we often do.
Tip. If the flavor turns out too sharp, don’t add more syrup. It’s easier to stir for 5–7 seconds longer or use larger ice. The dilution from the ice controls the balance much better than sweetness. We’ve noticed that with good large ice, the cocktail turns out cleaner and more “collected” than with regular small cubes.
5. Non-Alcoholic Thanksgiving Punch

Lindy and I make this non-alcoholic punch every time we need to serve everyone — kids, guests, drivers, and those who simply don’t want alcohol. The punch turns out bright, rich, and never feels like a “kids’ drink.” And yes, it’s convenient that it comes together in a big container in 10 minutes and can sit on the table for a couple of hours without losing flavor.
The base here is fruit juices with moderate sweetness and a slightly sour note. The spices give an autumn vibe without overpowering it. We add the sparkling water at the end to preserve the fizz.
Ingredients (for a large bowl, 8–10 servings)
- 4 cups apple cider (960 ml) — non-alcoholic
- 2 cups orange juice (480 ml)
- 1 cup cranberry juice (240 ml) — 100% juice, no sugar
- 1 cup sparkling water or ginger ale (240 ml)
- 1 apple, sliced into thin half-moons
- 1 orange, sliced into rounds
- 1/2 cup fresh cranberries (optional)
- 2 cinnamon sticks
- 3–4 cloves
- 1 small piece of fresh ginger (0.5 cm thick)
- 1–2 tbsp maple syrup, if you want extra sweetness
If you want a clean and smooth cider flavor, we often use Martinelli’s Apple Cider on Amazon. It’s easy to use in hot or cold drinks.
How to Make It
- Prepare the fruit.
We slice the apple into thin half-moons — they float beautifully and release flavor evenly.
The orange should be sliced into thin rounds, but not too thin or the peel dissolves. - Pour the apple cider, orange juice, and cranberry juice into a large glass or plastic container.
It’s better to avoid metal — citrus can sometimes create a metallic taste after long contact. - Add the fruit: apple, orange, and cranberries.
The fruit isn’t just “for looks” — orange adds a slight peel bitterness, apple gives soft sweetness, and cranberries add a light tartness and cool aroma. - Add the spices: cinnamon, cloves, and ginger.
Ginger works best if you lightly score it with a knife — it releases aroma faster.
Since the punch is cold, the spices open gradually over 15–20 minutes. - Stir the drink and chill it in the fridge for at least 30 minutes.
This matters: cooling gives the spices and fruit time to merge with the juices.
If you mix and serve immediately, the spices will be barely noticeable. - Before serving, add the sparkling water or ginger ale.
Not earlier. We always do this at the last moment because the fizz disappears quickly if added ahead of time.
Ginger ale gives gentle spiciness, sparkling water gives a cleaner flavor. - Taste and add maple syrup if needed.
If the fruit is too tart or the cranberry dominates, maple syrup balances the sweetness and adds body.
We don’t always add it — only if the juices turned out “dry.” - Serve with extra ice cubes if you want.
For big gatherings, we often use an ice ring (a bundt pan mold): it melts slower and doesn’t dilute the drink too quickly.
Tip. If you want the flavor to feel more “festive” and the spices brighter, don’t throw the cloves directly into the punch. Instead, poke 3–4 cloves into the peel of one orange slice and place that slice into the container.
This gives a smooth, even aroma, and guests won’t accidentally scoop out whole cloves.
It’s a small trick, but Lindy and I figured it out after a couple of times when the cloves made the flavor too sharp.
6. Pumpkin Spice Coffee Syrup Ideas
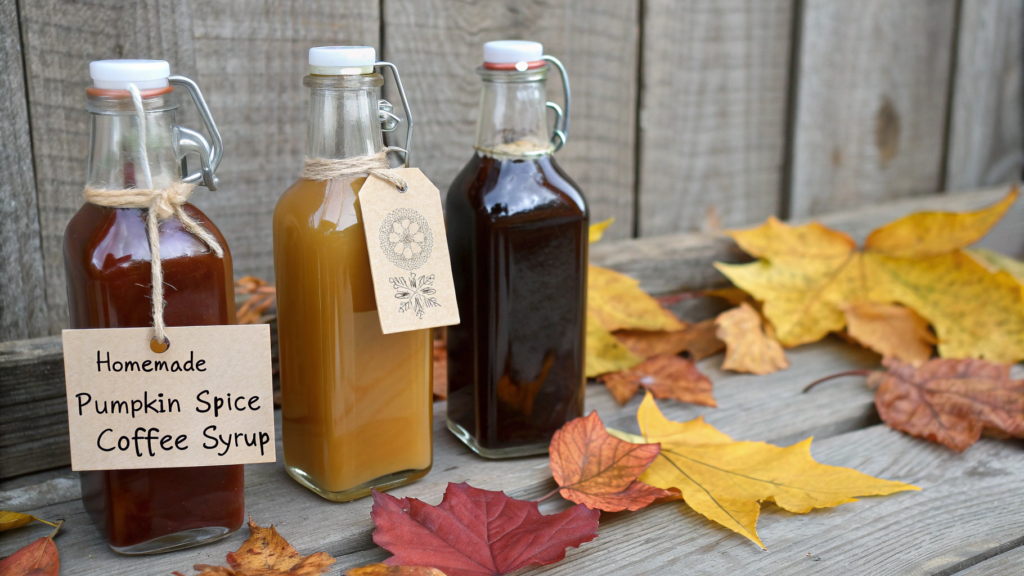
Lindy and I really love pumpkin syrup — not from a coffee shop, but from a small café near the farmers market in Idaho. The woman behind the counter once said a phrase that stuck with me: “A good syrup is the one that doesn’t try to be sweet instead of coffee.” And that turned out to be true.
After that day, we started making syrup at home ourselves — to control the spices, the sweetness, and the consistency. That’s how we came up with a few versions that work every time: a basic syrup, a more spiced and “thick” version, and a light syrup for iced coffee.
Ingredients (base for any version)
- 1/2 cup pumpkin purée (120 g) — unsweetened
- 1 cup water (240 ml)
- 1 cup sugar (200 g) — can be partially swapped for brown sugar
- 1 tsp cinnamon
- 1/2 tsp ground ginger
- 1/4 tsp nutmeg
- 1/4 tsp ground cloves
- 1 pinch salt
Version 1: Classic Syrup (universal, for hot coffee)
How to Make It
- Mix the water, sugar, and pumpkin purée in a small saucepan.
It’s better to whisk the purée — it blends faster and doesn’t form dense lumps. - Add the spices and turn on medium heat.
The spices need to get into the liquid before heating — they open better and don’t create bitterness. - Bring the mixture to a light boil and reduce the heat.
Don’t boil for long: boiling destroys the aroma of nutmeg and makes the flavor “cooked.” - Simmer for 5–7 minutes, stirring.
The syrup will start to thicken slightly — that’s enough. Lindy and I noticed that if you cook it longer, it can start to “cling” in coffee. - Strain the syrup through a fine sieve.
This step is essential: without straining, the syrup will contain pumpkin pulp, and the coffee will become grainy. - Pour into a clean bottle and store in the fridge for up to a week.
A glass bottle is better than plastic — it doesn’t absorb the spice aroma.
Version 2: More Spiced Syrup (for those who like stronger spices)
The difference is small, but the flavor becomes much richer:
- Increase cinnamon to 2 tsp.
- Add 1–2 slices of fresh ginger during cooking.
- Replace half of the white sugar with brown sugar — the flavor becomes denser.
The cooking process is the same as in the classic version.
Version 3: Light Syrup for Iced Coffee (doesn’t overpower the espresso)
- Reduce the pumpkin purée to 2 tbsp.
- Keep the full amount of sugar.
- Cut the spices in half.
This syrup turns out more liquid, mixes easily with ice, and doesn’t leave sediment.
Tip. If you want a smooth, velvety texture, add 1 tsp cornstarch dissolved in 1 tbsp cold water during cooking. We started doing this by accident — after Lindy said the syrup was too thin. This way, the syrup holds better in coffee and doesn’t sink to the bottom.
7. Brown Sugar & Maple Latte Syrup
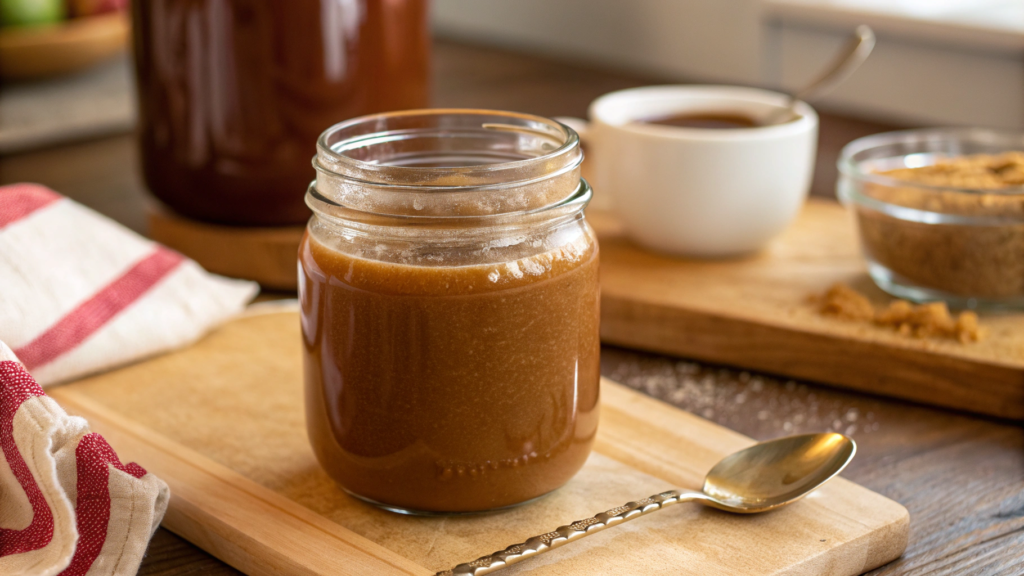
This is one of the simplest recipes in our collection: no spices, no tricky temperatures. Just the right ratio of water, sugar, and maple syrup.
The brown sugar gives coffee that very “depth” people often try to get with caramel. And the maple syrup adds body and a light smokiness without an artificial flavor. The result is a syrup that works great in both hot lattes and cold drinks.
Ingredients (for a small bottle of syrup)
- 1 cup brown sugar (200 g) — dark brown is best
- 1/2 cup water (120 ml)
- 1/4 cup pure maple syrup (60 ml)
- 1 tsp vanilla extract (optional)
- A pinch of salt
Use real maple syrup, not “maple flavored.” We’ve been using Butternut Mountain Farm Pure Maple Syrup for a long time — great flavor and consistent thickness from bottle to bottle.
How to Make It
- Mix the brown sugar and water in a small saucepan.
It’s best to use a saucepan with a thick bottom — the syrup won’t burn.
Brown sugar contains molasses, so it dissolves a bit slower than white sugar — that’s normal. - Place the mixture over medium heat and stir until the sugar fully dissolves.
No need to wait for boiling. Once the liquid becomes smooth and transparent — that’s enough. - Reduce the heat and add the maple syrup.
Lindy and I usually add it to a warm but not boiling mixture. This helps preserve the aroma better. - Simmer for 3–4 minutes over low heat.
The syrup will start to thicken slightly and become more viscous.
Don’t bring it to a hard boil — this isn’t caramel and not a high-density sugar syrup. - Remove from heat and add the pinch of salt and vanilla.
Salt works as a flavor enhancer, and vanilla softens the taste (optional).
If you’re using vanilla paste, 1/4 tsp is enough. - Let the syrup cool for 10–15 minutes and pour it into a clean glass jar or bottle.
We store these syrups in the fridge for up to a week. It stays liquid even when cold — brown sugar doesn’t crystallize.
How to Use It
This syrup is easy to add directly to your finished coffee. We usually use one or two spoonfuls in a latte — that’s enough to make the flavor warm and soft without being too sweet.
If you’re making iced coffee, it’s better to first mix the syrup with a small amount of hot espresso or just warm water, and only then add ice and milk. This way it blends more evenly and doesn’t sink to the bottom in a heavy sweet ribbon.
Tip. If you want the syrup to be slightly thicker without caramelizing, add 1/2 tsp cornstarch dissolved in 1 tbsp cold water.
We once did this by accident — Lindy mixed up the bowls — and it turned out the syrup holds better in cold drinks and gives lattes a richer texture.
8. Apple Butter Hot Toddy
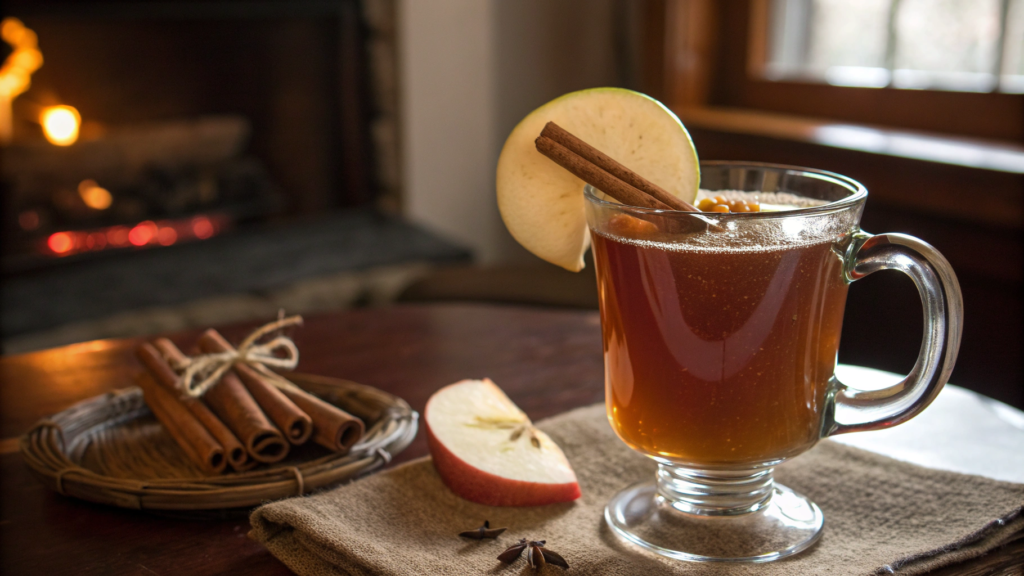
We first tried a Hot Toddy version with apple butter at our neighbors’ place in Idaho. They brought a thermos to an evening gathering by the fire. The apple butter makes the toddy thicker, softer, and less like a medicinal tea. After that night, Lindy and I started making our own version — not sweet, not cloying, but rich and warm.
And the best part: this toddy works great even without alcohol if you skip the bourbon. The flavor stays full, apple-forward, and warming.
Ingredients (for 1 large mug)
- 1 tbsp apple butter — smooth, without chunks
- 1 tbsp honey
- 1–1.5 oz bourbon (30–45 ml) — optional
- 1 cup hot water (240 ml)
- 1–2 thin lemon slices
- 1 cinnamon stick
- 2–3 thin slices of fresh ginger
How to Make It
- Place the apple butter, honey, and ginger into a mug or heatproof glass.
It’s best to start with these three — honey and apple butter dissolve faster when they contact hot water right away. - Pour in the hot water and whisk vigorously with a whisk or fork.
Not just a spoon — it won’t manage as well.
You want to achieve a uniform texture so the drink doesn’t separate into layers. - Add the lemon and cinnamon.
Lemon isn’t just for aroma — the acidity “pulls the flavor together” and makes the drink less sweet.
We always use a cinnamon stick, not ground cinnamon, so the drink doesn’t become cloudy. - Now add the bourbon, if you’re using it.
It’s important to add the alcohol after the hot water, not before — this keeps the flavor softer, without a sharp alcohol note. - Stir again and let it sit for 2–3 minutes.
In that time, the cinnamon releases part of its aroma, and the lemon rounds out the flavor. - Taste and add more honey if needed.
It depends on how sweet your apple butter is.
Some brands are barely sweet — in those cases, honey is needed.
How to Make It Without Alcohol. Simply remove the bourbon — and add an extra 1/2 tbsp of apple butter. We did this a couple of times when we had guests who don’t drink — the flavor stays full and warm.
Tip. If you want a thicker, richer drink, use hot apple cider instead of hot water.
Even a regular non-alcoholic cider from the store works well for home use.
9. Vanilla Bean Caramel Coffee
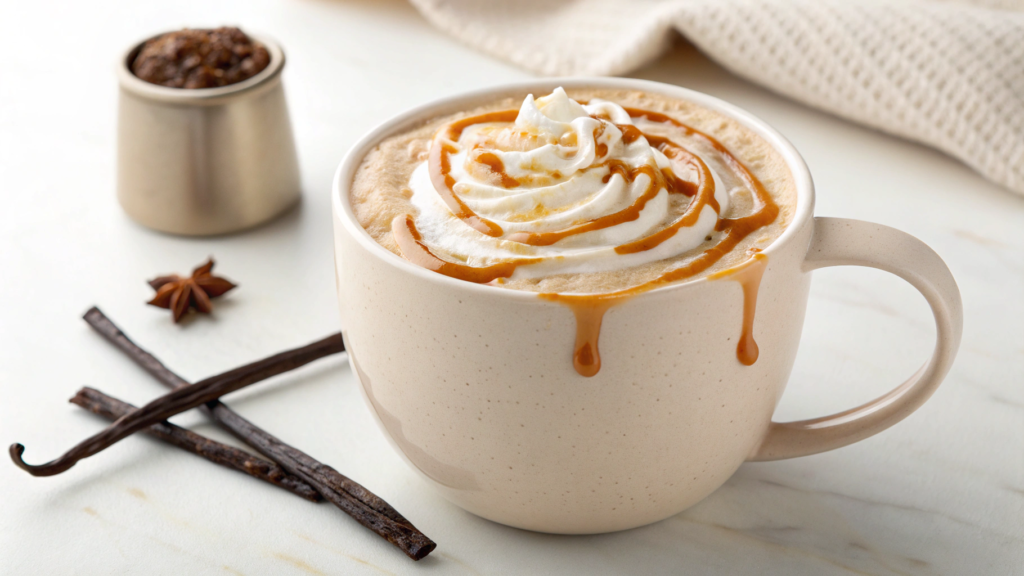
This drink is simple, soft, with a clear balance of sweetness and coffee — no excessive caramel, no artificial smell. We like that the vanilla here isn’t a “background note” but a full part of the flavor, and the caramel doesn’t overpower the coffee.
It’s a drink that’s easy to put together in the morning, yet it feels more considered than a regular latte.
Ingredients (for 1 large serving)
- 1–2 shots espresso or 1/2 cup strong coffee (120 ml)
- 1 cup milk (240 ml) — any kind
- 1 tbsp caramel sauce
- 1/4 tsp vanilla paste or seeds from 1/3 vanilla bean
- 1–2 tsp sugar (optional)
- A pinch of salt
How to Make It (detailed and practical)
- Heat the milk in a small saucepan or mug.
Heat it until hot, but don’t boil — boiled milk forms a film and loses some sweetness. - Add the caramel sauce and vanilla paste to the hot milk.
At this stage the caramel dissolves completely, without sticky clumps.
Add the vanilla right away — it needs warmth to open up. - Add a pinch of salt.
This isn’t “salted caramel,” but salt enhances both the caramel and vanilla, making them brighter. - Froth the milk.
You can use a handheld frother, a whisk, or even shake the hot milk in a closed jar (yes, people do this — and it works). - Make the espresso or strong coffee.
Espresso is preferable — it gives a stronger base where the caramel doesn’t disappear. - Pour the coffee into the mug, then gently add the milk mixture.
If you want a pretty gradient, pour the milk down the side of the mug afterward. - Taste and add a bit of sugar if needed.
Some caramel sauces aren’t very sweet — it depends on the brand. - For serving, you can add a light layer of frothed milk on top and a drop of caramel.
We often do this — it looks cleaner and makes the flavor slightly more expressive, with a brighter coffee note.
Tip. If you want a richer flavor, don’t increase the caramel — instead add a bit more vanilla paste.
It gives depth without extra sweetness, and the coffee keeps its balance. The flavor becomes more pronounced while the drink stays well-rounded.
10. Cinnamon Maple Creamer for Fall
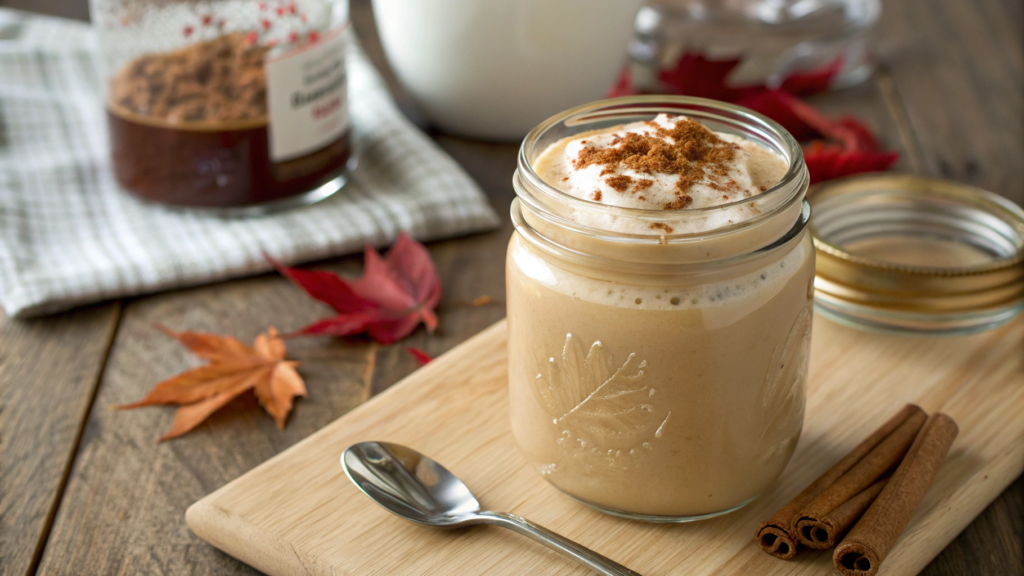
This creamy “creamer” with cinnamon and maple syrup turns out soft, slightly spiced, with a natural sweetness. It keeps in the fridge for several days, and in the morning you just pour a little into your mug — and that’s it.
Ingredients (enough for about 8–10 cups of coffee)
- 1 cup heavy cream or half-and-half (240 ml)
- 1 cup milk (240 ml) — 2% or whole
- 1/4 cup maple syrup (60 ml)
- 1–2 tbsp brown sugar (to taste)
- 1 tsp cinnamon (you can use a bit less if you prefer a lighter flavor)
- 1/2 tsp vanilla extract
- A pinch of salt
How to Make It
- Combine the milk and cream in a small saucepan.
Choose a saucepan with a thick bottom — the mixture won’t scorch.
Keep the heat medium: the goal is to warm it, not boil it. - Add the maple syrup and brown sugar.
Stir immediately with a whisk or spoon so the sugar starts dissolving even before heating.
If you prefer a less sweet flavor, start with 1 tbsp of sugar — you can always add more. - Heat the mixture until hot, but don’t boil.
Look for small bubbles forming along the edges and rising steam.
If it starts to boil, remove the pan from the heat for a minute, then return it on low. - Add the cinnamon, vanilla, and pinch of salt.
Cinnamon opens best in a hot but not boiling mixture.
Salt is important here: it makes the maple and cinnamon brighter without turning the creamer “salty.” - Let the mixture warm for another 2–3 minutes over low heat, stirring occasionally.
Don’t walk away: dairy–maple mixtures like to overflow if left unattended.
For us with Lindy, the moment the aroma becomes noticeable and pleasant — that’s enough. - Remove from heat and let it steep for 10–15 minutes.
During this time, the cinnamon “settles in” and the overall flavor becomes softer.
If you’re in a hurry, you can shorten this to 5 minutes, but the flavor will be slightly simpler. - Strain the creamer through a fine sieve into a clean bottle or jar.
If you use ground cinnamon, some of it will still remain — straining makes the texture smoother.
We like glass bottles with a lid that can be shaken well. - Cool completely and refrigerate.
In the fridge, this creamer keeps perfectly for 4–5 days.
Shake before using — cinnamon and sugar components may settle.
How to Use It
Most often, we simply pour a little creamer straight into hot coffee — aim for a couple of tablespoons, then adjust to your taste.
There’s one nuance for cold drinks: it’s better to first mix the creamer with a small amount of coffee without ice, and only then add the rest. This way it blends more evenly and doesn’t turn into “patches” on the surface.
Tip. If you want a lighter version (so it doesn’t feel like “cream on top of cream”), use a ratio of 1.5 cups milk + 1/2 cup cream instead of 1:1.
The flavor stays rich thanks to the maple and cinnamon, but the drink becomes lighter, and you can easily enjoy a couple of mugs in the morning.
Favorite Fall Drinks
Fall drinks are great because they don’t need to follow strict rules — every recipe can be simplified, strengthened, or fully adjusted to your own habits.
That’s exactly what Lindy and I did: first we tried the basic versions, then changed the sweetness, removed extra spices, added new ones — and gradually built a collection that’s easy to use every day.
All these drinks share one thing: they are practical, made from accessible ingredients, and suitable both for weekdays and for holidays.If you make something from the list, write in the comments which version was the most convenient and what you would change. I genuinely want to see how these recipes work for others.