
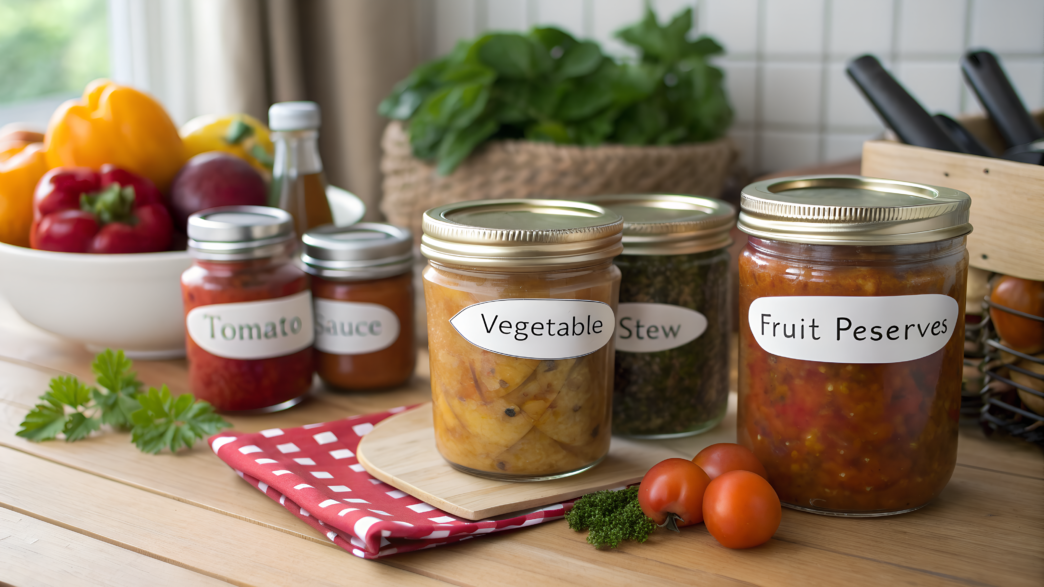
Canning jars are like a little secret reserve. When it’s cold and you don’t feel like cooking, they save the day: you open one — and you instantly have something to put on the table.
In summer, when the harvest is in full swing, we put up soup bases, sauces, chutneys, and salsas so we can enjoy quick and hearty dinners all winter long.
Preserving helps cut down cooking time and lets you use seasonal produce to the fullest, making sure nothing goes to waste.
It’s important to remember: some of these recipes require a pressure canner — without it, they aren’t safe because of the risk of botulism. If you don’t have a canner, don’t worry: many of these dishes are great for freezing.
Just pour the hot base into containers, let it cool, and move it to the freezer. This way you’ll save both flavor and health, and your winter cooking time will still be much shorter.
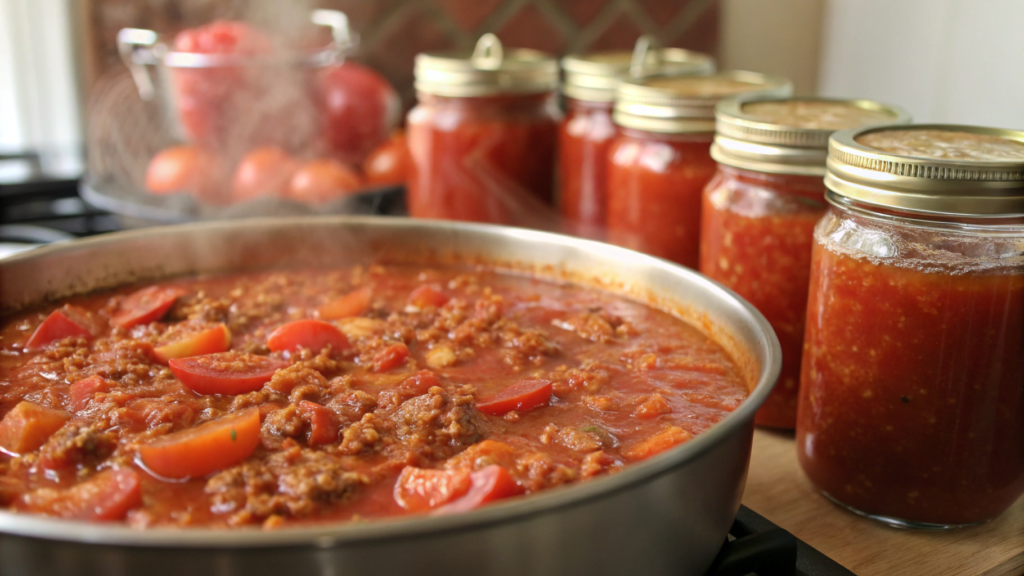
1. Hearty Tomato Chili in a Jar
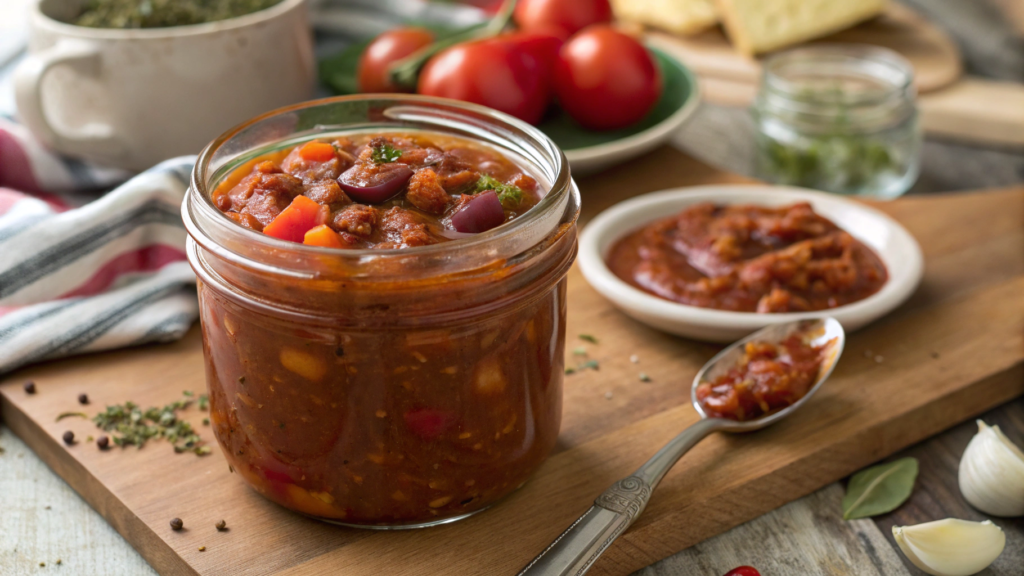
I used to think that chili was always something you made right here and now: brown some meat, add beans, tomatoes, spices — and dinner’s ready. But it turned out to be incredibly handy to have a pantry shelf with a ready-to-go jar of aromatic tomato chili. You can pop it open anytime and in just 15 minutes serve it with rice, pasta, or even just a slice of bread.
In this recipe we use fresh seasonal vegetables and the right spices, and the result is a hearty, thick, homemade chili that stores beautifully when canned.
Ingredients (for 6–7 quart jars / 950 ml each)
- 12 cups fresh tomatoes, peeled and diced (about 9 lbs / 4 kg)
- 3 cups red beans, par-cooked (about 1 lb / 500 g)
- 2 cups sweet bell pepper, diced (about 2 medium peppers)
- 2 cups chopped onion (2–3 medium onions)
- 1.5 cups corn (frozen or fresh)
- 2 cups ground beef or turkey (optional for vegetarian version)
- 4 cloves garlic, minced
- 1–2 hot chili peppers, finely chopped
- 2 tbsp olive oil
- 3 tbsp chili powder
- 1 tbsp smoked paprika
- 2 tsp ground cumin
- 1 tsp dried oregano
- 2 tsp salt (to taste)
- 1 tsp sugar (to balance acidity)
How to Make this Canning Meal: Easy Recipe & Instructions
- Base prep. Heat oil in a large pot. Sauté onion and garlic until soft, then add the meat (if using) and cook until browned.
- Add the veggies. Stir in bell pepper, hot pepper, and corn. Cook for 5–7 minutes until the vegetables start to soften.
- Tomatoes and spices. Add diced tomatoes, all the spices, sugar, and salt. Stir well and simmer for 20 minutes until the sauce thickens.
- Beans. Stir in the beans and cook another 10 minutes so all the flavors come together.
- Canning. Ladle the hot chili into sterilized jars, leaving 1 inch (2.5 cm) of headspace. Wipe the rims. Seal the jars with new lids and screw the bands on finger-tight (snug but not overly tight).
Process jars in a pressure canner at 10 pounds pressure (≈0.7 atm) for 75 minutes (pint jars) or 90 minutes (quart jars).
For reliability, I always use a pressure canner. If you’re just starting and looking for a solid option, check out the Presto 23-Quart Pressure Canner — one of the most popular choices for home canners in the US.
Safety Note
This recipe contains low-acid foods (meat, beans). They must be processed in a pressure canner at the correct pressure and time. Processing in a water bath is unsafe — it can cause botulism, a life-threatening foodborne illness.
If you don’t have a canner, use this recipe for freezing. It’s safe, though the vegetables may get softer in texture.
Beans bring the protein, veggies add fiber and vitamins, and spices bring the warmth and depth. These jars disappear especially fast in winter: you open one — and dinner is almost ready!
2. Chicken and Vegetable Stew Base
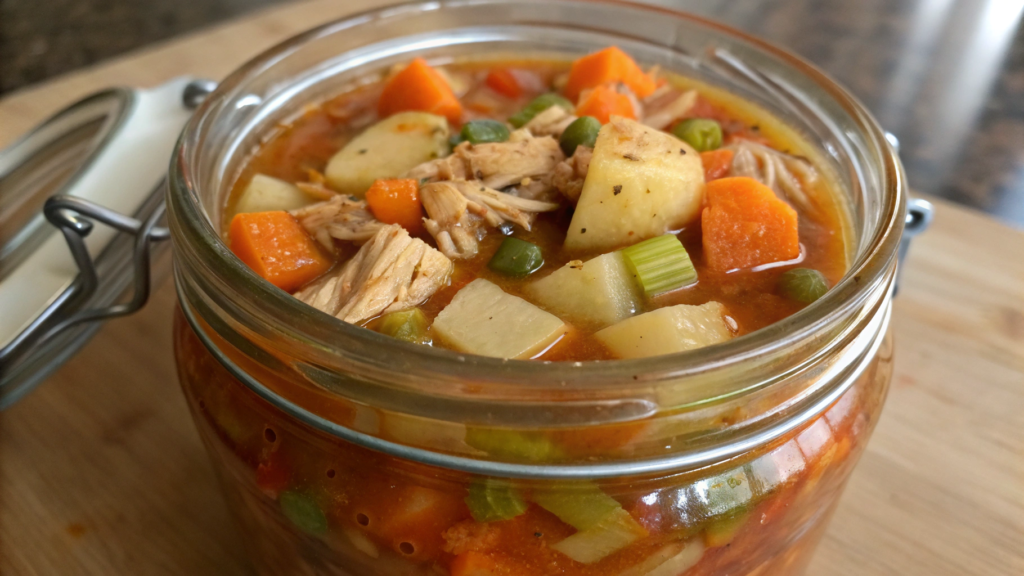
It’s incredibly handy to have a pantry shelf with a ready-to-go stew base. Open a jar, add some potatoes or noodles, and in just half an hour you’ve got a steaming full dinner on the table.
Ingredients (for 7 quart jars / 950 ml each)
- 4 lbs boneless, skinless chicken, cut into chunks (about 1.8 kg)
- 2 cups carrots, diced (about 300 g)
- 2 cups celery, chopped (about 300 g)
- 2 cups green beans, cut into 1-inch pieces (about 300 g)
- 2 cups peas (fresh or frozen)
- 1.5 cups onion, finely chopped (2 medium onions)
- 8 cups chicken broth (about 2 liters)
- 2 tsp salt (to taste)
- 1 tsp ground black pepper
- 2 tsp dried thyme or oregano
- 2 tbsp olive oil
How to Make this Canning Meal: Easy Recipe & Instructions
- Prepare the chicken. In a large pot, lightly brown the chicken in olive oil until it gets some color. This step adds a deeper flavor base to your stew, but don’t cook it all the way through.
- Add the veggies. Toss in onion, carrots, and celery. Let them cook for about 5 minutes, just until they start to soften and release their aromatic sweetness.
- Broth and spices. Pour in the chicken broth, add salt, pepper, and herbs. Bring to a boil and simmer for 10–15 minutes. This creates a flavorful broth that ties everything together.
- Beans and peas. Stir in the green beans and peas, then remove from heat right away. Keeping them slightly firm prevents them from turning mushy, since they’ll finish cooking during the pressure canning process.
- Canning. Ladle the hot mixture into sterilized jars, leaving 1 inch (2.5 cm) of headspace. Make sure there’s enough liquid to cover all the ingredients. Seal the jars with new lids and screw the bands on finger-tight (snug but not overly tight).
Process in a pressure canner at 10 pounds pressure (≈0.7 atm):
- 75 minutes for pint jars (475 ml)
- 90 minutes for quart jars (950 ml)
- 75 minutes for pint jars (475 ml)
Safety Note
This recipe contains meat and low-acid vegetables. These recipes are not suitable for processing in a water bath. Always use a pressure canner; otherwise, there’s a real risk of botulism — a life-threatening illness.
If you don’t have a canner, prepare the stew and freeze it in portions. Freezing is completely safe, though the vegetables may soften in texture.
This is a base recipe you can take in many directions. Add potatoes for a hearty chicken stew, or toss in noodles and cream for a light chicken soup. A recipe like this makes home cooking flexible and time-saving.
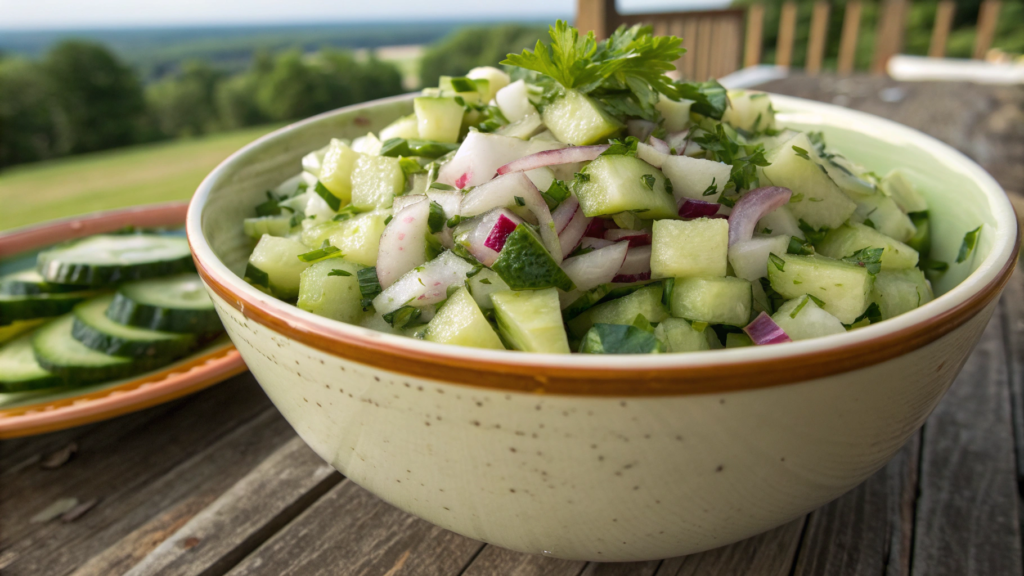
3. Cucumber Soup Starter
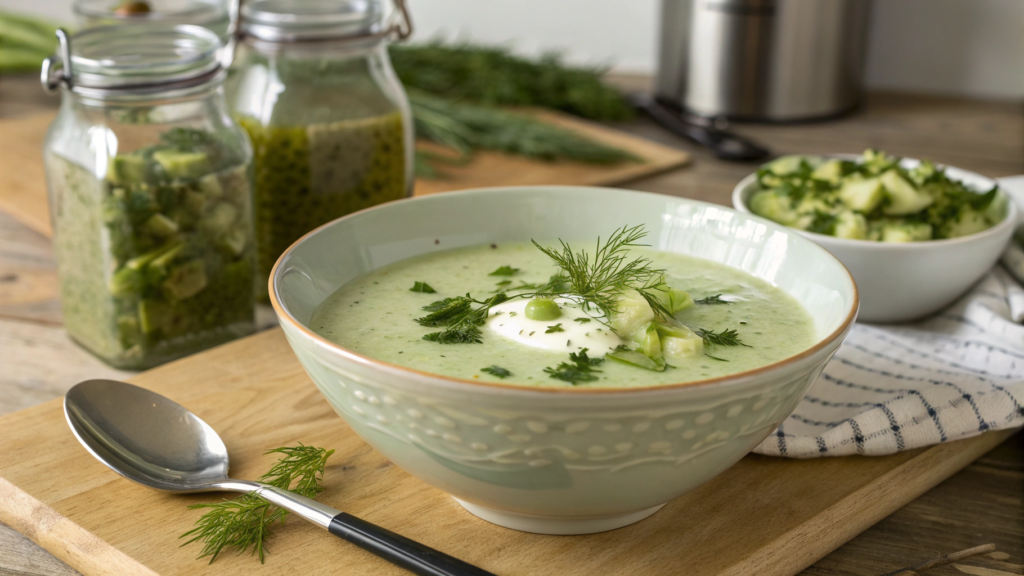
When summer cucumbers practically flood in from the garden, making a cucumber soup starter is the perfect idea. In summer, you can open a jar, add yogurt or kefir and fresh herbs, and lunch is ready. In winter, you can add it to a vegetable stew or cream soup to brighten the flavor.
Ingredients (for 6–7 pint jars / 475 ml each)
- 10 cups fresh cucumbers, peeled and diced (about 5.5 lbs / 2.5 kg)
- 2 cups white onion, chopped (about 2 medium onions)
- 1.5 cups celery, chopped (about 200 g)
- 4 cups vegetable broth (about 1 liter)
- 2 tsp salt
- 1 tsp sugar
- 1 tsp white pepper
- 2 tbsp fresh dill or parsley, finely chopped
- 2 tbsp olive oil
How to Make this Canning Meal: Easy Recipe & Instructions
- Prep the vegetables. Dice cucumbers, onion, and celery. Lightly sauté the onion in olive oil to remove its sharpness.
- Broth and spices. In a large pot, combine cucumbers, celery, onion, and broth. Add salt, sugar, and pepper. Cook for about 10–12 minutes until the vegetables soften slightly.
- Herbs. Stir in the fresh herbs at the end of cooking for the best flavor.
- Canning. Ladle the hot mixture into sterilized jars, leaving 1 inch (2.5 cm) headspace. Seal jars with new lids and screw the bands on finger-tight (snug but not overly tight).
Process jars only in a pressure canner at 10 pounds pressure (≈0.7 atm):
- 55 minutes for pint jars
- 85 minutes for quart jars
- 55 minutes for pint jars
Safety Note
Cucumbers and vegetable broth make a low-acid mix. This starter must be processed in a pressure canner. Processing in a water bath is unsafe — it can lead to botulism.
If you don’t have a canner, use this recipe as a base for freezing: cool it down and portion into containers. It’s safe, but keep in mind that cucumbers will be softer after thawing.
We usually use this starter for a cold summer soup with yogurt and garlic — quick, refreshing, and perfect on hot days. It also works beautifully in vegetable cream soups: add a jar to potato or zucchini soup, and the flavor instantly pops.
4. Peach Chutney for Quick Meals
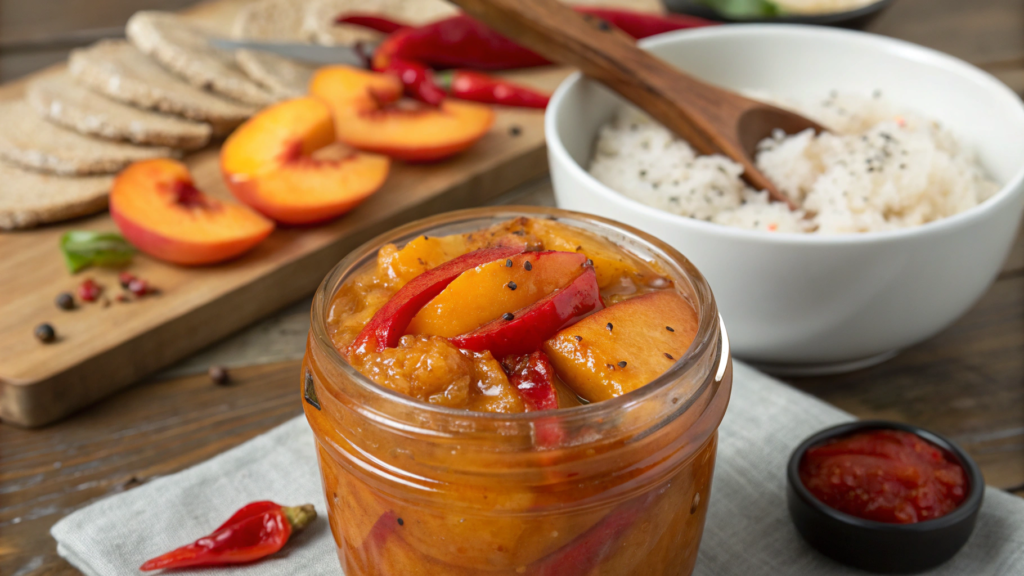
Spicy sweetness, a hint of tang, and warm spice… all of this can turn a plain piece of chicken or rice into something that feels festive.
Unlike soup or meat bases, chutney is a high-acid preserve (fruit + vinegar). That means it’s simple: no pressure canner needed, you can safely process it in a water bath. Convenient, tasty, and absolutely safe.
Ingredients (for 6 pint jars / 475 ml each)
- 8 cups fresh peaches, peeled and diced (about 5.5 lbs / 2.5 kg). A Cuisinart Food Processor is a lifesaver for prep — it cuts the time dramatically.
- 2 cups apple cider vinegar (about 500 ml)
- 2 cups brown sugar (about 400 g)
- 1.5 cups raisins (about 200 g)
- 1.5 cups white onion, finely chopped (about 2 medium onions)
- 2 tbsp fresh grated ginger
- 2 cloves garlic, minced
- 1 tbsp mustard seeds
- 1 tbsp salt
- 1 tsp ground cinnamon
- 1 tsp ground red pepper (to taste)
How to Make this Canning Meal: Easy Recipe & Instructions
- Prep the peaches. Peel them (the easiest way is blanching in boiling water to slip off the skins) and dice into cubes.
- Main simmer. In a large pot, combine vinegar, sugar, onion, garlic, raisins, and spices. Bring to a boil.
- Add the peaches. Stir in the peach cubes, reduce the heat, and simmer 30–40 minutes until the mixture thickens. Stir occasionally to prevent sticking.
- Canning. Ladle the hot chutney into sterilized jars, leaving 1/2 inch (1.3 cm) headspace. Seal jars with new lids and screw bands on finger-tight (snug but not overly tight).
Process in a water bath canner:
- 15 minutes for pint jars
- 20 minutes if you live above 1,000 m (3,280 ft)
- 15 minutes for pint jars
Safety Note
This recipe has high acidity from vinegar and fruit, so water bath processing is safe. The risk of botulism is excluded here.
But make sure to keep the right ratio of vinegar and sugar — these are what guarantee safe preservation.
This is one of those cases where a jar of chutney can rescue dinner: open it and serve with rice, chicken, cheese, or even sandwiches. It’s especially good on a warm evening on the porch with a slice of sharp cheddar and a glass of dry wine.
5. Homemade Pasta Sauce with Roasted Tomatoes
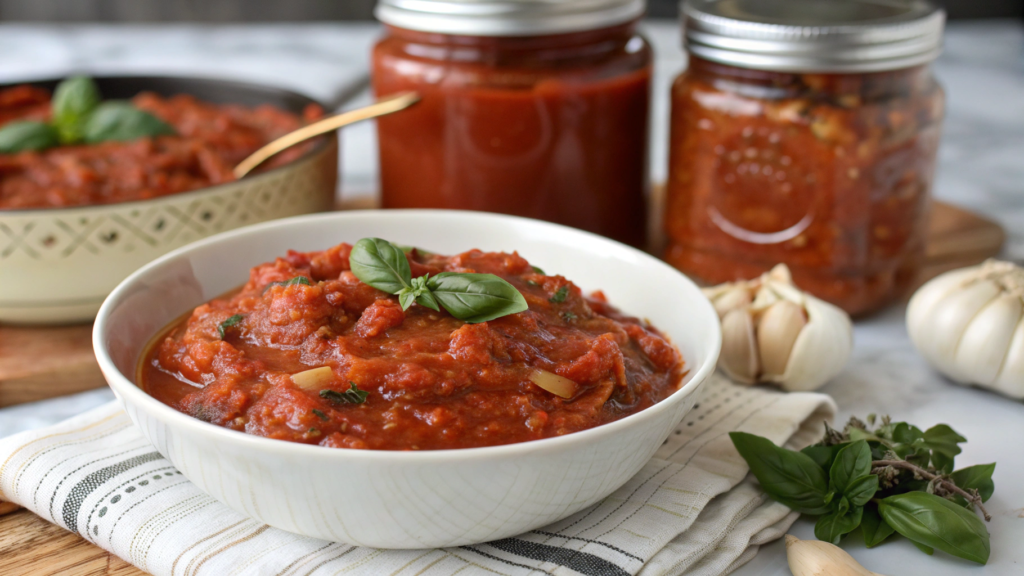
If you’ve ever tried sauce made from roasted tomatoes, you know the flavor is completely different: rich, slightly sweet, and deep. For us, this is one of the most go-to canning recipes. In summer, we roast trays full of tomatoes, mix them with garlic and basil, and in winter we pull out a jar and have dinner with pasta or lasagna ready in minutes.
Ingredients (for 6–7 pint jars / 475 ml each)
- 12 lbs ripe tomatoes (about 5.5 kg)
- 2 large onions, chopped
- 1 head garlic
- 1/4 cup olive oil (60 ml)
- 1/2 cup fresh basil, chopped
- 2 tbsp salt
- 2 tsp sugar
- 1 tsp ground black pepper
- 1/2 cup bottled lemon juice or 1/2 cup 5% vinegar (120 ml) — required to increase acidity!
How to Make this Canning Meal: Easy Recipe & Instructions
- Roast the tomatoes. Cut the tomatoes in half and place them on baking sheets along with the onions and unpeeled garlic cloves. Drizzle with olive oil. Roast at 400°F (200°C) for about 40 minutes, until the edges start to caramelize.
- Purée. Transfer everything to a large pot. Peel the garlic, then blend the mixture until smooth.
- Season and acidify. Add salt, sugar, pepper, and basil. Pour in the lemon juice or vinegar — this step is mandatory to make the sauce safe for canning. Simmer for 15–20 minutes on low heat.
- Canning. Ladle the hot sauce into sterilized jars, leaving 1/2 inch (1.3 cm) headspace. Seal with new lids and screw the bands on finger-tight (snug but not overly tight).
Process in a water bath canner:
- 35 minutes for pint jars
- 40 minutes for quart jars
- 35 minutes for pint jars
Safety Note
Tomatoes are right on the borderline of acidity. That’s why every pasta sauce canning recipe requires the addition of lemon juice or vinegar. This ensures the preserve is safe for water bath processing. Without acidification, there’s a risk of botulism.
If you don’t want the sharper vinegar taste, use lemon juice — it’s gentler.
In winter, when grocery store tomatoes are flavorless and pale, a jar of this sauce feels like a gift from last summer. We use it most often for quick dinners: spaghetti, pizza, or casseroles. Sometimes we toss in browned ground meat or extra veggies right into the skillet with this sauce, and dinner is ready in 20 minutes.
6. Pickled Cucumbers for Sandwiches
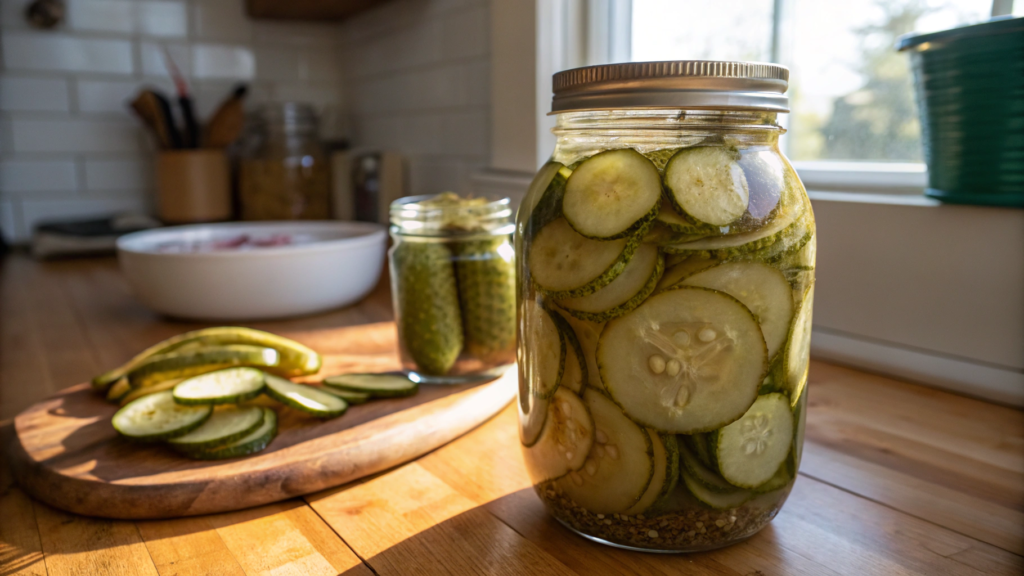
We always keep jars of quick pickled cucumbers in the pantry. Thin, crispy slices that are perfect for sandwiches, burgers, or subs. In summer, they disappear so fast that sometimes we end up making two batches back-to-back.
Ingredients (for 6 pint jars / 475 ml each)
- 4 lbs cucumbers, sliced into thin rounds (about 1.8 kg). For big batches, the OXO Good Grips Mandoline Slicer is a lifesaver — the slices are even, and prep time is much faster.
- 2 large onions, sliced into rings
- 4 cups apple cider vinegar 5% (950 ml)
- 4 cups water (950 ml)
- 1.5 cups sugar (300 g)
- 1/4 cup salt (60 g)
- 2 tbsp mustard seeds
- 1 tbsp dill seeds
- 1 tbsp whole black peppercorns
- 1 tsp red pepper flakes (to taste)
How to Make this Canning Meal: Easy Recipe & Instructions
- Prep the vegetables. Slice cucumbers into thin rounds and cut the onion into rings.
- Brine. In a pot, combine vinegar, water, sugar, salt, and all the spices. Bring to a boil, stirring until the sugar and salt are fully dissolved.
- Fill the jars. Pack cucumbers and onion into sterilized jars. Pour the hot brine over the top so the vegetables are fully covered. Leave 1/2 inch (1.3 cm) headspace.
- Canning. Seal jars with new lids and screw the bands on finger-tight (snug but not overly tight). Process in a water bath canner for 10 minutes (pint jars).
Safety Note
Pickled cucumbers are a high-acid preserve thanks to vinegar. That means they can be safely processed in a water bath. There’s no risk of botulism here if you strictly follow the vinegar, sugar, and water ratio.
If you don’t want to deal with water bath canning, just pour the brine over and refrigerate. These refrigerator pickles will keep for 1–2 months.
These cucumbers are a real hit in our house. I add them to sandwiches, burgers, or even toss them into potato salad. They’re crisp, flavorful, and always ready to grab.
7. Savory Tomato and Bean Soup
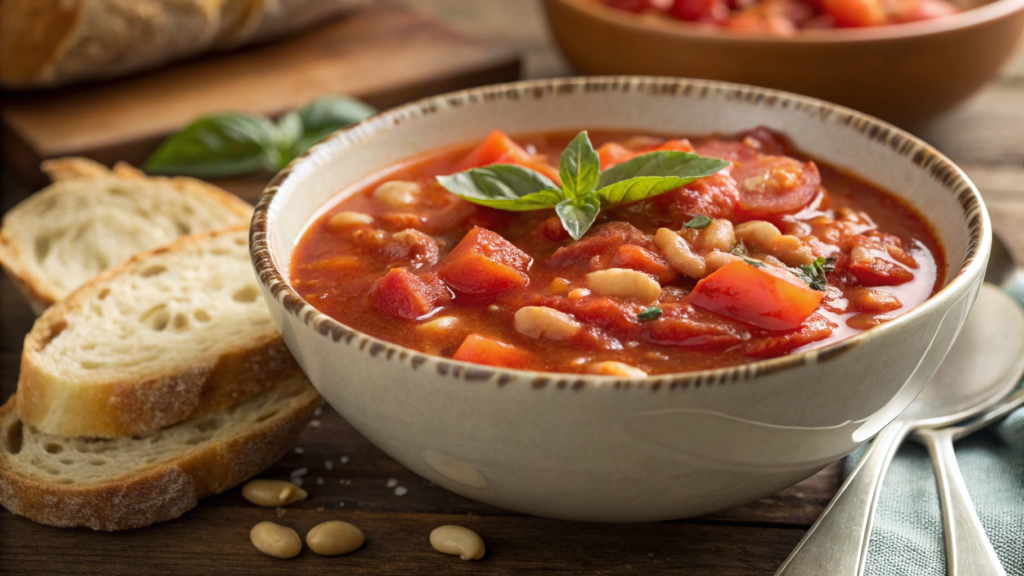
Beans and tomatoes are an unshakable classic. We often end up with such a big harvest of both that we can’t possibly use them all fresh. We quickly learned that if you cook a soup base and can it, you can have a hearty stew or thick soup on the table in half an hour, even in the middle of winter.
Ingredients (for 7 quart jars / 950 ml each)
- 10 cups fresh tomatoes, peeled and diced (about 9 lbs / 4 kg)
- 6 cups beans (pinto or red), soaked and par-cooked (about 2 lbs / 1 kg)
- 3 cups carrots, diced (about 450 g)
- 2 cups celery, chopped (about 300 g)
- 2 cups onion, chopped (2 medium onions)
- 2 cups vegetable or chicken broth (about 500 ml)
- 3 cloves garlic, minced
- 2 tbsp olive oil
- 2 tsp salt (to taste)
- 1 tsp sugar (to balance acidity)
- 1 tsp ground black pepper
- 1 tsp dried oregano or thyme
How to Make this Canning Meal: Easy Recipe & Instructions
- Prepare the beans. Soak the beans overnight. Cook until half-done (about 30 minutes after boiling).
You can cook without soaking (about 1 hour in the Instant Pot Duo 7-in-1), but soaking is still recommended for easier digestion and a gentler flavor. - Sauté the vegetables. Heat oil in a large pot, sauté onion and garlic until translucent. Add carrots and celery and cook for another 5 minutes.
- Tomatoes and spices. Stir in the tomatoes, salt, sugar, pepper, and oregano. Cook over medium heat for 20 minutes until the tomatoes soften.
- Combine. Add beans and broth, stir well, and simmer for another 10 minutes so the flavors blend together.
- Canning. Ladle the hot soup into sterilized jars, leaving 1 inch (2.5 cm) headspace. Seal jars with new lids and screw the bands on finger-tight (snug but not overly tight).
Process only in a pressure canner at 10 pounds pressure (≈0.7 atm):
- 75 minutes for pint jars
- 90 minutes for quart jars
- 75 minutes for pint jars
Safety Note
Beans and vegetables are low-acid foods. They cannot be processed in a water bath. Only a pressure canner reaches the temperature needed to destroy Clostridium botulinum spores.
If you don’t have a canner, use this recipe for freezing. It’s completely safe, though the vegetables may soften once thawed.
Open a jar in winter, add some pasta or noodles — and you’ve got a thick, hearty soup. Sometimes I use this base as a starter for chili, just adding more spices and hot peppers. The options are endless!
8. Cucumber and Onion Relish
Cucumber and onion relish was a revelation for us. It’s sweet, tangy, and crunchy all at once — and it instantly upgrades a hot dog, burger, or potato salad to weekend picnic level.
Ingredients (for 6 pint jars / 475 ml each)
- 10 cups cucumbers, finely diced (about 5.5 lbs / 2.5 kg). The KitchenAid 3.5 Cup Food Chopper is perfect for this — compact, fast, and gets the job done in seconds.
- 4 cups onion, finely chopped (about 4 medium onions)
- 1 red bell pepper, finely diced
- 1 green bell pepper, finely diced
- 1/4 cup salt (60 g)
- 3 cups apple cider vinegar 5% (710 ml)
- 2.5 cups sugar (500 g)
- 2 tbsp mustard seeds
- 1 tbsp celery seeds
- 1 tsp turmeric
How to Make this Canning Meal: Easy Recipe & Instructions
- Prep the vegetables. Dice cucumbers, onion, and peppers very finely — about 1/4 inch (5–6 mm). That way, the finished relish has an even texture without large chunks. Using peppers of different colors makes it look prettier.
- Salt soak. Mix the vegetables with salt, cover with cold water, and let sit for at least 4 hours (overnight is even better). This draws out excess moisture and helps keep the crunch. Tip: place a plate on top to keep everything submerged.
- Drain and rinse. Drain the liquid and rinse the vegetables 2–3 times in cold water. Squeeze out excess water well — too much liquid will make the relish watery.
- Cook the syrup. In a large pot, combine vinegar, sugar, and spices. Bring to a boil, stirring until the sugar dissolves. Add the drained vegetables and simmer for 10 minutes, stirring often so nothing sticks.
- Fill and process. Pack the hot relish into sterilized jars, leaving 1/2 inch (1.3 cm) headspace. Remove air bubbles and top up with syrup if needed. Wipe rims, seal with new lids, and screw bands on finger-tight (snug but not overly tight). Process in a water bath canner for 10 minutes.
Safety Note
Thanks to the vinegar and sugar, this relish is a high-acid preserve. That means it can be safely processed in a water bath — just make sure to keep the proportions exact.
If you don’t want to can it, simply store the relish in the fridge. It will keep for a couple of months without issue.
This relish works with meat, sandwiches, sausages, or even on a cheese board. In our family, a jar never lasts more than a week — especially in summer, when everyone’s eating outside.
9. Spicy Peach Salsa for Tacos
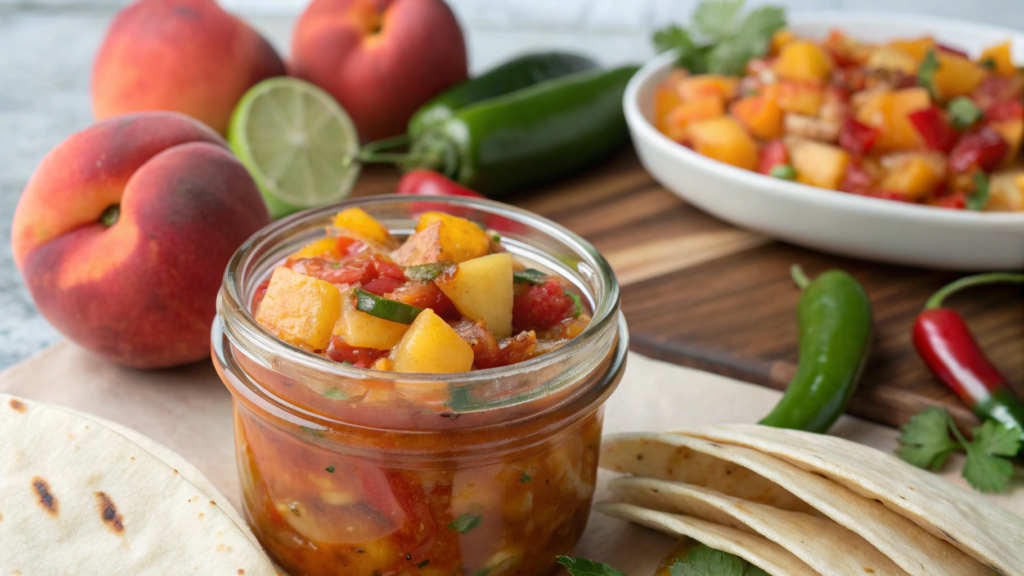
Fruit and hot peppers might sound like a strange combo. But once you open a jar and spoon it onto tacos, burritos, or even grilled meat, everything changes: the sweetness of the peaches softens the heat, while the spices give it an unforgettable kick.
Ingredients (for 6–7 pint jars / 475 ml each)
- 8 cups fresh peaches, peeled and diced (about 5.5 lbs / 2.5 kg)
- 2 cups red bell pepper, finely diced
- 2 cups tomatoes, diced
- 1 cup white onion, finely chopped
- 3–4 fresh hot peppers (jalapeño or serrano), minced
- 1 cup apple cider vinegar 5% (240 ml)
- 1 cup sugar (200 g)
- 2 tbsp salt
- 2 tbsp fresh lime juice
- 2 tbsp fresh cilantro (optional)
How to Make this Canning Meal: Easy Recipe & Instructions
- Prep the peaches and veggies. Blanch peaches in boiling water, peel, and dice. Chop tomatoes and bell peppers finely so the finished salsa has an even texture. Adjust the number of hot peppers to taste — more peppers = more fire in your tacos.
- Mix the ingredients. In a large pot, combine peaches, tomatoes, bell pepper, hot peppers, and onion. Add vinegar, sugar, salt, and lime juice. Stir well.
- Cook. Bring the mixture to a boil, then reduce heat and simmer about 10 minutes, stirring often. The peaches should soften, and the flavor should balance between sweet, tangy, and spicy.
- Fill jars. Spoon the hot salsa into sterilized jars, leaving 1/2 inch (1.3 cm) headspace. Remove air bubbles with a spatula or stick, and top up with liquid if needed.
- Canning. Seal jars with new lids and screw bands on finger-tight (snug but not overly tight). Process in a water bath canner for 15 minutes (pint jars). If you live above 1,000 m (3,280 ft), increase the time by 5–15 minutes depending on altitude.
Safety Note
Thanks to peaches, tomatoes, and vinegar, this salsa is a high-acid preserve, which makes it safe for water bath canning. The risk of botulism is excluded as long as you don’t reduce the vinegar.
We use this salsa most often for tacos and burritos, but it also works as a sauce for grilled chicken or as a dip with chips. Opening a jar in winter and catching that burst of summer flavor is priceless.
10. Slow-Simmered Tomato Bolognese
Yes, you can actually can Bolognese sauce! At the peak of tomato and zucchini season, we made a giant pot, packed it into jars, and ran it through the pressure canner. Come winter, it was absolute gold — rich, hearty, and ready to use.
Ingredients (for 7 quart jars / 950 ml each)
- 6 lbs ground beef or turkey (about 2.7 kg)
- 12 cups fresh tomatoes, peeled and diced (about 10 lbs / 4.5 kg)
- 3 cups carrots, shredded or finely diced (about 450 g)
- 2 cups celery, finely diced (about 300 g)
- 3 cups onion, chopped (about 3 medium)
- 6 cloves garlic, minced
- 2 cups tomato paste (about 450 g)
- 2 cups dry red wine (optional, but adds depth)
- 1/4 cup olive oil (60 ml)
- 3 tbsp dried oregano
- 2 tbsp dried basil
- 2 tsp salt (to taste)
- 1 tsp sugar (to balance acidity)
- 1 tsp ground black pepper
How to Make this Canning Meal: Easy Recipe & Instructions
- Brown the meat. Heat olive oil in a large pot, add the ground meat, and cook until browned, breaking up clumps. Drain off excess fat so the sauce doesn’t turn greasy.
- Add the vegetables. Stir in onion, carrot, celery, and garlic. Sauté 8–10 minutes until softened and fragrant.
- Tomatoes and wine. Add diced tomatoes, tomato paste, and wine. Stir in herbs, sugar, salt, and pepper. Bring to a boil, then reduce heat and simmer for at least 45 minutes — the longer it cooks, the richer the flavor.
- Jar it up. Ladle the hot sauce into sterilized jars, leaving 1 inch (2.5 cm) headspace. Remove air bubbles and top up with sauce if needed.
- Canning. Seal jars with new lids and tighten bands finger-tight (snug but not forced). Process only in a pressure canner at 10 lbs pressure (≈0.7 atm):
- 75 minutes for pint jars
- 90 minutes for quart jars
- 75 minutes for pint jars
Safety Note
Because this recipe contains meat and vegetables, it’s a low-acid preserve. That means it must be processed in a pressure canner only — a water bath is not safe and carries the risk of botulism.
If you don’t have a pressure canner, freeze the sauce instead. The flavor will hold up, though the texture of the veggies will soften a bit.
A jar of Bolognese is a lifesaver on busy nights: just reheat and toss with pasta. Sometimes I use it as the base for lasagna or baked casseroles, or stir in a splash of cream to turn it into a silky tomato-cream sauce.
Fall Pantry Round-Up
And that’s it — 10 foundational recipes to stock your pantry with quick meals and sauces. In winter, you’ll just grab a jar and have a fragrant, home-cooked dish on the table in minutes.
I hope every safety step is followed closely — because proper equipment, exact proportions, and the right processing time mean not just flavor, but your family’s health too.Now share your favorite preserving tricks and family traditions in the comments. Who knows — your recipe might inspire someone else to try a new kitchen experiment!


