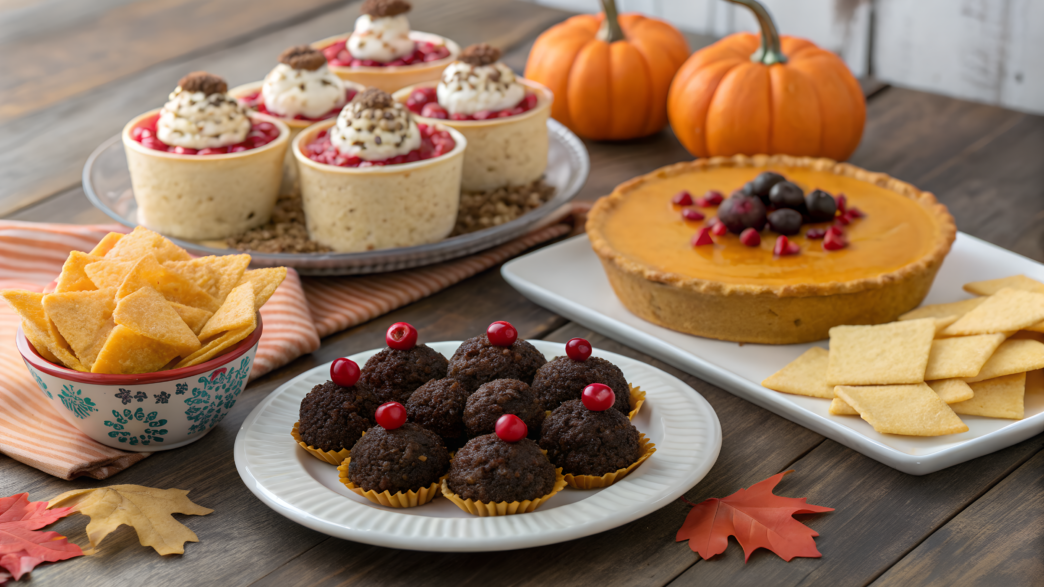
These 10 desserts are not just a collection of cute sweets. They are my personal “lifesavers” that saved us on the Idaho homestead and continue to save us now on our two-acre plot in the Pacific Northwest.
What they have in common: they come together fast, they look impressive, and there’s always enough for everyone.
Here you’ll find ideas that you can easily adapt to your holiday style: simple truffles, light mousses, quick brownies, and apple desserts that smell like cinnamon even before you open the oven.
In short, if you want to add something new to Thanksgiving, keep reading. I’m sure at least one of these desserts will make its way into your permanent November collection.
1. No-Bake Oreo Turkey Truffles
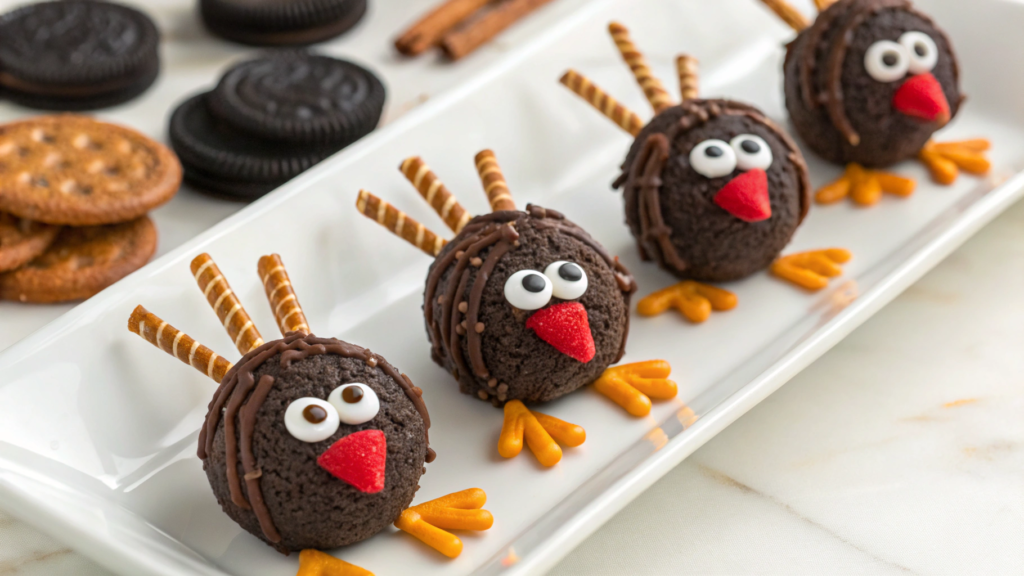
This is the perfect option if you want something dramatic, tasty, and oven-free.
We honestly admit: by late November we usually have zero energy left to roll out dough. Even our garden still demands the last push in November: gather the remaining sage, sort the seeds, stash the tools. So no-bake desserts save us a lot. And they’re regular guests on our holiday table.
What You Need
- 36 Oreo cookies (about 1 standard family pack — around 330 g)
- 8 oz cream cheese (225 g — plain cream cheese)
- 12 oz melting chocolate (340 g of chocolate for melting)
- Candy eyes (edible “eyes,” can substitute with chocolate drops)
- Mini peanut butter cups (1 pack)
- Candy corn (about 20–25 pieces)
- A bit of vegetable oil if the chocolate needs thinning
I usually melt chocolate in the Wilton Candy Melts Pot on Amazon — it really saves time.
How to Make It
(and yes, everything is no-bake!)
- Crush the Oreos. Throw the cookies into a food processor and crush into fine crumbs.
If the processor is busy with nuts for another recipe, you can also crush them in a bag with a rolling pin. We’ve done both: same result, only your hands get tired more. - Combine with cream cheese. Add the cream cheese and mix until smooth and sticky.
It should be pliable — kind of like very soft modeling clay. - Shape the truffles. Roll small balls slightly smaller than a walnut.
We usually get 18–22 pieces — depending on how much “dough” we accidentally eat during the process.
Place the balls in the freezer for 10 minutes so they don’t fall apart when coating. - Melt the chocolate. Melt the chocolate in a double boiler or microwave in 20–30 second bursts.
If it becomes too thick, add a drop of oil. - Coat the truffles. Dip the balls using a fork, gently shake off the excess.
The chocolate should go on smoothly, but even if there are small bumps — that’s fine, they look more homemade and charming. - Decorate. While the chocolate is still soft:
— attach the candy eyes
— place the mini peanut butter cup as the body
— stick in 3–4 candy corn pieces as the tail
— make a tiny beak from a candy corn piece
Sometimes the tail ends up crooked, but that only makes them cuter.
How to Serve
Contrasting colors work great on the plate: place the dark truffles on a large white or beige dish.
We usually set them around a small bowl of cranberry sauce — purely for the color scheme. Guests always think it’s a chef’s idea, but honestly, it was just improvisation.
A Few Tips From Experience
- If you make the truffles ahead of time, you can store them in a container in the fridge for 3–4 days.
- Don’t try to speed up the setting process by leaving them in the freezer too long — chocolate bloom (white spots) appears fast.
- For a big group, make a double batch. They disappear faster than you can pull the second tray from the fridge.
2. Mini Cranberry Pie Bites

Mini Cranberry Pie Bites — a mix of a crisp base, tart cranberries, and a soft sweet sauce. This combination is loved by everyone here in the Northwest, especially when the season of gray fog and damp evenings arrives.
What You Need
- 1 cup canned cranberry sauce (240 ml cranberry sauce, homemade works even better)
- 1 tablespoon orange zest
- 1 tablespoon orange juice
- 1–2 tablespoons sugar — to taste
- 1 package mini phyllo shells (30 pieces)
- ½ teaspoon cinnamon
- 1 tablespoon melted butter
If you want the mini shells to feel more “homemade,” you can warm them slightly beforehand — the texture turns out nicer for us this way.
How to Make It
- Prepare the cranberry mixture. In a small bowl, mix the cranberry sauce, zest, juice, and sugar.
If you want a brighter flavor, add a bit more zest. I often do this because our oranges in November are very fragrant. - Warm the mini shells. Place the phyllo shells in the oven for 5 minutes at 350°F (175°C) so they become slightly crisp.
This is optional, but it really improves the overall impression. - Fill the shells. Spoon the cranberry filling into all the cups.
Don’t be afraid to add a little extra — these little ones love generosity. - Add cinnamon. A light sprinkle on top creates that classic November aroma.
Sometimes I mix cinnamon with brown sugar — it tastes a bit more caramel-like. - Bake. Put them in the oven for 8–10 minutes at the same temperature.
The shells should turn golden around the edges, and the filling should look slightly bubbly. - Let them rest. Just a couple of minutes — and they’re ready to serve.
Though honestly? We usually start “tasting” them right on the baking sheet.
How to Serve
We have an old wooden board that we found back on the Idaho homestead when clearing the property. I always serve these mini pies on that board — the warm tones of the wood and the ruby cranberry look surprisingly beautiful.
You can add a bit of orange zest on top before serving — it looks more festive.
A Few Practical Tips
- If you’re making brunch for a big group, make a double batch right away.
- A vegan version works great if you use vegan phyllo shells and cranberry sauce without gelatin.
- For a brighter flavor, add a pinch of ginger — it works surprisingly well.
3. Pumpkin Cheesecake Dip

I love that this dip is easy to make, easy to serve, easy to double… and easy to clean up, because there are almost never leftovers. This soft, airy cream with pumpkin and cream cheese became a tradition for us around the time we moved to the Pacific Northwest. Fall here is always cool, damp, and dips are the perfect rescue when guests arrive early (and almost always hungry!).
What You Need
- 8 oz cream cheese, room temperature
- 1 cup pumpkin puree
- ½ cup powdered sugar
- 1 teaspoon vanilla extract
- 1 teaspoon pumpkin pie spice
- 2 tablespoons maple syrup
- A pinch of salt
- For serving: apple slices, crackers, gingersnaps, pretzels
For mixing, my small KitchenAid 5-Speed Ultra Power Hand Mixer on Amazon works perfectly — it’s lightweight and doesn’t throw ingredients everywhere.
How to Make It
- Prepare the base. In a large bowl, beat the softened cream cheese until airy.
This is important: if the cheese isn’t softened, the dip will have lumps, and that’s not as pleasant. - Add the pumpkin puree. Mix in the puree on medium speed. The color instantly turns autumnal — rich and orange.
Sometimes I use homemade puree if I have leftovers after processing pumpkins at the end of the season. - Sweeten it. Add the powdered sugar, vanilla, maple syrup, and salt.
Maple syrup gives that soft caramel note — we started adding it almost everywhere after moving to the Pacific Northwest. - Season it. Mix in the pumpkin pie spice.
If you want a “warmer” flavor, add an extra pinch of cinnamon separately. - Chill. Place the bowl in the fridge for at least 20–30 minutes.
During this time, the texture becomes firmer and the flavor deeper. - Transfer to a nice dish. I most often use an old ceramic bowl we found while clearing out the shed on the Idaho homestead. It suits all pumpkin recipes perfectly.
How to Serve
We usually place the bowl of dip in the center of a large wooden platter and arrange apple slices, crispy crackers, gingersnaps, and salty pretzels around it.
Sweet + salty always works beautifully.
A Few Tips
- It keeps for up to 3 days in the fridge in a container.
- If you want a thicker texture, add a couple more spoonfuls of powdered sugar.
- The dip goes perfectly with coffee on Thanksgiving morning — pure pleasure.
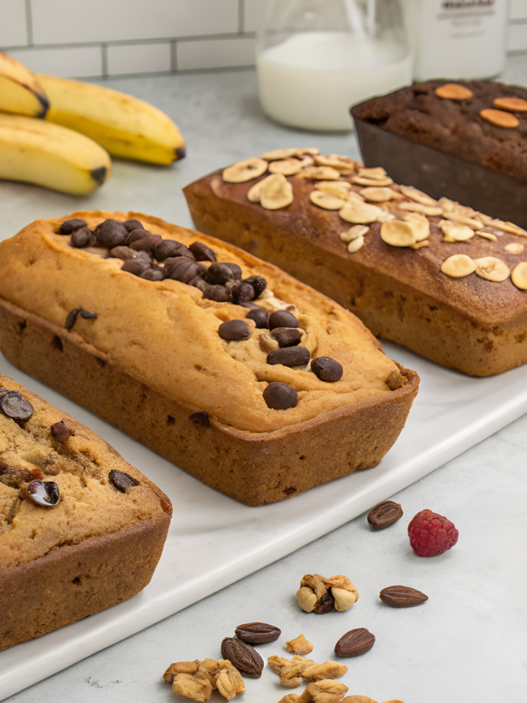
4. Gluten-Free Pumpkin Bread
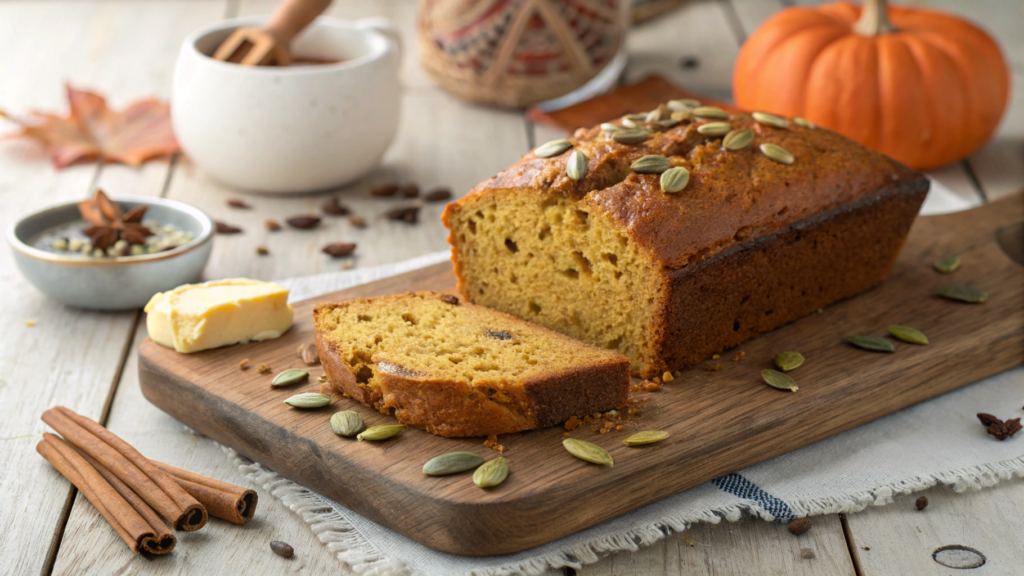
I treated gluten-free baking for a long time with this… well, cautious curiosity. Especially when it came to that dense, moist pumpkin bread that appears in our house every fall. Surprisingly, Gluten-Free Pumpkin Bread turned out lighter, the spice aroma opens up brighter, and the pumpkin puree makes the crumb soft, almost tender.
Lindy loves spreading butter on a warm slice, and I love saving a piece for the next morning… if it survives until tomorrow.
What You Need
- 1 ¾ cups gluten-free all-purpose flour
- 1 cup pumpkin puree
- ½ cup vegetable oil
- 1 cup brown sugar
- 2 large eggs
- 1 teaspoon baking soda
- ½ teaspoon baking powder
- 1 teaspoon cinnamon
- ½ teaspoon ground ginger
- ¼ teaspoon nutmeg
- ½ teaspoon salt
- 1 teaspoon vanilla extract
How to Make It
- Preheat the oven. 350°F (175°C) — the classic for pumpkin bread.
- Prepare the pan. Grease or line a standard loaf pan with parchment.
I usually use our old metal loaf pan — it heats evenly, proven over the years. - Mix the dry ingredients. In a large bowl, combine the flour, baking soda, baking powder, salt, and spices.
Gluten-free flour likes good distribution — that way the bread rises more evenly. - Make the wet mixture. In another bowl, whisk together the pumpkin puree, eggs, oil, sugar, and vanilla.
The color is so rich it’s hard not to smile. Fall on a spoon. - Combine the mixtures. Add the dry mixture to the wet and gently fold.
Gluten-free batter doesn’t like long mixing — just aim for uniformity. - Transfer to the pan. Smooth the top with a spoon. Sometimes I sprinkle brown sugar on top — it forms a crisp crust.
- Bake. 55–65 minutes, until a toothpick comes out clean.
If the top starts darkening too quickly, cover it with foil. - Cool. Let it cool in the pan for 10 minutes, then transfer to a rack.
Yes, you’ll want to try it right away — but wait at least a couple of minutes or it will crumble.
How to Serve
In our house it’s almost a ritual — cutting warm bread into thick slices, setting a small jar of soft butter on the table, and brewing fresh coffee. In the Pacific Northwest, fall mornings are always gray, and this bread turns it into a softer, friendlier morning.
Use it as a snack after garden work, a sweet element on a Thanksgiving brunch, or a grab-and-go breakfast if you have leftovers (which is rare).
To boost the flavor, you can fold in chocolate chips — about ½ cup (80 g). Sometimes I add chopped walnuts; they give a slight density. And if you want a bit of fresh sweetness on top, make a simple glaze from powdered sugar and orange juice — it pairs beautifully with warm bread.
A Few Tips From Experience
- Keeps for up to 3 days at room temperature or up to a week in the fridge.
- Reheating it in a toaster makes it taste better — strange but true.
- Gluten-free bread dries out faster, so keep it in a container.
5. Caramel Apple Nachos
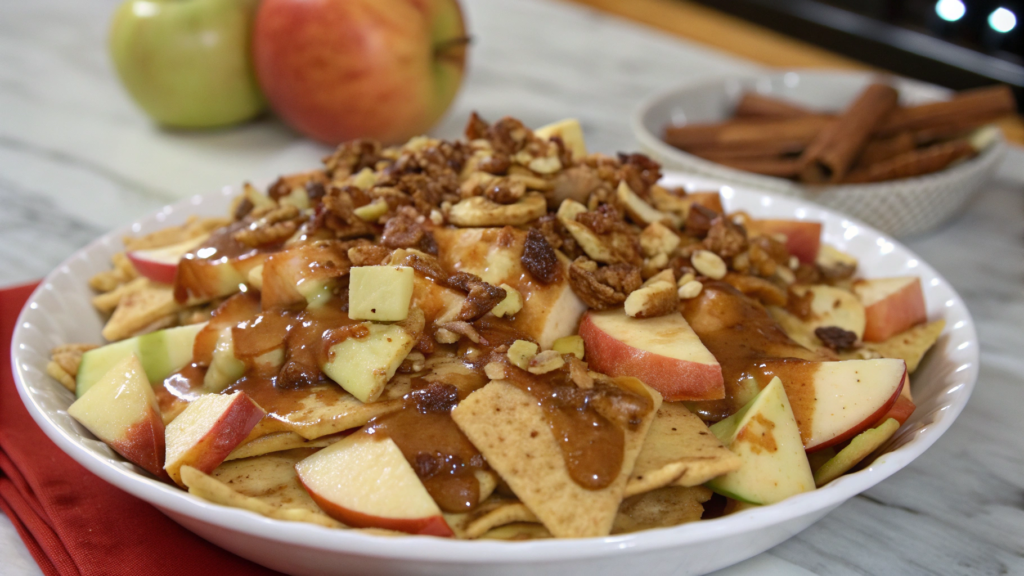
Caramel Apple Nachos — they sound like a recipe from a teen magazine — but they disappear faster than anything else on Thanksgiving.
And the main thing is that this dessert comes together in 10 minutes. No stress at all.
What You Need
- 3–4 crisp apples — Honeycrisp or Granny Smith work best
- ⅓ cup caramel sauce
- ¼ cup chocolate sauce — optional
- ¼ cup chopped peanuts or almonds
- ¼ cup mini chocolate chips
- A pinch of cinnamon
- A little lemon juice so the apples don’t brown
For clean slicing, I use the OXO Good Grips Apple Slicer on Amazon — it’s convenient, fast, and the slices always turn out even.
How to Make It
- Prepare the apples. Wash, dry, and slice them thinly.
I usually drizzle them with lemon juice — just to keep the color. - Arrange the base. Spread the apple slices on a large platter or wooden board in a “fan” shape.
We like using our old board from the Idaho homestead — it sets the right mood all by itself. - Drizzle with caramel. Warm the caramel sauce slightly (literally 10–15 seconds in the microwave) and drizzle thin ribbons over the top.
If you want more sweetness, add chocolate sauce too. - Add the toppings. Sprinkle mini chocolate chips, nuts, and a bit of cinnamon.
Sometimes we add shredded coconut — it works well too, but that’s already a variation. - Serve immediately. This dessert is best while the apples are still fresh and crisp.
We usually place the platter in the center of the table and give guests small forks or just toothpicks — it turns into a casual, fun dessert people eat standing, chatting happily.
A Few Tips
- If you’re making it for a large group, double the ingredients — they vanish almost instantly.
- Use firm apples. Soft ones release juice quickly and turn everything into mush.
- If there are kids, remove the nuts or serve them separately.
6. Chocolate Fudge Pumpkin Bars
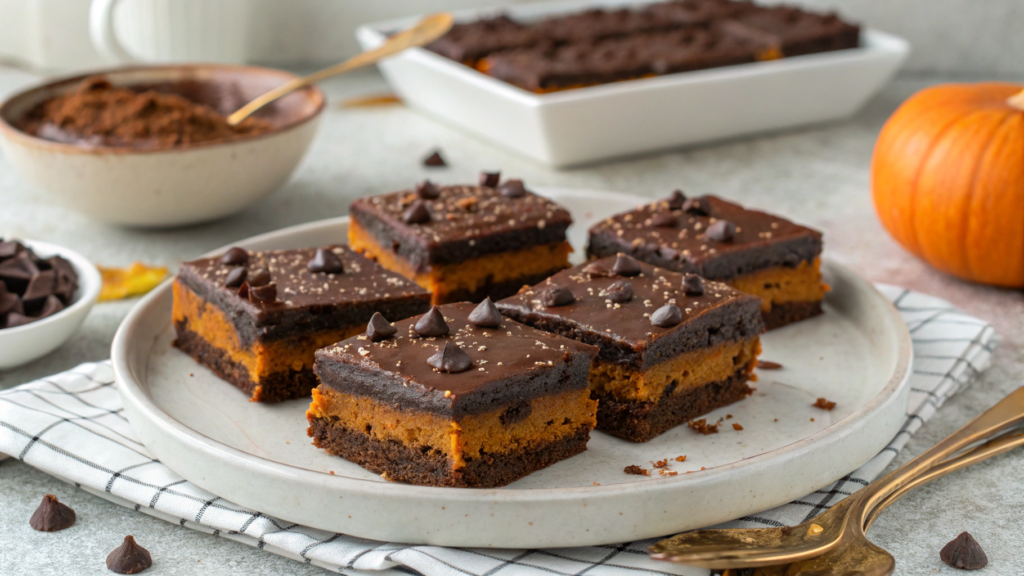
Chocolate Fudge Pumpkin Bars turn out dense, moist, with a deep chocolate flavor and warm sweetness from the pumpkin layer.
Every time Lindy sees a bowl of melted chocolate in the kitchen, she shows up literally within seconds — “I’m just looking.” And if the pumpkin layer isn’t spread yet, half the chocolate magically disappears. That’s what our fall evenings look like!
What You Need
For the chocolate base:
- 1 cup semi-sweet chocolate chips
- ½ cup butter
- ½ cup sugar
- 2 large eggs
- 1 teaspoon vanilla extract
- ⅔ cup all-purpose flour
- ¼ cup cocoa powder
- A pinch of salt
For the pumpkin layer:
- 1 cup pumpkin puree
- ¼ cup sugar
- 1 large egg
- 1 teaspoon pumpkin pie spice
- ½ teaspoon cinnamon
How to Make It
- Preheat the oven. 350°F (175°C). Prepare an 8×8-inch square pan and line it with parchment.
- Make the chocolate base. Melt the chocolate chips and butter.
Stir until smooth and let it cool slightly. - Add the sugar, eggs, and vanilla. Mix everything in one at a time, slowly.
The mixture should become glossy and thick. - Fold in the dry ingredients.
Add the flour, cocoa, and salt gently.
The base will be dense, almost like thick brownie batter. - Make the pumpkin layer. In a separate bowl, mix the pumpkin puree, sugar, egg, spices, and cinnamon.
This layer will be more fluid — that’s exactly right. - Assemble the dessert. Spread the chocolate base in the pan.
Gently spoon the pumpkin mixture on top.
Sometimes I run a knife through in wavy lines to make a light marbled pattern — it looks pretty on a holiday. - Bake. 30–35 minutes. The center should be firm but not overbaked.
If it jiggles slightly — that’s fine, it will set as it cools. - Cool completely. First in the pan, then transfer to a board and cut into squares.
Warm, they crumble, so patience is best here (though we sometimes still sneak a corner).
We like serving them on a large dark plate or wooden board — the contrast helps highlight the bright pumpkin color.
Sometimes I sprinkle a tiny pinch of cocoa on top.
With coffee? Perfect.
With hot cider? Also great.
With kids at the table? You’ll need a double batch.
Tip From Experience
- Keeps in the fridge for 3–4 days and becomes even denser and richer.
- If you want a stronger chocolate flavor, add 1 more tablespoon of cocoa.
- Freezing works too — they thaw evenly, no surprises.
7. Marshmallow Turkey Pops

Marshmallow Turkey Pops are quick, funny, tasty, and always make people smile, even those who say they “don’t like sweets.”
I made them for the “kids’ table” on Thanksgiving. I had this naive idea that only the kids would eat them. Ten minutes later I saw two adults standing by the kitchen counter arguing about whose turkey looked “more expressive.”
What You Need
- Large marshmallows
- Candy melts or chocolate melts (about 1 cup / 170 g)
- Lollipop sticks
- Candy eyes
- Candy corn (for beaks)
- Mini pretzels (they make the funniest tails)
- A little vegetable oil for the chocolate if needed
How to Make It
- Prepare the marshmallows. Stick each marshmallow onto a lollipop stick. Try to insert the stick straight — it makes coating them in chocolate easier.
- Melt the chocolate. Heat the candy melts until smooth and pourable.
If the mixture is thick, add a drop of oil. - Coat the marshmallows. Dip each marshmallow fully into the chocolate, gently twist the stick so the excess drips off.
- Let the chocolate set slightly. Just about a minute. It should still be sticky for the decorations, but not hot.
- Decorate — the most fun part. While the chocolate is soft, attach the candy eyes, make a small beak from a piece of candy corn, and stick mini pretzels in the back as the tail.
Sometimes the tail turns out crooked and goofy — but that just adds charm. - Let them cool. Place the pops on parchment and let them sit for 10–15 minutes until everything sets.
We like arranging them in a tall glass like a bouquet. Sometimes on a wooden board when we want a more “homemade” look.
A Few Tips
- If you’re making a big batch, split the process into two waves: dip all the marshmallows first, then do the decorating.
- Kids love participating — just put a bowl of eyes and a bowl of pretzels next to them, and they’ll do half the work for you.
- Store them in the fridge, especially if your house is warm — the tails stay in place better this way.
8. S’mores Thanksgiving Brownies
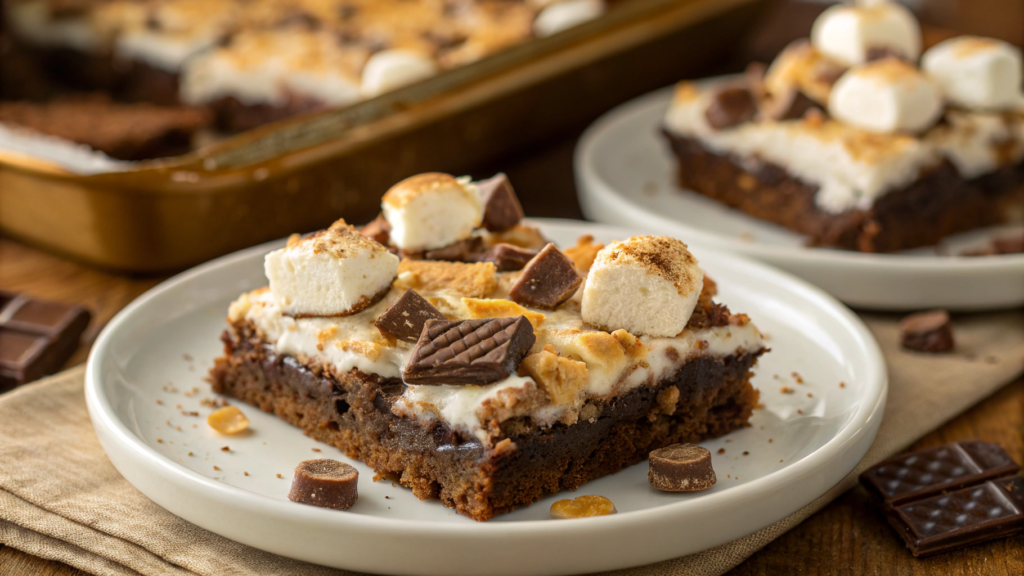
S’mores Thanksgiving Brownies always give us a bit of nostalgia: the smell of the forest, the sound of rain on the roof, a blanket, and that classic mix of chocolate, marshmallows, and a crisp top layer.
This dessert is one of our November favorites.
What You Need
For the brownie base:
- ½ cup butter
- 1 cup sugar
- 2 large eggs
- 1 teaspoon vanilla extract
- ⅓ cup cocoa powder
- ½ cup all-purpose flour
- ¼ teaspoon salt
- ¼ teaspoon baking powder
For the s’mores layer:
- 1 ½ cups mini marshmallows
- 1 cup crushed graham crackers
- ½ cup chocolate chips
How to Make It
- Preheat the oven. 350°F (175°C). Prepare an 8×8-inch square pan and line it with parchment.
- Make the base. Melt the butter, add the sugar, and mix.
Add the eggs and vanilla. The mixture becomes smooth and glossy. - Add the dry ingredients. Cocoa, flour, salt, baking powder — all in one bowl.
Mix until combined. Don’t overbeat. - Transfer the batter to the pan. Smooth the surface — this helps the top layer sit evenly.
- Add the s’mores topping. Sprinkle marshmallows, graham cracker crumbs, and chocolate chips on top.
Sometimes I press the marshmallows slightly into the batter so they don’t burn too much. - Bake. 25–28 minutes. The top should be golden, and the marshmallows should be lightly toasted.
- Cool. Try to wait at least 20 minutes before cutting.
Though honestly, we usually have someone catching a melted marshmallow right by the windowsill.
I love serving these brownies warm — not hot, just warm. That way the marshmallows stay soft and stretchy, and the chocolate inside stays slightly moist.
A simple serving style works great:
— a large wooden board
— a wide-blade knife
— and a small pinch of graham cracker crumbs sprinkled on top before serving
A Few Tips
- If the marshmallows darken too fast — cover the pan with foil.
- Store them in a container at room temperature — the top stays soft this way.
- A double batch in a 9×13 pan disappears faster than you think.
9. Apple Butter Biscuit Bake
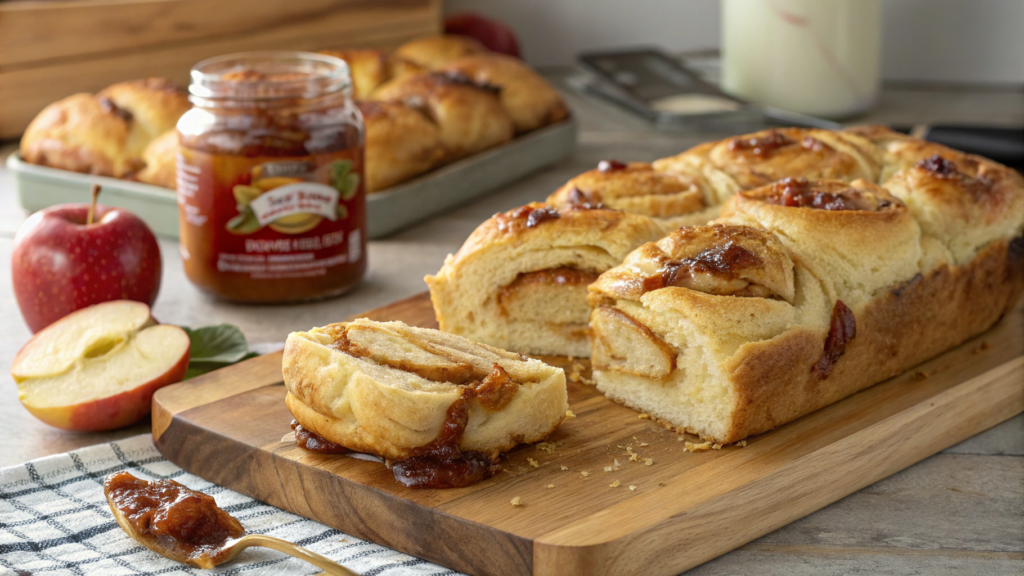
Apple Butter Biscuit Bake is something between a pie, pull-apart bread, and a morning bake.
A jar of apple butter left by a neighbor, a pack of store-bought dough… and about forty minutes later the house smells like we’d baked something fragrant for the last two hours.
What You Need
- 1 can refrigerated biscuit dough (about 340–400 g)
- 1 cup apple butter
- 2 tablespoons melted butter
- 1 teaspoon cinnamon
- 2 tablespoons brown sugar
- A little flour — just to dust the board
- Optional: a handful of pecans, vanilla glaze, a few apple cubes
I tear the dough apart gently with a small flat spatula — I use the OXO Good Grips Silicone Spatula on Amazon, it’s convenient, soft, and doesn’t tear the dough too sharply.
How to Make It
- Preheat the oven. 350°F (175°C). Prepare a small baking dish — round or square, doesn’t matter.
- Prepare the dough. Place the biscuit dough on a floured surface.
Divide each biscuit into 4 pieces.
You can just tear them by hand — it’s faster and more fun. - Mix the filling. In a bowl, combine the apple butter, cinnamon, brown sugar, and melted butter.
The mixture becomes thick and fragrant — that classic November aroma. - Coat the dough pieces with the mixture. Add the dough pieces to the bowl with the apple butter and gently mix until every piece is coated.
Yes, it will be sticky. But it’s worth it. - Transfer everything to the baking dish. Spread the pieces evenly.
If you want to add nuts — this is the moment. - Bake. 30–35 minutes, until the top is golden and the apple mixture starts bubbling slightly at the edges.
- Let it cool for a couple of minutes. Not long — just enough not to burn yourself.
It’s especially good warm.
We like placing it right in the baking dish onto a wooden board.
The dough separates easily with a fork — it’s not even “cutting,” it’s pulling apart.
Sometimes I make a quick glaze:
— a little powdered sugar
— a splash of milk
— a pinch of vanilla
Drizzle a few thin lines on top — and done.
This dessert works in the morning, evening, after garden work, with coffee, with tea… even with hot cider. It’s one of those recipes that look simple but taste incredibly comforting and delicious.
A Few Tips
- If you want a denser texture — add small cubes of fresh apple.
- If you want more sweetness — mix in a bit more brown sugar.
- You can store it in a container for 1–2 days, but we almost never get to that point.
10. Cranberry Mousse Parfaits
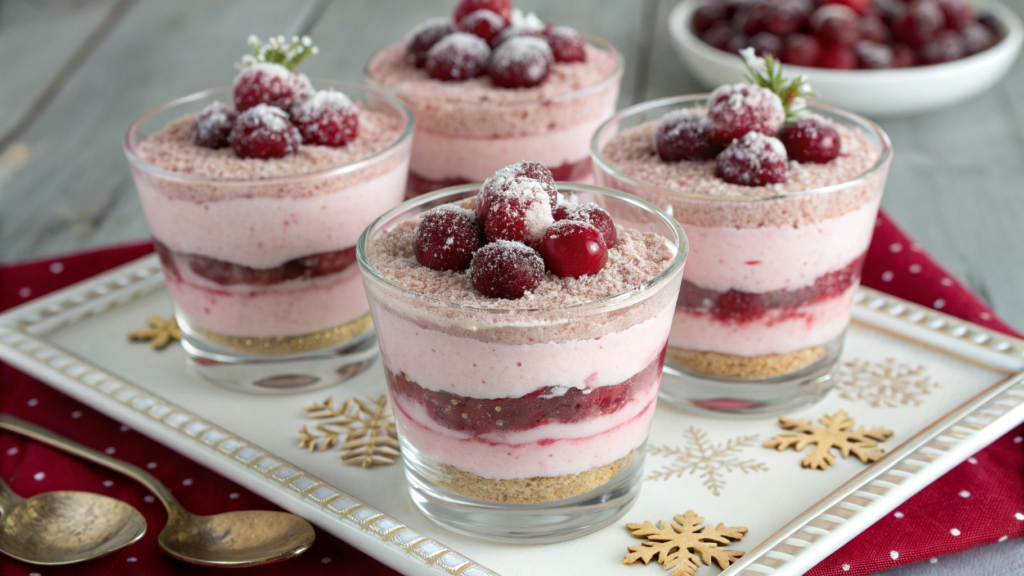
Cranberry Mousse Parfaits are light, delicate, pleasantly tart, and look quite pretty. They go perfectly after a heavy holiday meal.
What You Need
The cranberry base:
- 1 cup cranberry sauce (homemade or canned)
- 1 tablespoon orange zest
- 1 tablespoon sugar — optional
The mousse:
- 1 cup heavy whipping cream
- 2 tablespoons powdered sugar
- 4 oz cream cheese (softened)
- 1 teaspoon vanilla extract
For assembling:
- Granola, cookies, or crushed gingersnaps
- A few fresh cranberries for garnish
How to Make It
- Mix the cranberry base. Combine the cranberry sauce, zest, and sugar.
If you want a “brighter” tang — add a bit more zest. - Whip the cream. Combine the heavy cream and powdered sugar.
Whip to soft peaks — don’t overdo it, or you’ll get butter. - Make the mousse base. Beat the softened cream cheese with the vanilla until smooth.
- Combine the cream with the cream cheese. Gently. Fold from top to bottom, not with a mixer.
The mousse should be delicate and airy. - Prepare the glasses. Clear cups, glasses, or mini jars work — anything that shows the layers.
- Assemble the dessert.
— a spoonful of mousse
— a spoonful of cranberry mixture
— a bit of granola
— mousse again
— finish with a drop of cranberry sauce and a few fresh berries - Chill. 20–30 minutes in the fridge — the mousse will become firmer and richer.
We like serving them in small glass cups — they almost “light up” the bright cranberry layer.
Sometimes I add crushed gingersnaps on top — they give a very pleasant crunch, especially if the main menu is heavy.
And yes, they’re easy to hold when guests start wandering around the house. This is one of those desserts people carry to the couch, to the fireplace, to the porch under a blanket — and no one complains.
A Few Tips
- If you want a denser mousse, add 2 more oz of cream cheese.
- If you want a lighter one — reduce the cream cheese by half.
- You can make them 4–5 hours ahead — the mousse holds its shape beautifully.
- If you use homemade cranberry sauce, increase the sugar just a bit so it’s not too tart.
Autumn Ritual
Every time I write collections like this, I think about how much this simple November bustle brings us closer together.
You stand in the kitchen, open a pack of cookies, melt chocolate, whip cream. All of it feels like a small ritual — quiet, informal, warm.
Which of these recipes will become “the one” for you? Write in the comments which dessert you’ll try first.
And if you have your own November recipe that once saved your Thanksgiving — I’d love to read it.