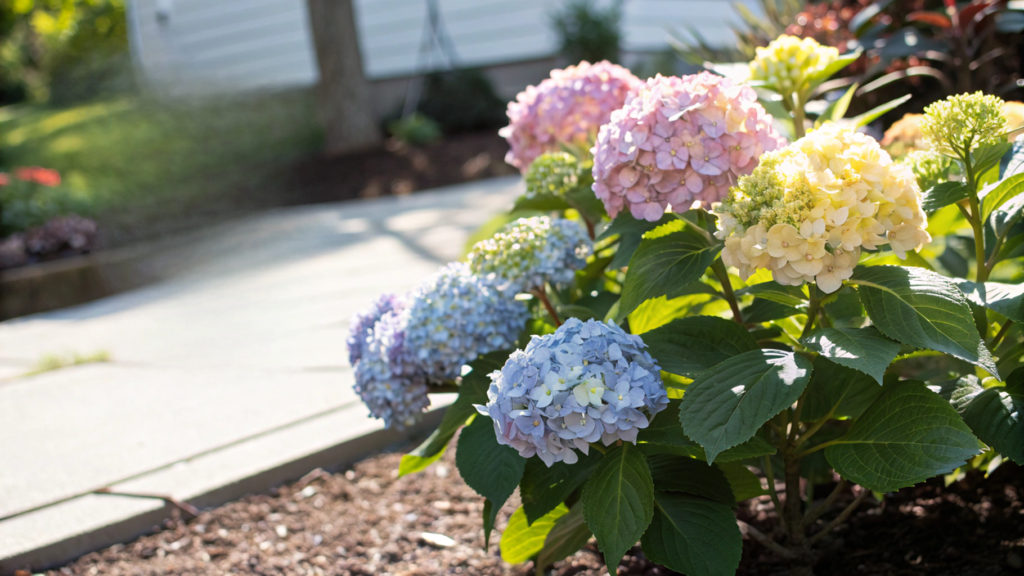
There are plants you’re drawn to instinctively. You’re walking past someone else’s house, see a huge cap of white-blue blooms — and you stop.
Hydrangeas know how to do that. They don’t just decorate, they pull you in.
I remember one June when Lindy and I were walking back from the farmers market, and in one yard right by the road there were three Limelight bushes — tall, full, beautiful… And I thought: I wish we had that too.
Many seasons, mistakes, and transplants have passed since then. And now I know for sure: for hydrangeas to truly make you happy, it’s not enough to just “plant and water” them. You need to understand what they like. And where they feel at home.
Here are 10 real, hard-earned, and very necessary tips for planting hydrangeas — especially if you want them to look great near your house or in containers.
This is everything I wish I had known much earlier.
1. Choosing the Right Hydrangea Variety
I used to think all hydrangeas were “more or less the same.” You know — fluffy pink-blue heads and that’s it. But once I planted an Annabelle tree hydrangea in full sun, it almost instantly turned into a sad, droopy bush. That’s when the real deep dive into varieties, needs, and nuances began.
In reality, choosing the right variety is half the success. And yes, different hydrangeas behave very differently. So before heading to the nursery (or ordering online), clearly decide what you want from the plant and where it will grow.
1. Hydrangea macrophylla — Bigleaf hydrangea
Best for containers, front yards with partial shade, protected spots near the house
USDA zones: 5–9 (but in zone 5 it may freeze back)
This type is a real diva among hydrangeas. Beautiful, but with a personality. Flowers can be deep blue, bright pink, or purple — all depending on soil pH. In acidic soil (pH 5.2–5.5) they turn blue; in neutral or alkaline soil, pink.
The key thing: it blooms on last year’s growth. Which means one wrong pruning and there will be no flowers. I’ve been there.
In Idaho, our first season we did everything “by the book” — except one thing: we accidentally cut old shoots in fall. In spring the bush grew lush and green… but didn’t bloom once.
Since then, I let them overwinter as they are and shape them only after flowering, in late summer.
Summary:
- Sensitive to pruning timing
Vulnerable to frost (zones 5–6 need protection) - Perfect for terrace pots, especially Endless Summer and BloomStruck — they bloom on new growth too
2. Hydrangea arborescens — Tree hydrangea
Best for in-ground planting, partial shade, large flower beds
USDA zones: 3–9 (very cold-hardy)
This is the famous Annabelle, loved for its huge white flower balls — up to 12 inches (30 cm) across. And they’re heavy. After rain, they’re like wet pillows. Without support, they can literally flop to the ground. I even had a season where I had to tie every bush to a net.
Tip. If you love this look but want sturdier flowers, try Incrediball. It has stronger stems and holds its shape better.
Why they’re great:
- Bloom on new growth — pruning is safe
- Tolerate sun (though partial shade gives better blooms)
- Not afraid of frost
- Grow vigorously — easy to divide and replant
In my Idaho garden, Annabelle grows along the east wall of the house — morning sun, afternoon shade. Every July it’s a white firework. Even the bees go wild.
3. Hydrangea paniculata — Panicle hydrangea
Best for sunny areas, borders, hedges
USDA zones: 3–8
If you don’t want to overthink things and need a variety that blooms every single year — go panicle. Their cone-shaped blooms handle sun beautifully.
My favorite is Limelight — flowers start lime green, turn white, and by fall become pink-green. Blooming runs from late June through October. In the Pacific Northwest, it’s often the last one heading into winter — already beige and dried.
Tip. If space is limited, look at Little Lime or Bobo — up to 3 feet tall (90 cm), compact, and perfect for front yards or containers.
They’re also easy because they:
- Bloom on new growth — prune freely
- Handle full sun
- Can be shaped as a bush or small tree
Yes, they grow in containers too — especially Bobo. Just choose a pot at least 18 inches (45 cm) wide and 16 inches (40 cm) deep, with good drainage.
4. Hydrangea quercifolia — Oakleaf hydrangea
Best for partial shade, woodland gardens, backyards
USDA zones: 5–9
This one is truly underrated. Oakleaf hydrangea feels like a forest nymph. Large, textured leaves turn crimson, bronze, and orange in fall.
It blooms earlier than others — from May to July — with elongated white flowers that later blush pink.
Important to know:
- Prefers partial shade, especially in the South
- Needs space and airflow
- Dislikes transplanting and takes time to settle — but then becomes a garden queen
- Perfect for naturalistic landscapes
Our Snow Queen grows at the edge of the woods, where it gets soft morning light and then shade. In fall, we almost take family photos with it — the foliage is that beautiful.
Front Yard
For front yards with midday sun, paniculata varieties like Limelight or Little Lime work best. They keep their shape, prune easily, and don’t wilt in heat. If the spot has light shade, try macrophylla varieties with bold color.
What About Pots?
The best choices are compact varieties:
- Bobo (up to 3 feet / ~90 cm)
- Endless Summer (a bit taller, but easy to shape)
Always choose a roomy container — at least 16 inches (40 cm) wide — with good drainage.
Still Not Sure Which Variety to Choose? Ask Yourself:
- How much sun does the spot get?
- Do I want to change flower color (play with pH)?
- Am I ready for seasonal pruning?
- Do I need a compact shape?
And yes — don’t be afraid to mix varieties. Compact potted Bobo in front, large Annabelle behind. Works every time — tested in my Idaho garden.
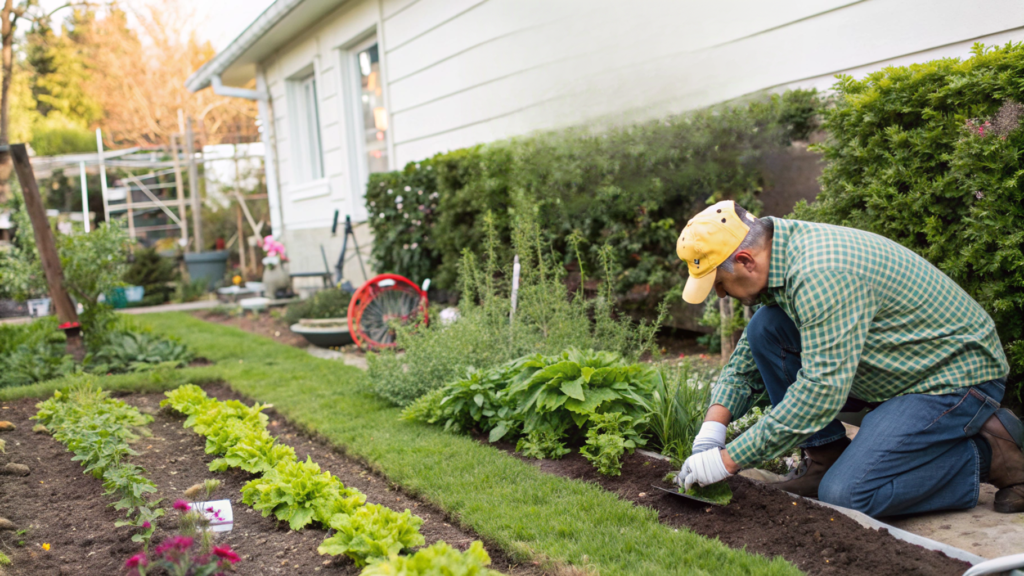
2. Soil Preparation for Healthier Blooms
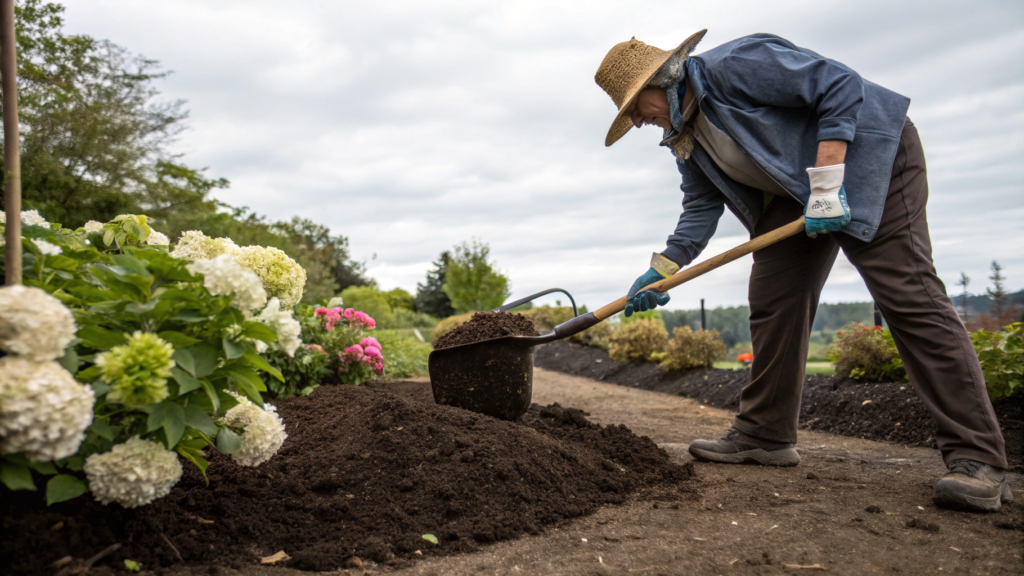
With hydrangeas, the approach of “dig a hole, plant it, water it, and let it grow” doesn’t work. These beauties are quite sensitive to what’s happening under their roots.
Here’s how I prepare planting spots (both garden beds and containers) so hydrangeas don’t just survive, but bloom abundantly and consistently every season.
1. Loose, moisture-retaining soil is a must
Hydrangeas love water, but they hate “wet feet.” That’s why the soil needs to be:
- well-draining,
- rich in organic matter,
- soft and not compacted.
In the PNW we have heavy clay soil, so I always add compost (2 buckets per bush), coco coir, and a bit of coarse sand. And by the way, I stopped using peat pellets long ago and switched to a proven store-bought mix — FoxFarm Ocean Forest Potting Soil. It provides the right structure and already contains a small amount of nutrients.
2. Soil pH affects flower color — but only for certain varieties
This applies to Hydrangea macrophylla.
Want blue flowers? pH should be around 5.2–5.5
Prefer pink? Keep it closer to 6.5
In my experience, the color starts shifting noticeably with a difference of just 0.3–0.4 on the pH scale. One season I slightly overdid it with wood ash — and instead of a sky-blue bush, I got bright fuchsia. A lesson learned.
3. Don’t plant too deep
The root crown (where the stem meets the roots) should be level with the soil, not below it.
I plant — backfill with soil — gently press with my hands — and that’s it. If you compact the soil too much or bury the plant deeply, the roots will start suffering from lack of oxygen.
4. Mulch is a gardener’s best friend
Mulching isn’t just about looks. It:
- retains moisture,
- stabilizes soil temperature,
- protects against weeds.
I use shredded pine bark — it breaks down slowly, and hydrangeas feel great in it. Especially the ones growing in partial shade — mulch helps them avoid overheating in summer.
5. Drainage is critical — especially near the house or in containers
If you have dense soil or hydrangeas growing near structures where water collects, drainage is essential. I once lost a bush exactly because of standing water in the planting hole after heavy rain.
Now, when planting near the house, I always add gravel at the bottom and raise the bed by 6 inches (15 cm). For containers — only pots with drainage holes, no exceptions.
A Small Conclusion From Big Experience
Take care of the soil once — and for the next five years you’ll simply enjoy your hydrangeas. I guarantee it: if the soil is alive, breathable, and balanced in pH, hydrangeas will reward you generously.
3. Planting Hydrangeas in Pots
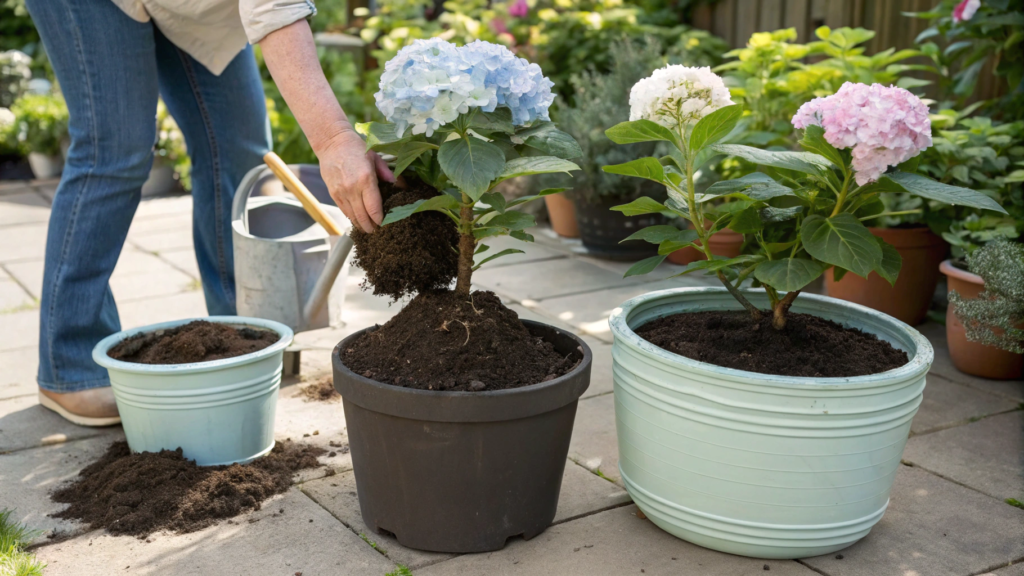
Planting in a container sounds simple. But growing hydrangeas in pots successfully is already an art. Or at least a clear sequence where everything matters: pot size, soil mix, planting depth, and even where the pot is placed.
So let’s go step by step.
1. Choosing the Right Pot
Yes, it sounds obvious, but it’s critical. A hydrangea is not a petunia and not a succulent. It has a large root system, and if it feels cramped, growth stops, and within a year the plant starts declining.
The minimum size is 5 gallons (about 18 liters), but 7–10 gallons is much better.
Pot material also matters:
- Ceramic — beautiful, but heavy and can crack in winter
- Plastic or composite — lightweight and doesn’t overheat as much, especially in light colors
- Metal — looks great, but heats up in the sun — and heat is an enemy to roots
We have a couple of favorite 10-gallon plastic pots that look like concrete but are light as a feather. They haven’t cracked in winter or summer. I once dropped one by accident — not even a chip.
And don’t forget drainage holes — without them, hydrangeas in pots will suffer. To keep soil from washing out, we place landscape fabric or a pottery shard at the bottom.
2. Soil Mix — No “Garden Soil” from the Yard
Garden soil is too heavy and compacts easily. In a container, that’s fatal. Instead, you need a light, moisture-retentive, but breathable soil mix. This is what we use:
- 2 parts quality all-purpose potting soil
- 1 part coco coir or peat moss
- 1 part perlite or coarse sand
- Extra: a handful of bone meal and a bit of compost
This mix holds moisture, doesn’t bake solid when dry, and doesn’t turn into sticky sludge after rain.
When repotting an older hydrangea, I always add fresh compost and mix it into the existing soil. Roots need food.
3. Planting Depth — This Is Where Most Mistakes Happen
It’s very important not to plant deeper than the hydrangea grew in its previous container. The root crown — where the stem branches at soil level — should sit flush with the surface.
Once I rushed and buried a plant too deep, thinking it would “rise over time.” It didn’t. The base started rotting, leaves wilted, and flowering never came. I had to replant everything.
Tip. After planting, gently firm the soil around the roots, but don’t pack it down. I always water thoroughly, and if the soil settles, I just add a little more on top.
4. Placement: Where to Put the Pot
This is a common pain point. People place hydrangeas on the south side in full blazing sun and then wonder why leaves droop by noon.
Best locations:
- east side of the house,
- under a canopy or tree with filtered light,
- morning sun until about 11, then shade.
We once had an Endless Summer macrophylla on the south side. I even used a sun umbrella during heat waves. Eventually we moved it under an apple tree — and since then it blooms every July without sunburn.
5. Watering: More Often Than You Think
Containers dry out fast. Especially clay pots or light-colored plastic ones.
My summer routine:
- every morning — water until moisture drains out the bottom,
- during extreme heat — an extra light watering in the evening,
- finger test at 2 inches (about 5 cm) deep — if dry, it’s time to water.
Important. Don’t overwater! Water should never sit stagnant. If leaves are wilted but the soil is wet, that’s a sign of oxygen deprivation at the roots, not drought.
6. Mulch in Containers
This is a surprisingly powerful trick. We always mulch the top layer in pots with pine bark, coco chips, or sometimes just compost.
Why it works:
- soil stays moist longer,
- no dry crust forms on the surface,
- roots don’t overheat in the sun.
Visually, mulch also makes even a basic plastic pot look like a real garden feature.
7. Fertilizing
A potted hydrangea uses up nutrients quickly. Without feeding, it looks weak, leaves fade, and blooms shrink. But overfeeding is just as harmful.
Our feeding schedule:
- Spring — slow-release granular fertilizer (10-10-10)
- June to August — liquid bloom fertilizer every 2 weeks (for example, 15-30-15)
- September — stop all feeding — let the plant rest
If a hydrangea produces lots of leaves but no flowers, it often means too much nitrogen.
8. Wintering: USDA Zone Matters
If you live in USDA zone 7 or warmer, hydrangeas can usually overwinter outdoors in pots.
But in zones 5–6 (like Idaho, where Lindy and I lived), pots can’t stay outside. The soil freezes solid, and roots die.
What we do:
- move pots into an unheated garage, shed, or basement — no frost, no heat,
- or remove the plant and temporarily plant it in the ground for winter, under mulch and frost cloth.
Some people wrap pots in burlap and place them in a sheltered corner. This only works in mild winters.
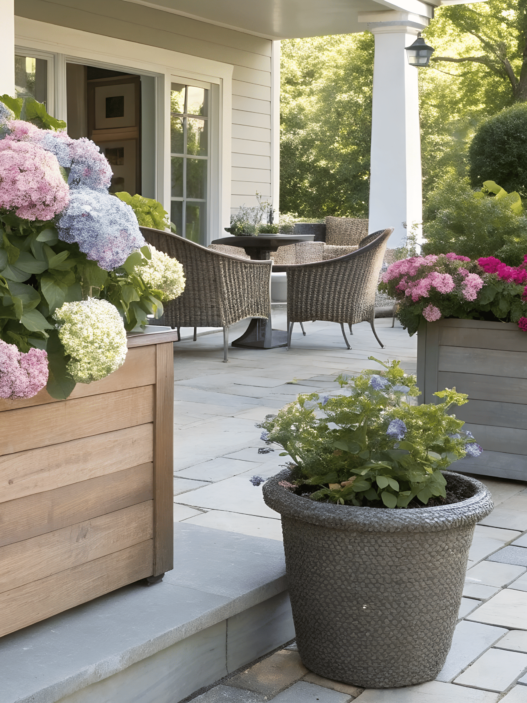
Planting a hydrangea in a container is easy. Growing it lush, healthy, and long-term takes attention, but it’s absolutely doable. And when they stand on both sides of the porch, blooming with flower heads the size of melons — that feeling is hard to compare to anything else.
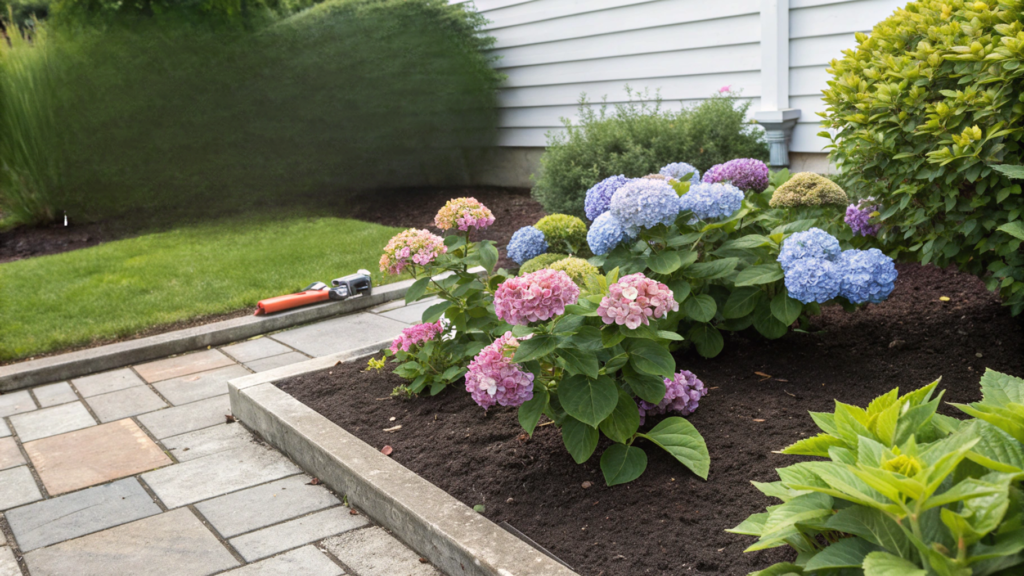
4. Best Locations for Planting near the House
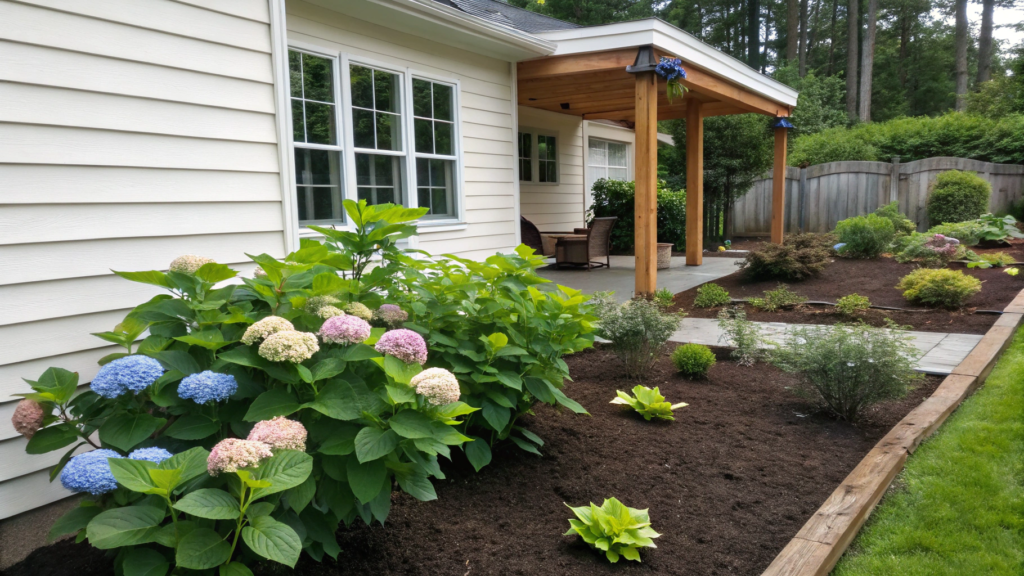
Planting a hydrangea near the house sounds like a great idea. But — and I’m saying this from experience — not every spot by a wall or under a window works for hydrangeas. Shade, wind, sun exposure, and even where your downspouts are placed all matter here.
1. East-facing side — almost always the best choice
On the east side, the sun is gentle, especially in the morning. That’s exactly the kind of light hydrangeas love most. By midday, the area shifts into shade or partial shade, so plants don’t overheat. This is especially important for macrophylla and quercifolia, which have large leaves and blooms that tend to droop in strong sun.
We have two Endless Summer hydrangeas planted along the east wall of the house, between the porch and a downspout. Morning light is perfect, and shade after noon protects them from heat. They bloom consistently from June through August.
2. South-facing side — with conditions
Many people want to plant hydrangeas under windows on the south side. The logic is clear: it looks nice, there’s lots of sun, and growth should be fast. But there are two major issues:
- Too much heat — leaves start wilting by late morning
- Color fading — especially blue and pink varieties lose color quickly
If you really want to plant there, choose Hydrangea paniculata varieties like Limelight or Bobo. They handle sun better. Even then, we place them slightly off to the side — under a balcony or where they get afternoon shade.
3. West-facing side — tricky territory
This is a deceptively difficult spot. In the morning, it’s shaded, but after 2–3 pm it gets intense afternoon sun until sunset. In summer, that sun is far harsher than morning light. Add dry air and wind, and hydrangeas struggle.
What can work here:
- Panicle hydrangeas,
- Tree hydrangeas, if there’s some shade from a tree or nearby structure.
4. North-facing side — good, but sometimes too dark
This can be a great option in hot climates or areas where hydrangeas regularly suffer from heat. The risk is insufficient light, which leads to weak flowering. We grow an oakleaf hydrangea (Hydrangea quercifolia) on the north side, and it does well there: leaves don’t scorch, and the soil stays slightly moist. But I wouldn’t plant sun-loving varieties in this spot.
If your house is tall and the shade is dense, consider other locations or add reflected light — for example, from a light-colored path or fence.
5. Downspouts, roofs, puddles — a hidden danger
One of the biggest mistakes is planting a hydrangea directly under a downspout or where roof runoff drips constantly. Why?
- after every rain — waterlogged roots,
- flowers and leaves get damaged by constant dripping,
- winter runoff can cause roots to freeze and die.
Solution. Redirect the downspout or plant the bush away from runoff zones. A raised bed also helps manage excess moisture and looks neat near the house.
6. Consider roof overhangs and foundation drainage
Sometimes you plant a hydrangea right against the wall — it’s protected from wind and rain, but the soil ends up bone dry. The roof blocks both water and light.
In this case:
- plant 18–24 inches (45–60 cm) away from the wall, or
- install drip irrigation.
7. Space for growth — give hydrangeas personal room
Don’t plant hydrangeas pressed tightly against walls or borders. They need air circulation and width to spread naturally. This is especially true for Annabelle, Limelight, and other vigorous varieties.
Recommended spacing:
- at least 2 feet (60 cm) from the wall,
- 3–4 feet (90–120 cm) between plants.
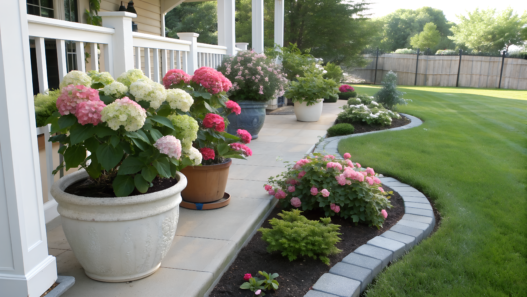
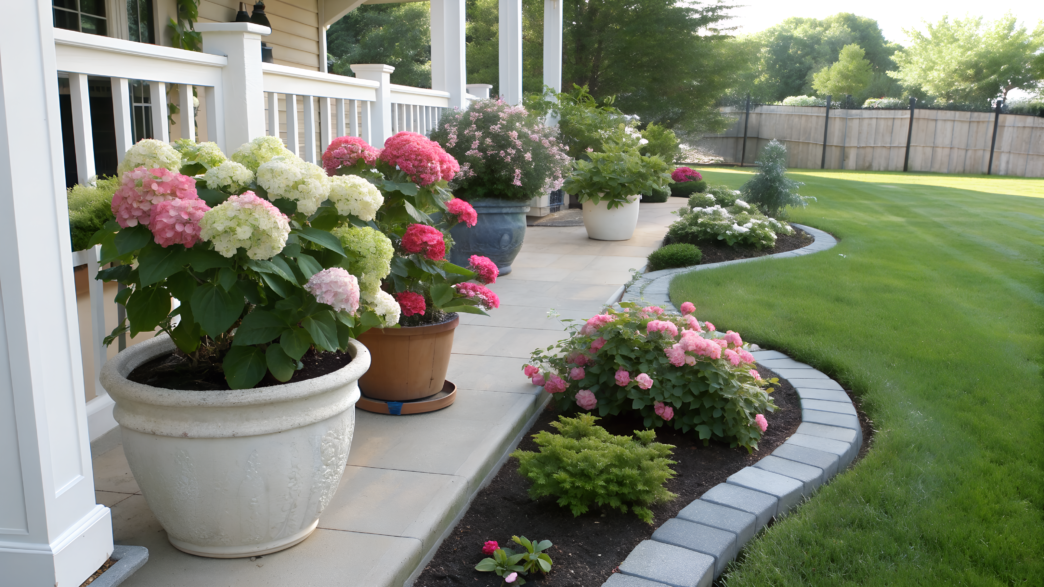
8. Background matters — visually and thermally
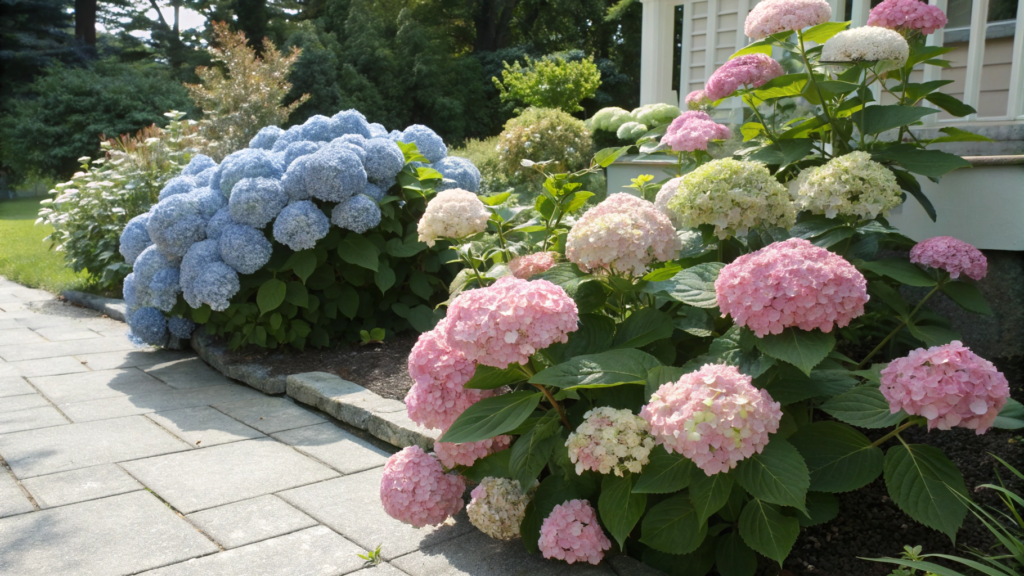
Hydrangeas look brighter against light-colored walls. Dark facades or fences absorb heat and can literally cook the plants.
Design tips:
- White siding with blue hydrangeas looks clean, fresh, and magazine-worthy.
- A dark gray facade makes Limelight blooms glow, especially in evening light.
- A wooden fence with oakleaf hydrangeas, especially ones that turn deep red and wine tones in fall, creates an instant photo spot.
But heat reflection matters too. On a south-facing wall with a light facade, even partial shade can feel too hot. In that case, step the plant 2–3 feet away from the wall.
Planting hydrangeas near the house is a balance of light, moisture, temperature, and space. Get it right from the start, and the hydrangea won’t just decorate your home — it will become the main focal point of your yard.
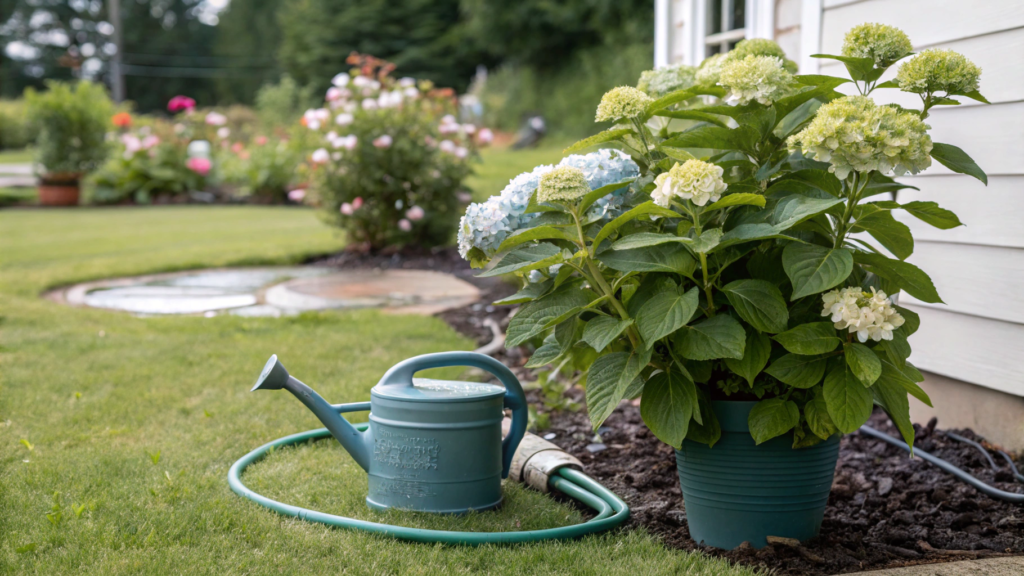
5. Watering Routines That Work
You’ve probably noticed this too: hydrangea leaves droop both in heat and in rain. And that’s not a mood swing. It’s just a plant with its own opinion about watering routines. Lindy and I learned that the hard way.
o let’s break down what proper watering actually means — from frequency to time of day, including the difference between in-ground hydrangeas and container-grown ones.
1. Morning watering — like coffee for hydrangeas
The best time to water hydrangeas is in the morning, before 10–11 am. Why?
- water has time to soak in instead of evaporating,
- the plant gets hydrated before daytime heat,
- leaves (if they get wet) dry before evening — less risk of fungal diseases.
We water at 7:30 am — coffee in one hand, hose in the other. The plants are happy, and so are we. Tested and proven.
2. Evening watering — only during extreme heat
If daytime temperatures hit 95°F (35°C) or higher, hydrangeas may wilt even after a good morning watering. In that case, we add a light evening watering, but with rules:
- only at soil level, never on leaves,
- 1–2 hours before sunset,
- small amount — just to refresh.
Watering every evening is risky: cool nights plus moisture create perfect conditions for mold and mildew.
3. Watering in-ground vs. in containers
In the ground, hydrangeas hold moisture longer, especially with good mulch.
In containers, moisture disappears fast — sometimes in half a day if the pot is in the sun.
Once we forgot to water a potted hydrangea during July heat. Two days later — dried leaves, dropped blooms. Since then, we follow a rule: containers every morning, in-ground plants every other day or as needed.
4. Mulch means less watering, less stress
If you’re not using mulch yet — you really should. A thick layer (2–3 inches / 5–7 cm):
- reduces evaporation,
- keeps roots cool,
- lets you water less often.
We use shredded pine bark or wood chips. They’re practical and look clean around bushes near the house.
5. How much water does a hydrangea need? Don’t guess — check
General guidelines:
- in-ground — about 1 inch (2.5 cm) of water per week,
- containers — more often, as soil dries out.
What we do:
- stick a finger or moisture meter into the soil,
- if it’s dry 2–3 inches deep, it’s time to water,
- if it’s still moist — wait.
Sometimes the surface looks dry, but deeper soil is fine. Automatic watering without checking is a fast way to root rot.
6. Drip irrigation — the best upgrade we made last year
Hydrangeas love frequent, moderate watering, not occasional soaking. That’s why drip irrigation systems are perfect.
We run a hose with a timer — 15 minutes every morning, slow and right at the roots.
Benefits:
- no evaporation,
- no wet leaves,
- water goes deep where roots actually are.
We installed a Raindrip kit ourselves — easy setup, second season running without issues.
7. Wilted hydrangea? Don’t rush to flood it
A very common mistake: seeing droopy leaves and grabbing the hose. In heat, hydrangeas can wilt not from drought, but from moisture evaporating through leaves — it’s a natural defense.
If leaves are perky in the morning and droop by noon — that’s normal.
If they’re still wilted in the morning — then watering is truly needed.
We once nearly drowned a bush before realizing the problem wasn’t roots, but weather. One day of rest — and it bounced back on its own.
8. What NOT to do
- Water leaves in heat — they’ll burn and spot.
- Let water sit at the roots — especially in pots.
- Ignore consistency — “it rained yesterday, so no watering for a week” doesn’t work.
Hydrangeas love stability, especially in watering. Moist, not soggy soil is their comfort zone.
Learn to read the plant — and it will thank you with lush, juicy, full blooms that are visible even from the sidewalk.
6. Sunlight vs Shade: What Hydrangeas Prefer
It all depends on the variety, climate, location, and even… the color you want your blooms to be.
I’ll break it down step by step — with specifics, varieties, and real-life observations.
1. Not all hydrangeas love (or hate) the sun the same way
First — by variety. Each type has its own relationship with sunlight.
| Hydrangea variety | Sunlight preference |
| Hydrangea macrophylla (bigleaf) | Partial shade. Morning sun with afternoon shade. Leaves and flowers burn easily |
| Hydrangea paniculata (panicle) | Full sun or partial shade. Very hardy, blooms even in heat |
| Hydrangea arborescens (tree) | Partial shade or filtered light. Tolerates sun with proper watering |
| Hydrangea quercifolia (oakleaf) | Partial shade. In hot climates, prefers more shade |
Our panicle Limelight hydrangea thrives in full sun, while bigleaf Endless Summer struggled in the same conditions until we moved it to a morning-sun location.
2. Morning sun and afternoon shade
If you don’t want to overthink varieties but want things to “just work,” choose a spot where:
- sun hits from 7 am to 11 am (max noon),
- then shifts to shade or partial shade from a fence, tree, or wall.
This setup is ideal for macrophylla and oakleaf hydrangeas. It kickstarts photosynthesis without scorching leaves.
3. Full sun — possible, but only with the right varieties and conditions
If you live in a moderate climate (like the PNW, USDA 5b–6a), full sun for 6+ hours a day works well for:
- Hydrangea paniculata (Limelight, Little Lime, Bobo)
- some Hydrangea arborescens varieties (Annabelle, Incrediball)
But even these still need:
- consistent watering,
- mulch,
- wind protection.
Bark mulch and drip irrigation make a huge difference.
4. Too much shade means fewer blooms (and a leggy plant)
“Oh, let’s plant it in shade — it won’t overheat!” That’s what many beginners think.
Then they get a stretched-out bush, small flowers, or no blooms at all.
Why this happens:
- without enough light, buds don’t form,
- the plant focuses on leaf growth, not flowers,
- blooms that do appear are weaker and collapse easily.
5. Sunlight affects… flower color
Sun exposure can influence not just plant size, but color intensity.
- In bright sun, blooms may look washed out, especially blue and pink macrophylla.
- In partial shade, colors appear deeper, richer, and last longer.
This is supported by research from North Carolina State University, showing that pigmentation in blue varieties depends on light almost as much as soil pH.
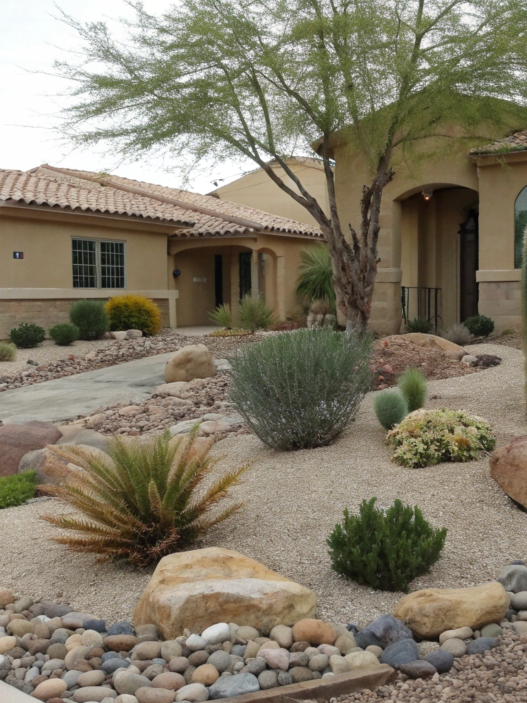
6. Heat-reflecting surfaces
You can do everything right: correct variety, partial shade, morning sun… And then plant the bush next to a white wall or stone pathway.
Result: brown leaves, limp flowers. Why?
Because reflected heat can amplify sun exposure by 1.5–2 times.
What helps:
- installing a shade screen,
- planting farther from the wall,
- using mulch and irrigation as buffers.
7. Wind plus sun — a brutal combo
If your yard is open, especially on the southwest side, wind combined with sun pulls moisture out of leaves fast. Even with moist soil, the plant looks dehydrated.
Lindy once placed a potted hydrangea on the exposed side of the porch — it looked great visually. Two days later, sun and wind flattened it. We moved it to a sheltered corner — and it bounced back.
8. How to tell if your hydrangea gets too much sun
Warning signs:
- brown leaf edges,
- blooms fading too quickly,
- flowers wilting right on the bush,
- leaves drooping despite proper watering.
This is not “just the variety.” It’s a clear signal: too much heat, too much stress. The fix is softer light or added shade.
Hydrangeas are neither shade plants nor full-sun plants by default. When you factor in variety, climate, sun exposure, and surrounding materials, they stop surviving — and start blooming.
7. Fertilizer Timing and Types
With fertilizers, many people fall into the same traps: “more means better,” “I’ll feed once a month and it’ll be lush,” or “once a year and forget it.”
But in reality, timing, type, and dosage are the three pillars that determine flowering quality, plant health, and even bush shape.
1. Spring (March–April): kickstart and growth fuel
In spring, hydrangeas wake up hungry. They need energy to build green growth, roots, and new shoots. This is when fertilizer matters as much as breakfast after winter sleep.
What to use:
- Balanced fertilizer with equal nitrogen, phosphorus, and potassium — for example 10-10-10 or 14-14-14
- Slow-release granules to avoid stressing the roots
We use Osmocote Smart-Release 14-14-14 — one spring application lasts up to four months. We simply scatter it around the bush and lightly work it into the soil.
How much:
- mature bush — about 2 tablespoons
- young or potted plant — about 1 tablespoon
Important: apply fertilizer before active growth starts, once temperatures stay above 50°F (10°C).
2. Late spring–early summer (May–June): focus on blooming
This is when hydrangeas prepare to set buds. They need phosphorus, which supports flower formation.
What to use:
- Liquid or water-soluble bloom fertilizer, such as 15-30-15
- apply every 2 weeks, especially for macrophylla and arborescens, where flowering responds strongly to feeding
Important. Don’t overdo nitrogen at this stage — or you’ll get lush leaves instead of blooms.
3. Peak summer (July–August): maintaining energy and shape
When hydrangeas are already blooming, the goal isn’t to push growth, but to maintain balance. Feeding becomes gentler and more targeted.
What to use:
- liquid fertilizers with lower nitrogen, like 10-20-20 or 5-15-15
- alternate with organic feeds (compost tea, well-rotted manure extract)
Lindy loves making compost tea — we mix one part compost with five parts water, let it steep for a couple of days, then water the bushes. The plants respond immediately.
Feed in the morning, when there’s no heat, so nutrients are absorbed before midday stress.
4. Fall (September): STOP fertilizing
Knowing when to stop is crucial. From late August onward — no nitrogen, no growth stimulants. Here’s why:
- the plant needs to prepare for dormancy,
- new growth triggered by fertilizer won’t harden off and will freeze,
- the risk of fungal disease increases.
A light potassium-only feed in early September is acceptable to strengthen tissues before winter. Otherwise — mulch and rest.
5. Containers need feeding more often — but weaker
Potted hydrangeas live in a limited soil volume, and nutrients wash out quickly. So the approach changes:
- spring — slow-release granules for 3 months,
- from June — liquid feed every 2 weeks,
- half the dosage compared to in-ground plants.
6. Color-changing varieties depend on pH and micronutrients
If you grow blue or pink macrophylla hydrangeas and want to influence color:
- Blue blooms = acidic soil (pH 5.2–5.5):
→ add aluminum sulfate or pine-needle mulch once a month - Pink blooms = more alkaline soil (pH 6.0–6.5):
→ apply lime or wood ash very carefully
Research from the University of Georgia confirms that available aluminum, not just pH itself, plays the key role in flower color.
This isn’t exactly fertilizer — but it’s a critical part of seasonal feeding strategy.
7. Unfertilized hydrangeas will survive… but
Yes, the bush will live. But:
- blooms will be weaker,
- leaves may turn pale or spotted,
- the plant survives, but doesn’t truly thrive.
One season we skipped fertilizing entirely — just didn’t get around to it. Flowers were smaller, and spring recovery was noticeably slower. Lesson learned.
8. Overfertilized? There are warning signs
Possible symptoms:
- lots of leaves, very few flowers
- root damage or rot
- brown edges on leaves
- slowed growth
What to do:
- stop all feeding immediately,
- flush the soil with plenty of water,
- let the plant recover,
- sometimes — repot into fresh soil (especially for containers).
Fertilizer is like seasoning: a little enhances the flavor, too much ruins the dish. With hydrangeas, this rule works every single time.
8. Pruning Mistakes to Avoid
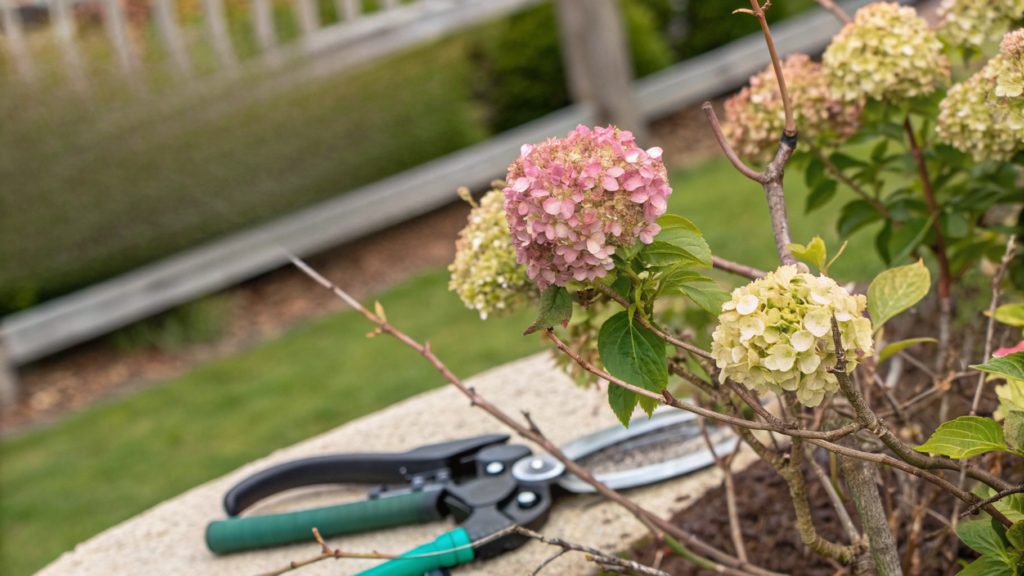
You’ve probably heard it too: “don’t prune hydrangeas,” “only prune in spring,” “cut everything to the ground.” All of this advice contradicts itself.
In our very first year, we lost all blooms on two macrophylla hydrangeas because we didn’t understand which shoots they bloom on. And that’s the key question you must answer before you even think about picking up pruners.
1. Mistake #1. Not knowing which shoots your hydrangea blooms on
This is the foundation of proper pruning. All hydrangeas fall into two categories:
| Blooms on | Varieties | When flower buds form |
| Last year’s growth | Macrophylla (Endless Summer), Quercifolia | Late summer–fall of the previous year |
| Current year’s growth | Paniculata (Limelight, Bobo), Arborescens (Annabelle) | Spring to early summer |
If you cut old wood on macrophylla in spring — you cut off the flowers. Period.
And if you don’t prune paniculata or arborescens in spring — the bush becomes weak and floppy.
2. Mistake #2. Pruning in fall — especially in cold climates
Why fall pruning is a bad idea:
- the plant is not dormant yet, sap is still moving,
- cuts act like open wounds and increase freeze damage,
- macrophylla and quercifolia already have flower buds set — and you destroy them.
Exception — removing dried flower heads, carefully cutting only the bloom itself.
Best pruning times:
- Paniculata and arborescens: early spring, before buds break
- Macrophylla and quercifolia: shaping only after flowering in summer, or light cleanup in early spring (dead wood only)
3. Mistake #3. Cutting the entire bush to the ground “just in case”
This is very common with Annabelle — people cut it completely to soil level. Yes, it will grow back. But flowers will sit on long, weak stems that collapse after rain.
The Annabelle secret: prune to 12–18 inches (30–45 cm), leaving strong bases. Blooms stay large, and the bush holds its shape.
4. Mistake #4. Not pruning at all (“let it grow naturally”)
Technically, the bush will survive. But:
- the center becomes too dense,
- less light means fewer flowers,
- disease risk increases.
5. Mistake #5. Poor pruning technique
Always cut:
- above an outward-facing bud,
- at a 45-degree angle,
- using sharp, clean tools.
Never:
- tear branches by hand,
- leave stubs,
- prune in wet weather (infection risk).
We keep a dedicated pair of pruners just for hydrangeas and never use them on other plants to avoid spreading fungal issues.
6. Mistake #6. Removing all “old” growth on macrophylla
A quick note about old wood — flower buds form on it. If you remove it every year, you’ll get a leafy bush with no blooms.
What we do:
- spring — remove only dead, clearly lifeless branches
- after flowering — cut spent stems, but no lower than 2–3 buds from the base
You can tell by the bark: woody and mature — leave it. Young and green — shorten carefully.
7. Mistake #7. Skipping sanitary pruning
If you don’t go through the bush in spring and remove dead, crossing, or inward-growing branches, you invite poor airflow, disease, and weak flowering.
We disinfect pruners with alcohol after every single bush. Non-negotiable.
8. Mistake #8: Confusing rejuvenation with regular pruning
Rejuvenation is not just “cutting everything shorter.” It means:
- once every 3–4 years,
- removing about one-third of the oldest stems at the base,
- encouraging strong new growth.
This is especially important for oakleaf and macrophylla hydrangeas. We do it in late summer, after flowering but before September.
Dried flower heads — cut or leave?
They look beautiful under snow in winter, but can interfere with buds in spring. We remove them:
- in March,
- cutting only the flower head, not the stem.
Hydrangeas respond to pruning only when it’s done intentionally, not out of habit and not based on random internet advice.
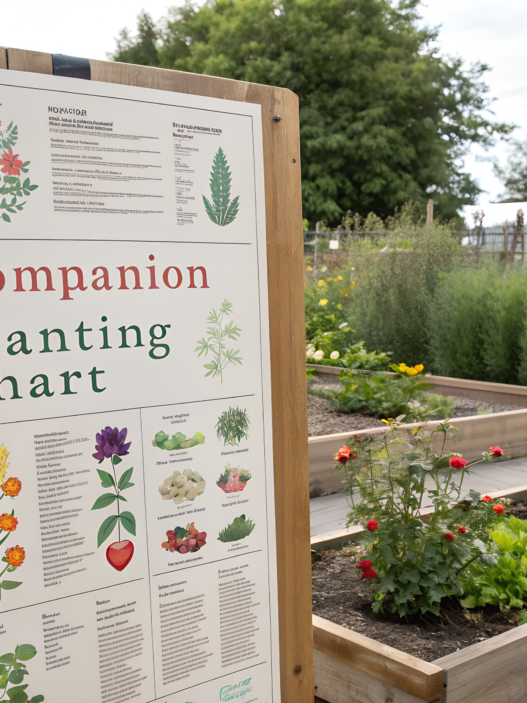
9. Companion Plants That Highlight Hydrangeas
Here are 9 great companion plants — with explanations of why they work, where to plant them, and which varieties to try.
1. Hosta
Shade, moisture, volume — a perfect backdrop for hydrangeas.
Why they work:
- Hostas love the same conditions (partial shade, moist soil)
- Their broad leaves create strong contrast with rounded hydrangea blooms
- They occupy the lower layer, so they don’t compete — they highlight the shrub
Best paired with:
- macrophylla (pink, blue)
- quercifolia (especially in fall — fiery leaves + green hostas are stunning)
Varieties to try:
- Halcyon (blue-gray)
- June (yellow-green with blue edge)
- Patriot (green with white margins)
2. Astilbe
Blooms at the same time as hydrangeas, but vertically — perfectly balanced.
Why they work:
- Thrive in shade and moisture
- Plume-like flowers add vertical movement
- Fill gaps between shrubs beautifully
Tip. Choose white, pink, or deep red varieties — they either contrast or echo hydrangea tones.
3. Ferns
Soft texture + shade equals timeless, natural beauty.
Why they work:
- Reliable in deep shade
- Delicate structure but strong visual presence
- Create a natural backdrop that makes hydrangea blooms pop
Best types:
- Matteuccia struthiopteris (ostrich fern)
- Athyrium niponicum ‘Pictum’ (Japanese painted fern)
We have Japanese painted fern growing behind a bigleaf hydrangea — a low-light corner with almost no sun. It still looks layered, calm, and alive.
4. Heuchera (Coral Bells)
Foliage color is the main advantage here.
Why they work:
- Low-growing, non-competitive
- Huge range of colors — from lime to deep plum
- Act as a visual accent beneath hydrangeas
Great combinations:
- Lime heuchera with blue or white hydrangeas
- Dark burgundy with pink or cream blooms
5. Japanese Forest Grass (Hakonechloa macra)
An elegant grass for a textural backdrop.
Why it works:
- Soft, arching leaves contrast with hydrangea structure
- Thrives in partial shade
- Non-aggressive, but very expressive
6. Bulbs — spring kickstart
While hydrangeas are just waking up (April–May), plant space beneath them with daffodils, tulips, or muscari.
They finish blooming just as hydrangeas fill out — no competition, only succession.
7. Peony
For classic gardens — a queen-meets-queen pairing. Peonies bloom earlier, but their large rounded flowers and glossy foliage complement hydrangeas later in the season.
Tips:
- Plant on the south side of the bed — peonies need more sun
- Leave space — peonies dislike root competition
8. Lavender — unexpected but powerful
A bold contrast in texture and scent. Yes, it needs more sun, but:
- Highlights white and lavender hydrangeas beautifully
- Helps repel pests
- Blooms at a different time, creating seasonal rhythm
9. Shade annuals: impatiens, begonias, coleus
For quick seasonal color under shrubs, plant:
- Begonias with pink or coral blooms
- Coleus with burgundy and lime foliage
- Impatiens, especially white or purple
What to consider when choosing companions
- Matching needs (moisture, light, soil acidity)
- Texture contrast or harmony
- Different heights (layering)
- Staggered bloom times for shifting accents
Well-chosen companions don’t compete with hydrangeas — they make them look intentional, grounded, and unforgettable.
10. Year-Round Hydrangea Care Schedule
Seasonal hydrangea care, the way Lindy and I follow it in our USDA zone 5b–6a.
When I planted my first hydrangea, I had no schedule. Later, we realized we needed a clear care rhythm that actually works for our climate and for our varieties — macrophylla, paniculata, and arborescens.
1. Spring. Еverything starts with observation
When the snow is just beginning to melt, this is not the time to rush. Hydrangeas wake up slowly in spring, and many people panic thinking the shoots are “dead.”
We wait until swollen buds are clearly visible. Only then do we start.
- First comes sanitary pruning. Anything obviously dead, dry, or winter-damaged gets removed.
We prune paniculata and arborescens quite hard — leaving 2–3 buds from the ground so they push strong shoots. Macrophylla, on the other hand, we barely touch — only dry tips and last year’s spent blooms. - After pruning, we apply a balanced NPK fertilizer (like 10-10-10), spread it on dry soil and lightly work it in. Then we mulch — usually with aged wood chips or last year’s leaves.
If spring is dry (and in Idaho it often is), we start watering already in April: light but consistent. We watch potted plants especially closely — they wake up faster and dry out faster.
2. Summer. Support, not interference
Summer for us is like a roller coaster: heat, downpours, wind. But hydrangeas love consistency. So our summer goal is not to overdo care.
In June, we continue feeding: every 2–3 weeks we apply a phosphorus-forward liquid fertilizer (15-30-15). This helps build large, full flower heads.
We water early in the morning — at the base, not on leaves. During heat waves, every other day; in cloudy weather, as needed.
For containers — daily watering. Yes, every single day. Lindy and I have even placed pots on trays with wet gravel during vacations to help retain moisture.
When blooms start fading (on paniculata and arborescens), we cut them off so the plant doesn’t waste energy. With macrophylla, we often leave them — they dry beautifully and add structure.
And one more thing: in summer we actively monitor for pests. For us, it’s usually aphids and powdery mildew. At the first sign, we use a mild soap solution and treat in the morning. Our rule is simple: no chemicals if we can avoid them.
3. Fall. Winter prep without panic
As nighttime temperatures drop in September, hydrangeas begin to slow down. The key here is not to interfere.
We stop all fertilizing in August. At most, a small potassium boost in early September to strengthen tissues.
What we do instead is mulch the base of the shrubs with compost or fallen leaves. Not bark — it ties up nitrogen. We want something that provides warmth now and nutrition by spring.
We lightly mound macrophylla as insurance against harsh winters — usually just leaves and compost held in place with wire mesh.
Do no pruning in fall. Our rule is simple: in autumn, we observe.
There was a year I trimmed arborescens in October out of habit. A hard freeze followed, and black damage appeared along the cuts. We don’t risk it anymore.
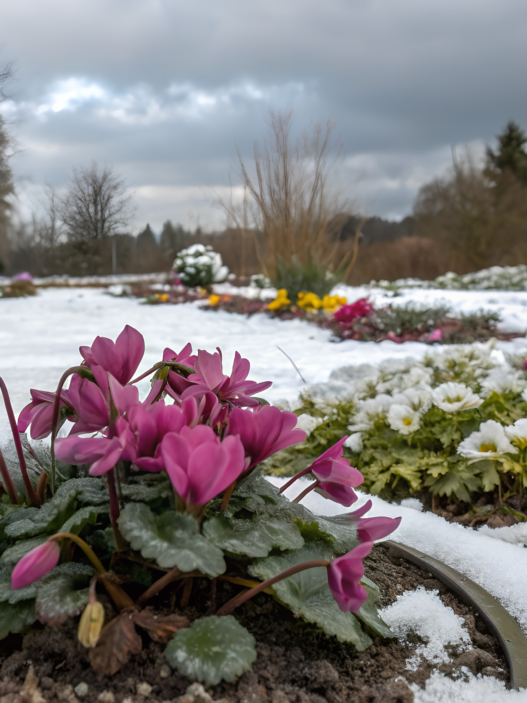
4. Winter. Rest and protection (sometimes)
If winter is snowy — perfect. Snow is the best natural insulation.
If winter is dry and windy, especially in exposed areas, we add protection.
One year, Lindy and I built a simple wind barrier from burlap and stakes — more against wind than cold.
Container hydrangeas get moved under cover or into a cold shed. The key is keeping temperatures above 20°F (–6°C). And yes — about once every three weeks, we lightly water so roots don’t dry out.
The rest of the time, we just enjoy dried blooms under snow. Oakleaf hydrangeas, especially, look like sugar-dusted sculptures in winter.
What helps us stay consistent
We’ve tried paper calendars and phone notes. What works best is a simple Google Calendar system with repeating reminders like:
- “Fertilize hydrangeas — season start”
- “Remove dried blooms — before buds swell”
- “Check mulch — before frost”
It gives us peace of mind that we’re not missing small things. And judging by the blooms, the hydrangeas appreciate it too.
Don’t try to do everything at once. Start with one bush. Watch how it responds. Then add care when it feels right.
Lindy and I learned this slowly — and we still don’t always do things “by the book.” But now we understand the plants. And hydrangeas respond to that.
Your experience
If I had this article when I planted my first hydrangea, I would’ve avoided at least three seasons of disappointment. And six transplants.
But maybe all of that was necessary. It’s our experience.
Now you have everything you need to create not just a flower bed, but a space that will bring joy for years.
So — gloves on, compost ready, pruners in hand. Don’t wait for the perfect moment. It’s already here.And if you want, write in the comments or by email which varieties you’ve tried and where you grow them.
Lindy and I love reading those messages — because every garden is, in the end, someone’s story.