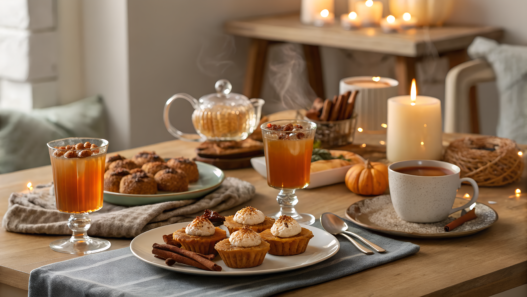

Fall in our home starts with the first warm cider, with the smell of cinnamon, with pumpkin sizzling in the pan. Lindy and I stopped buying “seasonal” drinks a long time ago — too sweet, too identical. Instead, we built our own collection: 10 drinks that actually work.
There’s something here for every taste. Each recipe has been tested more than once, when it’s already cold outside and warm inside the house.
Here you’ll find the right spice balance, proper temperatures, control of sweetness and texture. And a bit of discipline — because great flavor rarely happens “by eye.”
1. Chai Spiced Latte From Scratch
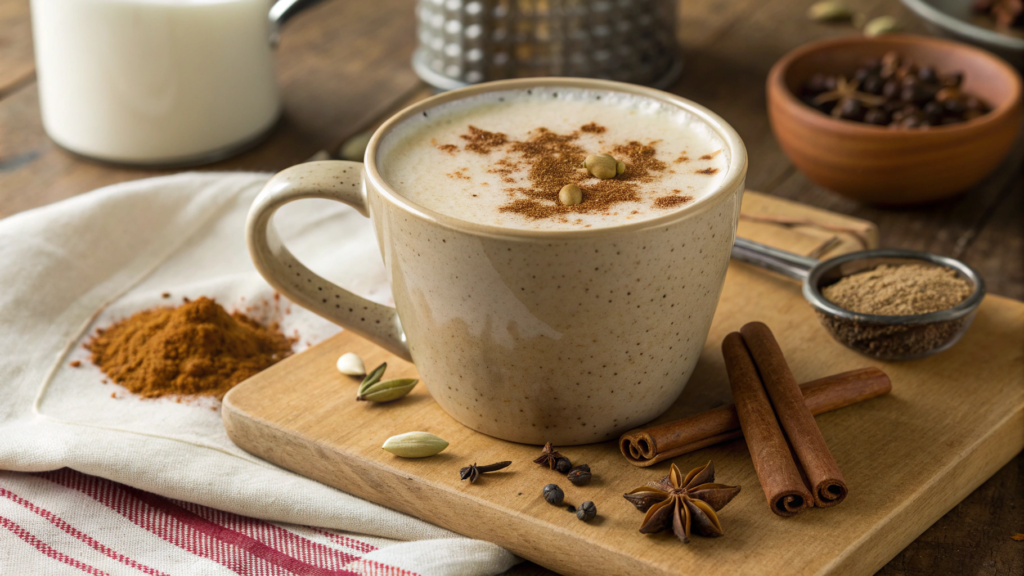
When you brew a chai spiced latte from scratch, instead of opening a powdered packet, the spices start unfolding right in your kitchen. And suddenly the evening isn’t just an evening — it’s a small ritual.
I made this latte for the first time at my own risk. And it turned out — it’s simple.
Ingredients (2 large mugs)
- 2 cups water (480 ml)
- 2 cups milk (480 ml) — whole milk gives the creamiest texture
- 2 tbsp loose black tea or 3 tea bags
- 4–5 whole green cardamom pods
- 1 cinnamon stick
- 4 whole cloves
- 4–5 thin slices fresh ginger (about 1 tbsp / 15 g)
- 4 whole black peppercorns
- 2–3 tbsp brown sugar or honey (30–45 ml to taste)
To crush the spices, it’s convenient to use a mortar like ChefSofi Mortar and Pestle Set 6 Inch Granite — heavy granite literally opens up the aroma.
How to Make It
- Prepare the spices.
Lightly crush the cardamom and pepper in a mortar — not into dust, just enough to crack the shell. That way the essential oils release more actively. Slice the ginger thin so it gives off heat and sharpness faster. - Simmer the base.
In a small saucepan, bring the water to a full boil. Add cinnamon, cloves, cardamom, pepper, and ginger. Lower the heat to medium and simmer for 5–7 minutes. The water will turn amber, and the aroma will become spicy, almost honey-like. - Add the tea.
Add the loose tea or drop in the tea bags. Simmer for another 2–3 minutes on low heat. Don’t oversteep — otherwise you’ll get extra bitterness. - Pour in the milk.
Add the milk and heat until small bubbles begin to appear around the edges. Do not let it boil aggressively — the milk should heat gently so the flavor stays round. - Sweeten and strain.
Add sugar or honey, stir until fully dissolved. Remove from heat and strain through a fine sieve directly into mugs.
Sometimes I froth a bit of hot milk with a handheld frother — the texture becomes velvety, like in a coffee shop, only better. Because you know what’s inside.
Small Variation
Sometimes I add a pinch of nutmeg or a drop of vanilla extract at the very end. It makes the flavor softer and reduces the sharpness of the spices, especially if the tea turned out strong.
Tip. Brew the spiced base without milk for 2–3 days at once (spices + water + tea), strain it, and store in the fridge. When you want a latte — just heat 1 cup of concentrate and add 1 cup of hot milk.
2. Homemade Hot Chocolate Mix for Holiday Gifts
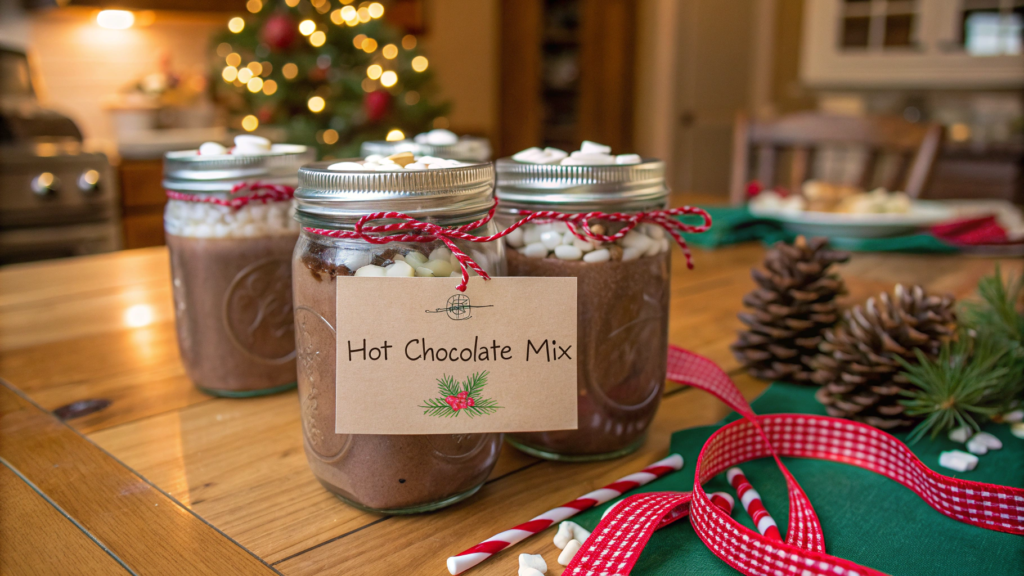
We started making our own Homemade Hot Chocolate Mix not to save money. But because store-bought mixes almost always contain questionable powdered milk and way too much sugar. And we want a rich chocolate flavor that actually dissolves and doesn’t sit like sand at the bottom of the mug.
Every December, Lindy and I make a big batch, portion it into glass jars, and add a small instruction card. Practical. And it works better than any store-bought box.
Ingredients (for ~4 cups dry mix / about 800 g)
- 2 cups powdered milk (220 g)
- 1 cup unsweetened cocoa powder (100 g natural cocoa, no sugar)
- 1 cup powdered sugar (120 g)
- 1/2 cup finely chopped dark chocolate 60–70% (85 g)
- 1/4 tsp salt (a pinch of salt)
- 1 tsp cornstarch (optional, 3 g — for a thicker texture)
How We Make It
- Sift the dry ingredients.
Cocoa tends to form lumps. Sifting through a fine sieve makes the mix smooth and helps it dissolve better. - Finely chop the chocolate.
Do not use large chunks. The chocolate should be almost crumb-like — that way it melts faster when hot liquid is added. - Mix thoroughly.
In a large bowl, combine powdered milk, cocoa, powdered sugar, salt, and cornstarch. Whisk for 1–2 minutes so the mixture becomes completely uniform. - Add the chocolate crumbs.
Fold in the finely chopped chocolate and distribute it evenly throughout the mixture. - Check the texture.
The mix should be dry and crumbly. If you feel damp lumps — sift it again.
How to Properly Prepare the Drink
For 1 cup (240 ml) of hot milk or water, use 3 tbsp (30–35 g) of the mix. If you want a richer taste, use hot milk instead of water. Stir with a whisk or a mini frother so the chocolate fully dissolves.
Flavor Variations
- Add 1/2 tsp ground cinnamon to the whole batch for a warm spiced profile.
- 2 tbsp instant espresso powder will make the flavor deeper.
- A pinch of cayenne pepper will enhance the chocolate without obvious heat.
Gift Packaging
We use 16 oz (450 ml) glass jars. On each jar, we attach a simple instruction: “Add 3 tbsp mix to 1 cup hot milk. Stir well.”
The mix keeps for up to 3 months in an airtight container at room temperature.
Tip. If you’re making this as a gift, don’t increase the sugar “just in case.” It’s better to keep the base sweetness moderate — a person can always add more sugar, but you can’t remove it once it’s there.
3. Mulled Apple Cider with Cinnamon Sticks
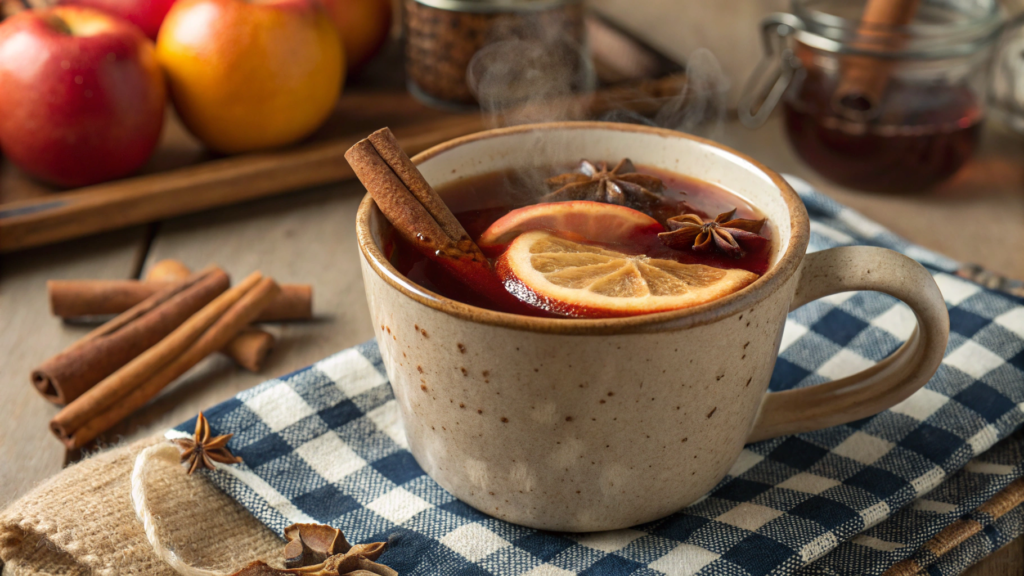
Hot mulled apple cider with cinnamon sticks is not just warmed juice. The technique matters here: the right spices, controlled heating temperature, and balanced sweetness. If everything is done properly, it turns out rich but not cloying, aromatic but without overdoing the cloves.
For a long time, I heated cider too much — and it lost its freshness. Then I started controlling the temperature. The difference is noticeable immediately.
Ingredients (4 servings)
- 8 cups apple cider (1.9 L natural unfiltered non-alcoholic apple cider)
- 3 cinnamon sticks
- 6 whole cloves
- 1 whole orange, sliced
- 1/4 tsp whole allspice berries (about 6–8 berries)
- 2–3 tbsp maple syrup or brown sugar (30–45 ml to taste)
- 1 small piece fresh ginger, sliced (about 1 inch / 2.5 cm)
How to Make It
- Choose the right base.
Use real apple cider, not clear apple juice. Unfiltered cider contains pulp and more natural aromatic compounds. The flavor becomes deeper without adding artificial syrups. - Combine ingredients without boiling.
Pour the cider into a saucepan, add cinnamon, cloves, allspice, and ginger. Slice the orange into rounds about 0.5 cm thick and add them with the peel — the essential oils are in the zest. - Control the temperature.
Heat over medium until it reaches 160–170°F (70–75°C). This is important. Do not bring to a boil — above 185°F (85°C), volatile aromatic compounds begin to break down and the flavor fades. - Simmer, don’t boil.
Keep the cider on low heat for 20–25 minutes. During this time, the spices fully open up but won’t turn bitter. - Adjust sweetness at the end.
Taste and add maple syrup or brown sugar if needed. Do this after steeping — the spices themselves enhance the perception of sweetness. - Strain before serving.
Remove large spices and orange slices. You can leave a cinnamon stick in the mug as an extra source of aroma.
Different Variations
- If the drink turned out too spice-forward, dilute with 1/2 cup (120 ml) hot water per serving.
- For a fuller flavor, add 1/4 cup (60 ml) unsweetened cranberry juice.
- If using honey instead of syrup, add it below 140°F (60°C) to preserve the aroma.
Important Storage Note
Cider can be stored in the refrigerator for up to 4 days. When reheating, do not boil — simply warm it until hot.
If you plan to serve it at a party, keep it on “warm” mode in a slow cooker at no higher than 170°F (75°C). This way the aroma remains stable for several hours.
Tip. To prevent spices from floating throughout the drink, place them in a cheesecloth bag or a metal tea infuser. This simplifies serving and prevents excessive clove extraction, which can create bitterness during prolonged heating.
4. Maple Bourbon Old Fashioned
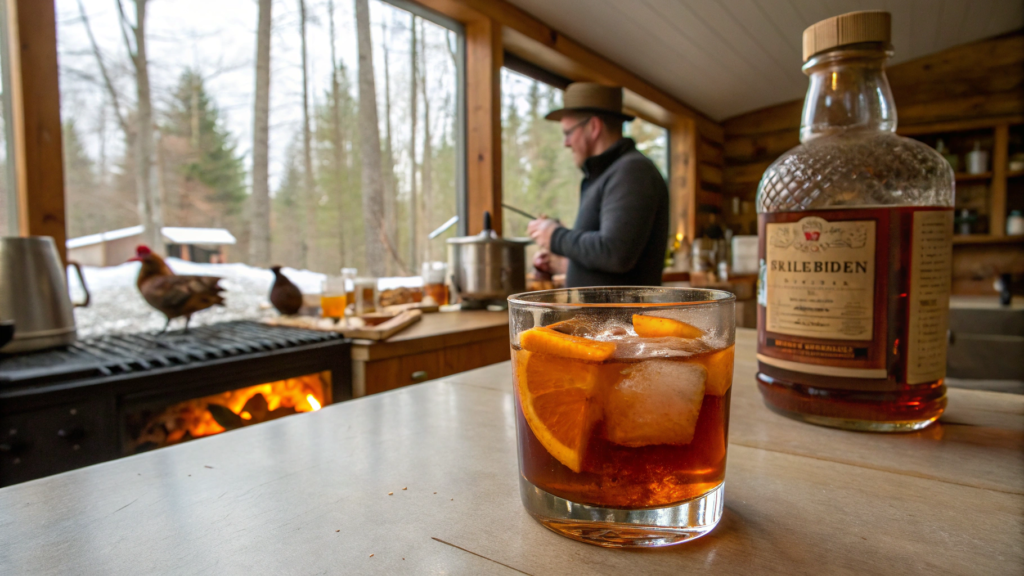
Lindy and I rarely drink cocktails in town. More often — we light the wood stove, check if the chicken coops are closed, and make a Maple Bourbon Old Fashioned in the kitchen with a view of our maples. And yes — our maple syrup is always real, not “pancake syrup.”
We started making this version of the Old Fashioned in the fall, when we found a good local bourbon from Idaho. We wanted to keep the character of the drink but remove the sharpness of regular sugar. Maple syrup solved that.
Ingredients (1 serving)
- 2 oz bourbon (60 ml)
- 1/2 oz pure maple syrup (15 ml real Grade A syrup)
- 2–3 dashes Angostura bitters
- 1 large ice cube
- Strip of orange peel
How We Make It in Our Kitchen
- Prepare the ice in advance.
We freeze large cubes in a silicone mold — big cubes melt slowly, and the drink doesn’t turn watery after 5 minutes. Especially if you sip it slowly. - Precise proportions — always.
I never pour “by eye.” I use a measuring jigger. 1/2 oz of maple syrup is enough. More — and the drink becomes dessert-like instead of classic. - Stir, don’t shake.
In a mixing glass with ice cubes, I stir for 20–25 seconds. This chills the drink to about 34°F (1°C) and gives proper dilution. - Handle the orange peel correctly.
I gently squeeze the peel over the glass so the oils land on the surface of the drink. Then I run the peel along the rim. This enhances aroma without adding sweetness.
Why Maple Syrup
We already have young maples growing on our land (not yet for our own syrup, but one day). So using natural maple syrup makes sense.
Unlike sugar, it:
- fully dissolves without residue
- adds light woody notes
- pairs better with the oak aging of bourbon
If you’re buying syrup — choose pure, 100 percent maple syrup. Not a blend with corn syrup.
Practical Tip from Our Experience
If you’re making several cocktails in a row (for example, on Thanksgiving), mix the bourbon, syrup, and bitters in advance without ice in a bottle. Store at room temperature. When needed — simply stir a portion with ice and add the peel.
That way you control the flavor and don’t get distracted from your guests.
That’s how we’ve been greeting the first frosts for more than two autumns now — checked the fence, covered the beds, walked into the house… and poured one glass each.
5. Pumpkin Brown Sugar Coffee Syrup
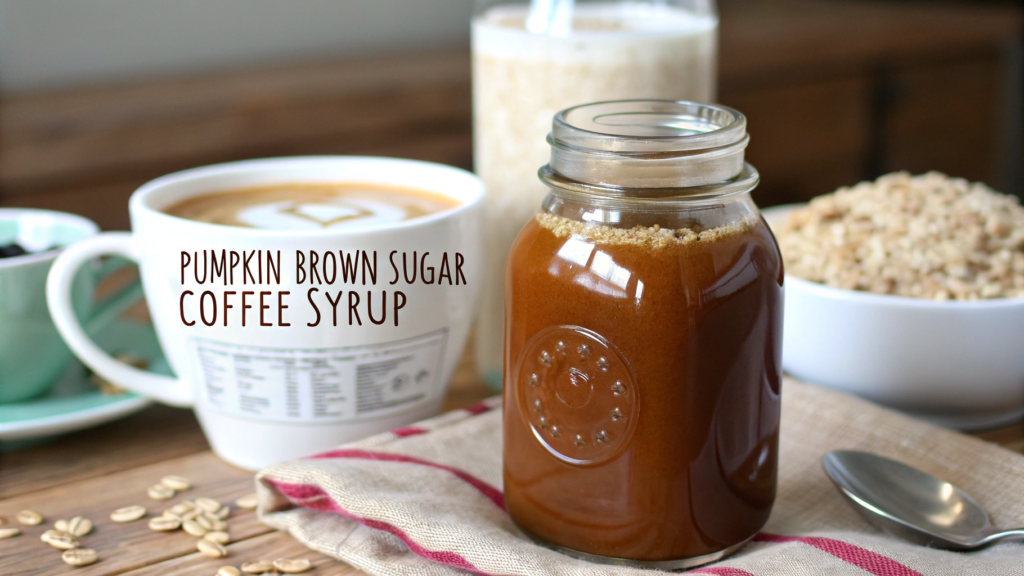
If you don’t want an overly sweet syrup with artificial flavoring instead of pumpkin, make your own Pumpkin Brown Sugar Coffee Syrup. We want a concentrate that actually adds flavor to coffee, not just sweetness.
We use this syrup in our morning latte, add it to cold brew, and even stir it into oatmeal. It’s simple to make, but the proportions and temperature matter.
Ingredients (about 1½ cups syrup / 360 ml)
- 1 cup water (240 ml)
- 1 cup packed brown sugar (200 g tightly packed brown sugar)
- 1/2 cup pumpkin purée (120 ml / ~120 g, pure pumpkin with no sugar)
- 1 tsp ground cinnamon (2 g)
- 1/2 tsp ground ginger (1 g)
- 1/4 tsp ground nutmeg (0.5 g)
- 1/8 tsp ground cloves (a pinch)
- 1 tsp vanilla extract (5 ml)
- Pinch of salt
Important! Use 100 percent pumpkin purée, not pumpkin pie filling.
How We Make It in Our Kitchen
- Combine the base properly.
In a small saucepan, mix water and brown sugar. Heat over medium, stirring, until the sugar fully dissolves. This takes 3–4 minutes. Do not let it boil actively — the syrup should not caramelize. - Add the pumpkin.
Stir in the pumpkin purée and whisk thoroughly so there are no lumps. The mixture will become slightly thick and cloudy — this is normal. - Add spices in measured amounts.
Add cinnamon, ginger, nutmeg, cloves, and a pinch of salt. Reduce heat to low and simmer for 8–10 minutes. During this time, the syrup thickens slightly and the spices fully distribute. - Control the thickness.
The finished syrup should coat the back of a spoon in a thin layer. If it’s too thin — keep it on the heat for another 2–3 minutes. If it’s too thick — add 1–2 tbsp (15–30 ml) hot water. - Finish.
Remove from heat, add vanilla extract, and stir. Strain through a fine sieve if you want a smoother texture (we sometimes strain it for latte, but leave the texture for home use). - Cool and store.
Let the syrup cool completely and pour it into a glass bottle. Store in the refrigerator for up to 2 weeks.
Where to Use the Syrup
This syrup is concentrated, so it’s important not to overdo it.
In a 12 oz (350 ml) morning coffee, I add 1–2 tbsp (15–30 ml). For latte, one tablespoon is usually enough — the milk already softens the flavor.
For cold brew, I first mix the syrup with a small amount of warm coffee so it fully dissolves, and only then add ice. That way there’s no thick sediment at the bottom.
Sometimes we add 1 tbsp to waffle or pancake batter — it replaces part of the sugar and gives a spiced flavor without extra seasoning.
Here it works as an aromatic addition, not just a sweetener — that’s important to keep in mind.
Tip. If you want a deeper flavor, you can lightly toast the pumpkin purée in a dry pan for 3–4 minutes before adding it to the syrup. This reduces excess moisture and makes the flavor more concentrated.
We usually make a double batch at the beginning of October — it lasts almost the whole month without cooking again.
6. Hot Maple Chai With Real Spices
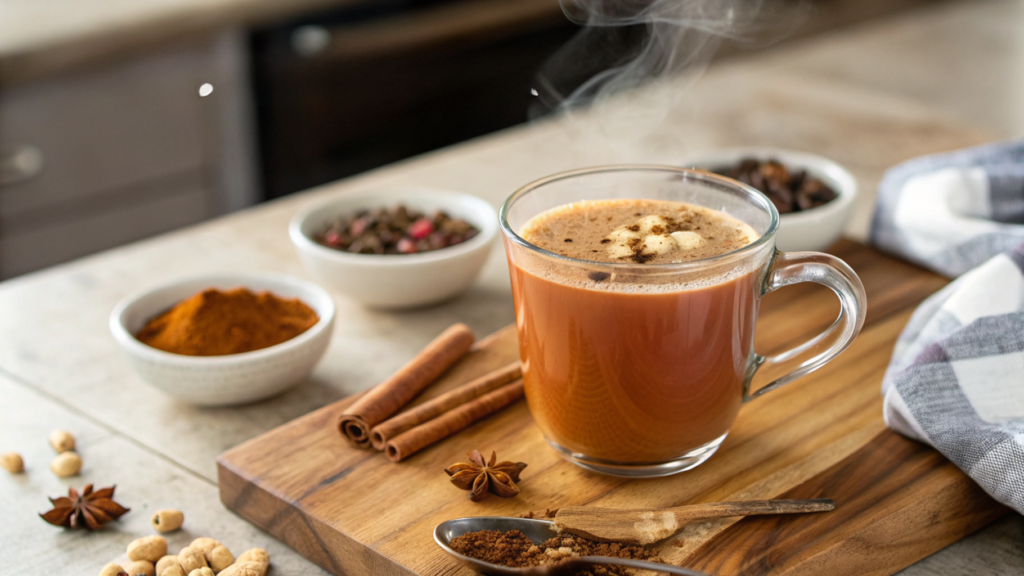
Lindy and I make Hot Maple Chai With Real Spices not from tea bags. If we’re brewing spiced tea — it’s from whole spices. The difference is noticeable right away: the aroma is deeper, the flavor cleaner, and there’s no “powdered mix” feeling.
This version is different from a regular chai latte because maple syrup isn’t just a sweetener here. It binds the spices together and makes the flavor more cohesive.
Ingredients (2 large mugs)
- 2 cups water (480 ml)
- 2 cups whole milk or 2% (480 ml)
- 2 tbsp loose black tea or 3 tea bags
- 4 green cardamom pods
- 1 cinnamon stick
- 4 whole cloves
- 4–5 black peppercorns
- 1 inch fresh ginger, sliced (2.5 cm)
- 2–3 tbsp pure maple syrup (30–45 ml)
- Pinch of salt
The spices are best lightly crushed before simmering. We use a granite mortar. It works well for releasing essential oils.
How to Make It
- Prepare the spices in advance.
Lightly crush the cardamom and pepper so the shells crack. Slice the ginger thin — it releases heat faster that way. Do not grind into paste: fine particles are hard to strain later. - Brew the spiced base.
In a saucepan, bring water to a boil, add all the spices, and reduce heat to medium. Let them boil for 5–7 minutes. The water will darken and become intensely aromatic. This is the extraction stage — the spices must fully open before adding tea. - Add the tea.
Add the loose tea and simmer for another 2–3 minutes on low heat. Longer is not needed — otherwise extra bitterness appears. - Pour in the milk and heat gently.
Add the milk and bring the mixture to about 170°F (75°C). Do not let it boil actively. When overheated, milk changes flavor and can develop a “cooked” taste. - Add maple syrup at the end.
Remove the saucepan from heat and only then stir in 2–3 tbsp maple syrup. This preserves its aroma. A pinch of salt at this moment enhances the overall flavor and reduces the perception of excessive sweetness. - Strain properly.
Use a fine sieve. If the spices were crushed coarsely, the drink will turn out clean, without sediment.
Adjusting Flavor Balance
If the taste turns out too spice-forward — add 2–3 tbsp hot milk.
If not rich enough — increase the spice simmering time by 2 minutes, but not the tea.
Sometimes we make a more concentrated version: reduce water to 1 1/2 cups (360 ml) to get a denser spiced profile that holds well in latte.
Tip. If you’re making chai for several people, brew the spiced base (water + spices + tea) in advance and store it in the refrigerator for up to 3 days. Before serving, simply add milk and maple syrup while reheating.
7. Non-Alcoholic Thanksgiving Punch
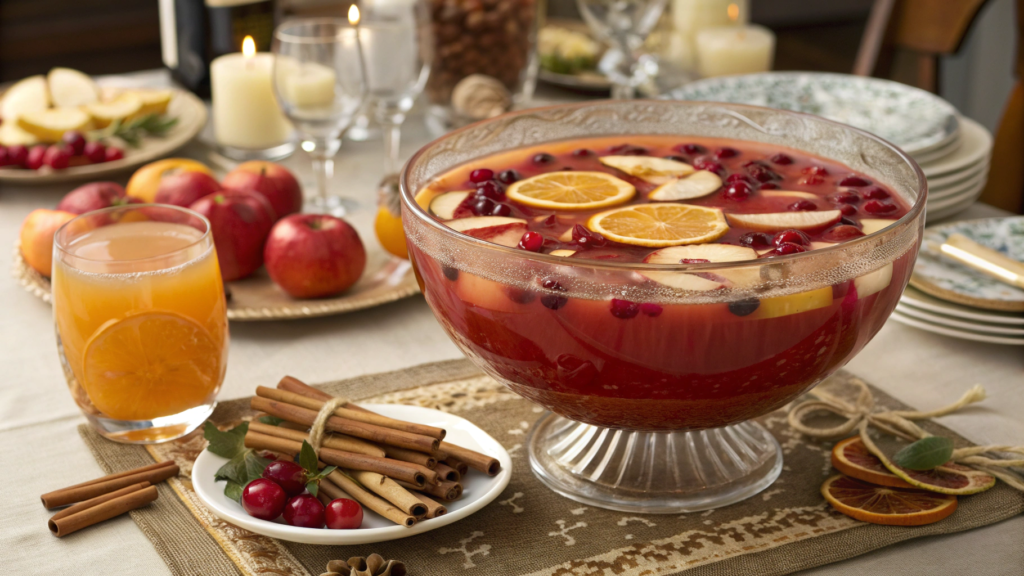
Not every celebration needs alcohol. On Thanksgiving at our table, there are kids, neighbors, someone driving, someone who simply doesn’t drink. That’s why Non-Alcoholic Thanksgiving Punch has been a must-have for several years now.
This is not “kids’ compote.” It’s a balanced drink with acidity, natural sweetness, and spiced depth. The key is not to overload it with sugar.
Ingredients (about 10–12 servings)
- 4 cups apple cider (960 ml unfiltered apple cider)
- 3 cups cranberry juice, 100% unsweetened (720 ml)
- 2 cups orange juice, freshly squeezed (480 ml)
- 2 cups sparkling water or ginger ale (480 ml)
- 1 orange, sliced
- 1 cup fresh cranberries (100–120 g)
- 2 cinnamon sticks
- 3–4 whole cloves
- 2–3 tbsp maple syrup (30–45 ml, to taste)
- Ice (as needed)
If using a carbonated base, choose one with a clean flavor — for example, Canada Dry Ginger Ale for a more spiced version or plain sparkling water for a drier profile.
How to Make It
- Prepare the spiced base in advance.
In a small saucepan, combine 1 cup apple cider with cinnamon sticks and cloves. Heat to 160–170°F (70–75°C) and keep on low heat for 10 minutes. This extracts spice aroma without bitterness. Cool and strain. - Mix the base juices.
In a large glass bowl, combine the remaining cider, cranberry juice, and orange juice. Whisk so the juices blend evenly. - Add the spiced concentrate.
Pour the cooled spiced base into the main mixture. Taste. Only after tasting, add maple syrup — often the natural sweetness is enough. - Add fresh ingredients.
Slice the orange into rounds about 0.5 cm thick and add along with fresh cranberries. They are not just for appearance — cranberries gradually release light acidity. - Add carbonation at the very end.
Pour in sparkling water or ginger ale right before serving. This preserves the bubbles and texture. - Control the temperature.
If serving with ice, use large pieces to avoid quick dilution. It’s better to add ice to individual glasses, not the main bowl.
Flavor Balance
If the drink turns out too acidic — add 1–2 tbsp maple syrup and stir well. If too sweet — pour in an additional 1/2 cup (120 ml) sparkling water.
Sometimes we make a more dry version: reduce orange juice to 1 1/2 cups (360 ml) and increase cranberry juice. The flavor becomes brighter and less dessert-like.
Tip. Do not mix everything several hours in advance if using a carbonated base. Prepare the juice mixture and spiced concentrate separately, and add sparkling water right before serving.
That way the drink stays fresh and keeps its texture even during a long dinner.
8. Creamy Pumpkin Spice Latte at Home
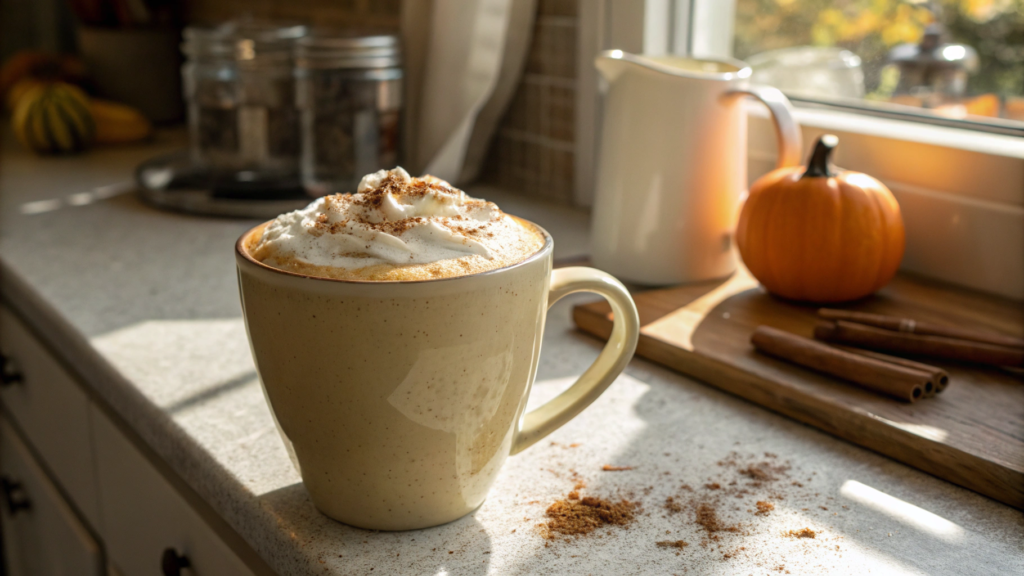
In coffee shops, pumpkin spice latte is usually too sweet and flavored instead of made with real pumpkin. That’s why Lindy and I make Creamy Pumpkin Spice Latte at Home — with real pumpkin purée and full control over texture.
Two things matter here: proper heat treatment of the pumpkin and well-frothed milk. Without this, the drink will be either watery or grainy.
Ingredients (1 large serving, 12–14 oz / 350–400 ml)
- 1 cup milk (240 ml, whole gives the densest texture)
- 1/2 cup strong coffee or 1–2 shots espresso (120 ml)
- 2 tbsp pumpkin purée (30 g, unsweetened)
- 1–2 tbsp maple syrup or brown sugar (15–30 ml)
- 1/4 tsp ground cinnamon
- 1/8 tsp ground ginger
- Pinch of nutmeg
- 1/4 tsp vanilla extract
- Pinch of salt
For frothing, a handheld tool like Zulay Kitchen Milk Frother Handheld works well — it creates dense foam in 15–20 seconds.
How to Make It
- Toast the pumpkin quickly.
In a small saucepan over medium heat, warm the pumpkin purée for 2–3 minutes, stirring. This reduces excess moisture and intensifies flavor. If you skip this step, the drink will be more watery. - Add spices to the pumpkin.
Stir cinnamon, ginger, and nutmeg directly into the warm pumpkin. Heat helps release the spice aroma. - Pour in the milk and heat gently.
Add milk and bring to 160–170°F (70–75°C). Do not boil — above 180°F (82°C), milk loses sweetness and can develop a cooked taste. - Add sweetener and salt.
Stir in maple syrup and a pinch of salt. Salt enhances the spices and reduces the perception of excessive sweetness. - Froth part of the milk.
Pour off 2–3 tbsp of the hot mixture and froth until thick foam forms. This creates a layered texture, not just coffee with milk. - Combine with coffee.
Pour hot coffee or espresso into a mug, then add the pumpkin-milk mixture. Top with foam.
Adjusting Flavor
If the drink turns out too thick — add 1–2 tbsp hot milk.
If too thin — increase pumpkin to 3 tbsp (45 g), but heat it slightly longer.
Sometimes we make a more clean version without sugar: keep only 1 tbsp maple syrup and increase cinnamon. The flavor becomes less dessert-like.
Tip. If you plan to make several servings in a row, prepare the pumpkin-spice base in advance (without coffee) and store it in the refrigerator for up to 3 days. Before serving, simply heat a portion and add fresh coffee.
It saves time in the morning and gives a good result without reheating pumpkin from scratch each time.
9. Maple Pecan Mocha
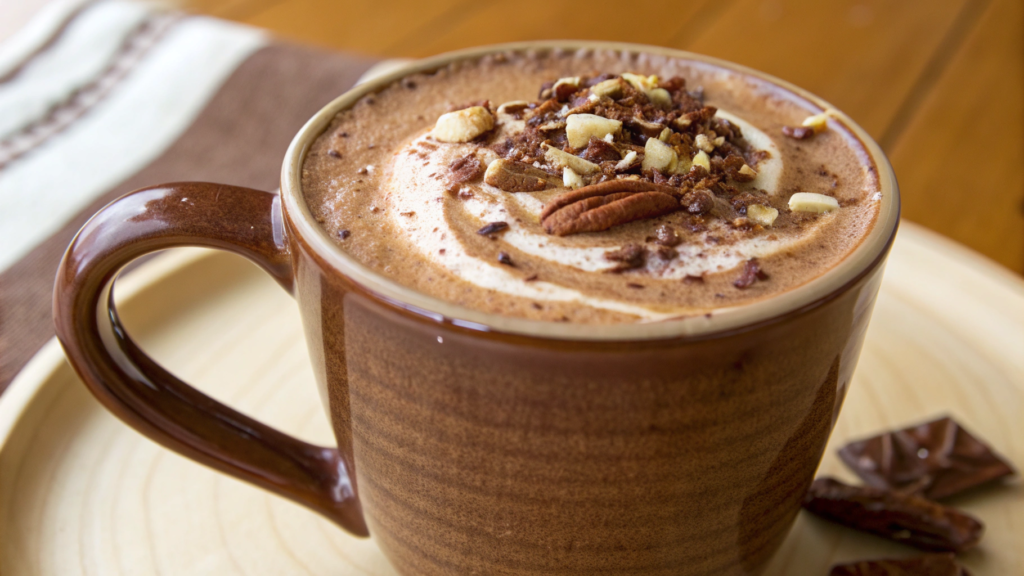
Maple Pecan Mocha is a drink slightly denser than a regular latte, but without the feeling of dessert in a mug. Coffee, chocolate, maple syrup, and nutty depth — rich and balanced. Especially when it’s cold outside.
Ingredients (1 large serving, 14 oz / ~400 ml)
- 1 cup milk (240 ml, whole or 2%)
- 1/2 cup strong coffee or 2 shots espresso (120 ml)
- 1 tbsp unsweetened cocoa powder (8 g)
- 1–1 1/2 tbsp pure maple syrup (15–22 ml)
- 2 tbsp finely chopped pecans (15 g)
- 1/4 tsp vanilla extract
- Pinch of salt
For a stronger pecan flavor, you can use a natural paste like LorAnn Pecan Bakery Emulsion, but we usually work with whole nuts.
How to Make It
- Toast the pecans properly.
In a dry pan over medium heat, warm the nuts for 3–4 minutes, stirring. They should become aromatic but not darken. Toasting enhances the nut oils and deepens flavor. - Extract the nut flavor.
Add 2–3 tbsp milk from the total amount to the nuts and heat for another 1–2 minutes. This helps transfer the pecan flavor into the liquid. Then blend everything to a fine texture. - Combine cocoa and maple syrup.
In a small saucepan, mix cocoa, maple syrup, and a pinch of salt. Add a little warm milk and stir into a smooth paste. This prevents lumps. - Add remaining milk and heat.
Pour in the rest of the milk along with the nut mixture and heat to 160–170°F (70–75°C). Do not boil — chocolate can become grainy. - Strain if needed.
If you want a smooth texture, strain through a fine sieve. We sometimes leave a slight nut texture — it makes the drink feel more homemade. - Combine with coffee.
Pour hot coffee or espresso into a mug and add the hot nut-chocolate mixture. Stir in vanilla at the end.
Flavor Balance
If the drink tastes too sweet — add a pinch of salt or a bit more strong coffee.
If not nutty enough — increase pecans to 3 tbsp (22 g) and toast slightly longer, but avoid bitterness.
We tried making it with pecan syrup, but real pecans give a cleaner flavor without artificial sweetness.
Tip. If making two or more servings, blend the nuts with milk using a high-power blender. The finer the texture, the more stable the drink and the less sediment.
And yes — add maple syrup gradually. It’s easier to add more than to fix an overly sweet mocha.
10. Salted Caramel Apple Cider
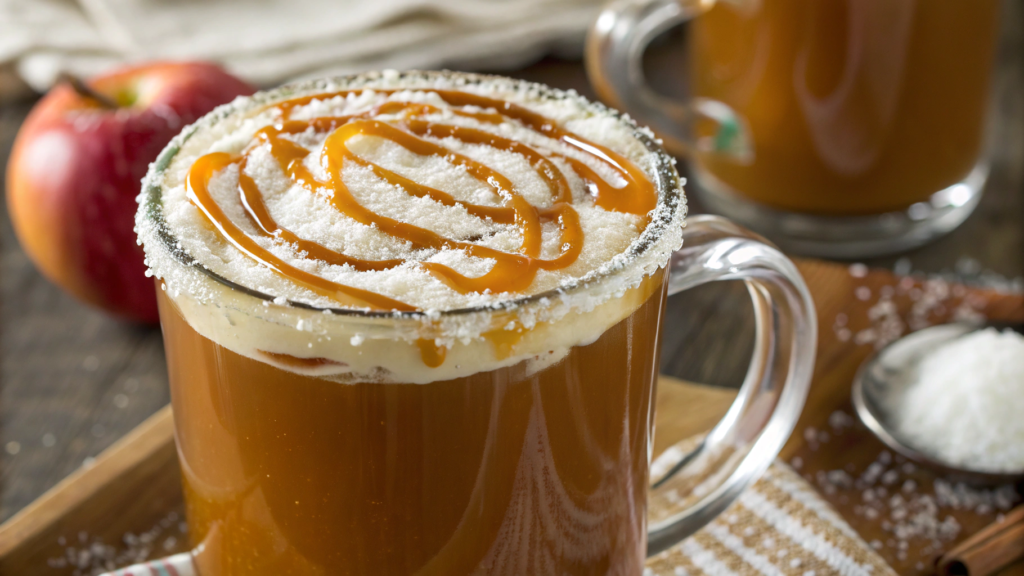
If you make Salted Caramel Apple Cider correctly, you get a drink built on contrast: bright apple acidity, rich caramel, and a light salty accent that pulls everything together.
Lindy and I started making this version after one failed experiment — I simply added caramel sauce to hot cider. It turned out sticky and overly sweet. We had to break the recipe down step by step and rebuild the balance.
Ingredients (4 servings, ~1 liter)
- 4 cups apple cider (960 ml unfiltered apple cider)
- 1/2 cup granulated sugar (100 g)
- 2 tbsp water (30 ml)
- 2 tbsp unsalted butter (28 g)
- 1/4 cup heavy cream (60 ml, 30–35% fat)
- 1/2 tsp flaky sea salt (to taste)
- 1 cinnamon stick
- 2 thin slices fresh ginger (optional)
How to Make It
- Make the caramel carefully.
In a small light-colored saucepan, combine sugar and water. Heat over medium without stirring — gently swirl the pan instead. The sugar will dissolve, turn clear, then darken. When it reaches amber (340–350°F / 170–175°C), remove from heat to avoid bitterness. - Add the cream and butter.
Slowly pour in warm heavy cream in a thin stream. The mixture will bubble — this is normal. Add butter and stir until smooth. Finish with sea salt, tasting to keep the balance. - Heat the cider separately.
In another saucepan, warm the apple cider with cinnamon (and ginger if using) to 160–170°F (70–75°C). Do not boil to preserve the fresh apple aroma. - Combine gradually.
Add caramel to the hot cider in portions, stirring constantly. Use about 3–4 tbsp caramel per 1 cup (240 ml) cider to control sweetness and texture.
Texture Control
If the drink feels too thick — add a bit more hot cider. If it’s too sweet — increase the cider ratio or add a small pinch of extra salt.
We don’t add whipped cream on top. This drink should remain a drink, not a dessert in a mug.
We pour it into heavy ceramic mugs and sometimes add a thin slice of fresh apple for aroma. When serving a group, we keep the caramel separate so everyone can adjust sweetness individually.
Tip. Do not try to make caramel far in advance and store it cold without reheating — it will thicken and dissolve poorly in cider. It’s better to make the caramel 1–2 hours before serving, keep it at room temperature, and gently reheat before mixing.
This is one of those drinks that looks more complicated than it actually is. The key is simply not rushing the caramel stage.
Favorite Seasonal Drinks
All of these drinks share one thing: they’re easy to repeat at home if you understand the core principles. Do not overheat milk. Do not overcook spices. Do not oversweeten caramel. Use real pumpkin, not flavoring.
We don’t make them “by mood.” We make them so the result is stable every time — whether it’s a quiet evening for two or a house full of guests.
If you try one of the recipes, it would be interesting to know which one became your favorite.And yes — if you have your own fall spice combination or an unexpected cider twist, share it. We love testing new ideas in our kitchen.