It usually seems that preserved lemons are something “for enthusiasts only,” and you’ll use them a couple of times a year. And then it turns out that these lemons work in dozens of dishes: soups, stews, marinades, salads, casseroles. And over time you start to realize that it’s worth having several jars at once with different aromatic profiles.
Over the past years, preserved lemons have become one of the most reliable staples in our kitchen. They take up almost no space, require simple ingredients, and give a predictable result even months later. In this article, I put together 10 variations that truly work: some are very basic, others have bold spices or a more restrained aroma.
We’ll break down different preparation methods, flavor differences, and where each variation is most useful.
Welcome!
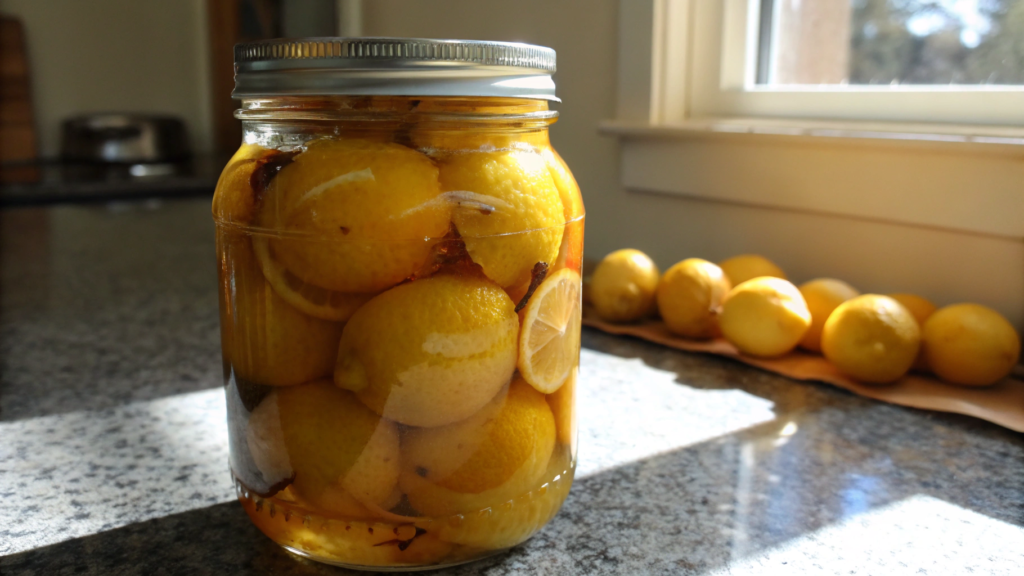
1. Classic Moroccan-Style Preserved Lemons
My preserved lemons turned out the way I wanted only after a couple of years of practice. But this classic Moroccan version — it always works, even if you’ve never done any preserving before and are afraid to overdo it with salt.
Moroccan cuisine has long used fermented citrus as a flavor base, and unlike fresh lemon, these give depth and a gentle softness you quickly get used to. And then you take one quarter of such a lemon — and oooh, the kitchen comes alive with this bright citrus depth.
By the way, a study in the Journal of Food Science shows that the fermentation process significantly increases the antioxidant content in citrus. Another large study in Food Chemistry confirms that fermented lemons retain bioactive compounds and become easier on digestion.
Ingredients (for 1 quart jar / ~1 liter)
- 6–8 small lemons
- 1/4–1/3 cup kosher salt (40–55 g)
- Additional lemons for juice — about 3–4
- Clean glass jar with a tight lid
Kosher salt is used because its large crystals dissolve more slowly and distribute more evenly. It has no additives or anti-caking agents that can change the taste of the brine. This type of salt gives a predictable result and helps control the amount without risking an oversalted brine.
How I Make Classic Moroccan Lemons
- Prepare the lemons. I wash them very thoroughly — the peel will be the main source of flavor. I make deep cross-shaped cuts on top so the lemon opens but doesn’t fall apart.
- Fill with salt. I take coarse kosher salt and pack it generously into every cut. Salt spills out? Perfect — that’s exactly how it should be.
- Pack into the jar. I place the lemons tightly, pressing them down so they release juice. The tighter, the better — this helps build that natural citrus brine.
- Pour in fresh lemon juice. I squeeze another 3–4 lemons and fully cover the packed fruits. There shouldn’t be any air left at the top.
- Start the fermentation. I keep the jar on the counter for 3–4 days. Every day I shake it gently.
- Move to storage. After a few days, I transfer the jar to a cool place or the fridge. The lemons become ready in about 3 weeks, but the longer they sit, the deeper the flavor and the more softened citrus complexity they develop.
How to Use
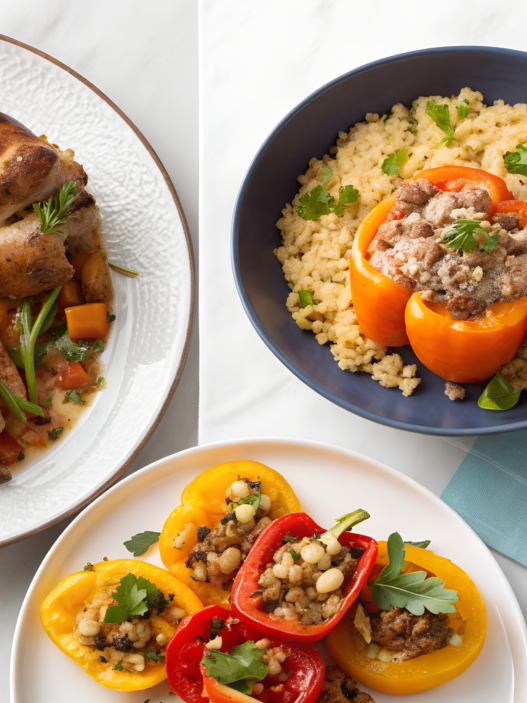
- In braised chicken (especially Moroccan-style — with olives and garlic).
- In salad dressing: mix finely chopped pulp with olive oil and honey.
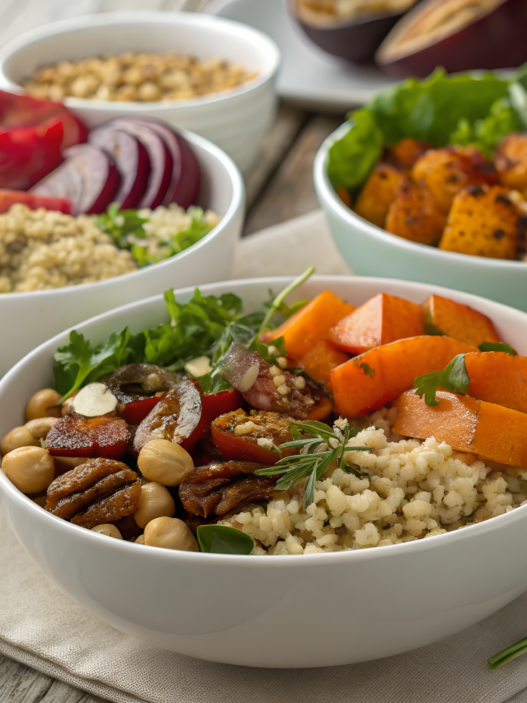
- In grains: couscous, bulgur, quinoa — everything opens up with this salty-citrus note.
I add a quarter to soups, sometimes to roasted vegetables, and sometimes I spread it on bread with tahini.
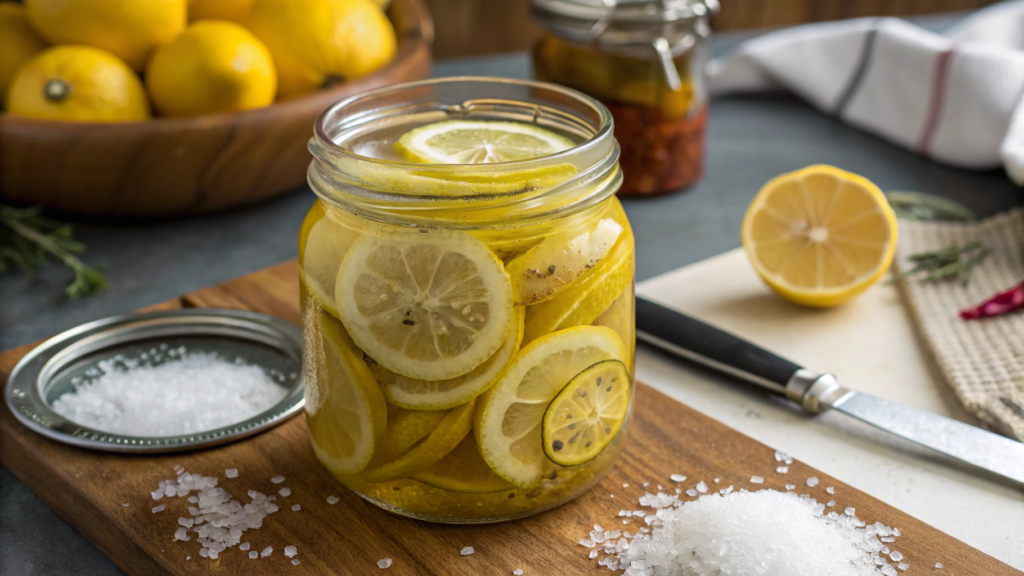
2. Quick Preserved Lemons with Sea Salt and Spices
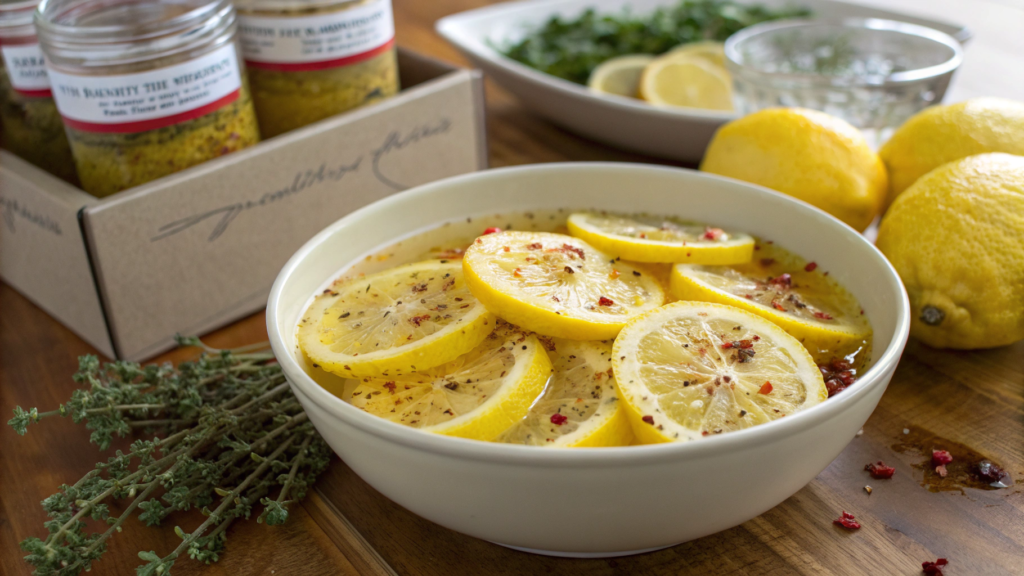
This quick method doesn’t replace classic long Moroccan lemons, but it gives an amazing bright flavor literally within a few days. Sometimes — within a day, if the lemons are very juicy.
I tried this method for the first time that summer when Lindy and I were moving from Idaho to our new home in the Pacific Northwest. Everything was in boxes, the kitchen half taken apart, but the habit of preserving had already settled into me. And there I was, standing among boxes, holding a bag of lemons and thinking, “Well, at least these I’ll manage to save.” And yes — I did.
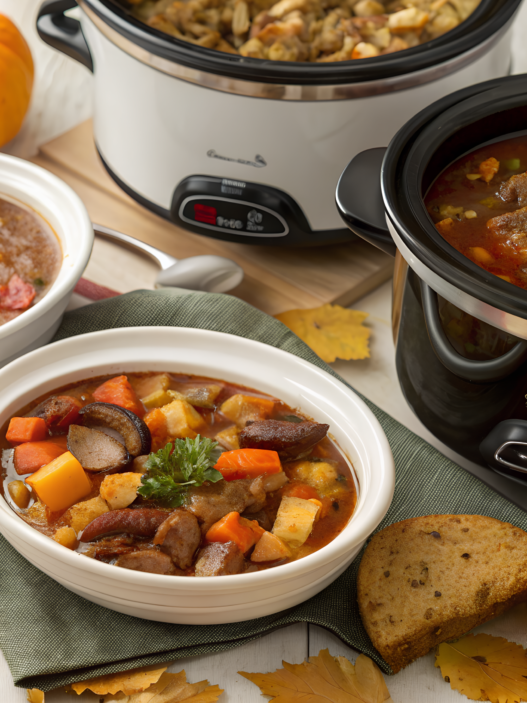
This version is especially good if you’re cooking something hot — stew, soup, braise — and want to add that bright, salty-citrusy spark. That salty-citrus spark is what makes these quick lemons so useful.
Ingredients (for 1 pint / ~470 ml)
- 4–5 lemons
- 2–3 tbsp sea salt (around 30–40 g)
- 1 tsp whole coriander seeds
- 1–2 bay leaves
- 1 small dried chili (or 1/2 tsp flakes)
- Juice of another 2–3 lemons (for topping)
Sea salt is great for quick lemon methods — it dissolves faster and gives a softer flavor. Kosher salt is better for long fermentation: the large crystals dissolve more slowly and create a more stable brine without additives. This difference in salt texture really matters.
How I Make Quick Lemons with Sea Salt and Spices
- Prepare the lemons. I wash them very thoroughly, with effort, because the thin peel absorbs everything. I slice them into thin wedges — the thinner they are, the faster they marinate.
- Mix the spices. I lightly crush the coriander seeds with the back of a knife — they release aroma better this way. I break the bay leaf in half so it fits in the jar. I keep the chili whole if I want a mild heat.
- Mix the lemons with salt. I place the wedges in a bowl, add sea salt, and gently “massage” them with my hands. The lemons start releasing juice — this is what kickstarts the quick fermentation.
- Transfer to the jar. I layer the lemons: some lemons — a pinch of spices — lemons again. Light pressing with a spoon helps remove excess air and creates a quick lemon brine.
- Pour in the juice. I squeeze 2–3 lemons and cover the wedges completely so none of them stick out above the liquid. This is important: without liquid they can darken.
- Leave for a day or two. On the counter, in the shade. I sometimes flip the jar upside down once a day — just a habit. After 24–48 hours the lemons become softer, brighter, and already ready for dishes.
- Move to the fridge. They only get better there. After 5–7 days the flavor becomes truly rich, and we usually finish the jar within a couple of weeks thanks to its intense quick-marinated flavor.
How to Use
- In pasta and stews — just toss a couple of wedges into the pan.
- In salads with cucumber and yogurt — the freshness becomes completely different.
- In roasted vegetables — especially carrots and cauliflower.
The quick method is convenient because it gives you a usable product in minimal time. These lemons are perfect for everyday cooking when you want to quickly add a clear lemon accent to a dish. They can be stored in the fridge, and the flavor becomes more saturated over time thanks to this fast citrus technique.
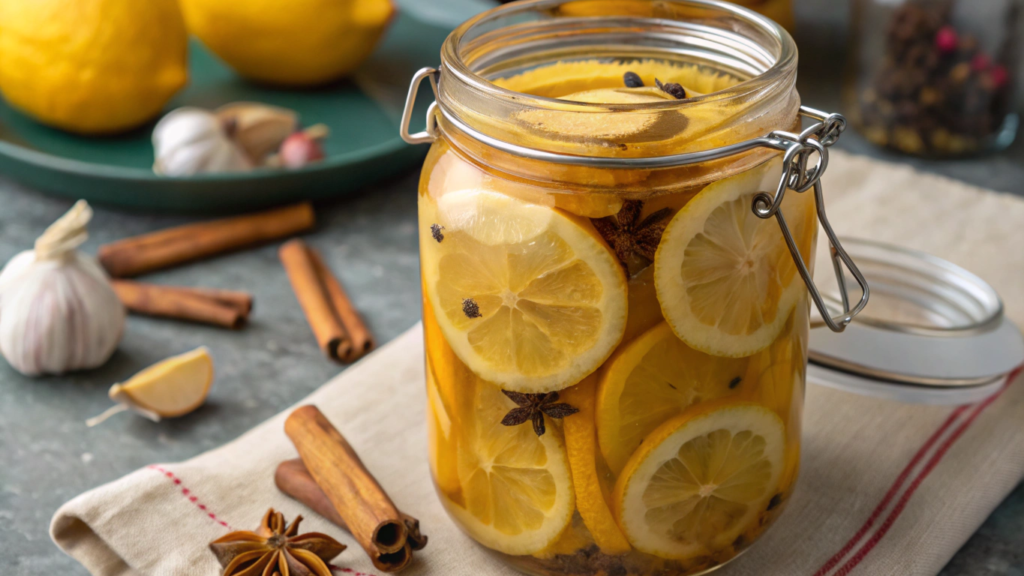
3. Preserved Lemons with Bay Leaf and Cinnamon
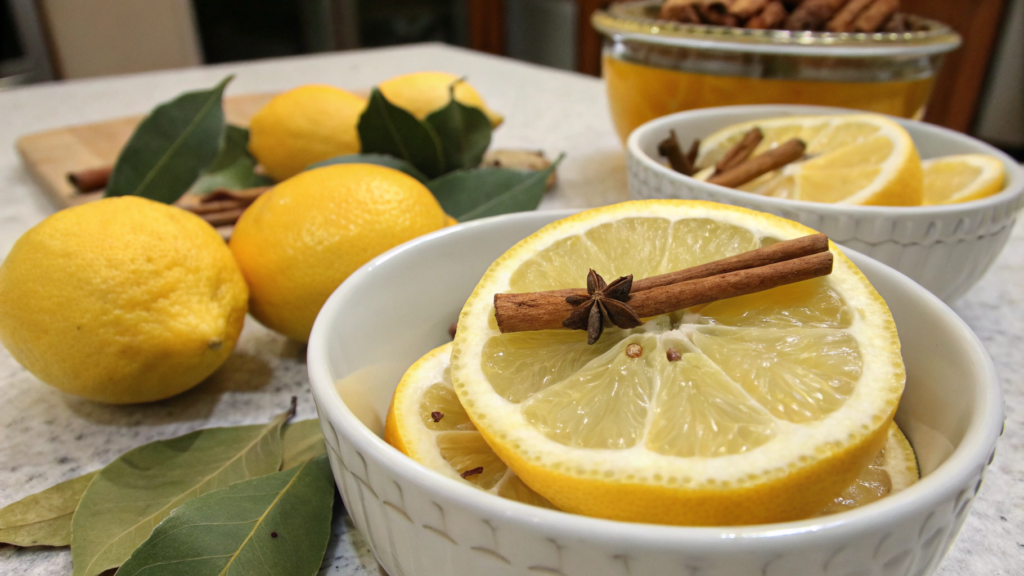
The combination of warm cinnamon and tart bay leaf creates a deeper, calmer flavor that works beautifully in braised dishes, roasts, and even meat marinades.
This recipe is a variation of the classic, but with a slight lean toward winter aromas. It’s prepared almost as simply as the basic version, yet gives a more balanced aromatic profile.
Ingredients (for 1 quart jar / ~1 liter)
- 6–7 lemons
- 1/4–1/3 cup kosher salt (40–55 g)
- 2–3 bay leaves
- 1 cinnamon stick
- Juice of an additional 3–4 lemons
How I Make Lemons with Bay Leaf and Cinnamon
- Prepare the lemons. I rinse the peel under hot water because it absorbs scents more than it seems. I cut the lemons crosswise, leaving the base intact so they keep their shape.
- Fill with salt. I add a generous portion of salt into each lemon and gently press it with my palm so the juice starts to appear. This helps the flavor spread through the flesh more quickly.
- Prepare the spices. I slightly break the bay leaves — they release aroma faster this way. The cinnamon stick stays whole, but if you want a stronger flavor, you can break it in half.
- Pack into the jar. I place some spices at the bottom, then tightly set the lemons. I tuck pieces of bay leaf and cinnamon between them. Light pressing with a spoon helps release more juice and build a steady spiced brine.
- Add the juice. I squeeze the additional lemons and fully cover the fruits. If the lemons aren’t completely submerged, they may darken and the flavor becomes less clean.
- Start the fermentation. I leave the jar for 3–4 days at room temperature, shaking it periodically. This distributes the salt and spices and speeds up the process.
- Storage. After a few days, I move the jar to a cool place. After 3–4 weeks the lemons become soft and aromatic. You can age them even longer — the flavor develops into a deeper, soft winter warmth.
How to Use
- In chicken dishes — especially if you add garlic and olives.
- In roasted root vegetables, where the warm note of cinnamon makes the flavor smoother.
- In marinades for lamb or pork — a quarter of such a lemon softens the meat beautifully.
This variation is great for anyone who wants a softer, more balanced flavor. The spices work gently but noticeably, and these lemons are perfect for dishes that cook for a long time and require a stable, predictable result thanks to their slow aromatic build.
4. Garlic and Herb Preserved Lemons

This recipe has a more pronounced aroma, perfect for fish, chicken, vegetables, and any dishes where you want brightness without acidity.
In summer, our rosemary grew wild, the thyme crossed every possible boundary, and there was more than enough garlic in the beds. Lemons with salt turned out to be the most convenient way to preserve all this goodness so it would work in dishes all season long.
Garlic is known for its strong antibacterial potential, as described in studies published in the Journal of Food Protection. And the stable phenolic compounds in herbs (particularly rosemary and thyme) retain activity even in salt solutions, which is confirmed by data from Food Chemistry. So you get something not only tasty but also quite technically efficient.
If you don’t have a good garlic grater — here’s a good option on Amazon Amazon Basics Garlic Press & Herb Mincer.
Ingredients (for 1 pint / ~470 ml)
- 4–5 lemons
- 2–3 tbsp kosher salt (30–40 g)
- 3–4 garlic cloves, crushed
- 1–2 rosemary sprigs
- 1–2 thyme sprigs
- Juice of an additional 2–3 lemons
How I Make Lemons with Garlic and Herbs
- Prepare the lemons. I rinse the peel under hot water and cut the lemons into lengthwise quarters — this helps them absorb the juice and the herbal aroma better.
- Add the salt. I mix the lemon wedges with salt right in the bowl. Usually within a minute the lemons start releasing their first juice — this speeds up further fermentation.
- Prepare the garlic. I crush the cloves with the flat side of a knife. In this form garlic releases flavor more evenly but doesn’t overpower the lemons like minced garlic would.
- Prepare the herbs. I lightly press the sprigs with my fingers — the essential oils come out faster. Thyme can stay whole, rosemary too.
- Pack everything into the jar. I layer: lemons — garlic — herbs. Light pressing with a spoon helps push out air and spread the juice.
- Pour the juice. I add freshly squeezed lemon juice until everything is fully covered. Sometimes I add a little more if the wedges float.
- Leave for the fermentation start. 2–3 days at room temperature. Once a day I shake the jar so the brine spreads more evenly for a steady herb infusion.
- Move to the cold. After a few days the jar goes into the fridge. You can start using them after about 2–3 weeks, but after a month the flavor becomes more smooth and cohesive.
How to Use
- In baked fish — especially white fish, where the lemon-herb note works perfectly.
- In chicken marinade — a quarter of such a lemon replaces three ingredients at once.
- In vegetable sauces — garlic adds depth, and thyme gives a stable aroma.
These lemons are great when you need to quickly add not just acidity but also herb aroma and a gentle garlic accent to a dish. They’re versatile, store well, and work in both hot and cold dishes thanks to their balanced herbal brightness.
5. Spicy Chili Preserved Lemons
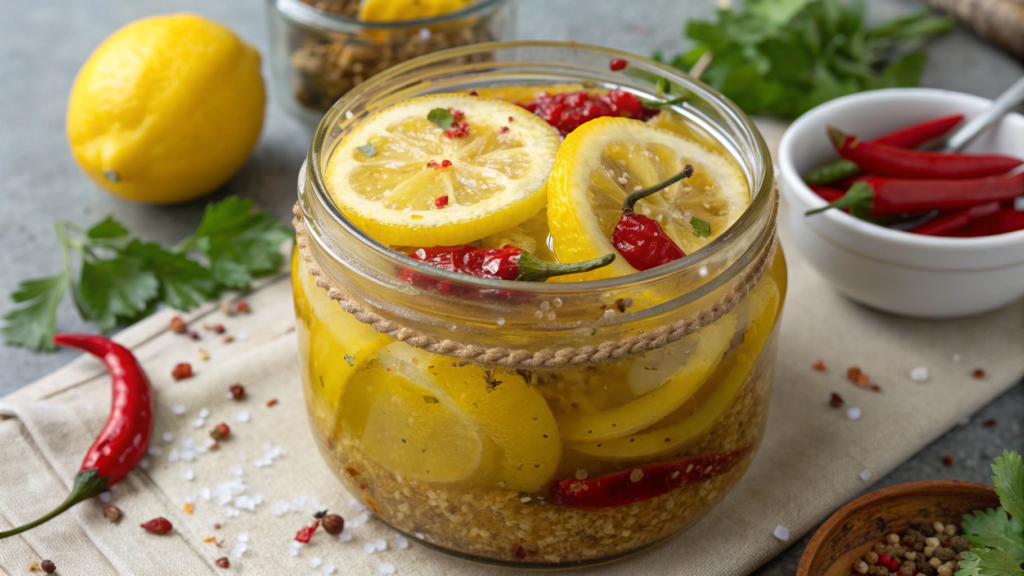
Lemons, salt, chili, a bit of brine — and suddenly we have a product that becomes the main “flavor accelerator” for soups, braised dishes, roasted vegetables, and even simple rice.
The heat here isn’t aggressive — it’s absorbed by the lemon peel and turns into a gentle, stretching warmth behind the salty citrus note.
Capsaicin, the active compound in hot peppers, remains stable in salt solutions, which is confirmed by Food Chemistry data, so the flavor lasts a long time and the aroma stays consistently intense even after months of storage.
Ingredients (for 1 pint / ~470 ml)
- 4–5 lemons
- 2–3 tbsp kosher salt (30–40 g)
- 1–2 fresh red chilies or 1 tsp dried flakes
- 1 small hot green pepper — optional
- Juice of an additional 2–3 lemons
How I Make Spicy Chili Lemons
- Prepare the lemons. I rinse the peel and cut the lemons into quarters or “boats.” The smaller the pieces, the faster they absorb the heat.
- Mix with salt. I mix the quarters with salt in a bowl. After a minute the lemons become slightly softer — a good sign, the juice has already started to come out.
- Prepare the chili. I cut the red pepper lengthwise. If I want a milder flavor, I remove some seeds. If I want bright heat — I leave everything as is.
- Pack into the jar. I layer the lemons and chili. Sometimes I add a bit of dried flakes between the layers if I want to boost the aroma.
- Add the juice. I squeeze the juice of 2–3 lemons and fully cover the contents of the jar. Small air bubbles are fine, but the lemons must be completely submerged for a clean, stable heat profile.
- Start the fermentation. 2–3 days at room temperature. Every day I shake the jar so the salt and juice distribute evenly.
- Further storage. I move the jar to the fridge. After 3–4 weeks the flavor becomes balanced, and the heat turns into a smooth, controlled spiciness. Over time the chili gives its color and aroma to the lemons.
How to Use
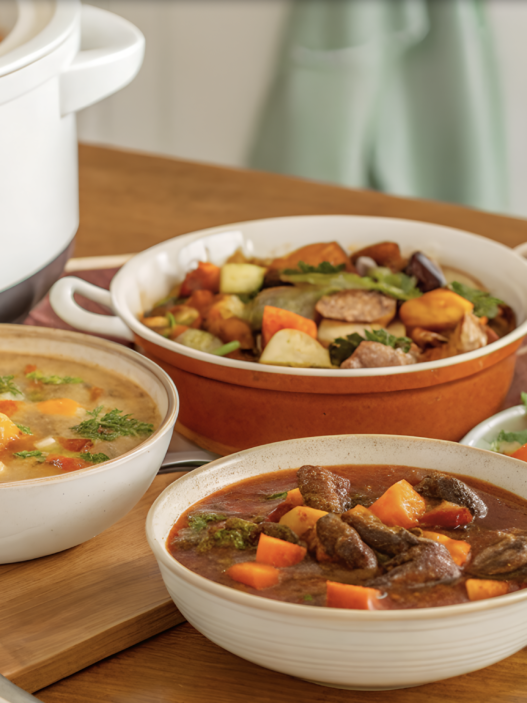
- In soups and braised dishes — a quarter replaces both lemon and heat at once.
- In marinades for chicken or tofu — especially good with garlic and honey.
- In roasted vegetables — just add a piece at the end of cooking.
This version is great for those who like gentle, controlled heat in dishes. The lemons store well, the flavor develops gradually, and the preserve stays universal even after months of aging thanks to its long-lasting chili infusion.
6. Preserved Lemons with Juniper and Coriander
In this variation, juniper gives a clean, dry, almost pine-like aroma, and coriander adds a warm citrus note. As a result, the lemons become more “structured” in flavor and are perfect for dishes where a clear, delicate aromatic line matters.
Juniper berries contain stable essential oils that retain activity in salty environments, as shown by Food Chemistry data. This means the aroma lasts a long time — even after months — and the lemons develop a steady aromatic profile.
If you don’t have a good mortar to gently crush the spices, here’s a reliable option — Granite Mortar and Pestle Set.
Ingredients (for 1 pint / ~470 ml)
- 4–5 lemons
- 2–3 tbsp kosher salt (30–40 g)
- 1 tsp juniper berries
- 1 tsp whole coriander seeds
- Juice of an additional 2–3 lemons
How I Make Lemons with Juniper and Coriander
- Prepare the lemons. I rinse the peel and cut the lemons into quarters. Sometimes I make slightly smaller wedges — in this variation it helps the spices work more evenly.
- Add the salt. I mix the quarters with salt by hand. After a minute the lemons become softer — a normal reaction to salt and the first step toward a balanced citrus brine.
- Prepare the spices. I lightly crush the juniper berries with a mortar — not into powder, just enough to crack them. I gently press the coriander seeds too, so the oils release sooner.
- Pack into the jar. I layer the lemons, sprinkling spices between them. In this recipe it’s important that the spices are spread evenly — the aroma should come from everywhere, not from one corner.
- Add the juice. I squeeze the additional lemons and fully cover the contents of the jar. If the lemons float, I press them down slightly with a spoon.
- Start the fermentation. I leave the jar at room temperature for 2–3 days. One gentle shake a day helps the salt work more effectively for a clean, even infusion.
- Storage. After a few days I move the jar to the fridge. The flavor evens out in about 3–4 weeks, but the juniper opens especially well after a couple of months.
How to Use
- In fish dishes — especially white fish and cod.
- In chicken marinades where you need a clean lemon-spice profile.
- In warm vegetable salads — works well with potatoes and beans.
This variation is ideal for anyone who wants a calm, precise aroma without sharpness. Juniper and coriander give a predictable flavor that holds well over time and suits simple, straightforward dishes thanks to its subtle spiced clarity.
7. Slow-Cured Preserved Lemons
This version is the most traditional and the most “unhurried.” If quick lemons work for everyday cooking, then slow-cured ones are the preserve you put on the shelf and can forget about for a couple of months. They become soft, firm, with a deep citrus flavor that no fast method can create.
Slow fermentation allows the peel to release more aromatic oils, which is supported by Food Chemistry data. This makes the flavor rich and very stable and long-lasting.
Ingredients (for 1 quart jar / ~1 liter)
- 6–8 small lemons
- 1/4–1/3 cup kosher salt (40–55 g)
- Juice of an additional 3–4 lemons
- Optional — 1 bay leaf or a few coriander seeds (but not required)
How I Make Slow-Fermented Lemons
- Prepare the lemons. I rinse them under warm water and make deep cross-shaped cuts without slicing all the way through so the lemon stays whole.
- Fill with salt. I generously pour salt inside each lemon. If some salt spills — that’s fine, it will be used during packing.
- Pack into the jar. I place the lemons as tightly as possible. I sprinkle any remaining salt between the layers. Tight packing helps release juice faster and keeps air out for a clean, reliable fermentation.
- Add the lemon juice. I squeeze the additional lemons and fully cover the fruits. The liquid must reach the very top — that’s the foundation of proper fermentation.
- Leave at room temperature. For the first 5–7 days the jar stays on the counter. Once a day I shake it to distribute the salt and juice.
- Move to a cool place. After a week I transfer the jar to a pantry or fridge. This is where the main stage begins. The lemons need at least 4–6 weeks, preferably 8. The flavor becomes more even and deeply developed.
- Ready to use. When the peel becomes soft and cuts easily with a knife, the preserve is ready.
How to Use
- In Moroccan dishes — especially tagines.
- In marinades for chicken and fish — it gives a clean, bright citrus note.
- In roasted vegetables — a small piece is enough to change the flavor of the whole dish.
The slow method is perfect for anyone who wants the deepest, most stable flavor without rushing. It’s a foundational preserve that works for long-term storage and gives a predictable result every time.
8. Preserved Lemons with Thyme and Rosemary
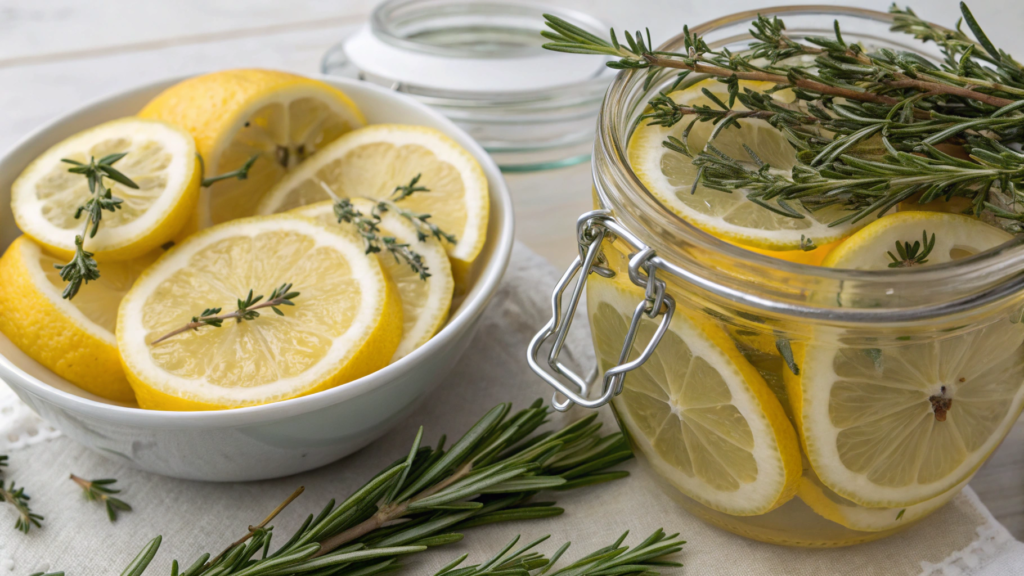
One day I simply decided to try combining thyme and rosemary with lemons. It turned into a practical, universal option that works beautifully in dishes where you want fresh but not sharp citrus notes.
Thyme gives a soft herbal aroma, and rosemary adds a light structure. Their essential oils are stable in salt, which is confirmed by Food Chemistry data, so the aroma lasts for months and stays clean and consistent.
Ingredients (for 1 pint / ~470 ml)
- 4–5 lemons
- 2–3 tbsp kosher salt (30–40 g)
- 2–3 sprigs of fresh thyme
- 1–2 sprigs of rosemary
- Juice of an additional 2–3 lemons
How I Make Lemons with Thyme and Rosemary
- Prepare the lemons. I rinse them carefully since the peel will be the main carrier of flavor. I cut the lemons into quarters — in this variation the herbs distribute best this way.
- Mix with salt. I place the lemons in a bowl and add the salt. I mix with my hands — within a minute the lemons start releasing juice, which immediately helps the fermentation process.
- Prepare the herbs. I leave the thyme as whole sprigs, and I lightly “break” the rosemary with my fingers to release the aroma. I don’t remove the leaves — whole sprigs are easier to take out of the jar.
- Pack into the jar. I make layers: lemons — herbs — lemons — herbs again. Light pressing with a spoon helps remove excess air.
- Add the juice. I squeeze the additional lemons and fully cover the contents. If the juice doesn’t rise immediately, you can wait a bit until the lemons settle.
- Start the fermentation. 2–3 days at room temperature. Once a day I shake the jar so the herbs distribute evenly and don’t float too much.
- Storage. After a few days I move the jar to the cold. The best flavor appears around 3 weeks, but the herbal profile becomes deeper after 6–8 weeks thanks to a slow aromatic infusion.
How to Use
- In baked chicken — especially with potatoes.
- In grilled vegetables — zucchini, eggplant, sweet pepper.
- In marinades — pairs well with olive oil and honey.
- In salad dressings — one teaspoon of chopped peel changes the whole flavor.
This variation gives a pleasant herbal aroma that suits everyday dishes. It’s simple to make and holds up well during long storage, giving a gentle, versatile flavor that works in many meals.
9. Instant Preserved Lemons for Same-Day Cooking
This quick method isn’t full fermentation — it’s an accelerated treatment that gives a similar flavor profile in just a few hours.
Warm resting and salt help “release” the aromatic oils of the peel faster. Food Chemistry research shows that heat and salt increase the availability of citrus essential compounds — enough to explain why this method works and why the flavor feels surprisingly close to traditional versions.
If you don’t have a good fine-tooth grater (and it’s really convenient here), here’s an option — Microplane Premium Zester.
Ingredients (for 1 small jar / ~250 ml)
- 2–3 lemons
- 1 tbsp kosher salt (15–18 g)
- 1 tsp sugar (optional, for softening the flavor)
- Juice of 1 more lemon
- A small piece of peel, finely grated (optional, for boosting aroma)
How I Make Lemons You Can Use the Same Day
- Prepare the lemons. I rinse the peel and slice the lemons into thin wedges. The thinner they are, the faster they release juice and aroma.
- Add the salt. I place the wedges in a bowl and sprinkle with salt. I mix with my hands: after a minute the lemons start releasing juice — a good sign that the process has begun for a fast citrus extraction.
- Thermal assistance (optional). I transfer the lemons to a small heatproof container and place it over a water bath for 10–15 minutes. Heat softens the peel and speeds up the extraction of oils.
If you don’t want to heat them — skip this step, but the resting time will be longer. - Add the lemon juice. I pour fresh lemon juice over the mixture just enough to lightly cover the wedges. In this variation, you don’t need much liquid — just enough to coat everything evenly.
- Extra aromatization. Sometimes I add a teaspoon of grated peel. It gives a more direct aroma, especially useful if the lemons aren’t very bright.
- Let it rest. 1–2 hours at room temperature. During this time the peel softens, the salt distributes, and the flavor becomes similar to traditional preserved lemons.
- Use immediately. These lemons can’t be stored long. In the fridge they last for a day, but it’s best to use them the same day for the freshest citrus punch.
How to Use
- In sauces and dressings — especially good for pasta or salads.
- In braised dishes — I add them at the very end to keep the aroma.
- In roasted vegetables — works as a quick flavor booster.
This method is perfect when you need a salty lemon note “right now.” The flavor isn’t as deep as traditional versions, but for most dishes it’s more than enough — bright, fast, and immediately usable.
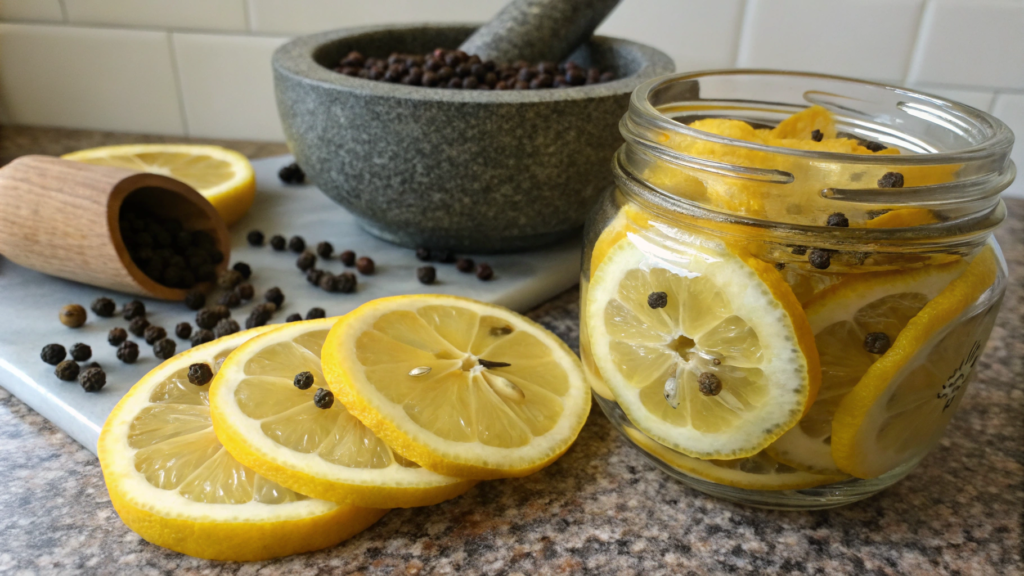
10. Lemon and Peppercorn Preserves for Bold Flavor
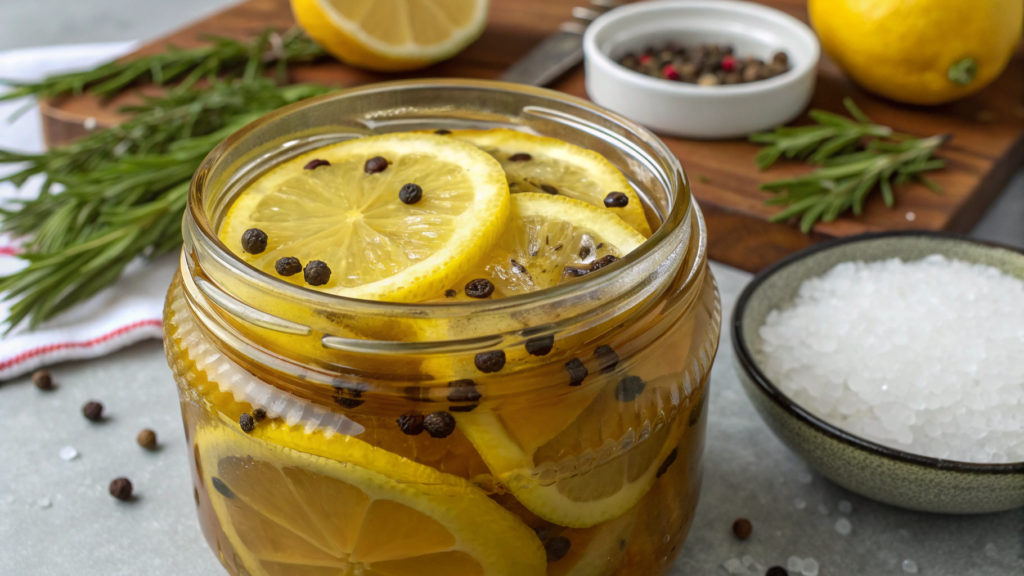
In this variation, pepper gives a clean, confident note without overpowering the lemon itself. Combined with salt and time, it creates a product that adds “clarity” to the flavor.
We made this preserve in winter when we often cooked roasted vegetables and chicken. Lemon with pepper gave the aroma we needed, and using it was easier than mixing several spices.
Piperine — the main active compound in pepper — is stable in salty solutions, which is supported by Food Chemistry data. This means the pepper keeps its aroma for months, even in liquid form, giving the lemons a steady pepper brightness.
Ingredients (for 1 pint / ~470 ml)
- 4–5 lemons
- 2–3 tbsp kosher salt (30–40 g)
- 1 tbsp whole black peppercorns
- 1 tsp pink pepper (optional, for a softer aroma)
- Juice of an additional 2–3 lemons
How I Make Lemons with Pepper
- Prepare the lemons. I rinse the peel and cut the lemons into quarters or thin wedges. For this variation, slightly larger pieces work well — the pepper distributes more evenly.
- Add the salt. I mix the lemons with salt in a bowl. After a minute the lemons begin releasing juice — enough for the spices to start working for a clean pepper infusion.
- Prepare the pepper. I lightly crush the black pepper with the flat side of a knife — not into powder, just enough to crack it. I leave the pink pepper whole.
- Pack into the jar. I layer the lemons, sprinkling them with pepper. Light pressing helps remove air and strengthens the brine.
- Add the juice. I squeeze the additional lemons and fully cover the contents of the jar. If needed, I add a bit more juice so everything stays submerged.
- Start the fermentation. 2–3 days at room temperature. Once a day I shake the jar so the pepper distributes evenly.
- Storage. After a few days I move the jar to the cold. They’re ready in about 3–4 weeks, but the pepper opens especially well after 6 weeks, giving a deep citrus-pepper balance.
How to Use
- In meat marinades — especially for chicken and pork.
- In soups and braised dishes — gives a clean lemon-spice note.
- In vegetable dishes — pairs well with potatoes, carrots, cauliflower.
- In salads — a small amount gives an even pepper aroma without sharpness.
This variation is great for those who want a lemon flavor with a clear pepper line. The preserve keeps well, the flavor develops slowly and evenly, and it’s convenient to use in many different dishes thanks to its steady lemon-pepper profile.
Universal Lemons
Looking at all these recipes together, one thing becomes clear: preserved lemons aren’t “one flavor for all dishes.” Each variation solves its own task. Some give heat, others a stable herbal profile, and others a soft, dense lemon flavor for long braises. And when you have several jars in the fridge at once, cooking becomes easier — you simply choose the aroma that fits the dish.
These recipes don’t require complicated techniques or rare ingredients. Everything relies on lemons, salt, and the right amount of time. And the most convenient part — you can adapt any variation to your taste and needs thanks to their versatile citrus base.
If you want — you can write in the comments which variations you use most often, and I’ll help pick dishes for them or make additional versions.