Packing a lunchbox for a teenager is almost like planning a negotiation. Because lunch in school is not just food, it’s part of public life. And everything inside can be either neutral or weird. And weird doesn’t get eaten. Not because it tastes bad, but because no one wants to explain it.
So the lunch should be something that can be taken out and eaten calmly. Something that doesn’t fall apart, doesn’t drip, doesn’t smell strange, doesn’t require a spoon, and ideally — looks normal. Plus — it should be filling. Because the day is long. Classes, gym, bus rides…
In this roundup — 10 proven options that really get eaten. These are meals that survive reality: morning prep, the backpack, 4 hours until lunch, and 10 minutes to eat. Yes, this is food that works. And food you’re not embarrassed to eat in front of friends.
1. Grilled Cheese Roll-Ups
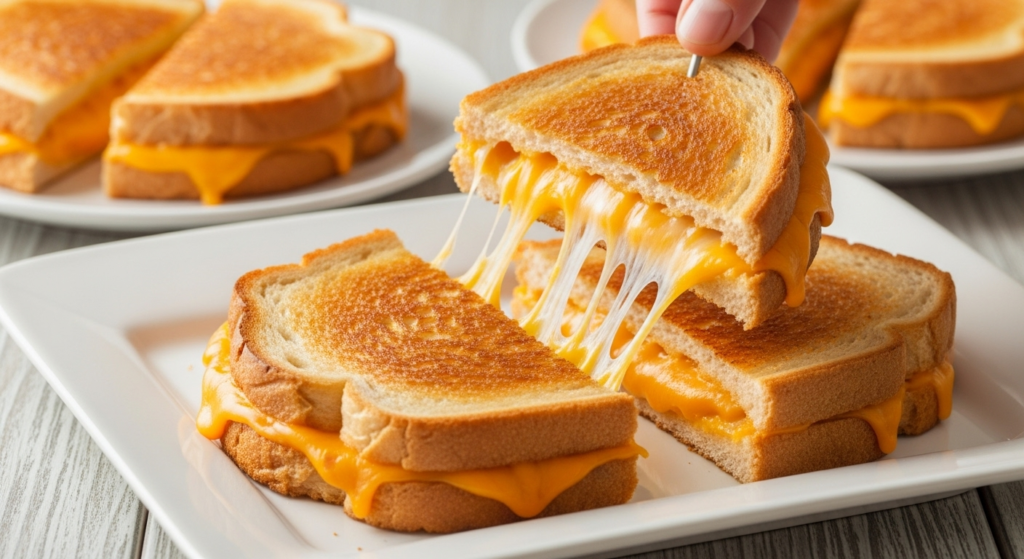
Grilled cheese is loved by both teens and adults, it stretches with melted cheese and brings childhood memories. But we went further and made grilled cheese roll-ups that are easy to eat without getting your hands messy. Tested and approved!
Roll-ups disappear from lunchboxes within the first 5 minutes after the bell. Because they’re convenient, tasty, and somehow… fun.
What you need:
- 6 slices of soft sandwich bread without crusts
(white toast bread works best — it rolls out easily and doesn’t tear) - 6 slices of cheddar cheese (or any good melting cheese — mozzarella, gouda, colby jack)
- 2 tbsp softened butter (≈ 30 g)
- Optional: a bit of ketchup or tomato sauce for dipping
Tip. It’s perfect to use a small non-stick skillet like Lodge Cast Iron Mini Skillet, so the roll-ups don’t burn but brown nicely!
How to cook:
- Prepare the bread. Cut off the crusts (you can leave them, but it’s harder to roll). Roll out each slice with a rolling pin until flat and pliable.
- Add cheese. Place one slice of cheese on each bread slice. Add a pinch of oregano or basil if your teen prefers a “grown-up” taste.
- Roll it up. Carefully roll each slice into a tight roll, starting from the short side.
- Fry. Heat a skillet over medium heat. Brush each roll with butter on the outside (or dip in melted butter), place seam side down. Fry for 2–3 minutes per side until golden and crispy.
- Cool. Even if the roll-ups are going into a lunchbox — letting them cool a bit after frying is important. First, they’ll hold their shape better. Second, the inside moisture won’t steam the bread, and the roll-ups will stay crispy instead of soggy by lunchtime.
We often make these roll-ups on weekends and store them in a container in the fridge. In the morning it’s enough to warm them up slightly in a toaster or microwave (cover with a damp paper towel so they don’t turn rubbery).
And yes, they look fantastic in a lunchbox, especially paired with sliced cucumbers, carrot sticks, and a small container of ketchup.
2. Smashed Chickpea Salad Sandwich

If the lunchbox has the same thing every day — ham sandwich, processed cheese, something from the vending machine — a teen has no choice. They either eat without joy or just leave it. Especially older students.
A chickpea salad sandwich is a worthy alternative to meat. It’s filling, flavorful, crunchy from the veggies, and looks and feels like real food — not a “vegetarian substitute.”
And most importantly — it actually gives energy. Protein + fiber + complex carbs = a balanced school lunch, work, or even a long trip.
Many parents have added this recipe to their weekly lunch rotation. It’s simple to make, holds its shape well, and stores perfectly.
Ingredients:
- 1 can chickpeas (15 oz / ≈ 425 g), rinsed and drained
- 1.5–2 tbsp mayonnaise or Greek yogurt
- 1 tsp Dijon mustard
- 1 tsp lemon juice
- Salt and freshly ground black pepper — to taste
- 2–3 tbsp finely chopped celery or fresh cucumber
- 1 tbsp finely chopped red onion
- Whole grain or rye bread
- Romaine or spinach leaves (optional)
How to cook:
- Mash the chickpeas in a large bowl. Best done by hand with a fork or masher. The texture should not be a paste, but slightly chunky. This version is tastier and holds better in a sandwich.
- Add the binding components — mayo, mustard, lemon juice. Mix well until combined. You can adjust the mayo if you want a creamier texture. Don’t overdo it — the salad shouldn’t be runny.
- Add the crunchy veggies — celery or cucumber and red onion. They bring freshness and make the texture more interesting. Mix again.
- Prepare the bread. Slightly toasted slices work best — they don’t get soggy as quickly. Spread the filling on one slice, add lettuce leaves on top if you want to create a “barrier” between filling and bread.
- Assemble the sandwich. Place the second slice on top and press lightly so it holds together. Cut in half if you like — diagonally always looks more appetizing.
Storing and packing
If you prepare for 1–2 days ahead, the chickpea salad can be stored in the fridge in an airtight container. It doesn’t lose flavor and doesn’t get “tired.” Some even say it tastes better the next day as the flavors blend.
To keep the sandwich from getting soggy:
- Use lettuce leaves as a barrier between filling and bread.
- Assemble the sandwich in the morning, not the night before.
- Or pack the filling and bread separately — let the lunch be built at school.
A convenient container option is the Rubbermaid LunchBlox Sandwich Kit. It’s compact, seals tightly, and allows you to separate the salad, bread, and sides into different compartments.
This sandwich has no meat, but it gives the same satiety and the feeling of “real food,” which is important for teens at school. And if you pack it with some fruit and a small bar, you get one of the most balanced and practical lunches you can put together in 10 minutes in the morning.
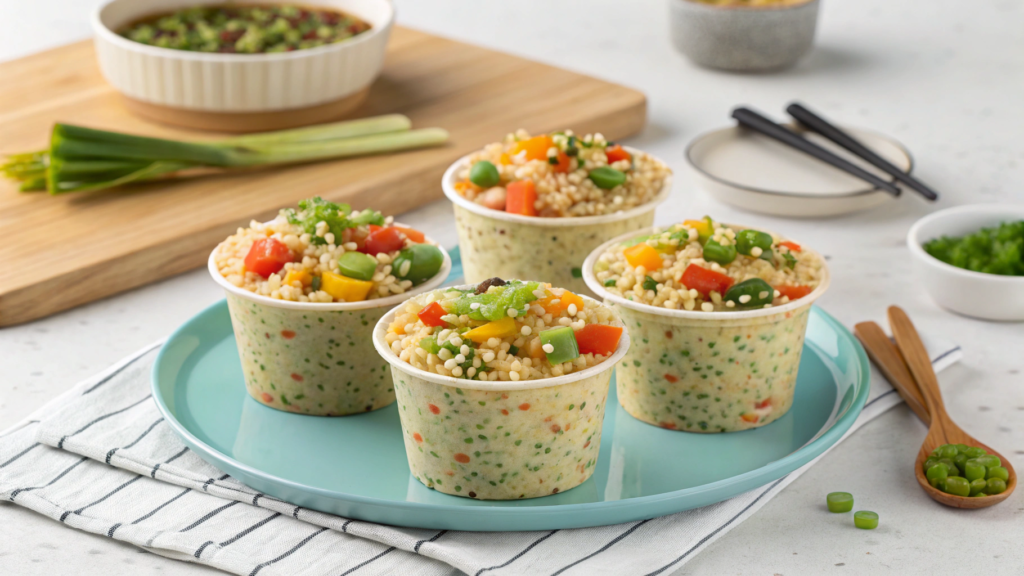
3. Veggie-Packed Fried Rice Cups
Some recipes appear by accident, and then you make them again. And again. Because they’re just convenient.
These veggie-packed rice muffins were born in our kitchen as a way to use up leftover rice, but they quickly turned into a planned school lunch. Because they’re easy to take with you. They hold their shape. You can eat them with your hands. And most importantly — they actually get eaten to the last bite.
For school lunches, office meals, or long trips — this is a stable, filling, and yet light option that can hide a lot of healthy ingredients.
Ingredients (for 12 small portions):
- 2 cups cooked rice (jasmine or basmati works best, leftovers from dinner are fine)
- 1 cup finely chopped vegetables (carrots, broccoli, bell pepper, green peas)
- 2 eggs
- 2 tbsp soy sauce
- 1 tsp sesame oil (optional, but adds flavor)
- ½ tsp garlic powder
- A pinch of salt and pepper
- ½ cup grated cheese (cheddar, mozzarella, parmesan — whatever you like)
- Muffin cups are a must! (Wilton Silicone Baking Cups — nothing sticks, they’re easy to wash, and reusable)
How to cook:
- Prep the veggies. Use whatever you have: grate the carrots, chop the broccoli, peas can be frozen or canned. Everything should be small so it bakes through and holds shape.
- Mix the base. In a large bowl combine cooked rice, eggs, soy sauce, sesame oil, garlic powder, salt, and pepper. Mix with a fork or your hands — the mix should be moist but not runny. This is your base.
- Add veggies and cheese. Mix again. The mass will become denser, and you’ll feel it holding together.
- Fill the muffin cups. Lightly grease silicone cups or muffin pans. Fill each about ¾ full, pressing lightly with a spoon so they don’t fall apart.
- Bake. Preheat the oven to 375°F (190°C) and bake for 18–22 minutes until the tops are golden. Let cool at least 10 minutes — too hot, they don’t hold shape in the container.
These muffins are the perfect grab-and-go format. They store well in the fridge for up to 4 days and don’t lose texture. You can reheat them, but they taste just fine cold too.
Pro tip. Рack a little teriyaki or sweet chili sauce in the lunchbox — it gives an Asian twist and makes the flavor richer. Or wrap them in a lettuce leaf and eat them like tacos.
This school lunch may look simple, but in reality it’s one of the most thought-out ideas: packed with protein (eggs), complex carbs (rice), fiber (veggies), and calcium (cheese).
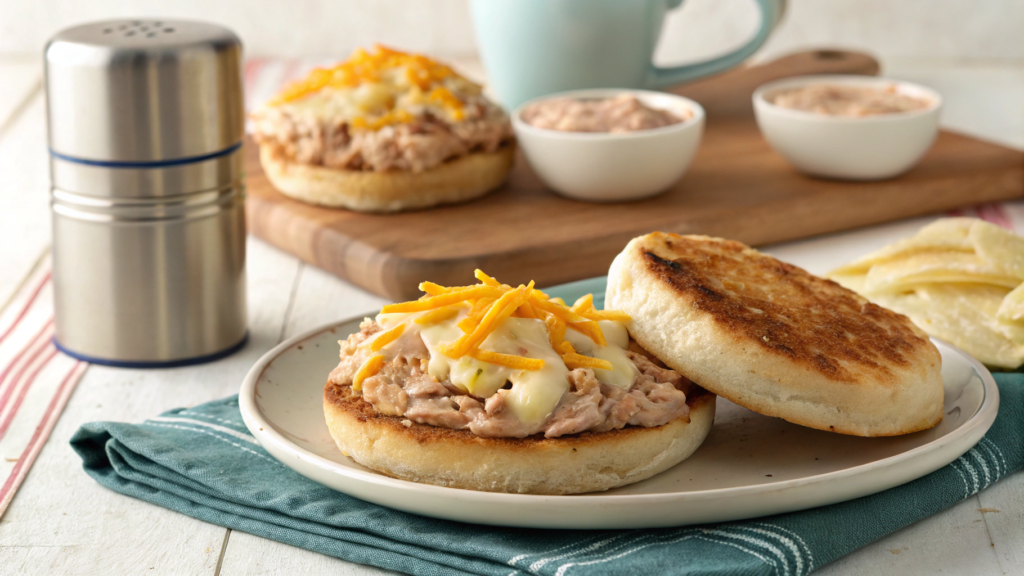
4. Tuna Melt English Muffins
Hot food at school is a luxury. Especially in middle and high school, where there’s one microwave for everyone, and time seems to run in reverse. That’s why smart moms (and dads) look for lunches that can either be eaten warm from a food thermos or still taste good cold.
Tuna with melted cheese on half of an English muffin is exactly that format. It’s compact, doesn’t fall apart, looks “normal” in the eyes of teens, and gives satiety without feeling heavy.
Plus — you can make several at once and store them in a container. In the morning just reheat or take them straight from the fridge and put them in a thermos.
Ingredients (for 4 halves):
- 2 English muffins, cut in half
- 1 can tuna in water (5 oz / ≈ 140 g), drained
- 2–3 tbsp mayonnaise
- 1 tsp Dijon mustard (optional)
- 1 tbsp finely chopped red onion
- 1–2 tbsp finely chopped pickles
- ¼ tsp dried dill
- Salt and pepper — to taste
- 4 slices cheese (cheddar, colby jack, gouda — the key is it melts well)
How to cook:
- Prep the tuna. Drain the liquid, place into a bowl, and mash slightly with a fork. It’s important to break up large chunks so the mixture spreads evenly.
- Add the dressing. Mayo, mustard, onion, pickles, dill, salt, and pepper — mix everything until you have a thick but not dry paste. It should spread easily but not run off.
- Spread on the muffins. Place 2–3 tbsp of tuna mixture on each half, spreading evenly to the edges. Don’t pile it high — otherwise the cheese will run off and the middle will stay cold.
- Add cheese. A slice on top, slightly hanging over the edge. This gives a nice browned crust and makes the muffin “stretchy.”
- Bake. Put in the oven or toaster oven at 400°F (≈ 200°C) for 8–10 minutes until the cheese bubbles and the edges are golden.
- Cool. Yes, a bit of patience. 5–10 minutes of cooling will make them firm and stable — easy to cut or pack without falling apart.
How to pack for school
If a microwave is available, place the muffins in a microwave-safe container or wrap in regular parchment. 30 seconds — and the cheese melts again, the toast is soft and appetizing.
If reheating isn’t an option — just pack them in a food thermos.
Another option — place the cooled muffins in a container with chilled veggies or salad. Even cold, they stay tasty and look appetizing.
This school lunch gives everything at once: protein, fats, flavor, and texture. And at the same time — nothing extra. No dripping sauce, no crumbs everywhere, and no one asking “what weird food is that?”
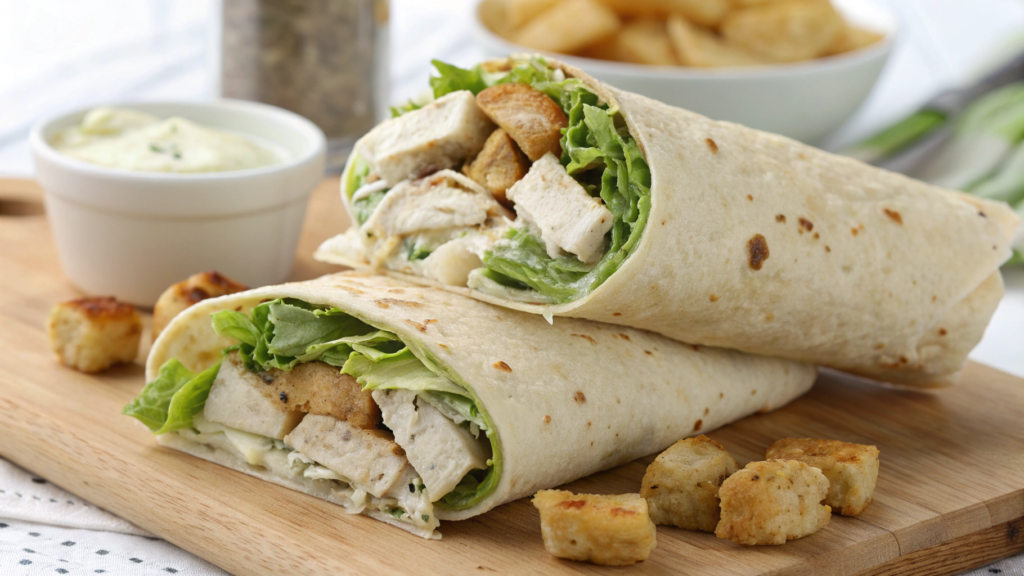
5. Chicken Caesar Wraps
For teens, a culinary masterpiece is not required — it’s enough if it’s tasty, consistent, and not embarrassing to pull out of the lunchbox.
A chicken Caesar wrap is one of the few options that holds its shape, can be eaten easily with hands, and gives everything needed: protein, crunch, freshness, and the feel of a “restaurant-style lunch.” And yes, putting it together takes just a minute.
Ingredients (for 2–3 portions):
- 2 cups chopped cooked or roasted chicken (breast, thighs, or leftovers from dinner)
- ⅓ cup Caesar dressing (store-bought or homemade)
- 1 cup romaine lettuce, torn into pieces
- ¼ cup grated parmesan
- Salt and pepper — to taste
- 2–3 large flour tortillas (burrito-size, 10 inches, work best)
- Optional: small croutons, for crunch
- Optional: avocado or slices of bacon
Mission Foods Burrito Size Flour Tortillas make assembly easier — they’re soft, sturdy, don’t tear while rolling, and fit the size perfectly.
How to cook:
- Prepare the filling. Chop or shred the chicken into small pieces. Mix in a large bowl with dressing, lettuce, parmesan, and croutons if using. The filling should be moist but not runny — tortillas can’t handle too much liquid.
- Warm the tortillas. This step matters. Without it they’ll crack. Heat on a dry skillet for 20–30 seconds per side, or wrap in a paper towel and microwave for 15 seconds.
- Assemble the wrap. Place the filling on the bottom third of the tortilla, leaving space at the edges. Fold the sides in, then roll tightly upward like a burrito. You can wrap it in parchment or foil — it will hold shape better and won’t unwrap.
- Cut in half. Diagonally for the look, straight for compactness. Wraps can be served right away or stored in the fridge overnight.
How to pack for school
If school lunch will be eaten within a couple of hours, don’t worry. A wrap holds its shape at room temperature, especially if wrapped in wax paper or plastic wrap.
We usually use Lunchskins Reusable Sandwich Bags — washable, reusable, and they keep a wrap fresh without leaking moisture or odors.
If you want it to stay cool until lunch — add a small reusable ice pack in the container.
Good sides for this wrap:
- a few slices of apple with lemon,
- carrot sticks,
- or a mini container with extra Caesar dressing for dipping.
This lunch is a version of “grown-up food” in a school format. Nobody will call it “homemade weird stuff” — on the contrary, it looks like the café-style wraps you’d pay $12 for. Only without the extra cost and with full control of the ingredients.
6. Creamy Pesto Pasta Bowls
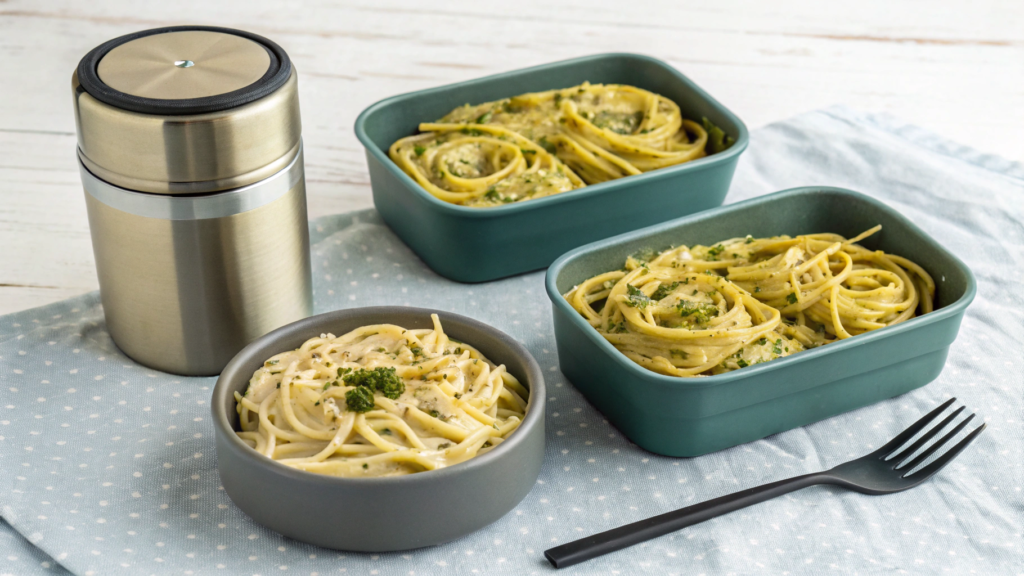
Sometimes a school lunch shouldn’t just be a sandwich or a snack, but something that really fills you up and gives energy. And in this sense, pasta is a great option. It tastes good even cold, and if you put it in a thermos, it will stay warm until lunch. The main thing — the right container and a simple fork.
Ingredients (for 3–4 portions):
- 8 oz (≈ 225 g) pasta — penne, rotini, or fusilli (anything that holds sauce well)
- ¼ cup green pesto (homemade or store-bought)
- ¼ cup cream cheese
- 1–2 tbsp milk or cream — for creamy texture
- ¼ cup grated parmesan
- Salt and pepper to taste
- Optional: cooked chicken, broccoli, cherry tomatoes
- For serving: fresh basil leaves or a drizzle of olive oil
How to cook:
- Cook the pasta. Choose a shape that holds sauce well — spirals or short tubes. Boil in salted water until al dente. Drain, but save a couple of spoonfuls of pasta water — it will be useful later.
- Make the sauce. In a small saucepan over medium heat, warm the cream cheese with pesto and a spoon of milk. Stir constantly — the sauce should become smooth. Add a bit of pasta water if you want it thinner.
- Assemble the dish. Mix the hot pasta with the sauce, add grated parmesan, a little salt and pepper. Optionally add cooked chicken pieces or veggies — broccoli (blanched for 2–3 minutes) or cherry tomatoes (cut in half).
- Cool. If it will be eaten cold, let it cool to room temperature before packing. If you plan to serve it warm — just transfer it into a thermos.
How to pack for school lunch
This option works in two formats — as a full hot meal or as a pasta salad when served cold. Both are easy to pack.
- Hot lunch. Use the THERMOS Stainless King 16 Ounce Food Jar — the pasta will stay warm until lunchtime.
- Cold version. Pasta keeps its taste and texture well even from the fridge. The key is not to put it into the container right after cooking. Wait until it cools, otherwise excess moisture will appear.
Add a couple of apple slices, some nuts or crackers — and you get a complete, balanced lunch that you actually want to eat.
Creamy Pesto Pasta is not “leftover food from the fridge,” but a real café-style meal, only without the hassle and the extra cost. It’s convenient, flavorful, and filling.
7. No-Bake Peanut Butter Oat Bars
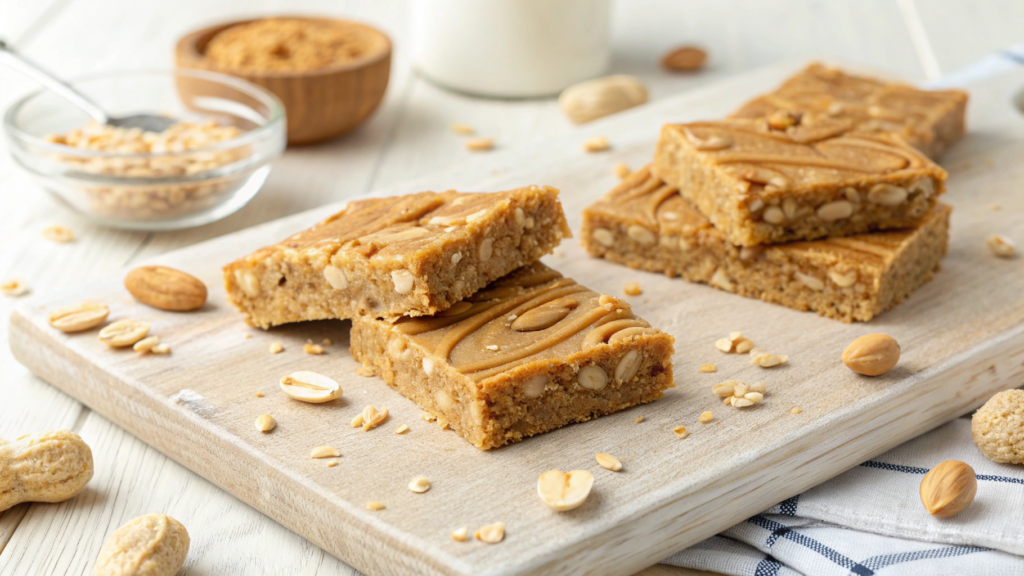
Oatmeal and peanut butter bars don’t try to be cookies. And they don’t disguise themselves as “healthy but boring.” This is an honest sweet snack that’s full of energy, with simple and familiar flavors, and that chewy texture teens are actually willing to trade a vending machine bar for.
Plus — they don’t require baking, take just 10 minutes to make, and store perfectly. Just toss one in the lunchbox, and that’s it.
Ingredients (for 8–10 bars):
- 1½ cups rolled oats (not instant)
- ½ cup peanut butter (creamy works best)
- ¼ cup honey or maple syrup
- ¼ cup mini chocolate chips
- Optional: a pinch of salt, cinnamon, or vanilla extract
- You can also add: chopped nuts, seeds, shredded coconut
It’s best to use a rectangular nonstick pan like the USA Pan Bakeware Rectangular Cake Pan — even for no-bake recipes it holds the shape well and releases bars easily.
How to cook:
- Mix the base. In a small saucepan over low heat, warm the peanut butter with honey (or syrup). Stir constantly until the mixture is smooth and sticky. Remove from heat and add cinnamon, vanilla, or salt if you like.
- Add the oats. Transfer rolled oats into a large bowl. Pour in the hot mixture and mix immediately — everything should be coated but not runny. The texture should be thick and sticky.
- Add the chocolate. Let the mixture cool for 3–5 minutes, then stir in the chocolate chips. If you add them too early, they’ll melt completely. This way, you get nice chocolate bits.
- Press into the pan. Transfer the mixture into a lined pan. Smooth it with a spoon or your hand, pressing firmly. Corners and density matter — this keeps the bars from crumbling.
- Chill. Refrigerate for at least 1 hour, preferably overnight. Then cut into rectangles or squares — ready to go.
How to pack for school
This is one of the safest dessert options for a lunchbox — it doesn’t leak, doesn’t crumble, and doesn’t require cooling (unless it’s very hot).
- Wrap each bar in wax paper or pack into a small container so it doesn’t get squashed among other foods.
- Compact boxes like the Sistema Klip It Collection Snack Containers work great — airtight and sturdy enough to keep the bars in shape.
The bars keep in the fridge for up to a week. You can make them in advance, store in a container, and just toss one or two into the lunchbox in the morning. That’s enough to have a snack that’s not only tasty but truly energizing.
8. Italian Deli Pinwheels
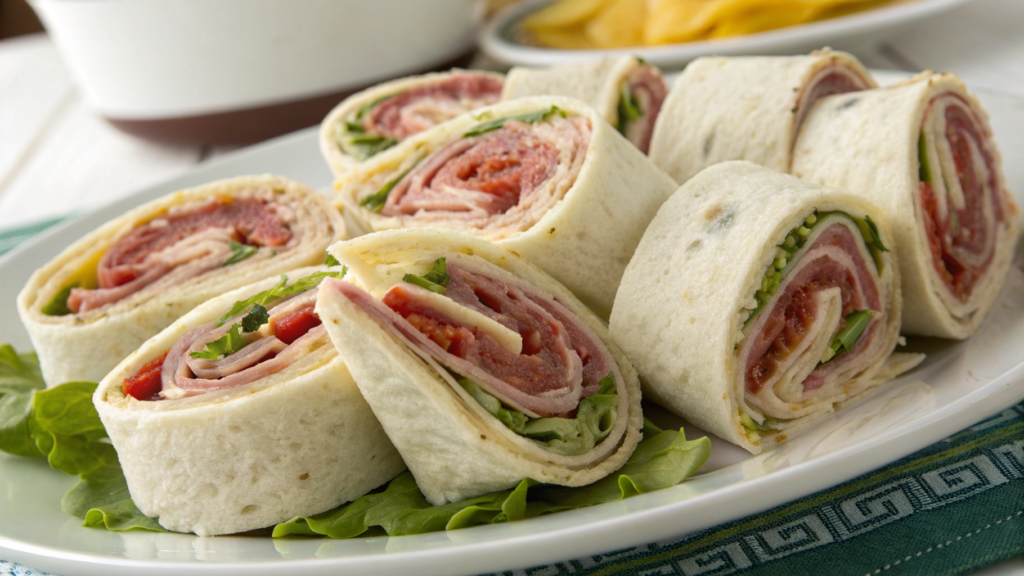
A sandwich is a classic school lunch. Pinwheels are a different story. Rolled-up tortillas with a dense filling, neatly sliced like mini sandwiches. They’re easy to eat, look great, and hold their shape well. Most importantly — they’re convenient to grab and eat calmly. Exactly what’s needed in the cafeteria, where time is short and attention even shorter.
The Italian deli meat version is one of the most popular. Tasty, juicy, filling, familiar. No unnecessary extras. Just a reliable, stable school lunch.
Ingredients (for 1 large tortilla / 6 pinwheels):
- 1 large flour tortilla (10-inch)
- 1–2 tbsp cream cheese or hummus — for the base
- 2 slices ham
- 2 slices salami or prosciutto
- 2 slices smoked turkey or roast beef
- 2 slices cheese (mozzarella, provolone, colby jack)
- Lettuce leaves — romaine, iceberg, or spinach
- Optional: thinly sliced red onion, peppers, olives, or sun-dried tomatoes
How to cook:
- Prep the base. Lay the tortilla flat. Spread a thin layer of cream cheese or hummus. This adds flavor and also helps “seal” the roll.
- Add the filling. Start with the meats: ham, salami, turkey — in an even layer, leaving 1 inch from one edge. Add cheese and lettuce on top. If using veggies, add lightly so the roll doesn’t fall apart.
- Roll. Carefully roll the tortilla tightly from the filled edge. Don’t overstretch, but don’t leave air gaps either. The empty edge at the end will seal it.
- Chill. Wrap in plastic wrap and refrigerate for at least 30 minutes. This stabilizes the shape, so everything stays inside when slicing.
- Slice. With a sharp knife, cut into 5–6 equal pieces. If making ahead, you can leave it whole until morning.
How to pack for school lunch
These pinwheels fit easily in a container in a single layer — nothing gets squished, leaks, or falls apart. Lunchboxes with sections are perfect.
Good add-ons:
- A few grapes or apple slices
- A couple of crackers
- A small container with mustard dip or yogurt sauce
Important! If you add veggies, it’s best to pack the pinwheels in the morning. Assembling the night before with wet ingredients can cause extra moisture.
Pinwheels are the ideal format for school: they don’t break, they’re not embarrassing to show, and you don’t have to explain what they are. Just food you can eat and move on with the day.
9. Crispy Baked Zucchini Fries
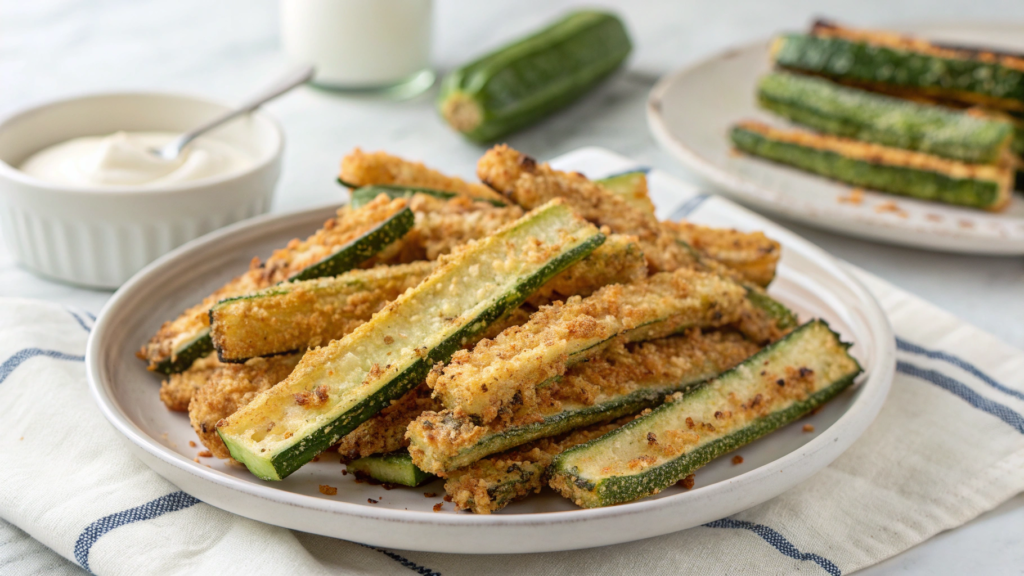
Oven-baked zucchini fries look like fast food, but they stay homemade, healthy, and subtly veggie. It’s a way to add fiber and greens to the diet without turning lunch into “health food.” Most importantly — a school lunch with these fries looks interesting, they crunch, and they’re easy to eat even cold.
Ingredients (for 2 portions):
- 1 medium zucchini
- ¼ cup flour (all-purpose or whole wheat)
- 1 egg, lightly beaten
- ½ cup breadcrumbs (panko gives extra crispiness)
- ¼ cup grated parmesan
- ½ tsp garlic powder
- ½ tsp Italian herbs
- Salt and black pepper — to taste
- Optional: a pinch of paprika or chili flakes
To get real crunch without oil, it’s convenient to use the Cuisinart Air Fryer Toaster Oven — it works as both an oven and oil-free fryer, perfect for fries that don’t fall apart.
How to cook:
- Prep the zucchini. Wash and cut into “sticks” about 2.5–3 inches (6–8 cm) long, the thickness of regular fries. No need to peel if the skin is thin.
- Coat in three steps. Prepare three plates:
- first — with flour,
- second — with egg,
- third — with breadcrumbs, parmesan, and spices.
Roll zucchini in flour (shake off excess), then dip in egg, then coat in breadcrumbs. Press lightly so the coating sticks well.
- first — with flour,
- Arrange on the baking sheet. Place on parchment or a silicone mat. Leave space between pieces — this way they bake, not steam.
- Bake. Preheat oven to 425°F (≈ 220°C). Bake 20–25 minutes, flipping once halfway. They’re ready when golden and firm, with a crispy crust.
- Cool. Let rest 10 minutes. Not just to avoid burning — cooling helps the fries “set” and prevents sogginess during transport.
How to pack for school
Best packed in a small ventilated container so the crust doesn’t soften. For example, the Sistema Bento Lunch Box lets the fries “breathe” and stay crisp.
Perfect dips to add:
- Greek yogurt with garlic,
- ketchup,
- ranch dressing,
- or Caesar sauce.
In another section of the container, add crunchy cucumbers, a couple of snack bars, or half a sandwich — and you’ve got a lunch that looks good, eats well, and fills you up.
Zucchini fries aren’t a “vegetable alternative,” they’re a real snack. No need to sell them as healthy food — they’re just tasty, crispy, and convenient.
10. Breakfast-for-Lunch Egg Muffins

A regular omelet won’t fit neatly into a container. And no one wants to pull out something pale, flimsy, and shapeless in front of classmates.
Egg muffins are the solution. Mini omelets in muffin form that hold their shape and come together in just 15 minutes. Convenient, tasty, sturdy, and they look like something ordered at a café.
Ingredients (for 12 muffins):
- 6 eggs
- ¼ cup milk or cream
- ½ cup shredded cheese (cheddar, mozzarella, or a mix)
- ¼ cup finely chopped bell pepper
- ¼ cup finely chopped spinach or broccoli
- ¼ cup cooked bacon or sausage
- Salt, pepper, garlic powder — to taste
- Oil for greasing the pan
How to cook:
- Whisk the base. In a large bowl, whisk eggs with milk, salt, pepper, and spices until slightly foamy. This adds lightness.
- Add the filling. Cheese, veggies, meat — all finely chopped so they spread evenly. Mix gently. Don’t overload with watery veggies — the muffins won’t rise.
- Fill the pan. Grease the muffin tin and fill each cup about ¾ full. The mixture will rise slightly but not much. For perfect edges, use paper liners or silicone cups.
- Bake. In a preheated oven at 375°F (190°C), bake for 18–22 minutes until set and lightly browned on top. Don’t overbake — or they’ll turn rubbery.
- Cool. Let rest for 10 minutes in the pan, then remove carefully. Once cooled, they can be stored in the fridge for up to 4 days.
How to pack for school lunch
These muffins are the perfect option for a quick morning pack. Take them from the container, place in a lunchbox — done. They fit nicely in compartment-style boxes like the Bentgo Kids Chill Lunch Box — compact, no squishing, and with sections for sides or sauce.
Good pairings:
- a few Greek crackers or pretzel sticks
- some cherry tomatoes
- yogurt dip or spicy ketchup
For a warm version — just place 2–3 muffins into a food thermos (skip the foil for microwave safety). They’ll stay soft and warm until lunch.
These mini omelets are easy to adapt: you can make them without meat, without cheese, or gluten-free — and they’ll still be convenient, filling, and delicious.
Try and choose
If even one of these recipes makes it into your lunchbox, you’ll see why we keep coming back to them. Because they’re convenient, they don’t waste time. Because they’re not “replacement meals” — they’re just normal, tasty, practical dishes you can make without hassle and that a teen won’t be embarrassed to eat. Or that you can take with you yourself.
Now tell me — which of these will you try first?
Maybe you’ve already made something similar? Or do you have your own school lunch idea that works every time?
Leave a comment — I’m truly curious what works for you. It’d be great to gather even more ideas together, ones that don’t just feed, but actually make sense.