So, do you live in an apartment or do you have a backyard the size of a parking space? In that case, I’m guessing you want to maximize your space. And a bucket garden is the way to go. Personally, I use buckets for everything from growing vegetables, creating vertical beds, self-watering systems, and even composting.
Here I’m just sharing 15 Creative Bucket Gardening Ideas for Small Spaces to help you create a fertile mini garden in even the smallest plot.
1. 5 Creative Ways to Use 5-Gallon Buckets in Your Garden
You’ll see that buckets aren’t just a container, but a versatile tool for the gardener. Here are five cool ways to use them:
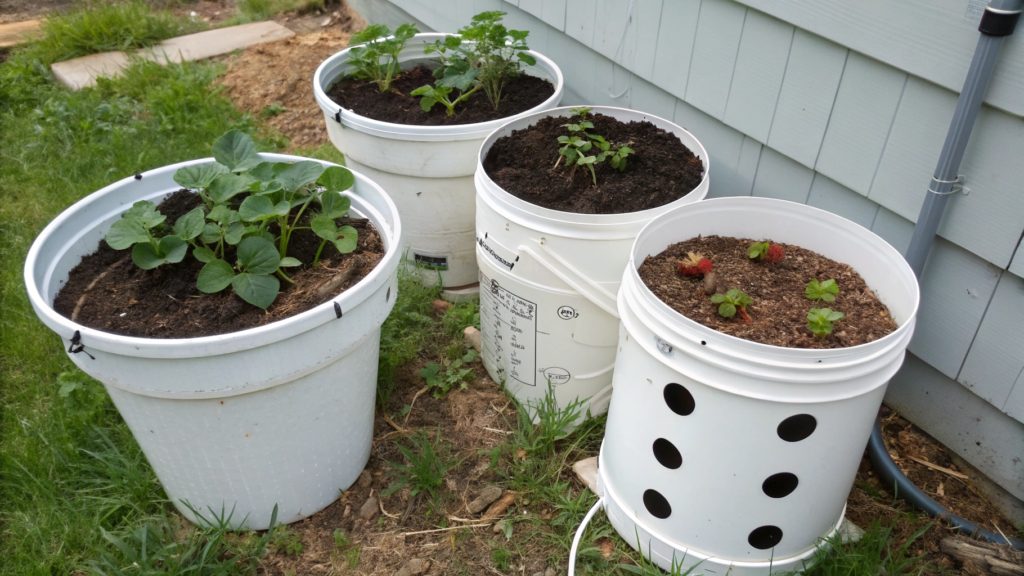
- Mini vegetable beds. First, create mini vegetable beds by making drainage holes in a bucket. Then, fill it with quality soil to ensure your plants have the nutrients they need. Finally, plant your chosen vegetables, and the bucket will create the perfect micro-environment, protecting the roots from weeds and pests.
- Portable greenhouses. In this case, simply cover young seedlings with a bucket at night if the temperature drops. This method is simple, but it effectively protects the plants from the cold.
- Self-watering system. Drill 5-7 holes on the sides of the bucket, about 5-7 cm above the bottom, bury it next to the plants so that the holes are at the level of the roots and fill it with water. The moisture will gradually soak into the soil, providing the roots with constant moisture. To reduce evaporation, cover the bucket with a lid (or at least cardboard).
- Vertical strawberry bed. Take a plastic bucket (preferably a 10-gallon bucket). Cut out the side holes, fill the bucket with soil – start with a small layer of soil, then add strawberry seedlings through the side holes and continue to fill with soil. You can plant 2-3 more strawberry bushes in the top of the bucket. Water from the top, the water will spread downward, moistening all the roots evenly. So you can grow up to 10 bushes on one bucket. Saves space!
- Compost Tank. Make several holes in the sides and bottom of a bucket with a lid. Fill with layers of organic waste, alternating with dry leaves, paper, sawdust. Close the lid and once a week just shake the bucket or stir it with a spatula.After 1.5-3 months you will have ready compost.
2. How to Turn Buckets into Raised Vegetable Planters
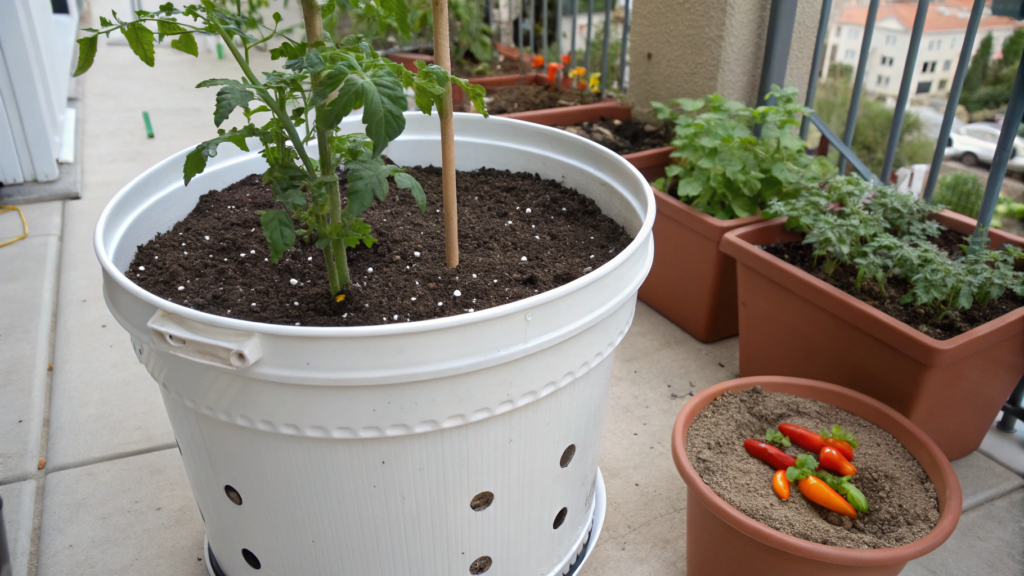
When I first tried growing tomatoes in buckets, I was a little hesitant, but I was pleasantly surprised by the results. The tomatoes behaved better than in conventional beds because:
- The roots are protected from pests
- The soil stays friable and warm for longer.
- Soil composition can be controlled
Here’s how to make a raised bed out of a bucket:
- Get a 10-gallon bucket (the bigger the better for roots).
- Drill 5-10 holes in the bottom to keep water from stagnating.
- Add a layer of drainage (gravel, pieces of pottery, sand).
- Fill the bucket with quality soil and compost.
- Plant tomatoes, sweet peppers, eggplants or carrots.
I think you’ll like this idea as it’s great for small yards or balconies.
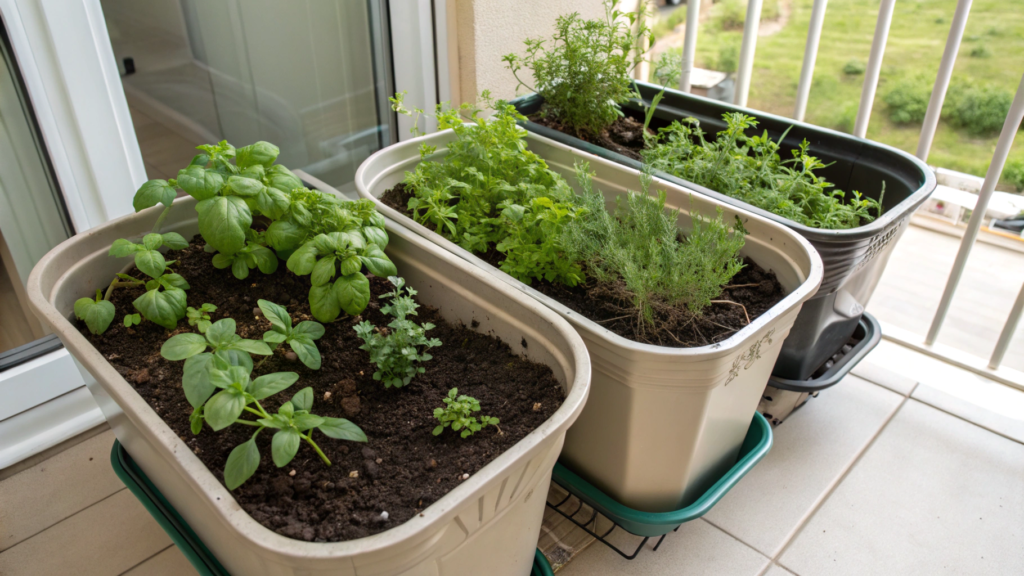
3. Herb Gardening in 10-Gallon Buckets: Compact and Productive
The easiest thing to grow in buckets is herbs. Personally, I have two 10-gallon buckets on my kitchen balcony, so they provide us with basil, oregano, parsley, and mint all year round.
How to make an herb bed in a bucket:
- Divide the bucket into 2-3 sections, planting several different herbs.
- Add drainage and good quality soil, because herbs don’t like heavy clay soil.
- Water moderately – it’s better to water more often, but a little at a time to avoid root rot.
Tip. Place such buckets closer to the kitchen, so it will be easier for you to pick fresh herbs while cooking.
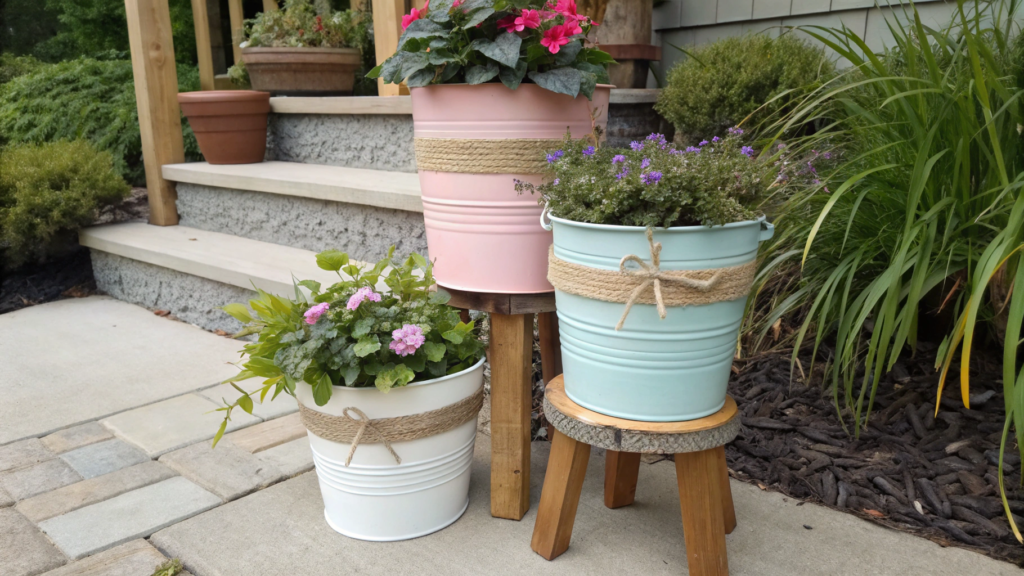
4. DIY Bucket GArden Planters That Save Space and Look Stunning
We’re talking about buckets today and we seem to have forgotten that they can be not only useful but also beautiful! Sure, you could just put plastic tomato buckets by your front door, but if you get a little creative and turn them into stylish planters?
How to make bucket beds stylish:
- Paint the bucket in soft pastel colors. This will definitely give it a more aesthetic look.
- Wrap the bucket with jute rope or burlap. This way we will create a “natural design” effect.
- Add wooden legs. Agree, raised buckets look much neater and make it easier to care for plants. Moreover, they protect the roots from overheating on hot surfaces. You can use the remains of old boards or buy bars. Ready-made wooden stands for buckets – see here.
- Place them in a cascade. Choose buckets of different sizes – for example, a 10-gallon bucket (large), a 5-gallon bucket (medium) and a 2-gallon bucket (small). Place the largest bucket on the ground and fill it with soil. Place the second bucket (medium) on top of the topsoil – so that it stands steadily, but is not completely buried. And a third small bucket on top. Plant plants in each bucket (strawberries in the bottom tier, flowers in the middle tier and herbs on top). If the buckets are plastic and slippery, you can drill drainage holes in their bottoms and fasten them together with small screws or strong wire. Such a composition not only saves space, but also looks spectacular.
5. 7 Budget-Friendly Bucket Garden Hacks You’ll Love
Is it possible to create a pretty bucket garden without spending too much? First, I’m no exception, and I too am always looking for ways to save money without losing out on quality. Here’s 7 budget friendly life-saving bucket gardening hacks that really work and will help you create a full garden for practically pennies.
1.Free buckets – they’re everywhere
If you want to save money, don’t buy buckets. Most cafes, bakeries and restaurants throw away buckets of all sorts of products – from mayonnaise, jams, pickles and even coconut oil.
Where to look.
Bakeries – flour buckets, butter buckets.
Cafes and restaurants – pickle buckets.
Farmer’s markets – sometimes syrup and fertilizer buckets are left over.
Construction stores – there may be cheap buckets with defects.
Tip. Ask employees to set aside clean buckets for you, trust me, some are even happy to get rid of them.
If you want to buy new, here are quality 5-gallon buckets with lids on Amazon.
2. Making your own soil: forget about expensive soils
It’s no secret that ready-made soil mixes are expensive (especially organic ones). Why pay when you can make great soil yourself?
Soil composition for a bucket garden
- 1/3 compost (better your own, but you can buy it). It is rich in nitrogen, phosphorus, potassium and trace elements.
- 1/3 coconut substrate (retains moisture better than peat).
- 1/3 perlite or vermiculite (for drainage and aeration). You can mix 50/50 for balance.
Tip. Use banana peels, coffee grounds and eggshells – all great free fertilizer.
3. Mulch the surface to water less
If the soil in your buckets dries out quickly, try adding mulch. This will retain moisture, protect the roots from heat, and save water.
Best budget-friendly mulch options:
- Hay or straw – you’ll find this for free at farms.
- Wood chips or sawdust – you can get this at carpentry shops, I think they will not refuse you.
- Dry leaves – well, it’s free in the fall, take as much as you want.
4. Racks and stands: don’t buy them, but make them yourself
Instead of spending a lot of money on expensive shelving units, make your own.
Ideas:
- You probably have an old ladder. Put it against a wall, secure it, and it becomes a bucket rack on multiple levels.
- Cut wooden pallets and fasten horizontally on the support, there you already have a great shelf for a bucket garden.
- Metal shelves from the garage. Drill holes in the shelves so the buckets stand securely and don’t slide around.
If you want a ready-made shelving unit, here are some good folding options.
5. Automatic watering from plastic bottles
If there’s no way to water your plants by hand every day, make an auto watering from a bottle. It’s very simple and costs nothing.
How to make:
- Take a plastic bottle of 1,5-2 liters.
- Make 2-3 small holes in the lid.
- Fill the bottle with water and stick the neck of the bottle into the soil
Before inserting the bottle into the soil, check how fast the water drips out. If the water goes right away, the holes are too big, make them smaller. If the water drips every 5-10 seconds, that’s ideal.
Do not stick the bottle directly at the stem, it is better to 5-10 cm to the side, so that the water does not wash the roots. For larger plants, you can use two bottles – on different sides of the bush.
The water will come to the roots gradually, moistening the soil for a few days.
6. The buckets can be insulated for free
If you live in a cold region, buckets get cold quickly, which can damage plant roots. But there are ways to insulate them for free.
What to use:
- Bubble wrap. You can take in the packaging from parcels and tightly wrap the bucket.
- Old jackets and blankets. You simply wrap the bucket for the winter, securing with rope.
- Fitting the bucket into the bucket. Double walls retain heat better and protect the roots.
If you need a more durable option, thermal covers for containers are at your service.
7. Buckets are not just for plants – but also for collecting rainwater
We’re looking for budget-friendly options and one of the easiest ways to save money on watering is to use rainwater.
How to do it:
- Place a few buckets under gutters or in an open space.
- Cover the top with mosquito netting to keep mosquitoes away.
- Use the stored water to water your plants.
6. Bucket Garden Ideas That Work for Any Climate
Bucket gardening can be adapted to any weather condition. But you need to know a few tricks to protect your plants from heat, cold, wind and excessive moisture. And then it doesn’t matter what climate you live in.
Hot climates: protection against overheating
If you have a scorching sun, buckets can overheat and that’s bad for the roots. But this is an easy fix:
- Paint the buckets a light color. White or pastel-colored buckets reflect the sun and heat up less.
- Add mulch. A thick layer of straw or wood chips retains moisture.
- Use self irrigation. I wrote about it above, but in hot climates it especially saves from drying out the soil.
- Place buckets in the shade during the hottest hours. For example, next to the wall of the house or under a tree.
Rainy and humid climates: protection against root rot
If it rains frequently in your region, buckets can collect too much water, causing roots to start rotting.
How can this be avoided?
- Extra drainage holes. If you get frequent rains, drill more holes in the bucket on the sides.
- Add sand to the soil. This improves drainage and allows water to pass through faster.
- Place buckets on bricks or wooden stands. This way the water drains and doesn’t stagnate at the bottom.
- Grow moisture-loving plants. Mint, marigold and even rice do well in this environment.
Cold climates: protection against frosts
In regions where temperatures drop sharply at night, buckets can freeze and roots can die. But there are some lifehacks:
- Put buckets closer to the walls of the house. At night, the wall will give up the accumulated heat and warm the plants a little.
- Cover the buckets with insulation. Old blankets, film or even bubble wrap will protect the roots from frost.
- Use mini greenhouses. You can simply cover the bucket with a transparent lid or a large plastic bottle with the bottom cut off.
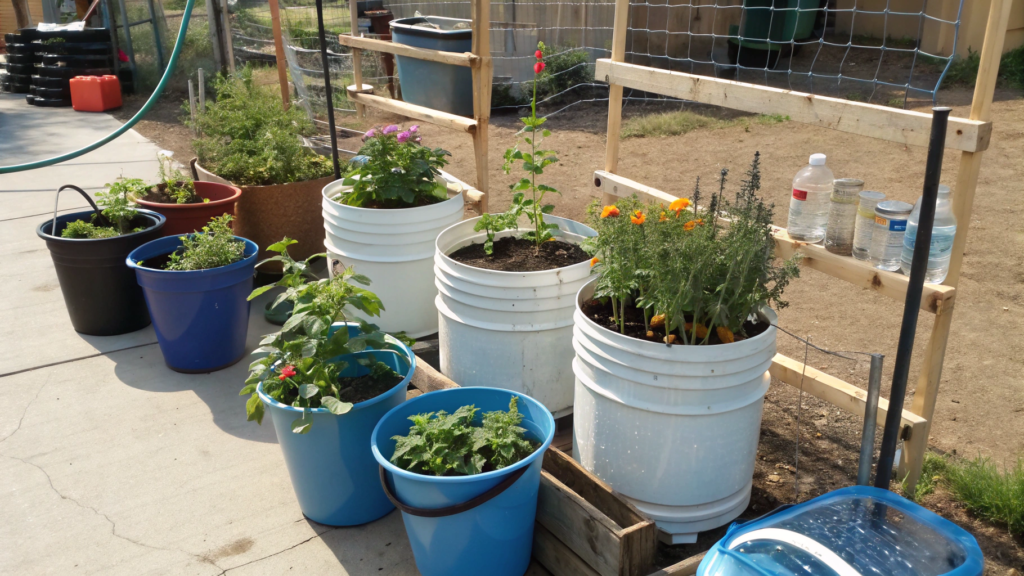
7. Vertical Bucket Garden Stands for Small Backyards

If you have very little space, like a small backyard, a narrow balcony, or a rooftop nook, vertical bucket garden beds are the only option to help maximize your space.
What can be grown in vertical bucket garden racks?
- Strawberries – you can make side holes in each bucket and grow up to 10 bushes.
- Herbs and salads – put buckets in 2-3 tiers to create a tiered bed.
- Cucumbers and beans – guide them up the trellis fixed in the bucket.
How to make a vertical garden from buckets
- Rack for buckets. An ordinary metal or wooden rack, on which buckets are placed on top of each other. Water flows from the top to the bottom, moistening the lower levels.
- Hanging buckets. You simply hang them from sturdy chains on a wall or fence.
- Perforated plastic buckets. You make holes in the sides and plant herbs or strawberries in them.
- Tiered pyramid. You put buckets on top of each other, reducing the diameter of each level. I wrote more details above.
And here are ready-made vertical posts for the garden.
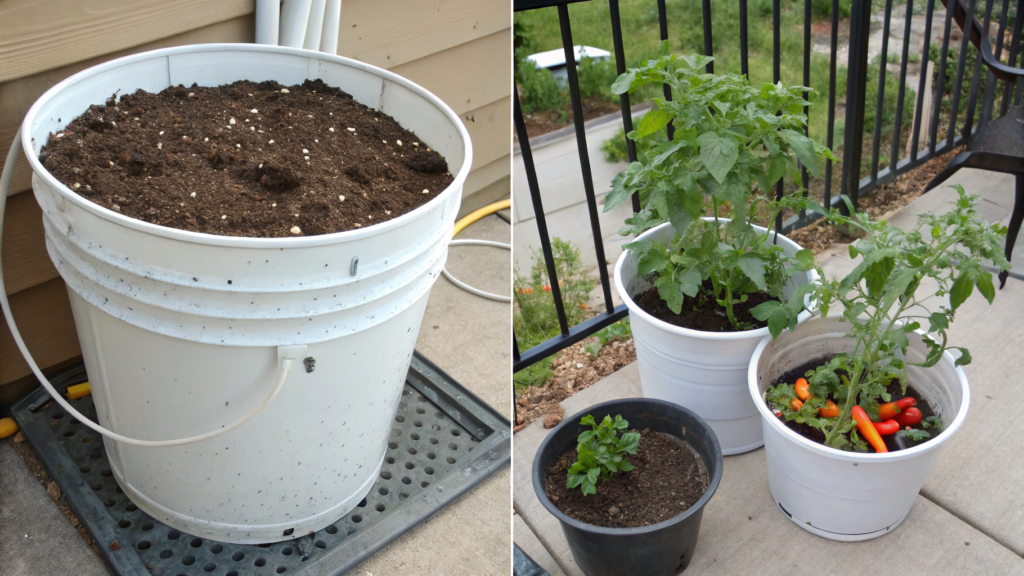
8. How to Build a Self-Watering Bucket Garden
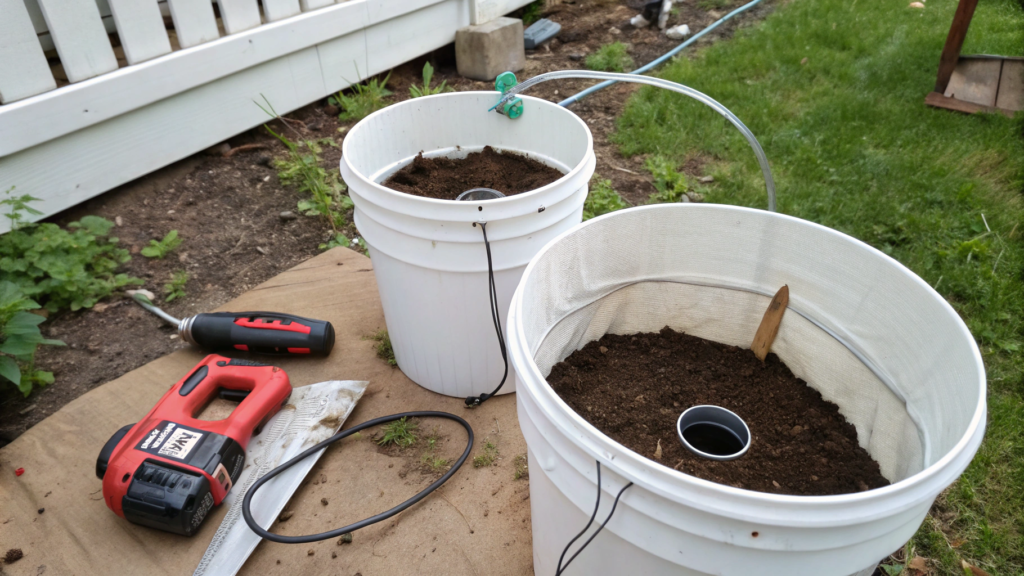
A self-watering bucket is probably the best way to simplify plant care. Especially if you’re away a lot, forget to water, or just don’t want to spend a lot of time tending.
How does a self-watering system work?
It’s simple: we take two buckets, one fits into the other. First, the lower one holds a supply of water, and the upper one holds the soil with the plant in it. Meanwhile, the water is slowly absorbed through the wick, and eventually, the roots get as much moisture as they need.
What you need:
- Two plastic buckets
- Old cloth or wick (you can use thick cord)
- A drill or knife for the holes
How to assemble a self-watering bucket (in 10 minutes!)
- In the bottom bucket make a small hole in the side to control the water level.
- In the upper bucket make drainage holes, one of them make a slightly larger (about 2-3 cm in diameter) for a wick, for example, a piece of cotton cloth or cord. Put it through the hole in the bottom of the upper bucket, so that one part of the wick was in the water and the other in the soil.
- Fill the upper bucket with soil and plant the plant.
- Pour water into the bottom bucket – the wick will gradually soak the soil above, providing even moisture without overwatering.
Benefits:
Saves water – plants drink exactly as much as they need.
You can leave the garden unattended for 5-7 days.
No risk of roots drying out or rotting.
Which option did you like best?
All of these ideas will help make a bucket garden convenient, economical, and effective in all conditions. I personally use self watering buckets and vertical racks. It saves tons of time and yields a great crop.
Have you ever done any bucket gardening? Write in the comments which idea you liked best!