Let’s take a moment to reflect on gardening on a tight budget. Budget-Friendly Mini Garden Ideas prove that you don’t have to rob a bank to enjoy greenery. With a dash of creativity and DIY skills, you can create a wonderful mini garden without spending a ton of money. Whether you have a small balcony, patio, or even just a windowsill, these ideas will help you create unique green corners in the space of your choice. So let’s get started!
DIY Vertical Mini Garden Pots for Small Spaces in Under 30 Minutes
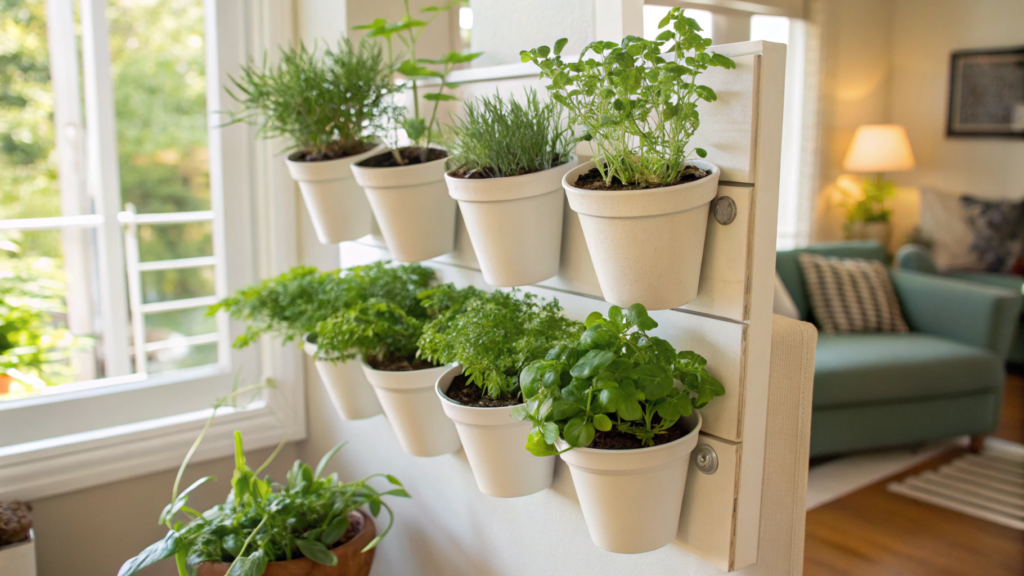
Vertical mini garden ideas are just what you need for limited space. These projects are easy to execute and won’t take much time.
1. Vertical garden on a pallet
What you need:
- A wooden pallet: free or $10
- Small plastic pots (5-6 pieces): $1-$2 each
- Soil: $5-$10
- Plants: $10-$20
- Screws and drill (optional): $5
How to make:
- Prepare the pallet. Sand it to avoid splinters. You can paint it to protect it from moisture (optional).
- Secure the pots. Drill holes in the pots and screw them to the pallet. If you don’t have a drill, use plastic ties.
- Fill with soil. Pour the soil into the pots, leaving some space for the plants.
- Plant the plants. Use herbs (basil, mint) or flowers (petunias, nasturtiums).
- Place the tray. Place it on the balcony or lean it against a wall.
2. Vertical garden from plastic bottles
What you need:
- 5-6 plastic bottles: free
- Rope or fishing line: $5
- Soil: $5
- Herb seeds: $5
How to make:
- Prepare the bottles. Cut them in half or cut holes in one side.
- Make drainage. Make small holes in the bottom of each bottle.
- Put the bottles together. Secure them to each other with string or fishing line.
- Fill with soil. Pour soil into each bottle and plant herbs (basil, mint, parsley) or small flowers (petunias, alyssum, velveteen).
- Secure the structure. Find a wall, fence, balcony railing, or sturdy wooden support on which to hang your vertical garden. It’s important to make sure the location is well lit, as herbs and flowers will need plenty of sunlight.
3. Vertical garden from a hanging shoe organizer
A fabric shoe organizer can be used to make a great (and very affordable) planter for herbs and flowers.
What you need:
- Fabric shoe organizer: $10-$15
- Soil: $10
- Seeds or small plants: $10
How to make:
- Hang the organizer. Attach it to a wall, fence, or door. Or you can hang this garden near your kitchen door for easy access to fresh herbs while cooking.
- Fill the pockets. Add a layer of soil to each pocket, leaving some space for plants.
- Plant the grasses. Plant one type of herb in each pocket. Parsley, cilantro, and mint work well.
- Water gently. Water carefully so the water doesn’t run out too much.
Tip. Sign the pockets to make it easy to find the right herbs while cooking.
4. A wall garden made from wooden crates
What you need:
- Small wooden crates (3-5 pieces): $10-$20
- Soil: $10
- Plants: $10-$20
- Nails and hammer: $5
How to make:
- Prepare the crates. Clean them and paint them if desired.
- Fasten them to the wall. Nail the crates to the wall or fence.
- Add soil. Fill the boxes with soil.
- Plant the plants. You can plant flowers or small vegetables such as spinach or radishes.
The Ultimate Outdoor Mini Succulent Garden for Under $50
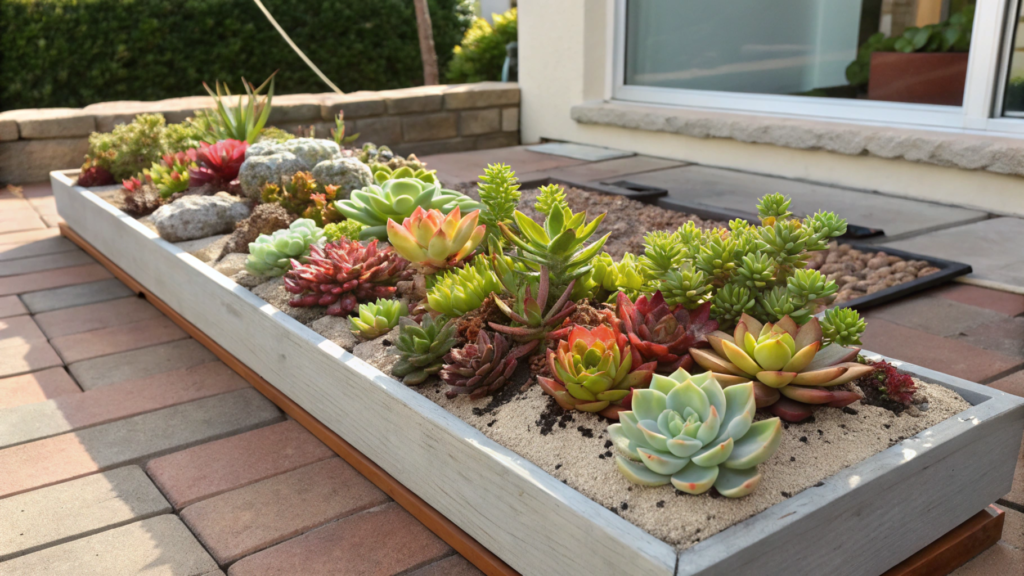
Succulents are easy to care for and are suitable for beginners and those with limited garden space. They also look great in compact arrangements.
5. Succulent garden in a wide bowl
What you need:
- Wide container or bowl: $10-$20
- Succulents (5-6 pieces): $15-$20
- Succulent soil: $5-$10
- Decorative rocks: $5
How to make:
- Prepare a container. You can find suitable bowls or crates at thrift stores. And if you decide to use something recycled, make sure it has drainage holes (or make them yourself).
- Add a layer of drainage. Spread a thin layer of pebbles or small stones in the bottom of the container. Succulents do not like standing water.
- Fill with soil. Fill the container with succulent soil, leaving a little space to the edge.
- Plant the succulents. Place the largest plant in the center and the smaller ones around it. Mix colors and textures and you’ll have a very interesting composition.
- Decorate. Decorative stones on top will give the composition a finished look.
Tip. Succulents love sunlight. Place the garden in a place where sunlight often falls and water very rarely.
6. A garden made from old cups
What you need:
- Old ceramic cups or enameled mugs: $1-$2 each
- Succulents (2-3 pieces): $5-$10
- Soil: $5
How to make:
- Clean the cups. Wash each cup with soap and hot water to remove dirt, dust or tea/coffee residue and, if necessary, make drainage holes with a drill and ceramic or glass drill bit. Work slowly to avoid cracking.
- Drainage. Add a layer of drainage to the bottom. Use expanded clay, small pebbles or gravel for this. This will prevent water from stagnating.
- Fill with soil. Spread the soil, leaving space for the plants.
- Plant the succulents. Place them in the cups and lightly tamp the soil, but not too much, as the roots need air.
Tip. Water the plants infrequently, only when the soil is completely dry. Succulents do not like overwatering. Place the cups in a sunny place, for example on a windowsill or on a shelf near a window.
7. A mini garden in an old frame
What you need:
- Old wooden frame: free
- Metal mesh: $5
- Landscape fabric or burlap: $5
- Dense backboard (wood, plywood or thick cardboard): free or $5
- Succulents: $10-$20
- Soil: $5
How to make:
- Prepare the frame. Fasten metal mesh to the back, and place burlap underneath. And then with plywood or thick cardboard, completely cover the back of the frame to create a closed system for the soil.
- Add soil. Pour light soil for succulents through the holes in the mesh. It should be loose so the plants can root easily.
- Secure the succulents. Place them in the holes in the netting, pressing them lightly into the soil.
- Hang them. Find a sunny wall or a spot with diffused light. Succulents like bright light, but not direct sunlight all day. Place the frame on the wall by first attaching metal hooks or staples to the back of the frame. They should be strong enough to support the weight of the frame with soil and plants.
Tip. Before hanging the frame on the wall, put it horizontally on a flat surface (for example, on a table) and leave it for 1-2 weeks. This will allow the plants to root and anchor themselves in the soil.
8. Clay pot garden
Pots are ideal for growing succulents because they provide good ventilation for the soil and roots.
What you need:
- Small clay pots (3-4 pieces): $2-$3 each
- Succulents: $10-$15
- Soil: $5
How to make:
- Clean the pots. Rinse the pots with warm water, if the pots have lime stains, wipe them down with a vinegar solution (1 part vinegar to 2 parts water). Allow them to dry completely.
- Fill with soil. Put small pebbles at the bottom of each pot for drainage. Then add the soil, leaving some space for the plants.
- Plant the succulents. Arrange them in the pots so that they sit tightly, but not too tightly. If you plant several plants in one pot, try to use different species to make a beautiful composition.
- Place the pots. You can place them on a windowsill, on a wooden shelf or even on a table for decoration.
Backyard Mini Vegetable Garden Idea: Grow Food in Just 2 Square Feet

And here we will give a selection of ideas for creating a compact vegetable garden for those who have very little space, but want to grow vegetables and herbs
9. Micro-garden in a wooden box
What you need:
- Wooden crate (such as an old fruit crate): free or $10
- Landscape fabric: $5
- Soil: $10
- Compact vegetable seeds: $5-$10
How to do:
- Prepare the crate. Clean it out and cover the inside walls with landscape fabric to keep the soil from spilling out.
- Fill with soil. Add compost to the garden soil. This will enrich it with nutrients.
- Divide the plot. Use wooden sticks to visually divide the bed into small sections (for different types of vegetables).
- Plant seeds. Leaf lettuce, radishes, dwarf peas and spinach are great for small beds.
- Water regularly. Make sure the soil stays moist, but not overwatered.
Tip. Place a small trellis to grow climbing vegetables such as peas or beans.
10. A circular vegetable bed in a basket
What you need:
- Large wicker basket (such as a laundry basket): $10-$15
- Landscape fabric: $5
- Soil: $10
- Vegetable seeds or seedlings: $10
How to make:
- Prepare the basket. Lay landscape fabric inside to keep soil from falling out through the cracks.
- Fill with soil. Spread fertilized soil to the edges.
- Plant the plants. You can use bush tomatoes, dwarf peppers, or spicy herbs.
- Place the basket. Of course, it is advisable to place it in a place that gets a lot of sunlight, such as on a terrace or in the garden.
Tip. If the basket becomes too heavy, you can attach wheels at the bottom for easy moving.
11. A compact bed made from a construction bag
What you need:
- Construction debris bag (or burlap bag): $5-$10
- Soil: $10
- Vegetable seeds: $5
How to make:
- Prepare the bag. If using an earthbag, make sure it is clean and undamaged. Make a few holes in the bottom for drainage.
- Fill with soil. Spread a 3-5 cm layer of small stones or pebbles at the bottom of the bag. This will improve drainage and prevent root rot. Fill the bag with a mixture of garden soil and compost. Tamp the soil lightly with your hands so that it is dense but not too compressed.
- Plant the seeds. Cut off the top of the bag and plant radishes, lettuce, arugula or dwarf carrots.
- Arrange the bag. Place it in a sunny spot, such as on a balcony, terrace, along a fence or in a corner of the garden. If the bag is on a hard surface (such as concrete or tiles), it is better to place it on a tray.
Tip. After harvesting from the bag, you can plant a new batch of soon-to-ripen crops such as radishes or spinach. In this way, you use the bed more than once in one season.
12. A 2 square foot garden with homemade sections
In such a small space, it’s important to organize your plantings so that you don’t mix up crops and ensure each one is properly spaced.
What you need:
- Planks or wooden sticks for dividing: $5
- Soil: $10
- Vegetable seeds: $10
How to do:
- Mark out the plot. Find a sunny spot and designate a 2 square foot area. This can be a small plot of land, a balcony, or even a box that is the right size.
- Divide the sections. Insert the sticks into the soil so that they don’t shift when planting or watering. This way you will divide the bed into small squares.
- Fill with soil. Add a fertile layer of soil.
- Plant the seeds. For example, radishes in one square, lettuce in another and green onions in a third square
Tip. This method is ideal for novice gardeners as it is simple and effective.
13. Mini container garden
What you need:
- Plastic containers (3 pieces): $1 each
- Soil: $5
- Seeds or herbs: $5
- Decorations (pebbles or figurines): $3
How to make:
- Prepare containers. Each container should have a minimum volume of at least 1 liter to allow the plants to grow comfortably. Make holes in the bottom for drainage.
- Fill with soil. Pour soil into each container. Use all-purpose soil for container plants.
- Plant herbs. You can plant basil, mint or dill, or parsley, cilantro or thyme in the containers
- Decorate. Decorative pebbles, glass or small figurines from the dollar store can help make your mini garden more stylish.
Tip. Use containers of different sizes. This will create a layered effect.
14. Fairytale mini-garden
A fairy garden will decorate your home, balcony or terrace and will delight everyone who sees it.
What you need:
- Plastic small but stable bowl with a diameter of 20-30 cm: $2
- Soil: $5
- Moss: $5
- Miniature figures (gnomes, houses): $5
How to make:
- Fill the bowl with soil. Use all-purpose soil for indoor plants. Leave a little space at the top.
- Add moss. Place the moss on the surface of the soil, pressing it down lightly. Moss works very well for creating “lawns” and “green carpets”. If the moss looks dry, lightly spritz it with water from a sprayer.
- Decorate with figurines. Place a miniature house or fungus in the center or on the side of the composition. Make a “path” of small pebbles or sand leading to the house. Be imaginative!
- Arrange the garden. Put it on a shelf, table or windowsill, on a terrace or balcony. Anywhere it will please your eye.
Tip. Such a garden will be a great gift for children or friends.
15. Mini garden bed from a laundry basket
The basket is lightweight, cheap and easily transformed into a mobile garden. This idea will suit both novice gardeners and those looking for a temporary planting solution.
What you need:
- A small plastic basket (choose a basket with a mesh or hole structure to let the soil breathe, or you can use an old basket, clean and undamaged): $5
- Soil: $5
- Vegetable seeds: $5
- Decorations (optional): $3
How to make:
- Prepare the basket. Make holes in the bottom for drainage (if you don’t have any)
- Fill with soil. Fill the basket ¾ full with fertile soil, leaving 5-7 cm from the edges for easy watering.Make sure the soil is loose but not too dry.
- Plant the seeds. Make small furrows or holes in the soil 1-2 cm deep. Sow the seeds, leaving space between them. You can plant lettuce, green onions or radishes.
- Decorate. Place small pebbles or glass balls on the surface, or you can use stickers to decorate the walls of the basket.
Well there you have it, our 15 Budget-Friendly Mini Garden Ideas Under $50.
What will you choose? Share your results in the comments or show off your mini gardens on Instagram, we look forward to seeing them!
