To grow strong, healthy plants, you need to take care of proper seed starting and seed germination. This is the key to success. To avoid wasting our efforts, we must properly prepare the soil or germination mix.
In this article, we will try to break down proven mix recipes, tips for creating your own variants, hydroponic methods, and methods for solving frequent problems. We will also familiarize ourselves with DIY approaches to grow herbs and vegetables productively.
The Best Soil Mix Recipe for Seed Starting Success

As you realize, not every soil mix is suitable for seeds. They have their own characteristics and needs. Therefore, seeds prefer to grow in a light, well-drained mixture that can retain moisture but does not become waterlogged. One of the most proven recipes looks like this:
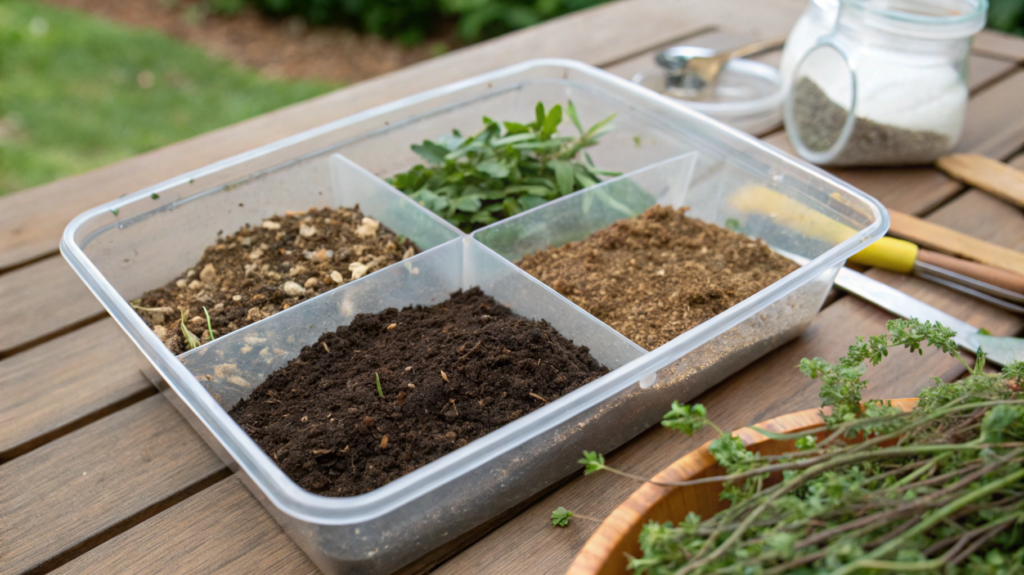
Basic recipe for germinating seeds:
- 2 parts sphagnum peat or coconut substrate (for moisture retention);
- 1 part vermiculite (for aeration and water regulation);
- 1 part perlite (to improve drainage).
If you feel the need to add nutrients, a small amount of compost can be added, but be careful as excessive amounts can harm tender sprouts. It is important to create an environment that encourages root development without overloading the plants.
Tip. Use a fine sieve to sift the ingredients. Large clumps can hinder seedling growth. If you don’t have a sieve, here’s an affordable kitchen sieve that will do the job just fine.
How to Make Your Own Seed Starting Mix at Home
If you want to control the composition of your soil, it’s best to make your own seed germination mix. Plus, it’s also cost-effective. Here are step-by-step instructions on how to make the mix at home:
- Peat or coconut substrate (base) – 2 parts. This is the main component that retains moisture and creates a favorable environment for germination of seeds.
- Perlite or vermiculite (for aeration) – 1 part. These materials provide good air circulation and drainage, which prevents overwatering and root rot.
- Organic compost or humus (nutrients) – 0.5 parts. This is an additive that will provide a minimum amount of nutrients to the seedlings without the risk of “overfeeding” them.
- Sterilization. Heat the mixture in an oven at 176°F(80°C) for 30 minutes to kill pathogens and pests. If you are sure of the quality of the ingredients, sterilization can be skipped. But for seeds, especially expensive or rare ones, it’s better to be over-insured.
Lifehack. If you choose coconut substrate, try this compressed briquette that expands when water is added. It’s convenient and economical.
Soil-Free Hydroponic Seed Starting Ideas for Beginners
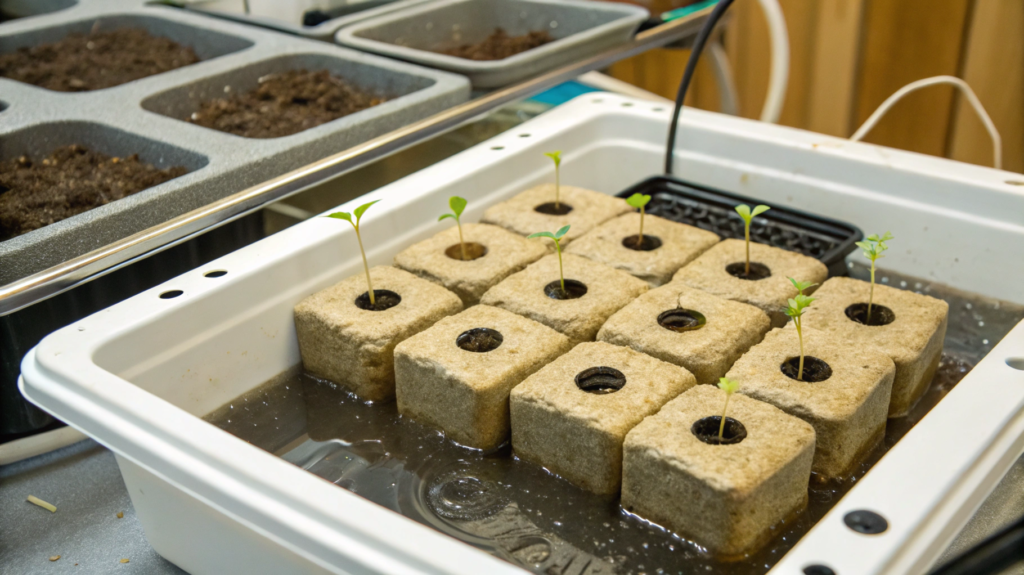
If you want to try something new or have experienced soil-borne diseases, hydroponic seed germination may well be your experiment. Instead of soil, this method uses water and sterile growing substrate.
A simple option for hydroponic germination
- Choose a substrate. The most popular options are mineral wool (rockwool cubes) or coconut plugs (coco coir plugs). They retain moisture, allow the roots access to air and create a favorable environment for growth.
Tip. Mineral wool should be soaked in a slightly acidic solution (pH 5.5-6) before use to neutralize its alkalinity.
- Prepare the cubes or plugs. Soak them in water or a weak nutrient solution to keep them moist but not too wet.
- Sowing the seeds. Place one seed in each cube or plug. Make sure the seed is in contact with the surface to access the moisture.
- Set up the tray. Place the moistened cubes or plugs in a shallow tray. Add a layer of water about 1-2 cm deep. The tray should not be completely filled with water so that the seeds do not “drown”.
- Create the right conditions. Place the tray in a warm place with a temperature of 20-25°C (68-77°F). Most seeds require good light, so place the setup under a plant lamp or on a well-lit windowsill.
- Nutrient solution. After a few days, when the first sprouts appear, replace the water in the tray with a diluted nutrient solution. Start with small concentrations of fertilizer specifically designed for hydroponic systems so as not to damage the young roots.
A great option for beginners is ready-made hydroponic fertilizer.
The advantages of hydroponic germination are cleanliness
As the absence of soil eliminates the risk of soil-borne diseases, and control, as you have complete control over moisture, nutrient and light levels. Saving space is also an advantage of this method of germination, as the hydroponic system takes up little space and is suitable even for apartments.
Don’t forget to always monitor the humidity. If the water evaporates too quickly, cover the tray with foil, but be sure to leave ventilation holes. Make sure that the roots do not dry out, but also do not remain completely submerged in water. For productive growth, the pH of the water or solution should be between 5.5-6.5.
Start with simple systems and add new elements to your hydroponic setup as you gain experience.
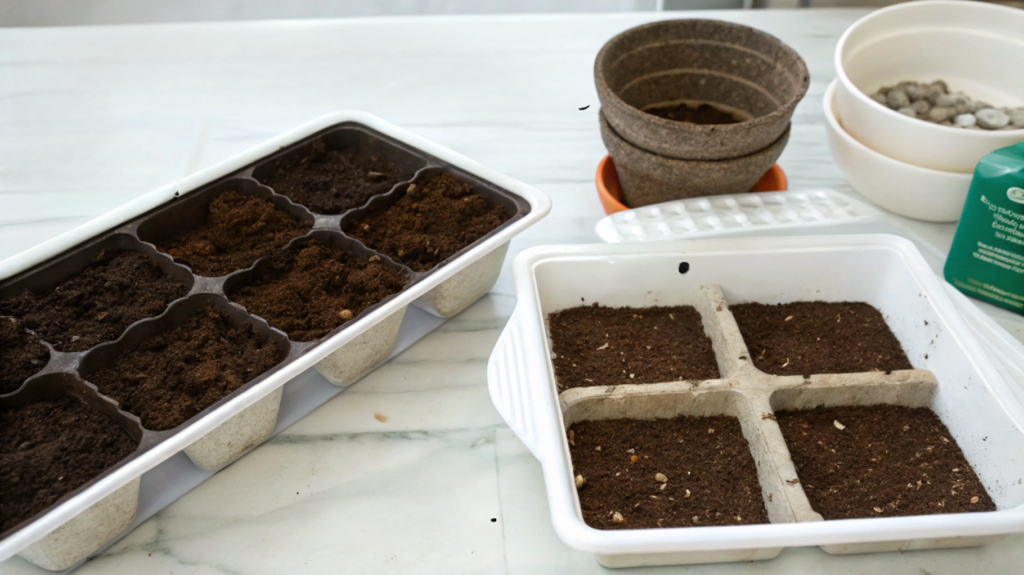
Tips for Choosing the Right Containers and Soil for Seedlings
I would argue that containers are just as important as the soil. They should provide seedlings with enough room for root growth while maintaining optimal moisture and aeration. Here are a few of my recommendations:
- Plastic trays. Ideal for germinating several seeds at once. Choose trays with drainage holes to avoid stagnant water. If your tray doesn’t have a lid, you can use food wrap to create a mini greenhouse effect. Take care that the foil does not touch the soil.
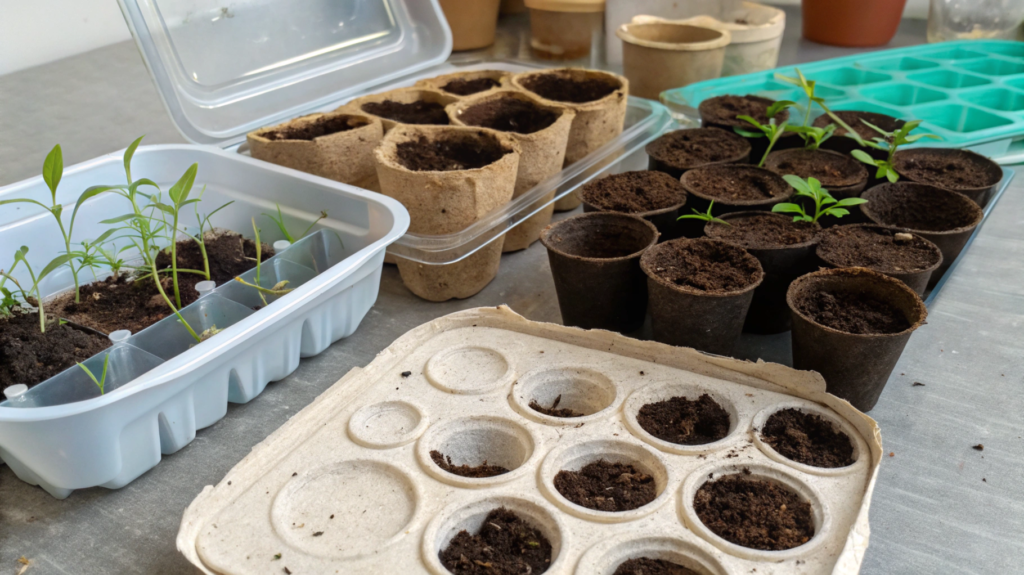
- Biodegradable pots. This is a good eco-friendly choice. These pots are made of peat, coconut fiber or pressed paper and can be planted in the ground with the plant. Make sure the pots are well moistened before use, as dry materials can draw moisture from the soil.
- Recycled containers. Old yogurt cups, egg cartons or cut-off bottles can all be adapted for germination. Just don’t forget to make holes for drainage. Of course, some may say that such containers look unaesthetic, but they are great for experimenting!
Tip. When filling containers, do not tamp the soil too tightly. Seeds need a loose and airy mixture to germinate. Fill the containers with about ¾ of the soil, leaving a little room for watering.
Common Soil Problems in Seed Starting and How to Fix Them
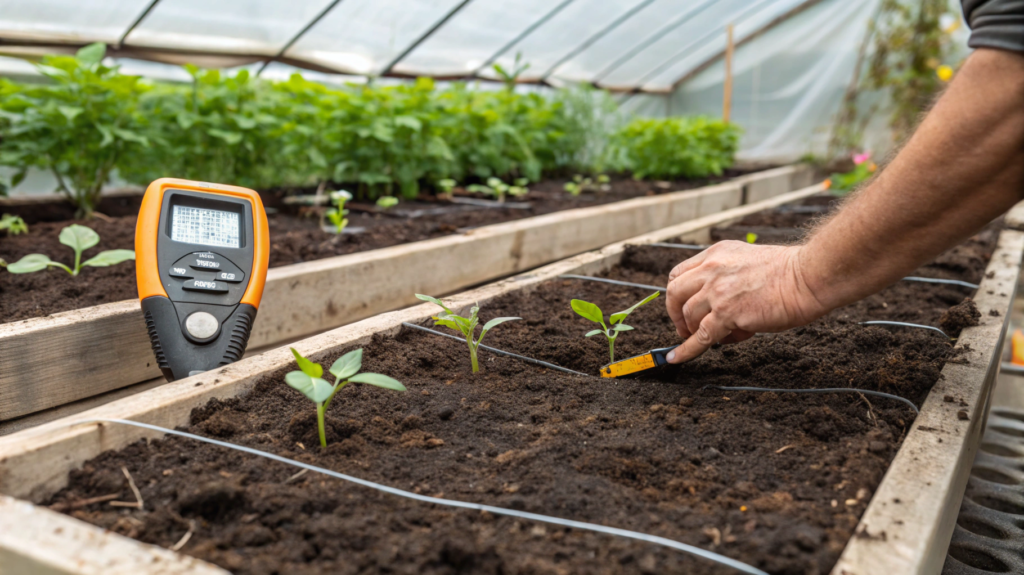
Unexpected gardening problems can happen even to trained gardeners. Here are a few common situations and solutions:
Overly moist soil. Yes, yes, overwatering is the most common cause of seedling death. Therefore, it is very important to use a moisture meter such as this one or check the soil with your finger. If it appears that it is still wet, do not water.
Fungus. White mold on the surface usually indicates poor ventilation. Mold can lead to the development of blackleg (damping-off). This disease often kills seedlings. Damping-off the seedlings and increase air circulation by opening the greenhouse lids or foil for at least an hour a day.
Tip. You can lightly cover the soil surface with a thin layer of ground charcoal or cinnamon. These natural antiseptics help to fight fungi.
Poor germination. Check the instructions on the seed packet. Some seeds will only germinate in light, while others prefer darkness. Also make sure the seeds are not expired. If the seeds are hard (like spinach or legumes), try pre-soaking for 12-24 hours in water. This will speed up germination.
Lack of nutrients. During the germination stage, the nutrients in the mixture are not always needed. However, seedlings sometimes look weak or start to turn yellow soon after sprouting, in which case the plants may need to be fed. Use a weak solution of a liquid fertilizer, such as an organic fertilizer. Dilute it 2 to 3 times weaker than for adult plants.
Check the lighting regularly. Most seedlings need 12 to 16 hours of light per day.
DIY Seed Starting Mix for Herbs and Vegetables
Herbs and vegetables have characteristics unique to them, so customizing the mix can affect growth productivity. Here’s a recipe that will be a base for both herbs and vegetables.
Herb and vegetable mix recipe:
- 2 parts composted conifer bark. This component provides excellent aeration, prevents soil compaction and promotes oxygen circulation, and reduces the risk of fungal diseases, which is especially important for herbs.
- 1 part coconut substrate. It retains moisture, giving plants a stable access to water.
- 1 part vermiculite;This component helps retain water and nutrients, slowly releasing them to the roots.
- ½ part humus. This is a natural source of nutrients that helps seedlings get everything they need to start growing. This is an organic brand that I have been using for years.
Herbs like basil and thyme like a slightly dried mix, so you can reduce the amount of coconut substrate. For vegetables, such as tomatoes or peppers, it’s worth adding an organic slow-release starter fertilizer (bone or fish meal). For root vegetables such as carrots, it is important that the mixture is homogeneous and free of coarse particles, so sift it before use.
How to prepare the mixture?
Sift the compost and coconut substrate to remove coarse particles.Mix all ingredients in a large container until they are homogeneous.
- Moisturizing. Moisten the mixture lightly before use so that it is evenly moist but not soggy.
- Storage. If the mixture is prepared ahead of time, store it in a tightly closed container in a dry place to avoid moisture and mold.
This mixture is suitable for most herbs and vegetables, which frees you from having to prepare different formulations for different crops. If you are growing herb and vegetable seedlings outdoors, it is advisable to add a layer of mulch on top of the mix. This will help retain moisture and prevent weed growth.
Now the most important thing is to find what works best for your plants. After all, seed germination is a fascinating process, full of trial and error. Whatever you choose, every step brings you closer to creating a wonderful garden.
What will you start growing? I’d be interested to know!