
I’m not the kind of person who rushes to adjust the soil right away.
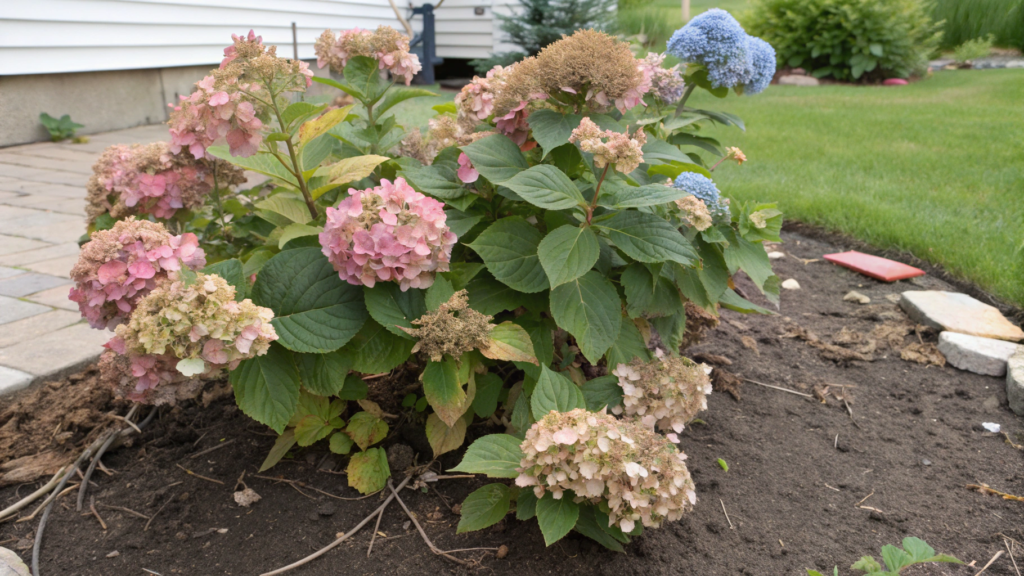
But you know how hydrangeas can look lush and green, with full leaves and strong stems—yet not a single bloom. Or the flowers show up kind of… meh.
And sometimes, out of nowhere, they turn some odd, washed-out color. Even if you didn’t change anything in your care routine, the plant still reacts.
That’s how I started digging into what really affects hydrangea color—and how baking soda might help with that.
Baking soda is a simple, affordable, and surprisingly powerful tool. It can gently shift your soil’s acidity, influence bloom color, and even support overall plant health.In this article, I’ve gathered only what actually matters. Just what I’ve done myself—with numbers, mistakes, and real-life takeaways from our own homestead.
1. How Baking Soda Alters Soil pH
When we first started reviving our overgrown lot in Idaho, I had no idea just how sensitive and picky hydrangeas could be.
But we quickly learned that these gorgeous plants have one big secret: soil pH has a direct impact on hydrangea color and health. And here’s where it gets interesting—regular baking soda, yep, the same one from your kitchen cabinet, can actually make a difference.
What is pH and why does it matter?
In simple terms, pH measures the acidity of your soil.
The scale runs from 0 to 14, where:
- 7 is neutral,
- below 7 is acidic,
- above 7 is alkaline.
Hydrangeas are especially sensitive to these shifts.
Their bloom color directly depends on your soil’s pH:
- Acidic soil (pH < 6) = blue tones
- Neutral to slightly alkaline (pH 6.5–7.5) = pink and lavender tones
- Higher than that = often pale beige or greenish blooms
How does baking soda work?
Baking soda (sodium bicarbonate) is a mild alkaline substance. When added to acidic soil, it raises the pH, gently neutralizing the acidity. Which means:
- If you want to shift your hydrangea from blue to pink — baking soda can help.
You’ll want to raise the pH to around 6.5–7.0. That’s the range where plants stop absorbing aluminum, and the petals turn pink or lavender. - If your soil is too acidic and your hydrangea isn’t growing well — baking soda can help again.
In that case, bring the pH up to at least 6.0, since anything lower than 5.5 can block root nutrient absorption, leaving your hydrangea stuck in survival mode instead of blooming.
But don’t expect miracles overnight. The effect is temporary and needs a careful approach.
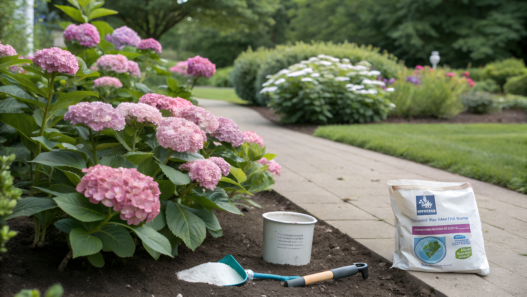
Last spring, one of our Endless Summer hydrangeas just… stopped blooming. The leaves were green, the plant looked healthy, but no flowers.We ran a simple soil test and got a pH of around 5.4 — way too acidic.
I decided to experiment: I mixed 1 tablespoon of baking soda into a gallon of water (about 3.8 liters) and carefully watered the soil around the plant. I repeated it two more times that season, spacing each application about three weeks apart.
And you know what? By July, it gave us three full, lush pink-lavender blooms. A small miracle!
If you want to try it yourself, here’s a solid option Arm & Hammer Baking Soda, 5 lb (2.26 kg). It’ll last more than a season—even if you’ve got a whole row of hydrangeas to treat.
2. Ideal Timing for Application

I know how it goes: you grab a box of baking soda, see a Pinterest post claiming it helps your hydrangeas, and next thing you know—you’re out in the garden pouring it everywhere.
But with hydrangeas, timing matters. If you want baking soda to actually make a difference—whether it’s to change bloom color or improve growth—you need to apply it at the right moment.
Spring is the best time to start
Why spring? Because that’s when hydrangeas begin actively absorbing nutrients, and it’s your chance to gently adjust the soil before buds start to form.
If your goal is to change bloom color (say, from blue to pink), it’s best to apply baking soda when fresh green shoots appear, but before the plant starts setting buds.
For most zones, that’s around April–May.
Reapply no more than once every 3–4 weeks
Baking soda isn’t instant—and that’s a good thing. Sharp pH shifts stress the plant, especially hydrangeas. Here’s a basic schedule:
If your goal is to change bloom color:
- Start with 1 tablespoon of baking soda per gallon of water (3.8 L) in April or May.
- Repeat the process once every 3–4 weeks.
- After the second application, it’s a good idea to test your soil’s pH, so you don’t push it too far.
A simple and reliable kit is the Luster Leaf 1601 Rapitest Soil Test Kit.
If your goal is just to maintain a healthy pH level (not change color):
- A single application in spring might be enough.
- Or up to two applications during the season: once in spring and once in early summer (around June).
Can you use baking soda on new hydrangea plantings?
It’s better to wait.
Young hydrangeas in their first year are still establishing roots and are much more sensitive to any pH shifts.
If you really want to try it—use half the dose: ½ tablespoon per gallon of water, and only once for the entire season.
When NOT to use baking soda
- In fall, when the plant is preparing for dormancy. Any chemical changes during this time can interfere with the natural shutdown process.
- During extreme heat or drought. High alkalinity paired with dry conditions can burn the roots and make things worse.
If you’re just starting to experiment with pH adjustments, it helps to track the weather and observe your plant.
After heavy rains, for example, pH can shift back toward acidity, and during periods of rapid growth, hydrangeas respond much faster to any soil changes.
3. Hydrangea Color Shifts Explained

When we moved into our new home, I brought three hydrangea bushes from our previous garden.
All of them were the same variety, planted side by side along a fence. The soil looked decent, so I prepped the holes, mulched with wood chips, and let the plants settle in.
No pH additives, no experiments—just observation.
And here’s what happened in spring:
- The first hydrangea bloomed bright pink,
- the second one turned blue-violet,
- and the third one looked undecided—soft lavender with a bit of green in the petals.
At first it made no sense. But actually, it was a clear lesson:
Even with the same care, soil pH can vary from one spot to another. Especially in areas where something grew before, or fertilizer was used, or maybe an old compost pile once sat—all of that leaves a footprint in the soil.
It’s all about pH and… aluminum
Most bigleaf hydrangeas (Hydrangea macrophylla) change color based on the acidity level of the soil.
But technically, it’s not the acidity itself that colors the petals—it’s the presence of available aluminum in the soil.
Here’s how it works:
- Acidic soil (pH below 6.0): aluminum dissolves and is absorbed by the roots.
Result: petals turn blue or purple. - Neutral to slightly alkaline soil (pH 6.5–7.5): aluminum gets locked out.
Flowers turn pink, lavender, or even deep magenta. - Very alkaline soil (pH above 7.5): the plant can struggle to absorb micronutrients,
and the blooms fade into pale green or off-white shades.
Want pink blooms? Raise the pH. Want blue? Lower it.
That’s the whole trick.
If you apply baking soda, your pH will go up—and the hydrangea will shift toward pink.
If you’re aiming for blue instead, you’ll need to acidify—add pine needle mulch, peat moss, or aluminum sulfate.
We use Espoma Soil Acidifier when we need to restore acidity after a more alkaline season.
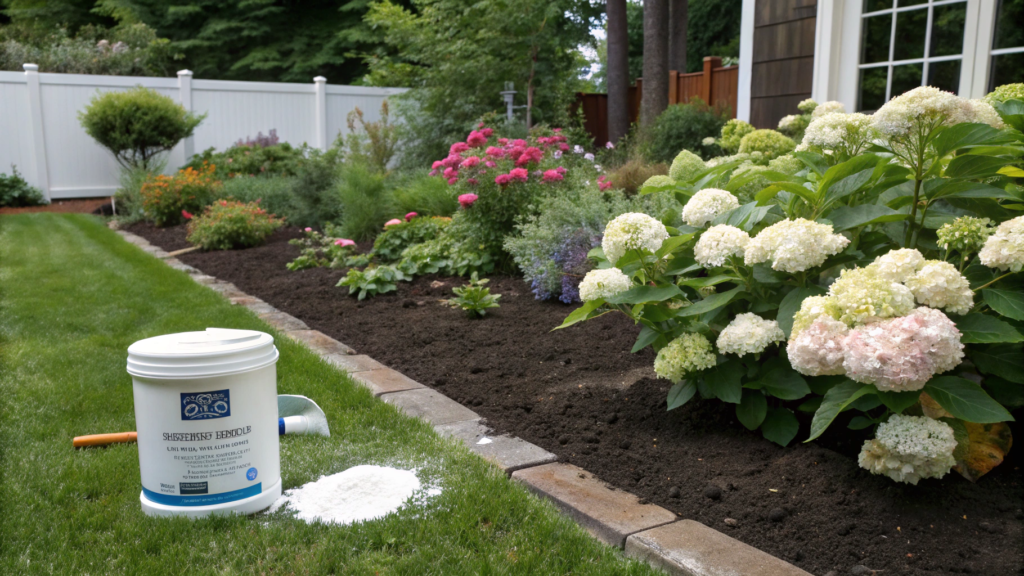
What if your hydrangea is white?
White hydrangea varieties generally don’t change color based on pH.
We’re mainly talking about classic bigleaf types (Hydrangea macrophylla).
Paniculata and arborescens also won’t react to pH shifts.
So before you start adjusting your soil, make sure you’re working with a color-shifting variety. The tag or plant description will usually tell you.
Some popular responsive types include:
- Endless Summer®
- Nikko Blue
- Blushing Bride
When will the color change?
Don’t expect results in a week. Even with proper adjustments, the plant may need a whole season—or more—to shift its bloom color.
Color is the result of nutrients building up in the plant over time, not just a quick response to a single watering.
So even if you start working on pH this spring, noticeable changes will likely show up next year. And that’s okay. The plant needs time to rebalance and rebuild.
4. Best Methods for Mixing and Applying
To start working with soil pH, you don’t need a lab coat or expensive equipment (though we’ll talk about testing kits later).
You just need to know the right proportions, choose the correct method of application, and understand what happens after you water.
But if you just mix “by eye,” you can burn the roots, mess with the soil biology, and end up with something very different from what you intended. I’ve been there.
How much baking soda do you need?
The golden rule: 1 tablespoon of baking soda per 1 gallon of water = about 15 grams per 3.8 liters.
That’s enough to gently raise the pH in a specific area without harming the roots. And believe me—more is not better.
If you’re unsure how your soil will react, start with half the dose: ½ tablespoon per gallon.
Important. Always use warm (not hot) water—baking soda dissolves faster and won’t settle at the bottom.
Two watering methods: one for light correction, one for full control
When you’re adjusting soil pH, it’s easy to overdo it. We only apply the solution where it’s needed—not all over the garden bed. There are two basic approaches—each with a clear purpose.
1. Spot watering around the base (for young plants or light correction)
Use this if the plant is still small, or if you’re just beginning to test how your soil responds to soda.
What we do:
- Mix ½–1 tablespoon of baking soda into 1 gallon of warm water.
- Water in a narrow circle around the plant, about 4–6 inches (10–15 cm) out from the base—not right at the stem.
- Use a small amount of water—about 1 gallon per plant.
- Always follow up with plain water to help the solution soak deeper into the soil.
A narrow-spout watering can is a must. Behrens Steel Watering Can, 2 gal has lasted us for years, doesn’t leak, and gives a precise pour.
2. Full-area watering (for mature plants and precise pH correction)
This works well if the plant is already large and you’re confident that the soil pH needs adjusting.
What we do:
- Same solution: 1 tablespoon of baking soda per gallon of water.
- Water around the outer edge of the plant canopy, about 18–24 inches out from the center—that’s where the roots are most active.
- Use more water—up to 2 gallons per plant, especially if the soil is dense or dry.
- Always follow up with a rinse of clean water afterward.
This method helps adjust the pH in the part of the soil where the plant is actually absorbing nutrients. But make sure to test your soil first—so you don’t push it too far.
When baking soda doesn’t work
If you’ve applied the solution 2–3 times (spaced 3–4 weeks apart) and still don’t see results—don’t give up just yet. Check these three things first:
- Soil pH level. It’s possible that soda simply didn’t raise the pH enough. Use test strips or get a lab test—guesswork won’t cut it.
- Is aluminum available in your soil? Hydrangea color doesn’t depend on pH alone—it depends on whether the plant can absorb aluminum.
➤ The easiest way to check is to apply a small amount of aluminum sulfate.
If the blooms turn blue afterward, aluminum is present and usable. - Is your hydrangea the right type? Only bigleaf hydrangeas (Hydrangea macrophylla) change color based on pH.
If you’ve got something like Limelight or Annabelle—no amount of baking soda will change the color. And that’s totally normal.
The first time I used baking soda, I didn’t rinse the soil afterward—just poured and walked away.
Two days later, the soil surface had gone hard and gray, like someone had dumped dry cement. The plant didn’t die, but it sulked for the entire month of June.
So always follow up with water after using baking soda, especially if you’re in a hot climate.
5. Common Mistakes to Avoid
Mistakes with baking soda are more common than most people think.
And I’ve made plenty of them myself early on in my “alkaline journey.”
Here are the top 5 mistakes that can mess up not just the color of your hydrangea—but the plant itself:
1. Applying baking soda “by eye” without dissolving it
The mistake. Sprinkling dry baking soda directly onto the soil or pouring it in without measuring or mixing.
Why it’s bad. In dry form, baking soda can concentrate in the topsoil and burn the roots, especially in younger plants.
How to fix it. Always dissolve 1 tablespoon per gallon of water, stir until fully mixed, and follow up with a rinse of clean water.
2. Using it on young hydrangeas
The mistake. Applying the solution during the plant’s first year.
Why it’s bad. New root systems are still adjusting and extra sensitive to pH shifts. It can slow down or stunt growth.
How to fix it. Wait at least one full season. Or, if you really want to try, use half the dose to minimize the risk.
3. Applying too often
The mistake. Treating the plant every week “to speed things up.”
Why it’s bad. You’ll likely push the pH past 7.5, which is the upper limit for hydrangeas.
This disrupts soil balance, kills off good microbes, and leads to dull, washed-out blooms.
How to fix it. Stick to once every 3–4 weeks, and only when there’s a clear need.
4. Ignoring the hydrangea type
The mistake. Trying to change the color of a variety that doesn’t respond to pH.
Why it’s bad. Nothing will happen—and you’ll just stress the soil with extra alkalinity.
How to fix it. Check your variety. Only Hydrangea macrophylla responds to pH changes.
Paniculata, arborescens, and smooth-leaf types will stay true to their original color.
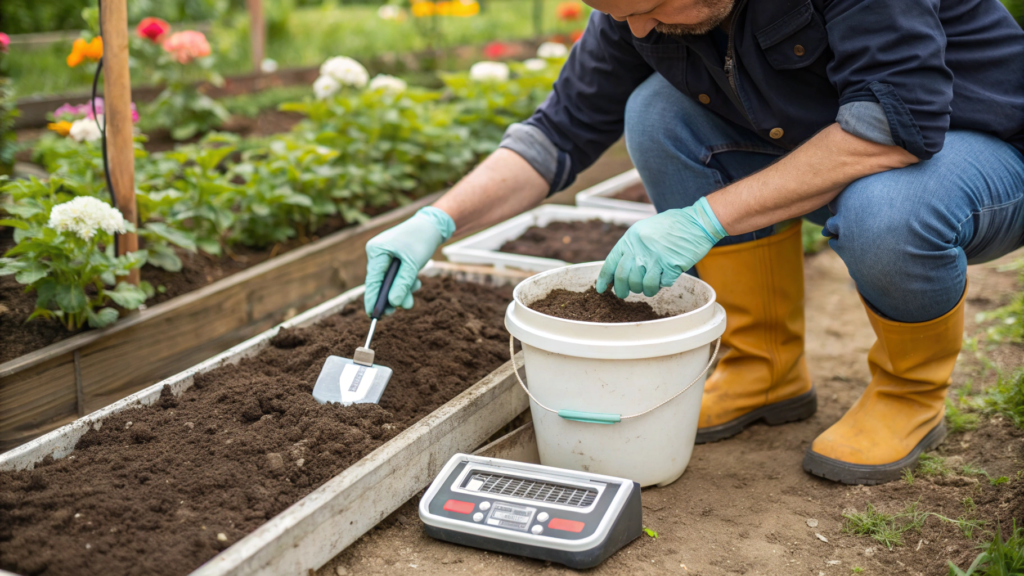
5. Skipping the soil test
The mistake. Applying baking soda without knowing your starting pH.
Why it’s bad. If your soil is already around 7, you’ll make things worse—causing chlorosis, leaf spotting, and pale blooms.
How to fix it. Start with a simple test—like the Luster Leaf Soil Test Kit. It’s affordable and gives you a reliable baseline.
One season, I got so carried away “fixing” one hydrangea that by August, the leaves started yellowing, the edges turned dry, and the blooms went a weird beige-green.
Turns out, I had raised the pH during a drought—a double whammy.
Since then, I always check soil moisture and the weather forecast before adding anything to the ground.
6. Signs Your Hydrangeas Need pH Adjustment
Just because your hydrangea isn’t bright pink or vivid blue doesn’t mean something’s wrong.
Healthy blooms can be soft, even a little faded—and that’s totally fine.
But you should still watch your soil.
Here are 6 real signs it’s time to check the pH—and maybe step in.
1. The color is “off” from what it used to be
If you’ve got a color-changing type like Hydrangea macrophylla, and it used to be deep blue or bright pink—
but now it looks pale, dusty lavender, or almost colorless—
there’s a good chance the pH has drifted out of the ideal 5.5–7.0 range.
Example:
Our Endless Summer hydrangea used to be a bold blue. Then one year, the flowers turned a weird “dusty lilac.”
The pH at the time? Around 6.9—aluminum uptake was almost shut down.
2. Leaves go dull and brown around the edges
When the pH rises too high (above 7.5), hydrangeas struggle to absorb iron, magnesium, and boron.
What you’ll see:
- leaves lose their shine
- edges start browning and drying out
- sometimes light-colored veins appear against the darker green
This shows up most clearly in mid-summer, when micronutrient demand peaks. Try lowering the pH with peat moss, pine mulch, or iron sulfate.
3. The plant looks healthy—but won’t bloom
Classic case. Strong leaves, sturdy branches—zero flower buds. Why? Because overly acidic soil (below pH 5.0) can block phosphorus.
That means: lots of green growth, but no blooms. In this case, baking soda can help bring the soil to 6.0–6.5, which is the sweet spot for phosphorus absorption and blooming.
4. New leaves are tiny and weak
If new leaves are:
- smaller than usual
- soft and pale
- not fully unfurled
…it might be a sign of cell division issues due to low pH.
Test your soil:
If it’s below 5.5, you can gently raise it using baking soda—1 tbsp per gallon of water, no more than once every 3–4 weeks.
If pH is fine, check for nitrogen and calcium deficiencies.
5. Mulch breaks down fast—but your plant just sits there
One year, we noticed our mulch breaking down beautifully.
Soil was loose and fluffy—but the hydrangea just sat there, doing nothing.
Turns out: too much acidic organic matter (like bark or pine needles) can drop your pH fast,
especially if you’re not adding compost or wood ash. Baking soda helped us rebalance the pH after all that mulch.
6. You’ve been using acid-forming fertilizers—without correcting it
All those “blue hydrangea boosters” with aluminum, sulfur, or ammonium nitrate?
They acidify the soil.
If you’ve been using them for 2–3 years without balancing, chances are your pH has dipped below 5.0. And your hydrangea is starting to feel it.
Last year, I added coffee grounds to my hydrangeas all spring (because Pinterest said it was a “must-have”). After a few weeks, the leaves looked yellowish, and the blooms faded into a weird “dirty white.” The soil pH? 4.9.
So I followed the soda fix: 1 tbsp per gallon, once a month — and within two months, the plant was back to normal.
Hydrangeas are tough—but not invincible. If you see two or more of these signs, grab a pH tester and check your soil. It’s probably time.
7. Alternatives to Baking Soda
Baking soda is a great way to gently raise your pH—especially if you’re just learning how hydrangeas react to different soils.
But sometimes… it just doesn’t work. And other times, you just don’t want to deal with it—maybe you prefer organic methods or you’re already using commercial blends.
Here’s what you can use instead of baking soda, depending on your goal.
If you want to raise the pH (to shift toward pink blooms):
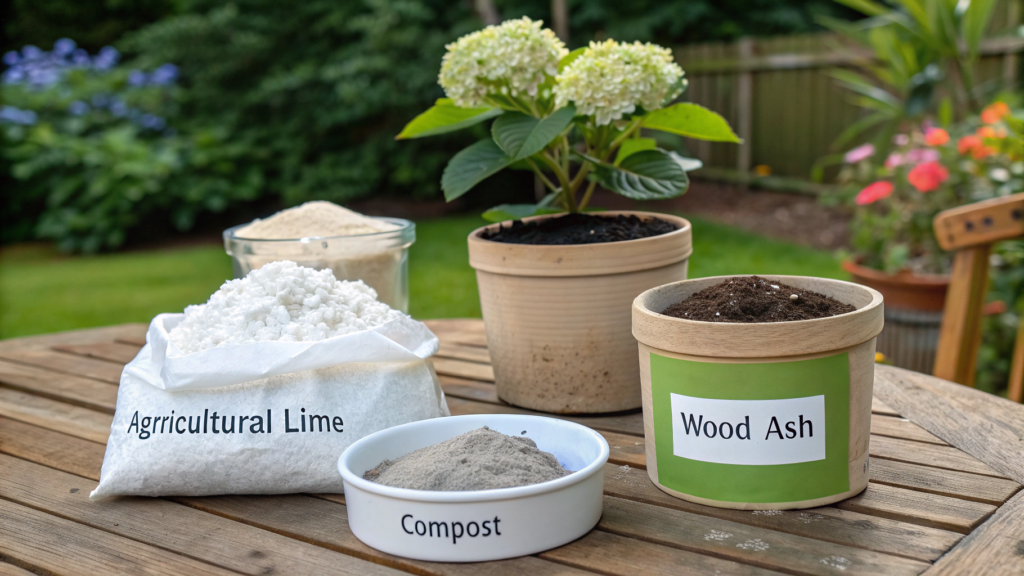
1. Garden lime (Dolomitic or standard)
This is a tried-and-true method for neutralizing acidic soil. It works slower than baking soda but gives a more stable, long-term result.
- Apply in fall or early spring
- Mix into the soil or add under mulch
- Takes 1–2 months to show effect
- Best for larger areas where long-term correction is needed
We use Espoma Garden Lime—it’s loose and easy to apply.
Key tip. Dolomitic lime contains magnesium, which helps if your plants show signs of deficiency (like yellowing leaves with green veins).
2. Wood ash
Ash from hardwood trees is a natural way to alkalize your soil.It also adds potassium, calcium, and phosphorus—great for established plants.
- Add ½ cup per shrub in spring
- Always mix well into the soil
- Don’t combine with nitrogen fertilizers—can cause salt buildup
But be careful—ash is potent and easy to overdo.One year, we ruined a peony bed by dumping on way too much.
If you want to lower the pH (to get deeper blue tones):
1. Aluminum sulfate
If you want a quick shift to blue, this is your go-to. It drops the pH and supplies aluminum—the key element for that deep blue hue.
- Mix 1 tbsp per gallon of water
- Water in early spring, before bud formation
- Results usually show in 3–5 weeks
2. Pine mulch or bark
A softer, organic way to maintain a slightly acidic environment without big swings.
Use fine pine needles, bark chips, or sawdust.
- Refresh once or twice per season
- Works great as a complement to your main soil adjustments
For us, pine mulch keeps the soil steady around pH 5.8–6.2—perfect for blue hydrangeas.
When we first moved onto a new plot, baking soda worked on one hydrangea—but did nothing for the other. The soil there was heavy clay, and the pH stubbornly held at 5.0.
So I switched to garden lime in the fall, covered it with mulch, then added a little wood ash in spring.
The shift was slow, but by next summer, that hydrangea finally bloomed in the rich pink I was going for.
Every garden has its quirks—and the key is finding what works for your space.
So, what’s worked for you?
If you’re still reading, I know you’re not just looking for a “pretty plant” by the gate. You want to understand how soil works, how hydrangeas “feel” the elements, and how we—gardeners—can cooperate with nature, not just control it.And hey—drop a comment and let me know: What color do you love most? Or have you ended up with one of those wild, gorgeous in-between purples?
Let’s talk.
Because in this garden, you’re not alone—we’re all here, elbow-deep in dirt, full of questions, hope, and a watering can in hand.


