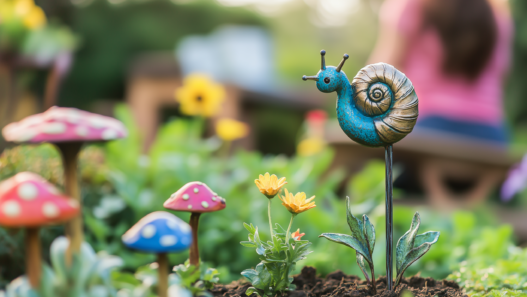

Looking for an easy, creative way to add some flair to your garden? DIY decorative garden stakes are the perfect solution! Whether you’re new to crafting or a seasoned DIY enthusiast, you’ll love this project for adding personality and charm to your outdoor space. I have to say, you don’t need to be an expert to create something beautiful. When we first started, we didn’t have a clue, and now our garden is bursting with vibrant color thanks to these simple stakes.
Why Garden Stakes? The Role of Garden Stakes in Garden Design
Garden stakes aren’t just a practical way to keep track of your plants—they can be an artistic expression of your garden’s personality. I remember back when our garden was a mess, and I couldn’t tell the difference between my herbs and the weeds. (We’ve all been there, right?) Adding decorative garden stakes changed everything. Not only did they help us organize, but they also made the space so much more inviting.
In fact, research suggests that incorporating visual elements like bright colors into your garden can boost your mood. According to a study by the American Horticultural Therapy Association, spending time in a garden with visual enhancements can reduce stress levels and promote mental well-being. So, why not make your garden a place of beauty and relaxation?
Choosing Materials for Your DIY Decorative Garden Stakes
This is where the fun begins! You don’t need to go out and buy expensive supplies for this project—many items can be found in your garage or backyard. Here’s what I recommend:
- Bamboo or wooden dowels: these form the backbone of your stakes. Bamboo is particularly sturdy and eco-friendly.
- Weatherproof paint: choose vibrant colors to make your stakes pop.
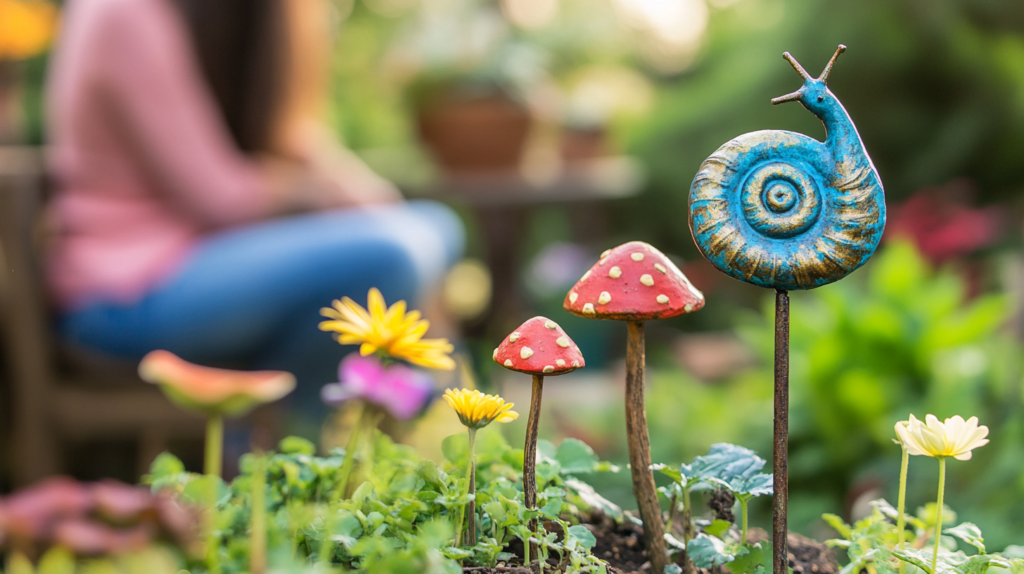
- Polymer clay: this is perfect for creating unique designs to top your stakes. You can mold it into any shape you like—flowers, animals, or abstract designs.
- Clear spray sealant: to protect your hard work from the elements.
A quick Amazon search will give you endless options for eco-friendly paints or clay sets. I personally recommend this weatherproof paint because it’s long-lasting and comes in a wide variety of colors.
Our first garden stakes were made from old fence posts we found lying around after a storm—talk about upcycling! They may have been rough around the edges, but the satisfaction of using something from our own property made them so special.
Step-by-Step Guide to Making DIY Decorative Garden Stakes
Now, let’s dive into the fun part: creating your DIY decorative garden stakes. Each step is designed to be simple, so even if you’re new to crafting, you’ll have no trouble following along.
Step 1: Cut Your Stakes
Start by cutting your bamboo or wooden dowels to the desired length. Around 2 feet is a good height for most garden beds, but you can adjust based on what works best for your garden.
Pro Tip: For taller plants like tomatoes, you might want to go a little longer. We made a mistake early on with short stakes, and well… let’s just say they vanished into the tomato jungle!
Step 2: Painting Your Stakes
Next up, grab your weatherproof paint and get creative! Use bold colors like red, yellow, or green to give your garden that lively pop. You can even stencil on your favorite designs for a more personalized touch.
I still remember the chaos of our first paint session—it was windy, and half the paint ended up on me instead of the stakes. But hey, we live and learn, right? The end result was totally worth it.
Step 3: Add Your Decorative Elements
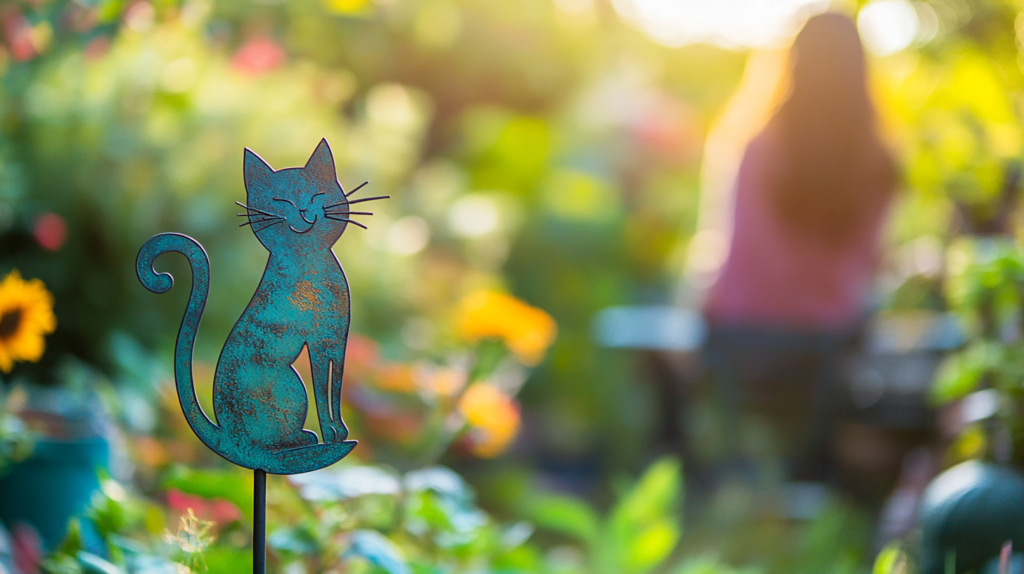
Now comes the most exciting part: decorations! Use polymer clay to craft decorative tops for your stakes. You can mold flowers, animals, or whatever inspires you. We took some inspiration from polymer clay artist Kathi Bowen, whose whimsical garden designs gave us so many creative ideas!
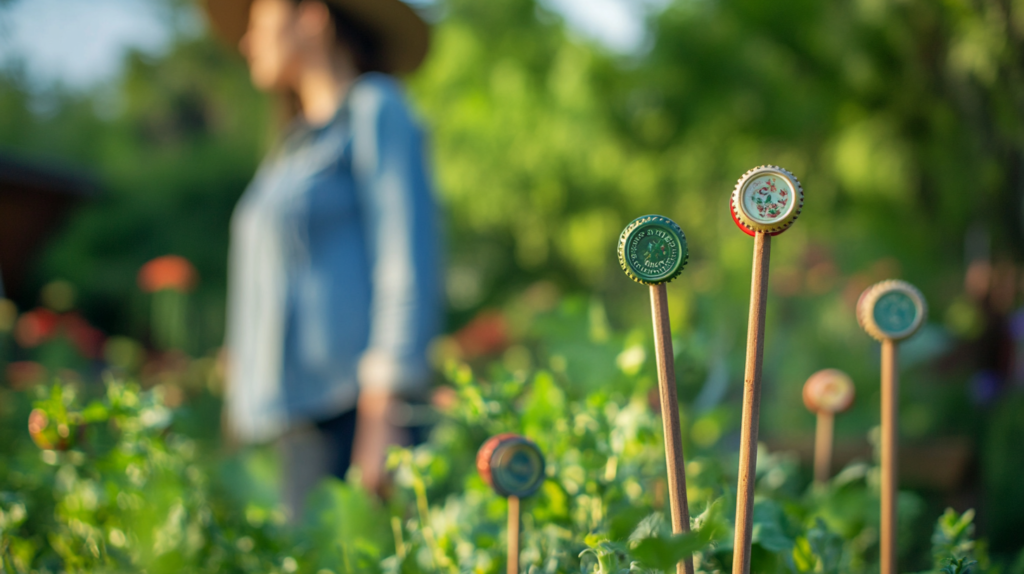
Want to take it to the next level? Attach beads, small trinkets, or even recycled materials like bottle caps for that upcycled touch.
Step 4: Seal Your Creation
Once everything’s dried and decorated, finish up by spraying a clear sealant over your stakes. This will protect them from rain and sun damage, ensuring your art lasts through the seasons.
Using Your DIY Decorative Garden Stakes
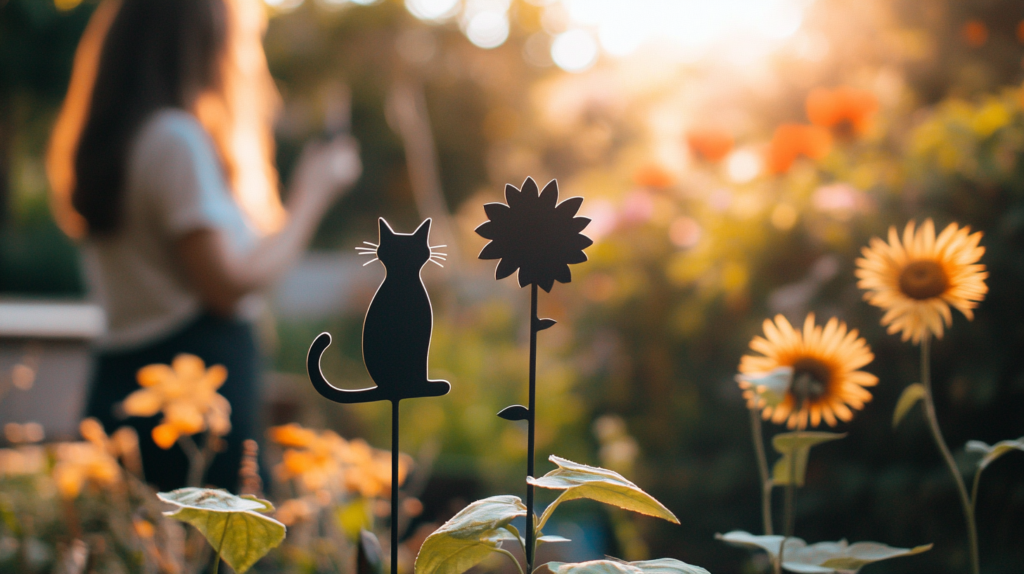
Now that your decorative garden stakes are ready, it’s time to place them in your garden. These stakes aren’t just for labeling plants—get creative with how you use them! They’re perfect for marking paths, helping climbing plants like peas or beans, or simply as decorative elements.
In our garden, we added stakes with fun, painted animal faces that the kids adore—now they love helping out in the garden!
Bonus: Upcycled Ideas for DIY Garden Stakes
Feeling a bit adventurous? Try making DIY decorative garden stakes from upcycled materials. Old spoons, bottle caps, or even discarded silverware can make quirky garden markers that are both unique and sustainable.
Eco Tip: Instead of buying new, look around your home and yard for items you can repurpose. It’s a great way to reduce waste and save money.
Product Recommendation: Check out these upcycled garden stake kits on Amazon to spark your creativity.
How DIY Decorative Garden Stakes Transformed Our Homestead
We used to have a garden where everything looked the same—no color, no personality, just rows of plants. But after adding these stakes, our space truly came alive. Not only did they make gardening more fun, but they also brought a bit of us into the design. It’s one of those small details that makes a big impact!
I still remember the first time we showed them off at a local garden tour. People couldn’t stop asking where we got them, and when we said “Oh, we made them ourselves!”—the look on their faces was priceless.