Growing seedlings indoors gives you an early start to the season, gives you better control over conditions, and means you get stronger and healthier plants. But to be completely honest, everyone understands that it can be financially costly to organize a space for seedlings.
That’s why I love DIY sprouting lifehacks. Using handy materials and clever techniques that speed up germination will save you money and make growing indoors much more efficient.
1. Egg Carton Seed Starting – The Shocking Hack That Saves You $$$.

I’m sure you’ve always thrown away egg cartons. STOP, we could really use them as they are perfect for growing seedlings.
Why it works:
- They’re biodegradable. You know, the cardboard can be placed right into the soil with the seedling. It naturally decomposes and the roots are not stressed when transplanting.
- They’re free. Agreed, why spend money on plastic seedling cassettes when you already have free and eco-friendly containers.
- They hold moisture. Cardboard absorbs moisture, but it does not retain excess water, which prevents roots from rotting.
How to use egg cartons for seedlings:
- Cut off the lid and make small drainage holes in the bottom of each box. This will prevent water from stagnating.
- Fill each cell with seedling soil mix (do not use regular garden soil-it is too dense and can suffocate seedlings). Light and loose soil helps the roots grow without hindrance.
- Plant the seeds and spray the soil with water. Don’t flood them, the soil should stay evenly moist, like a well wrung out sponge.
- Put them in a warm, bright place and keep them moist until they germinate. The optimum room temperature is around 21°C, this will speed up and even out sprouting.
Tip. Sometimes cardboard begins to mold earlier than the seedling is ready for transplanting. In this case, carefully remove the cardboard, leaving only the seedling with soil.
You can always use a greenhouse to keep warm and moist – like this mini greenhouse for seedlings.
2. DIY Indoor Greenhouse – The Zero-Cost Setup That Works Like Magic

You don’t necessarily need an expensive greenhouse to grow healthy seedlings indoors. You can do just fine without one by building a simple mini greenhouse with your own hands. It’s an affordable and effective solution, and you probably already have everything you need to build it.
Why it works:
- Creates a controlled microclimate. The mini greenhouse retains heat and moisture, speeding up seed germination and preventing seeds from drying out.
- Saves money. Instead of buying expensive greenhouse kits, you can use a clear plastic container, old food containers or even a regular bag.
- Protects seedlings. Indoor air is often too dry, but a mini greenhouse helps keep the right humidity, reducing the risk of seedling death.
How to make a mini greenhouse with your own hands:
- Take a transparent plastic container with a lid (the one you usually use to store seasonal items). The bigger the better – you will be able to place more seedling containers.
- Put the seedling trays inside the container and spray them lightly with water.
- Close the lid, but not completely! This is important for air circulation and to prevent mold.
- Place the container in a warm place. lBest on a sunny windowsill or next to a radiator.
Tip. If you decide to use a plastic bag instead of a greenhouse, insert wooden skewers into the soil so that the bag does not touch the plants and prevent them from growing.
3. No Grow Lights? This Genius Trick Will Get Your Seeds Sprouting Fast

Grow lights are a great thing and would really come in handy, but they can be expensive. If you want to sprout your seeds without spending a fortune, use this simple lifehack to get the most light.
Why it works:
- Imitates seedling bulbs. Instead of light only falling from one side, this method is able to reflect light back to the seedlings.
- Prevents pulling. If plants don’t get enough light, they become thin and weak.
- Uses improvised materials. No expensive reflectors or artificial lighting.
How to make a foil reflector for seedlings:
- Take a thick piece of cardboard (such as from a cereal box or shoebox). The size of the cardboard should be about 10-15 cm above the seedling tray, so that it reflects light well.
- Cover one side with aluminum foil, shiny side out. This will help reflect natural light back to the plants.
- Place the reflector behind the seedling trays so that the foil faces the plants and the light from the window hits it. In this way, the sunlight will be reflected and evenly illuminate all the seedlings.
- Fix the reflector. You can simply put it leaning against the wall, or fix it on a stand for stability.
Tip. Turn the trays with seedlings every couple of days – this way the sprouts will develop evenly and will not lean to one side.
4. Cheap DIY Seed Starting Containers – You Already Have These at Home!

So, no money wasted on expensive seedling cassettes. Everything you need is already in the house, just look into a recycling container.
The best handy materials for seedlings:
- Rolls from toilet paper. Cut them in half, put them in a tray and fill with soil. They are biodegradable, so you can plant directly into the soil with the plant. But be careful – if they get wet all the time, they can fall apart too soon.
- Yogurt cups. Make drainage holes in the bottom to avoid stagnant water. These containers are deeper than regular cassettes, which helps roots develop better and prevents tangling.
- Transparent Berry Containers. By the way, they already kind of have a greenhouse effect! The clear plastic retains moisture, creating the perfect conditions for germination. Just add a little air by opening the lid.
- Takeaway food containers. If they are clear, this is the most suitable mini greenhouse. Just make a few holes in the lid for ventilation and you’ve got free protection for your seedlings.
Tip. Ask in bakeries or stores – there are often leftover muffin trays, they are also suitable for germinating seeds.
Of course, you can also try reusable seedling containers, which will last you more than one season.
5. Upcycled Egg Cartons for Seeds – The Surprising Truth You Need to Know

We’ve all heard that egg cartons are great for growing seedlings. But here’s something that will surprise you, unfortunately, they’re not always the best option.
Pros and cons of using egg cartons for seedlings:
Pros:
- Free and biodegradable. A great way to recycle cardboard and grow hardy seedlings at the same time.
- Easy to transplant. Just cut the cells and plant directly into the soil.
Cons:
- They dry out very quickly. Cardboard does not retain moisture as well as plastic or ceramic, so seedlings need to be watered more often.
- Can go moldy if too much moisture is present. Especially if standing in an overly humid environment without good ventilation.
- Limited space for roots. Cells are shallow, which can inhibit root growth.
What would be a better option? Use deeper containers like yogurt cups or berry trays. They allow the roots to develop more freely.
Tip. If you do decide to use egg cartons, put a plastic tray under them so that water doesn’t soak into the surface they stand on. This will help to slow down their deterioration and avoid drying out the soil.
6. Mini Greenhouse DIY – The Space-Saving Secret Every Gardener Should Try

Unfortunately, you don’t always have enough space for a greenhouse. But that’s not a problem, because a mini greenhouse comes to the rescue, and it’s just perfect for small apartments and balconies.
Why it works:
- Saves space. Even on a small windowsill you can grow a lot of seedlings.
- Creates a greenhouse effect. Temperature and humidity remain stable, which speeds up sprouting.
- Easy to make yourself. You will only need one container.
How to make a mini greenhouse:
- Take a clear cake container or a plastic tray with a lid – any clear container will do.
- Place the seedling cups inside the container and moisten the soil slightly.
- Close the lid, but leave small gaps so that the seeds germinate faster but the air does not stagnate.
- Remove the lid when the first sprouts appear – this will help to avoid rotting
Tip. Ordinary plastic lettuce wrappers also work well as a mini greenhouse.
7. Start 100+ Seeds Indoors for Pennies – The Ultimate Hack Revealed

Using soil blocks you can grow hundreds of seedlings, and without expensive containers or cassettes.
Why it works:
- Eco-friendly. No plastic cassettes, just compressed soil.
- Strong root system. Roots self-limit their growth rather than curling up in the pot.
- Space saving. Blocks can be placed close together, leaving no empty space.
How to make soil blocks:
- Mix the potting soil with water. It should be a little wetter than usual to hold its shape.
- Use a special tool to form the blocks or just mold the cubes with your hands.
- Plant 1-2 seeds in each block and moisten the soil slightly.
- Keep the humidity and temperature constant. You can cover with foil to create a mini greenhouse.
Tip. When you don’t have a soil block press, you can use an ice tray or silicone muffin mold. There is always a way out!
Improved version. This soil block press allows you to quickly make perfectly even cubes.
8. DIY Seed Starting Setup – The #1 Beginner Mistake You MUST Avoid
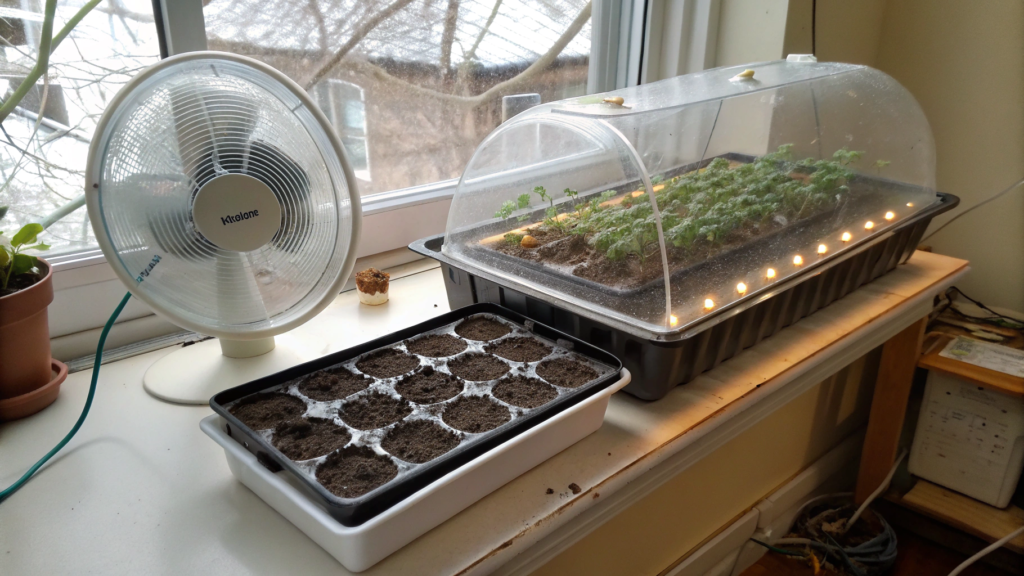
Many beginning gardeners make the same mistake: they forget to ventilate.
Why it’s a problem:
- The seedlings don’t have enough stress on their stems. Without air movement, the plants remain weak and stretch out.
- High humidity provokes fungus. Without air circulation, mold and rot appear very quickly.
- Seedling growth becomes uneven. Due to stagnant air, some seedlings grow faster and others lag behind.
How to fix it:
- Put a small fan near the seedlings. The light airflow will make the stems stronger.
- Don’t flood the plants with water. The soil should be moist, but not soggy. Too much moisture creates conditions for mold and disease to develop.
- Remove the dome or bag from the greenhouse when the seeds have sprouted – otherwise the seedlings may rot.
Tip. Turn the fan on at minimum speed for a few hours a day. The airflow should be weak, like a light breeze.
Improved version. This small USB fan is ideal for seedlings and doesn’t take up much space.
9. Plastic Bottle Mini Greenhouses – The Simple Trick for Fast Growth
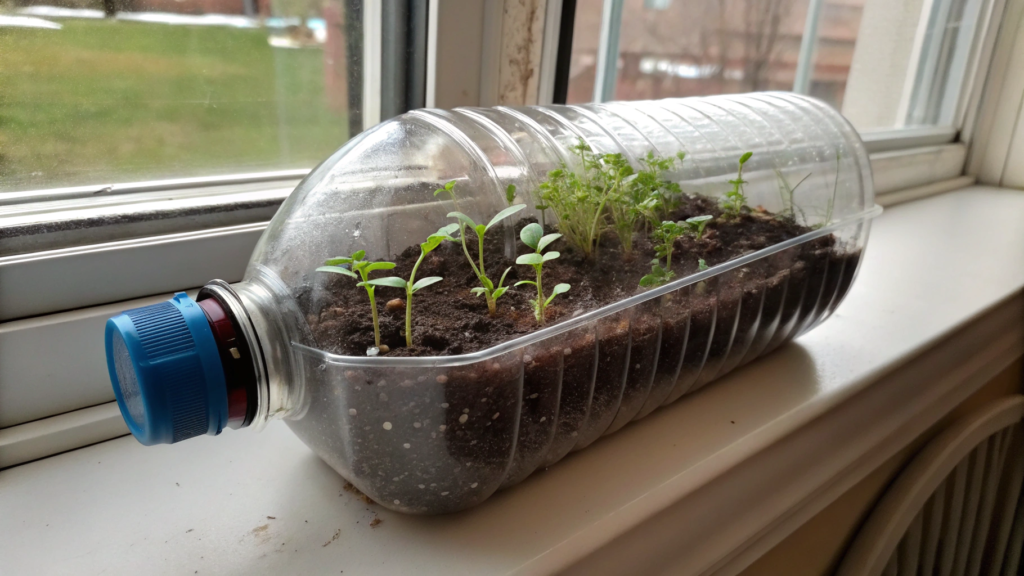
Don’t throw away your two-liter plastic bottle – turn it into a mini greenhouse.
Why it works:
- Retains heat and moisture. The bottle creates a greenhouse effect, helping seeds germinate faster.
- Great for small spaces. Works well even on a windowsill or balcony.
- Protects tender seedlings. Sharp temperature fluctuations are no longer terrible!
How to make a mini greenhouse from a plastic bottle:
- Cut the bottle in half with scissors or a box cutter. The bottom part will become a container for seeds.
- Make drainage holes in the bottom of the bottle. Without them, water can stagnate, leading to root rot. If you plan to place the container on a tray, you can just put a thin layer of expanded clay or fine gravel in the bottom.
- Fill the bottom with soil mix and plant the seeds. Use a light seedling potting soil that holds moisture well but doesn’t compact.
- Put the top of the bottle back on to create a moist microclimate.
- Unscrew the lid so that there is a little airflow. If too much moisture is collecting inside, open the top a little.
Tip. This method is especially good for heat-loving plants such as tomatoes, peppers and eggplants. If your home is cool, place the bottles on a heating mat to speed germination.
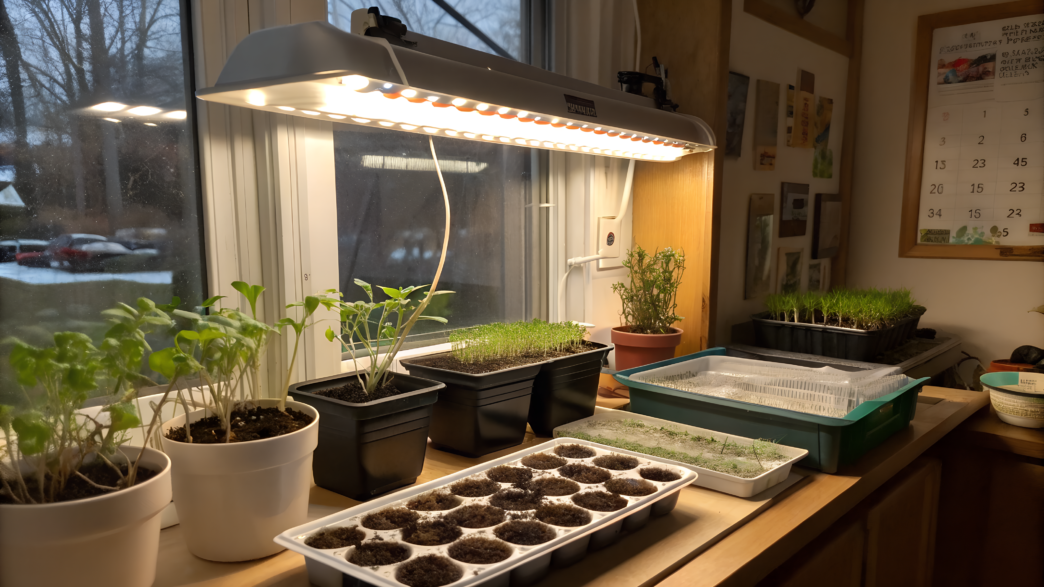
10. Best DIY Grow Lights – The Under-$10 Solution No One Talks About

If you’re serious about growing seedlings, you can’t do without lighting. But you don’t have to spend a ton of money, as a regular LED cold light bulb will get the job done for less than $10.
Why it works:
- Mimics sunlight. The right spectrum of light helps sprouts grow strong instead of stretching out.
- Saves money and energy. No need to buy expensive plant bulbs, just a regular table lamp with a cool daylight bulb.
- You can adjust the height.The light should be at a distance of 2-3 cm from the seedlings, so that it does not stretch out.
How to adjust the light for seedlings:
- Use an adjustable table lamp and point it directly at the seedlings.
- Choose a 6500K LED bulb (cool white light) – it’s as close to natural sunlight as possible.
- Keep the bulb on 12-16 hours a day so that the plants get enough light.
- As the seedlings grow, raise the lamp higher to keep the light at an optimal distance.
Tip. If you’re growing seedlings in a dark room, put a foil reflector behind the containers. This will increase the amount of light.
Growing seedlings at home doesn’t have to be complicated or expensive
Growing seedlings at home doesn’t have to be complicated or expensive. All you need is a little creativity and a knowledge of some useful lifehacks.
- Use handy materials instead of expensive containers.
- Create the perfect environment without spending too much.
- Save money without sacrificing seedling quality.
With these tried-and-true and workable tips, you can grow strong, healthy seedlings without investing a lot of money. Try them this season and you’ll see the results for yourself.