Smoke cleansing (aka smudging) can be used to promote good energy in your home, to perform a blessing, or to mark any number of mental or spiritual occasions. Read on if you want to learn how to make a sage smudge stick for positive energy and spiritual cleansing.
“So you’re a witch now?”
That’s the question I got when I made sage smudge sticks for the first time! It made me laugh out loud because we had just learned that the tiny town we moved to is rumored to have a huge witch population! Weird, but cool!?
Unfortunately, I only aspire to be cool enough to be a witch someday! The real reason I made smudge sticks was that we had sage growing out of our ears!
I had already dried and preserved about 5 mason jars worth and still had tons left over. Making DIY smudge sticks to use throughout the year seemed like a fun new way to preserve the sage and create a handmade gift to give to friends.
Anyway, in this post, I’ll take a look at:
- What a smudge stick is
- When to use smoke cleansing
- How to make a sage smudge stick – 6 steps
- How to use your smudge stick for smoke cleansing
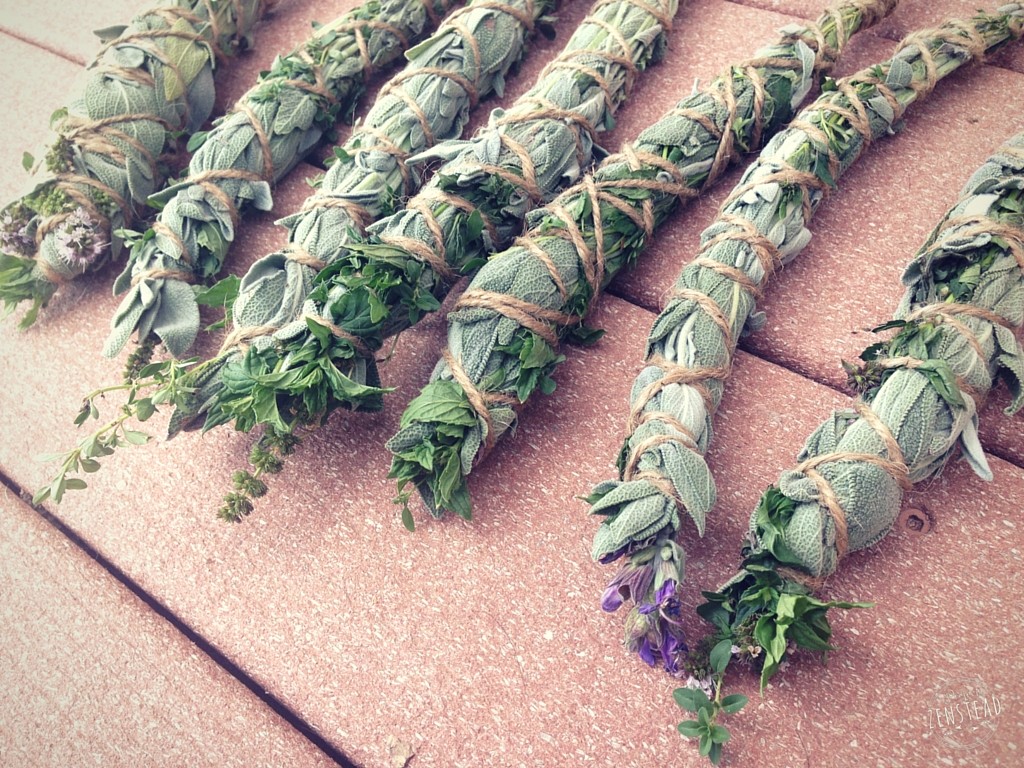
What is a Smudge Stick?
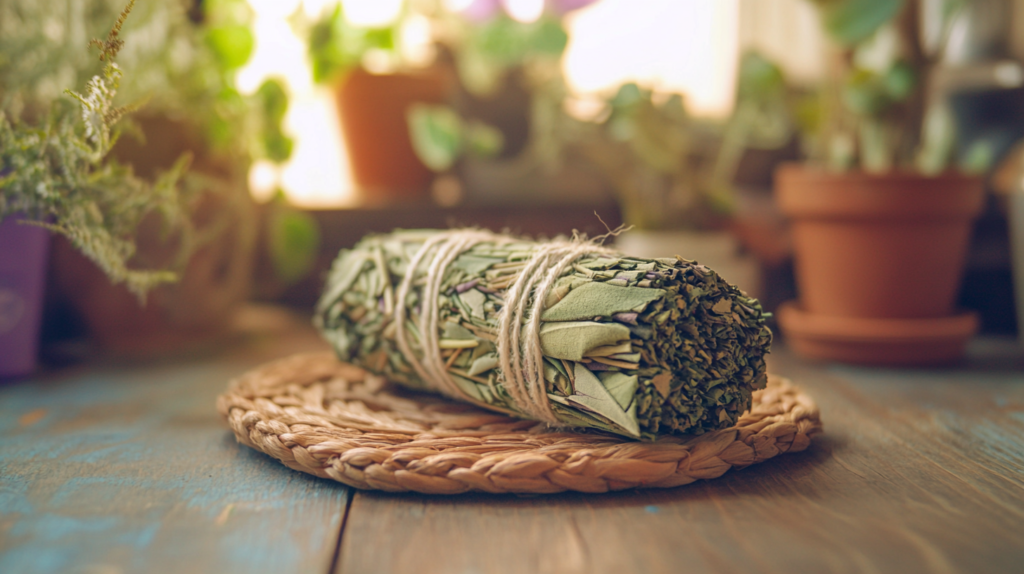
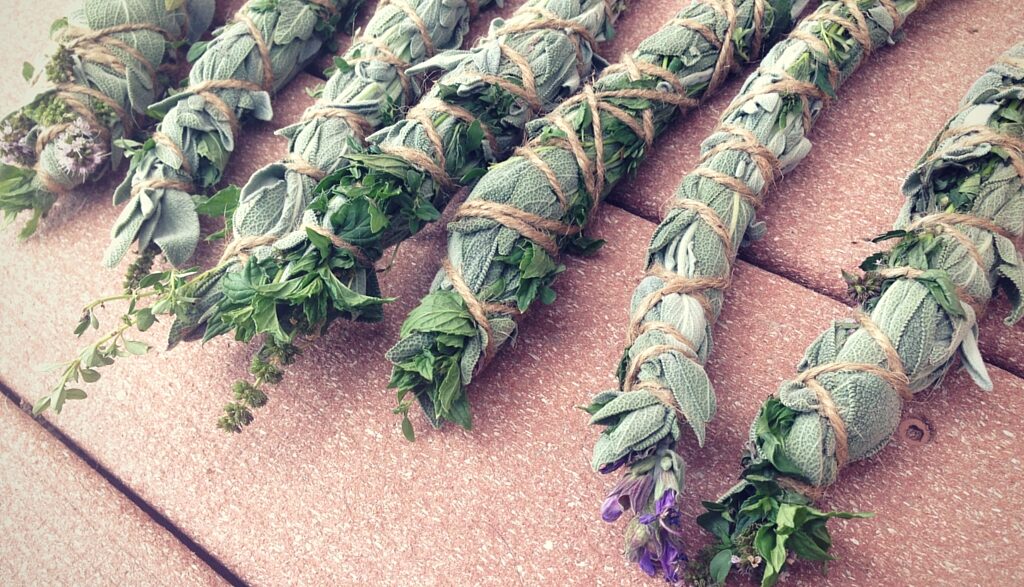
A smudge stick is a bundle of tightly wrapped herbs that are dried and then burned to “cleanse” an area.
Native American cultures traditionally burned bundles of white sage and herbs in spiritual ceremonies. The customs and rituals that Native Americans performed by burning sage were highly religious and were performed for a variety of reasons.
I always try my very best to understand as much as I can about other people and cultures, while realizing everyone’s experiences are different from my own.
Over the years, I’ve realized that smudging can often be considered a form of cultural appropriation.
To be honest, this makes sense because very little of our modern-day use of smudge sticks resemble the highly sacred tradition of the Native Americans.
I would never want to try to copy such a special ceremonial practice when I understand so little of this heritage.
White sage, the herb traditionally grown and used for indigenous ceremonies, has been over-harvested in recent years because of the growing popularity of smudging.
For this reason, I don’t grow or burn white sage which is considered a sacred herb for many indigenous people.
I also now try to refer to the practice as “smoke cleansing” rather than “smudging” to ensure that it isn’t confused with the sacred traditions of indigenous people.

In 2024, sustainability is more important than ever. When you’re crafting your smudge sticks, think about where your herbs are coming from. Growing them in your own garden? That’s fantastic! If not, make sure you’re buying from ethical, sustainable sources. For example, did you know that white sage has been over-harvested and is considered endangered in some areas? That’s why I always recommend alternatives like rosemary or lavender—they’re easy to grow and much more sustainable. Let’s make sure our practices are as kind to the earth as they are to us.
When to Use Smoke Cleansing
Smoke cleansing can be used to symbolize anything you want. It can be used to mark a mental starting point after a particularly hard time or break up, to promote “good energy” in a new home, or to perform a blessing.
There is even evidence that suggests smoke cleansing may help clean the air in your home!
For me, smoke cleansing with a sage stick is a way to practice mindfulness. Smoke cleansing at the start of a new season helps prepare my mind and spirit for the changes that are to come.
The dried sage smells amazing, too, which is always a bonus – especially after a good spring cleaning!
I always feel a little fresher, lighter and more focused after taking a couple of minutes to smoke cleanse my home while breathing deeply and slowing my mind.
It’s crucial to approach smudging with respect and cultural awareness. Smudging has deep roots in Indigenous cultures, where it’s a sacred practice. Before making your own sustainable smudge sticks, take a moment to learn about the history and significance of this ritual. It’s all about honoring the traditions, not just following trends.
How to Make a Sage Smudge Stick – 6 Steps
DIY sage smudge sticks can be made in minutes and are a fresh new way to put your garden herbs to use. To make smudge sticks, you will need fresh sage and other herbs, natural string (or twine), and scissors.
Some of the best herbs to use for smudge sticks:
- Garden sage
- Lemon balm
- Lavender
- Sweet grass
- Rosemary
- Mint
- Pine
- Eucalyptus
- Basically any herb or plant that smells delicious!
**Note: Everyone is different and may have allergies to different plants. Stop burning immediately if you notice a reaction to the herbs that were used.**
How To Assemble the Smudge Stick – Guide:
[mv_create key=”25″ type=”diy” title=”How to Make a Sage Smudge Stick (6 Steps)” thumbnail=”https://rootedrevival.com/wp-content/uploads/2024/08/image-55.png”]
How to Use Your Garden Sage Smudge Sticks for Smoke Cleansing
Now that you have learned how to make smudge sticks, you are ready to promote positive energy!
Hold the “handle” portion of the smudge stick and use a lighter or candle to light the top of the herb bundle. Let it burn for a few seconds and then carefully blow out the flame.
Allow the dried herbs to smolder as you gently wave the stick around the desired area of your home. Move your smudge bundle into the corners of the rooms and all around to clear energy and make way for positivity.
As always, be smart and please don’t light your house on fire. Hold a fireproof ceramic bowl under the smudge stick to catch any embers that may fall.
Once you are done burning the smudge stick, extinguish it by compressing the smoldering end against the bowl.
You can save any unused portions of the smudge stick to burn at a later date. Relax and enjoy!
We’d love to see what you come up with! Share your smudge stick creations on Instagram using the hashtag #RootedRevivalSmudge and join our community of wellness enthusiasts. And don’t forget to drop a comment below with your favorite herbs and smudging rituals. Let’s inspire each other and grow together.



How long does it take for the fresh bundles to dry?
Hey Veronica! It can vary depending how thick you make the bundles and what herbs you use. Generally, they will take a couple of weeks to fully dry. You can hang them to dry or lay them flat as long as there is appropriate airflow. A cool, dark location works best. I hope you enjoy making your own smudge sticks!
Hello, my mom wants to make her own smudge sticks and she justs wants to know what all we can put into the smudge sticks.
Hi! Smudge sticks are most traditionally made using sage. If you want to add other herbs as well, some good ones are pine, sweet grass, mint, rosemary and lemon balm.
Hello. I particularly like your comment about cultural appropriation. Can I quote that section of your post?
Hi Denise! Thank you for asking. Yes, you can absolutely quote it as long you cite the reference and link back to the original post 🙂 It’s an important topic and I’m glad to see it shared! Have a great day!
I was looking forward to reading this, but then you went into that cultural appropriation crap and ruined it for me. Native Americans couldn’t care less if you make smudge sticks with sage. In fact, they would probably be honored.
Perhaps they would. But it isn’t my heritage or culture, so I prefer to err on the side of respect because it takes nothing from me to be respectful and considerate of others.
That’s not true! Many indigenous cultures have spoken quite clearly about cultural appropriation- perhaps you should check with indigenous people before you speak for them. Kaylee and Lindy are behaving in a sensitive and respectful way. Thank you.
Thanks, Deanna! 🙂
@Gemma midori, unfortunately it’s common for modern people to not recognize that smudging has been a common practice among many cultures, not solely Native American. My ancestors were Norse and they practiced smudging. You are welcome to honor them, and your own ancestors who likely practiced similarly as well.
@Project Zenstead, it’s disrespectful to presume smudging wasn’t practiced by someone’s ancestors. It’s been commonplace throughout worldwide ancient history. Don’t disrespect the rest of the cultures of the world in favor of one.
Can you use bee balm in burn wands?
Yes, you can! It would be a beautiful addition I think!
Hey there, this is a great tutorial! I happen to be a Witch and 1/16 Native American both maternally and paternally. I still have a lot to learn about all the cultures that make me, but I do know one thing about smudging. It is a native American tradition ans well as other antient cultural traditions to a degree (burning traditional incense) however when I smudge, I first asked my ancestors (in anyone else’s case, who’s not Native American, I would ask the Spirit Elders for permission then feel their response) I usually get a sense of calm when I know it’s appropriate to smudge before meditating, or setting an intention/spells (some religions would call this prayer, but that’s a whole nother conversation on culture).Others, not of a “culture”, have used this technique for permission and have felt that same calm. After smudging, I always thank my ancestors for the traditional use of smudging. Again if you’re not Native American at all, I would still thank the spirit elders after being granted permission. While some people feel a duty to respect and preserve traditional or spiritual appropriation, I completely respect their feelings on the subject. Just keep in mind, medicine is a modern science but was of ancient traditional origin, of many cultures. We widely use their sacred knowledge for modern times. Consider this… It’s like telling a boy he can’t wear a dress because he’s a boy or telling a girl she can’t play football because she’s a girl. You certainly don’t have to ask permission to do one or the other, but if you don’t feel the common doing so, You usually try to avoid doing it or hiding it or whatever. Just because you’re not part of a specific heritage doesn’t mean you can’t follow the path of certain traditions. All you have to do is ask and and you will feel the feedback of Ancient Elders. Sorry that was long-winded, I just felt like my thoughts would resonate with others and encourage respect of traditions while incorporating them into their own lives. Blessed Be.
Violet Willow
Violet,
Thank you so much for chiming in and sharing your insight on this! I am so glad you shared! I really like the idea of asking permission. I often do the same before wildcrafting and foraging (especially with elderberry). I think it’s so important to connect in this manner with all those who’ve gone before us and try to tap into a bit of their wisdom. I agree that any practice can be carried out thoughtfully and respectfully by members outside of the tradition’s original practice. But I think the emphasis on understanding the practice and the importance of it is central to doing so respectfully. I really really appreciate your clarity and understanding on the practice and it’s definitely helped confirm some things for me as well as bring me some new insight! Thank you and blessed be!
Hi! I’m turning on notifications for responses to this, because it’s important to me. I tried making smudge sticks with fresh coastal mugwort and the bundle dried on the outside and rotted in the middle. What did I do wrong?
Ugh! I’m sorry! I hate when that happens! When I made the bundles pictured in this post, I lived in the high desert and everything dried SO fast! Now that I live in the rainy Pacific Northwest it isn’t quite as easy! I find that using a dehydrator is a HUGE help! You can actually dry the whole bundle in the dehydrator on low or pre-dry the herbs about half way to get them started, then make the bundle and finish drying them. Hope that helps! Best of luck
Hi there! I am going to be making sagebrush smudge sticks for my business. Just have a quick question. Mine are going to be between 6-9 inches in length, but what about the thickness of the smudge stick? What is the standard or popular thickness it should be? The ones I already made are about 1 inch thick and are 1 oz in weight. Do you think this is okay or should I go thicker? Thank you so much!
Hey there! They really can be any size that you want based on the herbs that you have available. Thicker ones will take longer to dry, so if you’re in a humid area, just keep a close eye on it! I usually keep mine smaller for that reason. But it’s great that you can add so much creativity and really find the best size and herb combos for you! Enjoy!
Could you use basil, oregano or rose in these? I’m trying to figure out what all I can use from my herb garden.
Basil tends to be an herb that holds a lot of moisture, so I would recommend drying it a considerable amount before bundling it. Oregano and rose should work great though! 🙂
What an awesome guid. Will try it next week. Thanks!
Thanks for commenting on! Participate in our challenge (the details are in the last paragraph).