The journey to a thriving garden begins with seed starting indoors. By following practical schedules and planning, you can ensure a successful start to your gardening season.
In this article, we will try to familiarize you with creating the perfect system for growing seeds indoors, as well as present you with creative DIY ideas and planning tips that will help your plants grow well. Let’s begin!
How to Set Up the Perfect Seed Starting Indoors. Beginner Tips
Some may think that growing seeds indoors is difficult. But it only seems that way at first glance. Here’s a step-by-step guide to get you off to a productive start.
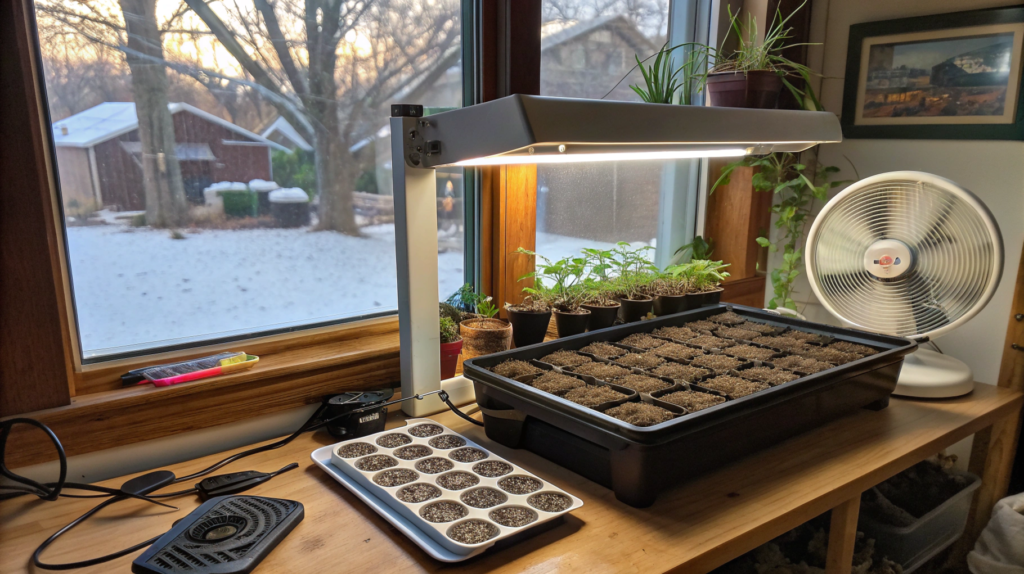
- Choosing a location. Find a spot with adequate light and a stable temperature. A south-facing window will work well, but you may well need additional light.
Tip. Keep the temperature around 18-24°C (64-75°F) for most seeds.
- Invest in phytolamps. Regular lighting is not enough for seedlings. LED or fluorescent lights mimic natural sunlight and are energy efficient.
Recommended product. GE LED Grow Light
- Use a quality seedling substrate. Unlike conventional soil, seedling substrate is light and well-drained, which greatly reduces the risk of fungal diseases.
Interesting fact. Studies show that using a sterile substrate significantly reduces the risk of black leg disease.
- Provide ventilation. Air circulation prevents mold growth. You can use a small fan for easy air movement.
- Maintain humidity, but in moderation. Moisten the soil regularly with a sprayer. Use a humidity dome to conserve moisture.
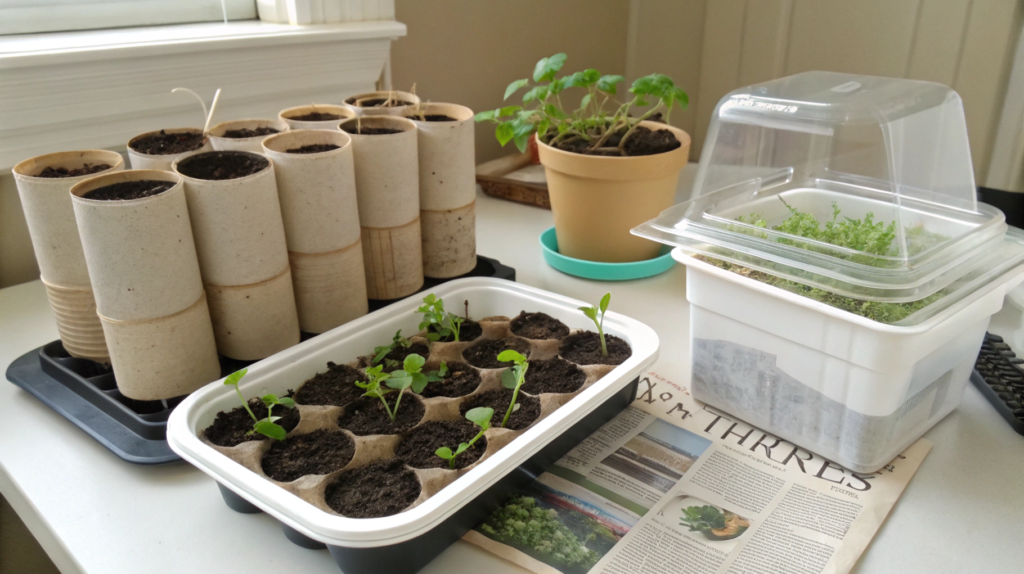
DIY Seed Starting Hacks for Small Spaces
Unfortunately, not all of us have large spaces, but that’s no problem! Here are some budget-friendly DIY hacks for maximizing your space:
Containers made from recycled materials.
- Egg trays. Great for small seeds such as herbs.
- Yogurt cups. Good for large seeds such as tomatoes and peppers. Poke holes in the bottom for drainage.
Mini greenhouse. Create a humidity dome by covering trays with plastic sheeting or using clear storage containers.
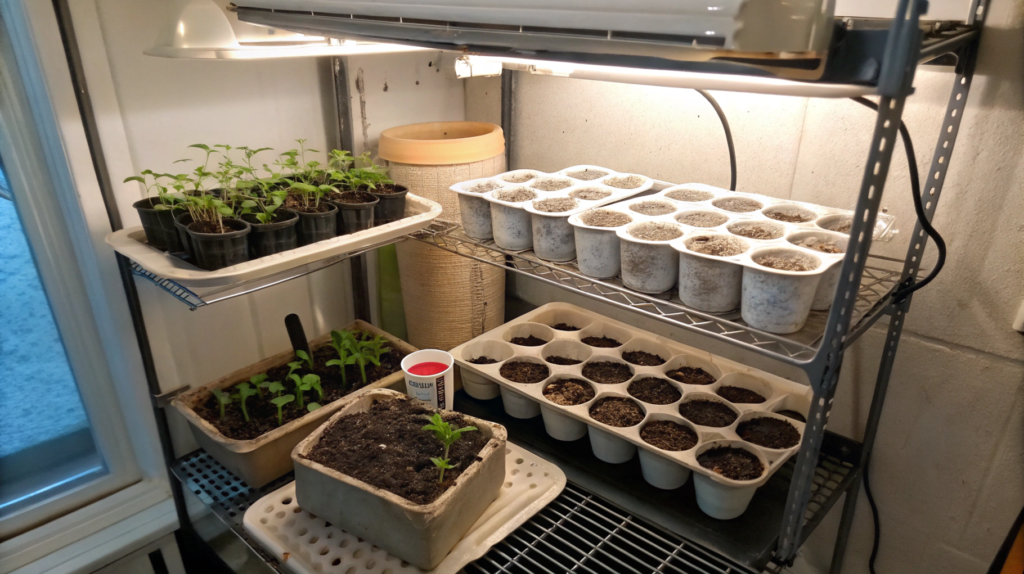
Vertical shelves with lights.
- Use an inexpensive metal rack and install grow lights at each level. This saves floor space and allows you to grow multiple trays of seedlings.
Alternatives to warmers. If you don’t have a heating pad to evenly heat germinating seeds, place the trays on the refrigerator or next to a radiator to gently warm the seedlings.
DIY watering system. Use a capillary mat (or perhaps an old towel) to feed water into the trays from below. This ensures that the seedlings are evenly moistened without overflowing.
Indoor Seed Starting Setup for Herbs and Vegetables
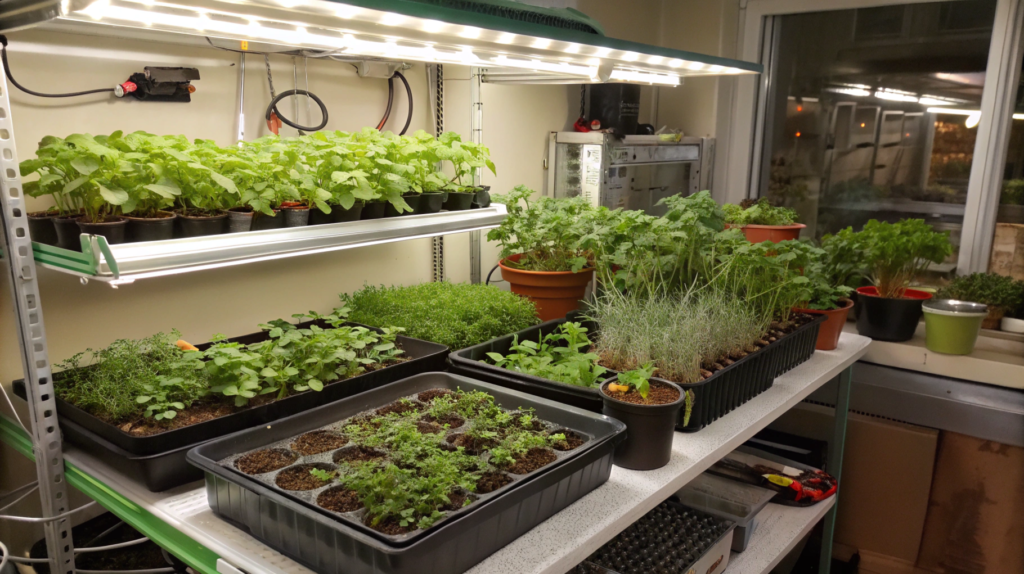
Greens and vegetables require a different approach to grow as productively as possible. Let’s take a closer look at how best to set up your system for each type of plant.
Greens
Greens tend to grow quickly and require less space, so they’re great for growing indoors.
The best herbs for growing indoors are:
- Basil.Heat-loving, requires lots of light.
- Parsley. Slow to germinate, but resilient.
- Cilantro. Fast growing but sensitive to temperature fluctuations.
- Chives. Easy to grow, easily regenerates after cutting.
- Thyme. Undemanding, but likes bright light.
Useful tips:
- Containers
Use small but wide containers with good drainage. For example, plastic trays or pots 10-15 cm deep will do.
- Tip: Add a layer of expanded clay to the bottom to avoid stagnant water.
- Lighting
- Greens need 12-14 hours of light. If natural light is not enough, use LED phytolamps.
- Place the lamps 15-20 cm away from the plants to avoid burning them.
- Watering
- Keep the soil slightly moist but not overwatered.
- Use a sprayer for even moistening.
- Thinning
- Once the sprouts have reached 5-7 cm, remove the weaker ones, leaving 5-7 cm between sprouts. This will ensure that each plant has enough room to grow.
Vegetables
Vegetables, on the other hand, need more preparation because they take longer to grow and require more space.
The best vegetables to grow indoors are:
Tomatoes. Hardy, but require deep pots.
Peppers. Temperature sensitive, require lots of light.
Broccoli. Best for cool conditions.
Cabbage. Slow growing, requires regular thinning.
Lettuce. Fast growing, ideal for beginning gardeners
Helpful tips:
Containers
- For large vegetables such as tomatoes or peppers, use pots of at least 5-7 liters.
- Containers should have drainage holes and trays to collect water.
Lighting
- Provide lighting with 14-16 hours of light per day.
- Use full spectrum bulbs to stimulate photosynthesis.
Temperature and humidity
- Maintain a temperature of 18-24°C (64-75°F).
- If the air is too dry, use a humidifier.
Watering and fertilizing
- Water plants as soon as the top layer of soil becomes dry.
- Add liquid fertilizer every 2-3 weeks to maintain growth.
Hardening before transplanting
- 1-2 weeks before transplanting, take the plants outside for 1-2 hours at first, gradually increasing the time. This will help them adapt to their new environment.
Growth support
- Support plants such as tomatoes or peppers. This will prevent them from becoming brittle.
Additional tips
- Harvesting greens. Start cutting greens as soon as the plants reach 10-15 cm in height. This stimulates further growth.
- Companion plants. Try growing vegetables and herbs together. For example, basil goes well with tomatoes, improving their flavor.
With these tips, you can successfully grow both herbs and vegetables indoors.
Best Containers for Seed Starting Indoors DIY Projects
Containers are an important element for successful seed starting. That said, you don’t necessarily have to spend money on store-bought options when there are plenty of affordable materials at your fingertips. Here are some ideas and detailed recommendations:
1. Biodegradable containers
These options are convenient because they can be planted in the ground with the seedlings, minimizing stress to the roots.
- Toilet paper rolls. Cut the roll in half, bend the edges to create a bottom, and fill with substrate. Suitable for herbs and small vegetables such as lettuce or basil.
- Pots made from newspaper. Twist newspaper into a cylinder and secure the shape with a rubber band, for example. Use an old jar to make the shape. The newspaper decomposes in the soil and the roots of the plant are free to grow through it.
2. Plastic containers
Plastic packaging that is usually thrown away can be used for our needs.
- Takeaway food containers. Great for creating mini greenhouses because of their transparent lids. Make drainage holes in the bottom of the container.
- Salad trays. Perfect for growing herbs or small vegetables. Use the lid from the tray to maintain humidity in the initial stages.
3. Containers made from milk cartons.
Cut the milk cartons in half to make two parts. Use the bottom part as a deep container for seedlings, and the top part as a cover to protect the seedlings outside or to create a greenhouse effect. These bags are dense and retain moisture, helping the roots develop evenly.
4. Ice molds
For small seeds. Ice molds are ideal for growing green or flower seeds. Make small drainage holes in each compartment. Fill with substrate and sow the seeds. These ice molds are convenient for windowsills due to their compact size.
5. DIY soil blocks
- What they are. Soil blocks are compact cubes of soil that are created with a special tool or by hand. They completely eliminate the need for containers. The blocks are ideal for vegetables with large seeds, such as peppers or tomatoes.
- How to make by hand. Mix the substrate with water to a dense mass. Mold the blocks with your hands or using a mold. Make sure they are dense enough to hold their shape.
Additional tips
- Coloring and labeling. Sign the containers with a waterproof marker or use colored sticks to mark which seeds are planted in each one.
- Cleaning before use. If you reuse containers, be sure to rinse them thoroughly with warm, soapy water or sanitize them to avoid pathogen transfer.
- Drainage. Make sure each container has drainage holes to avoid water stagnation and root rot.
If you’re on a tight budget, these simple and effective ideas can help you grow seeds indoors.
Seed Starting Calendar and Chart for Zone 5 Gardeners
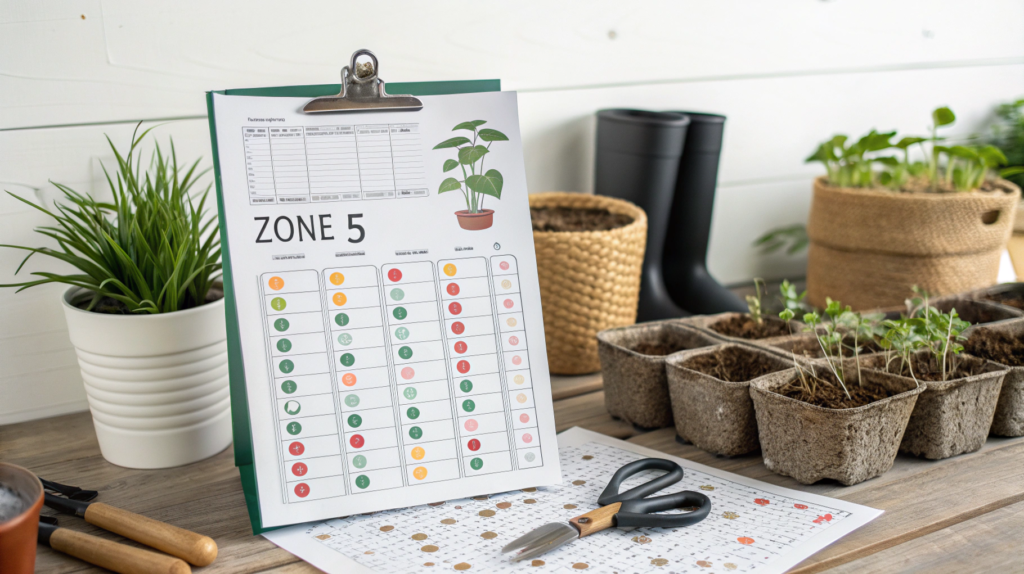
It is very important to decide on the timing when it comes to starting seeds indoors. In zone 5, the last frost usually occurs in mid-May, so plan accordingly.
| Plant type | Start indoors | Transplant in the ground |
| Tomatoes | Early March | Middle of May |
| Peppers | End of February | Middle of May |
| Broccoli | End of February | Early April |
| Basil | Middle of March | End of May |
| Lettuce | Early March | Early April |
Tip. Keep a garden journal to record seed planting dates and results. This will help make your schedule for next year more accurate.
How to Plan Your Seed Starting Schedule Indoors
Planning a seed starting schedule avoids overcrowding and saves space. Here’s how to do it:
Start with the date of frost
First, you need to determine the date of the last frost in your area. This information is available on weather websites, gardening apps, or you can consult with local gardeners. After that, count back the correct number of weeks for each plant. For example:
- Peppers and eggplants: start 8-10 weeks before the last frost.
- Tomatoes: 6-8 weeks.
- Lettuce and radishes: 3-4 weeks.
Tip. Use online tools such as the Seed Starting Calculator or apps to automatically calculate these timelines.
Group crops by germination time
Divide plants into fast-growing and slow-growing to avoid confusion and wasted time. Here’s an example:
- Fast-germinating: lettuce, radishes, dill. These plants can be started later, closer to transplanting.
- Slow growers: peppers, eggplant, celery. These crops require more time to grow.
This division helps to focus on key crops without overloading yourself with all the crops at once.
Sow in stages
Never sow all the seeds on the same day, as this can lead to chaos. Sow in stages, starting with the most demanding crops, such as peppers and tomatoes. After a week or two, add other plants. This approach ensures a continuous harvest and also saves space, as later crops will take up the vacated trays.
Sign everything
Use popsicle sticks, plastic markers, or painter’s tape for signatures. On each signature, indicate:
- Name of the crop.
- Date of seeding.
Tip. Use a waterproof marker so the captions won’t wash off when you water.
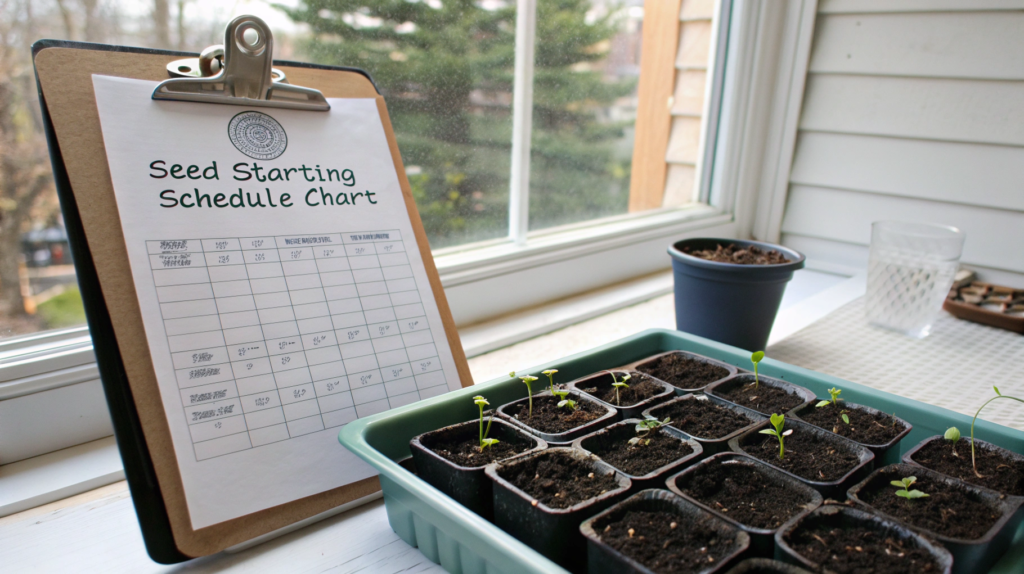
Use a printed calendar
Create a calendar or spreadsheet to keep track of:
- Sowing dates.
- Time of germination.
- Transplanting dates.
Tip. If you keep a garden journal, record all the results there so you can adjust the timing next year.
Ready to try starting seeds indoors? With a proper and clear plan, your seeds will germinate in no time. Whether you have a large garden or a small plot, these tips for growing seeds indoors will help you succeed.
Have fun sowing and let us know how your plants are growing!