

Fall is the season of apples. And you know that joy of harvesting, which quickly turns into questions. How to store them? Which varieties are good for what? What to do with bruised or overripe apples?
Over the years of our “apple experiments” I’ve tried everything: from drying apples on a string over the stove to freezing entire crates. Sometimes it worked out perfectly, sometimes it turned into a pile of mold and disappointment. And that’s exactly how my favorite 10 apple picking hacks you’ll wish you knew sooner were born.
In this article I’ll share simple tricks that actually work in a regular kitchen. We’ll go over which apples are best for pies, how to sort your harvest, how to store without a cellar, and many other tips that you’ll definitely find useful.
1. How to Choose Apples Based on What You’ll Cook
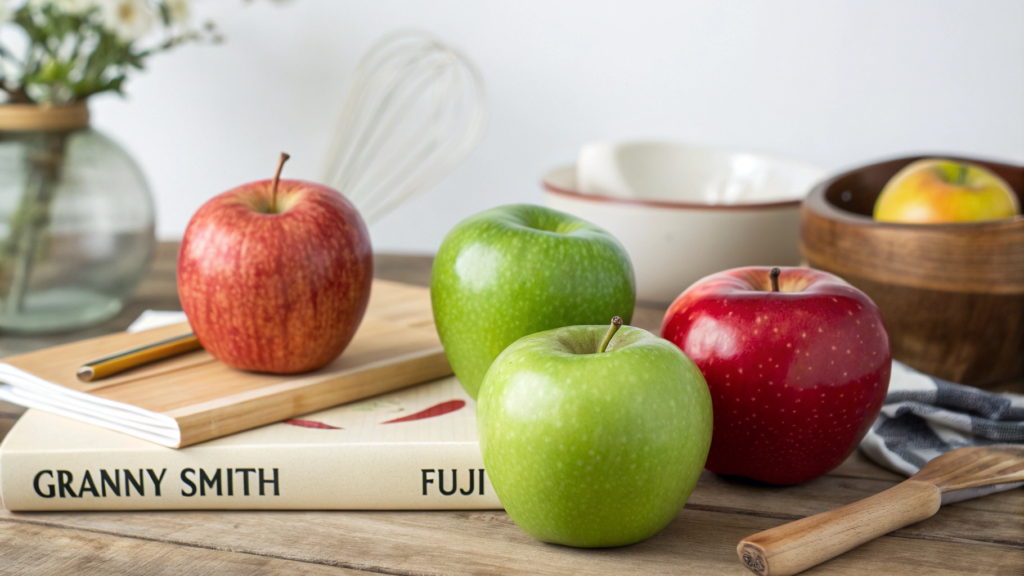
Apples are versatile fruits, but that doesn’t mean every apple works for everything. Varieties differ in density, sweetness, acidity. And if you need firm and tart apples for a pie, you want soft and aromatic ones for sauce. I went through dozens of trials and errors before I understood: first think about the recipe, and only then about the apples.
1. For pies and bakes
I still remember my first attempt at making an apple pie with Red Delicious. Beautiful on the outside, but in the oven they turned into mush. That’s why for pies I only choose varieties that hold their shape:
- Granny Smith. Classic. Bright tartness and firm texture. Even after an hour in the oven they stay in pieces, not mush. Their acidity perfectly balances the sweetness of the crust.
- Honeycrisp. More expensive, but honestly worth it! Juicy, sweet, with a light starchy crunch. They make the pie not just tasty, but flavorful.
- Braeburn. Harder to find, but grab them if you can. Not as tart as Granny Smith, but in baking they’re ideal: they keep their shape and stay aromatic.
My favorite trick. Mix Granny Smith and Honeycrisp. The result is a pie with bright tartness and gentle sweetness. And all of that is decided simply by the choice of variety.
2. For sauces, purées, and apple butter
Here the goal is the opposite: apples should break down easily.
- McIntosh. They cook down in just 10 minutes! Perfectly soft purée. My number one choice for apple sauce.
- Cortland. A bit firmer than McIntosh, but still break down easily. Plus, they have a nice tartness that keeps the purée from being too sweet.
- Golden Delicious. Many think they’re too basic and “store-bought,” but I love them for their sweetness. Combined with cinnamon they make apple butter with caramel notes.
Little hack. Make apple butter in a slow cooker on low for 6–8 hours. The smell that fills the house is worth living on a homestead for.
3. For snacks and salads
When you just need a quick snack or a fast salad, sweetness isn’t enough — you also need juiciness and resistance to browning (so the slices don’t turn dark in five minutes).
- Fuji. Sweet and very juicy. We often give them to kids on the go because they’re easy to eat whole.
- Gala. Softer, but still pleasant for snacking. I like to add them to oatmeal in the morning — the mild sweetness fits perfectly.
- Pink Lady. My salad favorite. Slightly tart, bright in flavor, and they look beautiful when sliced.
To keep slices in a salad from browning, I drizzle them with lemon juice or dip them for a minute in water with citric acid. Tested — even after a couple of hours they still look fresh.
4. For drying and chips
I always make chips for winter, and sometimes I grind part of them into powder and add to baked goods. But not all apples taste equally good when dried.
- Jonathan. Strong, rich flavor. After drying, the taste only gets stronger.
- Empire. Slightly tart, very aromatic. A great choice for crunchy chips.
- Gravenstein. An old variety, but worth finding — dried they smell like caramel.
Tip. Slice apples thin, about 1/8 inch (3 mm). That way they stay crispy, not rubbery. For this I use the Nesco Snackmaster Pro Food Dehydrator. It’s powerful, with multiple trays, and lets me load up a large batch of apples at once.
I always sort apples right in the orchard — I take several paper bags and separate them into “for pie,” “for purée,” “for snacking.” At home it’s just about putting them into boxes.
2. My Apple Sorting Method After the Orchard
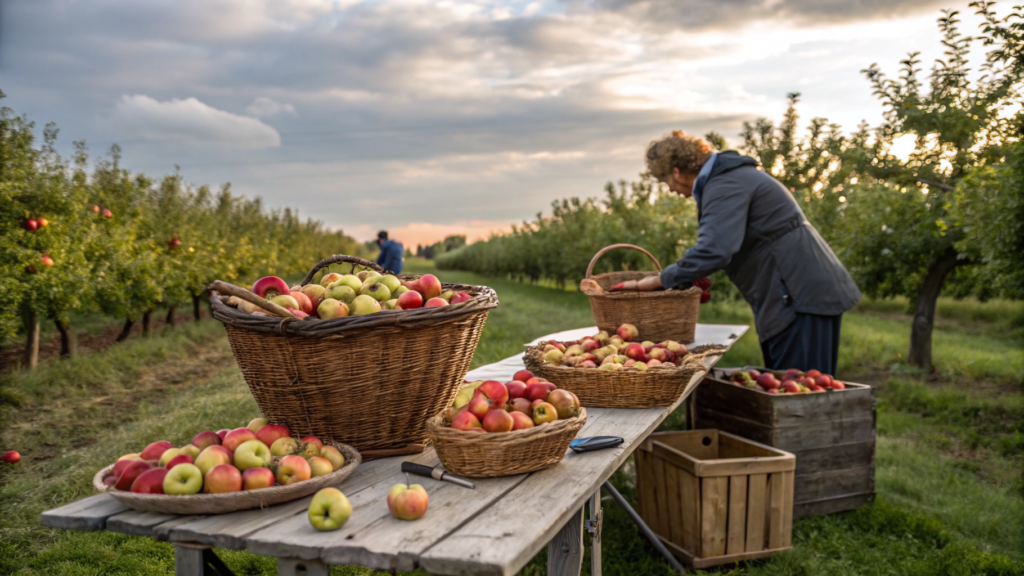
Picking apples in the orchard is only half the job. After that, sorting is a must — there’s no way around it.
1. First — a quick check
As soon as I bring apples home, I always set aside about an hour just for sorting. The main rule: any apple with damage goes into a separate basket. Even a small bruise quickly turns into a center of rot. These apples need to be used right away — for pie, compote, or drying.
2. Sorting by purpose
Apples with perfect skin and firm texture I separate into different boxes depending on their use:
- For storage — the firmest varieties, like Granny Smith or Fuji. They can last for months.
- For baking — everything that holds its shape well in the oven: Honeycrisp, Braeburn.
- For sauces/purées — soft varieties: McIntosh, Golden Delicious. I don’t keep them long, I use them within a week or two.
And here’s the key: I don’t pile everything together. Each “purpose” has its own container. That way I don’t have to re-sort the entire harvest every time.
This method really saves nerves and apples. When you know that one box is “storage apples” and another is “weekend baking,” the kitchen stops being chaos. Plus, you’ll use up the apples that spoil faster much sooner.
Another important note: apples and potatoes shouldn’t be stored side by side. Potatoes release ethylene gas, which speeds up fruit ripening and shortens storage life. Even if they’re in the same cellar or pantry on different shelves, that’s enough for apples to start spoiling faster.
Bonus hack. I keep apple containers in a cool pantry, and if I don’t have one — I use a mini fridge. At the homestead, it sits in the garage and keeps the perfect temperature for apples that need to last until winter.
3. Best Way to Store Apples Without a Root Cellar
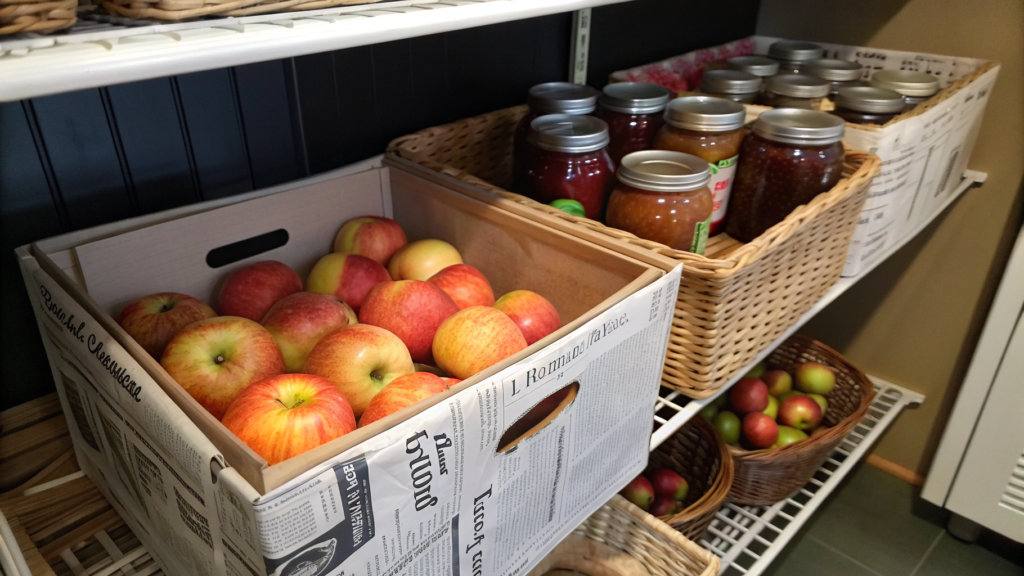
Not everyone has a real cellar. So you have to find ways to keep apples longer without the classic root cellar setup.
1. Cold is an apple’s best friend
Apples love cool conditions: 32–40°F (0–4°C) is the ideal range. But in a regular house or apartment, it’s hard to find that spot. Here’s what worked for us:
- Garage or utility room. If winter temps there don’t dip below freezing, it’s almost perfect. I cover boxes with an old blanket or burlap — apples don’t freeze, but they stay cold.
- Fridge. Yes, it sounds obvious, but the fridge really works. I keep apples in the crisper drawer, separate from vegetables.
2. Humidity matters too
Apples lose moisture quickly, especially if the air is dry. In a cellar, natural humidity is high, but at home you need tricks:
- I put apples in plastic bags with small holes. This way they “breathe” but don’t dry out.
- Another option is wrapping each apple in newspaper. Sounds crazy, but it really helps. The paper holds in moisture and keeps apples from touching each other.
In this case, Reynolds Kitchens Wax Paper Sandwich Bags turned out to be super handy. They breathe, and apples do much better in them than in regular plastic wrap.
3. Sorting before storage
Apples with even the smallest bruise or spot shouldn’t go into storage — they’ll spoil the others. I already mentioned this in my sorting method, but here it’s even more critical.
My rule:
- Perfect apples — into boxes or the fridge.
- Bruised apples — straight into processing: sauces, baking, drying.
Storing apples near potatoes is a bad idea. Potatoes release ethylene gas, which makes fruit age faster. And this isn’t just an “old wives’ tale”: the effect of ethylene on fruit storage has been studied in scientific literature, like reviews in Annual Review of Plant Biology and Food & Function (Royal Society of Chemistry, 2023).
My favorite method. A small fridge in the garage plus a couple of boxes where each apple is wrapped in paper. In this setup they last easily until January or February, and sometimes even into spring.
4. When to Pick for Sweet vs. Tart Flavors

The same tree can give you both tart and sweet fruit — it all depends on when you pick them. My first year in the orchard I thought: “Well, I’ll just pick everything at once so I don’t have to go back five times.” And what happened? Half the harvest turned out way too sour, and the other half was already overripe.
1. If you want sweeter apples
The secret is that sugar levels in apples increase as they ripen. The longer the fruit stays on the branch, the more fructose and glucose it accumulates.
- Varieties like Fuji, Gala, Honeycrisp should be picked a little later — they become juicier and sweeter if you give them time.
- A sign of readiness: the apple comes off the branch easily with a light twist. If you have to pull, it’s still underripe.
- Seed color also helps: when they turn brown, the apple has developed its sweetness.
A small gadget that really helps: Atago PAL-1 Digital Refractometer. It measures sugar levels in the juice (Brix). I sometimes test out of curiosity — the difference between early and late-picked apples can be 3–4 Brix points.
2. If you want tart apples
Love it when an apple makes your cheeks pucker? Then pick earlier!
- Granny Smith, McIntosh, Pink Lady can be harvested before full ripeness, and they’ll be sharply tart.
- If you wait until they’re fully ripe, the flavor softens and the acidity fades.
- Early picking is especially great if you plan to bake: tartness balances the sweetness of the crust.
3. Balancing sweet and tart
My favorite way: pick some apples early and let the rest ripen longer. For example, with Honeycrisp — the early ones go into pies (you need that hint of tartness), and the late ones are perfect for snacking.
Researchers confirm: the ratio of acids to sugars changes significantly during ripening. A review in Postharvest Biology and Technology notes that it’s exactly this balance of fructose and organic acids that defines how we perceive apple flavor.
So the rule is simple. If you want tart, pick a bit earlier; if you want sweet, let the apples hang. And if you’re not sure, just pick some early and some later — that way you’ll have both pies and sweet snacks!
5. Which Apples Bruise the Fastest? (And What to Do with Them)
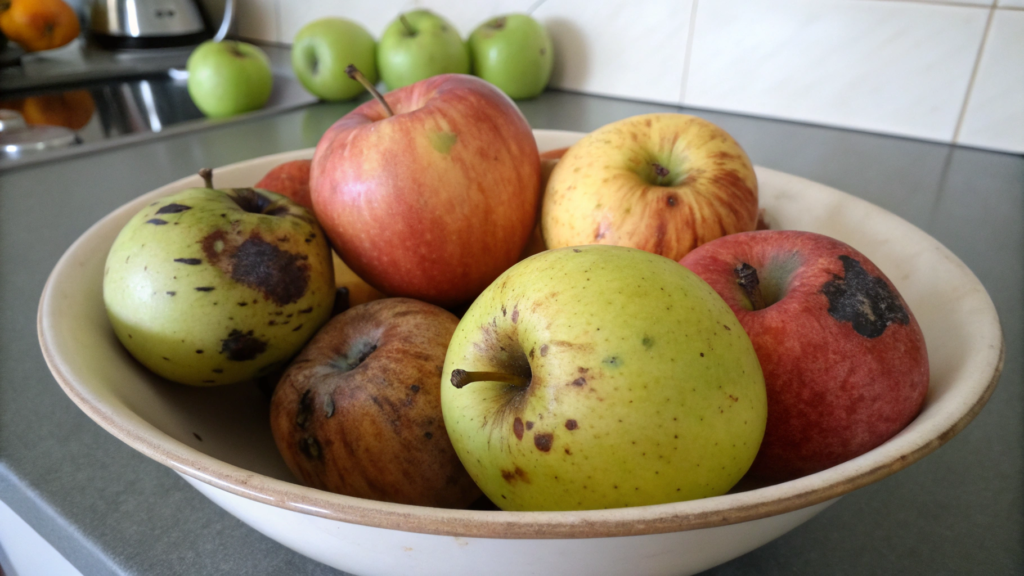
You pick the perfect apples… and the next day you already spot a couple with black spots. At first I was frustrated: how is that possible, I picked so carefully! But then I realized — it’s not only about handling, it’s also about the varieties themselves.
1. Varieties that are especially delicate
Some apples have very thin skin and soft flesh. They’re tasty and aromatic, but they bruise instantly:
- McIntosh — their juiciness and tender texture are amazing for sauces, but these apples spoil from the slightest pressure.
- Cortland — also bruise quickly, especially if stacked in a big box.
- Golden Delicious — sweet but soft, easily damaged during storage.
These varieties are best eaten fresh or turned into sauce/purée within the first week.
2. More resilient varieties
If you want apples that last, look for firm-fleshed types:
- Fuji — surprisingly tough, they can store for months.
- Honeycrisp — juicy but still hold their shape and resist damage better.
- Granny Smith — the true “soldiers” of apples. Their thick skin, acidity, and firm texture help them stay intact much longer.
3. How to handle apples so they don’t spoil
Experience shows: even firm varieties can be ruined with poor handling. Here are my rules:
- Pick carefully. Never yank an apple — gently twist it off instead.
- Don’t pile them high. Top apples press on the bottom ones, causing bruises. I always use small boxes or baskets now.
- Don’t mix varieties. Delicate and firm apples store differently. If you put them together, the delicate ones will spoil faster and affect the rest.
Use boxes with dividers for storage. They’re light, allow airflow, and keep apples from pressing against each other.
4. What to do with bruised apples
See a bruise? Don’t wait. These apples go into a separate bowl and get used within days. My favorite uses:
- Compote or cider. Even slightly damaged apples give great flavor.
- Apple chips. Slice thin and pop them into the dehydrator.
- Sauces and jams. The bruise disappears during cooking, but the taste stays.
There are apples “for storage” and apples “for immediate enjoyment.” And it’s important to know the difference. That way you won’t be disappointed when a dark soft spot suddenly appears in the box.
6. Turning “Bad” Apples Into Instant Butter
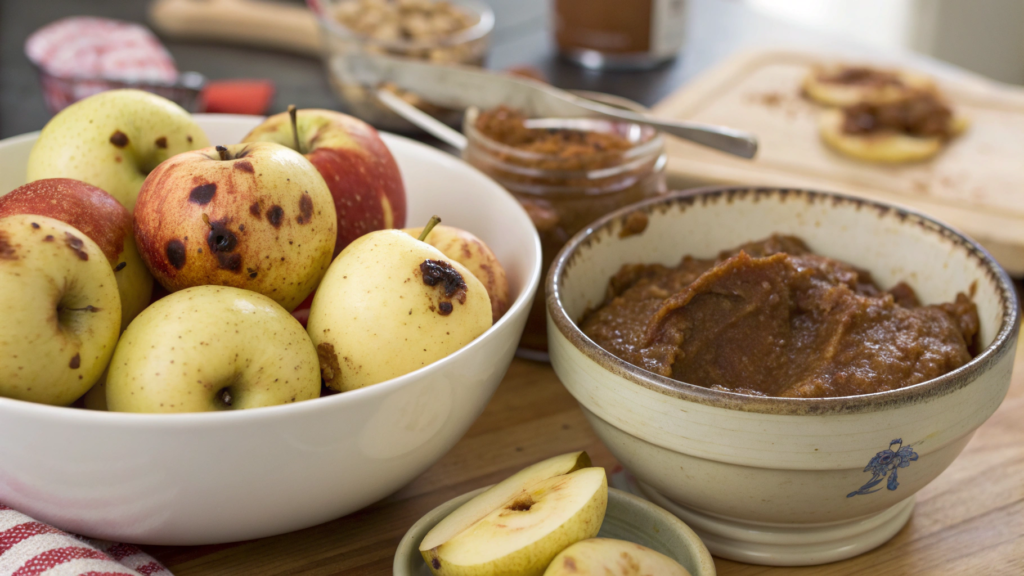
It’s important to notice dark spots on apples in time and quickly figure out how to use them. Bruised means it’s time for processing. And nothing beats quick apple butter.
1. Which apples to use
The main rule: the apple should only be slightly damaged.
- Suitable: apples with bruises, light skin discoloration, overripe fruit.
- Not suitable: apples with mold, rot, or suspicious smell.
Honestly, the best apple butter I’ve made always comes from McIntosh and Golden Delicious. They’re soft, break down easily, and give a rich aroma. But I often toss in 2–3 tart Granny Smith for balance — it adds a little kick.
2. Minimal effort, maximum aroma
The easiest way is in a slow cooker or Instant Pot. Here’s my basic method:
- Chop apples into large chunks (you can leave the peel — it adds pectin).
- Place them in the slow cooker, add a little water (½ cup / 120 ml).
- Spices: cinnamon, nutmeg, cloves. Sometimes a bit of ginger.
- Sugar — to taste, but often I don’t add any at all: apples are sweet enough on their own.
- Leave on low for 6–8 hours. The whole house fills with a smell no candle can replace.
For these long “apple marathons” I use the Crock-Pot 7-Quart Oval Manual Slow Cooker. It’s huge, fits a mountain of apples, and overnight makes perfectly thick apple butter.
3. How to get the perfect texture
After slow cooking, the apples turn into a thick purée. But if you want a silky smooth texture, I use an immersion blender.
- For thickness, open the lid for the last hour to let excess moisture evaporate.
- Sometimes I add a teaspoon of vanilla extract — it deepens the flavor.
4. What to do next
- Fresh apple butter keeps in the fridge for up to 2 weeks.
- Preserving: you can can it in jars using standard safe canning rules.
- Freezing: it freezes beautifully, especially in small 1–2 cup containers.
Small tip. I store apple butter in 8 oz (about 240 ml) Mason jars — practical and pretty.
5. How to use apple butter
Apple butter isn’t “butter” in the literal sense, but a very concentrated apple purée. Its flavor is deep and caramel-like. Here’s how I use it:
- Spread on toast or rolls.
- Filling for pies or crepes.
- Stirred into oatmeal or yogurt.
- As a base for sauces with meat (with turkey or pork it’s amazing).
The best part — knowing you didn’t throw away bruised apples but turned them into something that brightens the whole winter. Bruised fruit stops being a problem.
7. Simple Apple Dehydrating at Home

Drying apples is probably the most “grandma-style” way of preserving. But that’s exactly its strength.
1. Which varieties work best
Not all apples taste equally good after drying. I tried almost everything that grew here in Idaho, and here are my favorites:
- Jonathan — bold flavor that stays even after drying.
- Empire — slightly tart, turn into especially tasty chips.
- Gravenstein — rare variety, but when dried they’re like caramel.
- Fuji — sweet and firm, easy to slice into thin rounds.
Softer varieties like McIntosh or Golden Delicious can also be dried, but they make less crispy chips — more like chewy dried fruit.
2. Prepping the apples
Here’s where the little details matter:
- Washing and peeling. I always wash apples thoroughly, especially store-bought ones. Sometimes I keep the peel — it holds lots of pectin and aroma.
- Slicing. Best option: rings about 1/8 inch (3 mm) thick. Thicker slices turn soft, thinner ones may burn.
- Soaking. To prevent browning, I soak slices for 5 minutes in a mix of 1 liter of water + 2 tablespoons lemon juice.
For slicing, the OXO Good Grips Apple Slicer works perfectly. It cuts even wedges and cores at the same time.
3. Oven or dehydrator?
- Oven. The most accessible way. I place trays at 200°F (95°C), leave the door slightly open for steam to escape. Time: about 2–3 hours, but I check every 30 minutes.
- Dehydrator. Easier and more reliable. Lets you dry large batches at once, and the apples turn out evenly crispy. Time: 6–8 hours at 135°F (57°C).
4. How to tell they’re ready
The rule is simple: a slice should be dry but not crumbly. If it bends and feels sticky, it’s still wet. If it snaps like glass, it’s overdone. I usually test by taste: pull a few slices, cool them, and try.
5. Storing dried apples
I once learned the hard way — packed warm chips in a jar, and a week later there was moisture and mold inside. Since then I do this:
- Let apples cool completely.
- Store in Mason jars or vacuum-sealed bags.
- Keep in a cool pantry.
6. Where to use dried apples
- For snacks (kids take them to school).
- In oatmeal or muesli.
- In compotes — they bring back bright summer flavor and aroma.
- In baking — especially muffins and bread.
Drying apples is a set of simple steps that turn harvest into food with a long shelf life. You spend a couple of hours prepping and get a tasty snack for the whole winter.
8. What You Can Freeze (That No One Talks About)
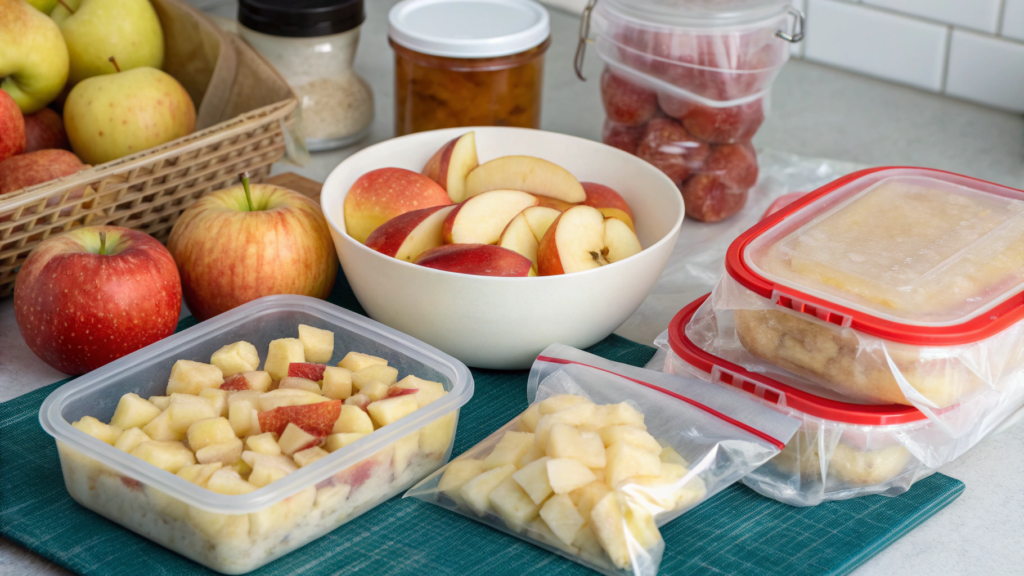
There are so many ways to save apples — their flavor and texture — not just in boxes or a dehydrator, but in the freezer too. And it’s not only about the usual “apple slices.” Here are my finds and favorite tricks.
1. Freezing sliced apples
Classic. I wash apples, slice them into wedges (½ inch — about 1.2 cm), drizzle with lemon juice, and lay them in a single layer on a baking sheet. After freezing, I transfer them into bags and put them back in the freezer for long-term storage.
These slices go into pies, strudels, oatmeal.
The flavor after baking is just like fresh.
For packing, Ziploc Freezer Bags Gallon Size are perfect. Tested: they don’t let smells in, and the apples don’t get covered with ice crystals.
2. Freezing grated apples
This is my hack for quick pies and fritters. I just grate apples on a coarse grater, squeeze out extra juice (otherwise they’ll freeze into one big block), and portion them into 1–2 cups (about 120–240 g).
- Super convenient when you suddenly want to bake: just grab a bag, thaw it, and the dough is ready.
- Great for apple muffins and pancakes with apple.
3. Freezing apple purée
Sometimes there are so many “bad” apples that it’s easier to cook a batch of purée and portion it into containers. I usually make it without sugar — that way I can use it in both sweet and savory dishes.
- 1-cup portions (about 240 ml) are perfect for baby food or muffin batter.
- Freezing in a muffin tin makes handy “portion pucks.”
4. Freezing pie filling
This one’s a lifesaver! Slice apples, add sugar, cinnamon, starch — just like for a pie. Mix, portion into bags, and freeze.
- When you want to bake, the apple mixture is ready. Roll out dough, line the pan, add the apples, then top with another crust or lattice. Straight into the oven!
- The taste is just like you picked the apples fresh.
5. Freezing apple juice
Juice from pressed or overripe apples can also be saved. I pour it into plastic bottles, leaving a couple inches (about 5 cm) at the top for expansion when freezing. Later you can drink it fresh or use it for cider.
6. Freezing apple butter
Yes, you can freeze this too! I portion apple butter into small 8 oz (240 ml) containers. Freezing doesn’t hurt the flavor at all — in winter you pull out a jar and it tastes just like fresh.
So in the end, the freezer turns into a strategic stash. Work in the fall, but joy in the winter: grab pie filling or a purée puck, and dinner comes together twice as fast.
9. My Weekend Apple Prep Routine (Post-Picking)
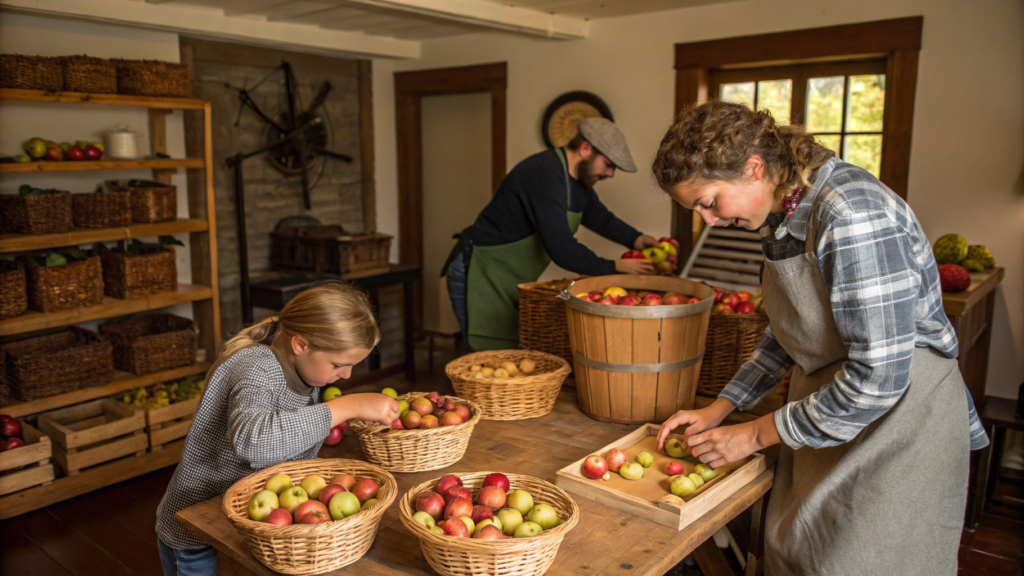
When apple season is in full swing, we have an unspoken rule at home: at least one weekend is fully dedicated to processing the harvest. Some people might think it’s exhausting, but in reality it feels more like a cozy family ritual with the scent of cinnamon and the quiet hum of the dehydrator. Here’s how it usually goes.
1. Saturday morning: sorting and planning
First thing, I dump the crates of apples right on the garage table. This is the most chaotic moment: apples in a pile, the dog circling around, the kids stealing the reddest ones. But this step is non-negotiable.
- Perfect apples → into separate boxes for storage.
- Bruised → into a bowl for immediate processing.
- Overripe → for juice and apple butter.
At this stage I already decide: how many apples go into the freezer, how many into the dehydrator, and how many straight into pies today.
2. Saturday afternoon: dehydrating and freezing
After lunch, the “workshop” kicks off. I slice apples for drying: some into rings, some into wedges.
- In the dehydrator (I use the Nesco Snackmaster Pro Food Dehydrator) apples turn for hours.
- At the same time, slices for the freezer take a quick “lemon bath” and then head onto trays to freeze.
The kitchen turns into a workshop: on one side, knives and bowls, on the other — stacks of Ziploc bags.
3. Saturday evening: family dessert
No apple weekend is complete without a fresh pie or crumble. I usually mix Granny Smith with Honeycrisp — that perfect sweet-tart combo. The pie goes into the oven, and suddenly the whole day’s fatigue feels minor.
4. Sunday: apple butter and sauces
Sunday is our “slow cooker day.” A whole load of bruised apples goes into the Crock-Pot. I add cinnamon, cloves, a little sugar — and forget about it for 8 hours. By evening, I’ve got thick apple butter cooling in Mason jars.
At the same time, I make a couple of pots of apple purée for the freezer — the kids love adding it to pancakes in the winter.
5. Monday morning reality
Yes, after such a weekend the kitchen is covered in sticky spots, but in return:
- Apples are sorted and organized.
- Freezer and dehydrator are full.
- Jars of apple butter are cooling on the shelf.
- The house smells insanely good.
And most importantly — I don’t feel stressed by the “mountain of apples.” Instead, there’s the sense that we saved the harvest properly and can enjoy it all the way through spring. This kind of weekend has become a tradition. Fall doesn’t feel like fall without it.
10. How to Tell If You Picked an Overripe Apple
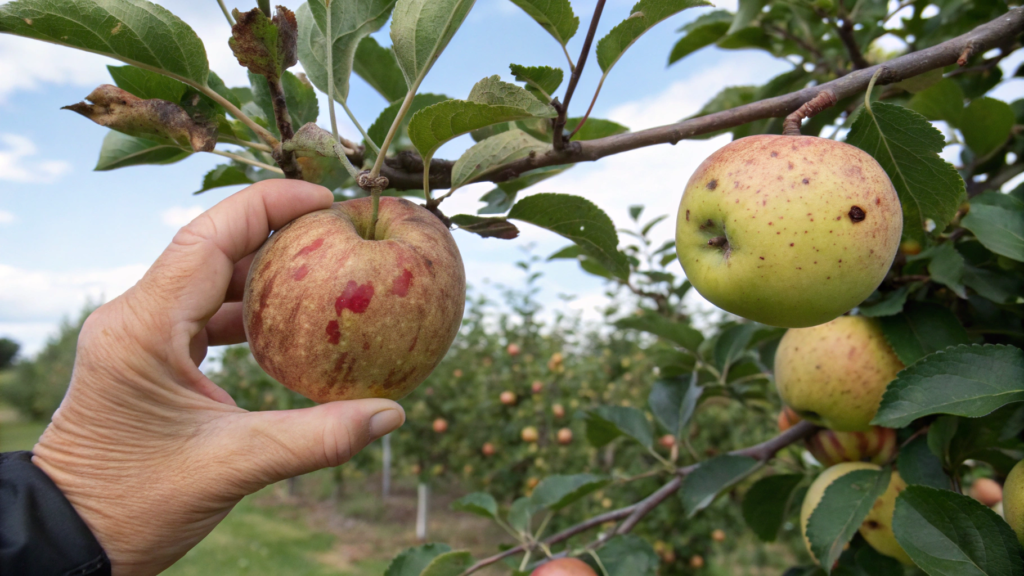
We already know that overripe apples are best sent straight to processing. But how do you actually tell — right on the tree or right after picking?
1. Texture and firmness
- A normal apple is firm. When you press it lightly with a finger, you only feel density.
- An overripe apple feels soft, sometimes even slightly “springy.” If a small dent stays after a gentle press — it’s overripe.
Here’s my test: hold the apple in your palm and squeeze very lightly. If it feels “rubbery,” it won’t store well.
2. Seed color
Seeds usually turn dark brown when an apple ripens. But if the seeds are already almost black and the flesh starts losing firmness — that’s a clear sign of overripeness.
3. Taste and aroma
Overripe apples taste sweeter, but the flavor turns flat. The balance between acid and sugar disappears, and the apple becomes like a caramel candy without freshness. Sometimes you’ll notice a slight “cider” note — a signal the fruit has started fermenting.
4. Skin and appearance
- Small dark spots and speckles often appear.
- The skin gets thinner and peels easily.
- Some varieties (like McIntosh) even start cracking right on the tree when overripe.
5. How to use overripe apples
If you’ve picked these apples — no need to be upset. They won’t work for storage, but they’re perfect for:
- Cider (the natural sweetness and softness are exactly what you need).
- Apple butter — the sweeter the apples, the more caramel-like the flavor.
- Baking — overripe apples break down beautifully in pies or cobblers.
- Smoothies — the softness makes them the ideal base.
For processing, I often use the Breville Juice Fountain Plus Juicer. Overripe apples turn into juice in seconds, and the leftover pulp goes straight to the compost.
Overripe apples aren’t a lost harvest — they’re just a new opportunity. The key is knowing how to spot them and redirect them right away. That way you won’t be disappointed when a crate shrivels in a week, and instead you’ll know how to put every single apple to good use.
Apple Secrets
Apple season hits us with crates of fruit. But that’s the beauty of it: from chaos comes order, and from bruised apples come sauces, butter, and pies.
These 10 little hacks help not only to process the harvest but also to set the mood. Apples remind us of simple things: don’t wait until tomorrow, use what you have for the right purpose, and enjoy small joys — like a crisp slice in winter.
And they give us endless reasons to gather around the table as a family.If you’ve got your own apple secrets, don’t keep them to yourself — share them in the comments. Who knows, maybe your tip will be the one that saves someone’s harvest in the middle of fall.


