This article was born from watching my own kitchen over the past few years. Old-school comfort food hasn’t gone anywhere. Roast chicken, stews, pies, pasta — all of that still feels right to cook and eat. But in 2025, we look differently at ingredients, at fat balance, at textures, at how food feels afterward.
All the dishes in this collection are familiar in shape and flavor, but built on a lighter logic. Seasonal vegetables, trusted protein sources, careful heat, and recipes that fit real life — not some ideal scenario.
This is normal home food that grew up with us.
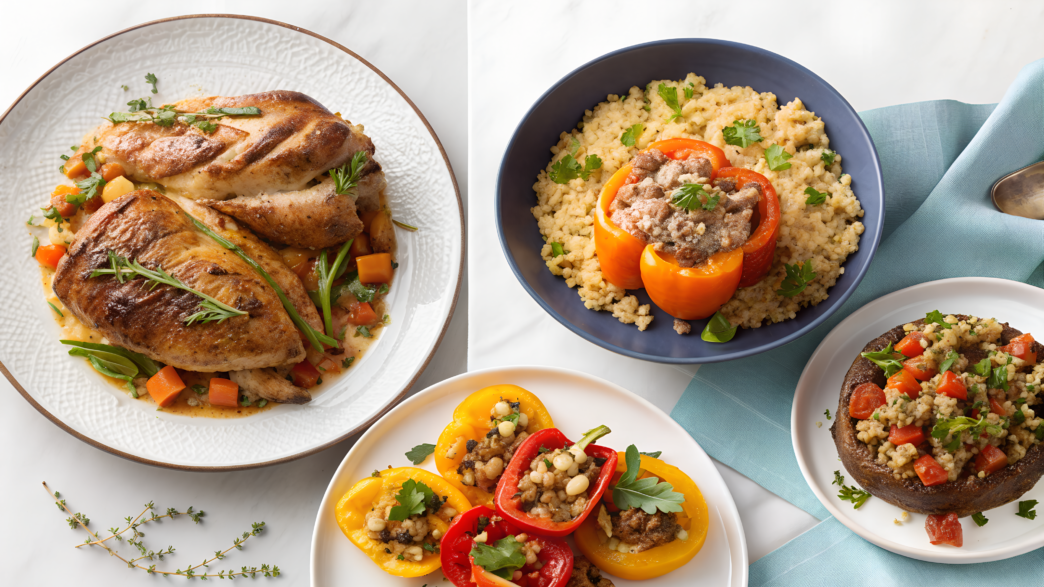
1. Classic Roast Chicken with Modern Herb Twist

Roast chicken is that dinner everyone seems to have made. But most home oven chickens turn out dry. Or bland. Or “yeah, it’s fine, but I don’t want it again.”
I’ve been there. Many times. And this version is my reliable roast chicken recipe — tested, repeatable, and genuinely loved. The same whole bird, but with a modern approach to herbs, temperature, and fat.
Why this recipe actually works
The key is fresh herbs paired with the right fat and a moderate temperature.
Food chemistry research confirms that fats help release aromatic compounds in herbs — especially rosemary, thyme, and sage (Journal of Food Science). Even heating also keeps the meat juicy, especially the breast.
I’m not chasing extreme diet rules. I’m about balance, and in 2025 that’s already the norm.
Ingredients (serves 4–6)
- Whole chicken — 4–5 lb (about 1.8–2.3 kg)
- Extra virgin olive oil — 3 tbsp (about 45 ml)
- Unsalted butter, softened — 2 tbsp (about 30 g)
- Fresh rosemary — 2 sprigs
- Fresh thyme — 4–5 sprigs
- Sage — 4–6 leaves
- Garlic — 1 whole head
- Lemon — 1
- Sea salt — 1½ tsp (about 9 g)
- Freshly ground black pepper — 1 tsp
- Yellow onion — 1 large
- Carrots — 2–3
If the herbs come straight from the garden, the flavor is deeper. That’s just a fact.
How I make it
- Take the chicken out of the fridge 30 minutes before cooking. Cold meat in a hot oven cooks unevenly. The breast dries out while the thighs are still “thinking.” Room temperature fixes this imbalance without any tricks.
- Preheat the oven to 375°F (about 190°C). Not higher. High heat browns the skin nicely but pulls moisture from the meat. Here we want balance, not a show.
- Make the herb fat mixture. In a bowl, combine olive oil, softened butter, finely chopped fresh herbs, salt, and pepper.
The smell at this stage is already right — rich, herbal, very kitchen. - Gently loosen the skin over the breast and place some of the mixture underneath. With your hands. Slowly. This is the moment that makes the chicken juicy instead of just “roasted.”
- Rub the remaining mixture over the outside of the chicken. No aggressive rubbing — just an even coat over the skin.
- Prepare the stuffing. Cut the lemon and garlic head in half. Place them inside the chicken with a couple of thyme sprigs. This is for aroma, not for eating.
- Vegetables go on the bottom of the pan. Roughly chopped onion and carrots go under the chicken. They catch the juices, protect the bottom from burning, and later become a great side.
- Roast until done, guided by temperature, not time. On average, 1 hour 20 minutes to 1 hour 30 minutes. Doneness is 165°F (about 74°C) in the thickest part of the thigh.
- Let the chicken rest for 10–15 minutes after the oven. This is not optional. Juices redistribute, and the meat stays inside the chicken — not on the cutting board.
If you don’t have a thermometer, it’s better to buy one. I use Wireless Digital Meat Thermometer, and it completely removes guessing during cooking.
Small details that decide everything
- Let the chicken rest for 10–15 minutes after roasting. The juices redistribute, and the meat becomes noticeably juicier.
- Don’t baste every five minutes. It’s not necessary.
- If the skin looks pale, turn on broil for the last 5 minutes — but watch it closely.
The recipe is simple and doesn’t try to be “Instagram-friendly.” It fits perfectly into modern home cooking: whole protein, herbs, minimal processing, maximum flavor.
I often serve this chicken with roasted cauliflower or a simple green salad — and it’s the kind of dinner after which you don’t want dessert or snacks.
Filling. Dependable.
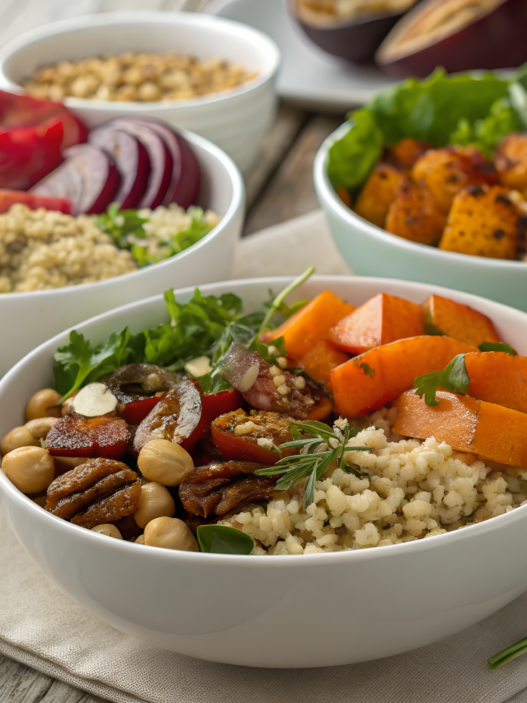
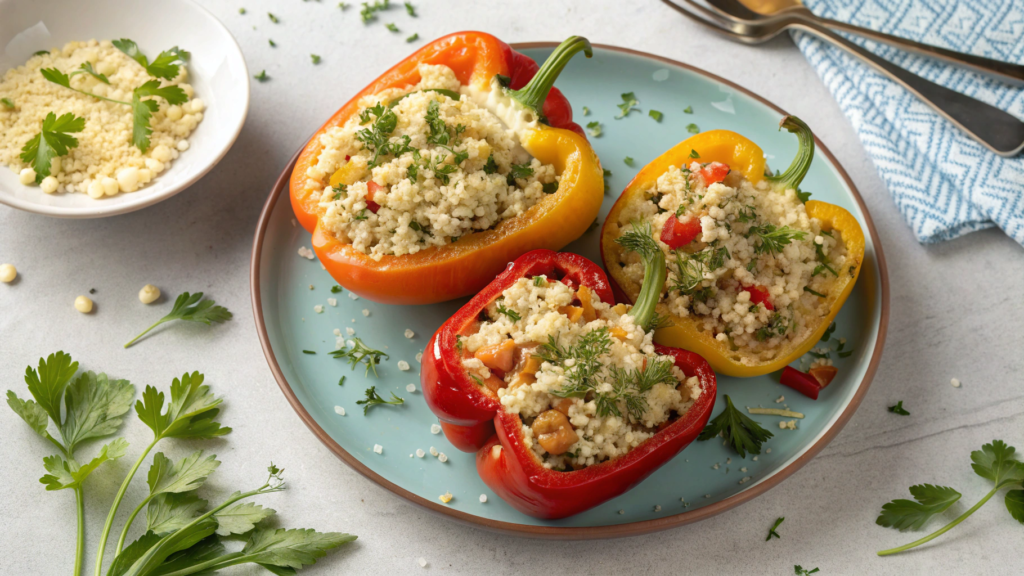
2. Fall 2025 Quinoa-Stuffed Peppers
Stuffed peppers are food from the past, when people cooked to feed, not to impress. And I respect that a lot.
But in 2025, I want this kind of food to leave no heaviness or fatigue after dinner.
In this version, quinoa isn’t there because it’s trendy. It actually works.
Why quinoa instead of rice
Quinoa gives texture, and on top of that it’s a complete protein. According to USDA data and reviews in Nutrients Journal, quinoa contains all nine essential amino acids and has a more stable glycemic response compared to white rice.
It also absorbs spices extremely well.
Ingredients (serves 4)
- Bell peppers — 4 large
- Quinoa (dry) — 1 cup (about 170 g)
- Vegetable broth — 2 cups (about 480 ml)
- Olive oil — 2 tbsp (about 30 ml)
- Yellow onion — 1 medium
- Garlic — 3 cloves
- Zucchini — 1 small
- Canned crushed tomatoes — 1 cup (about 240 ml)
- Smoked paprika — 1 tsp
- Ground cumin — ½ tsp
- Dried oregano — 1 tsp
- Salt — ¾ tsp
- Black pepper — to taste
- Hard goat cheese or feta — ½ cup (about 75 g)
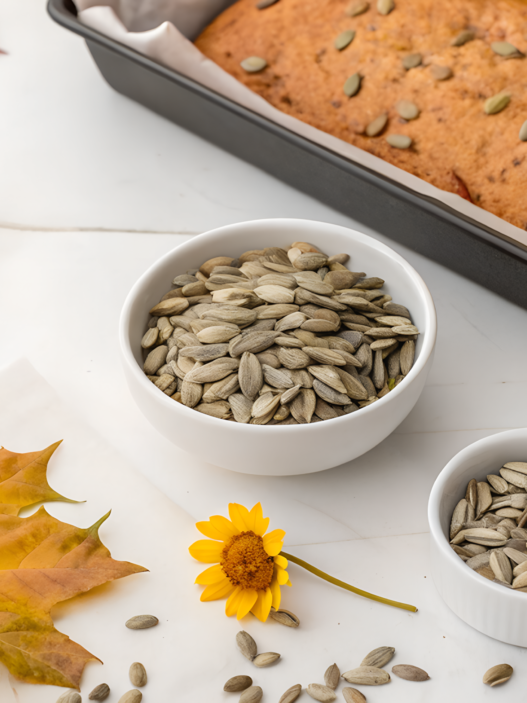
- Pumpkin seeds — 2 tbsp (about 20 g)
How I make it
- Cook the quinoa in broth, not water. This is the base flavor. I bring it to a boil, lower the heat, and cook for 15 minutes until the liquid is absorbed. Then I remove it from the heat and let it sit covered for another 5 minutes.
- While the quinoa cooks, prep the vegetables. Finely chop the onion, cut the zucchini into small cubes. Garlic however it goes — just not into a paste.
- Sauté the onion over medium heat until soft. Not caramelized. We want sweetness, not browning.
- Add garlic, spices, and zucchini. This is where you don’t rush. Cumin and smoked paprika need time to wake up in the oil. The smell changes immediately — it becomes warm.
- Combine the vegetables with quinoa and tomatoes. Mix gently, taste for salt. If the flavor feels flat, add a pinch of salt — not more spices.
- Prepare the peppers. Cut off the tops, remove the seeds. Lightly brush the inside with olive oil — yes, even inside.
- Stuff the peppers without packing them down. The filling should stay airy. Top with a bit of goat cheese and pumpkin seeds.
- Bake at 375°F (about 190°C) for 35–40 minutes. The peppers should be soft, but not falling apart.
Small details that make the dish feel “grown-up”
- Always rinse quinoa, even if the package says pre-washed.
- Goat cheese adds acidity. Feta adds saltiness. Choose by mood.
- Pumpkin seeds are not decoration. They add texture and fat.
This is not a “vegetarian substitute.” It’s a full dinner that doesn’t leave you looking for something else to eat.
We often eat these peppers the next day — and they only get better. The flavors settle, the spices calm down, and the quinoa absorbs everything around it.
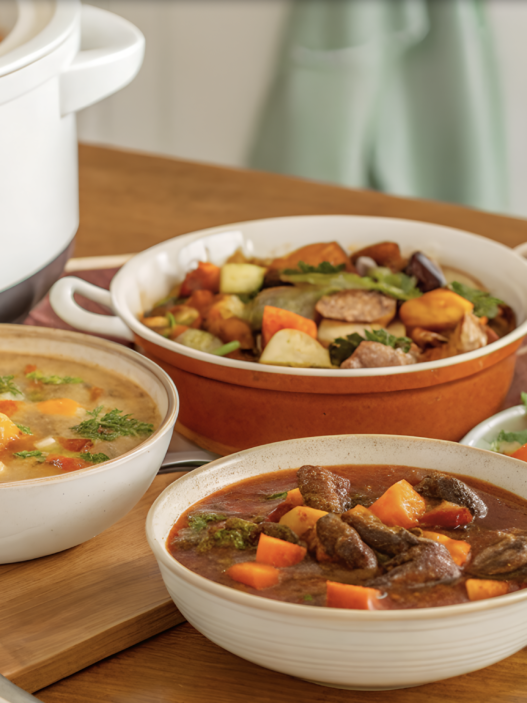
3. Grandma’s Beef Stew Reinvented with Lighter Ingredients
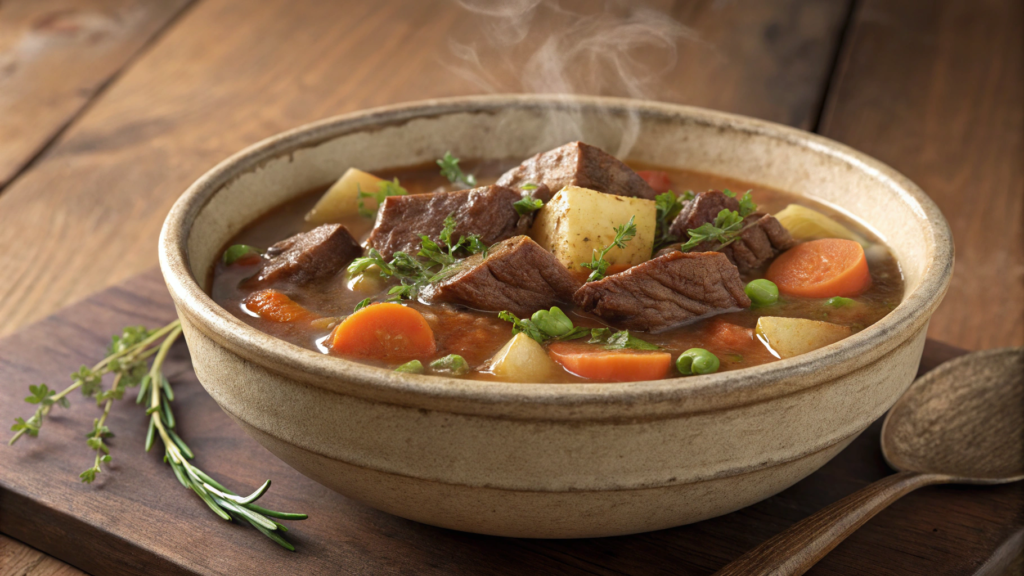
The classic beef stew is often too heavy. Too much potato, too much flour, too much fat. After it, you just want to lie down and not move.
This version came from real life. When you want that familiar stew flavor, but without the feeling that dinner was an endurance test.
We cooked stews like this many times in Idaho during winter — and adjusted something every time. Less thickener. Cleaner broth. More defined texture.
What’s the main shift compared to the grandma version
- Less starch — no piles of flour
- One clear fat source instead of everything mixed together
- Long, gentle simmering instead of boiling
- Focus on umami, not thickness
Research published in Meat Science Journal shows that slow cooking at moderate temperatures improves beef tenderness without the need for extra fats. This is exactly the case where technique matters more than ingredients.
Ingredients (serves 5–6)
- Stewing beef (chuck) — 2 lb (about 900 g)
- Olive oil — 2 tbsp (about 30 ml)
- Yellow onion — 2 medium
- Carrots — 3
- Celery — 2 stalks
- Garlic — 4 cloves
- Tomato paste — 1½ tbsp
- Beef broth — 4 cups (about 960 ml)
- Dry red wine — ½ cup (about 120 ml)
- Bay leaves — 2
- Fresh thyme — 3 sprigs
- Worcestershire sauce — 1 tbsp
- Salt — 1½ tsp
- Black pepper — to taste
How I make it (and where people usually mess up)
- Cut the meat into large cubes and dry it properly. I cut the beef into pieces about 4–5 cm and never go smaller — small pieces lose juice faster. Before searing, I lay the meat on paper towels and let it literally “breathe” for a couple of minutes. Skip this step, and the meat will start stewing right away, and the right flavor simply won’t form.
- Sear the meat in batches, without rushing. The pot must be hot, and the pieces should lie freely. I place the meat in a single layer and don’t touch it for the first few minutes. This is when that deep flavor forms — the one you later taste in the broth, not just “boiled beef.”
- Remove the meat and work with the vegetables in the same pot. Onion, carrots, and celery go straight into the remaining fat. They lift all the browned bits from the bottom that many people deglaze with wine later — and that’s a mistake. The vegetables should become soft, not browned. This is a base, not a separate dish.
- Add the tomato paste and let it cook. I mix the paste into the vegetables and leave it on the heat for 1–2 minutes. It darkens, and the aroma becomes warmer and rounder. If you just add it to liquid, the flavor stays sharp.
- Deglaze with wine, gently scraping the bottom. I use a wooden spatula and take my time. The wine picks up all the concentrated flavor we’ve built so far. The alcohol cooks off fairly quickly, leaving only depth and light acidity.
- Return the meat, add broth and herbs. The liquid should barely cover the ingredients. No more. Stew is not soup. I add thyme and bay leaves whole, so they’re easy to remove and don’t over-infuse the dish.
- Simmer on the lowest heat for 2–2½ hours. I make sure the liquid barely moves. No boiling, no bubbling. If the heat is too high, the meat turns dry and the broth becomes cloudy.
- Adjust the flavor at the very end. I add salt gradually. Sometimes a pinch is enough, sometimes Worcestershire sauce is needed for depth. At this stage the flavor is already assembled, and every adjustment is immediately noticeable.
Why flour isn’t needed here. Thickening happens through:
- collagen from the meat
- natural evaporation
- vegetables releasing texture
This is confirmed by studies on collagen transformation during long braising (Food Research International). And yes — the flavor is cleaner than with flour.
Cookware matters. A heavy-bottom pot holds temperature steadily. I use cast iron, and the difference is obvious.
The next day, this stew gets better. The flavor comes together, the meat becomes even softer, the broth thicker — but without heaviness. We often eat it with just chopped greens and a piece of sourdough bread. No sides needed.
4. Spicy Cauliflower Tacos with a Chef’s Secret Sauce

We wanted something spicy, crispy, and real — but without meat. Not out of principle, just out of curiosity. And cauliflower unexpectedly worked.
I never really liked cauliflower. But once you get the spices, the temperature, and the sauce right — everything changes. Fast.
Why cauliflower can handle heat
Cauliflower has a dense, fibrous structure and a neutral flavor. It’s an ideal carrier for spices.
According to the Journal of Food Composition and Analysis, it holds fats and aromatic compounds well, especially when roasted rather than deep-fried. That’s why the flavor turns rich without feeling heavy.
Ingredients (serves 4)
The cauliflower:
- Cauliflower — 1 large head
- Olive oil — 3 tbsp (about 45 ml)
- Smoked paprika — 1½ tsp
- Ground chili — ½–1 tsp (depending on mood)
- Cumin — 1 tsp
- Garlic powder — 1 tsp
- Salt — ¾ tsp
Sauce:
- Greek yogurt — ¾ cup (about 180 g)
- Mayonnaise — 2 tbsp (about 30 g)
- Lime — juice of 1
- Honey — 1 tsp
- Chipotle in adobo — 1–2 tsp (finely chopped)
- Salt — to taste
For serving:
- Tortillas — 8
- Red cabbage — 1 cup (thinly sliced)
- Cilantro — a handful
- Avocado — 1–2
How I make it (and where it’s easy to ruin everything)
- Break the cauliflower into large florets. Don’t go small. Small pieces dry out and lose character. I want crisp edges and a soft center.
- Thoroughly coat the cauliflower with spices and oil. With your hands. This way the spices distribute evenly and stick better to the surface.
- Roast at high heat — 425°F (about 220°C). 25–30 minutes, flip once. The color should be deep, even almost dark in spots. That’s normal. That’s flavor.
- While the cauliflower roasts, make the sauce. Mix yogurt, mayonnaise, lime, honey, and chipotle. The sauce should be spicy, acidic, and slightly sweet at the same time. If it’s just “pleasant,” it’s not right.
- Taste and let the sauce rest. About 10–15 minutes. The flavor comes together, the heat evens out. This matters.
- Warm the tortillas. Either in a dry pan or directly over a gas flame. Cold tortillas kill the whole experience.
- Assemble the tacos in layers. Cauliflower → sauce → fresh cabbage → avocado → cilantro. Not the other way around.
About the “secret” sauce. The whole difference here is chipotle in adobo. It brings smoky heat, depth, and a slight bitterness. Without it, the sauce is just yogurt-based — neutral and fairly boring.
Chipotle in adobo ties acidity, fat, and heat into one whole.
We often make these at the end of the week, when we want something fast, bold, and without heavy consequences.
And every time, the cauliflower runs out before the tortillas do.
5. One-Pot Lentil Soup for Busy Weeknights
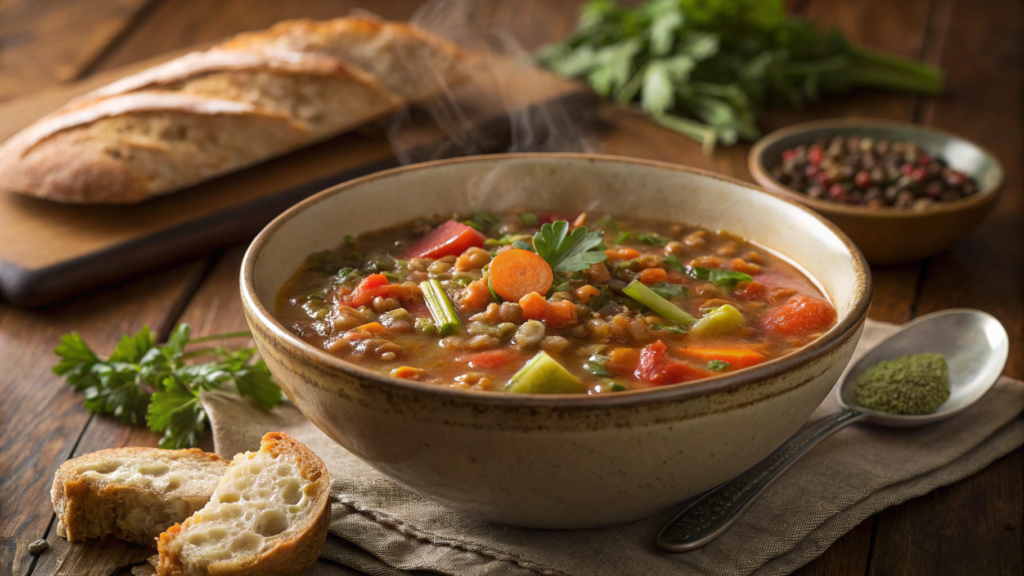
I started cooking lentil soups during the years when we were renovating the house and setting up garden beds at the same time. By evening, I had energy for exactly one pot. And honestly — these are the recipes that stay with you for a long time.
Why lentils are ideal for weekdays
Lentils cook quickly, don’t require soaking, and provide steady satiety.
According to USDA data and reviews in Nutrients, red and brown lentils contain a high amount of plant-based protein and soluble fiber, which helps you stay full longer without heaviness.
And one more thing people rarely mention: lentils absorb spices extremely well. Even the simplest ones.
Ingredients (serves 4–5)
- Brown or green lentils — 1½ cups (about 300 g)
- Olive oil — 2 tbsp (about 30 ml)
- Yellow onion — 1 large
- Carrots — 2
- Celery — 2 stalks
- Garlic — 4 cloves
- Tomato paste — 1 tbsp
- Cumin — 1 tsp
- Smoked paprika — 1 tsp
- Dried thyme — ½ tsp
- Vegetable broth — 6 cups (about 1.4 l)
- Bay leaf — 1
- Salt — 1½ tsp
- Black pepper — to taste
- Lemon — for serving
How I make it (slowly, without rushing)
- Start with the vegetable base right in the pot.
Heat olive oil over medium heat and add finely chopped onion, carrots, and celery. Cook for 6–8 minutes until the vegetables are soft and aromatic. I don’t brown them — I want sweetness, not color. - Add garlic and spices, let them open up.
I add the garlic at the very end so it doesn’t turn bitter. I warm the cumin, paprika, and thyme for just 30–40 seconds. At this moment the smell changes sharply — it becomes warm and “assembled.” - Stir in the tomato paste and lightly cook it.
This step matters. The paste loses its sharp edge and adds depth. If you just drop it into the broth, the flavor will be off. - Rinse the lentils and add them straight to the pot.
I rinse until the water runs clear. This removes excess starch and keeps the broth cleaner. I stir so the lentils get coated with the aromatic base. - Pour in the broth and add the bay leaf.
The liquid should fully cover everything with some room to spare. Bring to a boil, then reduce the heat to low. - Cook uncovered for 30–35 minutes.
The soup should simmer quietly. The lentils will be tender but not falling apart. If using red lentils, reduce the time by about 10 minutes. - Salt closer to the end.
Salting too early makes legumes firmer. I add most of the salt 5–7 minutes before it’s done and adjust in the bowl. - Let the soup rest for 10 minutes after cooking.
The flavor comes together, the texture evens out. It’s a small step, but the difference is noticeable.
What makes this soup practical
- One pot
- Keeps well for 3–4 days
- Tastes better the next day
- Can be frozen without losing texture
I most often serve it simply with a drizzle of olive oil, a pinch of freshly ground pepper, and обязательно a bit of lemon juice. It lifts the whole flavor.
6. Baked Salmon with Maple Glaze and Crisp Veggies
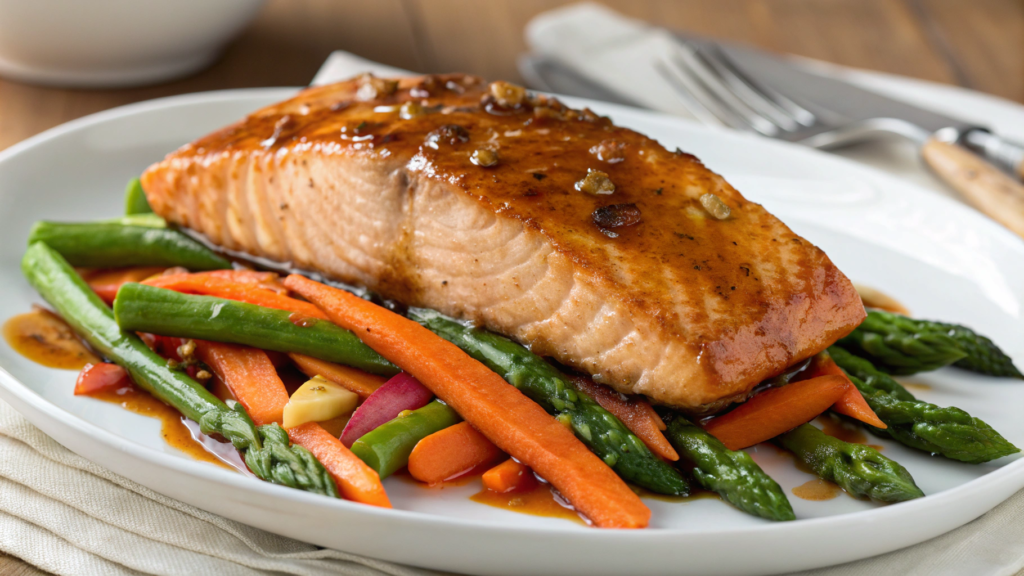
Baked salmon is one of those dinners that looks neat and put-together, even if you cooked it on autopilot and without much mood.
Here you get light sweetness from maple syrup, the rich structure of the fish, and vegetables that don’t turn into a soft mash. No complicated techniques.
A few facts
- Salmon is a source of omega-3 fatty acids (EPA and DHA). This is confirmed by USDA data and multiple reviews in the Journal of Nutrition.
- Baking at a moderate temperature helps preserve protein structure without excessive drying — this is described in studies on fish thermal processing (Food Chemistry).
- A small amount of sugar (in our case, maple syrup) participates in the Maillard reaction during baking, enhancing flavor without turning the dish into a “dessert.”
No promises of “healing effects.” Just good food.
Ingredients (serves 4)
- Salmon fillet — 1½ lb (about 680 g), skin on
- Pure maple syrup — 3 tbsp (about 45 ml)
- Dijon mustard — 1 tbsp
- Soy sauce or tamari — 1 tbsp
- Olive oil — 2 tbsp (about 30 ml)
- Garlic — 2 cloves
- Black pepper — to taste
For the vegetables:
- Broccoli — 2 cups (about 180 g)
- Carrots — 2 medium
- Brussels sprouts — 1½ cups (about 200 g)
- Olive oil — 1½ tbsp
- Salt — ¾ tsp
How I make it
- Preheat the oven to 400°F (about 205°C). This is the temperature where the salmon cooks evenly and the vegetables have time to brown instead of just softening.
- Prep the vegetables ahead of time. I cut them into roughly equal-sized pieces. This matters: different sizes mean different doneness. I toss them with olive oil and salt right on the baking sheet.
- Put the vegetables in the oven first. They start cooking 12–15 minutes before the fish. This way, they end up truly crisp on the edges, not boiled.
- While the vegetables roast, make the glaze. I mix maple syrup, Dijon mustard, soy sauce, and finely chopped garlic. The flavor should be balanced — sweet and savory.
- Prepare the salmon. I pat the fillet dry with paper towels and place it skin-side down. This helps the fish roast instead of “steaming.”
- Brush on a thin layer of glaze. Don’t pour it on. A thin layer gives aroma and color without overpowering the fish.
- Return the pan to the oven and bake everything together. The salmon cooks in 10–12 minutes. I don’t watch the clock — I watch the texture. The fish should flake easily with a fork but stay juicy.
- Let the dish rest for 5 minutes before serving. The protein settles, juices redistribute — and the flavor becomes balanced.
Small details that matter
- Natural maple syrup is essential. Artificial syrups give sweetness without depth. I usually use Crown Maple Organic Maple Syrup.
- If the vegetables start to darken too early, just toss them — don’t lower the temperature.
Why this dish stays in regular rotation
It:
- cooks on a single sheet pan
- looks neat on the plate
- doesn’t overload the palate
- reheats well
Simple, reliable, and exactly what a weeknight dinner should be.
7. Stuffed Acorn Squash Inspired by Farm-to-Table Dining
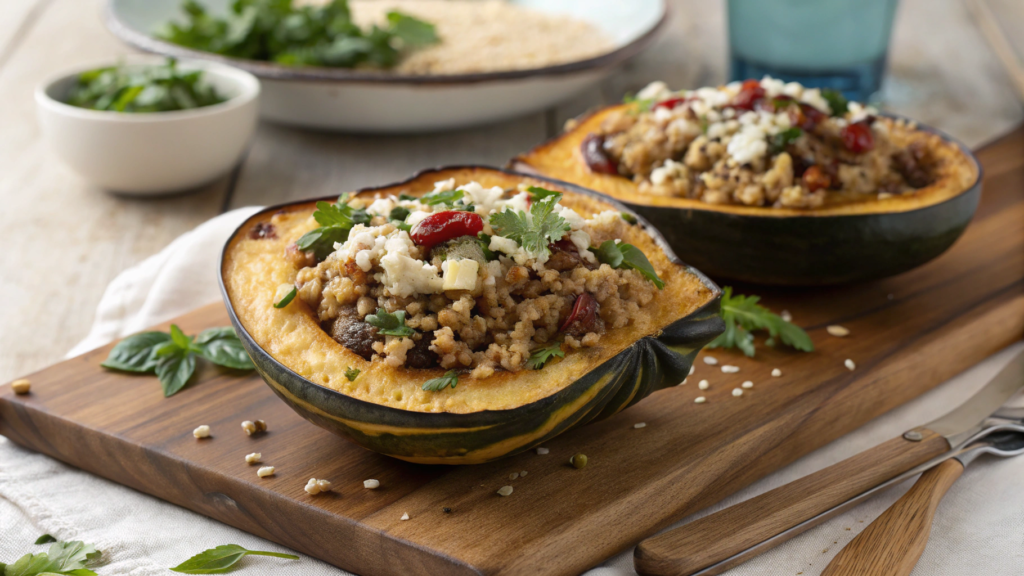
This recipe grew naturally out of farm-to-table logic. No concept, just ingredients that feel good together. Squash, grain, a bit of cheese, herbs. Everything makes sense. Everything is in its place.
Why acorn squash
Acorn squash is dense, mildly sweet, and holds its shape well when baked.
According to USDA data, it contains dietary fiber and potassium, as well as carotenoids — and when roasted, nutrient loss is minimal as long as you don’t push the temperature too high or dry out the flesh.
Just a solid seasonal vegetable.
Ingredients (serves 4)
- Acorn squash — 2 large
- Olive oil — 3 tbsp (about 45 ml)
- Salt — 1 tsp
- Black pepper — to taste
For the filling:
- Cooked quinoa or farro — 1½ cups (about 270 g)
- Yellow onion — 1 medium
- Garlic — 2 cloves
- Button mushrooms or cremini — 1 cup (about 90 g)
- Spinach — 2 cups (about 60 g)
- Goat cheese or feta — ½ cup (about 75 g)
- Fresh thyme — 1 tsp (finely chopped)
- Olive oil — 1½ tbsp
How I make it
- Cut the squash in half and remove the seeds. I scoop them out with a spoon without scraping too much. The walls should stay firm — they hold the filling.
- Roast the squash cut-side down. I brush it with olive oil, lightly salt it, and bake at 400°F (about 205°C) for 35–40 minutes.
The squash should be tender but not falling apart. - While the squash is in the oven, make the filling. Over medium heat, I sauté the onion until translucent, then add the mushrooms and cook until excess moisture is gone. This matters — the filling shouldn’t be wet.
- Add garlic and spinach. Garlic goes in for literally 30 seconds. I add the spinach at the very end — it wilts almost instantly.
- Combine the vegetables with the grain and herbs. I take the pan off the heat, add quinoa or farro, thyme, and taste for salt. The filling should be flavorful on its own.
- Fill the squash halves. Don’t pack it down. I crumble goat cheese on top — it adds acidity and balances the squash’s sweetness.
- Return to the oven for another 10–12 minutes. Just enough to heat everything through and slightly melt the cheese.
Small details that decide the flavor
- The grain should already be cooked and fluffy.
- If you want more depth, add a pinch of grated Parmesan on top — just a little.
- Leftovers reheat best in the oven the next day, not the microwave.
We eat this squash as a standalone dish. Sometimes with a simple green salad. Sometimes just like that, straight from a bowl, standing by the kitchen island.
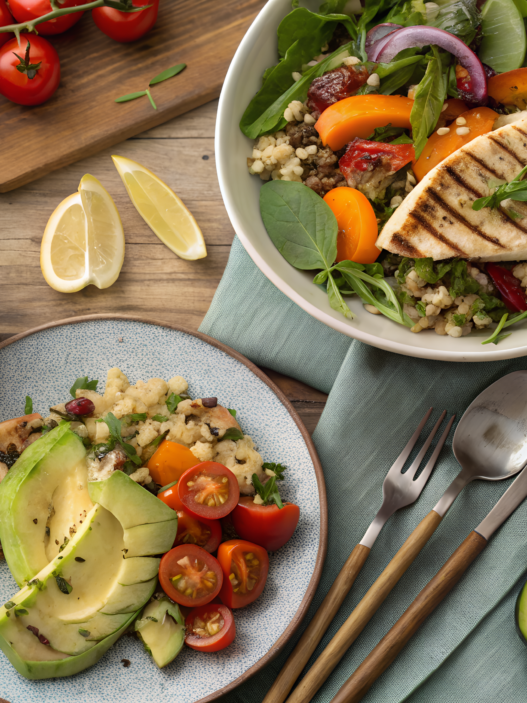
8. 2025 Pasta Primavera with Seasonal Vegetables

Pasta Primavera is when pasta stops being the heavy base and becomes a background for seasonal vegetables. No cream, overload, feeling like you just ate “something starchy.”
I come back to this dish every time the fridge is full of vegetables and my desire to stand at the stove is minimal. It comes together fast, but the flavor stays clean and fresh.
A few facts — short and to the point
- Al dente pasta digests more slowly than fully overcooked pasta — this is supported by data from the Journal of Nutrition and guidelines on grain glycemic response.
- Quick heat treatment of vegetables (sautéing, blanching) preserves more vitamins than long stewing — described in Food Chemistry.
- Olive oil helps the absorption of fat-soluble compounds found in vegetables (USDA).
Just proper technique.
Ingredients (serves 4)
- Pasta (penne, fusilli, or linguine) — 12 oz (about 340 g)
- Extra virgin olive oil — 4 tbsp (about 60 ml)
- Garlic — 4 cloves
- Zucchini — 1 medium
- Asparagus — 1 cup (about 120 g)
- Green peas (fresh or frozen) — ¾ cup (about 100 g)
- Cherry tomatoes — 1 cup (about 150 g)
- Lemon — zest + juice of ½
- Salt — 1½ tsp
- Black pepper — to taste
- Parmesan — ½ cup (about 45 g), grated
- Fresh basil — a handful
You can change the vegetables — the principle matters more than the list.
How I make it
- Bring water to a boil for the pasta and salt it generously. The water should be properly salty. This is the only chance to season the pasta from the inside.
- Cook the pasta until al dente. I drain it 1 minute earlier than the package says. I always save 1 cup of the pasta cooking water.
- While the pasta cooks, prep the vegetables. I slice zucchini into half-moons, cut asparagus into pieces, and halve the tomatoes. Sizes should be similar so everything cooks evenly.
- Heat the olive oil and add the garlic. Medium heat. The garlic should not brown — I want aroma, not bitterness.
- Sauté the vegetables in stages. First the firmer ones (asparagus, zucchini), then peas, and tomatoes at the very end. The vegetables should stay bright and slightly crisp.
- Combine the pasta with the vegetables right in the pan. I add some of the reserved pasta water — the sauce forms on its own, without cream.
- Remove from heat and add lemon, zest, and Parmesan. The lemon lifts the flavor. The cheese brings everything together. I mix gently.
- Taste and adjust salt and pepper. This is the final moment. Everything should feel balanced — not loud, not flat.
Details people often miss. Don’t overheat the vegetables — they shouldn’t collapse. If the pasta feels dry, add a couple more spoons of pasta water, not oil. Add basil at the very end, with your hands, not a knife.
Why this dish stays relevant
It:
- adapts to the season
- doesn’t overload
- works equally well for a weekday dinner and a big table
This is the kind of pasta that leaves you feeling fed — not heavy.
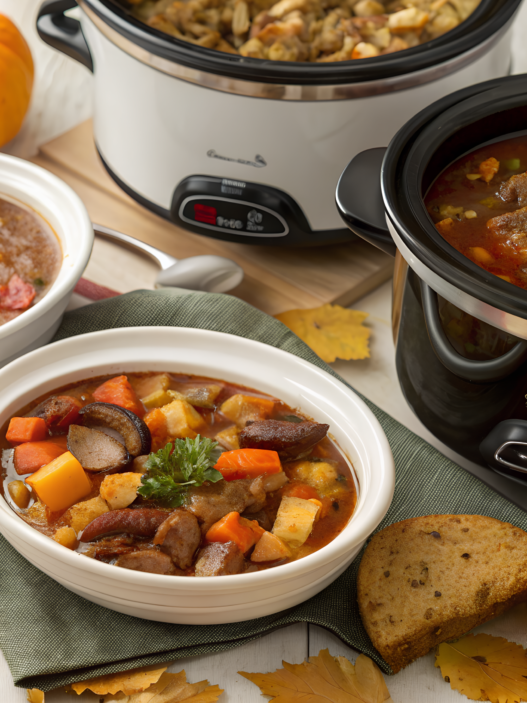
9. Slow Cooker Turkey Chili with Minimal Prep
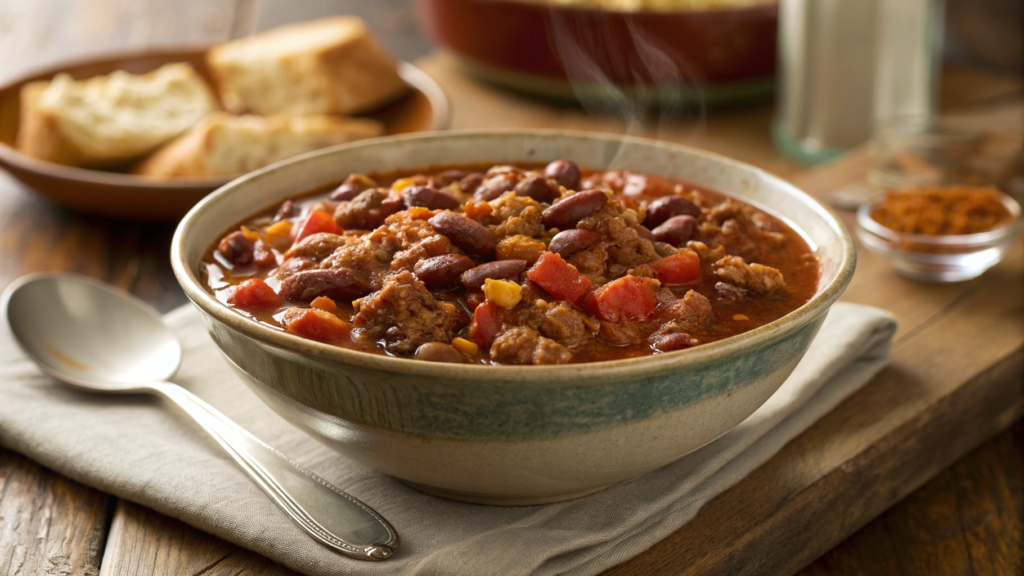
This chili quietly cooks itself and by evening turns into a warm, solid dinner. No searing, no three pans, no wasted time.
It showed up in our life during a period when there was basically no time at all. And honestly — that’s when I fully fell in love with the slow cooker.
Ground turkey contains less saturated fat compared to beef — this is confirmed by USDA data. Slow cooking at low temperature reduces the risk of drying out lean meat (Journal of Food Science). Beans in chili are a stable source of plant protein and fiber.
Ingredients (serves 6)
- Ground turkey — 1½ lb (about 680 g)
- Canned beans (kidney or pinto), rinsed — 2 cans, 15 oz each
- Canned crushed tomatoes — 1 can, 28 oz
- Tomato paste — 2 tbsp
- Yellow onion — 1 large
- Bell pepper — 1 large
- Garlic — 4 cloves
- Chili powder — 2 tbsp
- Cumin — 1½ tsp
- Smoked paprika — 1 tsp
- Salt — 1½ tsp
- Black pepper — to taste
- Vegetable or chicken broth — 1 cup (about 240 ml)
How I make it
- Finely chop the onion and bell pepper and add them straight to the slow cooker. I don’t sauté the vegetables beforehand. With long cooking, they become soft and sweet on their own, without losing flavor. The key is cutting them small enough so they distribute evenly.
- Add the garlic and dry spices directly to the vegetables. This matters. The spices should meet the moisture from the vegetables, not cold meat. This way they bloom more gently and don’t give off a raw, harsh note.
- Place the ground turkey on top of the vegetables without mixing. I just spread it out in chunks. During cooking, it will break down on its own. If you mix it right away, you’ll get a dense mass instead of a loose texture.
- Add the tomato paste and crushed tomatoes. I dot the paste over the surface instead of spreading it. It dissolves gradually and adds depth rather than sharp acidity.
- Pour in the broth and only now gently mix. Once. No enthusiasm. The goal is to combine the ingredients, not turn everything into purée.
- Add the beans last. Rinsed, without their liquid. This keeps the beans intact and prevents the chili from turning cloudy.
- Cook on LOW for 6–7 hours or on HIGH for 3–4 hours. I almost always choose LOW. The flavor becomes more even, the turkey stays juicy, and the spices don’t stick out.
- Taste and adjust salt at the very end. Only at the end. The liquid reduces during cooking, and it’s easy to oversalt if you do it earlier.
What makes this chili especially practical
- No searing required
- Can be started in the morning
- Keeps well for 3–4 days
- Freezes beautifully
I serve it with a spoon of Greek yogurt, a bit of cilantro, sometimes a slice of avocado. That’s it.
This is not a “diet dish.” It’s a working dinner that doesn’t demand attention and doesn’t drain your energy.
10. Vegetarian Shepherd’s Pie with Creamy Sweet Potato Topping
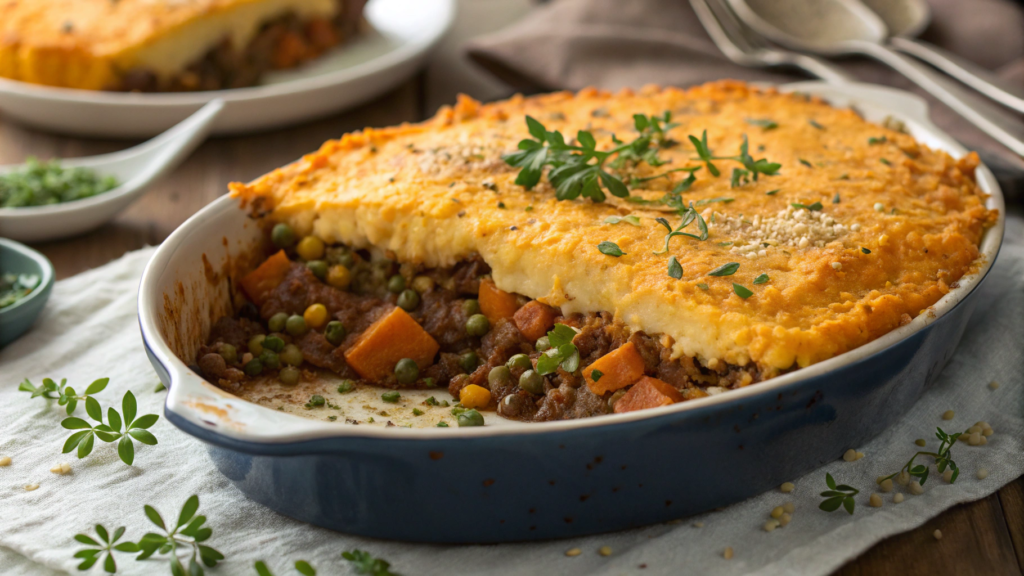
Shepherd’s pie is a dense, grounding dish — made for a cold evening and a full plate.
But the classic version is often too heavy: lots of meat, lots of fat, and mashed potatoes on top like a concrete slab.
In this version, vegetables and legumes can give the same depth and satisfaction — if flavor and texture are built correctly.
And the sweet potato topping isn’t here for color. It genuinely works.
Sweet potatoes contain more dietary fiber and beta-carotene than regular potatoes (USDA data). Lentils and mushrooms provide pronounced umami flavor thanks to natural glutamates — described in studies published in the Journal of Food Science.
Baking at a moderate temperature helps preserve vegetable structure without excessive drying (Food Chemistry).
Ingredients (serves 4–6)
For the vegetable base:
- Brown lentils (dry) — 1 cup (about 200 g)
- Yellow onion — 1 large
- Carrots — 2
- Celery — 2 stalks
- Button mushrooms or cremini — 2 cups (about 180 g)
- Garlic — 3 cloves
- Tomato paste — 1½ tbsp
- Soy sauce or tamari — 1 tbsp
- Vegetable broth — 1½ cups (about 360 ml)
- Olive oil — 2 tbsp
- Fresh thyme — 1 tsp
- Salt and black pepper — to taste
For the mash:
- Sweet potatoes — 2 lb (about 900 g)
- Butter — 2 tbsp (about 30 g)
- Milk or unsweetened plant milk — ¼ cup (about 60 ml)
- Salt — ¾ tsp
How I make it
- Cook the lentils separately until tender. I boil them in salted water for 20–25 minutes, until the lentils hold their shape but crush easily with a fork. Overcooked lentils turn into mush — and here, texture matters.
- Prep the sweet potatoes at the same time. I peel them, cut into large chunks, and boil until soft. I drain the water completely — excess moisture makes the mash watery.
- Make the vegetable base in a pan. I sauté onion, carrots, and celery over medium heat until soft. This builds sweetness and depth of flavor.
- Add the mushrooms and let them release moisture. I don’t rush this step. The mushrooms look dry at first, then release liquid, and only after that start to brown. This is when umami shows up.
- Stir in garlic, tomato paste, and thyme. The paste should darken slightly. This removes sharpness and makes the flavor more cohesive.
- Combine vegetables with lentils and broth. I add soy sauce, stir, and let the mixture simmer for 5–7 minutes. The filling should be thick but not dry.
- Make the sweet potato mash. I mash the hot potatoes with butter, add milk and salt. The texture should be creamy, soft, but able to hold shape.
- Assemble the pie in layers. Vegetable filling on the bottom, mash on top. I smooth it with a fork, creating small ridges — they brown beautifully.
- Bake at 400°F (about 205°C) for 25–30 minutes. The top should lightly brown, and the filling should bubble actively around the edges.
Details that are often underestimated
- It’s better to adjust salt before baking, not after.
- If the filling tastes “flat,” don’t add spices — add a pinch of salt or a drop of soy sauce.
- The next day, the flavor becomes deeper and more balanced.
This shepherd’s pie is filling, textured, holds its shape calmly, and doesn’t need explanations at the table.
It’s just a good pie, and honestly, this is exactly how I like to end dinner.
Updated Classics
When you look at all these dishes together, one thing becomes clear: fewer heavy sauces, fewer unnecessary steps, more attention to how food is cooked and how it feels afterward.
There are no hard rules here and no dramatic restrictions. Just choices that became conscious over time.
I truly believe these recipes stick not because they’re “correct,” but because you want to repeat them.
On a weekday. On a weekend. When you’re tired. When you’re in the mood to cook.
Which of these dinners would you make first? Is there a dish from childhood you’ve been wanting to rethink, but didn’t know where to start?Write in the comments. I read them all.