In fall, the garden stops demanding attention every single minute and starts giving back. Fall seeds have long become a link for me between the garden and the kitchen, between the current season and the next one. This is the time when it’s especially clear which plants were strong, which ideas worked, and which ones didn’t. Seeds capture this better than any notes ever could.
In this article, I’ve gathered the things we use every year. This is only what works in real life — on a small plot, in cooler weather. You do your part, and then you let time and nature do the rest.
No rushing, constant adjustments, feeling that you have to “get everything done.”
1. Fast-Growing Fall Seeds for Beginners
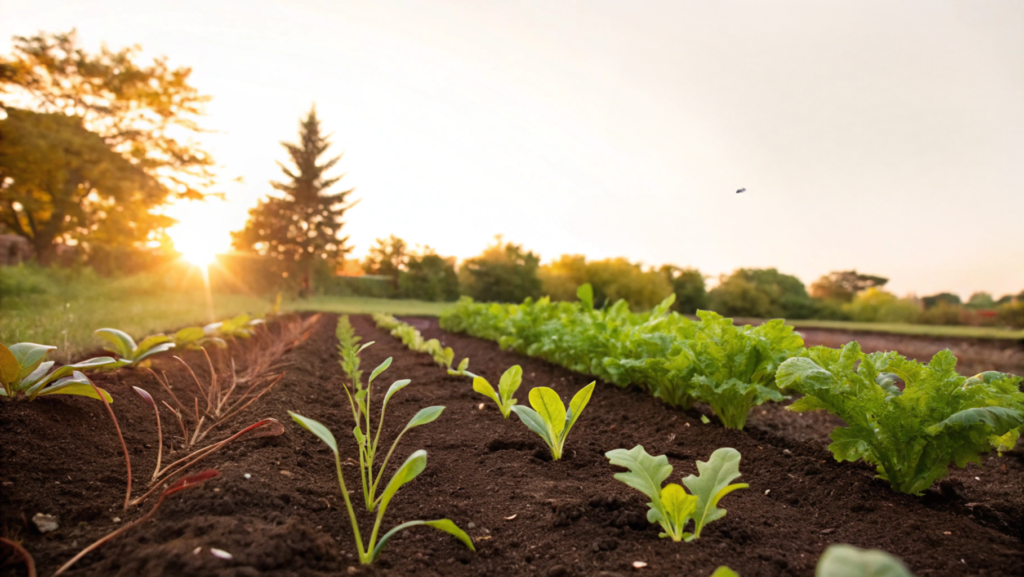
Fast-growing fall seeds for beginners are always where I suggest starting the fall season. Fall is surprisingly generous. The soil is still warm, the sun is softer, plants need less water, and weeds… well, they’re no longer as aggressive. It’s an ideal time for beginners.
What “fast-growing” fall seeds mean in practice
This refers to crops that:
- sprout in 3–7 days
- are ready to harvest in 20–45 days
- tolerate night temperatures down to 28–32°F (≈ −2…0°C)
- don’t require a greenhouse or complex protection
Perfect for first steps. And for confidence.
My proven favorites for beginners
1. Radish
A classic — and for good reason. Sprouts appear in just 3–4 days, and you can harvest in 21–30 days. In fall, radishes turn out juicier and milder, without the summer bitterness.
We usually sow them in beds about 12–18 inches wide (30–45 cm), simply scattering the seeds and lightly covering them with soil. No ruler. No stress.
2. Arugula
If I had to pick one fall green favorite, this would be it. Arugula loves cool weather. In the cold, its flavor becomes nutty and deep.
Harvest starts in 25–30 days. And if you cut it carefully, it grows back. Again. And again. And again.
3. Spinach
Yes, spinach is a bit more serious. But in fall, it works in your favor. Seeds germinate at soil temperatures starting around 45°F (≈7°C), which makes spinach an ideal candidate for late planting.
We usually sow it densely and then thin it out — and that gives you the first “harvest” even before the main one.
4. Mustard Greens
A very underrated crop. It grows fast, looks great, and has a bold flavor.In 30–40 days, you have full greens for the kitchen. And young leaves can be eaten even earlier.
5. Sunflowers (Dwarf Varieties)
Not everyone knows this, but some sunflowers can be grown for seeds even in early fall.
Dwarf varieties reach maturity in 55–65 days and are great for learning how to save seeds.
And yes — this is one of the best “teaching” plants for understanding the full cycle: from seed to seed.
Good seeds are already half the success. We often use simple, reliable fall seed mixes like the Organic Fall Garden Seed Variety Pack on Amazon — it’s convenient when everything is already selected by timing and cold tolerance.
A bit of science
Research shows that cooler temperatures reduce heat stress in leafy crops and help maintain leaf quality longer — especially in spinach, arugula, and mustard greens. This is well documented in USDA guidelines and recommendations from agricultural universities in northern states, including Oregon State University Extension and University of Minnesota Extension. These sources also note that fall plantings are less likely to bolt and tend to produce denser, sturdier leaf growth.
Fall planting is easier when you don’t expect a perfect result. It makes observing simpler, learning calmer, and walking away after the first mistake much less likely.
2. How to Harvest Sunflower Seeds the Easy Way
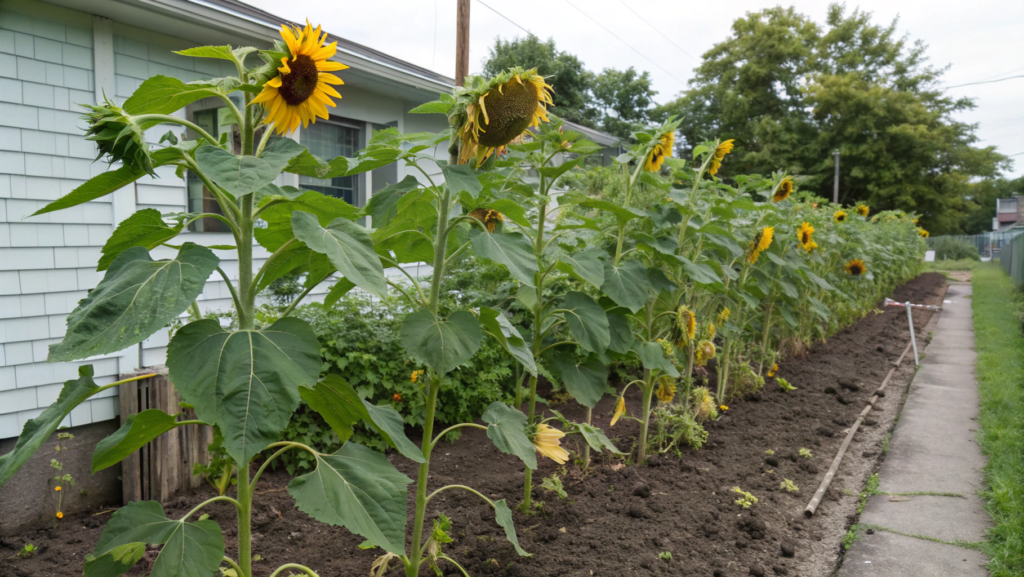
We harvested sunflower seeds for the first time back on our very first property in Idaho. A small yard, hand-dug soil, and sunflowers planted more out of curiosity than any real plan. And then they stood there. Tall. Heavy. Their heads drooping down, almost like they were saying: okay, that’s it, it’s time.
How to tell when sunflowers are ready
You don’t need a calendar here. Everything is visible:
- the petals have completely fallen off
- the back of the flower head has turned yellow-brown
- the seeds are firm, dark, and come off easily with your fingers
If you run your hand across them and the seeds feel solid instead of soft or “milky,” that’s the key moment.
If the weather stays dry, we usually let the plants stand like this for another 5–7 days. It noticeably lowers the risk of mold during storage.
The easiest harvesting method (no fuss)
I’ve tried different approaches and eventually settled on the calmest and most predictable one. It doesn’t require special conditions or extra space in the house.
1. Cut the head, leaving 8–12 inches of stem (20–30 cm)
This “handle” makes the head easy to carry without touching the seeds. The remaining stem also helps the sunflower head breathe better while drying, especially when the air is already cool and damp.
2. Move it under a roof or into a well-ventilated garage
Warmth isn’t the goal here — air movement is. I avoid closed rooms without airflow because seeds can sweat and spoil there. A porch, open shed, or airy garage works perfectly.
3. Place the head seed-side up on a rack or mesh
This allows the seeds to dry evenly without touching a solid surface. If you place it directly on a table or shelf, moisture gets trapped underneath and the risk of mold goes way up.
4. Let it dry for 2–3 days, then remove seeds by hand
Once the head dries slightly, the seeds come out easily, without effort. I do this slowly, usually in the evening, sitting next to a box. It’s one of those rare garden moments where you don’t want to rush.
For cleaning, a deep bowl and a simple sieve work well. If the seeds are going both for eating and for planting, I separate them into containers right away.
A few simple facts
Sunflowers are a self-pollinating crop, which means seeds from a single plant mostly keep their original traits. That’s exactly why sunflowers are so good for beginners who want to try saving seeds for next year. Agricultural Extension services often use sunflower as an example of a “simple seed cycle.”
Put simply: what grew is what you’ll plant.
Seeds for the kitchen
We always set aside part of the harvest for cooking and snacking. Here it’s important to dry them thoroughly — at least 7–10 days in a dry place.
After that, I store them in glass jars or sturdy containers. Sometimes I lightly salt them and dry them in the oven at 300°F (≈150°C) — not for storage, just for quick snacks during fall garden work.
A small but important detail
Not all seeds are worth saving. I always choose:
- the largest seeds
- seeds without damage
- seeds from the center of the flower head
These give the strongest plants in spring. The rest go into the kitchen. Or to the chickens, if they’re nearby. The cycle closes in a very satisfying way.
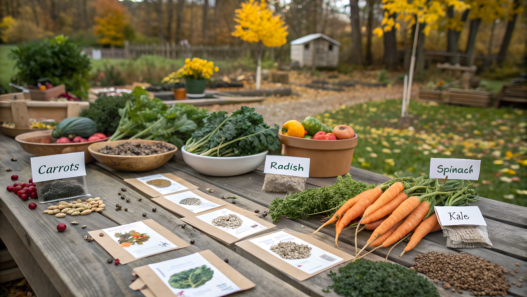
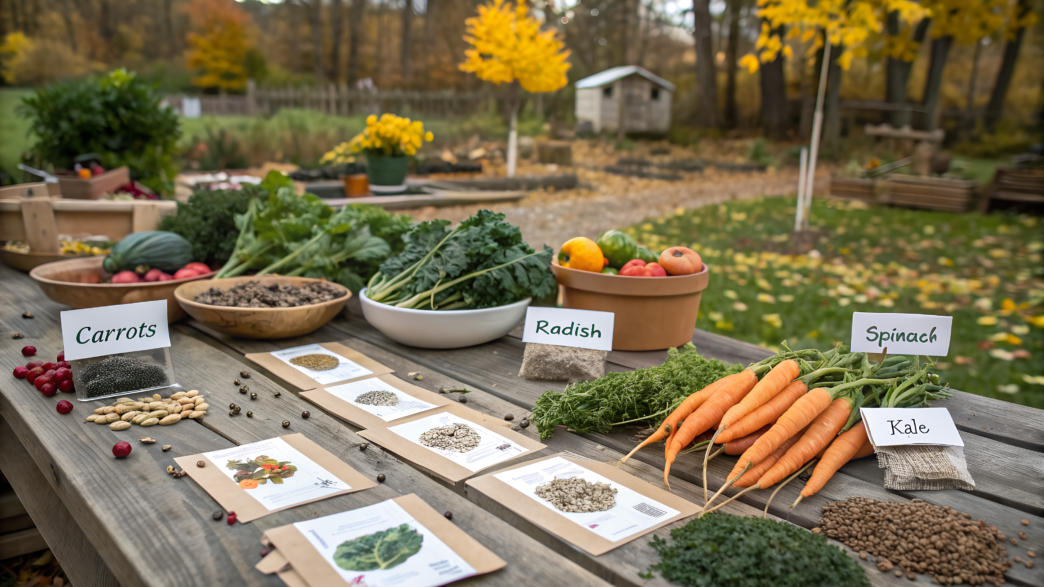
3. Best Seeds to Save for Next Year’s Garden
The best seeds to save for next season aren’t rare or expensive. Most of the time, they’re the simplest crops — the ones that give predictable results and don’t require a separate “seed operation” to manage them.
Which seeds are actually worth saving
It’s best to start with crops that:
- don’t cross-pollinate too easily
- produce mature seeds in their first season
- keep their traits without surprises
These are the ones I recommend starting with every single time.
1. Sunflower
An absolute favorite. The seeds are large, easy to spot, and hard to mess up when it comes to timing. Sunflowers rarely surprise you in spring — what you saved is what grows.
Perfect for first attempts.
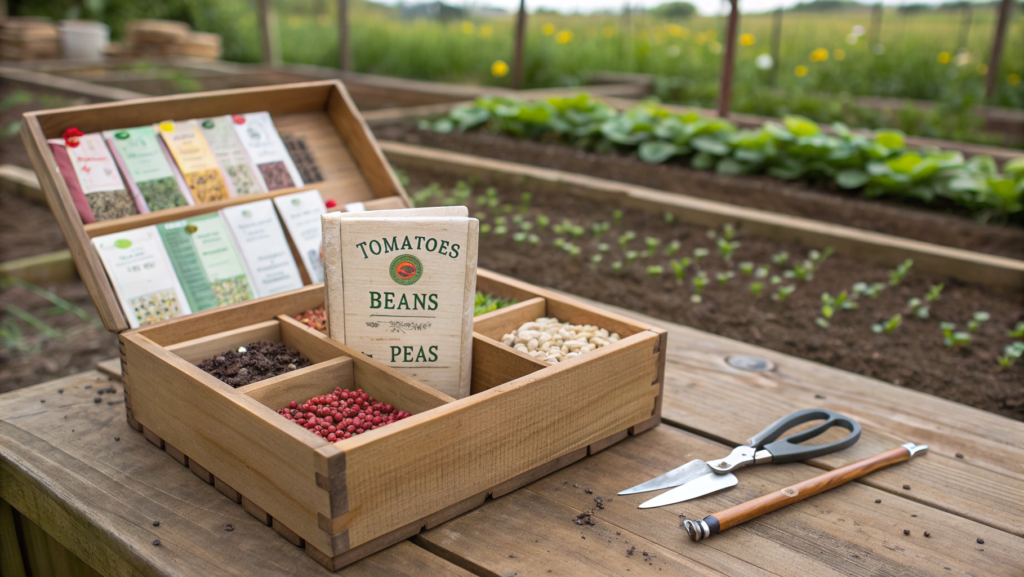
2. Beans and peas
If you want quick success, this is it. You simply leave the pods on the plant until they dry completely. The seeds inside are already ready for storage. No extra steps.
We usually save beans from the strongest plants — the ones that flowered first and stayed healthy the longest. The plants themselves make the choice clear.
3. Radish
Very few people let radishes flower, and that’s a missed opportunity.
If you leave a couple of plants until the end, they’ll produce long seed pods. This is a great beginner option: radishes rarely cross-pollinate and move quickly through their full cycle.
4. Lettuce
Lettuce is one of the easiest “seed-saving” vegetables. When it bolts, it forms soft, fluffy seed heads. The seeds fall easily and store well.
I simply place a bowl underneath and gently shake the plant. No complicated setups.
Many of these crops are self-pollinating or only lightly cross-pollinated, which means the chance of varieties mixing is very low. Extension recommendations often point to beans, lettuce, and sunflowers as good examples of crops that work well for home seed saving without special conditions.
Put simply: nature already did the hard part for us.
How I choose seeds for storage
I never save everything. My selection is simple:
- the largest seeds
- no spots or damage
- seeds from plants that looked healthy all season
The rest go into the kitchen or to animal feed. This kind of selection saves both space and energy in spring.
For storage, I rely on a simple system with paper envelopes and glass jars. For labeling, I use Seed Saving Envelopes for Garden Seeds — sturdy paper envelopes that are easy to write on and store neatly in stacks.
What not to save (at least at first)
If you’re just starting out, I wouldn’t recommend saving seeds from cucumbers, squash, or pumpkins.
They cross-pollinate easily, and the results in spring can be unpredictable. Sometimes fun. Sometimes… not so much.
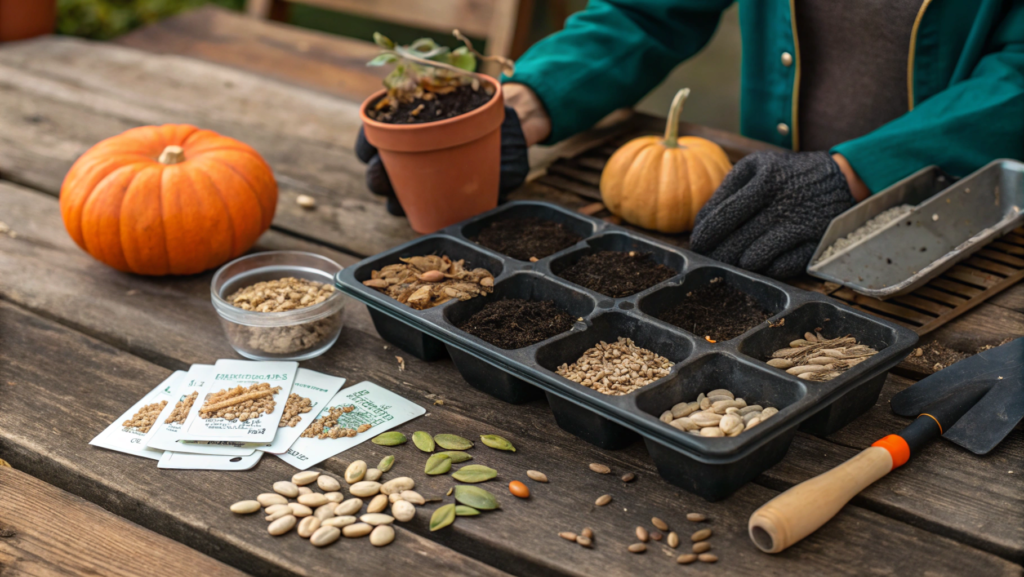
4. DIY Seed Starting Trays from Leftover Items
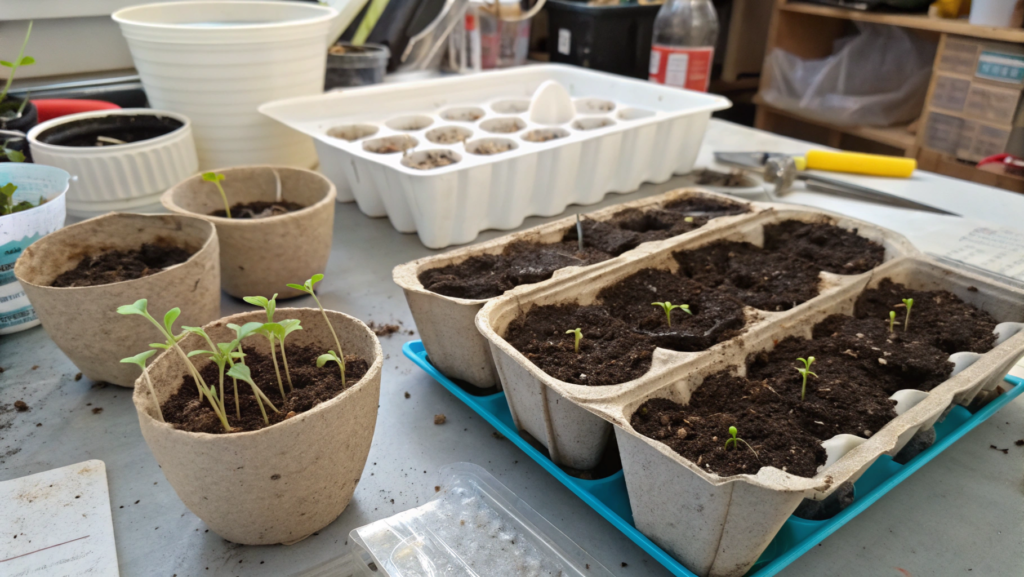
When you spend more than one season in the garden, there’s a moment when you simply stop throwing containers away. Yogurt cups. Salad green boxes. Egg cartons. Because at some point you realize: this would actually work great for seedlings.
And it’s not about saving money. It’s more about getting tired of buying the same things every single year. And a bit of curiosity too — will this work or not?
What actually works well (not just looks cute)
Not all “reused” containers are equally useful. I choose them based on three criteria:
- a depth of at least 2–3 inches (5–7 cm)
- the ability to add drainage holes
- enough stability so the container doesn’t tip over when watering
If I’m starting a lot of seedlings and want things to stay organized, I sometimes use Seed Starting Trays with Drainage Holes — especially when I’m sowing several dozen plants at once. They simply save time and space. If a purchase makes the process easier, it earns its place.
What I actually use
1. Containers from salad mixes and greens
Clear plastic boxes with lids are almost a ready-made mini greenhouse.
I poke a few holes in the bottom with a heated nail or awl, add soil to a depth of 2–2.5 inches (5–6 cm), and sow several rows at once.
The lid holds moisture during the first 3–5 days while seeds germinate. After that, I just remove it.
Simple. Effective. No overwatering.
2. Yogurt cups and sour cream containers
Perfect for:
- sunflowers
- beans
- peas
They’re deep enough for root development, and the volume keeps seedlings from stretching.
I make 2–3 holes in the bottom, label them with a marker, and place everything in an old tray.
This is where a tray with raised edges really helps. For a long time, our “tray” was just the lid from a large plastic storage bin. It worked perfectly.
3. Cardboard egg cartons (with limitations)
Yes, they can be used. But not for everything. I only use thick, uncoated cardboard. They work well for lettuce, mustard, and greens with shallow roots.The downside is that they soften quickly. That’s why I place them inside another container and water very carefully, usually with a spray bottle.
Extension services often emphasize that for starting seeds, drainage, consistent moisture, and airflow to the roots matter far more than the shape of the container.
If water doesn’t sit and roots can breathe, the plant doesn’t care whether it’s growing in a perfect plastic tray or something improvised.
A small but important detail from experience
Don’t fill containers all the way to the top. I always leave about ½ inch (≈1–1.5 cm) of space. It makes watering much easier and reduces the risk of washing seeds out.
And one more thing — don’t be afraid to mix approaches. About half of my seedlings almost always grow in DIY containers, and the other half in store-bought trays. And honestly, the plants don’t react to that at all.
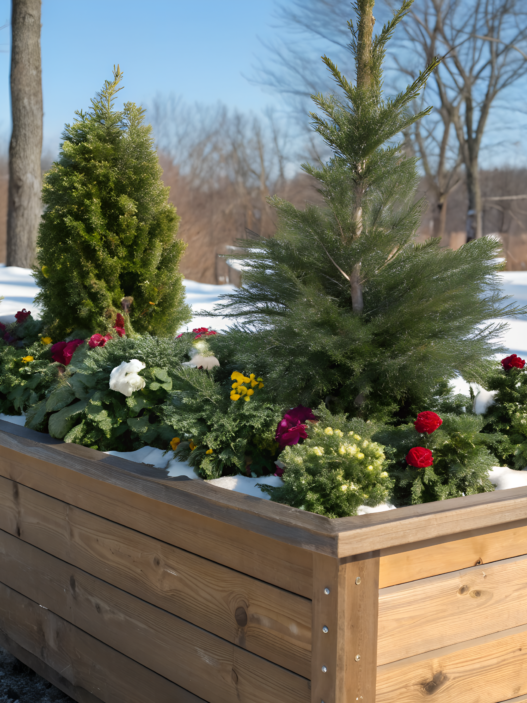
5. Cold-Weather Seeds That Still Thrive
When nights suddenly turn cool, mornings smell like damp leaves, and the beds start to look a little tired, some seeds keep growing as if everything is just getting started.
And that’s simply their normal biology.
Why some seeds aren’t afraid of the cold
With cold-hardy crops, growth slows down, but key processes don’t stop. Cooler air reduces moisture loss, while roots keep working in warm soil. That’s exactly why fall greens often turn out denser and juicier.
Agricultural Extension recommendations explain it plainly: at soil temperatures around 40–50°F (≈4–10°C), many leafy crops feel more stable than they do in summer heat. Less stress means more even growth.
Seeds I plant without hesitation
1. Spinach
Spinach is the absolute late-season champion. It tolerates nighttime frosts down to 20–25°F (≈ −6…−4°C), especially once plants are established.
I sow it densely and then thin as it grows. Even if the leaves get a bit frost-damaged, they recover quickly in spring.
2. Mâche (Corn Salad / Lamb’s Lettuce)
It grows slowly, but steadily. It handles cold better than most lettuces and produces soft, compact greens. It’s often underestimated — and it really shouldn’t be. For cold regions, it’s a solid choice.
3. Mustard Greens
Mustard doesn’t just survive cooler weather — it improves with it. Cold temperatures remove the sharp edge and leave a deeper, richer flavor.
I usually sow it late in the season and harvest leaves as needed, without pulling the whole plant at once.
4. Kale
Yes, kale isn’t fast. But if it has time to establish before cold weather hits, fall and winter become its working season.
After the first frosts, the leaves turn noticeably sweeter. This happens because the plant builds up sugars as protection against the cold. Simple physiology, very satisfying results.
How I plant cold-hardy crops
- I sow a little more densely than in spring
- I don’t mulch right away, letting the soil warm during the day
- I water less often, but more deeply
And yes, if the forecast calls for a sharp temperature drop, a simple floating row cover usually solves almost everything. It’s lightweight, doesn’t press plants down, and genuinely helps them get through the first frosts.
Cold isn’t the enemy. Moisture without airflow is. I always make sure beds aren’t waterlogged and don’t get sealed under dense mulch too early. A fall garden needs less intervention, but more attention. And that’s exactly why I love it.
6. How to Store Garden Seeds for Winter
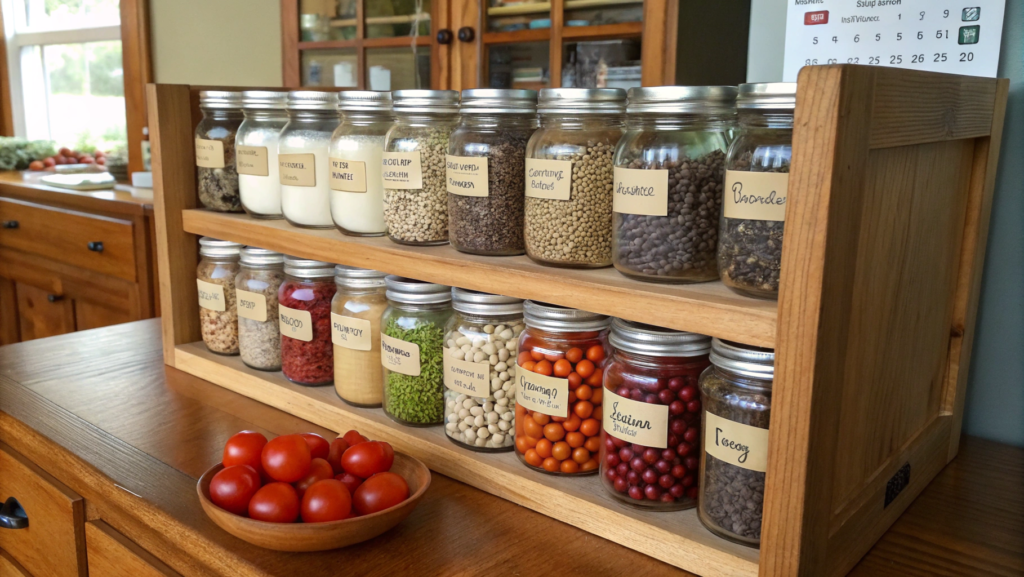
Storing seeds over winter is the stage where a lot of people mess things up. Not out of laziness. Mostly because it feels simple: just put them in a jar and forget about it. We thought the same. Once. Then spring came, and half the seeds didn’t sprout. Not a disaster, but frustrating — especially when those were seeds you collected by hand.
Over time, a very simple system took shape, along with a clear understanding of what seeds actually don’t tolerate.
Three things that ruin seeds in winter
If you strip it down, seeds are damaged by:
- moisture
- sharp temperature swings
- light
A dry place, steady cool temperatures, and minimal light are what’s most often considered optimal for home seed storage. Under those conditions, seeds quietly sit through winter without losing their ability to germinate.
How I store seeds, step by step
1. Full drying — the most important step
Before storage, seeds need to be completely dry. I leave them:
- for at least 7–10 days
- in a dry room
- spread out in a thin layer, not piled
If a seed snaps when pressed and doesn’t bend, it’s ready.
2. Paper first, glass later
I never put freshly collected seeds straight into glass.
First comes:
- paper envelopes
- labeling the crop, variety, and year
- letting them “breathe” for another couple of days
For this, Seed Saving Envelopes for Garden Seeds work really well. The paper is sturdy, doesn’t trap moisture, and is easy to label with a regular marker.
3. Long-term storage
After that, the envelopes go:
- into glass jars with lids
- sometimes with a small silica gel packet
- into a dark cabinet or pantry
Our storage temperature usually stays around 40–55°F (≈4–13°C). That’s more than enough.
I rarely use the refrigerator — only for seeds I plan to keep longer than two seasons.
Where you store seeds matters more than it seems
Seeds store best where it’s dark, dry, and free of sudden temperature changes. For us, that’s a regular pantry or the lower shelves in closets — places that don’t heat up during the day or cool down sharply at night.
The kitchen almost always turns out to be a bad choice. Too much moisture and constant temperature changes. The garage looks logical at first, but daytime warmth and nighttime cold create swings seeds really feel. The greenhouse is a separate story altogether. Even in winter, it has its own rhythm, and for seed storage that’s usually a downside.
The more stable the conditions, the calmer seeds make it through winter. And in that sense, an ordinary cabinet often ends up being the most reliable place.
Small details that make a difference
- I don’t store seeds in airtight plastic without ventilation
- I don’t mix varieties in one envelope
- I refresh seed stock every year, even if seeds still seem “fine”
7. Favorite Seeds to Snack on During Planting Season
When your hands are in the soil, a seedling tray is balanced on your knees, and seed packets are scattered nearby, it’s very easy to forget to eat properly. And then you suddenly realize it’s already one in the afternoon, and you’ve been running on coffee alone. Not the best plan.
That’s why I have a small set of go-to seed snacks that are easy to keep nearby and actually make you feel nourished, not like you’re just mindlessly chewing on something.
1. Sunflower seeds, shelled or in-shell
If I know I’ll be working for a long stretch without time for a real break, I grab shelled seeds. If the work is calmer — sowing greens or labeling rows — I’ll take them in-shell. The whole crack-crack rhythm works like a metronome, honestly.
This is how I usually do it:
- I take a small 8 oz jar (≈240 ml)
- add just enough seeds to last a couple of hours
- keep it next to water, because it’s easy to forget to drink when eating seeds
I like options like DAVID Roasted and Salted Sunflower Seeds — not because it’s the only good brand, but because it’s predictable: flavor, texture, freshness.
2. Pumpkin seeds (pepitas)
These are my favorite when I’m working in cooler weather. They feel more “warming,” richer, and they keep me full longer.
My working setup is simple: I keep them in a small bag and add a handful to any quick snack — an apple, yogurt, a piece of cheese. When you’re constantly squatting, standing up, carrying trays, this kind of add-on really saves you.
From experience, a couple of things matter:
- pumpkin seeds absorb moisture from the air easily
- if left open, they soften quickly
So I always seal them tightly, especially when working outside.
3. Sesame and poppy seeds
These aren’t for eating by the handful. They’re more of a small trick for days when I want something light. I keep a mix of sesame and poppy seeds in a tiny jar and sprinkle it on everything: salad, toast, eggs, even soup.
Why this works so well during planting season:
- it takes up almost no space
- no prep required
- adds flavor with zero effort
The key is moderation. This is a light topping, not the base of a meal.
4. Flax and chia seeds
I like flax and chia, but they’re not “grab-and-go” seeds. They work best when you have proper water, yogurt, or porridge — not when you’re rushing between beds.
My usual routine:
- in the morning, I make yogurt or oatmeal
- add 1–2 tsp (≈5–10 ml)
- then I can work for a couple of hours without thinking about food
A small rule that saves me every season
I try to keep planting snacks so that:
- they can be eaten with one hand
- they don’t turn the work area into a sticky mess
- they don’t make me crave something sweet right after
Seeds are perfect here: small, filling, straightforward. And the best part — this isn’t some special “diet.” It’s just a smart, familiar snack that fits naturally into long hours of garden work.
8. Companion Planting with Seed Crops
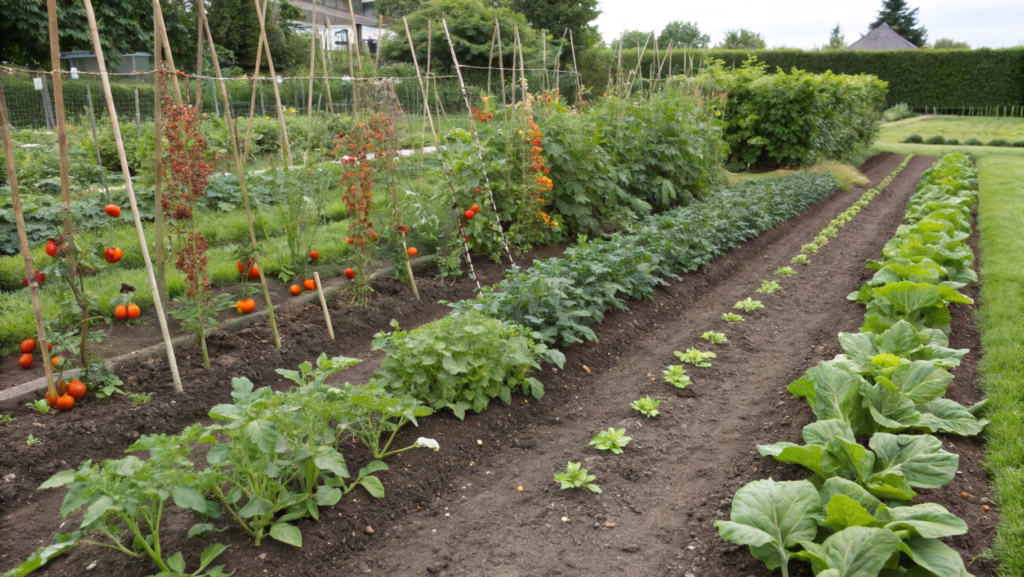
For me, everything here is built on observation: who feels better next to whom, and who starts acting fussy.
When we began saving seeds intentionally, one thing became obvious very quickly — not all plants tolerate neighbors equally well, especially if your goal is quality seed production, not just greens for quick harvest.
Why it’s worth thinking about neighbors for seed crops
Seed plants stay in the bed much longer than usual. They are:
- taller
- stronger
- flowering for longer
- actively attracting insects
If you plant them randomly, they start getting in each other’s way — shading, competing for nutrients, or simply creating chaos. Companion planting here isn’t about looks. It’s about letting seeds mature calmly.
Crops that work well together
1. Sunflower + beans
This is one of the simplest and most reliable combinations. Sunflowers provide height and structure, beans contribute nitrogen and an extra harvest. When beans are grown for seed, they need support but not dense shade. Sunflowers handle that perfectly.
I leave 12–18 inches (30–45 cm) between plants so sunflower heads stay well ventilated and seeds don’t trap moisture in fall.
2. Lettuce + radish (for seed)
Radish left for seed shoots up quickly and creates light, airy shade. Lettuce underneath overheats less and keeps its leaves dense for longer. The key is spacing. Seed plants need room. I always give lettuce more space than during regular sowing.
3. Kale + dill (for seed)
Dill taken all the way to flowering attracts a lot of beneficial insects. When kale seeds are maturing nearby, this noticeably improves the overall condition of the bed. Less aphids. Fewer random issues. This is ecosystem work on a small scale.
What I don’t experiment with anymore
There are combinations I now avoid completely:
- different varieties of the same crop planted close together if seeds will be saved
- squash-family crops growing near each other when variety purity matters
- aggressive herbs next to seed plants
The rule is simple: if there’s a risk of cross-pollination or strong competition, separation works better.
Companion planting recommendations often come down to root structure, plant height, and flowering time. When plants aren’t competing for the same resources and bloom at different times, they interfere less with each other and produce more stable seeds.
That’s one reason mixed plantings often give more consistent results, especially over a long seed-saving season.
How I plan these beds in practice
I don’t use complex схемes. Usually I:
- choose one main seed plant
- add one or two supporting crops
- leave more space than feels necessary
If I need a quick reminder of which plants are being saved for seed, I use simple markers and labels — sometimes just wooden sticks.
9. Easy Seed Gifts for Friends and Neighbors
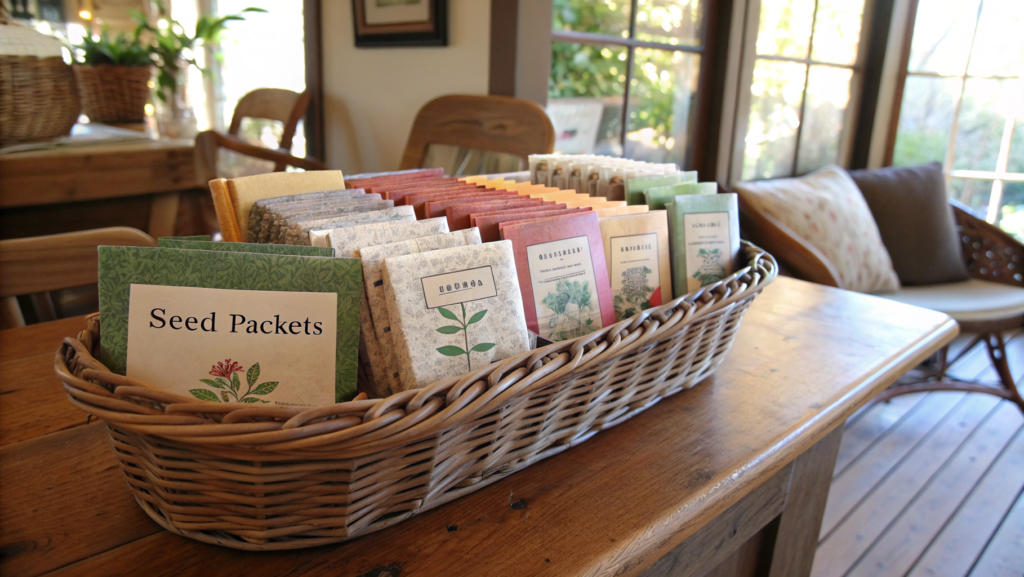
Seeds are one of the simplest and warmest gifts you can give in fall. Without that feeling of “I picked the wrong thing.” You’re simply sharing something that worked well for you.
This kind of gift works for almost anyone, but it’s especially appreciated by people who already show interest in gardening, plants, or home-grown food — even if it’s still just curiosity.
Which seeds work best as gifts
I always choose seeds that:
- germinate easily
- don’t require complicated conditions
- give results even for beginners
And here, the list almost always repeats itself.
1. Sunflowers (especially dwarf varieties)
This is almost a guaranteed win. People love sunflowers. Even those who “aren’t gardeners.”The seeds are large, easy to plant, and results show up quickly. And they’re beautiful. Honestly, very few people stay indifferent.
2. Lettuce and mustard greens
Perfect for people who live in the city or grow plants on a balcony. I usually gift these with a short handwritten note like: “sow thick, harvest young.” That’s enough.
3. Beans or peas
Especially when these aren’t store-bought packets, but seeds “from our own garden.”
People really like that sense of continuity: you plant, you harvest, and you plant again.
How I package seeds so they look intentional, not rushed
Everything needs to feel simple and clear. My basic setup:
- paper envelopes
- handwritten labels
- crop name and year
I use Seed Saving Envelopes for Garden Seeds — they’re sturdy, don’t wrinkle easily, and handle storage and mailing well. No decoration. No surprises.
Sometimes I add a tiny note:
- when to sow
- how dense to plant
- what to expect
One line. Not an instruction manual.
People don’t need another “perfect set.” They enjoy receiving something living, simple, and human. Seeds are an invitation. Not an obligation.
Plant them if you want. Pass them on if you don’t. That alone removes a lot of pressure.
A small observation from experience
The best reactions I’ve ever gotten weren’t to rare or exotic seeds, but to the most ordinary ones. The ones that actually grow.
Sometimes a year later someone comes back and says: “Those lettuces are still self-seeding in my garden.” That’s what a real gift looks like.
10. Fall Seed Cleanup and Seedling Care
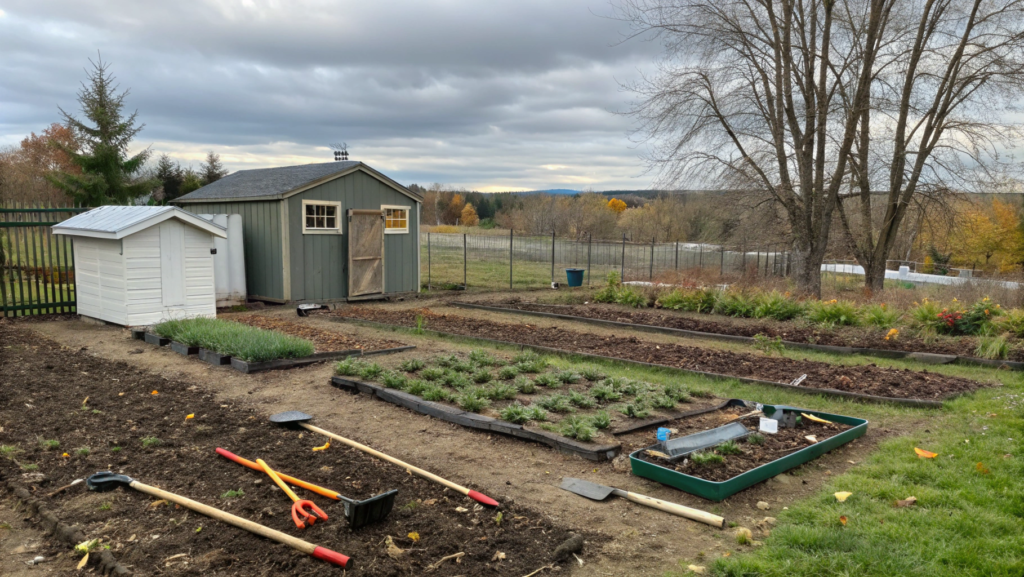
Fall seed cleanup is a calm way to close the season. You’re not pulling everything out at once — you’re leaving order behind so spring doesn’t start from zero. For a long time, I treated this step casually. Like, “I’ll deal with it later.” Spring always caught up with that “later” — weeds, mold, mixed-up varieties, weak seedlings. Not a disaster, but frustrating. Now I do it differently. Slower. But only once.
Where I start with fall seed cleanup
I never try to do everything in one day. Usually, it’s 2–3 short trips into the garden.
I start by:
- removing empty stalks from seed plants
- shaking off remaining seeds from dry flower heads
- gathering labels and markers so nothing gets lost
It’s important not to pull everything at once. Some plants are still protecting the soil and young seedlings from wind and sharp nighttime temperature swings.
What I leave in the bed and what I remove
I always leave:
- legume roots (beans, peas) — they keep working in the soil
- mulch, if it’s dry and not compacted
- low-growing plants that are still alive and not in the way
I remove:
- diseased plants
- anything that has already started to rot
- dense piles of plant debris without airflow
There’s no strict checklist here. I look at condition, not at what’s “allowed” or “not allowed.”
Soil guidance tends to agree on one thing: in fall, it’s important not to seal the soil and not to leave wet organic matter in a dense layer. Air and moderate dryness help microorganisms break things down over winter without turning beds into a spring problem.
That’s why I always check: if I lift the mulch and it feels wet or smells off, it’s better to loosen it or remove part of it.
Caring for fall seedlings
This is the part many people miss. If something sprouts in fall, it’s not “on pause.” It’s alive and following its own rules.
My basic approach:
- I water less often, but more deeply
- I avoid nitrogen feeding
- I make sure the soil isn’t constantly wet
If the forecast calls for a sudden cold snap, I simply cover seedlings with a light fabric. I don’t insulate. I don’t seal them in. The goal is to smooth temperature swings, not to create a greenhouse.
Small things that make spring much easier
- I label beds even in fall
- I remove extra supports and stakes
- I put tools back in one place right away
It sounds minor. But in spring, when everything starts growing at once, this saves a lot of time and nerves.
That quiet fall calm
Every time I close the season, one thought keeps coming back: seeds aren’t about control. They’re about trust. You do your part, and then you let time and nature move forward on their own. Without rushing, constant adjustments, the feeling that you have to finish everything.
Fall planting, seed saving, and seed care slowly teach calm. And that’s what stays with me the longest — longer than harvests or neatly labeled envelopes. In spring, that feeling helps more than anything else.
If you save seeds too, experiment, or are just starting to pay attention, I’d genuinely love to hear it. Leave a comment and share which seeds you’re saving for next year or which fall habits turned out to be the most useful for you.
Shall we keep the conversation going?