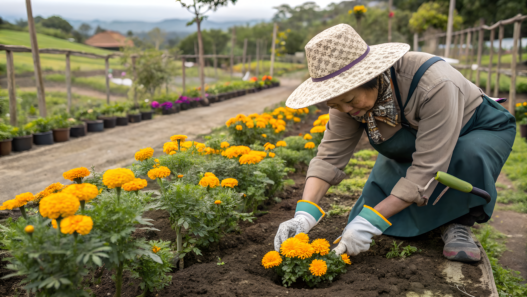

Every gardener wants to know the secrets of planting marigolds — not just so something blooms, but so the plants are strong, smell the way they should, actually help the garden, and don’t burn out halfway through the season.
Marigolds are very quick to show what works for them and what doesn’t. They don’t need complicated systems, expensive fertilizers, or fancy gardening tricks. What they do care about are the small decisions we often make on autopilot: how much space to leave, when to water, how not to overfeed, and when to cut back what’s no longer needed.
Here, I tried to gather everything that truly affects the result. This is hands-on practice, tested first on a small plot in Idaho and later on a two-acre permaculture garden in the Pacific Northwest.
These are working principles that help marigolds do their job — in vegetable beds, in containers, and even at the end of the season, when it feels like it’s already too late to change anything.
1. Choosing the Right Marigold Varieties
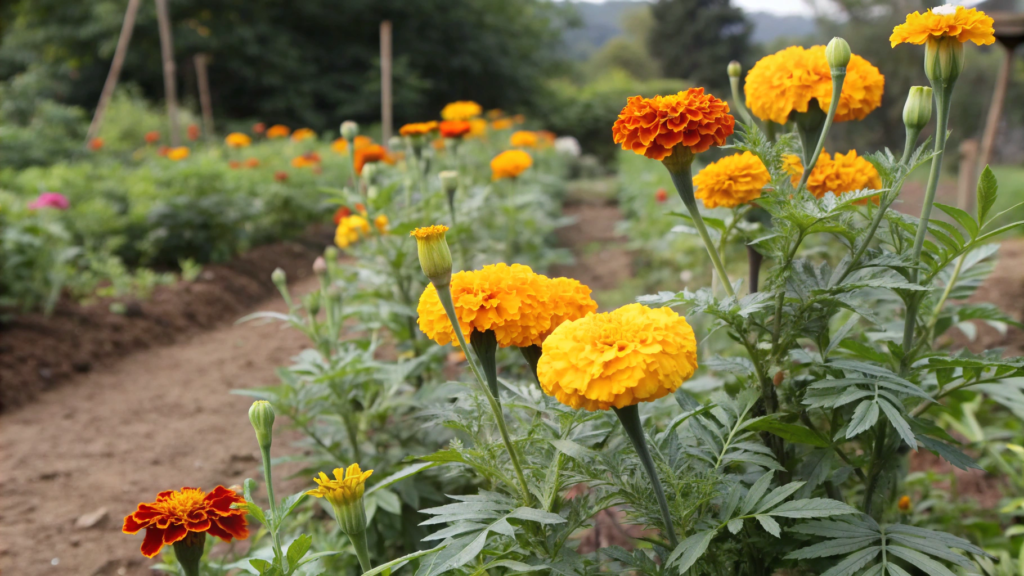
Strangely enough, the problem is almost always the same — the wrong variety was chosen. Marigolds are not one universal flower “for everything.” They are very different. In height, in scent, in root strength, and even in how well they repel pests.
Main Types of Marigolds (and Why They Matter)
In our garden, we don’t use marigolds “for looks.” Here are three groups that actually make a difference:
- French Marigolds (Tagetes patula)
Low-growing, compact, often up to 12 inches (≈30 cm). Our favorites for vegetable beds.
They release compounds that suppress soil nematodes — this has been described in studies on biological plant protection. - African / American Marigolds (Tagetes erecta)
Tall and powerful, up to 36 inches (≈90 cm). Stronger root systems and a sharper scent.
They work great along the garden perimeter or near cabbage and tomatoes. - Signet Marigolds (Tagetes tenuifolia)
Small, delicate, with a citrus-like aroma.
And yes — they’re edible. We often add the petals to salads.
As pest control, though, they’re less effective.
How to Choose a Variety for a Specific Purpose
There’s no universal answer here, but there is logic. In short:
- For vegetable beds → French marigolds
- For garden borders → African marigolds
- For containers and edible flowers → Signet marigolds
When we first started restoring our abandoned plot in Idaho — the one where the grass was knee-high and the soil felt like concrete — we planted tall African marigolds between lettuce and carrots.
A month later, it was obvious that this was a mistake. They shaded everything around them, pulled water aggressively, and literally pushed their neighbors out.
Since then, the rule has been simple: low varieties go into beds, tall ones stay on the edges.
What to Look for When Buying Seeds
I know how tempting seed packets can be. Still, I always read the fine print.
Pay attention to:
- Plant height (in inches, not words like “compact” or “tall”)
- Days to maturity — usually 50–70 days
- Type (Tagetes patula / erecta / tenuifolia)
- A note that the variety works for companion planting
A Small but Important Detail About Scent
This part is often underestimated. The stronger the smell, the better the protection. Varieties without a strong aroma may look pretty, but as “guards,” they’re mediocre at best.
I always do a simple test: gently rub a leaf between my fingers. If the scent hits you right away — YES. That’s what you want in the garden.
Quick Variety Selection Checklist
- Decide where the marigolds will grow — a bed, a container, or the perimeter.
Location decides everything: the same variety can be a helper or a problem. - Choose the type: French, African, or Signet.
This isn’t about looks, but about function and plant behavior. - Check the height in inches, not marketing words like “compact.”
I no longer trust descriptions — only numbers. - Make sure the variety is suitable for companion planting.
Not all marigolds are equally helpful for vegetables, and that’s okay. - Pick seeds with clear descriptions, not just a pretty picture.
If a producer hides details, I move on.
A little more time spent at the beginning — and the season brings far fewer problems.
We learned that the hard way.
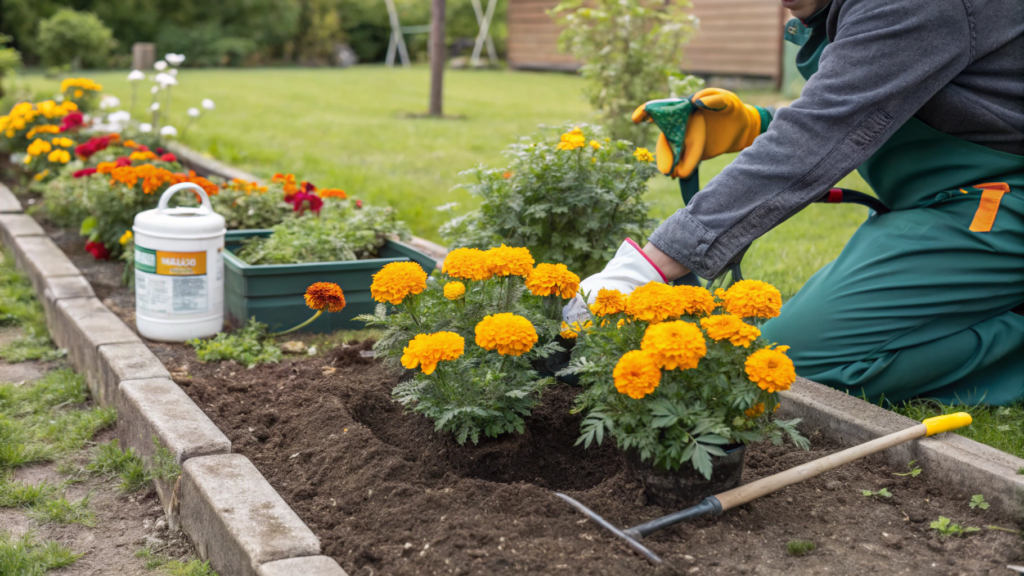
2. Preparing Soil for Strong Growth
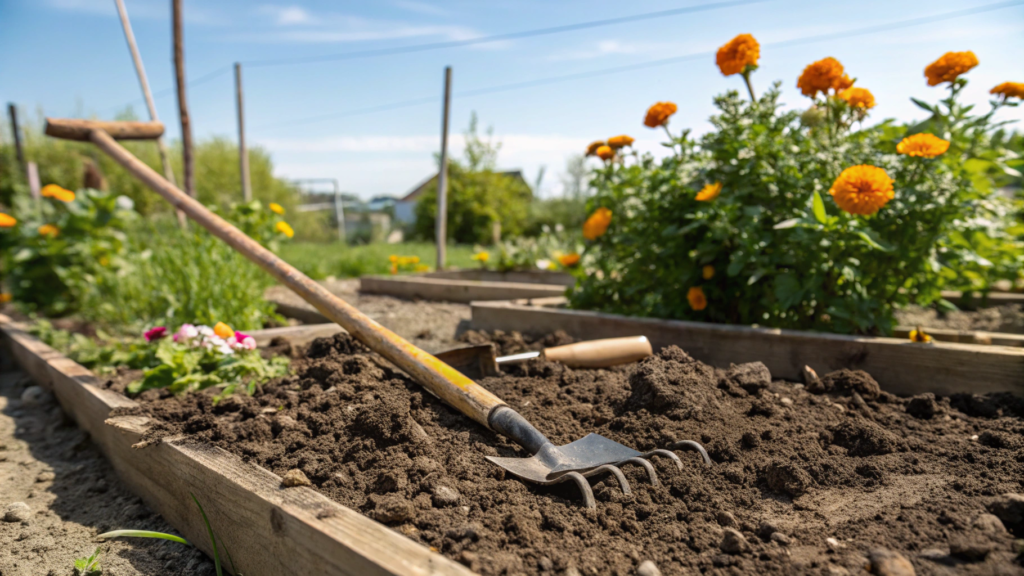
Preparing the soil for marigolds makes a huge difference. But here’s the thing — marigolds don’t need “rich” soil in the usual sense. They need the right soil. We didn’t figure this out right away.
In the early years, back on our Idaho property, I added a lot of compost, some manure, really tried to treat the soil. The result was weird. The plants grew big and green, very confident-looking — but flowering was weak. Lots of foliage, yes. Flowers? Meh. And that was frustrating, because the expectations were completely different.
Over time it became clear: marigolds bloom better in moderate, well-structured soil, not in overfed ground.
What Kind of Soil Marigolds Actually Need
If you strip it down to the essentials, marigolds feel best in soil that:
- drains water well
- stays loose even after rain
- contains a moderate amount of organic matter
- has a pH in the 6.0–7.0 range
Agronomic research on Tagetes patula and Tagetes erecta shows that excess nitrogen directly reduces flowering intensity by pushing leafy growth instead. This is noted by specialists from University of Florida IFAS Extension and USDA Agricultural Research Service. We’ve seen the same thing ourselves — season after season.
Why Structure Matters More Than Fertilizer
Marigold root systems are compact but sensitive. When soil is compacted or poorly drained, roots literally struggle to breathe. Growth slows down, plants become less resilient, and they don’t perform their protective role in the garden as well.
On our current property in the Pacific Northwest, the soil is heavy and clay-rich. The first thing we did was not add fertilizer at all. Instead, we focused on structure — loosening, lightening, creating space for air and water. After that, marigolds took off faster than they ever did on “richer” beds.
What to Add to the Soil (and Where to Stop)
Works well:
- mature compost at a depth of 1–2 inches (≈2.5–5 cm)
- leaf mold
- a small amount of coarse sand to improve drainage
- beds previously used for legume crops
Better to avoid:
- fresh manure
- nitrogen-heavy fertilizers
- heavy clay soil without loosening it first
For containers and small plantings, I often use FoxFarm Happy Frog Potting Soil — marigolds stay calm and predictable in it, and that’s exactly what you want.
Soil Preparation Step by Step
- Remove weeds and roots to a depth of about 8 inches (≈20 cm).
Even small leftover roots will start competing with marigolds within a couple of weeks. - Loosen the soil with a garden fork without flipping the layers.
This keeps the soil microbiology intact and helps roots adapt faster. - Add 1–2 inches of mature compost and gently mix it into the top layer.
Thick compost layers usually mean leaves, not flowers — tested and confirmed. - If the soil is heavy, add coarse sand or fine gravel.
This is especially important in regions with frequent rain. - Level the surface and let the bed rest for a couple of days before planting.
The soil settles, and seeds won’t sink deeper than they should.
Tip. Before planting, I always lightly moisten the soil — not wet, just evenly damp. Seeds and transplants respond noticeably better this way. Germination is more even, and plants root faster.
3. Sunlight and Watering Essentials
Sunlight and water for marigolds are a big deal. Marigolds are very sensitive to these signals, even though they often look easygoing and low-maintenance.
We really felt this on our new property in the Pacific Northwest. The sun here is softer, the rains are more regular, and watering routines that worked perfectly in Idaho suddenly stopped working. The marigolds survived, but they looked… tired. Not sick — just tired. Smaller flowers, looser growth. Clearly, something was off.
How Much Sun Marigolds Actually Need
Marigolds are sun-lovers, but not sun fanatics.
Optimal conditions:
- 6–8 hours of direct sunlight per day
- morning sun is ideal
- light afternoon shade is acceptable, especially in hot climates
In periods of sustained heat (90°F+ / ≈32°C and above), full all-day sun can lead to faded blooms, a shorter flowering window, and root stress.
Agronomists from University of California Agriculture and Natural Resources note that moderate shading in hot climates helps annuals maintain stable flowering for longer. This matches exactly what we’ve seen on the southern side of our garden.
If marigolds stretch and “search” for light — there isn’t enough. If leaves look pale and flowers get smaller — there’s too much.
Watering: Common Mistakes
The most common mistake is frequent shallow watering.
Marigolds tolerate it… but they don’t like it.
They’re much happier with:
- infrequent but deep watering
- a topsoil layer that dries out properly
- no constant moisture around the roots
Deep watering encourages a stronger, deeper root system, while shallow watering keeps roots near the surface and makes plants more dependent and less stress-resistant.
How Often to Water (Guidelines, Not Rules)
On average:
- in ground — 1–2 times per week
- in heat — more often, but deeper
- in containers — when the top 2 inches (≈5 cm) dry out
I always check the soil with my finger. If it’s dry at about 2 inches deep, it’s time to water. If it’s still moist — no, even if today is “watering day.”
The Right Sun and Water Routine
- Choose a spot with 6–8 hours of direct sunlight per day.
Morning sun jump-starts growth and flowering, while light afternoon shade helps reduce overheating in hot weather. - Pay attention to how quickly the soil dries after rain.
If the ground is still wet after 24 hours, that’s a risk for roots, even when you’re watering infrequently. - Water deeply so moisture reaches 6–8 inches (≈15–20 cm).
Shallow watering keeps roots near the surface and makes plants dependent on frequent watering. - Let the top layer of soil dry out between waterings.
Light, short-term “thirst” encourages stronger root development and supports better flowering. - In hot weather, watch the leaves instead of the calendar.
If they droop slightly by evening but recover by morning, the balance is close to ideal. - In containers, check moisture daily.
Pots dry out and overheat much faster, especially in sun and wind. - Water in the morning, not in the evening.
Leaves dry faster, and roots get moisture before the heat of the day sets in.
Containers
In pots, everything happens faster. Including mistakes. Containers:
- dry out faster
- overheat more easily
- require closer monitoring
Observation from Practice
When marigolds get the right balance of sun and water, they start to smell stronger. And that’s directly tied to their protective function. The scent isn’t just “aroma.” It’s a signal that the plant is healthy and actively producing compounds that help repel pests.
4. Spacing Tips for Healthy Blooms
Marigolds don’t like being crowded. Not because they’re picky, but because air circulation, light, and root access to moisture directly affect both the quantity and quality of blooms. This is supported by agronomic observations and plain, hands-on practice. Proper spacing between marigolds is one of those things that’s almost always underestimated.
When marigolds are planted too close together, air gets trapped between the plants, leaves stay wet longer, the risk of fungal diseases increases, and plants start competing for light and water.
Specialists from University of Illinois Extension note that overcrowded annual plantings suffer from diseases more often and produce fewer flowers, even with good care. This lines up perfectly with what we’ve seen in our own garden — especially during rainy seasons.
Recommended Spacing (No Guessing)
These are the guidelines that actually work:
- French marigolds (Tagetes patula) — 8–10 inches (≈20–25 cm)
- African / American marigolds (Tagetes erecta) — 12–18 inches (≈30–45 cm)
- Signet marigolds (Tagetes tenuifolia) — 6–8 inches (≈15–20 cm)
If you’re unsure, it’s always better to leave a bit more space rather than less. Marigolds fill in quickly, especially in warm soil.
Proper Spacing Step by Step
- Identify the variety and its mature size, not how the seedling looks right now.
Marigolds grow fast. What looks neat today can turn into a dense bush in a month. I always go by the stated plant width, not by how it looks at planting time. - Measure spacing from plant center to plant center, not leaf to leaf.
This keeps spacing correct as plants grow. A hand-width or a short stick with a mark works better than guessing. - Take neighboring crops and their growth into account.
Near tomatoes, peppers, or cabbage, I add a few extra inches because these plants quickly take light and air. - Leave room for air circulation, especially in humid climates.
If leaves stay wet for a long time after watering, spacing is too tight — even if it looks good visually. - Don’t fill empty space with extra plants — use mulch instead.
A thin layer of mulch looks tidy and holds moisture, while overcrowding almost always leads to weaker flowering.
Containers and Plant Density: A Different Logic
In pots, the rules are even stricter. One marigold plant per container:
- 8–10 inch container for French and Signet marigolds
- 12–14 inch container for African marigolds
If you want a “bouquet look,” it’s better to use multiple containers rather than overfilling one. Simple, stable pots like Classic Home and Garden Resin Planter work especially well.
When marigolds are spaced correctly, bushes hold their shape, flowers appear consistently, the scent is noticeable but not overpowering, and leaves don’t constantly touch. If leaves are rubbing against each other all the time, it’s already too crowded, even if it looks “pretty.”
5. Marigolds as Natural Pest Control
Marigolds as natural pest control are not a myth from gardening forums and not “grandma’s tales.” But they’re also not a magic pill. They work only if you understand how, where, and why to use them. We tested this over many years — first on a small plot in Idaho, then more systematically on our two-acre permaculture property in the Pacific Northwest.
And yes, there were seasons when marigolds didn’t work. Unfortunately. Because what matters is not the fact that you planted them, but the strategy behind it.
How Marigolds Actually Protect the Garden
Marigolds act in several ways at once — and some of these effects are described in studies on Tagetes spp., including work by USDA and universities in Florida and California.
Here’s what they really do:
- Suppress soil nematodes
The roots, especially of French marigolds, release thiophenes — compounds that reduce populations of root nematodes. This is one of the most well-documented effects. - Disrupt pest insects’ orientation
Their strong scent masks the “smell signals” of vegetable crops. Insects literally lose their bearings. - Create visual noise
Dense, colorful plantings make it harder for pests to quickly locate their target.
Important: marigolds don’t kill everything outright. They make the environment less comfortable for pests — and more resilient overall for the garden.
Which Pests Respond Best
Based on our experience and agronomic observations, marigolds are especially effective against aphids, whiteflies, cabbage moths, root nematodes, and some types of beetles.
That said, they don’t replace netting, crop rotation, or healthy soil. They’re one element of a system — and that’s exactly how they work best.
Where Marigolds Are Useless (and This Matters)
If you plant one lonely marigold “somewhere nearby,” the effect will be minimal.
If the variety has no scent — same story.
If the plants are weak or overfed — don’t expect protection.
How to Use Marigolds for Garden Protection
- Choose the right variety, not just the first one you see.
French marigolds (Tagetes patula) work best against nematodes. Pretty but scentless hybrids are weak defenders. - Plant marigolds in groups, not as single plants.
One plant is decoration. A group of 3–5 plants already creates an effect. - Place them in active contact zones, not “just for show.”
Between tomatoes, along cabbage beds, next to root crops — where pest pressure actually exists. - Watch plant health closely.
If marigolds grow poorly, they barely perform their protective role. Scent is a strong indicator here. - Give them time to work.
The effect on soil and insects builds gradually. This is not an instant response.
Containers vs. Garden Beds: Does It Work the Same?
In containers, marigolds affect soil less, but they still help with insects. We often place pots of marigolds near greenhouse entrances and next to vulnerable crops.
When marigolds truly work as protection, you can smell it. The scent becomes stronger, more distinctive, slightly sharp. If it’s missing, something went wrong — the variety, the conditions, or the nutrition.
6. Growing Marigolds in Containers
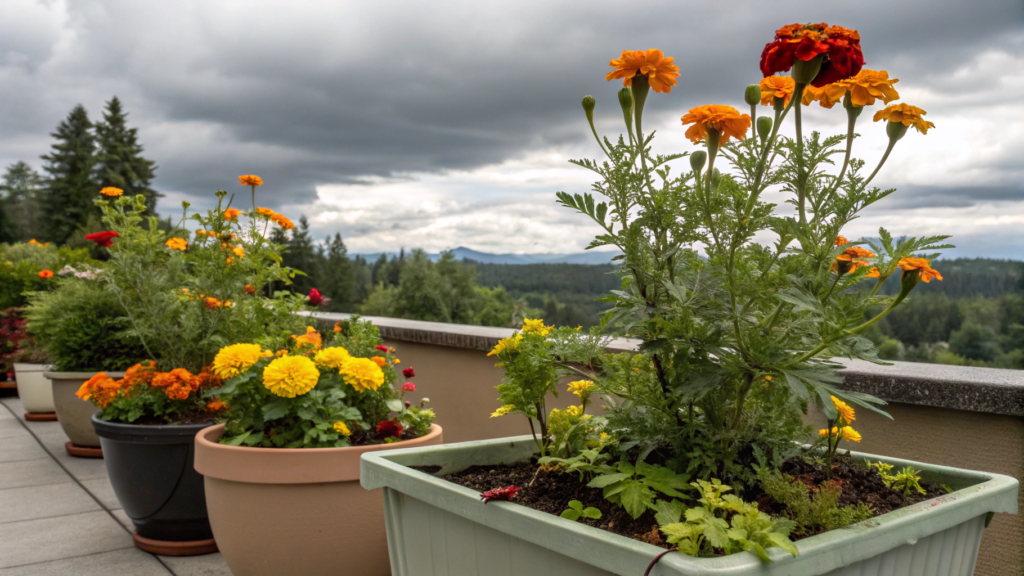
Growing marigolds in containers comes with its own advantages, its own risks, and the same mistakes that repeat year after year. For a long time, we treated containers as something secondary, until we realized that marigolds in pots can actually be the most stable and controllable plants in the entire garden.
This became especially obvious in the Pacific Northwest, where soil and weather often set the rules. Containers give you control. And control brings calm. And flowers.
Why Marigolds Do Well in Containers
Marigolds have a compact root system and high adaptability. But there’s a catch: in containers, they react to mistakes much faster. If something is off, you’ll see it in a few days, not a month later.
Pros of container growing:
- full control over soil
- fewer soil-borne pests
- mobility (sun, wind, heat)
- ideal for patios, entryways, and greenhouses
There are downsides too, and they matter:
- soil dries out faster
- roots overheat more easily
- watering mistakes show up sooner
Container Size Matters
This is one of the most common problems. A container that’s too small and marigolds look stressed, even when everything else is done right.
Guidelines that actually work:
- French marigolds — containers at least 8–10 inches in diameter (≈20–25 cm)
- African marigolds — minimum 12–14 inches (≈30–35 cm)
- Signet marigolds — can be slightly smaller, but with good drainage
We use simple, stable containers like Bloem Ariana Self Watering Planter — they hold moisture more evenly and reduce the risk of drying out, especially during hot weeks.
Soil in Containers
You can’t just scoop soil from the garden. A container is a closed system.
Good container soil for marigolds is light, well-draining, low in excess nitrogen, and with a neutral to slightly acidic pH. Overly “rich” mixes push leafy growth instead of flowers.
How to Grow Marigolds in Containers Step by Step
- Choose a container with drainage holes and extra volume.
Marigold roots don’t grow very deep, but they need room to spread. A small pot overheats, dries out quickly, and literally traps the plant. - Use a quality container soil, not garden soil.
Garden soil compacts fast in pots and stops letting air through. Marigolds survive in it, but they won’t bloom properly. A loose mix is the foundation. - Plant one marigold per container, even if it looks like there’s space left.
In pots, crowding shows up faster than in the ground. One plant builds a stronger root system and produces more flowers than two planted “for fullness.” - Place the container where it gets 6–8 hours of direct sun, while avoiding overheating.
South-facing walls, concrete, and asphalt amplify heat much more than open soil. If the container overheats during the day, roots get stressed even with correct watering. - Water based on soil condition, not a schedule.
I check the top 2 inches (≈5 cm). If they’re dry, I water deeply until water runs out the drainage holes. If they’re still moist, I wait — even if it’s “watering day.”
A Small Detail That Makes a Big Difference
I always raise containers on feet or bricks. This improves drainage, reduces bottom heat buildup, and extends root life. It’s a small thing, but the difference shows up within a couple of weeks.
When marigolds feel good in containers, they stay compact, bloom steadily, smell strong but not harsh, and don’t stretch.
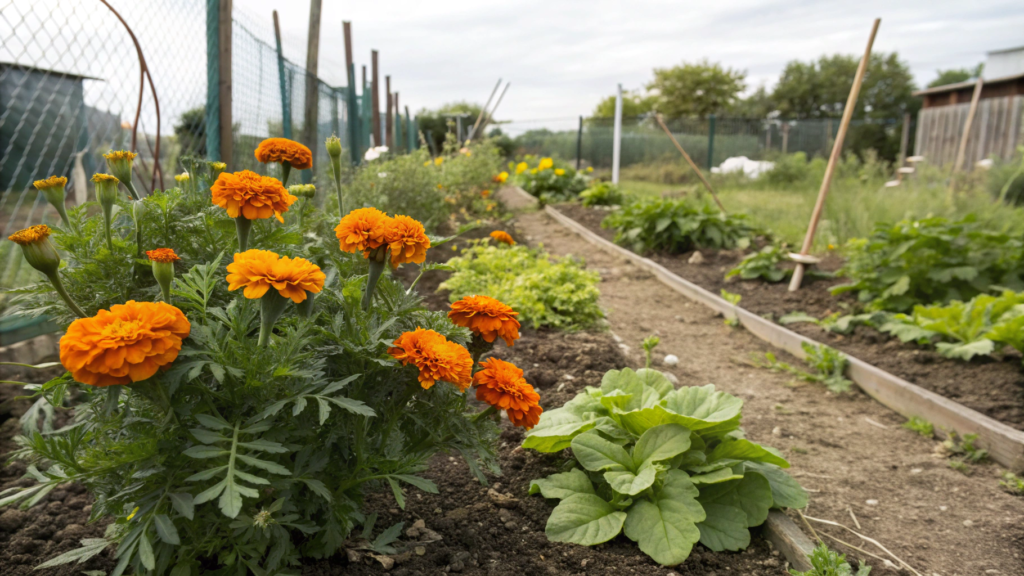
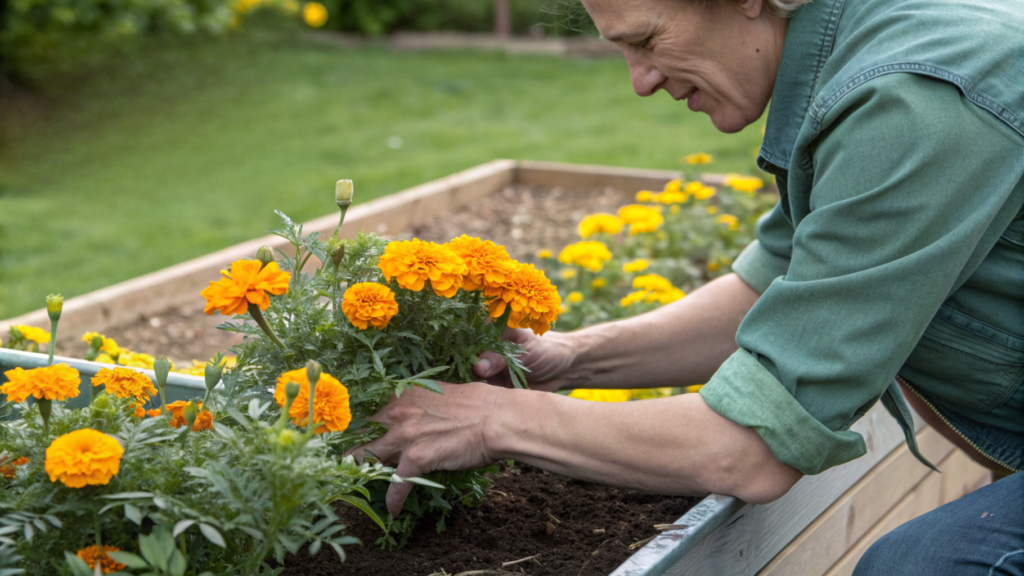
7. Companion Plants That Thrive with Marigolds

We stopped treating marigolds as standalone flowers pretty quickly. In pairs — and sometimes in tight combinations — they work noticeably better. As pest protection, as a microclimate stabilizer, and even as a soil condition marker.
Early on, we ran simple experiments: planting the same crop with marigolds and without them. The difference was always there. Fewer aphids. Less stress. More even growth. And in permaculture, it’s exactly these small but repeatable effects that add up to real results.
Why Marigolds Work So Well in Mixed Plantings
Marigolds don’t aggressively compete for nutrients or water if they’re given proper spacing. Their roots stay compact, and their above-ground growth is easy to control. At the same time, they:
- create a scent background that confuses pests
- improve the micro-environment at soil level
- visually break up monoculture plantings
Agronomic observations, including publications from University of Florida IFAS Extension, show that polyculture plantings reduce pest and disease pressure even without extra treatments. Marigolds are simply a convenient and accessible tool for that.
Best Companion Plants for Marigolds (From Practice)
There are plants that marigolds consistently “get along with.” We come back to these combinations every season.
Vegetables that benefit from nearby marigolds:
- tomatoes, peppers, eggplant, cabbage and broccoli, carrots
Herbs and greens:
- basil, dill, cilantro, parsley
Why does this work? Because these plants have different root zones, different growth speeds, and different scent chemistry. They don’t interfere with each other — instead, they create a more complex and resilient environment.
Where Marigolds Are Better Kept at a Distance
This matters too. Marigolds are not universal companions. We try not to plant them too close to:
- beans and peas
- spinach
- beets
Not because they “fight,” but because marigolds can take too much light in dense plantings and alter the soil-level microclimate.
Here, it’s usually enough to give them a bit more distance — and everyone does better.
Proper Companion Planting with Marigolds
- Choose the main crop and define its growth zone.
I always start with the primary plant: where its roots spread, how wide it grows, how much light it needs. Marigolds adjust to it — not the other way around. - Place marigolds along edges or between rows, not in the center of the bed.
This lets them act as a protective and aromatic barrier without taking space from the main crop. - Respect spacing for both plants.
Crowded marigolds weaken. Crowded vegetables won’t be saved by marigolds. Every plant’s needs matter. - Plant marigolds in groups of 3–5 plants, not as single bushes.
Groups create a stable effect: stronger scent, more visual disruption, and more noticeable protection. - Observe the season and adjust plantings as needed.
If a combination works especially well, repeat it next year. Companion planting is practice, not a fixed diagram from a book.
When marigolds grow next to the “right” neighbors, they look better themselves. Bushes stay compact, flowers are brighter, and the scent is stronger. That’s a good sign the system is balanced — not just “nicely arranged.”
8. Fertilizing Strategies and Schedules
Marigolds are not hungry plants. But they also won’t run well on an empty tank for long. What matters to them is not the strength of feeding, but timing and balance. And that’s exactly the part most people miss.
Why Marigolds Don’t Like “Rich” Fertilizers
If you give marigolds a lot of nitrogen, they’ll do exactly what they’re programmed to do — go hard on foliage.
The bush gets big, lush, and very green. And the flowers? Sparse and lazy.
Agronomic recommendations, including materials from University of Florida IFAS Extension, agree on one thing: excess nitrogen reduces flowering intensity in annuals, including Tagetes. This isn’t theory. It’s practice, repeated season after season.
When Marigolds Actually Need Feeding
Short answer — less often than you think. Marigolds usually need feeding:
- in containers
- in poor or heavily depleted soil
- during long, continuous blooming
In well-prepared garden beds, they can grow just fine without any extra feeding for the first 4–6 weeks.
Fertilizers That Work Best
We moved away from “universal” formulas a long time ago. For marigolds, the most reliable options are:
- balanced fertilizers with low nitrogen
- organic slow-release blends
- liquid feeds at half strength
Proper Fertilizing Strategy Step by Step
- Start with the soil, not the fertilizer.
If you added mature compost at planting time, marigolds already have what they need to get going. Feeding right after planting often causes more harm than good. - Apply the first feeding no earlier than 3–4 weeks after planting.
By then, the root system is established and the plant can take up nutrients without imbalance. - Use fertilizers with low nitrogen content.
Formulas focused on phosphorus and potassium support flowering, not leafy growth. - Cut the recommended dose at least in half.
Marigolds respond better to “a little less” than to “a little more.” I always start at half strength and watch the plant’s response. - Feed no more than once every 3–4 weeks.
If flowering is steady and leaves look healthy, the schedule is working. Frequent feeding gives fast but short-lived results.
Containers: A Different Schedule
In containers, nutrients wash out faster, especially with frequent watering. Here I follow a simple rule: small amounts, regularly. A light feeding every 2–3 weeks works better than occasional heavy doses.
If after feeding the leaves suddenly get bigger, flowers shrink, and the plant loses its compact shape, that’s a clear sign of too much nitrogen. I just stop feeding for a month — and marigolds usually rebalance themselves on their own.
9. Deadheading Flowers for More Blooms
Deadheading marigolds is a direct intervention in how the plant distributes its energy. When done correctly, the difference becomes visible within 7–10 days. When it’s ignored, flowering slowly fades — even with perfect sun and watering.
Why Deadheading Actually Works
Once a flower finishes blooming and starts forming seeds, the plant considers its job done. That’s it. Energy shifts toward seed production instead of new buds.
When you remove spent flowers:
- the plant doesn’t waste energy on seeds
- new bud formation is stimulated
- the bush stays compact longer
- overall flowering becomes more even
This is basic annual plant physiology, and marigolds respond to it especially fast.
When Marigolds Need Deadheading the Most
There are three moments when removing spent flowers matters most:
- mid-season, when the first bloom wave slows down
- after heat stress or weather stress
- in containers, where resources are limited
If a plant looks “tired” but still alive — deadheading almost always helps.
Proper Deadheading Step by Step
- Remove the spent flower completely, including the flower head — not just the petals.
If the base is left behind, the plant will continue seed formation and keep sending energy there. - Cut below the flower head, down to the first healthy pair of leaves or a side shoot.
Cutting too high leaves a bare stub that can dry out and slow growth. A cut at the node (where leaves or shoots emerge) almost always triggers new growth and new buds. - Make a clean cut with sharp scissors or pruners, at a slight angle.
Tearing by hand is convenient, but it damages tissue. Damaged cuts heal slower and are more likely to rot, especially after rain or evening watering. Clean cuts dry faster and attract fewer problems. - Check plants regularly: during peak bloom — every 3–5 days, more often in heat and containers.
Marigolds switch to seed mode quickly. One missed mature flower won’t ruin the season, but many will noticeably slow blooming. - Don’t remove more than about one-third of all flowers and buds at once.
Heavy cutting stresses the plant and pushes it into recovery instead of flowering. Two light passes with a few days in between work better than one aggressive reset.
Containers: The Effect Is Even Stronger
In pots, deadheading works faster because resources are limited. One missed flower can flip the entire plant into seed mode. That’s why I check container-grown marigolds more often — sometimes every other day during peak season.
With regular deadheading, marigolds bloom longer, produce larger flowers, stay neater, and develop a stronger scent. And that scent is a reliable indicator. A pronounced aroma almost always means the plant is active and hasn’t shifted into shutdown mode.
10. Winter Care and Extending the Season
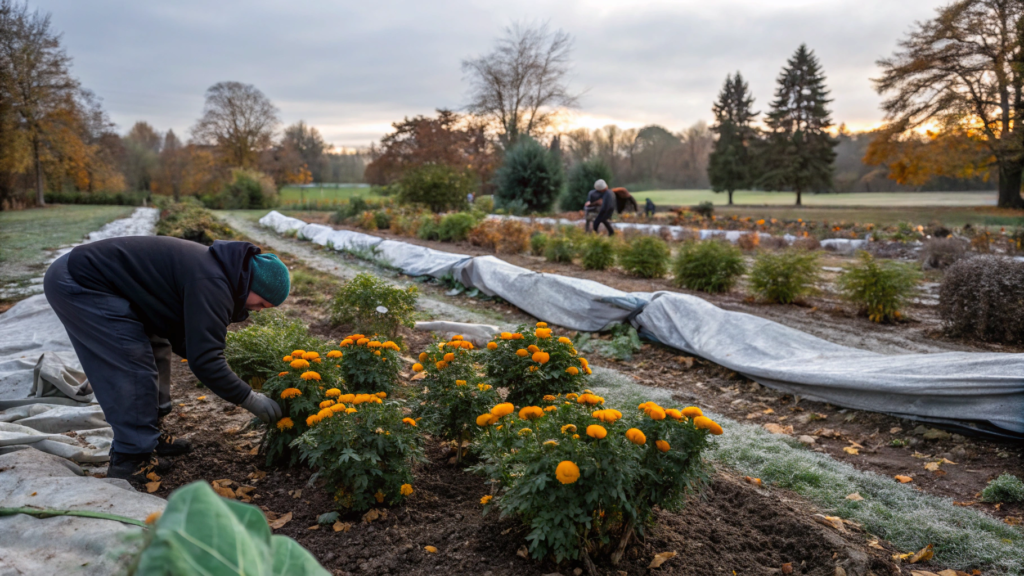
For many years, we kept seeing the same pattern: the first frosts hadn’t arrived yet, there was still daytime sun, but marigolds already looked like the season was over. And almost every time, the reason wasn’t the weather. It was that the plants weren’t helped through the transition period.
What Actually Kills Marigolds in Fall
Not frost. Stress. Most often, that stress comes from:
- sharp temperature swings
- cold nights combined with wet soil
- stopping care “because winter is coming”
Marigolds are capable of flowering at temperatures around 40–45°F (≈4–7°C) as long as there’s sun during the day and the roots stay dry and warm. We’ve stretched blooming by 3–4 extra weeks more than once just by paying attention to small but important details.
How to Extend the Season Without a Greenhouse
No complex structures needed. What works is a combination of simple actions:
- root protection
- moisture control
- light preservation
- reduced nighttime cold
All of this can be done in a single evening.
Winter Care and Season Extension Step by Step
- Remove all spent and weak flowers before temperatures drop.
In fall, the plant shouldn’t waste energy on seeds or damaged parts. A clean plant handles cold better and continues forming buds during warm spells. - Reduce watering, but don’t stop completely.
Cold, constantly wet soil is the main enemy of roots. I water less often, but I make sure the soil doesn’t dry out completely — especially in containers. - Mulch the soil with a 2–3 inch layer (≈5–7 cm).
Leaves, straw, or pine needles stabilize soil temperature and protect roots from nighttime swings. This often gives marigolds a few more active weeks. - Use overnight covers when the forecast drops below 40°F (≈4°C).
I throw on lightweight row cover or even an old sheet in the evening and remove it in the morning. Important: the cover shouldn’t rest directly on the flowers — a small “tent” works better. - Move containers closer to the house or into a sheltered spot.
A south-facing wall, porch, or unheated greenhouse can add a few degrees of warmth. Sometimes that’s enough to keep marigolds blooming until the first real frost.
Containers: Maximum Extension Potential
In pots, marigolds are easiest to “save” from the cold. We regularly move containers into an unheated greenhouse, under a roof, or into a garage with a window overnight. Even a 5–7°F difference (≈3–4°C) can extend flowering noticeably longer than in open ground.
An Important End-of-Season Decision
When you realize frost is close, don’t rush to pull the plants out.
I often leave marigolds until the very end, even when they don’t look perfect. They keep working:
- covering the soil
- supporting soil microbiology
- repelling some insects
And then — yes, I leave a few flowers for seeds. Not all of them. Only the best ones. That feels like a natural way to close the season.
When you look at the whole cycle, it becomes clear: marigolds aren’t just “spring–summer and done.” They’re a plant whose life can be extended, if you treat it as a living part of the system instead of temporary decoration.
Marigolds in Real Life
A garden isn’t a place where everything is done once and forever. It constantly responds to what we do. Sometimes very clearly.
If you’ve been growing marigolds for more than one season, I’m genuinely curious — what worked best for you? Maybe one variety turned out stronger than the others. Maybe you noticed that spacing mattered more than feeding. Or maybe containers gave better results than open ground.
Share in the comments how marigolds behave in your garden. What worked. What didn’t. What you’d do differently next season.
I read every comment. And very often, it’s exactly these conversations that lead to the most valuable ideas — the ones we can actually apply in our own gardens.