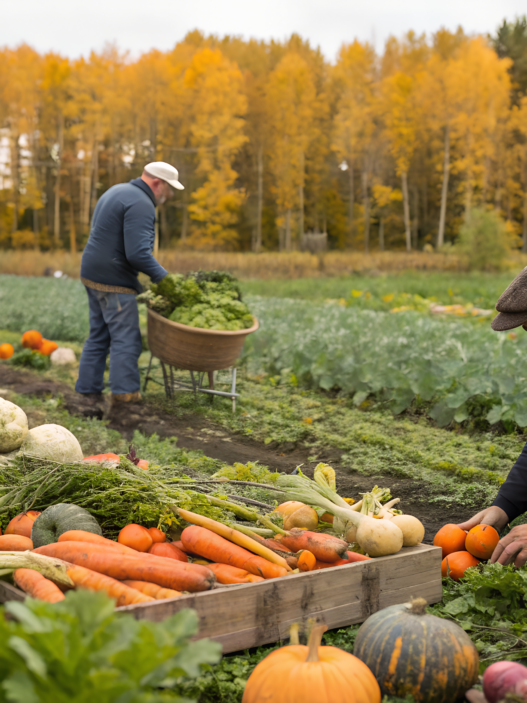
When we first started, I truly believed that for a garden you needed at least half an acre of land, a tiller, and free evenings. By the way, we didn’t have any of that. No land, no confidence, not even a decent watering can.
If you’re reading this and thinking, “What if I could grow at least something?” — it means you’re already one step ahead of where we were back then.
I’ve gathered here 10 simple but proven tricks that really help at the start.
Not theoretical tips from textbooks, but what has passed through our hands and been tested through our own mistakes.
Sometimes it will be a bit naive, funny and unexpected. But all of it — is real.
1. Tomato Slices to Harvest: A Lazy Gardener’s Trick
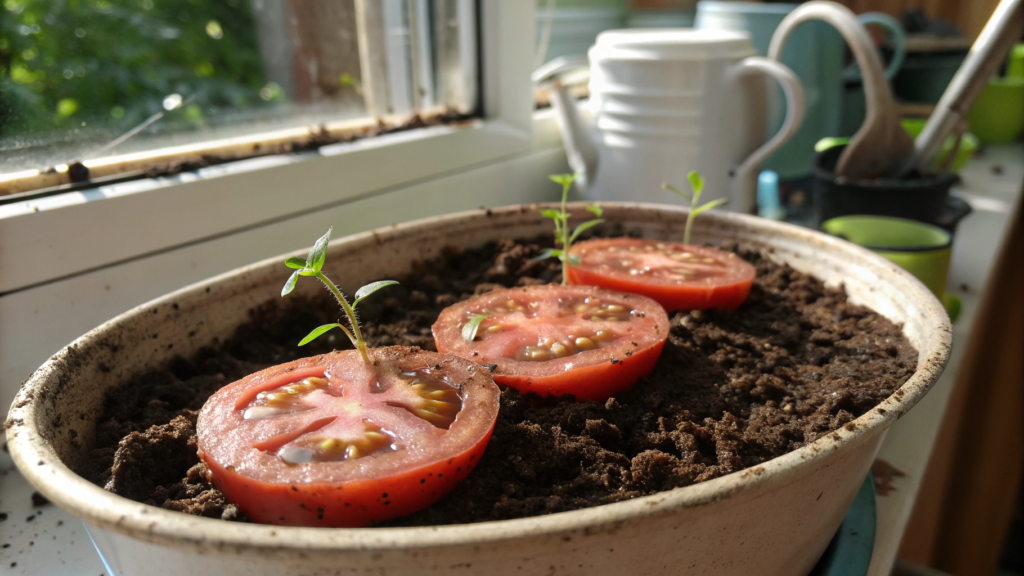
I admit: I’m the kind of person who can forget to water seedlings. Or fail to transplant tomatoes on time. Or… well, if you’re not a perfect gardener either — you’re going to love this trick. Because it works. And yes, it’s lazy. But sometimes it’s exactly these kinds of methods that spark the most loyal love for gardening.
What’s this method? It’s a way to grow tomatoes from ordinary slices of a ripe tomato. Yes, you simply take a tomato, cut it into slices, and… put it in a pot with soil. That’s it. The rest is done by nature.
How to Grow Tomatoes from Slices
- Choose the right variety. The best choice is ripe heirloom tomatoes — they’re not hybrids, and their seeds produce sprouts similar to the parent plant. We most often use Brandywine or Cherokee Purple — delicious, juicy, and excellent for sprouting.
- Prepare the container. You need a container 4 to 6 inches deep (about 10–15 cm), with drainage holes. We like using the Gardzen Seed Starter Tray with Lid — it’s convenient, with a tray and cover, perfect for a windowsill.
- Slice the tomato. The slices should be about 1/4 inch thick (about 0.6 cm). The main thing — don’t squeeze out the seeds, they need to stay inside the pulp.
- Place the slices on the soil. Lay them directly on the surface of slightly moistened soil. Space them out so the sprouts won’t crowd each other.
- Cover lightly with soil. Sprinkle with a thin layer — no more than 1/2 inch (about 1.2 cm). We usually use a light seed-starting mix or a blend of coconut coir with compost.
- Moisten with a spray bottle. Don’t drench! Just spray the soil until it’s moist. And cover the container with a lid or plastic wrap to create a mini greenhouse effect.
- Wait for sprouts and transplant. In about 5–10 days the first sprouts will appear. When they reach 2–3 inches (about 5–7 cm), gently transplant them into separate pots.
Does It Really Work?
Yes, and tested many times in practice! Many organic gardening blogs note that tomato seeds sprout perfectly right in the pulp, especially if the fruit is fully ripe. We’ve seen it ourselves more than once: such seedlings can even be stronger than store-bought ones.
Note. This method doesn’t guarantee 100% germination. It works best with true heirloom tomatoes, not hybrids. Sometimes too many seeds will sprout, and you’ll need to thin them out.
I’ve repeated this method for 4 years in a row. On the windowsill, in the greenhouse, in a bucket… anywhere. And one time I even took a store-bought organic tomato and planted its slices in an old pot. I ended up with 6 sturdy plants that gave us over 20 pounds (9 kg) of tomatoes in one season. Where else can you get that for $2?
This method won’t replace full-scale growing from carefully selected seeds. But if you just want to try — go for it. It’s safe, simple, and sometimes gives results that inspire you for the entire season.
2. Indoor Basil That Doesn’t Die After 2 Weeks
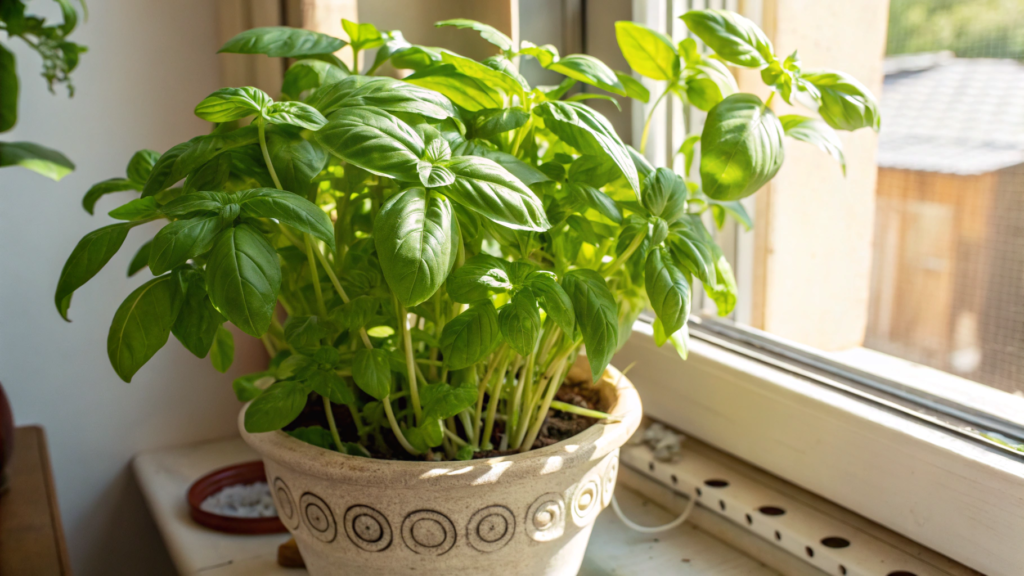
Many people think basil is always easy — until they try to grow it indoors. It wilts, stretches, drops leaves, develops mold. At some point, you start thinking that maybe you’re not a gardener at all… but a destroyer of herbs.
But basil has very clear needs. If you keep in mind just 4 basic points, you’ll forget what a “wilted windowsill basil” even looks like.
1. Don’t Keep Store-Bought Basil As Is
What you buy at the store is not a full-grown plant. It’s densely packed “seedlings in a decorative disguise.” In one small pot, there can be up to two dozen shoots. They lack space, nutrients, and air.
What to do? After purchase — transplant it. Carefully separate the clumps into 2–3 stems and plant them in separate small pots. Add drainage, loose soil, and give them a real chance to grow.
2. Light Is Life (and Forget “Partial Shade”)
Basil is a plant of warm sun. It won’t survive in a kitchen corner and even on a south-facing window in winter it’s too dim.
According to the University of Maryland Extension, without bright light basil stretches and loses its aroma — and therefore, its purpose.
What to do?
- Give it at least 6 hours of direct sunlight per day.
- If your window can’t provide that — use a simple full-spectrum LED lamp. We like the GE BR30 Full Spectrum Grow Light — it gives a pleasant white light and fits into a regular socket.
3. Water Less Than You Think
The most common cause of death — overwatering. Many of us water every day “just in case,” while basil is already rotting from below.
What to do:
- Check the top layer of soil: if it’s dry down to your fingertip — water. If it’s still moist — wait.
- You need a pot with drainage holes. Without them, even the best soil will turn sour.
- Use a light mix with vermiculite or coconut coir. It holds moisture but doesn’t turn into a swamp.
4. Pinch It — And It Will Respond with Growth
If you don’t pinch the tops, basil stretches upward and becomes a thin, limp “stick.” Then it falls over. Sad, but true.
- What to do?
As soon as you see 3–4 pairs of leaves — pinch the top. - Do this every 7–10 days and you’ll get a bushy, aromatic plant.
- Always pinch above a pair of leaves, not just anywhere — that way the plant will send out side shoots.
5. Feed It — But Sparingly
Basil doesn’t need daily feeding. Too much nitrogen makes it watery and bland.
What to do?
- Every 3–4 weeks use a liquid organic fertilizer.
- We use Espoma Organic Grow! — gentle, with no chemical shock.
With good care, basil can easily grow for up to 4 months on a windowsill. We harvest a bunch from one plant every 5–7 days and add it to pasta, soup, pesto… or simply on bread with butter.
It smells great. It grows. And most importantly — it doesn’t die after 2 weeks like it used to.
3. Microgreens on a Window Sill: The Fastest Crop Ever

Microgreens are like the “kids” of vegetables. Young, green shoots of familiar crops — radish, broccoli, peas, basil, and even sunflower.
They’re harvested at the stage of 1–2 true leaves, when they’re bursting with flavor and packed with nutrients.
And yes — they really grow in just 5–10 days, depending on the type. No soil all over the floor, no digging, no waiting for summer.
Why Does It Grow So Fast?
Microgreens have one special feature — all the energy and nutrients needed for growth are already inside the seed. That’s why they don’t need super-rich soil, compost, or additives.
They just need warmth, moisture, and a little care. Once the seed sprouts, it starts rapid growth. At that stage, you cut it — and eat it.
Confirmed by a 2012 USDA Agricultural Research Service study, which showed that microgreens of broccoli, radish, and cabbage contain 4–6 times more vitamins and antioxidants than mature plants.
What Can You Grow on a Windowsill?
Here’s a list of crops that aren’t fussy, grow fast, and don’t require special conditions:
- Radish — fast-growing, peppery flavor. Harvest in 5–6 days.
- Sunflower — crunchy and juicy. Harvest in 7–10 days.
- Broccoli — mild flavor, great for salads. 7–8 days.
- Peas — sweet and fresh. Harvest in 8–10 days.
- Cress — almost instant: ready to cut in 4–5 days.
What You’ll Need (and What You Definitely Don’t)
For basic “micro-farming,” you don’t need complicated trays or expensive systems. All you need is:
- Container — with or without holes. The main thing is that it’s not too deep. Food packaging, a plastic box, or a seed tray will work. If you want something easier to use, you can get a Delxo Seed Sprouter Tray — reusable, with drainage and a mesh insert, convenient for bottom watering.
- Substrate — coconut coir works best, or just paper towels/cheesecloth. Yes, microgreens really do grow even on paper.
- Seeds — not from the spice aisle! They might be treated. Only use seeds labeled “for microgreens” or “microgreens.” We often order from True Leaf Market or Mountain Valley Seed Co.
- Spray bottle — essential for even moisture. Without it, it’s hard to control humidity.
- Light — a south-facing window is ideal. If it’s a north window or wintertime, you can supplement with a small lamp. Microgreens are much less demanding for light than mature plants.
How to Grow
- Soak the seeds (if needed) — most (especially sunflower, peas, radish) do better if soaked overnight.
- Lay out the substrate — for example, a layer of coconut coir about 1/2 inch thick (≈1.2 cm) or a double layer of paper towel.
- Spread the seeds densely — not in a row, but like a “carpet.”
- Moisten with a spray bottle — evenly, so everything is damp but not soggy.
- Cover with a lid or place in the dark for 2–3 days (they germinate better without light).
- Once sprouts appear — move to the light. Now, air them daily, spray, and enjoy watching them grow.
- Harvest in 5–10 days, cutting at the base with scissors.
Where We Use Microgreens
- On sandwiches (radish with butter is incredibly good!)
- In salads (broccoli and cress add a “second layer of flavor”)
- In omelets, soups, wraps
- Even in green smoothies if the broccoli grows a bit too long
Is Growing Microgreens Worth It?
Absolutely. Not only do you get fresh greens in a week, you also get your first gardening experience, a quick result, visual satisfaction, and simply the feeling that you can do it.
And sometimes it’s microgreens that spark a lifelong love of gardening.
4. No-Dig Herb Spiral for Small Yards
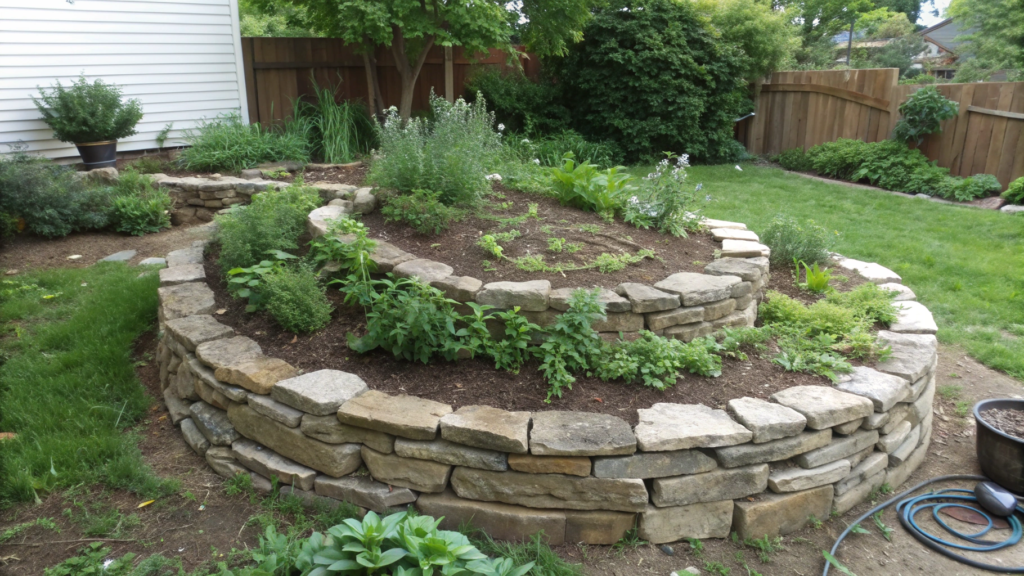
I always thought an herb spiral was something out of a designer landscape for “million-dollar homes.” You know — neat stones, a perfect circle, Pinterest-worthy photos…
But then, a couple of years ago, Lindy and I stumbled upon the no-dig approach. And that was it — now we have a spiral growing in our backyard, just 6 feet (≈1.8 m) in diameter. And yes — we built it without digging and without concrete.
What Is an Herb Spiral and Why Bother?
It’s a vertical bed in the shape of a snail, where different levels create different microclimates — from dry sunny spots at the top to moist shady ones at the bottom.
This means you can plant basil, rosemary, mint, and cilantro in the same spot — and they’ll all be happy.
An herb spiral is a permaculture technique that allows you to create a variety of conditions for plants in a very small space.
Why No-Dig?
Because digging is hard, it disrupts soil life, and sometimes it’s just not possible (for example, if you have a rented lot or clay under a layer of gravel — like we had in Idaho).
The no-dig method is based on layering nutritious materials on top — right over grass, soil, or even rocks. Everything works thanks to the decomposition of organic matter, and worms will come “visit” on their own.
What You’ll Need (Simple and Effective List)
- Cardboard or unprinted paper — as a base to suppress weeds
- Compost or well-rotted manure — the main nutrient layer
- Dry branches, hay, leaves, straw — to create volume
- Bricks, stones, or even large sticks — to form the spiral shape
- Herbs — basil, oregano, thyme, mint, dill, cilantro, sage — choose your favorites
How to Build It
- Pick a spot. Best in full sun — at least 6 hours of sunlight a day. Even a corner of the yard or a spot by a wall will work.
- Lay down the cardboard. Right over the grass. Overlap the seams. This will prevent weeds from growing through. Water it well.
- Make the “spiral” from stones or sticks. No need for perfect circles. Just lay the curve from the center outward, with a gradual slope — so the center is higher, and the outer edge is lower.
- Fill it in. First — a layer of branches and coarse material. Then — hay, leaves. On top — compost.
The center height should be about 18–24 inches (45–60 cm), the edges about 6–8 inches (15–20 cm). - Plant smart.
- Top: thyme, rosemary, sage — love sun and dryness
- Sides: basil, cilantro, oregano — need more moisture
- Bottom: mint, dill — prefer shade and dampness
Practical Tips
- We used old bricks and even a few wooden blocks from an old composter. The main thing is — they hold the shape.
- The cardboard layer decomposes in about 3 months — by then, the plants are already established.
- Water from the top down — it will naturally flow through the spiral to the bottom, where the moisture-loving plants are.
Does It Still Work in the Second Year?
Yes! We just add a bit of compost on top each spring, and everything comes back to life.
Mint spreads, but it’s easy to control. Rosemary sits at the top like a queen. And oregano — it’s the all-season champion.
And the best part — you walk up, and everything’s right there. Pick, smell, toss in a salad. Or into tea. Or just… for the mood.
5. Seed Starting in Egg Cartons: Does It Work?
This method sounds so tempting: zero waste, almost free, and kind of “natural.”
You take a cardboard egg carton, fill the cells with soil, drop in a seed, water… and wait for a miracle.
We tried it too. More than once.
So, does it work? Yes — but… only if you know all the details.
Why Does Everyone Try This?
Because it’s cheap and accessible; it looks good in photos; it looks good in photos.
But do you know how many seedlings we had to throw away in 2019 due to overwatering and rot?
The packaging was cute, yes. But the sprouts? Almost none.
The Pros (Yes, They Exist)
- Great for experiments — If you’re not ready to invest in seed trays or plug flats, cardboard egg cartons will work for a start. Especially if you just want to test old seeds for germination.
- Can be planted directly into the ground (theoretically) — Cardboard will eventually decompose, so in theory you can plant seedlings right in their “pots.” But there are caveats, and we’ll get to them below.
- Eco-friendly and aesthetic — Especially if you’re as much of a reuse fan as we are.
The Cons (What Nobody Tells You in Reels)
- Mold appears quickly — Cardboard absorbs water, stays damp, and in 3–5 days you might see white fuzz. It’s not always harmful, but it looks awful and can damage seeds and roots.
- Limited root space — A standard egg cell is about 1.25 inches deep (≈3 cm). That’s not enough even for lettuce seedlings. Roots hit the “ceiling” fast, and plants stall.
- Cardboard breaks down too soon — In 10–14 days, frequent watering makes the bottom soft. It can literally fall apart in your hands, especially when moving it.
- Planting with the carton is a bad idea — Yes, cardboard is biodegradable. But not in 3 days. Not even in 3 weeks. If you plant seedlings without removing the carton, it will slow root growth and trap moisture, which can cause rot. Gardeners have confirmed through experience that roots develop poorly when blocked by decomposing cardboard.
When to Use Egg Cartons
- If you want to try gardening without buying anything yet.
- If you’re working with kids — it’s safe and visually clear for showing how seeds sprout.
- If you have enough light and warmth so seedlings don’t stay in the cells for more than 10 days.
How to Get Better Results
- Use only cardboard cartons, not foam.
- Place the cells in a plastic tray so water doesn’t break down the bottom.
- Make small holes in the bottom for ventilation.
- Transplant seedlings into a proper pot on day 7–10, as soon as the first true leaves appear.
- If you see mold — wipe it with a paper towel and increase ventilation a bit.
We don’t use egg cartons for our main seedlings. But sometimes in March–April we do “test mini-sowings” in them — just to check the germination of new seeds, especially if we have leftovers from last season.
For real planting, especially tomatoes and peppers, we use Jiffy Peat Pots 3″ Wide — they’re still biodegradable, but deeper, sturdier, and don’t mold as quickly.
The Verdict? Does it work? Yes. Does it work consistently? No.
Egg cartons are like paper cups: you can use them, but don’t expect them to replace a ceramic mug.
They’re fine for starting, practicing, and getting inspired. But if you want strong, healthy seedlings, it’s better to invest in proper pots or trays.
6. The 3-Square-Foot Salad Garden
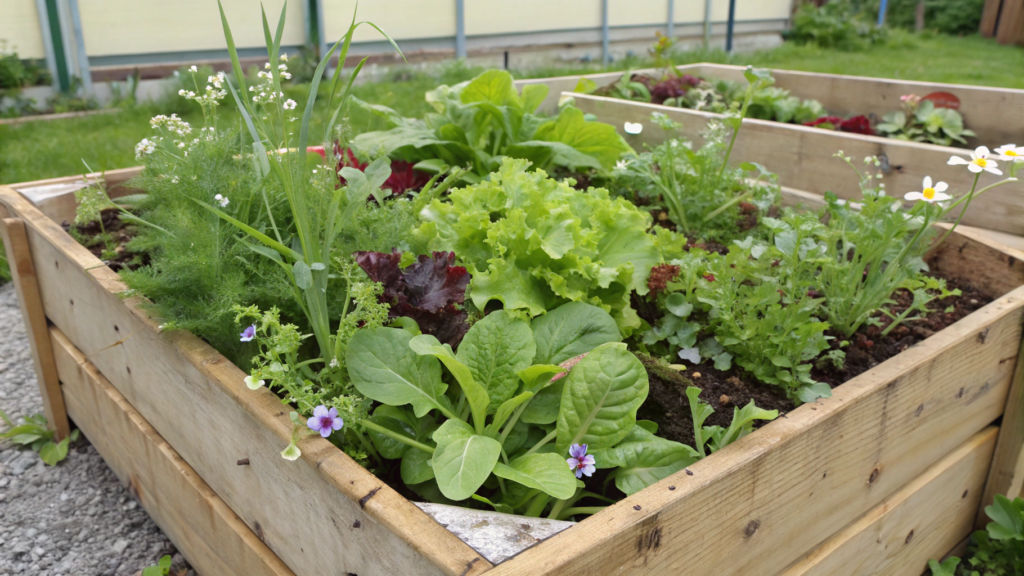
We had one summer when the whole garden was taken over by pumpkins and corn. The plans were huge, Napoleon-style — and of course, we didn’t leave a single bed for salad greens.
The rescue came in the form of an old wooden box measuring 1×3 feet (≈30×90 cm). Three square feet — that’s it. Now it’s a whole little green world.
What Can You Grow in Three Square Feet?
A lot. Seriously. Especially if you don’t plant everything in rows like in textbooks, but in a dense mixed planting, using fast-growing varieties and repeat sowings.
Here’s what fits:
- Looseleaf lettuce — up to 12 heads
- Arugula — 2 strips with 3–4 plants each
- Spinach — 4–6 plants
- Mizuna or pak choi — 2–3 plants
- Green onions — between main plantings
- Radishes — along the edges
- Dill, cilantro — one clump in each corner
You can put this mini garden together in 20 minutes, and start harvesting in as little as 3 weeks.
Why This Format Works So Well
- Smaller space = more attention — You don’t have “thirty beds,” just one box. Easier to care for, easier to spot problems, easier to control everything.
- Soil warms up faster, especially if the container is in the sun — meaning earlier germination and earlier harvest.
- Easier pest protection — You can cover it with mesh, raise it on a stand, even bring it under shelter if there’s hail.
- Repeat sowing — Cut the arugula, and a week later plant a new batch. The bed stays productive all the time.
Our Setup
We use a shallow container 6–8 inches deep (≈15–20 cm). At the bottom — a layer of wood chips or twigs for drainage, then loose soil mix (compost, coconut coir, a bit of sand).
The container stands on wooden legs so it doesn’t heat up from the ground.
Watering — once a day in the morning or evening, depending on heat. Sometimes with drip irrigation if we’re away.
Best Crops for This Mini-Garden
- Red Salad Bowl — looseleaf lettuce with beautiful frilled leaves
- Arugula Rocket — spicy, fast-growing
- Bloomsdale Spinach — ready to harvest in 25 days
- Tokyo Cross Turnip — mini turnips, tender and sweet
- Evergreen Hardy White Onion — heat-tolerant green onion
If you’re looking for seeds — we’ve had great results with sets from Seed Needs and Botanical Interests.
Common Mistakes (and How to Avoid Them)
- Overcrowding without thinning — I get it, you want everything at once. But even in dense planting, plants need minimum space.
- No mulch — Yes, even in a small box, mulch helps retain moisture and suppress weeds. I use chopped grass or straw.
- One-time planting — If you want salad all season, sow every 2 weeks. This is called succession planting, and it’s a lifesaver.
Is It Worth It? Yes. Especially if you’re a beginner, live in an apartment with a balcony, or just want salad without nitrates and plastic packaging.
You’re getting more than just food. You’re getting a daily gardening ritual, a connection to the soil, and the joy of watching things grow — which is impossible to put into words.
7. Compost Without the Smell: Beginner Bin Setup
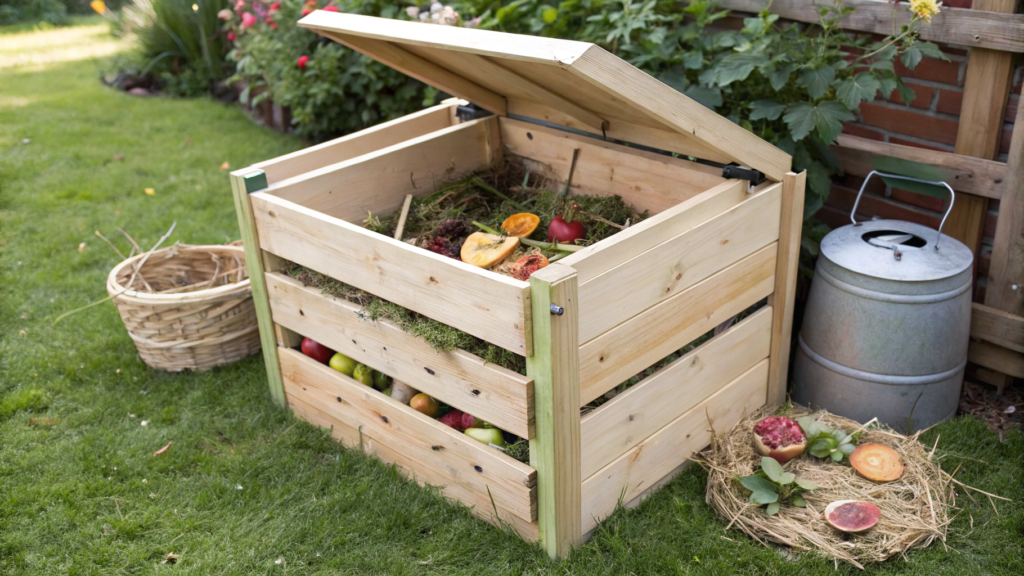
I remember my first compost nightmare all too well. Lindy and I built a box out of old boards, proudly tossed in all the kitchen scraps, and… a week later, that smell appeared. The one that gets into your clothes and makes guests glance at you suspiciously.
If you want to start composting but are afraid of the smell — you’re not alone. But here’s the good news: there should be no smell at all if you follow three basic principles.
What Causes Compost Smell?
The main cause of odor is too many wet “green” materials and not enough “browns” like dry grass, paper, or leaves.
Simply put: too many vegetables, too little paper — and you trigger an anaerobic process (rotting without air). That’s where the smell comes from.
Composting Basics Every Beginner Should Know
1. Balance of Green and Brown
- Greens — anything moist: vegetable peels, coffee grounds, fresh grass clippings
- Browns — anything dry: cardboard, newspaper, dry leaves, sawdust
The ideal ratio is about 1 part greens to 2–3 parts browns by volume.
If you’ve just added a pot of veggie scraps — sprinkle on a couple of handfuls of shredded paper.
Pro tip. We keep a bucket of dry paper right next to the composter. Open the lid, toss in the veggies — then immediately “dust” them with paper.
2. Airflow
A sealed plastic barrel with no ventilation is a disaster waiting to happen. Compost needs oxygen.
Provide holes, a loose structure, and occasional mixing — and it will smell like forest floor, not a dump.
If you don’t want to fuss with a pitchfork, check out the VIVOSUN Outdoor Tumbling Composter 43 gal. It’s a drum on legs you can just spin. We had one at our old place — almost zero maintenance, and zero smell.
3. Protection from Excess Moisture
If the compost is too wet, it can’t breathe. It starts to rot. Especially if it’s outdoors and it rains a lot.
What to do:
- A covered compost bin or lid (not airtight!)
- A base layer of sticks or dry straw at the bottom
- During heavy rains — just throw on an old cloth or a piece of sheet metal temporarily
NOT to Put in Compost (If You Want It to Smell Like Earth)
- Cooked food with oil, salt, or meat
- Large amounts of citrus
- Cat or dog waste
- Moldy bread and baked goods (small amounts are okay, but better to avoid)
Basic Beginner Compost System Looks Like
- Container with a volume of 30–50 gallons (≈110–190 liters)
- Ventilation holes on the sides and bottom (small, not through-holes — so air and excess moisture can escape, but contents stay in)
- Lid to protect from rain but allow air in
- Inside: dry layer at the bottom, then alternating greens/browns
- Turn the pile once a week (even with just a shovel or stick)
If everything is set up correctly, your compost can smell like soft, damp soil. Or hay. Or almost nothing at all. But definitely not like rotten cabbage.
Once it’s working, every time you lift the lid you won’t be holding your nose — you’ll be surprised at how good the earth smells.
8. Watering 101: When & How Not to Drown Your Plants
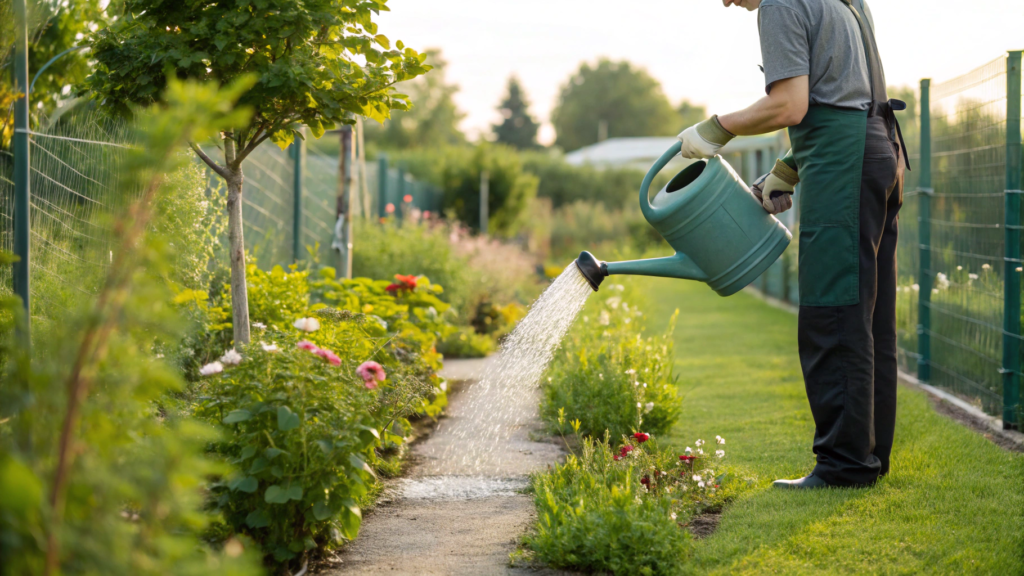
When I first started gardening, I watered… out of fear. Fear that something would dry out. That it would wilt. That it would die.
But in the end, overwatering killed more plants than cold or pests ever did.
Watering is like a relationship — don’t overdo it, but don’t ignore it either.
Here are 5 rules that saved our garden — especially for beginners.
1. Water Based on Soil, Not a Calendar
One of the most common mistakes is watering “once a day” like clockwork. But plants don’t need a schedule — they need the right soil moisture balance.
Finger test:
Stick your finger into the soil up to the second knuckle (about 2 inches ≈ 5 cm). If it’s dry — water, moist — leave it, wet and sticky — stop immediately.
According to Oregon State University Extension, overwatering kills plants more often than drought, especially in dense or clay soils.
2. Less Often, but Deeper
Surface watering is like a quick snack — it feels better for a moment, but does little good.
If water doesn’t reach the roots, they won’t grow deeper and will stay weak.
What to do:
- Water slowly and thoroughly, especially for garden beds or shrubs.
- For containers: water until it starts dripping out of the drainage holes.
- For beds: aim to moisten the soil to 4–6 inches (≈10–15 cm) deep.
3. Morning Is the Best Time to Water
Why not in the evening? Because moisture stays on the leaves and doesn’t evaporate overnight — perfect conditions for fungi and diseases.
In the morning, the soil absorbs water before the heat sets in, and plants get it when they need it most — during photosynthesis and active growth.
4. Water the Roots, Not the Leaves
Leaves aren’t sponges. Watering from above wastes water through evaporation and increases the risk of burns and disease.
Water at the base of the stem. If you don’t have drip irrigation, just use a bottle with the bottom cut off or a watering can with a long spout.
5. Mulch Is a Watering Ally
Mulching keeps moisture, reduces evaporation, and stabilizes soil temperature.
We usually use:
- Dry grass clippings (without seeds)
- Coconut coir
- Straw
- Cardboard (for pathways between beds)
Layer thickness: 1–3 inches (≈2.5–7 cm), depending on the material.
Containers Are a Special Case
Plants in pots lose moisture faster because they have a limited volume of soil and the air warms the container from all sides.
What we do:
- Use deep containers (at least 10–12 inches deep)
- Add vermiculite or hydrogel to the soil mix to retain moisture
- Check moisture from the bottom, through the drainage holes (yes, I sometimes even reach under and feel the soil)
Common Mistakes and How to Avoid Them
- Watering “on autopilot” without checking the soil
- Constantly wetting only the top layer
- No drainage (especially in containers)
- Evening watering, especially on leaves
- Skipping mulch (“it’s fine, I don’t need it”)
The way and frequency you water determines where roots grow. Water shallow and often — roots will stay near the surface. Water deeply and less often — roots will grow down.
That means your plants will be stronger, more resilient, and less dependent on you.
9. Shade-Tolerant Veggies for Balconies

Balconies can be tricky. When we lived in a rented apartment with a northeast-facing balcony, I was convinced I could grow tomatoes. They did grow… but it was a sad sight.
Spinach, mint, and chives, on the other hand — they went wild.
That’s when I realized: if you don’t have much sun, don’t fight it — work with it.
What Counts as “Shade”?
Important: we’re talking about partial shade, not total darkness. That means:
- 2–4 hours of direct sunlight a day
- Or bright, indirect light all day (for example, under an awning or behind frosted glass)
These are the conditions where many vegetables and herbs don’t just survive — they produce a decent harvest.
Veggies and Herbs That Actually Grow in Shade
Here’s what we’ve grown successfully on a shaded balcony (and according to University of Minnesota Extension, these plants tolerate limited sunlight):
- Spinach. Loves cool weather and tolerates shade well. Germinates quickly and produces tender leaves even with just 2–3 hours of sun.
- Leaf lettuce. Looseleaf, Buttercrunch, Red Salad Bowl — all do great in bright indirect light. Less sun means slower growth, but the flavor stays mild and fresh.
- Mizuna and pak choi. Asian greens that grow fast and don’t mind low light. Perfect for planting in balcony boxes.
- Dill. Hates heat and dryness, so a shaded balcony can actually extend its season. Just don’t overwater.
- Cilantro. Bolts in hot weather, but lasts longer in the shade. Best sown in “waves” every 2 weeks.
- Chives. Extremely hardy, rarely gets sick, and can grow for years. Great for constant harvesting.
- Mint, lemon balm, oregano. Can thrive with just 2–3 hours of morning sun. Just be careful with mint — it loves to spread and crowd out neighbors.
What NOT to Plant in Shade
- Tomatoes, peppers, eggplants — need 6–8 hours of sun
- Cucumbers — get leggy and sick
- Beans — may grow but won’t produce
- Basil — will survive, but with weaker flavor and aroma
How to Set Up a Shade-Friendly Balcony Garden
- Choose shallow but wide containers — 6–8 inches (≈15–20 cm) deep is enough for most greens.
- Watch your drainage — with less evaporation in the shade, soil stays wet longer.
- Use light-colored or reflective surfaces — pots, stands, white walls — to bounce more light onto plants.
- Sow in “waves” — especially lettuce and cilantro — for a constant harvest without tough, overgrown plants.
- Feed lightly — plants grow slower in shade, so monthly feeding is plenty.
Shade isn’t the enemy. It’s just a different environment — and you can (and should) adapt to it.
There’s less evaporation, less watering, less risk of burns and disease. And the mint you get from a north-facing balcony? Tender, juicy, and with a fragrance that’s unforgettable.
10. Raised Bed vs. Ground Soil: Beginner Breakdown
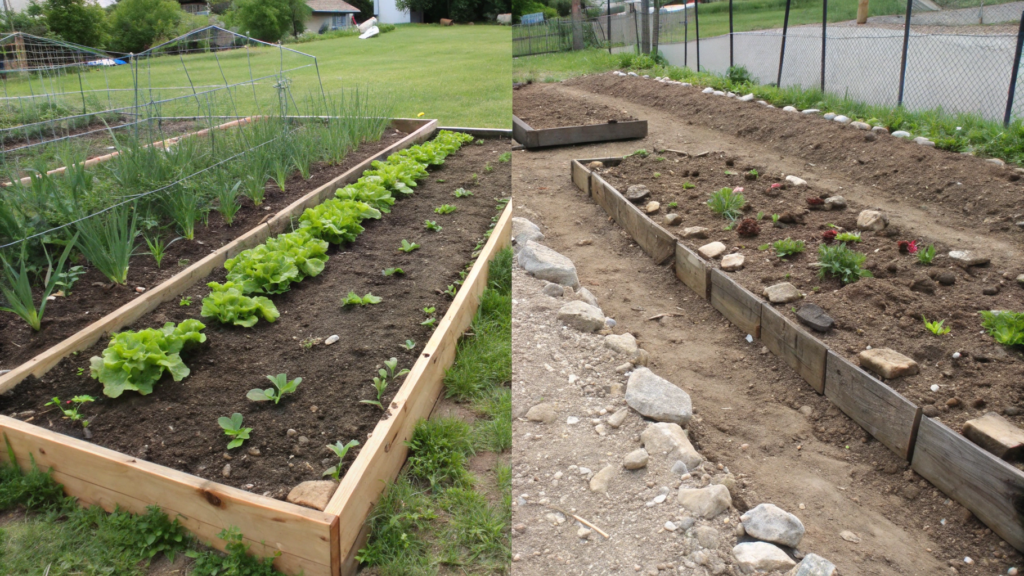
When we first started planting anything more serious than lettuce, I probably spent an entire evening reading articles and forums, trying to decide: should I plant directly in the ground or use raised beds?
Visually, raised beds looked appealing — neat, tidy, and organized.
But then I stepped into the garden, looked at the clay, rocks, and dozens of weeds — and realized I just didn’t want to dig.
If you’re standing at the same crossroads, here’s the practical breakdown — no theory, just real-world experience.
What’s the Difference?
Ground soil — you plant directly in the existing soil. Maybe you till it a bit, add compost, and start planting.
Raised bed — a frame (usually wood, metal, or stone) that you fill with soil mix from the top. It sits above ground level, and you control exactly what goes inside.
What Raised Beds Offer
✅ Pros
Control over soil. Got sand, clay, or gravel? Doesn’t matter. In a raised bed, you decide the soil mix. We usually use compost + coconut coir + a bit of garden soil.
Better drainage. After rain, raised beds don’t turn into swamps — especially important if you live in an area with heavy soil.
Fewer weeds. A cardboard or landscape fabric layer at the bottom really does stop weeds from coming up. Just make sure your compost is clean.
Ergonomics and looks. Yes, they look nice. But the main thing — you don’t have to bend as much. Beds 12–24 inches (≈30–60 cm) high are a back-saver.
Earlier start to the season. Soil in raised beds warms up faster in spring, meaning you can plant 1–2 weeks earlier.
❌ Cons
More expensive and labor-intensive upfront. You need to build, buy materials, and bring in soil. Even a simple 4×8 ft bed (≈1.2 x 2.4 m) needs about 10–12 bags of soil, each 1.5 cubic feet (≈42 liters).
Dry out faster in summer. Especially without mulch or in windy spots. You’ll water more often, particularly in hot climates.
Limited root depth. Roots can’t go as deep as in open ground. Some crops (like corn or large pumpkins) may feel cramped.
When to Just Plant in the Ground
- If you already have decent soil and your yard doesn’t flood after rain
- If your budget is tight and you want to start right away
- If you’re not ready to build, fill, and level a frame
- If you’re planting perennials — strawberries, mint, horseradish — they thrive in ground soil
My Take After 5+ Seasons
We now use both. In raised beds, we grow everything that needs extra attention: lettuce, carrots, peppers, cabbage. It’s easier to control moisture, mulch, and feeding.
In the ground, we grow pumpkins, potatoes, garlic, onions — crops that like to do their own thing without daily check-ins.
If you can have both, don’t choose “either/or.” But if you’re starting from scratch, have poor soil, and limited time — a raised bed will give you more control and less frustration.
From My Garden to Yours
I used to think a garden was just about planting something and getting something in return.
In reality, it’s not just the harvest — it teaches you to notice, to wait, to enjoy growth even when it’s small.
If even one of these tricks inspires you to grab a handful of soil, then the day’s been worth it.
And if you’ve already tried any of these — share in the comments what you planted last year that you didn’t think would sprout… but did.Because the best part of gardening isn’t just growing vegetables. We raise and educate ourselves, too. Sounds dramatic? Maybe. But you know there’s truth in it.