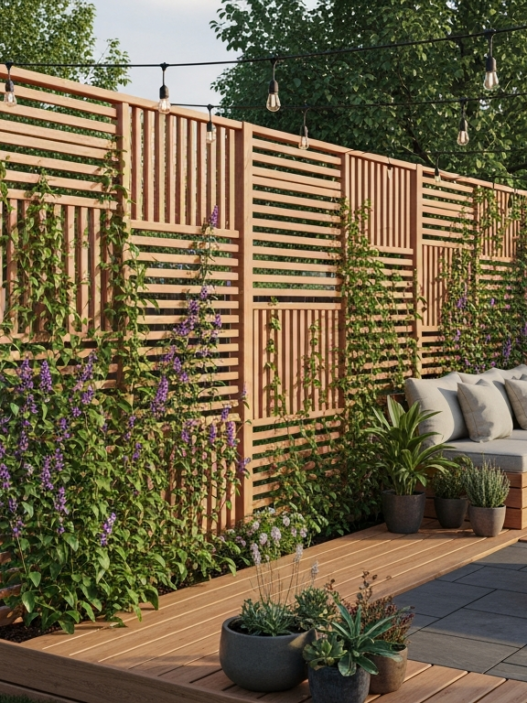
An outdoor bench can be a simple working surface next to the garden beds, a place to relax by the fire, or a part of the patio where not only function but also appearance matters. And it is one of those elements that sets the tone for the whole space.
Each of these garden bench designs does its own job: sometimes stability matters, sometimes compactness, and sometimes the ability to integrate planter boxes or a small table.
In this article, I decided to share 10 outdoor bench options that have proven themselves in real-life conditions — from small balconies to large yards. All designs are tested in practice, easy to adapt to the size of your space, and offer convenience, durability, and a clean look without extra cost.
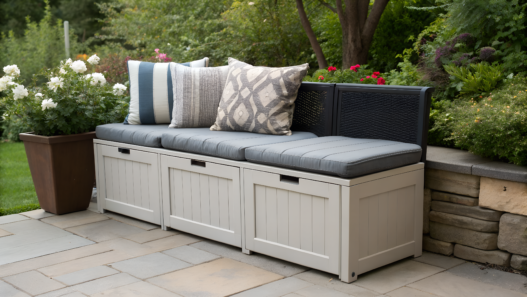
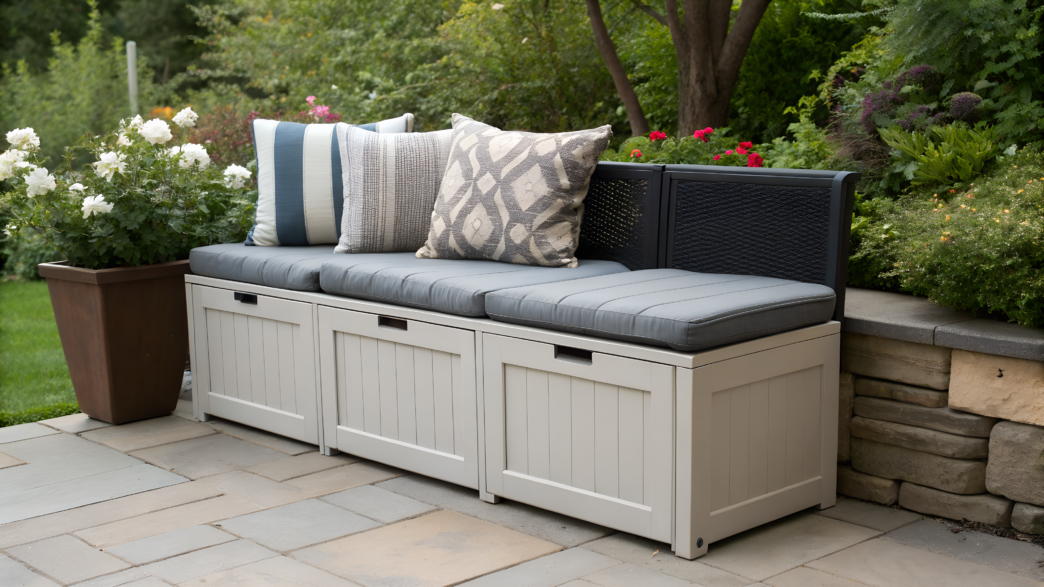
1. Built-In Storage Bench for Patio Essentials
When there are pillows, garden gloves, and a bunch of little useful things scattered around the yard, you inevitably start thinking: “Where are we going to store all this stuff?”. Of course, you need a built-in bench box — the kind that survives winter, summer heat, and our endless “oh, this also needs a spot.”
I don’t know why we lived without it for so long. Probably because we thought about beauty, not practicality. But practicality won!
- Protects textiles — the pillows stay dry and clean even after rain or morning dew.
- Tames the little things — gloves, garden scissors, folding lanterns — everything found its place.
- Creates additional seating — a comfortable spot for two or three people if you choose a length of 5–6 ft (152–182 cm).
- Serves for many years: if you use 2×6 or 2×4 cedar, it will handle snow and heat.
How We Built It
- Choosing the location and size. We looked at the area by the south wall — there’s light, and the roof gives a bit of cover from the rain. We settled on a length of 6 ft (182 cm) and a depth of 24 in (61 cm). This volume easily holds blankets, pillows, and “all the things that will be useful later.”
- Assembling the frame. We used 2×4 boards — lightweight but strong. The finished base came out to about 65–80 lbs (30–36 kg). Two people can carry it.
- Creating the bottom. We laid moisture-resistant 3/4 in (19 mm) plywood. In Idaho, the weather changes fast, so the bottom must be durable and steady.
- Installing the lid. For the lid, we used cedar boards and added gas hinges. This tiny detail makes everyday use smoother — no slamming lids and no pinched fingers.
- Protecting the wood. We applied outdoor oil, which absorbs deeply and preserves the natural wood texture instead of forming a film that peels later.
- Organizing the internal space. Inside, we placed two small containers so gloves don’t roll around on top of the blankets. A tiny step that creates surprisingly consistent order during chaotic spring days.
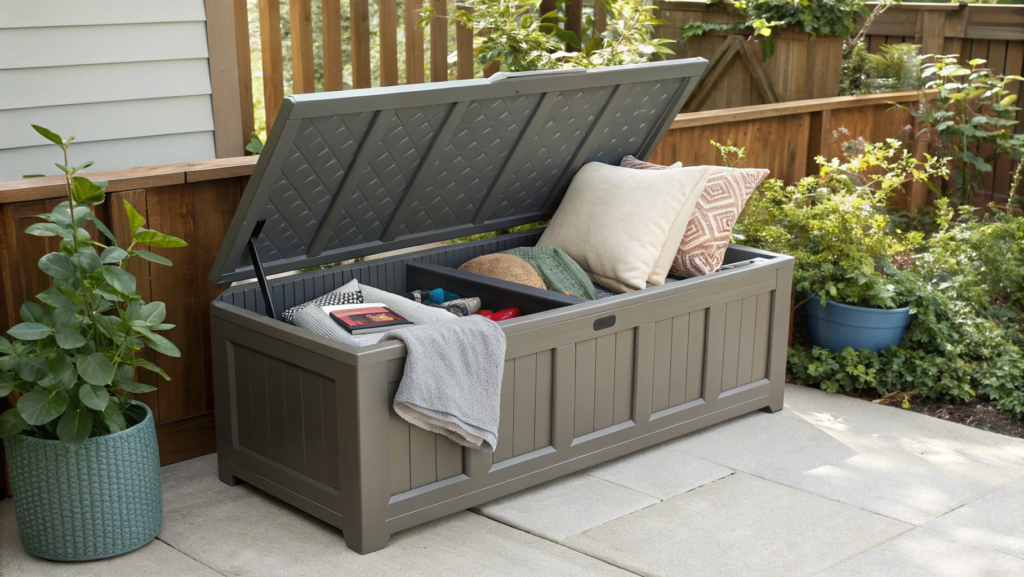
Here’s an excellent ready-made option for those who aren’t confident in their woodworking skills — Keter Westwood 150 Gallon Outdoor Storage Bench.
It’s big, weather-resistant, and pretty good-looking. For small terraces, it’s a real find.
What You Can Store Inside
- Blankets, throws, tablecloths
- Outdoor furniture pillows
- A small set of quick tools: pruners, gloves, mini-rake
- Kids’ outdoor toys
- Candles, lanterns, string lights
- Seed packets in an airtight container (if the space is cool)
And yes, even dog toys. Our goats once stole the dog’s ball. Anything on the ground is doomed.
So many times this bench has saved us! When:
— a sudden rain came and all the pillows were outside;
— friends arrived and we urgently needed to seat three adults and one child who only wanted to sit with me;
— we were decorating the yard for a summer party and all the string lights were in one place, neatly stored.
No chaos, no overflowing boxes, no running across the whole yard.
2. Cinder Block Fire Pit Bench
Near the fire ring in the yard, it’s important to find a place where it’s truly comfortable to sit. Our chairs either sank into the soil or the metal ones were freezing cold in the evening…
That’s how we ended up with a Cinder Block Fire Pit Bench — simple, reliable, and surprisingly harmonious with the fire.
Why a Cinder Block Bench
- Cinder block holds heat well but does not overheat — a real find near a fire.
- It doesn’t fear moisture, snow, or heat — in Idaho, temperature swings are so strong that wood often gives up first.
- Modularity. You can make it 4 ft, 6 ft, or 10 ft (122–305 cm) — whatever you like.
- You can assemble it in 30–40 minutes, even if you hold a hammer as confidently as I did in my first year (meaning… not confidently at all).
- Concrete near fire looks garden-friendly. And I really enjoy that.
Materials You Actually Need
- Standard 16×8×8 in (40×20×20 cm) cinder blocks — usually 6–10 pieces per bench.
- 4×4 wooden beams or 2×6 boards — if you want a warmer seat.
- Sanded boards, if you want the top to feel more “homey.”
- A bit of fire-resistant adhesive — if you plan to secure the blocks together.
- Plus a blanket. Because an evening by the fire without a blanket is not an evening.
How We Built Our Bench
- Leveling the area. We used a level and added a thin layer of gravel. Sitting on a crooked bench is… let’s say questionable pleasure.
- Positioning the blocks. We placed them so the holes faced sideways — that’s where the wooden beams will slide in. Usually, two stacks of two blocks each are enough.
- Inserting the beams. We used 4×4 beams, 6 ft (182 cm) long. They fit well into the block openings and create a stable seat.
- Adding the top surface. We screwed on 2×6 boards treated with oil — softer to sit on, warmer, and visually softer than bare concrete.
- Securing the structure (optional). Sometimes the blocks stand securely without any fixatives, but we added some adhesive — the winds on our property could easily carry off a stool.
- Adding cushions and testing. This is the best moment. We sit down, light the fire, and every spring evening feels incredibly cozy and heartfelt.
What to Keep in Mind
- Place it 3–4 ft (91–122 cm) from the fire. Closer can be too hot, farther loses the vibe.
- Concrete is heavier than it looks. One block weighs 28–35 lbs (12–16 kg). Better carry them with a partner to avoid straining your back.
- Use treated lumber if the top will be wooden — otherwise, within a year everything turns gray and starts to split.
This type of bench looks, let’s say, a bit “construction-like.” To soften it visually, you can add fire-resistant cushions and a couple of warm blankets. This is taste-dependent, but for us it was the moment of “oh yes, now we can sit here for hours.”
When This Bench Is Irreplaceable
It’s especially helpful when you need a stable place by the fire without the risk of sinking into soft soil or sitting on scorching metal. If a group gathers, the bench provides quick additional seating — without moving furniture around.
And on cool evenings, concrete pleasantly retains soft, even warmth, making it comfortable to sit for a long time. Plus, this design creates a safe and steady zone for kids and pets — nothing tips over or wobbles.
3. Pallet Bench with Cushions

Pallet Bench with Cushions is one of the simplest and most comfortable things you can build in a single day.
But it’s not just about the load capacity. This bench:
- Costs almost nothing, especially if you get pallets from a local farm or warehouse.
- Is easy to adapt. You can make it longer, taller, L-shaped, or add armrests.
- Works with almost any cushions, so it fits both a casual “neighborhood barbecue” style and a more “tidy” corner by the house.
- Doesn’t mind experiments. Paint it — new life; keep the wood natural — also looks great.
How Many Pallets You Need and How to Choose Them
For a standard 48 in (122 cm) bench, we used:
- 2 pallets — one for the base, one for the backrest.
- 1 extra pallet if you want more depth or a side section.
It’s better to choose pallets with the HT (heat-treated) mark — they’re treated thermally, not chemically. This matters if the bench will be where kids or pets hang out.
Weight of one pallet: about 30–45 lbs (13–20 kg). You can bring it into the yard alone, but we usually carried them together — easier.
How We Build These Benches
- Inspecting the pallets. We check for cracks, rot, or protruding nails. Sometimes a pallet looks fine, but one block is already drying out — better replace it right away. We lightly sand the top surface for 2–3 minutes so cushions don’t snag.
- Forming the base. One pallet goes horizontally — that’s already the seat. For a standard height of 16–18 in (40–46 cm), we place a second pallet underneath and secure them with long screws in the corners.
- Adding the backrest. The second pallet stands vertically behind the base. We tilt it back 10–15° so it feels comfortable, and we fasten it in three spots for stability.
- Reinforcing the structure. Even if it seems stable, reinforcement pays off. We add two metal brackets on each side — the bench becomes noticeably sturdier when two or three people sit down.
- Painting or protecting the wood with oil. Dry wood absorbs oil beautifully. Outdoor oils keep color longer and resist rain. Paint works too, but fades faster in the sun — choose outdoor acrylic if you want color.
- Adding cushions. The final and most satisfying step. Cushions 3–5 inches (7–12 cm) thick are ideal — not too soft, not too firm. We always choose removable covers because they’re easy to wash when seasonal dust appears.
A Few Small Comfort Tips
- If the bench sits in the shade, the wood stays cooler and more comfortable — especially in summer.
- For long, comfortable sitting, seat height around 16–18 in (40–46 cm) works best. If your pallet is low, add a second one to the base.
- Cushions are better stored under a roof — even water-resistant fabrics age faster under direct sun.
These are the little observations that come only after several seasons of use.
A bench like this is great as a quick solution for company: place two benches at an angle — and you’ve got a full seating zone.
If you have a garden or flower beds, a pallet bench becomes a handy resting spot between tasks — sit down, relax, drink water, and get back to the beds.
Pallets visually calm the space. Their simple form makes the area feel more organized, without a sense of clutter.
4. 2×4 Sturdy Double Seating Bench
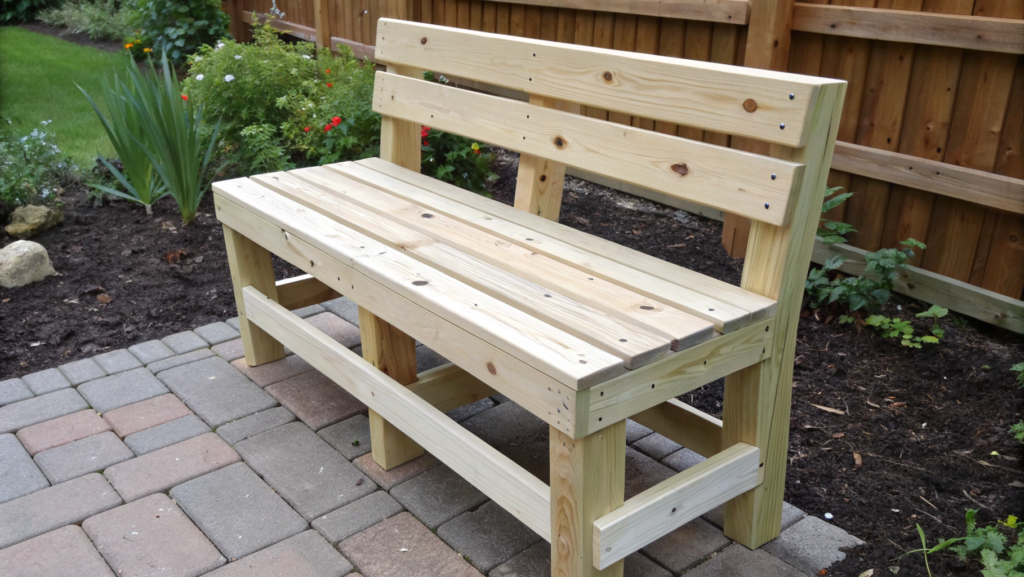
A bench for two people can be built from 2×4 lumber. And this is one of the best solutions.
2×4 boards provide stability that’s hard to achieve with thin decorative materials. They don’t warp as quickly, they hold their shape, and they’re perfect for outdoor builds.
Why a 2×4 Bench Is a Reliable Choice
- Handles heavy load. A properly built bench holds 450–500 lbs (204–226 kg) of total weight.
- Doesn’t require complicated tools. Basically, you only need a miter saw or hand saw and a drill.
- Works in any climate. With good wood protection, it lasts 5–7 years without rebuilds.
- Fits narrow spaces. You can build it 36 in to 72 in (91–182 cm) long.
Optimal Dimensions
- Seat height: 17–18 in (43–46 cm)
- Seat depth: 16–18 in (40–46 cm)
- Length: 48–60 in (122–152 cm) for comfortable double seating
- Total weight: 35–50 lbs (15–22 kg) depending on length
These proportions ensure consistent comfort.
How We Build This Bench
- Choosing the boards. We use dry planed 2x4x8 ft boards. It’s important to check for straightness — if a board has a twist, assembling will be unpleasant and the structure will flex.
- Assembling the side frames. Two H-shaped frames made of 2x4s serve as legs + support. Height: 17–18 in. We always add a horizontal brace at the bottom — it reduces wobbling.
- Adding the front and back stretchers. We connect the side frames with two long cross-pieces. This is the base that carries the entire weight. At this stage, the bench already stands on its own.
- Mounting the seat. Usually this is 4–5 boards of 2×4, laid with a small 1/8 in gap for ventilation and moisture drainage. You can round the edges with sandpaper — it feels nicer to sit on.
- Reinforcing the underside. We add a central support under the seat. If two adults sit down, the load distributes more evenly.
- Protecting the wood. Oil or an outdoor polymer finish — that’s our choice. Oil highlights the texture, while polymer keeps color longer. It depends on the style of the area.
- Adding cushions (optional). It’s comfortable even on bare wood, but for long evenings, a cushion is better. Especially a dense, water-resistant one.
We love dense waterproof cushions 3–4 inches (7–10 cm) thick. They don’t slide and don’t soak after evening dew: QILLOWAY Outdoor Bench Cushion, 48-inch.
Tips
- If the bench sits in an open area, it’s better to use pressure-treated wood for the bottom elements — moisture from below destroys wood fastest.
- In spots where the soil is soft or the braces are short, we add small rubber feet so the wood doesn’t absorb moisture.
- For windy areas (we get plenty!), you can lightly anchor the bench to the deck or the house wall so the structure doesn’t tip over.
We use this bench as a working seat — convenient between gardening tasks or when picking harvest.
And it’s become the perfect transition zone between the garden and the house: you can sit, take off your boots, leave a basket of vegetables without cluttering the porch.
And when a friend stops by, this is always the place they choose to sit while waiting for me to turn off the irrigation or finish something in the greenhouse.
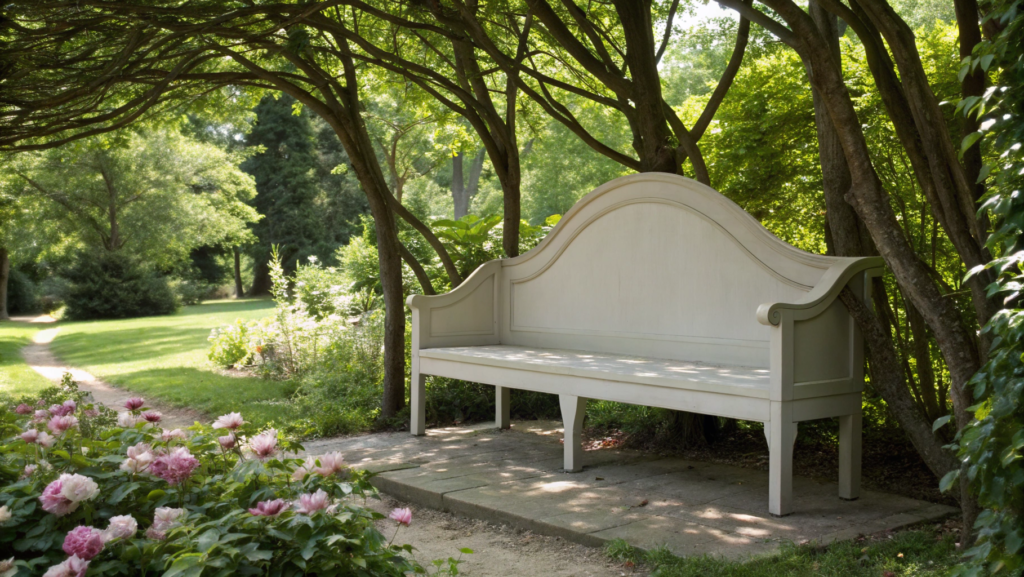
5. Outdoor Bench with Elegant Backrest
Often a yard lacks a space meant just for yourself. Not a working spot. Not a guest spot.
Lindy once said: “What if we make the backrest smoother? Not straight, but with some aesthetics?”
Now we have an Outdoor Bench with Elegant Backrest — comfortable, stable, and a bit more refined than classic garden designs.
Why This Type of Backrest Changes the Bench
- Comfort increases noticeably even with a slight tilt — about 10–12°.
- The bench looks “finished,” like part of a thoughtful landscape design.
- It supports the lower back — something you only notice after an hour of sitting.
- Fits any style: from a classic garden to a modern patio.
And the best part: this kind of wooden construction lasts long if you choose the right boards.
Optimal Dimensions for Comfortable Seating
- Seat height: 17–18 in (43–46 cm)
- Seat depth: 17–19 in (43–48 cm)
- Backrest height: 16–18 in (40–46 cm)
- Backrest angle: 10–12°
- Length: 48–60 in (122–152 cm)
These proportions give comfortable seating even for people who usually don’t linger on garden benches.
How We Build This Bench
- Choosing the wood. Cedar or larch works best — both resist moisture well. We choose 1×4 or 1×6 boards for the backrest to create a clean, elegant look. Before assembly, we dry and sort the wood — boards with slight bends go to places where it’s not critical.
- Assembling the side frames. This is the foundation of the entire structure. On the sides, we use 2×4 lumber to create an H-shaped form, but with the top crosspiece at seat level. It’s important to mark the backrest attachment point in advance — this prevents misalignment later. We cut the legs to the needed 17–18 inches.
- Adding seat crosspieces. Two main boards go in front and back, connecting the side frames. They carry the primary load. We pre-drill holes so the wood doesn’t crack — especially with dense species.
- Forming the seat. We lay 4–5 boards of 1×4 or 1×6, leaving a small ventilation gap — about 1/8 inch — crucial for moisture drainage after rain. We gently round the edges with sandpaper — it genuinely boosts comfort.
- Creating the elegant backrest. The backrest is the key element. We use guide rails fixed at a 10–12° angle. This lets us attach the boards evenly and securely. Then we add vertical or horizontal slats depending on the style. For smoother lines, 1×4 slats work beautifully — they look more refined and visually lighten the structure.
- Reinforcing the lower frame. We add one central support under the seat. It’s invisible, but it gives stability, especially when two adults sit down.
- Treating the surface. Outdoor oil highlights the texture, and a polymer finish gives a more “finished” look. We often do a combo: oil first and a light matte protective coat on top.
Practical Tips
- If the bench sits near a tree, watch the roots — they can lift the structure over time.
- In hot climates, choose light-colored cushions — they heat up less.
- If the backrest uses wide boards, leave a small gap — wood expands in humidity.
- For a perfectly straight top line of the backrest, we use a long straightedge as a template.
One time we forgot, and the top looked like a wave. Don’t repeat our mistake.
The bench is perfect for zones where you need an accent rather than just functionality.
If there’s shade from a tree or canopy, the backrest makes the space feel like a small relaxation nook.
This is where Lindy goes with a book while I’m busy in the garden beds.
Such a bench looks great next to flowering shrubs — visually, the backrest creates a vertical line, and the shrubs add volume.
The result is a clean, balanced composition.
6. Wedding-Style Bench Setup for Events
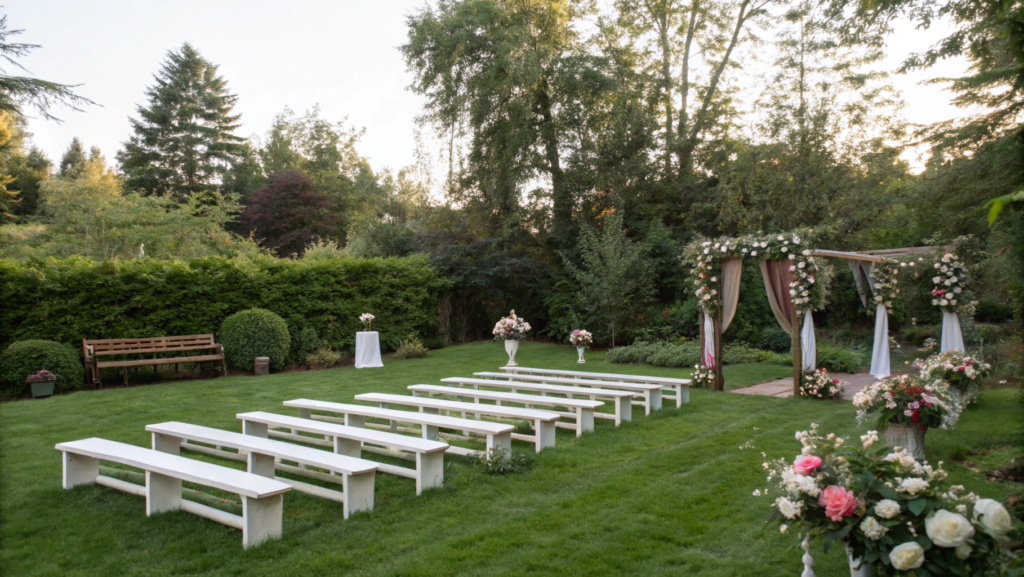
We created this wedding-style zone on our property for our friends. And even though it wasn’t an official wedding, wedding-style benches transformed an ordinary lawn into something symbolic.
Why This Bench Style Works Perfectly for Events
- Looks neat and unified. Simple, repeating forms create order and lightness — especially when benches stand in straight rows.
- Easy to assemble and disassemble. Most constructions are lightweight, so you can move them around depending on the placement of the stage or table.
- Guests can sit in groups comfortably. Unlike individual chairs, benches create a sense of togetherness.
- Can be adapted to the event style — from classic with white textiles to a more natural “garden” look with wooden surfaces.
And of course, we built these benches ourselves — and they looked wonderful.
How We Create a Wedding Seating Zone
- Choosing light but sturdy materials. We usually use 2×10 or 2×12 boards, 6 ft (182 cm) long. Such benches seat 3 adults and don’t sag. Legs are made from 2x4s, and assembly takes about 20–25 minutes. It’s important that each bench weighs no more than 20–25 lbs (9–11 kg) — this makes them easy to move around even alone.
- Assembling simple supports. We build triangular or A-shaped side supports — these shapes are more stable on grass. We attach two supports to each bench. If the ground is uneven, we add small shims under the legs.
- Attaching the seat. A board width of 10–12 inches (25–30 cm) gives comfortable seating yet still looks visually light. We lightly sand the top so guests in nice clothes don’t snag their fabric.
- Adding soft décor (optional). If you want a more festive look, you can use decorative white covers, ribbons, lightweight fabrics, or greenery garlands. Once, we wrapped the bench edges with eucalyptus — it looked fresh and celebratory without being overly ornate.
- Lining up the benches. This is a key moment: even simple constructions start looking “wedding-like” when they stand straight and symmetrically. We leave 6–7 ft (182–213 cm) between rows so people can walk through comfortably.
- Adding a center aisle. A width of 4–5 ft (122–152 cm) works. It’s a classic wedding layout, but it works for any celebration because it creates an organized visual axis.
Décor
A few simple elements make the area look complete:
- Lightweight throws in neutral tones — we place one on the edge of each bench.
- Lanterns along the aisle — especially if the event is near evening.
- Small bouquets or greenery bundles on the bench supports.
- Matching cushions for the back rows so guests sit more comfortably and longer.
For these events, the main rule is don’t overload — nature already does half the work.
Practical Tips
- If the grass is soft, put wide pads under the legs so the bench doesn’t sink.
- In direct sun, guests prefer sitting closer to shade — plan the bench placement in advance.
- If the event lasts several hours, add at least a few cushions here and there — you’ll be surprised how much comfort this adds.
- For photos, perfect rows matter. Once we aligned the lines using a long string as a guide — and it worked great.
When This Concept Is Especially Useful
- When you need to quickly create a structured space for a group without a sense of chaos.
- When the event is small but you want to give it an organized, “event-like” feel.
- When you don’t want to rent furniture or depend on vendors.
And most importantly — these benches can be reused: after the event, they become part of the garden, patio, or garden-bed zone.
7. Budget-Friendly Bench with Built-In Table
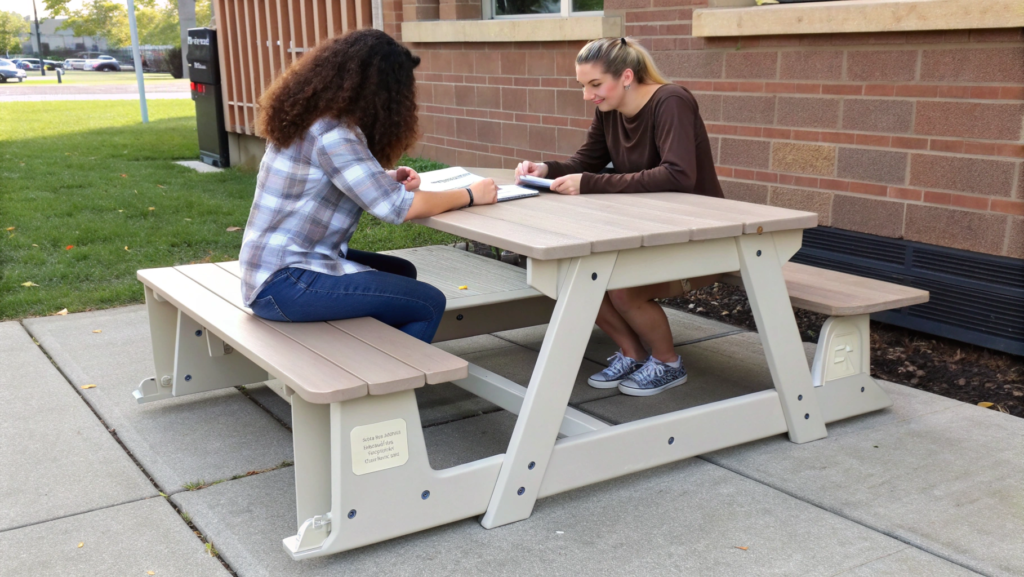
A bench with a built-in table is a convenient and budget-friendly design. It:
- Saves materials — the tabletop becomes part of the structure rather than a separate piece of furniture.
- Works well for two people — each person sits on an end, and the table in the center creates a bit of personal space.
- Fits narrow areas — the width stays compact, but functionality increases.
- Can be assembled in 1–2 hours, even if it’s your first time.
And yes, this is one of those rare budget projects that looks neat and “more expensive” than its materials.
Optimal Dimensions
- Bench length: 60–72 in (152–183 cm)
- Seat height: 17–18 in (43–46 cm)
- Seat depth: 16–18 in (40–46 cm)
- Built-in table width: 12–16 in (30–40 cm)
- Total weight: 30–40 lbs (13–18 kg)
The table shouldn’t be too wide — otherwise sitting on the ends becomes uncomfortable.
Materials
- 2×4 boards for the frame
- 1×6 or 2×6 boards for the seat
- 1×10 or 1×12 board for the tabletop
- Outdoor screws
- Oil or paint for protection
You can build it entirely from 2x4s, but a wider top board makes the construction more comfortable.
How to Build a Budget Bench with a Table
- Assembling the two side frames. These are the familiar H-shaped structures made from 2x4s. We set the height to 17–18 inches. Before assembly, we check the boards for straightness — crooked legs create misalignment along the entire bench.
- Installing the crosspieces for the seats. One crosspiece goes in each side section — they define the depth. We usually keep 16–18 inches, which is enough for comfortable seating. We secure the crosspieces with two screws on each side.
- Adding the central post for the future table. This is the key element of the design. We place a vertical 2×4 post between the side frames, exactly in the center. It acts as the table “leg” and adds rigidity to the entire bench.
- Securing the upper rails. Two long 2×4 boards connect the side frames and the central post. They support the weight of both the seats and the tabletop. Here it’s especially important to check the level — otherwise the top will turn out uneven.
- Mounting the seats. We lay 1×6 or 2×6 boards on both ends of the bench. You can use 2–3 boards per side. We leave a 1/8 in gap between boards for ventilation and moisture drainage.
- Installing the tabletop. A board 10–12 inches (25–30 cm) wide works perfectly. We slightly round the edges with sandpaper — feels better and is safer. We attach it to the central post and rails.
- Treating the surface with a protective finish. Oil highlights the grain and makes the wood less slippery. Acrylic paint creates a more “clean” look, which works well for patios and events.
We use this table for morning coffee, for baskets of greens while harvesting, for phones so we don’t keep them in pockets while gardening, for tools like pruners, even for small flower pots when we want to quickly freshen up the space.
And when guests come, the table easily turns into a mini-bar — water, snacks, candles, or lanterns.
Small Upgrades That Make the Design Better
- Add rubber feet so the bench doesn’t absorb moisture from the ground.
- If the bench sits near a wall, secure the top with one bracket — adds stability but still allows removing it if needed.
- Sometimes we make the tabletop slightly longer than the seats — it adds structure visually and is more convenient for objects.
These are simple steps, but they noticeably improve longevity.
If you don’t want to plane a wide board, you can buy a ready-made tabletop: Kinger Home Acacia Serving Board (Large) on Amazon.
Where This Bench Works Best
It performs great near the house entrance, greenhouse, or barbecue area — places where you need seating and a surface at the same time.
In small yards, this format is almost irreplaceable: one structure performs the functions of two pieces of furniture.
And yes, strangely enough, guests always choose this bench.
8. Rustic Garden Bench from Reclaimed Wood

Here in Idaho we have lots of old barns, farms, and sheds — and sometimes the owners are willing to give boards away almost for free.
And they work perfectly for a rustic garden bench. You can build it literally in a single day.
Why Reclaimed Wood?
- The wood has already lived through seasons, so it’s stable and doesn’t warp from rain like freshly cut lumber.
- The texture is stronger. Cracks, wear marks, the old gray tone — all this makes the bench feel visually warm and natural.
- Savings. Such boards often come free or almost free.
- Eco-friendly. Reusing old materials feels very “right” for the garden.
What Boards Work Best
We usually take:
- Boards 1–1.5 in (25–38 mm) thick — strong but not excessively heavy.
- Width 6–8 in (15–20 cm) — ideal for seats.
- Old 2x4s (38×89 mm) for the frame — farm posts from old structures are often extremely dense.
And we always check:
- No rot (dark, soft spots go aside immediately).
- No old rusty nails (better to remove them right away).
- Whether the ends crumble too much.
Reclaimed wood shouldn’t fall apart — it should be solid wood that has simply “seen life.”
Garden-Friendly Dimensions
- Length: 48–60 in (122–152 cm) — perfect for two or three people
- Height: 17–18 in (43–46 cm)
- Seat depth: 16–17 in (40–43 cm)
- Weight: 40–60 lbs (18–27 kg) — old wood is heavier
The farther from the house the bench stands, the more important stability becomes.
We place ours near the garden beds — and the wind can’t touch it.
How to Build a Rustic Bench
- Cleaning and preparing the wood. First we brush the boards with a metal brush — removing dirt, old paint, moss. Then we lightly sand only where needed — the goal is not to make the wood smooth, but simply remove splinters. Often old boards have a natural gray color — we preserve that.
- Building the frame from 2×4. Reclaimed 2x4s are often incredibly dense — old forest grew slowly. We make two H-shaped legs, 17–18 in tall. We check to make sure the boards aren’t twisted — if they are, the leg becomes wobbly.
- Installing the longitudinal rails. Two 2×4 boards go in front and back — they hold the seat. Here it’s important to add one screw “at an angle” to reinforce the connection in old wood.
- Laying the seat. Usually two wide 1×8 boards or three narrow 1×6 boards. We leave a 1/8 in gap between them — old wood reacts to moisture, and ventilation helps prevent warping. Edges can be lightly rounded — reclaimed wood can be sharp at the corners.
- Reinforcing the bottom. We place one central brace under the seat. This increases the bench’s lifespan — especially when two tired adults sit down after a long gardening day.
- Oiling the wood (optional). If you want to keep the gray color, use clear oil. If you want to slightly darken the wood, choose an oil with a warm tint. Lindy loves a mix: half the bench stays gray, and the top gets a slight warm tint — it looks beautiful and natural.
A reclaimed bench is not the kind you place at the front entrance. Its place is deep in the garden.
It works especially well:
- in the shade of trees, where old wood looks organic;
- near garden beds, as a spot to rest, remove gloves, or place a basket;
- next to flower borders, where the texture of aged wood enhances the natural feel;
- as part of a garden “composition,” where the sense of history and earth matters.
We often use our bench as a “station” between the beds and the greenhouse — a place to sit, leave tools, or take a sip of water.
Small Upgrades for Longevity
- Add rubber feet so the wood doesn’t absorb moisture from the ground.
- If a board is cracked but still strong, reinforce the crack with a flat steel bracket underneath.
- Remove old nails completely — they tend to “pop out” over time.
- Once a season, clean the bench lightly with a dry brush — it keeps its character for years.
This is the ideal option for places where you need not just furniture, but a garden element with personality — something that feels like it has always belonged there.
Near the garden beds, under an old tree, by the compost area, or among the flowers — reclaimed wood looks best in exactly these spots.
9. Multi-Use Bench with Planter Boxes
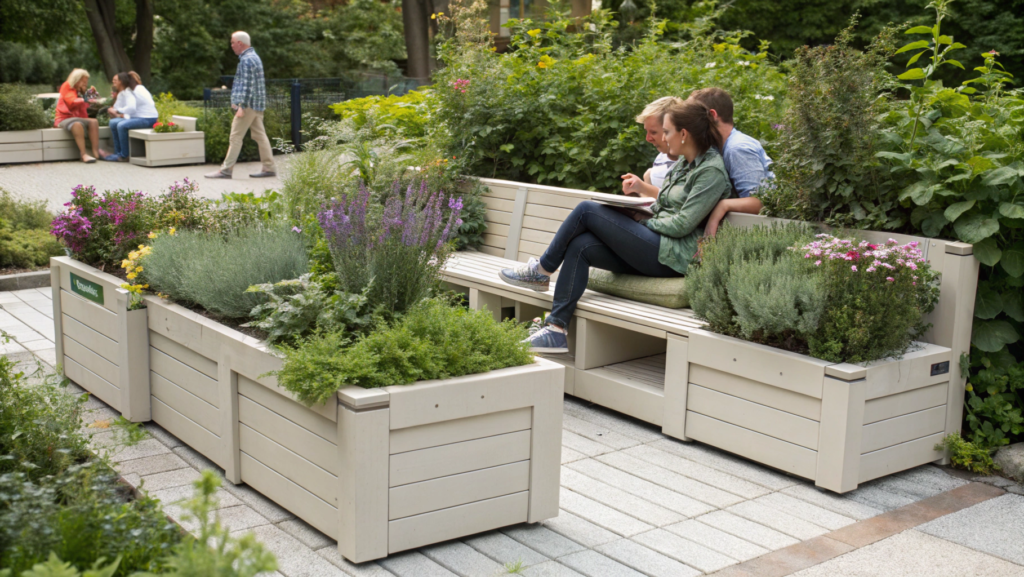
A bench with built-in planter boxes is a spot where flowers, herbs, and people meet literally on the same line.
Why This Bench?
- Space-saving. When the bench is combined with planters, there are fewer objects and more open area.
- Creates a natural boundary. It works as a zone divider, visual accent, or the edge of a terrace.
- Works like a mini-garden. We’ve grown mint, sage, and dwarf tomatoes there.
- Enhanced comfort. Plants on the sides create a sense of coziness and protection (in a good way).
- And most importantly — unlike separate pots, planter boxes look unified and don’t create visual clutter.
Optimal Dimensions
- Total length: 60–72 in (152–183 cm)
- Length of seat between boxes: 36–48 in (91–122 cm)
- Seat height: 17–18 in (43–46 cm)
- Planter box width: 12–16 in × 16–20 in length
- Planter depth: minimum 12 in (30 cm) — otherwise roots are restricted
If you plan to plant perennials — make the depth 14–16 inches.
Wood and Materials
- Cedar or larch — both resist moisture and don’t rot quickly.
- Inside the planter boxes — landscape fabric or thin liner to prolong the wood’s life.
- Outdoor screws, preferably anti-corrosion.
- Geotextile + a layer of small gravel on the bottom — improves drainage.
We made planter boxes from 1×6 boards, and the seat from sturdy 2×6 boards.
How to Build This Bench
- Building two planter boxes. Each box is a small frame made from 1×6 boards. We make the height around 16 in — plants look harmonious and don’t need deeper soil. We place gravel (1–2 inches) at the bottom, then line with geotextile.
- Reinforcing the lower frame. Under each box we build a simple 2×4 frame so the construction stays stable. This is important because wet soil makes the planter heavy.
- Assembling the seat between the boxes. Two long 2×6 boards go between the planter boxes and attach to the side rails. We check the level — even a slight sag will be noticeable when using the bench.
- Creating reinforcement under the seat. We add a central support block so the bench doesn’t flex when two adults sit down.
- Treating the wood with protective finish. Outside — oil or outdoor paint. Inside the planters — only liner/membrane so the wood doesn’t touch soil chemistry.
- Filling the planter boxes. Gravel on the bottom, then good-quality soil mix. If you want to grow herbs — add a bit of sand for better drainage.
Best Plants for This Setup
We tried many combinations and settled on these:
- Lavender — airy, pollinator-friendly.
- Sage — strong, fragrant, ages beautifully.
- Dwarf tomatoes — especially compact varieties.
- Petunia or verbena — if you want a wave of color.
- Thyme and mint — but mint is better kept in a small inner pot, it loves spreading.
Plants on the sides make the seat feel more private and visually cozy.
Since the seat sits between two boxes, cushions should be fairly firm — soft ones sink on the edges.
Practical Tips
- Add rubber feet under the planter boxes so the wood doesn’t absorb moisture from the ground.
- If your property gets strong winds, anchor the bench to the deck with a few brackets.
- Add a small top trim on the planters — looks cleaner and prevents soil from spilling out.
- Use mulch (bark or gravel) on top of the soil — easier maintenance and better moisture retention.
This bench works especially well in small gardens where one item has to perform multiple tasks.
It looks great near the house entrance or greenhouse and replaces separate pots and furniture.
On a patio, planter boxes act as simple natural décor, and in a seating area, the plants create a softer, calmer atmosphere.
10. Compact Balcony-Size Bench
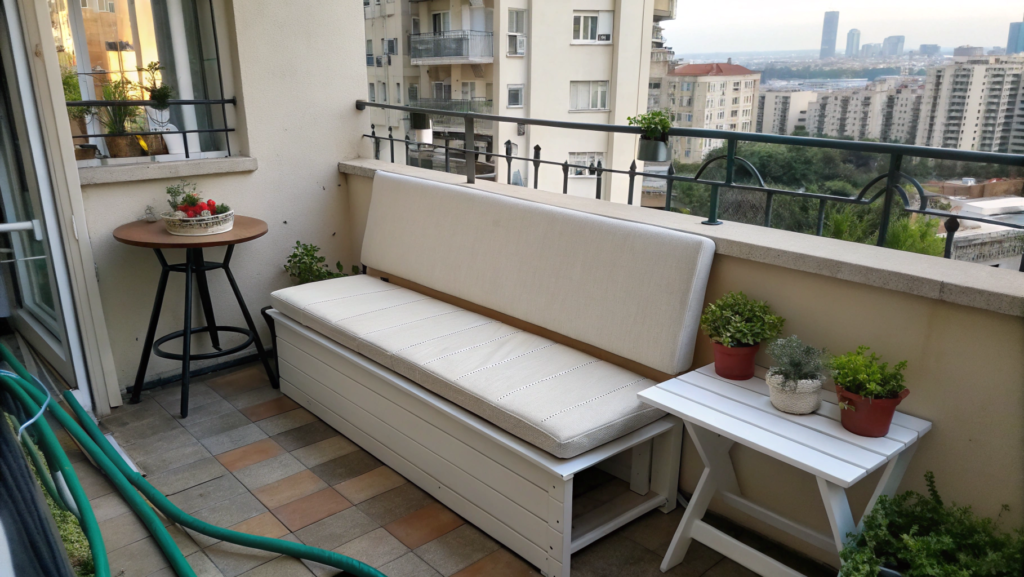
Balconies are those spaces that always feel smaller than they really are.
Especially when there’s already a small table, a couple of pots, and a hose lying somewhere on the side that you keep promising yourself you’ll “put away soon.”
That’s why it makes so much sense to make a compact bench here — one that won’t steal space, will be light, stable, and still comfortable enough.
Why a Compact Bench
- Doesn’t take up usable area because the depth stays minimal.
- Easy to move — a light version weighs only 20–25 lbs (9–11 kg).
- Universal: can be used as seating, as a plant shelf, or even as a temporary table.
- The most budget-friendly construction of all options, because it uses the fewest boards.
Optimal Dimensions for Small Spaces
- Length: 36–48 in (91–122 cm)
- Depth: 12–14 in (30–35 cm) — the key parameter!
- Height: 17–18 in (43–46 cm)
- Weight: 18–28 lbs (8–13 kg)
Less depth — and it becomes uncomfortable to sit. More depth — and it starts blocking the passage.
What Materials to Use
- 2×2 and 2×4 boards — they form a light but sturdy frame.
- For the seat — 1×4 or 1×6 (gives the construction a neat look).
- Wood screws 2–2.5 in (5–6 cm).
- Oil or outdoor varnish.
- Small rubber feet if the balcony has tile.
We once made this bench entirely from scrap pieces — it turned out almost free.
How to Make a Compact Balcony Bench
- Determine the exact placement and measure the depth. Balconies are rarely even — railings, ledges, corners. We measure in three points: left, center, and right. We take the smallest depth so the bench doesn’t bump into anything.
- Build the two leg-frames. We use 2×2 or 2×4. Height — 17–18 inches. The frames are rectangular but with a center brace so the structure doesn’t wobble. On a small balcony wobbling is immediately noticeable, so this brace is a must.
- Connect the legs with longitudinal rails. Two 2×2 boards go in front and back — these will support the seat. We always pre-drill so the narrow boards don’t split. We check the geometry: the bench must stand level, especially if the balcony is slightly sloped.
- Install the seat. We use 1×4 or 1×6. We leave a 1/8 in gap between boards — balconies are often humid, and without ventilation the wood darkens. To make sitting more comfortable, we slightly round the front edge with sandpaper.
- Add hidden reinforcement. In the middle, we install a short 2×2 brace under the seat. Balcony benches are narrow, and without this detail the seat may “flex” when two people sit.
- Treat the surface. Outdoor oil works best — it gives the bench a matte finish and protects it from humidity. If you want a more “urban look,” you can paint it with outdoor acrylic paint.
- Install rubber feet. A tiny detail, but on tile or concrete it prevents sliding and protects the wood from moisture after rain. Without them the bench quickly starts absorbing water “from below.”
How to Use This Bench in Real Life
- as a morning mini-seat with coffee;
- as a stand for pots when you want to bring seedlings into the sun;
- as a temporary laptop table (yes, we’ve worked on the balcony more than once);
- as extra seating for guests if the balcony is connected to the patio.
A narrow bench gives much more than its size suggests.
Practical Tips
- If the balcony is open — we secure the bench to the wall with one bracket so the wind doesn’t shift it.
- If you plan to sit often — add a low back slat (literally one 1×4 board): it gives a slight sense of protection and supports the back a bit.
- For style, you can paint the frame one color and leave the seat natural.
A bench like this is especially useful where space is literally at a premium and you need a narrow, stable, lightweight construction that does not block the walkway.
On small balconies, this bench creates a full seating spot in a zone where regular furniture simply doesn’t fit.
It’s convenient as a mini relaxation area, as a plant stand, or as a temporary table — in small spaces, this kind of multi-functionality is felt the most.
Share Your Experience
We’ve built these ten designs at different times and for different parts of the yard, and each solved a very specific task: sometimes we needed strength, sometimes compactness, sometimes we wanted to combine seating with planting or storage.
And every time it was the same — a simple bench transforms a space much more than it seems during planning.
If you’ve tried your own versions or adapted one of these designs to your conditions, write about it in the comments. It’s always interesting to see how these ideas work in other gardens and yards, and what solutions appear in the process.