Skip to Content

How to Make Green Powder from Homegrown Greens!

You can easily turn your homegrown greens into a nutritious green powder to use in smoothies, soups and more! Here’s how to do it!

Growing your own greens is incredibly easy! Greens can be grown in containers, in-ground or in raised beds. Honestly, they are one of the easiest crops to start growing!

If you’ve gardened for any matter of time, you probably already know that greens tend to come on quickly and all at once! And, if you blink again, they will have all bolted!

Greens are ideally grown when temperatures are below 80 degrees. Anything above that, and you’ll find your greens bolting even faster!

A lot of root crops will also provide delicious and nutritious edible greens! Even cole crops like broccoli and cauliflower deliver a ton of greens in addition to the heads that we are used to capitalizing on! Don’t miss out on this valuable bonus harvest of greens!

Mason jar tipped on side with green powder spilling out

That means we need to make the most of our greens while we have them! And, often, it can get a bit overwhelming to use them all up – even if you love salads!

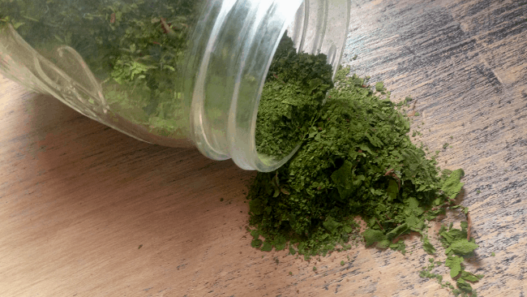
So how is a gardener supposed to use up all those greens while they are in season? One of my favorite ways is to make green powder!

Benefits of Making Green Powder from Homegrown Greens

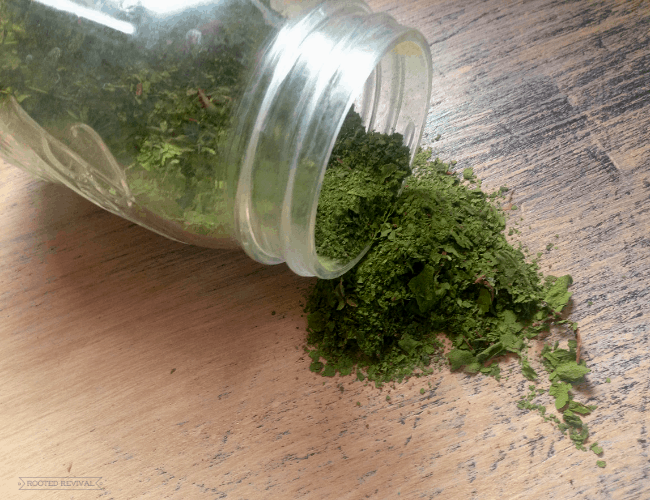
Green powder is just that: dried and powdered greens! 

You’ve undoubtedly seen it in the grocery store health food aisle! Green powder has become a popular and efficient way to add extra greens into your diet. There are so many benefits, including:

  • Aiding digestion
  • Strengthening the immune system
  • Being a healthy superfood for the menopause

But, do we actually know how those greens were grown and processed? Probably not.

Greens are at their best and most nutritious right after they are harvested. The nutrient levels start to drop considerably after that! This means that homegrown greens will be much more nutrient dense than store-bought. 

Hand holding a jar of dried greens

Plus, you know that your homegrown greens are grown in nutrient-dense soil (further boosting their nutrient levels) and that they haven’t been sprayed with chemical herbicides or pesticides.

On top of all that goodness, think about all the fossil fuels for packaging and shipping that will be saved by growing and making your own greens powder at home!

And, if you already have a garden, you undoubtedly have greens going to waste at some point because, let’s face it: there’s usually too many to keep up with!

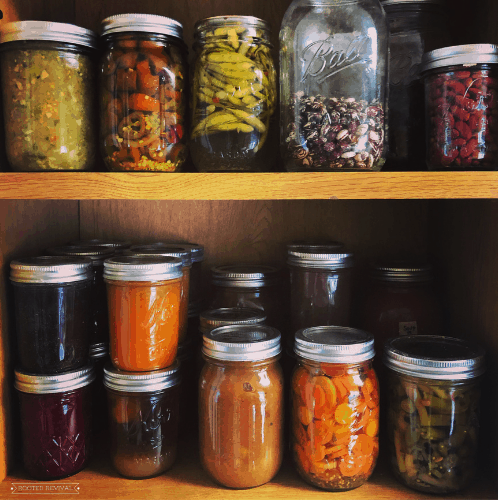
Dried greens are a perfect solution to extend the harvest!

dehydrator tray with colorful rainbow chard leaves laying on it

Oh, and did I mention that a pack of seeds costs about $3 and will give you more greens than you know what to do with?!

Compare that with how much a tub of green powder costs at the health food store and you will be running to the nursery to grab some seeds!

Plus, if you let some of the greens bolt (go to flower), they will produce seeds that you can save for future years.

Greens are incredibly easy to save seeds from and one plant will give you hundreds of seeds!

So, what are you waiting for?! 

Uses for Dried Greens & Green Powder:

  • Blend them into your smoothies
  • Add the powder or dried flakes to your soups, stocks, chowders and stews
  • Mix them into rice dishes, casseroles and slow cooker meals
  • Add them to homemade protein bars for an extra serving of veggies
  • Add a sprinkle to your morning oatmeal
  • Mix them into veggie dips
  • Whip them up with egg dishes, like scrambled eggs, quiche and omelettes
fingertips holding up a piece of dried chard

Ideal Greens for Drying & Powdering:

  • Radish greens
  • Beet greens
  • Asian greens like tatsoi and chinese broccoli
  • Kohlrabi greens
  • Kale
  • Chard
  • Broccoli leaves
  • Cauliflower leaves
  • Spinach
  • Turnip greens
  • Dandelion greens
  • Carrot greens
Hand placing pieces of dried greens into a bullet blender cup

How to Make your own green powder

Mason jar tipped on side with green powder spilling out

How to Make Green Powder from Homegrown Greens!

Yield: 1 cup fresh greens = 1 Tbs powder
Prep Time: 15 minutes
Cook Time: 6 hours
Total Time: 6 hours 15 minutes

Make your own green powder using your homegrown greens!

Ingredients

  • Greens of choice (1 cup of fresh greens = about 1 tablespoon of powdered greens)
  • Dehydrator

Instructions

  1. Clean your greens
    Make sure that your greens are free of dirt and debris. If my greens are fairly clean, I’ll usually just wipe them with a  damp towel. However, if they are dirtier, you can run them under cold water. Pat dry.
  2. Prep the greens
    If you are using leaves with large midribs (the primary stem or vein running through the middle of the leaf), you can remove it. This can be especially helpful with chard and kale.
  3. Briefly blanch the greens (optional)
    You don’t have to blanch your greens (I rarely do because I’m lazy!), but it can be helpful in certain situations. If you are using more mature greens that are a bit woody or tough, blanching will help soften them. It also helps reduce the oxalic acid found in some greens. Greens that are high in oxalic acid include beets, chard, spinach and turnip greens. If you have issues with kidney stones or other health concerns that can be effected by oxalic acid, it would be most ideal to blanch them before drying. 

    To blanch your greens, submerge them into boiling water for about 1 minute. Remove them and place them in cold water or an ice bath for a few minutes. Then, strain them in a colander to remove any excess moisture. Lay them out on towels and pat them to help dry.
  4. Lay out on dehydrator trays
    Give any damp greens another pat down to help dry them as much as possible (drier greens will dehydrate much faster than damp ones). Then, place a single layer of greens on the dehydrator trays. It’s okay if the edges overlap some because they will shrink during the drying process.
  5. Set the dehydrator 
    Place your trays in the dehydrator. Set it to about 125oF. On my dehydrator, this is labeled as the “fruits & veggies” temperature. I’ve found that this temperature is the best setting for greens in my experience. I have tried drying them on lower settings and it takes forever! Higher temps can cook the greens instead of just drying them and lead to more nutrient loss. 
  6. Watch closely while greens dry
    Start the dehydrator and check your greens every few hours. Your greens will be done once they are crumbly all over. Pick up a few leaves and test them every few hours. 

    Each dehydrator is different! Some may dry much faster or slower. On average, my greens take between 6-8 hours to dry. But it also varies based on how damp the greens are. If they are dry and were just wiped instead of washed, they can often dry in as little as 4 hours. 
  7. Powder the greens
    You can break the greens into pieces if you want larger bits for soups and other dishes. If you want powdered greens for smoothies and such, you can place the pieces into a bullet style blender and process them into smaller pieces or into a fine powder.
  8. Store 
    Store your dried greens in an airtight container - a mason jar works great!

Notes

Oven Drying:
You can also dry your greens in an oven. Set it to the lowest temperature and lay out your greens in a single layer on a cookie sheet. Place the greens in the oven and leave the door cracked just a bit for airflow and to prevent overcooking. Check the greens every half an hour or so for doneness. Oven drying should take 1-3 hours depending on how damp the greens are and how low the oven is set. 

Pin it so you don’t forget it!

Author

  • Kaylee Vaughn

    Kaylee is the Founder of Rootedrevival.com. She has set up and run two homesteads, a one-acre in Idaho, and her current two-acre dream homestead in the Pacific North West. Her qualifications include a Permaculture Design Certification from Oregon State University, and she is a Gardenary Certified Garden Coach. Kaylee currently produces at least 80% of her own food. She contributes to our site through articles, training and coaching to our clients. You can read more about her at rootedrevival.com/kaylee-vaughn

Levi

Sunday 1st of January 2023

Thanks for the awesome article

Skip to Recipe