Behind the Scenes: May 2019 – A quick recap of some of the homestead happenings that occurred on the Zenstead this month!
Oops. Sorry ya’ll!
It’s already mid-June and I’m just now getting around to talking about everything we did in May!
June really hit with a bang and life has been kicking my butt lately! I’ve been extremely overwhelmed with the homestead and life in general… feelings I’m sure all you good people have never experienced! ? I’ll share a bit more about all that when I write the June “Behind the Scenes” post in a couple weeks. But, for now, I’m getting back on track, back to homesteading and back to blogging!
So let’s chat about all the things May brought our way!
More Chickens!
We got more chickens! I can tell you’re shocked because it’s just so unlike me! ? We got 5 new layer hens, all of which are new breeds to us: a Dominique, a Gold-Laced Wyandotte, a Cuckoo Maran and a Black Austrolorp. We also got a Polish… cause they have mohawks and I need that in my life!
We’ve used lots of different styles of brooders (which I talk about in this post), but my favorite method is to have the chicks live outside! We have a spare coop that we use as a brooder. It keeps our house from being filled with dander and dust from the chicks. And, since our adult chickens free range, they are able to check out the chicks and get to know them. It makes introducing the chicks to the flock so easy! We’ve never has a single issue!
We also got 10 Rainbow Ranger chickens. While we have raised and processed some of our roosters, this will be our first time intentionally raising meat birds. We don’t eat any commercially-raised meat, so we’ve had very little meat in our diets over the last decade. These birds will fill our freezer – something we are always grateful for. And they will live their happy chicken lives in the pasture, eating high quality non-GMO feed and as many bugs as they can catch until it’s time for us to process them.
My Garden Challenge:
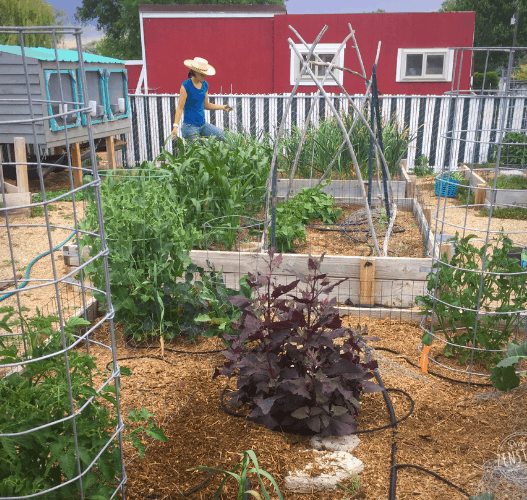
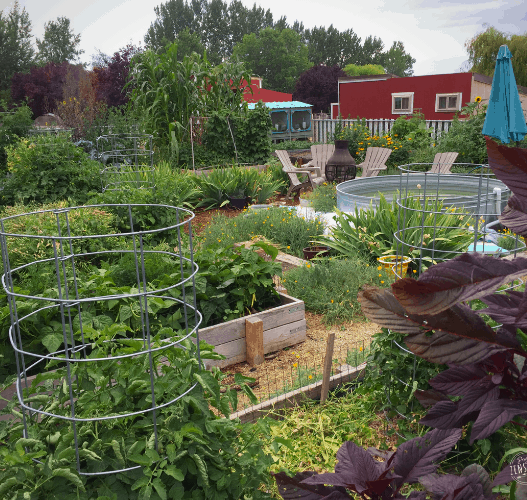
This year, I challenged myself to grow everything in our veggie garden from seed!
Why?
- It saves a lot of money versus buying plant starts!
Starts range from $3-$6 each! That really adds up when you have a 1,000+ square foot garden and you want to grow enough food to eat all year! For just our 16 tomato plants, we would have spent around $70 if we had bought them as starts! Instead, I spent $0 on them, reusing seeds that I already have on hand. Which brings me to my next point… - Seed packets are affordable and can last several years!
Seed packets usually have enough seeds to last for a few growing season when you store them properly. My local nursery also sells last year’s seeds at half price, which saves me even more money! - I can grow extra for friends and family
When you grow from seed, you usually plant more than you need in case some of the plants don’t germinate. Chances are, you will have extra plants than what you need! This allows you to share with your family and friends. And, believe me, it feels awesome to help other people grow their own food too! - I’m super competitive with myself and wanted to see if I could do it!
To be honest, this was one of the main reasons I did it! ?
On top of growing everything from seed, this is by far the biggest garden I’ve ever had, with over 100 varieties of herbs, veggies and flowers. I’m also spending a lot of time developing a large space for our new herb and perennial garden (more about that below).
Maybe this is why I had a mini emotional/mental breakdown in early June! ?
I don’t think I would have tried to tackle this challenge in my first couple years of gardening! It’s very important to get the timing right to know when to plant everything. And of course, keeping everything alive and hardening them off properly is also very important… and time consuming! If you aren’t ready for a challenge like this yet, that’s totally fine! (I spent the last five years royally messing up my garden in order to learn how to do this!) But I would encourage you to challenge yourself to try something new every year so that you are continually pushing yourself and expanding your skills!
Here’s the basic planting schedule I used for my seeds (Zone 6b):
- February – Early March:
- Started long-season crops like tomatoes, okra, eggplants, peppers, nasturtiums, and flowers seeds. I kept them inside under grow lights in our Seed Starting Cabinet.
- March:
- Direct seeded cold crops in our raised garden beds. This included crops like kale, cauliflower, broccoli, Brussel sprouts, carrots, beets, parsnips, onion and leek seeds.
- Started herbs and more flower seeds inside.
- April:
- Direct seeded onion starts, greens, radishes and some flower seeds outside.
- Moved sprouted seeds from inside to the outdoor greenhouse.
- Started a few more flowers and herbs in the greenhouse as well as replacing any that were lost in the frost.
- Started all of my cucurbit seeds (squash, pumpkin and cucumber) in the greenhouse.
- May:
- Hardened off the warm crop seedlings the first two weeks of May. I harden them off in our East-facing cold frames. They provide protection to the seedlings while still exposing them to the sun, wind and weather. Since they are blocked by the barn on the South, they protect the seedlings from the hot afternoon/evening sun, giving them about 7 hours of sunlight a day. The frames can be open and closed based on the overnight temps. It’s by far the easiest way to harden off veggies that I’ve ever found and I don’t have to haul them in and out of the greenhouse each day!
- Planted out the hardened off seedlings in mid to late May once all chance of frost was gone.
- Direct seeded beans and grains outside in the garden
- Started some more flower and herb seeds, just for the heck of it!
Basically, everything is now planted out in the garden except for some flowers and herbs that I started in May and my squash and pumpkins. Which I will explain more about below??
Squash Bug Prevention:
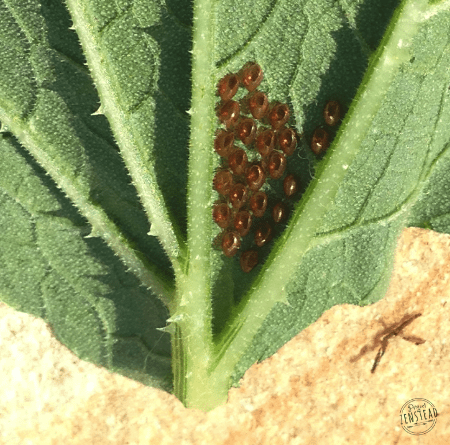
Last year, we had a horrible squash bug infestation! I watched as they destroy plant after plant last summer, despite diligently picking them and their eggs off of my plants every day. There were just too many and I couldn’t keep up. Sadly, we had very little squash to put away for the winter, which is normally a big part of our winter diet. ?
This year, I’m doing some very specific things to hopefully alleviate the problem:
- I’m waiting extra long to plant out my squashes and pumpkins. I have potted them up a few times so they can continue growing in their pots.
- I’ve chosen varieties that have shown a higher resistance to squash bugs.
- I’m planning to plant them in new locations rather than in my primary garden raised beds where they’ve grown in the past.
- I plan to cover them with floating row cover to prevent bugs. I will need to remove the cover once they bloom so they can be pollinated, but until then, they will be tucked under the covers!
- I will be as diligent as possible about checking them for eggs and bugs and removing any that I find!
I’ll keep you guys posted on how it goes! Now, my problem is figuring out where to plant all those squash plants! ? Looks like it’s time to build some more raised beds!
Another Garden Challenge… Because apparently I can’t stop myself!
In May, I did a ton of work in our “Magic Garden”. That’s what we’re calling our new permaculture/perennial/herb garden. ‘Cause I’m determined that it’s gonna be damn magical by the time we get done!
Just to make things more fun, we are attempting to create the garden using only free & repurposed items! Can you tell that I love a good challenge?! Especially when it saves us money! ?
Here’s what we’ve been able to source for free for the garden:
- We used free logs from Craigslist to make the perimeter border. These will also provide natural habitats for beneficial insects.
- I made a plank walkway out of free pallets and painted it with wood deck stain we also got for free on Craigslist.
- We are making pathways with stepping stone pavers we got for free from a coworker who was moving.
- We made a small patio using concrete stepping stones we got for free from Craigslist.
- We are building a pergola over the seating area using primarily repurposed wood from a nearby construction site.
- We are building a giant raised bed from repurposed stud boards we got for free from the construction site.
- I made a garden trellis from old branches. I have literally hauled these branches through two house moves because I knew I’d have a purpose for them someday. Lindy thought I was crazy, but who’s crazy now?! Probably still me…. ??♀️
P.S. Here’s a post all about how we score so many free items on Craigslist for our homestead!
Bits & Pieces:
**This post contains affiliate links. We may receive a commission at no expense to you if you choose to sign up for services using these links. See our full affiliate disclosure here. Thanks for helping support this blog! **
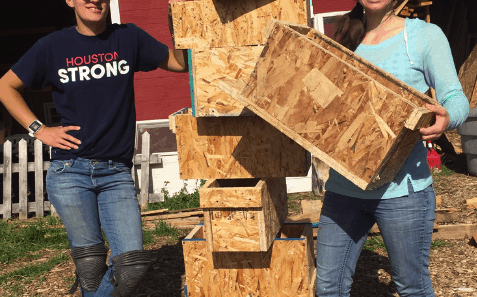
- We made a helluva lot of bee boxes in May. We are also up to 13 hives now at our house! It’s considerably more than what we expected to have so we are definitely feeling that learning curve!

- Farmer Lindy turned 30! The shirt is courtesy of yours truly!

- I bought a new hat! Okay, I know it’s not super exciting news, but it’s still news! ? We are big fans of the Nevada-style flat tops here in the high desert. This one a bit different but it has an extra wide brim (great for working in the sun!) and it’s extremely comfortable! The pattern is adorable but’s a bit flashy compared to what I’m used to! What do you guys think? Flashy or cute? Although, I’m gonna wear it regardless! ? Also, here’s the link
to the hat in case you love it so much that you want to buy one! Then we can be twinsies!
What happened on your homestead in May? Let us know in the comments!
