

Behind the Scenes: August 2019 – A quick recap of some of the homestead happenings that occurred this month, including: how we make harvest season easier, our bathroom renovation, and some surprise chicks!
August was a whirlwind! We must have been momentarily possessed by the “ghost of project left undone” because we took on several big projects – including a bathroom remodel – this month!
Why we chose the heat of summer and the middle of harvest season to do so, I have no idea. ? Seriously, we must have been possessed! Crazy or not though, we made it through and accomplished a lot! We even squeezed in a quick trip to visit our friends in California and help them build a goat barn! #whenhomesteadersvacation ?
Here’s a quick peek “behind the scenes” at some of our August highlights!
**This post contains affiliate links. We may receive a commission at no expense to you if you choose to sign up for services using these links. See our full affiliate disclosure here. Thanks for helping support this blog! **
Tips to make canning & harvest season easier!
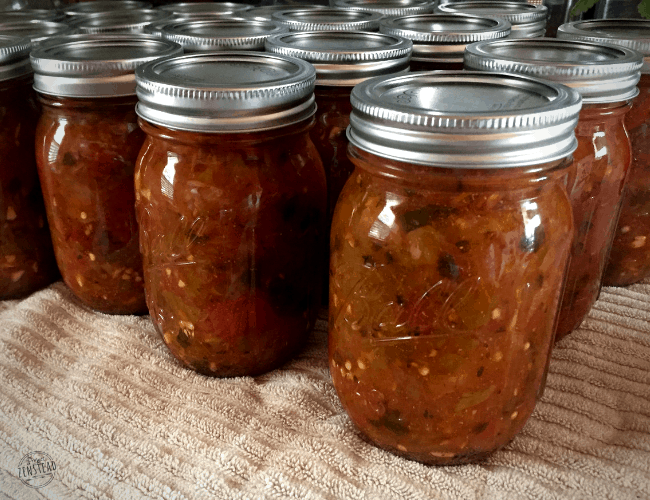
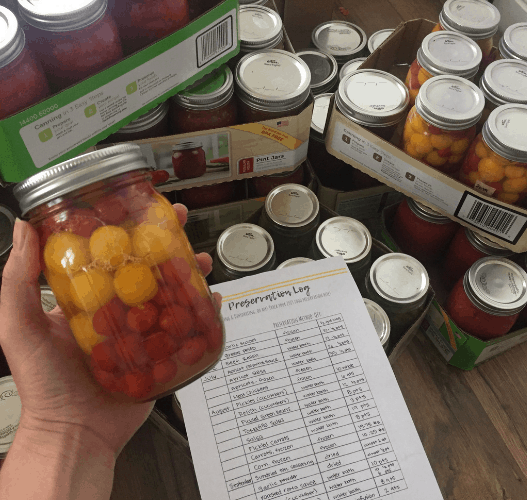
We harvested and processed tons of corn, carrots, eggplants, cucumbers, tomatoes and herbs this month! Without a doubt, August and September are the busiest months for harvesting and processing our garden’s goodness. Processing and canning becomes a daily occurrence from August until the frost hits in October! Luckily, over the past several years, we’ve developed some systems that makes this crazy time of year a bit more organized and less chaotic!
Our Preservation Station:

We’ve found over the years that having an organized system and organized supplies makes harvest season a lot less chaotic! A few years ago, I created our “Preservation Station” to do just that! It’s actually quite the life-saver! I can’t stress enough how important it is to have all your supplies in one central and well-organized location!
To make the “Preservation Station”, I built specially-sized free-standing shelves from scrap lumber. The shelves hold my giant pots, dehydrator, canning supplies, empty egg cartons, canning books and other supplies. There are hooks on the sides which we use to hang the egg baskets, harvest baskets and milk pail on. The station is conveniently located in our mudroom, right by the back door and next to the kitchen – so it’s easily accessible from both the garden and the kitchen!
Our Canning Set-Up:
We have also developed a well-organized set up that helps streamline our canning process. Each kitchen is set up differently, so it’s important to find a layout that works well for you! Here’s how we set up our kitchen so it stays clean and efficient while we can our garden produce.
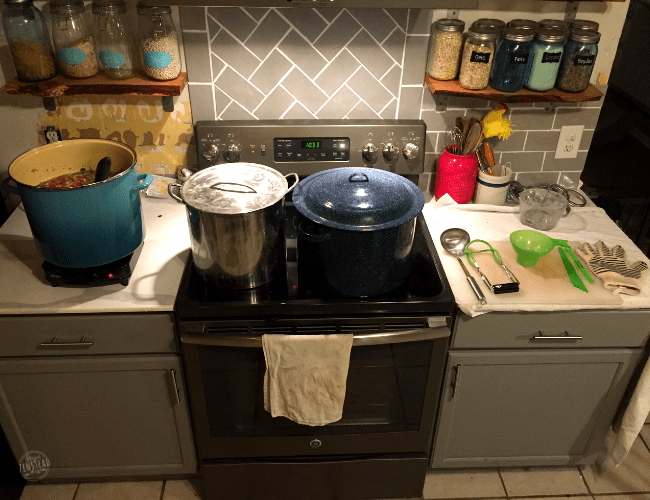
If we are doing large batches of produce (especially salsa and other tomato sauces), we will put two canners on the stove and use an electric single burner for the pot of sauce. When it’s time to can, we place a bar stool in front of the stove with a hot pad on it and put the pot of sauce on it. This makes it easy to quickly fill jars without having to reach back and forth.
We cover our counter with a towel… cause white counters + tomatoes = disaster! We also cover the counter with a large plastic cutting board that acts as a catch-all for spills and a place to set hot jars while they are being filled. And, I can’t stress how great the OveGlove is for canning! They make it so easy to handle hot jars and they work much better than oven mitts or hot pads!
Canning on a Flat Glass-top Stove:
And, yes, we can on our glass flat-top stove! There’s a lot of debate about whether it’s safe to can on flat-top stoves. Since safety is my first concern when canning, I did a ton of research before we purchased our stove. After two years of canning on it, I’m happy to report that It’s absolutely possible to can on a flat-top!
While canning on a flat-top stove is entirely possible, there are some basic safety practices to follow:
- Never slide the canners/pots. Lift them carefully on and off the cookstove.
- Don’t let moisture drip onto the stovetop, as it can create a seal between the pot and stovetop.
- Try to find canning pots with flat bottoms, if possible. This will reduce the risk of a form sealing between the pot and the stove top.
- Ensure that your pot diameter doesn’t extend more than 1-inch beyond your burner.
- Make sure your stove holds constant heat. I contacted GE before we bought ours to ensure it didn’t cycle when heating.
- If you are using a pressure canner, be sure to buy one that is approved for use on flat-top stoves, like the All American brand
pressure canners.
Our Bathroom Renovation

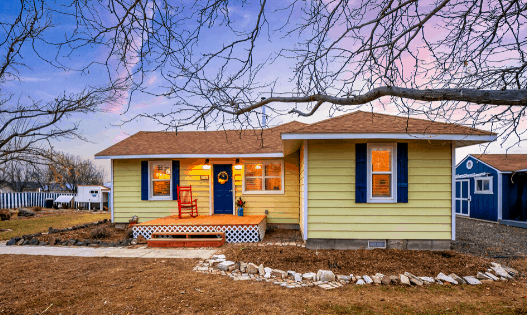
It’s hard to believe that we bought our fixer-up homestead three years ago! You can read more about why we chose a fixer-upper here. It’s been an interesting journey, for sure! I absolutely love that we have been able to make this property our own and pour our love and sweat into it. It’s been difficult and frustrating, too. But for the most part, this property is truly a showcase of our heart’s work over the past three years!
For the most part, we’ve done all the work with our own hands. The exceptions to that are: having the old cast iron plumbing pipes professionally replaced, having kitchen counters professionally installed and some electrical work. So, when it came time to finally renovate our bathroom (the very last room in the house to get a facelift), we decided to hire it out.
Yes, we hired a handyman!
I’m surprised because we’ve actually gotten a little push back from some people because we didn’t do the work ourselves. But when you buy a fixer upper, there will come a time when it’s best to enlist some help. And, heck, there’s nothing wrong with that! You can still be a homesteader and have someone help you with projects!
Could we have done it on our own? Yes, absolutely. Do I regret hiring a handyman to do the work for us? Absolutely not!
Reasons why we hired a handyman for this project:
1. We only have one bathroom in our house. As much as I’m sure the compost pile enjoyed the extra nitrogen, we weren’t big fans of not having a bathroom! ? So, hiring someone allowed the project to be completed much faster than if we were to do it ourselves. In fact, it was finished in just about a week! Whereas our projects seem to stretch on for months. Or, sometimes, years… yeah, looking at you, kitchen paint and tile (as I’m sure you saw in the earlier picture)!
2. If you’ve done renovations yourself, you know how consuming they can be! By enlisting professional help, we were able to continue our other projects, while also having a big huge project completed. We were able to keep up with canning and processing the garden harvest, work on some property improvements and complete a bunch of other little projects – all while having the bathroom redone! There’s no way we could have done that without help!
3. We learned a lot! We are pretty handy, but our knowledge is entirely self-taught. Being able to watch and talk to a professional helped increase our knowledge even more! We learned about new techniques and products to make the process easier.
There were also things I didn’t even realize would have been an issue had we done the project ourselves. For instance, the tile we bought was porcelain rather than ceramic. And porcelain tile doesn’t stick to grout as well because it’s not porous. So it’s important to get a special type of grout that has a synthetic fixative added to it. You also have to let it dry for longer than ceramic! Who knew?!
And, of course, this old house had surprises that made me very grateful for our handyman! He ended up having to completely redo the subfloor. He also had to redo the plumbing for the sink because it was still the original old pipes. And, not surprisingly, nothing was level or square! I don’t doubt for a second that we made the right choice by hiring out or this project!
So, ready to check it out?
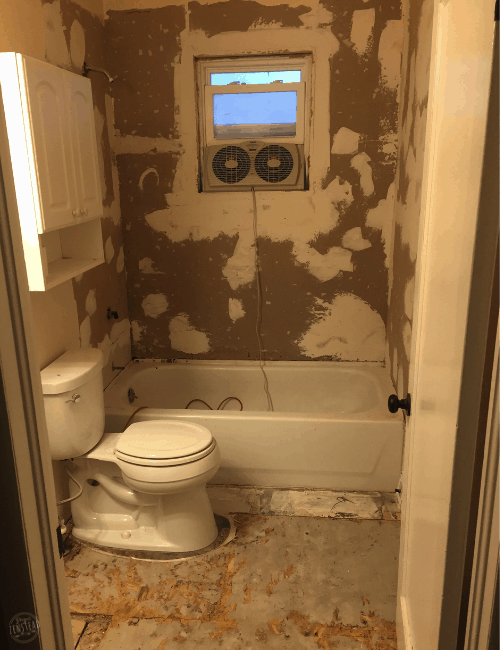
First, here’s a look at the “before”:
Check out that duct tape! Classy, right?? The grout around the tile was falling out so we’ve been scared to take showers for the past three years for fear of water damage! Also, the subfloor wasn’t level, so there were noticeable dips when you walked on the floor.
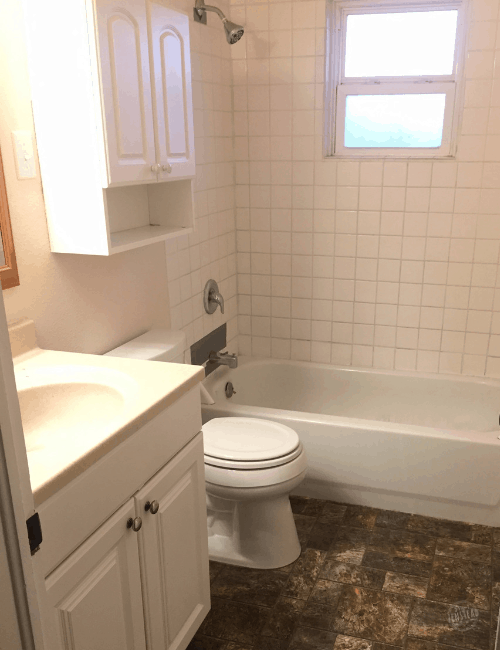
Okay, here it is after the renovation! ?
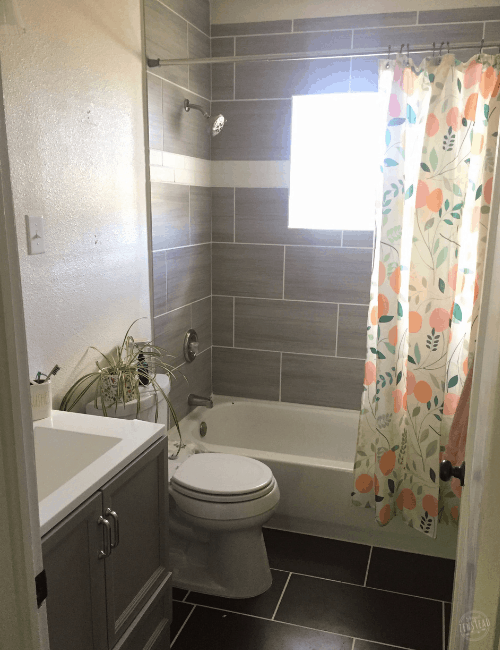
We still need to paint and install the new light. We are also going to make live-edge wood shelves (exactly like the shelves we made for our kitchen) for above the toilet.
I had no idea I could be so excited about a bathroom! When we started, it just felt like another chore that needed to be checked off the list, but I’m actually really stoked about it now that it’s complete. It’s such a huge improvement! I still can’t believe it’s our bathroom!
How much did it cost?
Even with hiring a handyman to do the hard work, we came in under our $5,000 budget! Which I was shocked by! But our saving grace was finding tile at Habitat for Humanity ReStore for a fraction of the price! Here’s a look at our expenses for the project:
- Floor & shower tile (from Habitat for Humanity ReStore which saved us thousands!): $201.67
- Bull-nosed tile for around window (had to special order): $64.23
- Vanity, light & faucet: $433.50
- Handyman fee (labor and materials): $3850
- Grand total: $4,549
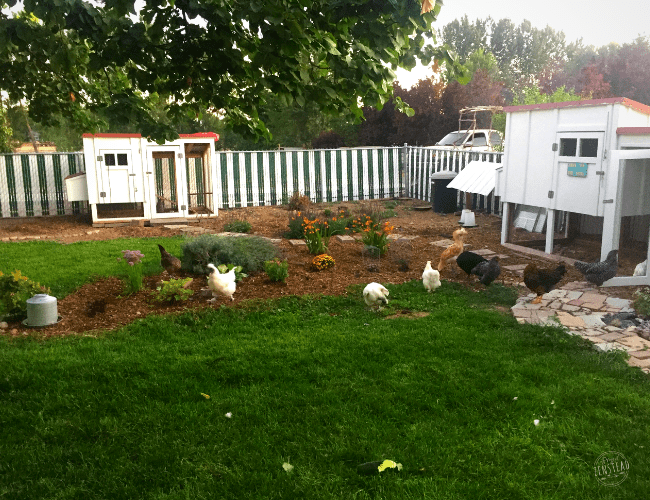
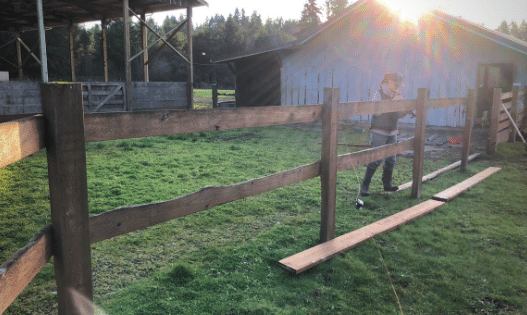
Chicken Yard Renovation
While our handyman was busy renovating our bathroom, we were busy outside renovating our “chicken yard”! Well, it wasn’t a huge renovation, but we finally got all the edging, weeding and landscaping done. We also painted both of the coops! I’ve always found this yard especially magical, but now it’s even more beautiful! I plan to plant an elderberry in the back corner between the two coops next Spring!
And, as a special surprise to celebrate the new and improved chicken yard, two of our hens magically appeared with tiny little chicks following them! One of the “joys” of free-range chickens is that occasionally, a few hens sneak off to sit on eggs. These two hens hid extremely well! They still came by a couple times a day to eat and check in, so we had no idea they were broody until they came waddling up with all their babies!
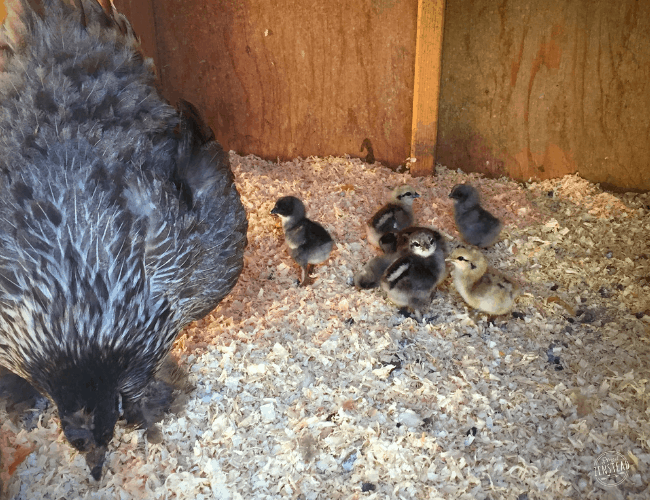
Nineteen baby chicks in total!! Yikes! We definitely weren’t planning on adding so many new chickens to the flock! I swear they need to develop some kind of free-range chicken birth control because we end up with surprise babies at least once a year!
We have listed them on our local farm groups and Craigslist to find them new homes since we can’t possibly keep that many! I’m sure we will end up keeping some, cause you can never have too many chickens apparently!


Whose the Father? Is Linda old enough to have done the deed?
The father has to be old Roy! Because Peaches isn’t very good at being “rooster-like” yet! I don’t think that Linda has much interest in being a mom – she likes the wild single life! ?