
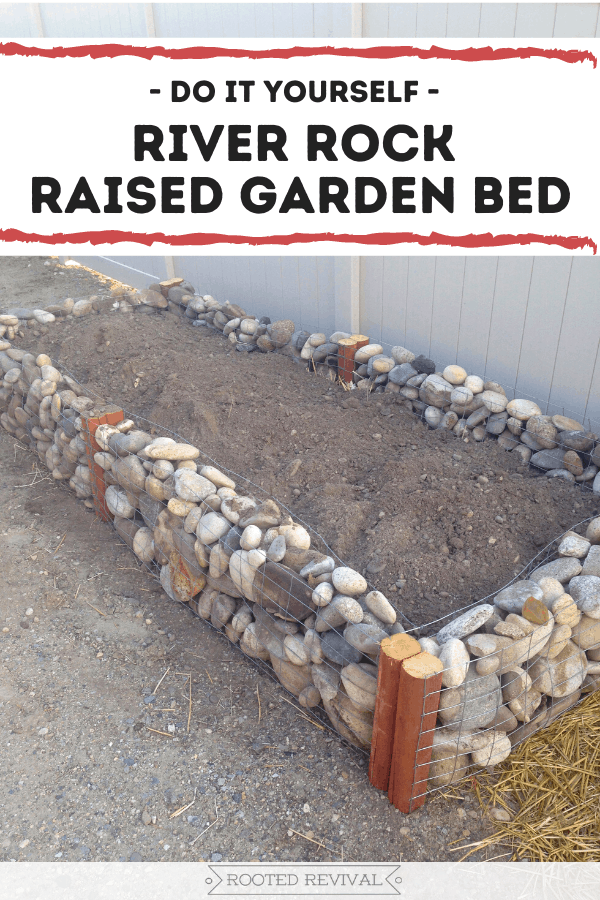
Raised beds are a wonderful solution for many types of gardening. Here’s how to make your own beautiful river rock garden bed using basic supplies you probably already have on hand!
Let’s talk about how to create a river rock raised garden bed! They are beautiful and extremely economical to make if you have a lot of river rocks on your property!
But, you don’t just get a tutorial with this post. Nope! You also get a bonus story about the haunted house that we used to live in! Why? Because that’s the house we lived in when we built these awesome beds!
About Our Rock Bed Garden
A priority in our homesteading lives has always been to live as locally as possible. That means we try to use and source materials that are native to our property and region before outsourcing.
We also try to be good stewards of our materials and resources by using up every last scrap and repurposing materials whenever possible.
Rock garden construction is a perfect way to use our natural resources and to use up scrap materials!
Our property was on a steep hill near an old river valley. Dozens and dozens of river rocks literally appeared out of the earth and rolled down the hillside every day!
So, we had ample amounts of river rock right on our own property to use. In fact, we would just gather up the newly-appeared rocks and drop them into these garden bed frames until they were full and then move on to the next one!
We sourced the other materials for these beds from scraps left over from other projects. We had been doing to some fencing around our chicken and duck house earlier that year. The leftover scraps of fence posts and wire fencing worked perfectly to create the frame for these rock beds!
To be honest, we weren’t at this property long enough to actually garden in these raised beds. So unfortunately, I can’t tell you how they held up over time.
But I can tell you that they were extremely sturdy! And they looked great! The rock walls can be used for raised garden beds, but would also work for a river rock flower bed or a rock border for your garden or yard.
I would definitely recreate these again if we still had a large amount of river rock as a resource.
This Just Wasn’t the House For Us
Haunted house story time! This property was a beautiful, fully-restored 1905 Victorian house on a hillside in a small town. It sounds very quaint, doesn’t it? But, in reality, the house, property and location couldn’t have been more wrong for us!
A large portion of the acre-property was a very steep hill so it wasn’t super usable. It was also surrounded by roads on both sides. Oh, and I’m 110% sure it was haunted – and not by the Casper-friendly type of ghosts.
I have never felt so unsettled and uncomfortable as I was in that house. I mean we never had stuff fly across the room, but everything just felt eerie.
It constantly felt like we were intruding on someone else’s house. And that we were never alone. It still gives me chills to this day!
We sold the house just 10 month after buying it.
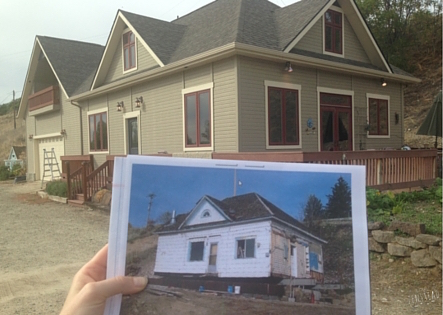
We did later learn that the house was the home of the original town coffin maker and undertaker. It was also partially on cemetery land and located directly down the hill from the town cemetery.
Soooo… bad juju all over.
Funny story: I actually learned how to make smudge sticks for this reason! But there wasn’t enough sage in the world to cure that place!
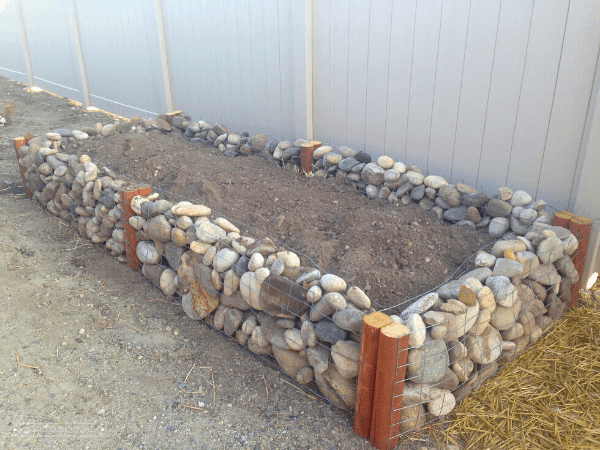
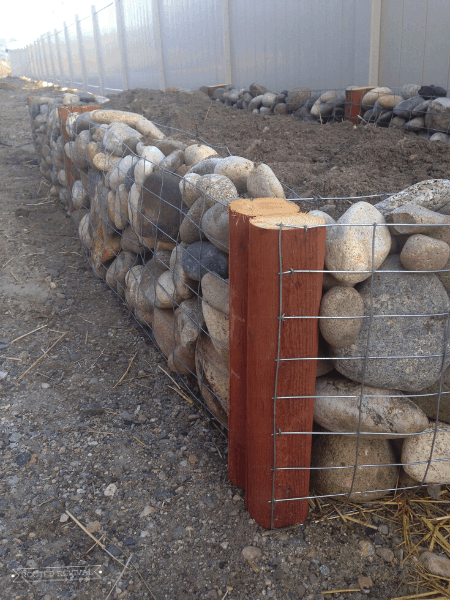
How to Make a River Rock Garden Bed
But one good thing did come out of that house – we learned how to create these river rock beds!
Material needed:
- River rocks (you’re going to need a lot but the exact amount will vary based on how big and how tall you make your beds)
- 2″x4″ welded or woven wire fencing (use wire with smaller hole size if your rocks are smaller)
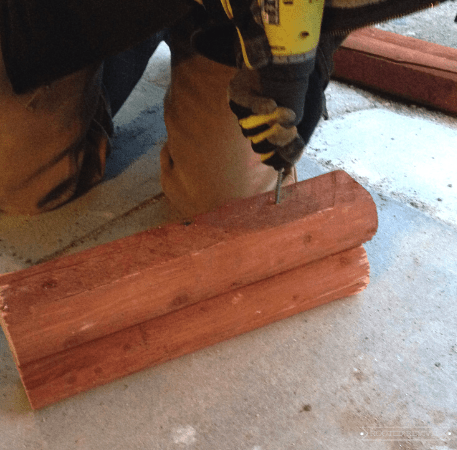
- 4″x4″ posts or other lumber boards (we used bits and pieces of fencing posts left over from previous a fencing project)
- Metal wire (we used 9 gauge)
- Fencing staples
- Hammer
- Drill & screws
- Saw
- Fencing pliers
or other pliers (seriously grab yourself a good pair of fencing pliers – they are one of our most used tools on the homestead!)
Assembling the raised beds:
- Start by deciding the desired dimension (length, width and depth) of your raised beds.
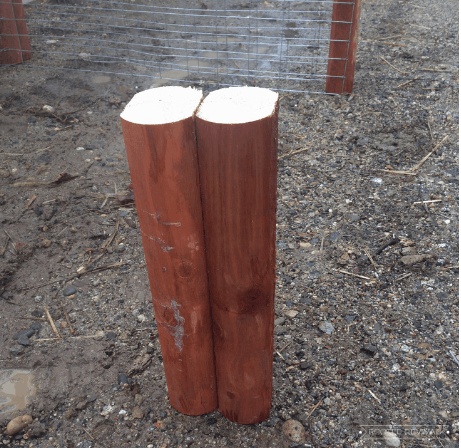
- Once you have decided on your desired depth, cut your support posts to the correct height.
- For our beds, we used scrap pieces of fencing posts. We chose to double them up (for extra strength) by screwing them together.
- Note: The posts we used were pressure treated, which I don’t recommend for food gardens. These beds were intended for ornamental plantings. For food gardens, I suggest a non-pressure treated wood.
- Set your support posts in place. You will want support posts every 4 feet (minimum) for maximum support.
- Note: if you want to place cardboard, hardware cloth or any other material at the bottom of the bed, do so now.
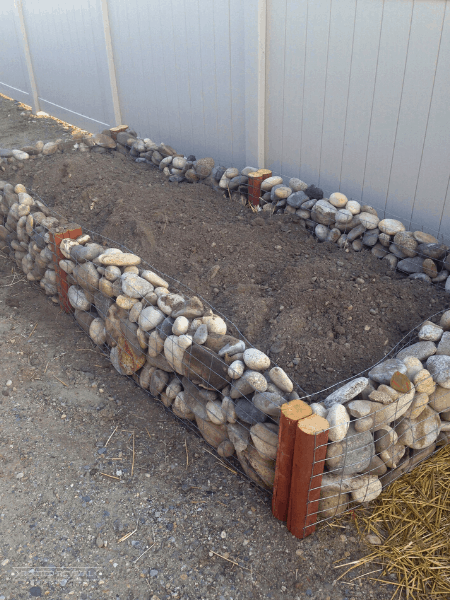
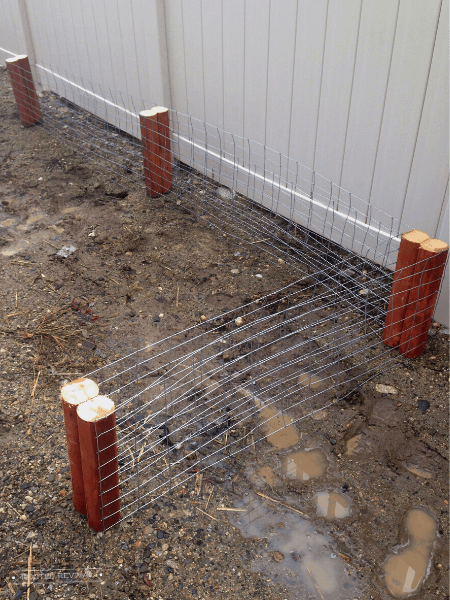
- Measure and cut the fencing wire. For each side of the bed, you will need to cut two pieces of fencing (one for the exterior “wall” and one for the interior “wall”).
- For each side of the bed, start attaching the wire to form the exterior wall first, using the fencing staples, as shown below.
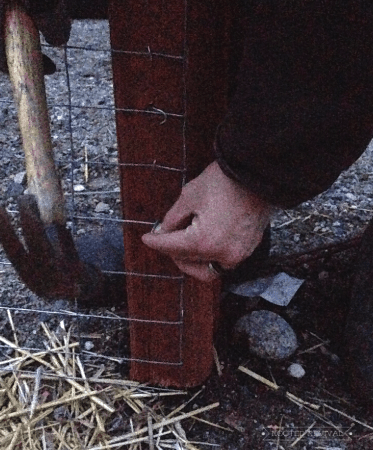
- Once you have connected the exterior wire wall, begin attaching the wire to form the interior wall.
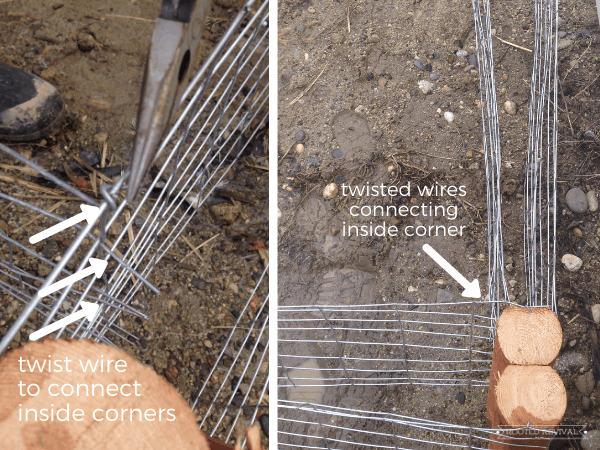
- For inside corner joints, you can attach one of the sides of wire to the posts using the fencing staples. For the other side, you can overlap the loose ends of the wire and wrap it around the attached wire to secure everything together, as shown below.
- Continue connecting wire to each side to form all four walls of the raised bed.
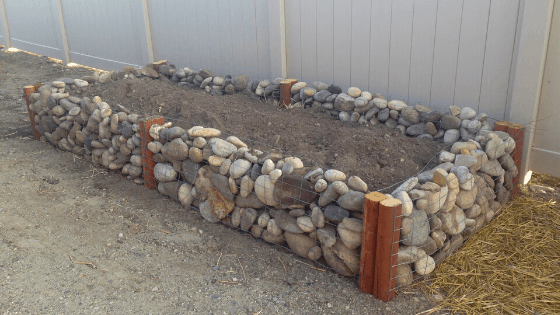
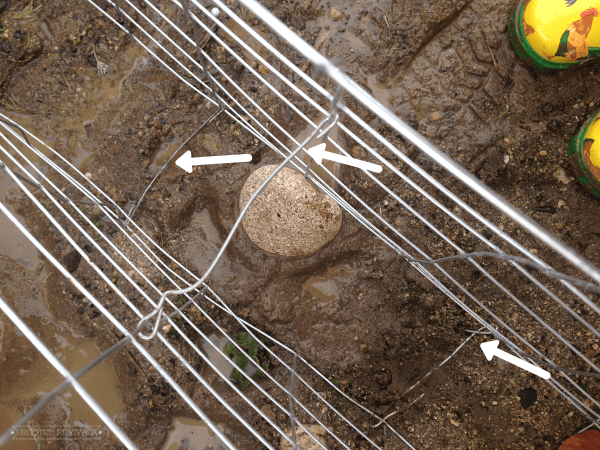
- Now that the walls are in place, you will want to secure them to prevent them from bulging and expanding from the pressure of the rocks. We used 9 gauge wire and ran it from the exterior wall to the interior wall at varying heights. You can see an example of this in the picture below.
- Now it’s time to start filling it up with rocks! Place each rock into the bed, ensuring that the walls maintain their primary shape. Some bulging is normal, but if the walls are really bulging, use extra wire to secure them as you go.
Once your river rock garden bed is created, you can fill it with soil, compost and plants! And, of course, don’t forget to mulch! Happy planting!
Share this idea with the world – pin it!


Why didn’t I think of that?! This is super smart and I’m so glad I saw this post. I’m starting to think that Missouri’s main crop is rock, so we certainly have enough for this project. We’ve used wattle beds before and love them, especially because they’re constructed with native materials. Ima gonna try these!
Awesome! It’s such a good way to get all those rocks out of the way when you are clearing areas for gardening or cultivation as well! 🙂 I’d love to see how they turn out if you end up making them!
These are SO BEAUTIFUL! I love anything river rock and this is so unusual. I’d really love to know how they hold up! I’ve never gardened in anything that didn’t have a straight side. Also…that house is giving me the creeps. I totally understand that feeling of not being alone and I’m not surprised you had to leave! The town COFFIN MAKER?! On a cemetery? Creepy!
It looks so clean and neat, I love it! Do you think it is possible to create something similar but smaller on the terrase?
I love the look of this and what a great way to use awesome river rocks. This makes me want to get in the garden.