Seed Starting Indoors is a great way to give your garden a head start before the season even begins. Whether you live in a cold northern climate or a warm southern one, sowing seeds correctly will result in hardier plants and a bumper crop.
This guide will break down all the key aspects of Seed Starting Indoors for each zone. After reading, you’ll feel like a real pro and start growing seedlings with confidence!
1. Seed Starting Calendar for Every Zone – Never Miss the Perfect Planting Time

Time is always the decisive factor when planting seeds. If you sow too early, the plants will elongate and weaken even before they are transplanted into the open ground, and if you are too late, you will miss the chance for an early harvest.
The main rule is to count down from the date of the last frost in your region.
How do I know the date of the last frost?
Your last frost date depends on your climate zone. Determine it using the USDA Plant Hardiness Zone Map or other online tools.
A general schedule for sowing seeds indoors
- 12+ weeks before the last frost: artichokes, celery, rosemary (this requires extra time!)
- 10-12 weeks before last frost: Peppers, celery, perennial flowers
- 8-10 weeks: Tomatoes, cabbage, broccoli, onions, eggplant.
- 6-8 weeks: Herbs, lettuce, spinach, beets.
- In 4-6 weeks: Zucchini, cucumbers, melons.
Tip. Make it mandatory to keep a garden journal to keep track of what works best in your area. Every year is different one from the other.”
2. How to Start Seeds Indoors – The Mistake That Kills 80% of Seedlings

Beginners forget that seedlings are incredibly fragile. You can give them the perfect soil, light and water, but they can still die literally overnight.
Why? “Blackleg (Damping Off).
It’s a fungal disease that attacks young seedlings, causing them to wilt and die almost instantly. And the worst part is that once it has appeared, it’s impossible to save the plants.
How to prevent blackleg and protect seedlings?
- Use a sterile, lightweight seedling substrate (not garden soil! It’s full of fungi and bacteria).
- Ensure good air circulation. Put a small fan next to the seedling containers.
- Water moderately. The soil should be moist but not soggy.
- Water from below to keep the surface dry (fungi like moisture on the soil surface).
- Decontaminate planting containers before use (hot soapy water or hydrogen peroxide works great).
- Don’t overcrowd your crops. If seedlings grow too densely, it creates a moist environment ideal for fungi to multiply.
- Use brown sphagnum moss. It has natural antifungal properties and prevents mold growth.
Extra protection. If your seedlings have already started to lean or look weak, try sprinkling cinnamon or charcoal on the soil surface. Both of these remedies have an antifungal effect.
Need quality seedling soil? This organic substrate prevents blackleg and promotes the development of a strong root system.
Remember. “Blackleg” spreads quickly, and if it started in one container, you need to isolate the affected plants immediately, otherwise it will destroy the entire seedling.
3. Best Seeds to Start Indoors in March – Get a Head Start on Your Garden

March is the perfect time to start sowing seedlings indoors, especially if you live in zones 3-7. The daylight hours are longer, and by the time you plant outdoors, the plants will be strong enough and ready for vigorous growth.
What crops should be sown in March?
- Tomatoes. Require 6-8 weeks to develop before transplanting. If you want an early harvest, choose early maturing varieties like ‘Sub-Arctic Plenty’ or ‘Glacier’.
- Peppers. Sprouts slowly, so it’s best to sow as early as possible. Pepper seeds can take up to 3 weeks to germinate, especially without additional heating. By the way, you can use a heat mat to speed up the process.
- Salads and greens. Grow quickly and are ready for transplanting in as little as 3-4 weeks. A great option for early harvests, as greens are cold tolerant.
- Flowers (velvets, zinnias, asters). They are important not only for beauty, but also for accompanying cultivation. Velvets, for example, repel nematodes and aphids, while zinnias attract pollinators.
- Basil and other herbs. These are simply great choices for March seeding. They grow quickly, and basil also protects tomatoes from pests if you plant them next to each other in the garden.
Additional tips.
- Choose the right soil for plants that will grow long in containers (like peppers and tomatoes), use a nutritious substrate with good water holding capacity.
- Peppers and tomatoes should be transplanted into larger containers when the first pair of true leaves appear – this strengthens the root system.
- Watch the temperature. Most heat-loving plants (tomatoes, peppers) germinate better at temperatures of 22-27°C.
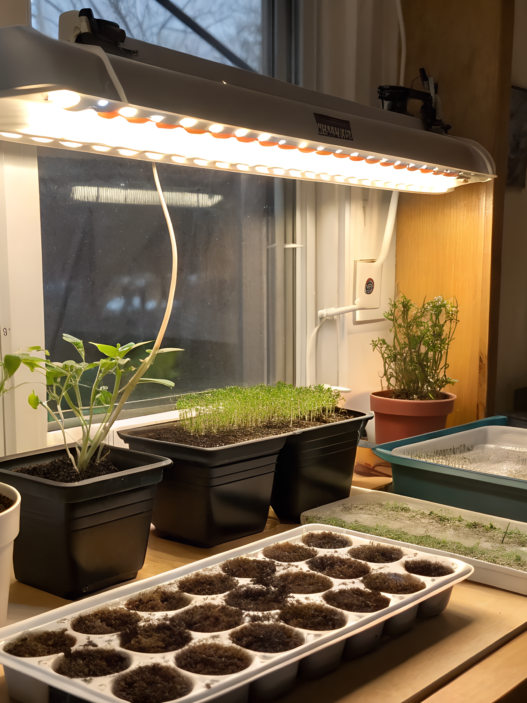
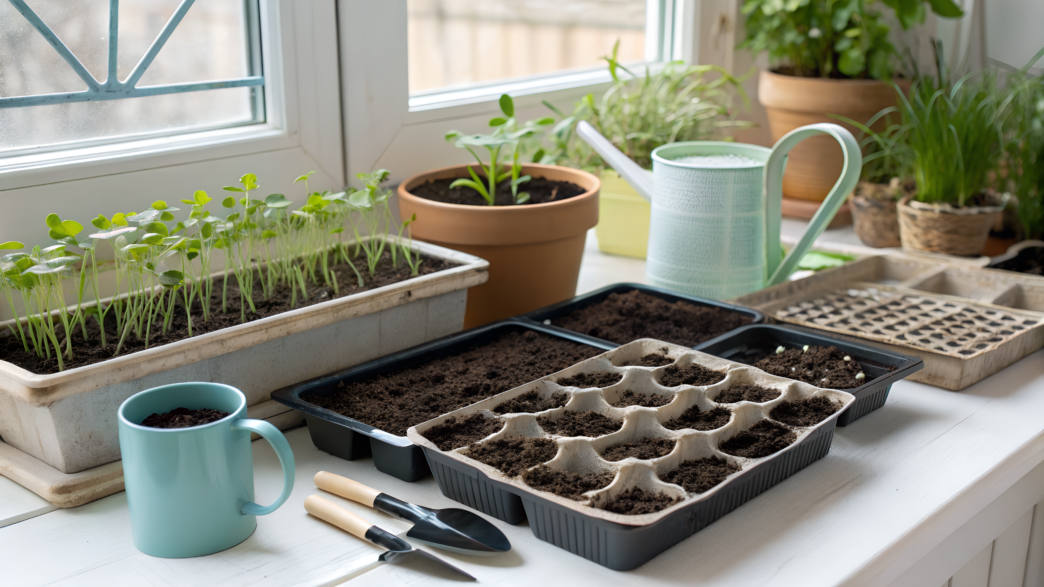
4. Step-by-Step Seed Starting Setup – The Secret Pros Use for 100% Success

To grow healthy seedlings you do not need to buy expensive equipment, in this case the most important thing is the correct organization of the process. Weak seedlings with thin stems, moldy soil and poor germination can all be prevented if you create the ideal growing conditions from the start.
The ideal system for growing seedlings
- Seedling trays with drainage holes
The trays should be sturdy, reusable and not too deep to allow good air circulation around the roots. Trays should have drainage holes (prevents root rot).
- Quality seedling soil
Use a light, sterile seedling soil mix – it holds moisture but doesn’t get soggy. Mixtures with added coconut fiber or vermiculite work well.
- A heat mat to maintain soil temperature
Most seeds germinate at 20-24°C (70-75°F), but peppers and tomatoes sprout better at 25-28°C. A heat mat helps maintain consistent heat and speeds germination.
- Light bulbs (special phytolamps)
Ordinary LED or room lamps are not suitable – they do not give the right spectrum of light. The seedlings need at least 14-16 hours of light per day. Choose full-spectrum LED lights that mimic sunlight and encourage healthy growth.
- Mini greenhouse dome (humidity hood)
In the first few days after sowing, seeds need high humidity – this speeds up their swelling and germination. Covering the containers with a transparent dome helps retain heat and moisture, creating a greenhouse effect. Once the seeds sprout – remove the dome to prevent mold.
- Fan to prevent fungus and strengthen seedlings
A small fan improves air circulation, reduces the risk of fungal infections and helps plants develop strong stems (wind causes plants to strengthen tissues).
Additional tips:
- Don’t plant seeds too deep. Planting depth = 2-3 sizes of the seed itself.
- Water through a tray – this way moisture gets to the roots but doesn’t cause mold growth on the surface.
- Keep the soil moist, but not soggy. If green mold forms on the surface, this is the first sign of overwatering.
5. Grow Tomatoes Indoors – The Foolproof Trick for Bigger, Healthier Plants

Tomatoes are one of the most popular crops among gardeners. But growing them indoors requires a special approach. The main secret is to create conditions that are as close to natural as possible.
How to grow strong tomatoes indoors
- Use deep containers
The root system of tomatoes grows deep, so the minimum height of the container should be 10-15 cm, but if possible, it is better 20-25 cm, so that the roots develop fully.
- “Iron” the plants every day
Yes, you did not mishear! Run your hand over the tops of the seedlings several times a day – this simulates the wind and makes the stems become thicker and stronger. Even better, put in a small fan to create air movement.
- Lighting for at least 16 hours a day
Tomatoes are a light-loving crop, and if they get less than 14-16 hours of light, the plants will elongate and weaken. Use special phytolamps that provide the right spectrum of light.
- Go deep when transplanting
When you transplant tomatoes into large containers, bury the stem about half its length. This encourages the formation of new adventitious roots, which will make the plant stronger and more resistant to drought.
Additional tips:
- Choose early tomato varieties, such as “Sub-Arctic Plenty”, which bears fruit as early as 50 days after planting, and “Glacier”, which is one of the best varieties for growing in cooler temperatures
- Don’t forget to fertilize. Fertilize every two weeks with a liquid tomato fertilizer containing calcium, nitrogen and phosphorus.
- Proper watering. Tomatoes don’t like it when the soil dries out or becomes overwatered. Water them evenly, without letting the soil dry out completely, but also without allowing water to stagnate.
If you do everything right, you will get juicy fruits even sooner than your neighbors plant them in the open ground.
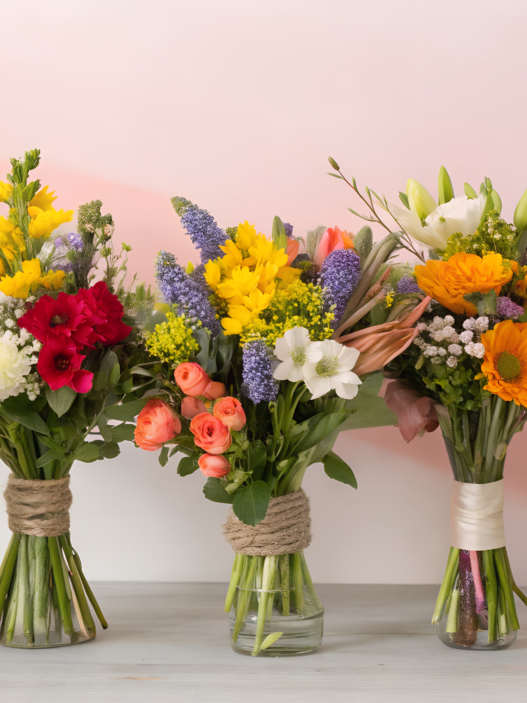
6. Indoor Flower Seed Starting – The Hidden Rule for Lush Blooms
Growing flowers from seed indoors is not an easy task. Many people are faced with the fact that the seedlings are stretched out, look weak, and after transplanting into the ground for a long time to adapt or do not bloom at all. The main thing here is lighting and there should be plenty of it!
How to create ideal conditions for flower seedlings?
- Provide 14-16 hours of light a day
Annuals such as zinnias, petunias and lion’s green (snapdragons) require a long day of light. In the wild, they grow during the lightest months of the year, so indoors they need supplemental lighting with phytolamps.
- Don’t plant flowers too early
Many flowers grow quickly. If you sow them too early, the roots will push against the walls of the container, resulting in stunted growth and weak seedlings. In addition, over-seeded flower seedlings may begin to bloom before transplanting, which weakens the plants.
- Proper soil.
Flower crops most often have thin and sensitive roots, so dense or too nutritious soil is not suitable for them. It is better to use a light, airy substrate with the addition of coconut fiber, vermiculite or perlite.
- Water carefully.
Many flower crops, especially petunias and violets, do not tolerate overwatering. If water stagnates in the pallet, it can lead to root rot. The best way to water is through the tray or with a sprayer so that the moisture is evenly distributed in the soil.
Take into account the individual requirements of the seeds
- Lavender and Echinacea – take longer to germinate, sometimes up to 3-4 weeks, and require pre-stratification (chilling before sowing).
- Petunias – need light to germinate, so their seeds are not covered with soil, but just lightly pressed into the ground.
- Lion’s Green – germinates only at cool temperatures (16-18°C), so do not place containers on a warm mat.
Proper care at the seedling stage will provide gardeners with abundant blooms and healthy plants after transplanting into the garden or containers.
7. Seed Starting Mistakes – The #1 Reason Your Seeds Don’t Sprout

The most common mistake is planting seeds too deep.
How deep should you plant seeds?
Most seeds should be buried as deep as 2-3 times their size. If you bury them too deep, the seedlings will have a hard time breaking through the soil and will either germinate too late or die before they make it to the light.
How to avoid the mistake:
- Small seeds (lettuce, basil, petunias) – don’t bury them, just press them lightly against the soil surface.
- Medium seeds (tomatoes, peppers, cabbage) – cover with a thin layer of soil, about 0.5 cm.
- Large seeds (pumpkin, peas, corn) – the optimal depth is 2-3 cm.
Other frequent mistakes when sowing seeds
- Using ordinary garden or potting soil instead of a light seedling substrate
Ordinary soil is too dense and can retain moisture, causing seeds to rot. Use a special sowing mix – it’s airy, holds moisture well, but doesn’t get soggy.
- Too low a temperature
Most seeds will not germinate in cold soil. Most crops need a temperature of 18-24°C to germinate successfully. If the room is cool, use a heat mat – it will speed up germination by a few days.
- Soil drying out
If the seeds dry out once after sowing, they may lose germination. The soil should be kept slightly moist at all times, but not soggy.
- Lack of stratification for some crops
Some plants, such as lavender, strawberries, and delphinium, require pre-stratification – soaking in the cold before sowing. If you don’t refrigerate the seeds before planting, they may not come up at all.
- Lack of air in the soil
If the potting mix is too dense, the roots may not get enough oxygen, leading to poor development. Add perlite or vermiculite to improve the soil structure.
If you follow these simple rules, your seeds will germinate quickly and amicably, without your nervousness, frustration and loss.
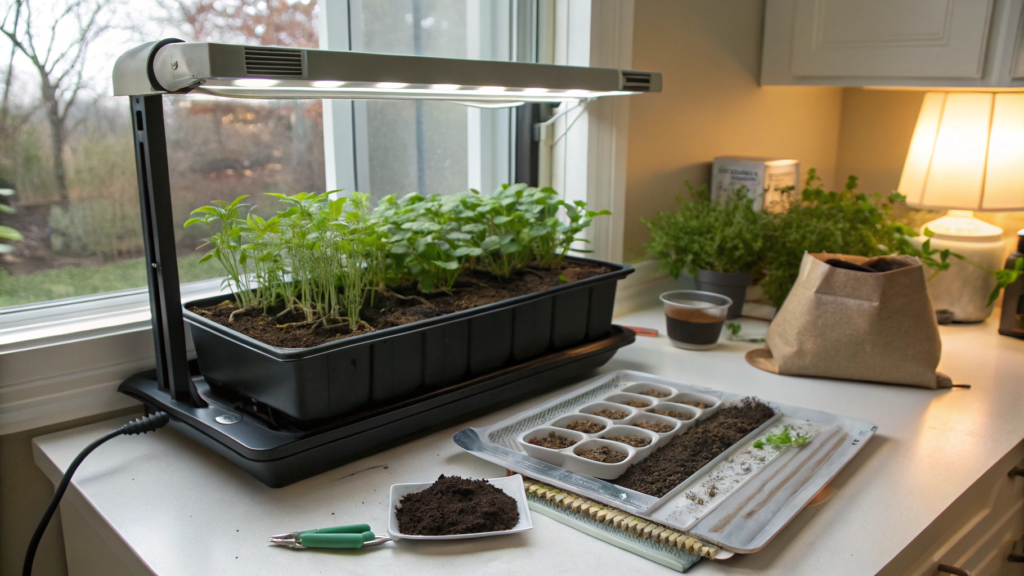
8. Mini vs. Indoor Greenhouse – The One You NEED for Explosive Growth

When growing seedlings indoors, it is important to create optimal conditions that will allow the plants to develop quickly and be ready for transplanting. Let’s explore together which option is better – a mini greenhouse or a full-fledged greenhouse installation? Both options have their advantages, and the choice depends on your goals, available space, and number of plants.
A mini greenhouse is a great option for limited space
If you don’t have a lot of space or are growing small crops, a mini greenhouse is the right choice. It helps retain heat and humidity, which is especially important for germinating seeds.
Mini greenhouses are ideal for:
- Small spaces, windowsills and balconies
- Growing microgreens, salads and herbs
- Temporary shelter for seedlings in the first weeks of growth.
But mini-greenhouses also have disadvantages: they have little space, it is more difficult to control the temperature, and some tall plants can quickly outgrow them.
A full-fledged greenhouse is for serious seedling growing
If you’re planning large batches of seedlings or growing plants year-round, a full greenhouse setup with controlled light, temperature and humidity is certainly the best option.
Advantages of a complete greenhouse indoors:
- Allows you to grow vegetables and flowers year-round
- Gives you complete control over the climate, which is important for finicky plants
- Accommodates more seedlings and larger plants
But you need more space for such a setup, as well as additional investment in lighting and ventilation system.
So if you’re just starting out and you don’t have much space, a mini greenhouse is great for your start-up experiments.
But if you want to get serious about growing seedlings or getting crops all year round, a full-fledged system with lighting and heating is at your service. It will give you more control and better productivity.
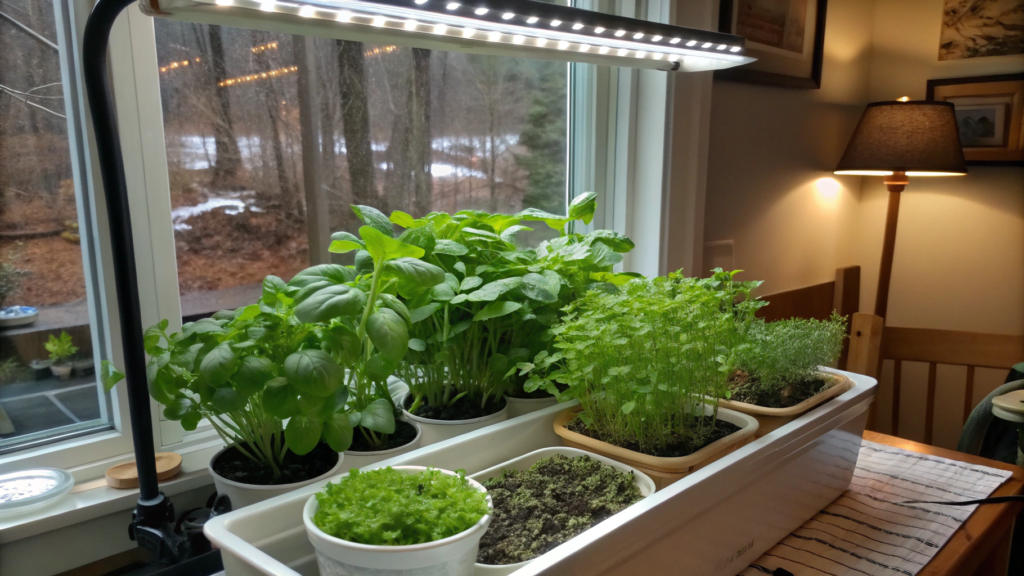
9. Tiny Space? No Problem! The Best Seed Starting Setup for Any Home

Not everyone has the opportunity to dedicate a separate room or a large greenhouse for seedlings. But even if you have very little space, you can optimize your space and grow hardy plants right in your home.
How to place seedlings if space is tight?
Use tiered shelving
- If you don’t have much horizontal space indoors, utilize height. Compact racks with multiple tiers allow you to grow several times as many plants in the same space. The key is to make sure each level gets enough light.
Choose lamps that attach to the shelves
- Regular lamps take up space on a windowsill or table, but clip-on phytolamps easily attach to shelving units, creating powerful lighting on all levels. This is especially important in winter when natural light is scarce.
Choose compact plants
- When space is limited, choose dwarf varieties of plants that don’t require large containers and lots of room. Great options for a small garden in the house:
Dwarf tomatoes (‘Tiny Tim’, ‘Micro Tom’)
Mini peppers (‘Lunchbox’, ‘Sweet Snack’)
Spicy herbs (basil, mint, oregano, parsley)
Micro greens and salads – can be grown all year round
What do you do if you only have a windowsill?
Even a small windowsill can become a mini-garden. The best crops for this option are:
- Spicy herbs – basil, rosemary, thyme, dill.
- Leafy greens – spinach, watercress, arugula.
- Mini vegetables – dwarf varieties of tomatoes and peppers.
The most important task is to provide sufficient light. If the windows do not face south, it is worth using additional lamps for at least 6-8 hours a day.
With the competent use of space, even in a small apartment you can create a full-fledged mini-garden. Try to do it!
10. Indoor Gardening for Beginners – The “Cheat Sheet” You’ll Wish You Had Sooner
Even if you’re just starting to grow plants indoors, don’t worry, it’s easier than it seems. The key is to get the process right from the start. So, let’s get started!
Where to start growing plants at home?
Start with simple crops
If you’re a beginner, don’t try to grow complicated or finicky plants right away. The best strategy is to start with herbs and leafy greens that grow quickly and don’t require complicated care. Great options for your first experiments:
- Basil
- Parsley
- Cress lettuce
- Spinach
- Microgreens (mustard, radishes, sunflowers)
Provide the right light
One of the biggest mistakes beginners make is not getting enough light. Even if your plants are on a windowsill, there will be little natural light in winter and fall.
- Use special phytolamps (full-spectrum LEDs) – they help plants to be healthy and rich green.
- The optimal time of additional lighting – 14-16 hours a day.
- If the lamps are too far away – the seedlings will stretch out and become weak.
Do not overwater the plants
Many people think that the more watering, the better. In fact, excess moisture causes root rot and fungal growth.
- Water only when the top layer of soil has dried up (about 1-2 cm).
- The best way is to water through a tray, this way the roots will take in as much moisture as they need.
Keep records
Every home is different – temperature, humidity, lighting – so keep a record of your observations:
- Which plants grow best in your house?
- At what temperature do seeds sprout faster?
- How long does it take for seedlings to develop?
After a couple of seasons, you will have your own proven algorithm that will help you avoid mistakes in the future.
Ready to get started?
The more you experiment, the better you’ll get at it. The main thing is not to be afraid to try and don’t get frustrated if something goes wrong. I hope this article has helped you understand the nuances of growing seedlings indoors and you can avoid a lot of mistakes.
You’ll see, home gardening is very exciting, especially when you see the results of your work and the first sprouts.