Fall always arrives with a very special vibe. The air gets cooler, and suddenly the house feels like it needs more warmth, light, and coziness. That’s when fall decorations becomes the perfect way to bring the season’s charm into your home.
You don’t need a big budget or fancy designer pieces: sometimes a couple of jars, a handful of acorns, and a bit of burlap are enough. In this article, I’ve gathered 10 simple DIY ideas that will turn your home and porch into a true fall retreat. These are projects you can easily make in just one evening — and they’ll still look like you spent days preparing for guests.
Just yesterday the porch was full of summer flowers, and today fall has already taken over. And it’s in moments like these that the simplest, most atmospheric ideas are born.
Why Mason jars?
These jars have long been a symbol of American life. They are sturdy, practical, and surprisingly versatile. You can store pickles in them, use them as glasses, or turn them into stylish candle holders.
What you’ll need for this Fall Decorations:
Mason jars (usually 16 oz, about 470 ml)
Tealight candles or small pillar candles (1.5–2 inches / 4–5 cm in diameter)
Small pieces of burlap or lace
Twine (jute or linen)
Dried leaves, cinnamon sticks, or mini pinecones for fall decorations
If you don’t have jars on hand, you can order Mason Jars 16 oz, Set of 12 on Amazon. They’re perfect not only for décor but also for food storage.
How to make them:
Prepare the jars. Wash and dry them thoroughly. For a vintage look, lightly sand the glass or spray with a matte finish.
Decorate the “belt.” Wrap the middle of the jar with burlap or lace. Secure with hot glue or double-sided tape.
Add details. Wrap twine around the burlap and tie a small bow. Tuck in a dried leaf or a cinnamon stick for extra charm.
Place the candle. Put a tealight or a small pillar candle inside. For extra safety, use LED candles — they give off a soft glow without heating the glass.
Final touch. Attach a few small pinecones or dried berries to the bow, or place them inside around the candle.
These candle holders are perfect for lining up on the porch — one on each side of the door. Or you can use them as a centerpiece on the dining table. And if you make a few different styles — some with leaves, some with lace — the result will be stunning.
I love this project because in just about an hour it transforms ordinary jars into beautiful fall decorations that looks like it came from a boutique. And the best part — it never looks the same, since you can change the leaves, ribbons, and little details every year.
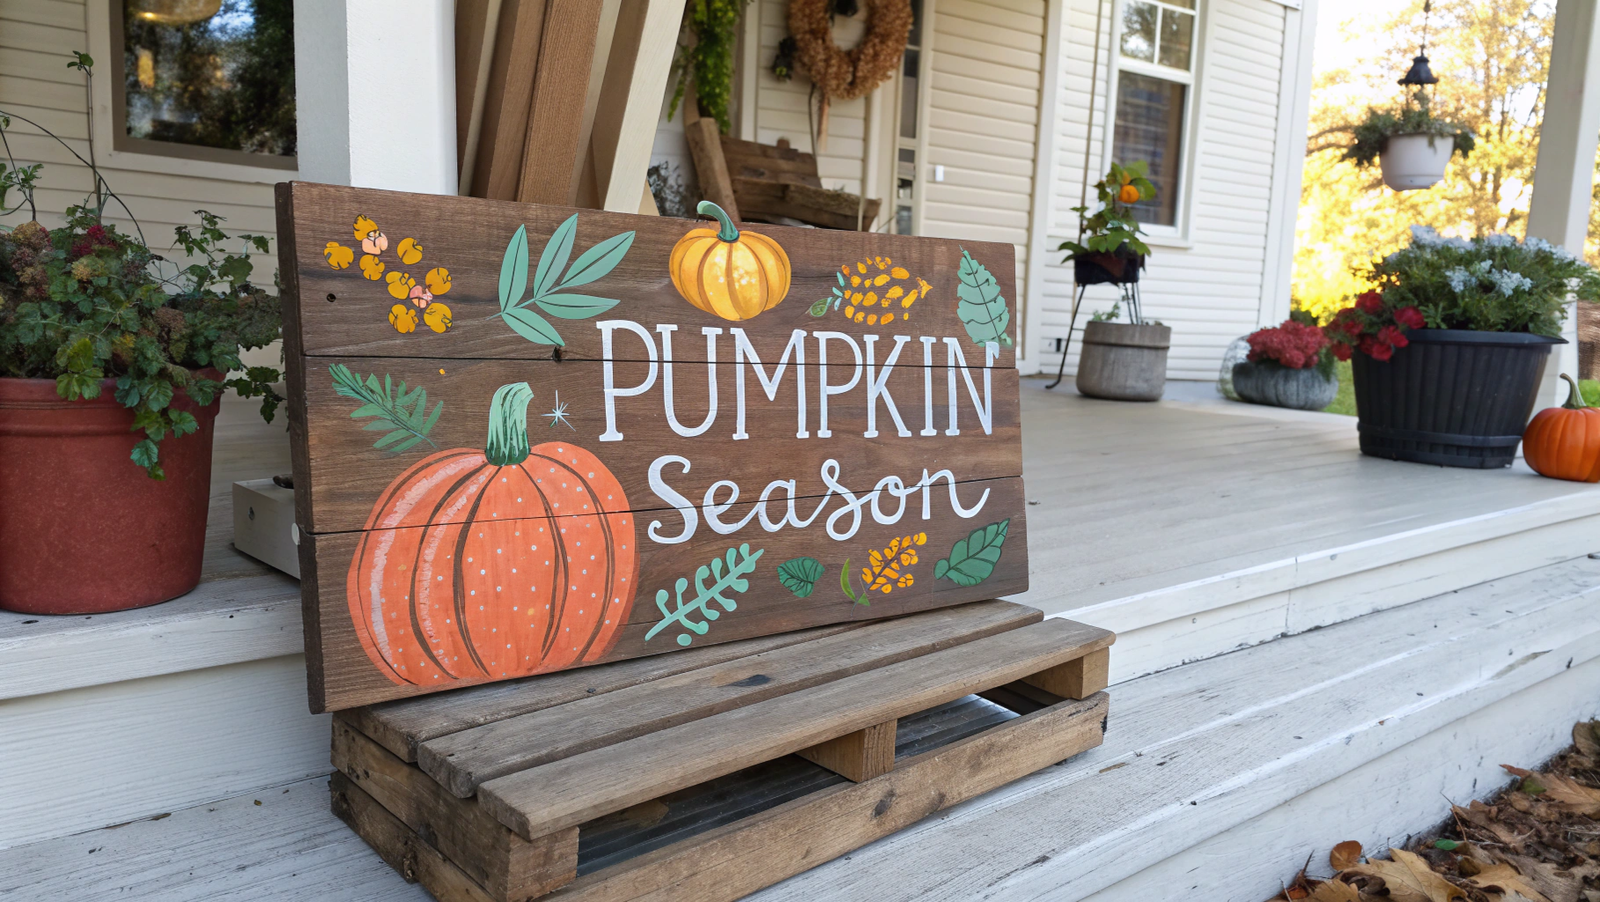
2. Hand-Painted Pumpkin Porch Signs
I believe it’s the little details like this that turn an ordinary house into a place you always want to come back to.
The idea is simple: take a wooden board and turn it into a bright sign with pumpkins and a fun phrase. It could be “Happy Fall,” “Welcome,” “Pumpkin Patch,” or something personal and quirky. I once painted just “Pumpkin Season,” and Lindy laughed every time she saw it — she said in our house pumpkin season lasts all year.
What you’ll need:
Wooden board 4–5 ft (120–150 cm) long and 8–10 in (20–25 cm) wide
Acrylic paints (orange, white, black, green)
Painter’s tape
Set of brushes in different sizes
Spray varnish to seal the paint
Optional: letter or number stencils
How to make it Fall Decorations:
Prepare the board. Sand the surface to remove splinters and smooth out imperfections. If the board is too light, you can tint it slightly with wood stain.
Mark it out. Use painter’s tape to block off sections for pumpkins or letters. This will keep your lettering straight and your designs neat.
Paint the pumpkins. The fun part! Use orange for the base, white and black for highlights and shadows, and green for the stems. Add a few curly vines and it instantly comes to life.
Add the text. Use a stencil or paint freehand. Even if it turns out a little crooked, that only adds to the handmade charm.
Finish. Once the paint is fully dry, seal everything with a clear spray varnish. That way, your sign can withstand rain and morning fog.
The best spot for this kind of sign is right by the front door. Lean it against a wall or railing. If your porch is big, put two on each side — it’ll look like festive gates. Sometimes I even place one in the garden by the cabbage patch. It feels like we’ve got our own little fall fair going on.
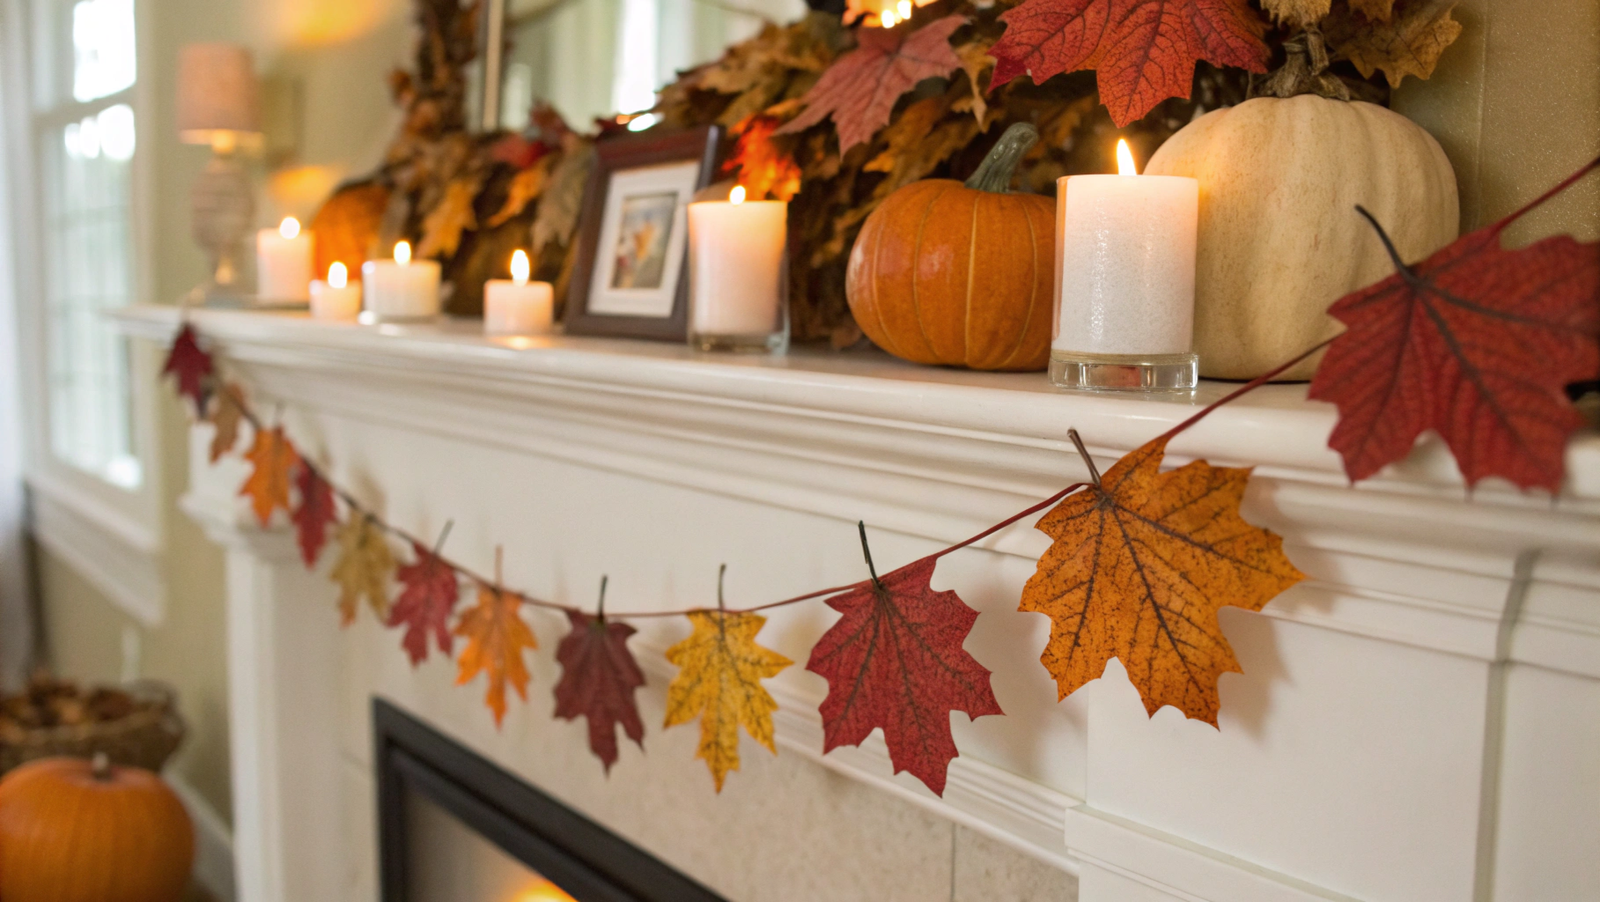
3. Cozy Autumn Leaf Garland
For instant fall vibes, just hang up a leaf garland. That’s it. Candles, pumpkins, string lights — sure, they matter, but it’s the garland that really sets the tone and makes it feel like fall has officially moved into your home.
And the secret, as always, is simple: take leaves (real or artificial), string them together, and decorate the spot you want to feel a little “warmer.” It could be the fireplace mantel, the staircase, a doorway, or even the headboard of your bed. I’m always amazed at how just a few maple leaves can completely change the atmosphere of a room.
What you’ll need:
Artificial maple or oak leaves (you can use real pressed leaves, but they’re fragile)
Jute twine or thin rope, 6–8 ft (1.8–2.5 m) long
Hot glue gun or needle and thread
Small clothespins or clips (optional)
Optional: a small battery-operated string light for extra glow
Prepare the base. Measure out the twine to your desired length. If you’re hanging it on a mantel, leave some extra so the ends can drape nicely.
Attach the leaves. Two ways: either glue them directly onto the twine with hot glue or thread them with a needle. The second way takes longer but gives the garland a more “natural” flow.
Add lights. Small LED string lights can be woven between the leaves. In the evening they give off a soft glow and highlight the texture. Important: only use LED lights — they don’t heat up and are safe with paper and dried leaves.
Decorate with extras. In between the leaves you can tuck in small pinecones, cinnamon sticks, or mini pumpkins for more character.
I made my first garland right after we moved to the Pacific Northwest. The garden was still empty, and I missed the bright Idaho leaves so much. I hung the garland on the mantel — and suddenly the house didn’t feel so unfamiliar anymore.
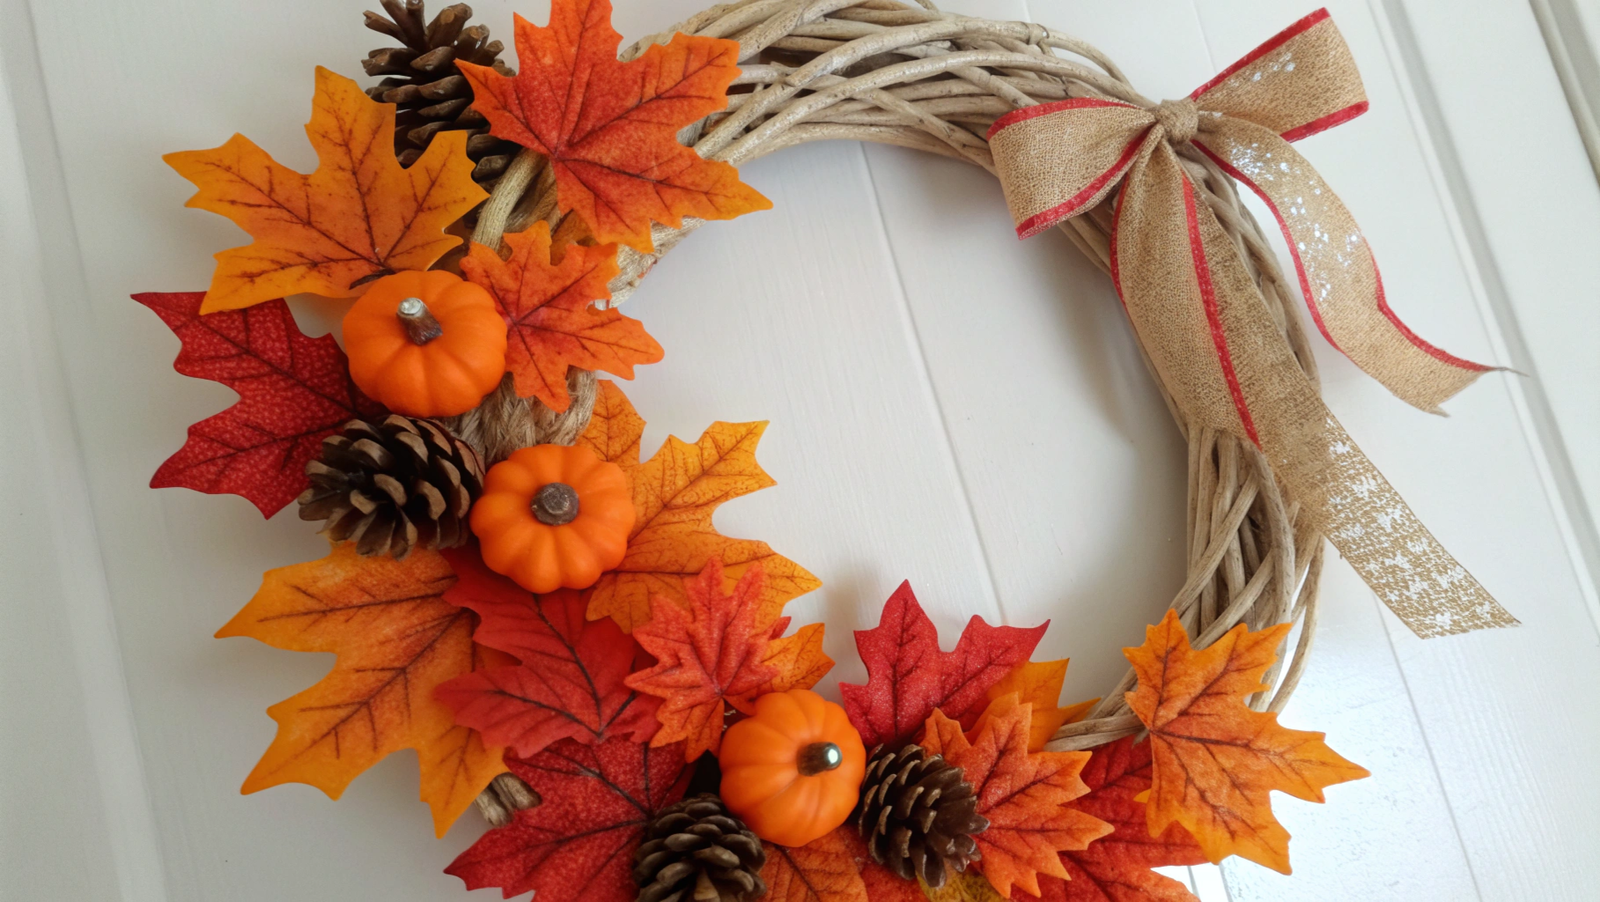
4. DIY Fall Wreath With Dollar Store Finds
Wreaths are the very first thing guests see, and they set the whole mood. And to make a beautiful wreath, you really don’t need to spend much. The dollar store (or any “everything for a little” shop) is a real treasure chest for these projects.
Take a simple base, add artificial leaves, a few mini pumpkins, some pinecones, and a ribbon — and your wreath is ready! Personally, I like to stick to a single color palette: the classic with orange and red leaves, or a softer version with white pumpkins and golden accents.
What you’ll need:
Wreath base (plastic or grapevine, like a Grapevine Wreath Base)
Artificial leaves and branches
Mini pumpkins (foam or plastic)
Pinecones (collect them on a walk)
Ribbon for a bow (burlap or satin)
Hot glue gun
How to make it fall decorations:
Prepare the base. If you’re using a plastic ring, wrap it with burlap or twine to hide the plastic. Grapevine bases look great on their own, so you can leave them as is.
Layer by layer. Start with large leaves, gluing them in a fan shape so they overlap slightly. Don’t aim for perfect symmetry — a little unevenness makes it look more “alive.”
Add volume. Tuck in a few small branches or dried grasses between the leaves. This gives the wreath more depth and texture.
Pumpkins and pinecones. Place them in small groups of 2–3. One large element looks best when paired with two smaller ones — it naturally draws the eye.
Final touch. Tie a wide ribbon into a bow. I recommend leaving long “tails” so they hang down freely. For extra charm, weave in a thin battery-powered string light and hide the power pack behind the bow.
Check the sturdiness. Before hanging, give the wreath a gentle shake. If anything falls off, glue it back now — it’s better than chasing a runaway pumpkin later.
Where to hang it. The classic choice is the front door. But wreaths look just as good indoors: above the fireplace, on a kitchen wall, or even on a big mirror.
I first saw the “dollar store wreath” idea at a friend’s house in Portland. We visited her in October, and her wreath with white pumpkins looked so stylish I couldn’t believe it when she said: “All of this cost a dollar!” That’s when I realized it’s not about the price — it’s about creativity.
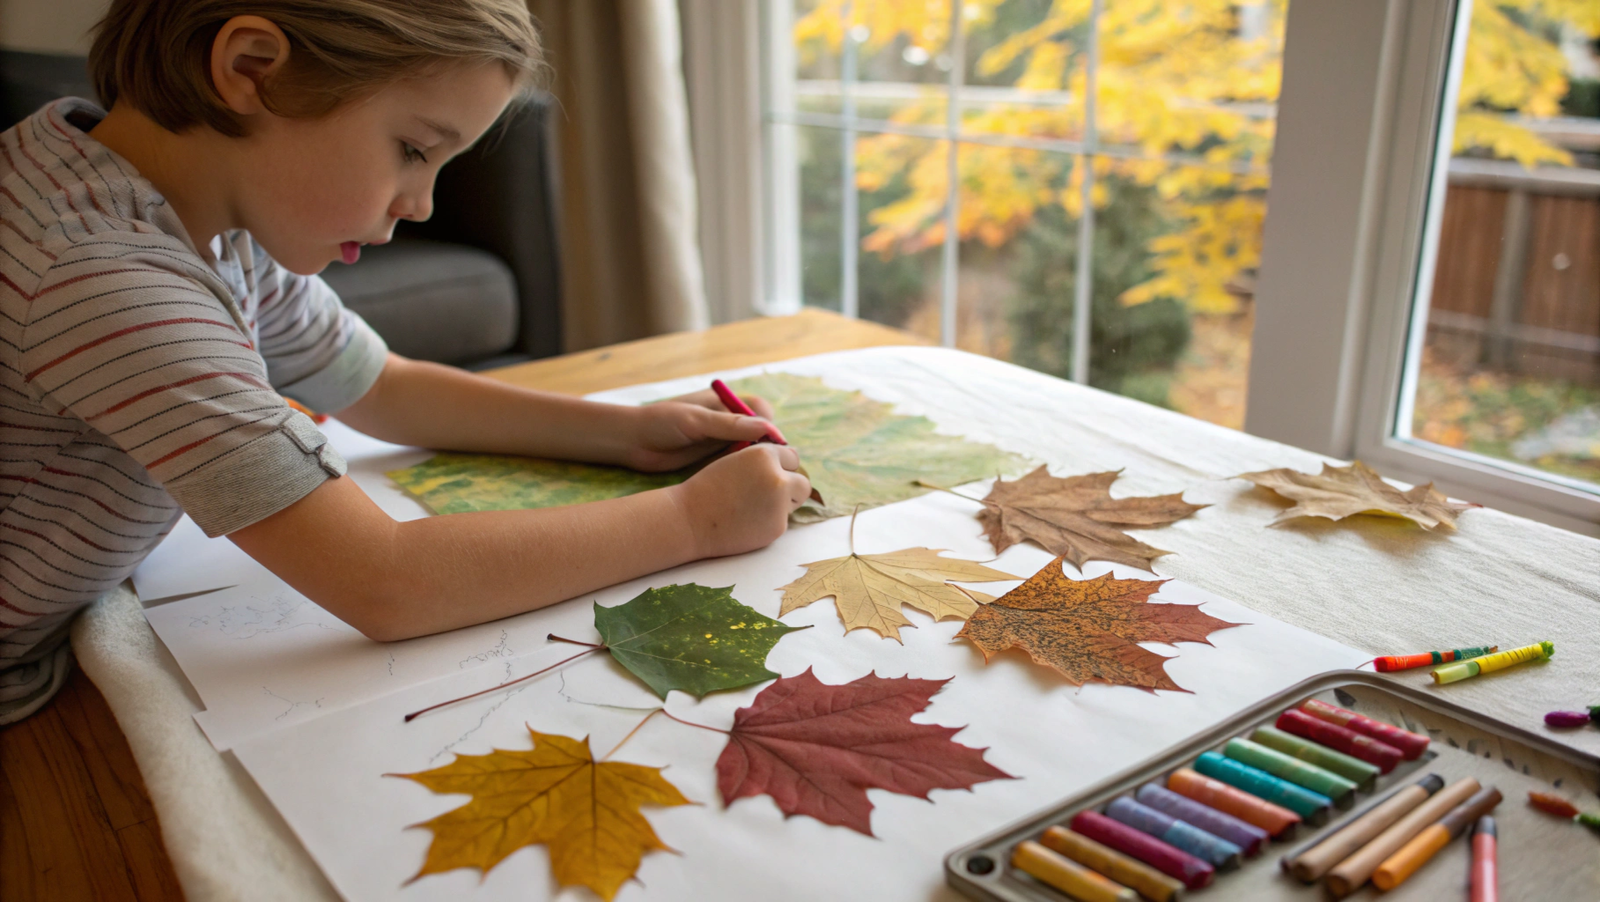
5. Kids’ Leaf Rubbing Art Project
You know how in the fall kids bring home piles of leaves. And what do you do with them? The simplest technique is leaf rubbing (making leaf prints with crayons or pastels). It’s not only creative but also educational: children can see the veins and shapes of the leaves appear right on the paper.
All you need are leaves of different shapes, a sheet of white paper, and a set of colored crayons. Kids place a leaf under the paper and rub the side of a crayon across the surface — and the image appears! By mixing colors and leaf types, you can create a whole fall “collection” on one sheet.
What you’ll need:
A variety of leaves (fresh ones work best; dry ones crumble easily)
White or lightly tinted paper, A4 or A3 size
Wax crayons or pastels (preferably without wrappers so you can use the side)
Painter’s tape (to hold the leaf in place under the paper)
Optional: a frame or an album to store the artwork
How to make it Fall Decorations:
Collect leaves. Go for a walk and gather different types: maple, oak, birch. The more variety, the more interesting the prints.
Set up the workspace. Place a leaf on the table, cover it with paper, and tape down the edges so nothing shifts.
Start the magic. Take a crayon and rub the side of it across the paper. Slowly the shape and veins of the leaf will appear.
Experiment. Try changing colors, layering leaves on top of each other, or blending shades into gradients. This adds depth and creates the effect of a fall carpet.
Final step. Frame the finished artwork to hang in a child’s room or give it as a gift to grandma.
Where to use it
As seasonal décor for the fridge or walls.
As greeting cards: cut out a section of the artwork and glue it onto cardstock.
As a “modern herbarium”: collect a whole album of prints.
Back when we lived in Idaho, my neighbor’s kids proudly showed me a folder full of their leaf rubbings, and I thought: “Why didn’t I ever do this as a kid?” Since then, every fall we gather leaves and dedicate an evening to this project. Sometimes friends come over with their children, and the table turns into a little workshop — everyone is focused, even the adults.
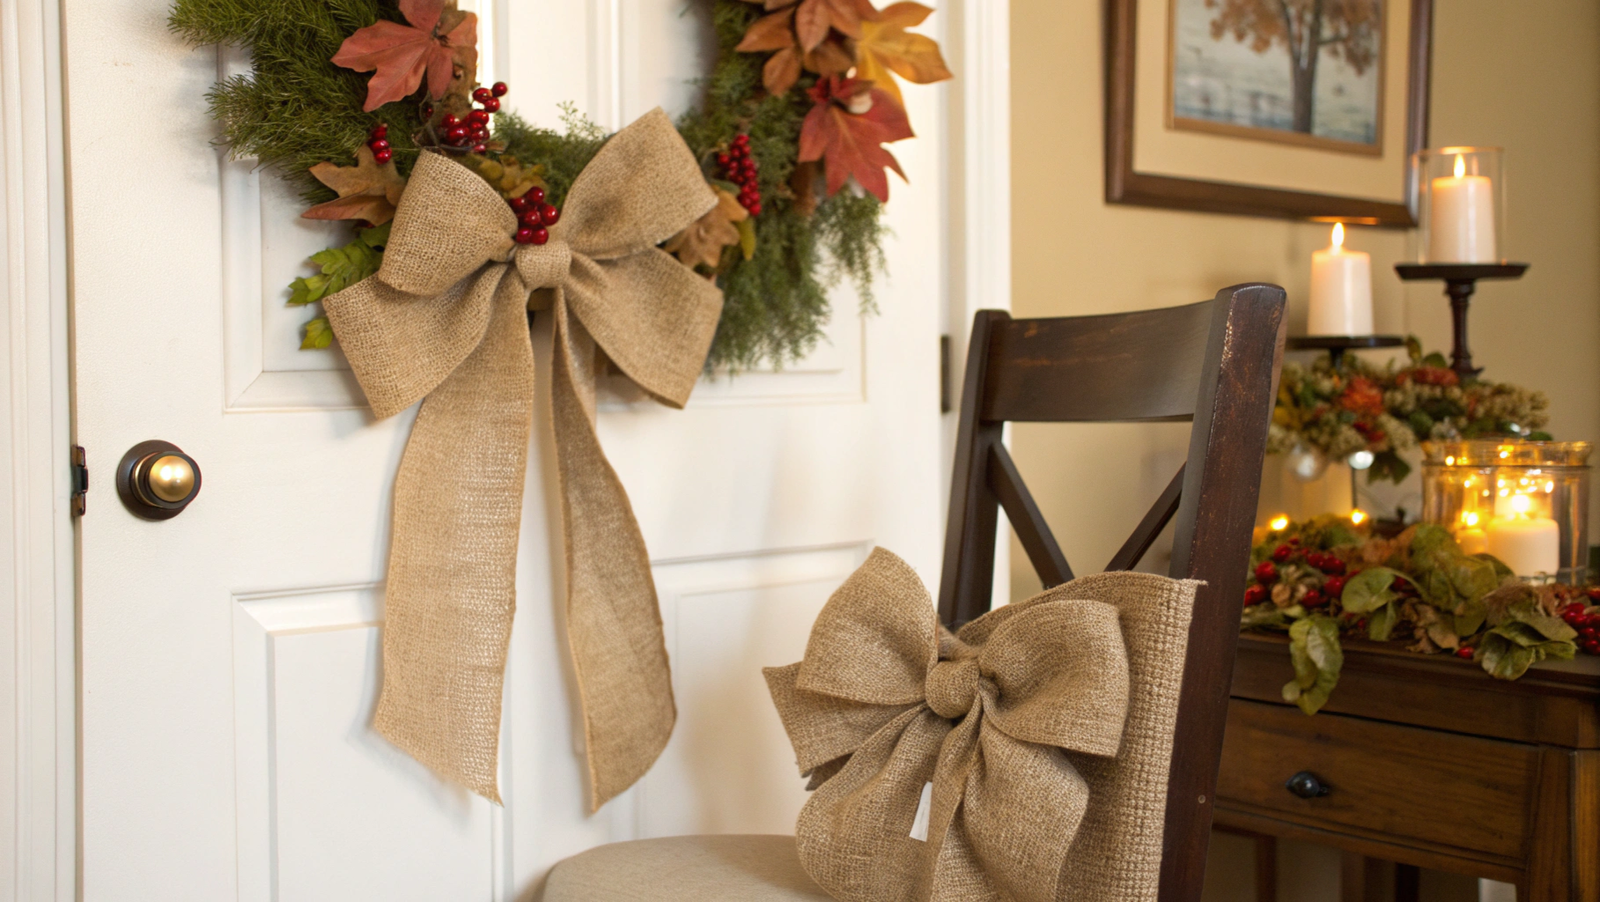
6. Farmhouse-Style Burlap Bows
In farmhouse style (that cozy rustic-chic look), simple materials can look incredibly stylish if presented the right way. And burlap is exactly that kind of material. From it you can make bows to hang anywhere: on a wreath, on a garland, on a door handle, or even on the back of a chair.
Burlap is naturally rough and textured, which creates a beautiful contrast with the soft glow of candles and the bright colors of fall leaves. A bow made of burlap is an accent that doesn’t feel plastic or mass-produced — it looks “old-fashioned,” handmade, and that’s its real charm.
Optional: lace ribbon to wrap the center of the bow
Hot glue gun for fall decorations
How to make it Fall Decorations:
Cut the ribbon. For one bow, 20–24 in (50–60 cm) is enough, but if you want it fuller, use a longer piece.
Form the loops. Fold the ribbon accordion-style so you get two or three loops on each side.
Secure the center. Tie the middle tightly with twine or wire so the bow holds its shape.
Shape the bow. Fluff out the loops with your hands to add volume. Trim the ends at an angle or into a “V” shape for a clean finish.
Add a detail. Wrap the center with lace or a decorative ribbon. If you’re making it for a wreath, glue on a small pinecone or mini pumpkin.
Where to use them
On wreaths (perfect accent at the bottom)
On garlands made of leaves or pinecones
On the backs of chairs for a festive table
As gift wrapping (a box + a burlap bow = rustic chic)
At a local farmers’ market, the vendor’s stall was decorated everywhere with burlap, and every corner was tied off with bows! We started talking, and she told me she makes them in just a couple of minutes right before the fair. I tried it at home — and yes, it really is that simple. And as a bonus: in winter, the same burlap ribbon makes beautiful Christmas tree ornaments.
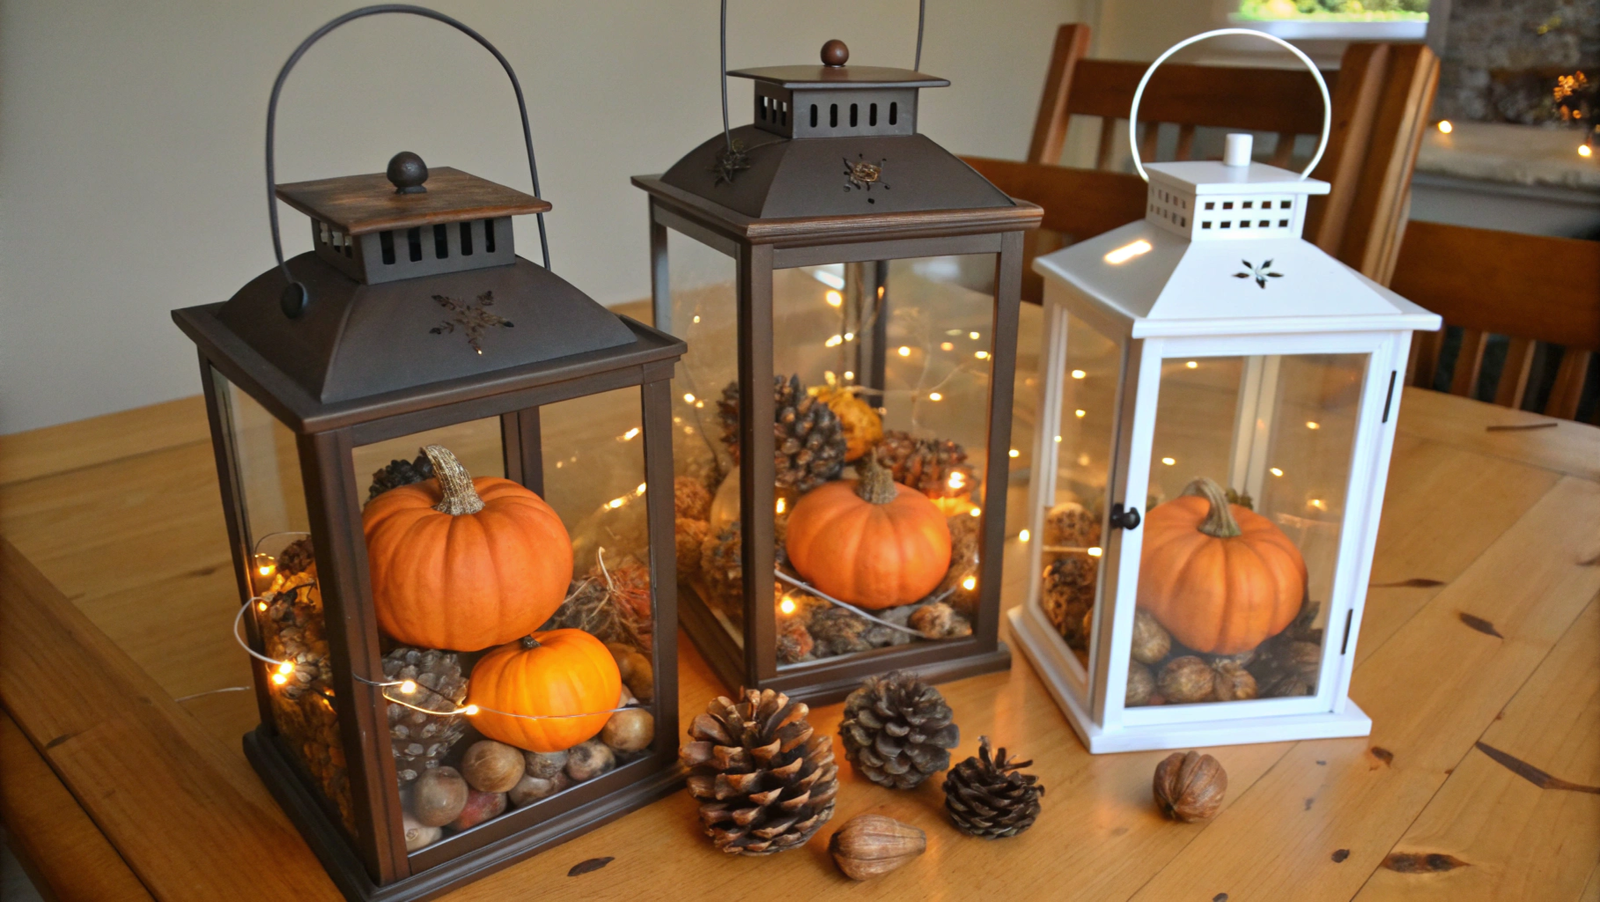
7. Repurposed Lanterns With Mini Pumpkins
Lanterns are one of those things that always feel warm and welcoming — even if there’s no candle inside. And if you fill them with mini pumpkins, pinecones, and a few leaves, you’ve got a ready-made fall display without much effort.
Take a lantern (maybe an old one forgotten in the garage or attic), clean it up, and use it as a clear “showcase” for your fall treasures. Inside you can place mini pumpkins, acorns, pinecones, tealights, or even a small string light.
What you’ll need:
Lantern (metal or wood, 10–14 in / 25–35 cm tall)
Mini pumpkins (real or decorative)
Pinecones and dried leaves
Small LED candle or battery-operated string light
Optional: a bit of moss or cinnamon sticks for fragrance
How to make it fall decorations:
Prepare the lantern. Wipe the glass inside and out, remove dust and rust. If the metal looks dull, gently sand it for a touch of “vintage shine.”
Create layers. Place a base of dried leaves, straw, or decorative moss (about 1 in / 2–3 cm thick). This adds texture and helps the pumpkins sit securely.
Add mini pumpkins. Put the largest in the center and 2–3 smaller ones around it. If the lantern is tall, use pumpkins of different sizes so the arrangement doesn’t look flat.
Decorate with extras. Tuck in pinecones, acorns, or cinnamon sticks between the pumpkins. They add aroma and dimension. Make sure small pieces don’t cover the main elements.
Light accent. Place an LED candle inside or weave in a tiny string light. Hide the wires among the leaves and tuck the battery pack behind the lantern. Important: always use LED candles — they don’t heat up and are safe around dry leaves and fabric.
Where to use it
On the porch, on either side of the door
As a centerpiece on the dining table
On the mantel paired with a leaf garland
Even in the garden — if you use a lantern with a closed top
At our friends’ place, they had an old lantern on the porch completely filled with mini pumpkins and leaves. It looked so warm and perfectly “fall.” What I loved most is how versatile it is — you can change the “filling”: pumpkins and pinecones in fall, evergreens in winter, flowers in spring.
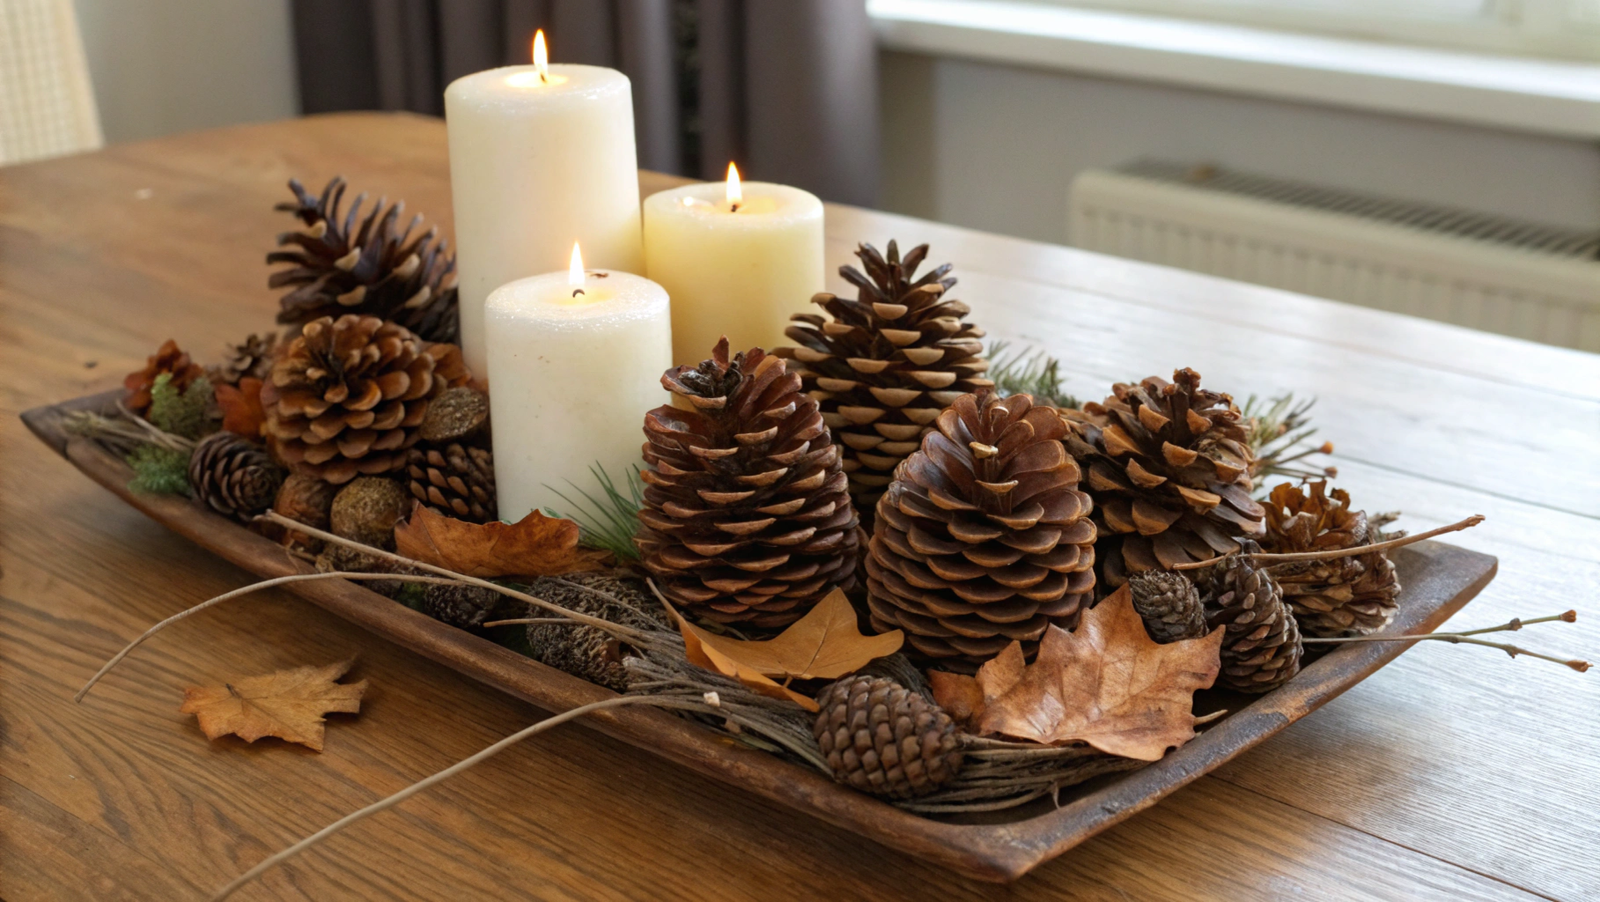
8. Simple Pinecone Table Centerpiece
Pinecones are one of the most beautiful materials for décor — and they’re literally lying under your feet on fall walks. Gather a basket of these woodland treasures, and you’ve got everything you need for a stunning seasonal centerpiece.
Mix different sizes and shapes, add a few candles, twigs, or dried leaves — and you’ll have an atmospheric table display. The best part: it costs nothing.
What you’ll need:
Pinecones of various sizes (10–15 pieces is ideal)
Large plate, tray, or wooden bowl (12–14 in / 30–35 cm in diameter)
Pillar candles or tea lights in glass holders
Dried leaves, moss, or small branches
Optional: spray paint (gold, white, bronze)
You can also find ready-made decorative pinecone sets on Amazon, like Decorative Pinecones.
How to make it fall decorations:
Prepare the pinecones. If you collect them yourself, make sure to dry them. Spread them on a baking sheet and heat in the oven at 200°F (90°C) for 20–30 minutes. This removes excess moisture and kills insects.
Choose a base. A wooden tray, large bowl, or even a pie dish works well. The important thing is a wide, flat bottom so the arrangement looks spread out.
Arrange the pinecones. Start with larger ones in the center and fill the edges with smaller ones. Mix up shapes and colors so it doesn’t look like just a pile.
Add accents. Tuck in dried leaves, cinnamon sticks, or small branches between the cones. For a festive touch, lightly spray the pinecones with gold paint.
Lighting touch. Place 2–3 pillar candles in the middle. For extra safety, use LED candles — their soft glow reflects beautifully off the pinecone texture without risk of heat.
Where to use it
As a centerpiece on the dining table
On the coffee table in the living room
On the mantel shelf
Even outdoors on a garden table — especially if you add a string light.
Picture this: a simple bowl filled with pinecones, with three candles glowing among them. Nothing fancy, but it feels perfectly cozy. It’s my go-to fall décor — quick, simple, and always effective. Choose LED candles: real flames near dry pinecones can be dangerous, while modern LEDs give off the same gentle glow.
9. Painted Acorn Jars
Acorns might be the most underrated symbol of fall. And yet, they look amazing in seasonal décor! With just a little paint, ordinary acorns turn into bright accents that can fill a jar or vase.
Take acorns, paint either the caps or the nuts in different shades — from gold to deep burgundy — and place them in clear jars. The result is simple but stylish décor you can display on a shelf, table, or mantel.
What you’ll need:
Mason jar (16 oz / ~470 ml) or any clear glass vase
Gather and prep the acorns. If using real ones, wash and bake them at 200°F (90°C) for about 30 minutes. This dries them out and kills any insects.
Choose your palette. Decide whether you want bright décor (red, green, orange) or a more muted look (white, gold, bronze).
Paint the acorns. You can paint just the caps gold and leave the nut natural, or flip it and paint the nut while keeping the cap brown. Experiment with combinations and even add a little glitter for a festive look.
Dry them. Spread the painted acorns on newspaper and let them dry completely. For durability, spray with a clear varnish.
Fill the jar. Place the acorns in a Mason jar or vase. Add a few pinecones or twigs for variety.
Where to use them
On the dining table as a centerpiece
On a bookshelf as a small seasonal accent
As a gift: tie a ribbon around the jar and give it to friends
In a child’s room — as colorful, safe décor (if you’re using artificial acorns).
I love this project, and every year I make jars filled with painted acorns. Sometimes I stick with classic autumn shades, and other times I go for a white-and-gold palette for a cleaner, more modern look.
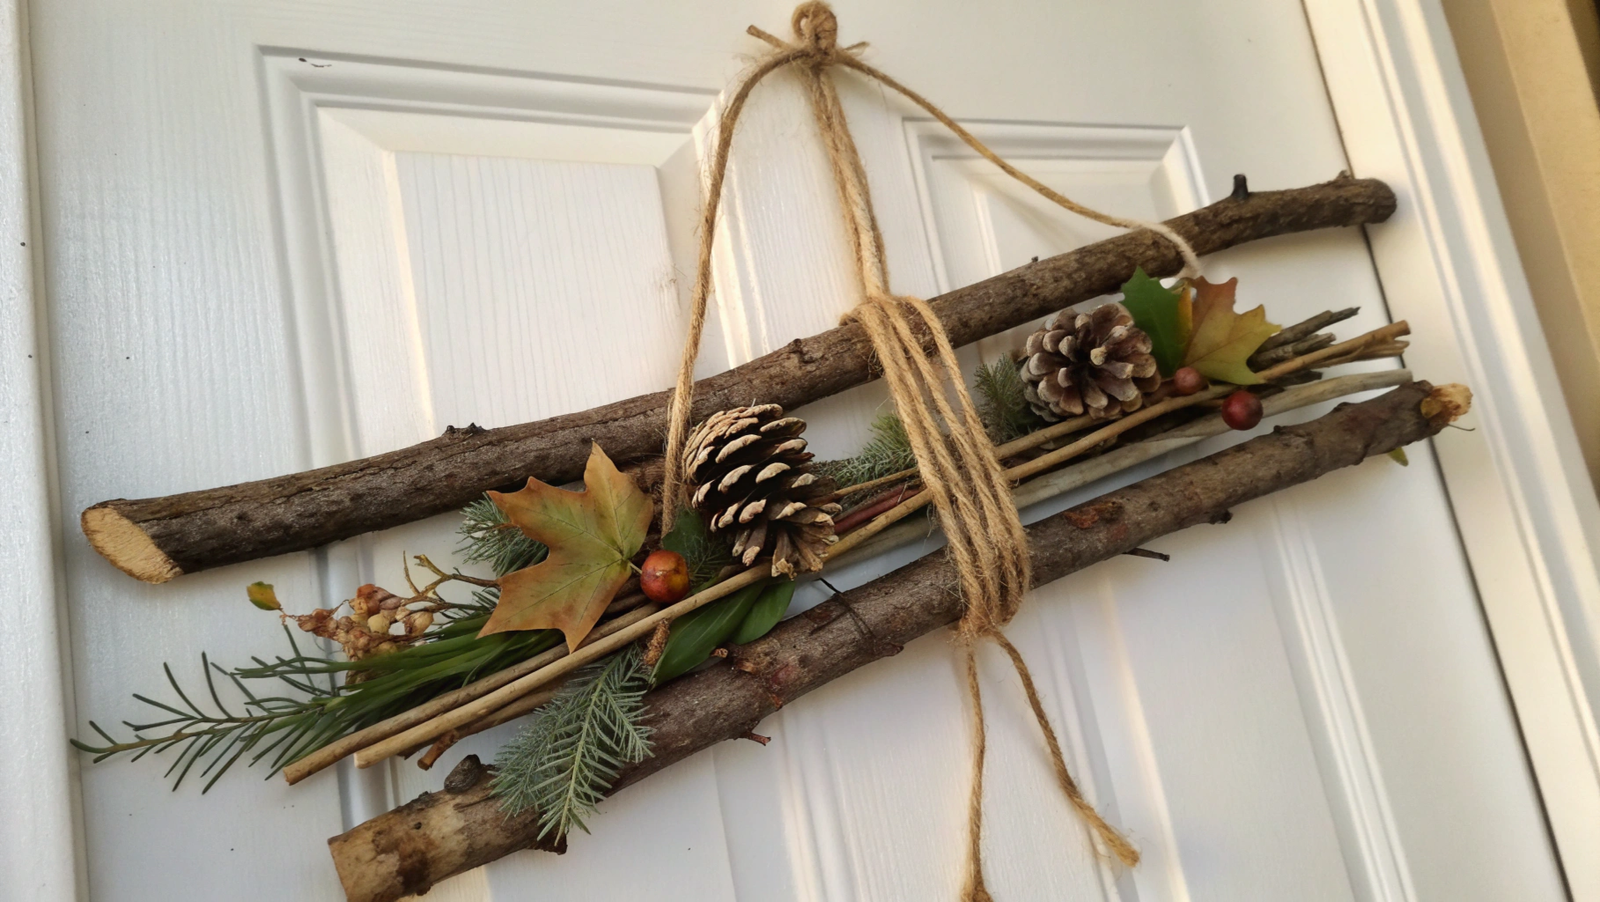
10. Twig and Twine Door Hangers
This is the kind of décor you can make in just one evening.
Take a few twigs of different lengths, tie them with jute twine, and decorate with leaves, pinecones, or small seasonal accents. The result is something between a wreath and a wall hanging — but with a more “wild” energy.
What you’ll need:
Dry twigs (thin ones work best, 10–15 in / 25–40 cm)
Optional: acrylic paint (white or gold) for the twig tips
How to make it fall decorations:
Prepare the twigs. Collect dry but sturdy twigs. Trim the ends so they’re even. For a cleaner look, lightly sand them.
Assemble the base. Gather 5–7 twigs in a bundle. Tie them at the top with twine, leaving a loop for hanging. Stagger the bottom ends so the hanger looks more dynamic.
Add decorations. Slip in small pinecones or leaves between the twigs. Secure with twine or a drop of glue. You can also add dried herbs — lavender or rosemary will look lovely and smell amazing.
Accent. If you’d like, paint the twig tips with white or gold acrylic paint. This adds a touch of artistry and makes the hanger feel more modern.
Finish. Tie another piece of twine at the top to make a loop for hanging.
Where to use it
On the front door as a wreath alternative
Inside the house, on the entryway wall
In the garden or on the patio, blending with plants
I made my first twig hanger in just half an hour — and to my surprise, it fit our home so well that I didn’t even bother putting up the usual wreath. It proved to me that the simplest materials often work better than anything store-bought.
Create Your Atmosphere
I believe it’s the little things that truly create the atmosphere. A jar with a candle, a wreath made of found leaves, a simple garland — all these details come together into a bigger picture where fall becomes part of your home.
And I’d love to know: what kind of fall decoration do you love? Maybe you have clever tricks or special traditions? Share them in the comments — I’d be so happy to hear your ideas and maybe even try them out in our home this season.
Kaylee is the Founder of Rootedrevival.com. She has set up and run two homesteads, a one-acre in Idaho, and her current two-acre dream homestead in the Pacific North West. Her qualifications include a Permaculture Design Certification from Oregon State University, and she is a Gardenary Certified Garden Coach. Kaylee currently produces at least 80% of her own food. She contributes to our site through articles, training and coaching to our clients. You can read more about her at rootedrevival.com/kaylee-vaughn