
Easter brunch isn’t just about eggs, baskets and finding candy in corners. It’s the morning when all your family gathers, the sun plays in the windows, and there’s always something truly delicious on the table.
And so you stand in the kitchen, in your apron, with a cup of coffee… and think: what to surprise this year?
I’ve gathered for you 10 tried-and-true recipes that you can easily replicate. Some are prepared in advance, some are made right in the morning. There’s sweet, salty, vegan, keto, and even a smoothie bowl that you want to take pictures of.
Most importantly, it’s all about food that comes together, stress-free and with love.
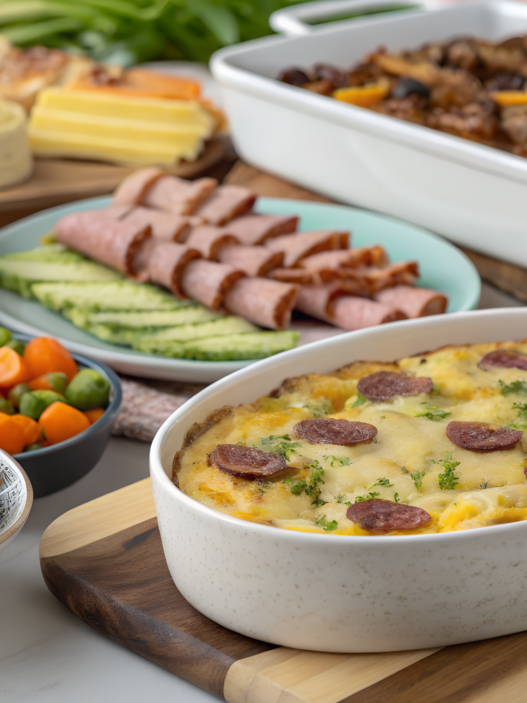
1. The Best Make-Ahead Easter Casserole – A Crowd Favorite!
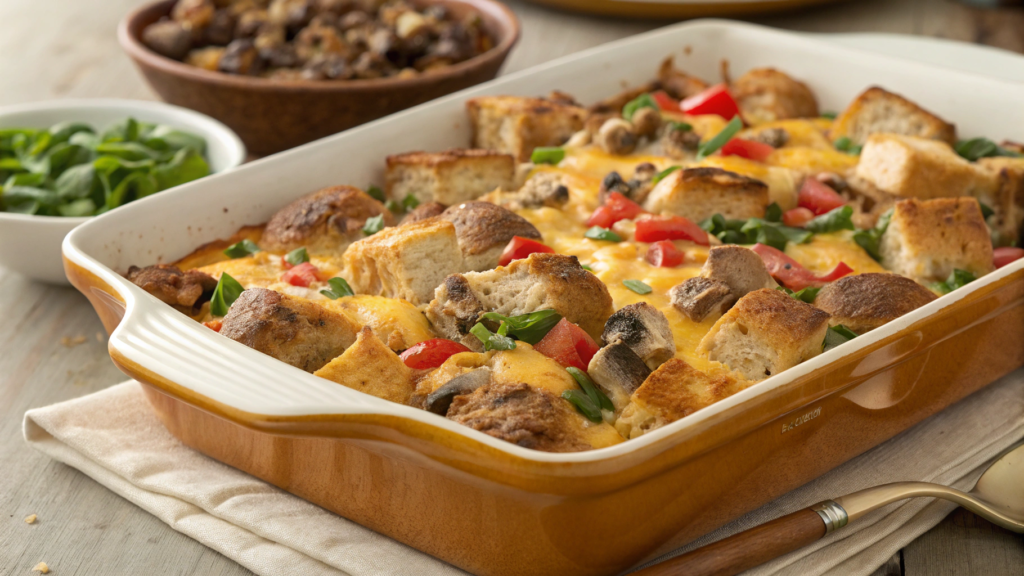
Ah, Easter morning… This Easter casserole, which can be made ahead of time, is always first on the list when I make brunch. Hearty, cheesy, cozy…honestly? I could eat it every day.
What makes it so special? Simple, adaptable, and feeds a whole crowd without too much stress.
Ingredients:
- 8 eggs
- 1 ½ cups whole milk
- 1 tsp. dijon mustard (gives it a slight spiciness!)
- 1 tsp. garlic powder
- 1 tsp. salt
- ½ tsp. black pepper
- 2 cups grated sharp cheddar
- ½ cup grated parmesan
- 450 g (1 lb) breakfast sausage (can be substituted for ham or bacon)
- 1 small onion, finely chopped
- 1 sweet pepper, diced
- 4 cups diced sour bread or French roll (slightly stale is better!)
- Optional: spinach, cherry tomatoes, mushrooms
Preparation:
- Roast the meat and vegetables. In a frying pan, fry the sausage with the onions and peppers. Cook until the sausage is browned and the vegetables are soft. Drain excess fat and set aside.
- Beat the eggs. In a large bowl, whisk eggs with milk, mustard, garlic powder, salt and pepper.
- Add the goodies. Add grated cheese, meat and vegetable mixture, and bread cubes. Mix gently so the bread absorbs everything.
- Transfer to the mold. Grease a 22×33 cm (9×13 inches) mold with oil and lay out the mixture. Cover with foil and put it in the refrigerator overnight.
- In the morning, pop into the oven. While the oven is preheating to 175°C / 350°F take the casserole out. Bake for 45-50 minutes, the last 10 minutes without foil so that a golden crust appears on top. Let cool slightly before serving.
Tips straight from our table. Add a blend of cheeses for depth of flavor. Personally, I love a little smoked gouda.
Bake best in a ceramic mold with a lid, such as this one on Amazon. It retains heat for a long time and looks beautiful right on the table.
This is the kind of dish that comes together. Served straight from the mold, hot, cheesy while the kids run around with chocolate on their cheeks and someone panics looking for a shoe. Easter in its purest form.
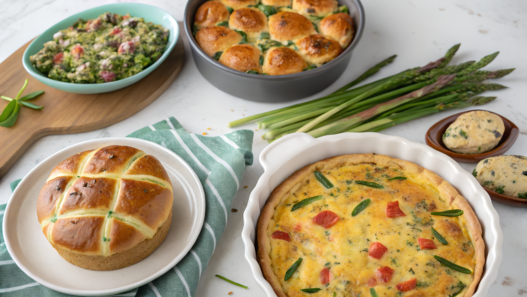
2. Easy Easter Brunch Quiche That’s Light and Delicious
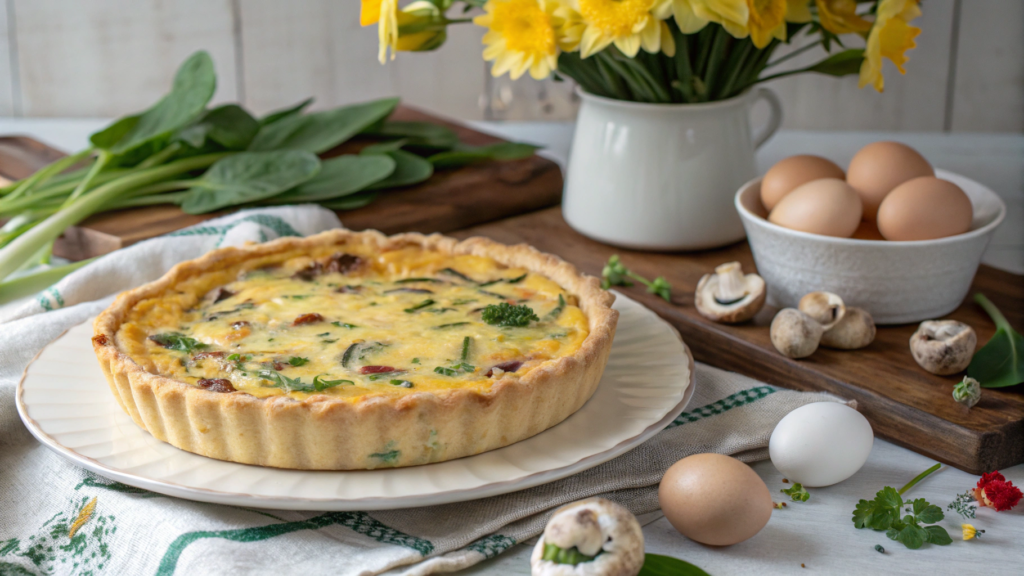
At Easter, you always want your food to be delicious, but without feeling heavy. That’s why this quiche is the perfect choice for Easter brunch: it’s light, full of flavor, and looks like a work of art.
I’ve made it dozens of times, and it’s a little different every time because you can change the filling to suit the season, your mood, or just what’s in the fridge. But the base remains: tender egg filling, cream cheese and thin crispy dough.
Ingredients:
For the base (you can take a ready-made one or make your own):
- 1 sheet of chilled dough (puff pastry or shortbread)
- Quiche or pie mold, 22-24 cm in diameter
For the filling:
- 4 eggs
- 1 cup heavy cream (or ¾ cup cream + ¼ cup milk for a lighter version)
- 1 tsp. salt
- ¼ tsp. black pepper
- A pinch of nutmeg (optional)
- 1 cup grated cheese (Swiss, cheddar, gruyere – whatever you like)
- ½ cup finely chopped spinach or other greens
- ½ cup sauteed mushrooms or leeks
- ½ cup sliced cherry tomatoes
How to cook:
- Preheat the oven to 375°F(190°C). If using ready-made pastry, carefully place it in a mold, prick with a fork and bake blind for 10 minutes (you can pour in legumes to weight it down).
- In a bowl, whisk eggs with cream, add salt, pepper, nutmeg.
- Place in base in layers: some cheese → vegetables → herbs → cheese again. Fill with the egg mixture.
- Bake for 35-40 minutes, until the center is set and the top is golden. Let cool slightly – quiche slices better when slightly cooled.
Tip. Don’t be afraid to play around with the filling. Broccoli, goat cheese, roasted peppers – you can show your imagination here.
Quiche is easy to prepare in advance: bake it the night before, and in the morning simply reheat it at 320°F (160°C) for 10-15 minutes.
3. Sweet and Savory Italian Easter Bread You Need to Try
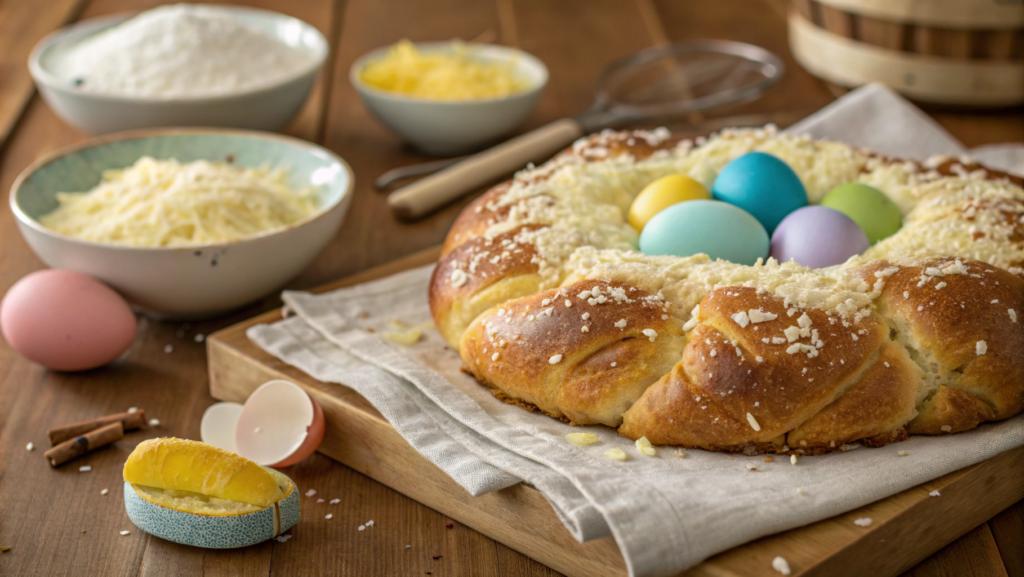
In the south of Italy these breads are traditionally baked for Easter – with cheese, eggs and spices. There are many versions: Casatiello, Tortano, Pane di Pasqua… We adapted our version a bit to our home American cuisine. It turned out simple and amazingly delicious. Its taste is slightly sweet, slightly brackish, with the flavor of cheese and notes of spices.
Ingredients:
- 4 cups of flour
- 1 bag of dry yeast (7 g)
- 1 cup warm milk
- 2 eggs (plus 1 for greasing)
- ¼ cup sugar
- 1 tsp. salt
- ¼ cup olive oil
- 1 cup grated cheese (hard cheese is best: parmesan, pecorino, cheddar)
- Optional: ½ tsp. ground black pepper or paprika
- 4 hard-boiled colored eggs (for decoration)
How to cook:
- Mix warm milk and yeast, let stand for 10 minutes to let everything set.
- In a large bowl, whisk together the eggs, sugar, salt and butter. Pour in the milk and yeast.
- Gradually add the flour and knead until elastic. The dough should be soft but not sticky. Stir in the cheese and spices.
- Cover with a towel and leave to rise for 1-1.5 hours.
- Divide the dough into 3 parts, roll out the bundles and braid. Place the dyed eggs (they must be pre-boiled and colored) between the braids. They remain intact during baking and serve as a beautiful Easter decoration.
- Transfer to a baking tray, brush with beaten egg.
- Bake at 350°F(180°C) for about 30-35 minutes. The top should turn golden and the house should smell like a holiday.
Tip. Eggs can be boiled and colored ahead of time, or you can use decorative eggs – if you’re baking bread “for display”. The dough is also great for small loaves, if you want to portion it out.
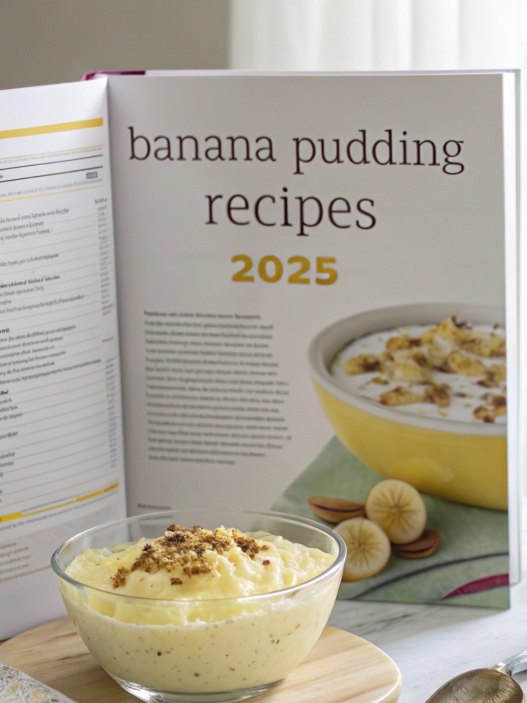
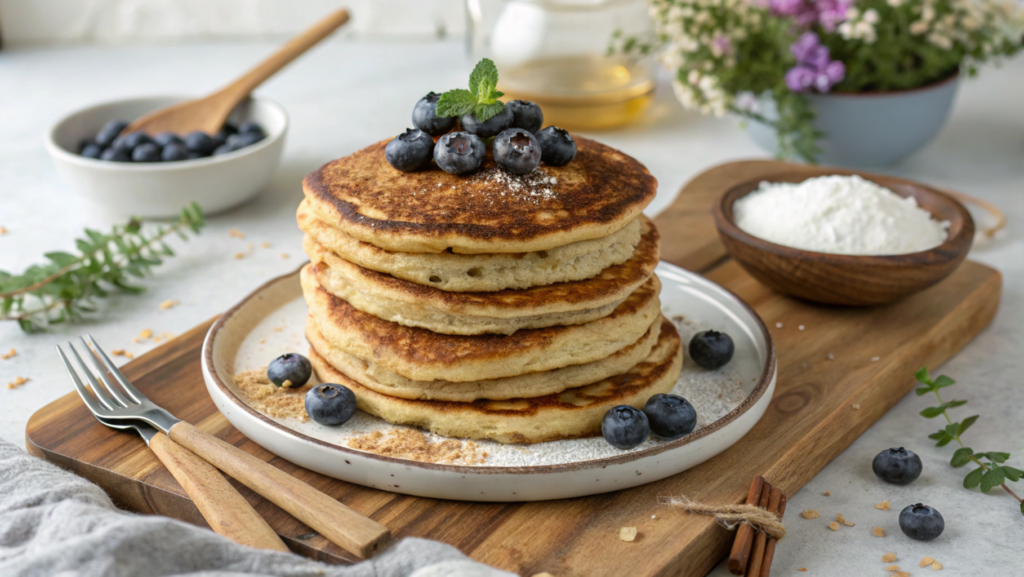
I know what you’re thinking right now: paleo and Easter? Well no, give me the delicious and real thing! But wait, these pancakes are the one where “healthy” and “delicious” go hand in hand. Tender, flavorful, with a crispy crust and soft middle… And yet – grain-free, sugar-free, gluten-free. Yes, yes, yes, yes!
4. The Perfect Paleo Easter Pancakes – No One Will Guess They’re Healthy
Ingredients:
- 2 ripe bananas
- 2 eggs
- ¼ cup almond flour
- ¼ cup coconut flour
- ½ tsp. baking soda
- 1 tsp. cinnamon
- A pinch of salt
- 1 tsp. vanilla extract
- Coconut oil for frying
- Optional: blueberries, grated apple, chocolate chips (no sugar)
How to prepare:
- Mashed potato the bananas in a bowl with a fork until mashed.
- Add the eggs, vanilla and mix everything well.
- In a separate bowl, mix the dry ingredients: flour, baking soda, cinnamon, and salt.
- Combine everything together and leave it for 5 minutes – the coconut flour will absorb the moisture and the dough will thicken.
- Heat up a skillet with coconut oil (or a non-stick pancake pan like this one – it’s just perfect for them!)
- Spoon out portions of batter and fry for 2-3 minutes on each side. They turn out more “heavy” than regular ones, so fry over moderate heat so they don’t burn.
I serve them with coconut yogurt, fresh berries and a little honey on top. Sometimes with homemade pecan syrup. And once we even had them with avocado and fried bacon.
They’re really versatile.
We first made these pancakes that spring when I was still trying the paleo diet – just to “clean up” the diet. Lindy was skeptical. But, when she took a bite of the first pancake, she simply said: “Are you sure you didn’t put anything in there?!” Since then, they’ve been on our table for more than just Easter.
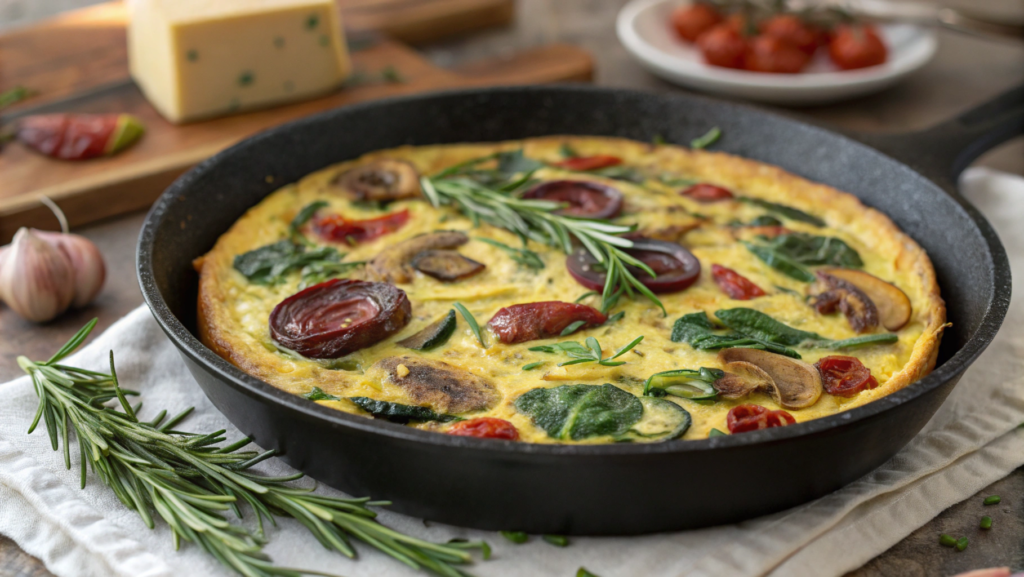
5. A Foolproof Vegan Easter Frittata That’s Packed with Flavor
It took me a long time to believe that a vegan frittata could taste good. No eggs? No cheese? Really?
And then I tried this one. And lo and behold – airy, flavorful, with roasted vegetables and a tender texture… Yes it’s even better than a regular one, to be honest.
The secret is chickpea flour. Yeah, regular chickpea flour. It gives you the texture, density and richness that eggs usually give you. It’s also rich in protein and fiber.
Ingredients:
- 1 cup chickpea flour
- 1 cup of water
- 1 tsp. turmeric
- 1 tsp. garlic powder
- 1 tsp. salt
- ½ tsp. black pepper
- 1 tsp. olive oil (and a little more for frying)
- 1 tsp. apple cider vinegar (or lemon juice)
Stuffing (you can vary, but here’s a favorite combination):
- 1/2 red onion, thinly sliced
- 1/2 zucchini, grated
- 1/2 cup boiled spinach or kale
- 1/4 cup roasted mushrooms
- 1/4 cup sun-dried tomatoes
- A little fresh thyme or rosemary
How to cook:
- In a large bowl, combine the chickpea flour, spices, vinegar, and water. Whisk with a whisk until smooth. Leave for 10 minutes – the mixture will thicken.
- Meanwhile, fry the vegetables in a pan with a little oil. Season lightly. If using grated vegetables, squeeze out the excess moisture.
- Add the vegetables to the chickpea mixture and mix gently.
- Pour everything into an oiled baking dish (a cast iron skillet is ideal, it holds heat super well). Bake at 350°F(180°C) for about 30-35 minutes, until the center is firm and the top is golden.
- Let stand for 10 minutes before serving – like a real frittata, it needs to “set”.
A tip from me. If you like a “cheesy” flavor – add 1-2 tbsp of nutritional yeast directly to the chickpea mixture. This will give that umami effect that is so often lacking in vegan dishes. It works especially cool if you’re not using sun-dried tomatoes or mushrooms – the yeast then makes up for the missing rich flavor perfectly.
We first served this frittata for a friend of ours who is a confirmed vegan. And guess what? The other guests ate the frittata with gusto, too. No one even asked “that” question: where are the eggs?
And if the frittata is served with a salad of fresh herbs with lemon dressing and some pickled onions… mmm.
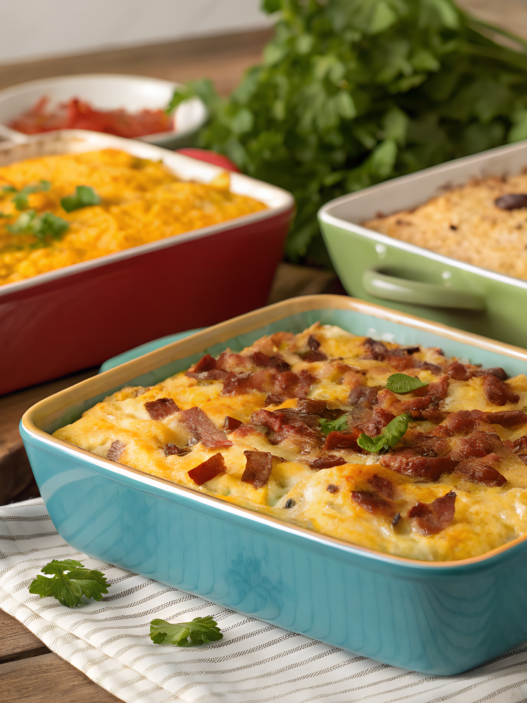
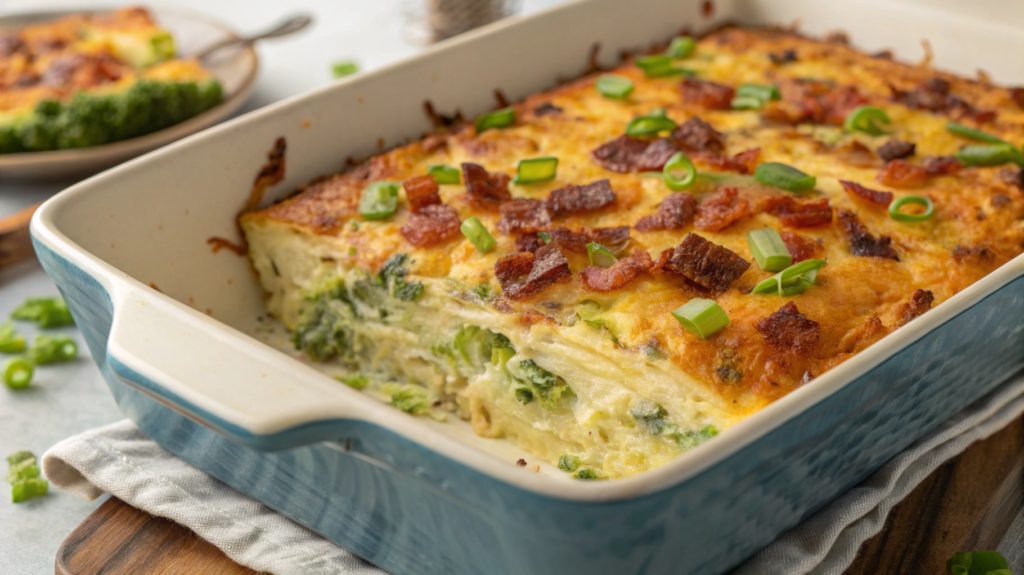
6. The Ultimate Keto Easter Breakfast Casserole – So Cheesy!
We love this casserole because it’s rich, flavorful, and very keto diet friendly.
And even if you’re not counting carbs, you’ll still want a refill. It’s all about the combination: fried bacon, eggs, cream, cheese, and veggies. Simple ingredients, and the result is a real treat.
Ingredients:
- 10 large eggs
- ¾ cup heavy cream
- 1 cup grated cheddar
- ½ cup grated mozzarella
- ½ cup grated parmesan
- 6 slices bacon (or 200 g), fried and chopped
- ½ head of broccoli, finely chopped
- ½ sweet pepper, diced
- ¼ cup green onions
- 1 tsp. garlic powder
- Salt and pepper to taste
- Oil or spray for molds
Preparation:
- Preheat the oven to 350°F(180°C).
- In a large bowl, whisk the eggs with the cream, garlic powder, salt and pepper.
- Add the cheese, fried bacon and vegetables. Mix well.
- Transfer to an oiled baking dish (22×33 cm or similar), flatten.
- Bake for about 35-40 minutes, until the middle is “set” and the top is browned.
- Cool for 5-10 minutes before serving so the pieces hold their shape well.
A couple of quick hacks
- You can substitute broccoli for spinach or zucchini – just make sure there’s not too much moisture.
- Don’t have three kinds of cheese? That’s okay. The main thing is cheddar and something stretchy like mozzarella.
This casserole is perfect for Easter because it’s hearty, quick, and there’s plenty for everyone. It stays nice and warm for another half hour after cooking. And the next day? Even tastier. We once ate the leftovers cold right out of the mold, not proud, but it was very good.
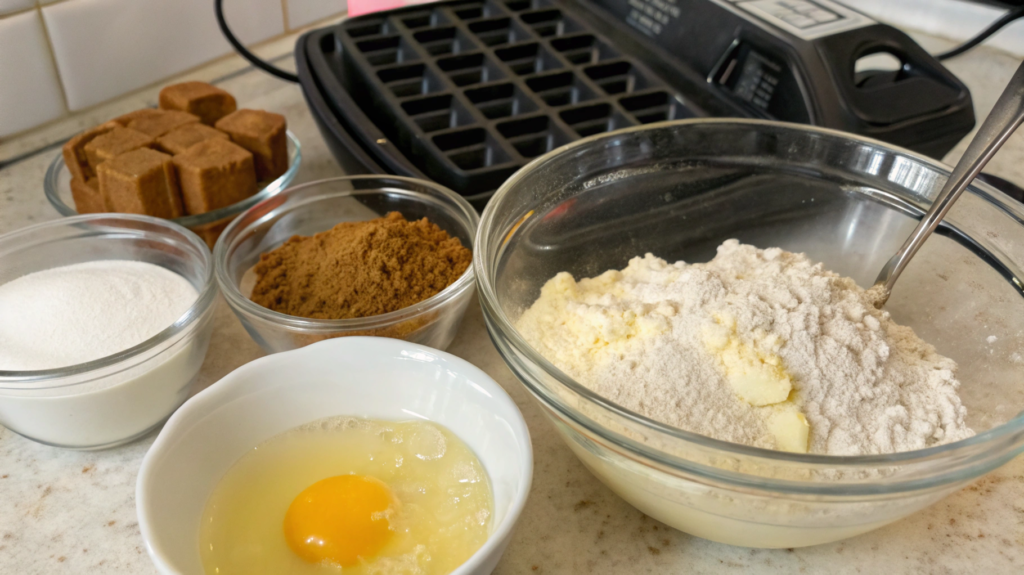
7. Easy Gluten-Free Waffles That Taste Better Than Regular Ones
If I got paid every time someone looked skeptically at my gluten-free waffles and then asked for the recipe…I’d have bought a goat named Waffle by now. Seriously.
These waffles are golden, crispy on the outside and soft on the inside, with a slightly nutty flavor and a slight vanilla aroma. And they don’t require a bunch of rare ingredients or special skills. Just delicious homemade food that you want to eat with your hands right off the waffle iron (not judging at all, by the way).
Ingredients:
- 1 cup gluten-free flour (any all-purpose blend, I like Bob’s Red Mill 1-to-1)
- 1 tbsp. coconut sugar or honey
- 1 tsp. leavening agent
- ¼ tsp. salt
- 1 egg
- ¾ cup vegetable milk (or cow’s milk if not vegan)
- 2 tbsp. melted butter (or coconut oil)
- 1 tsp. vanilla extract
- Optional: cinnamon, chocolate drops, berries directly into the batter
How to cook:
- Preheat your waffle iron and lightly oil it.
- In a bowl, mix the dry ingredients: flour, baking powder, baking powder, sugar, salt.
- In another bowl, combine the eggs, milk, oil, and vanilla.
- Combine both mixtures and stir. The batter should be a little thicker than for pancakes.
- Pour into the waffle iron in batches and bake until golden (usually 3-5 minutes, depending on the model).
Tricks from our kitchen
- These waffles can be frozen! Just cool, wrap in parchment and put them in the freezer. Then reheat in the toaster oven – perfect for breakfast on the Monday after Easter.
- The batter is also suitable for pancakes – in case your waffle iron gets clogged with berries (I’ve had it too).
- We use this waffle maker from Dash – it’s compact, cheap and makes exactly one waffle per batch. It’s cool when everyone wants “their own.”
And you can serve with coconut yogurt + fresh strawberries, almond paste + banana slices and a little butter and a dash of syrup (yep, sometimes you can!).
8. Crockpot Easter French Toast – Set It and Forget It!
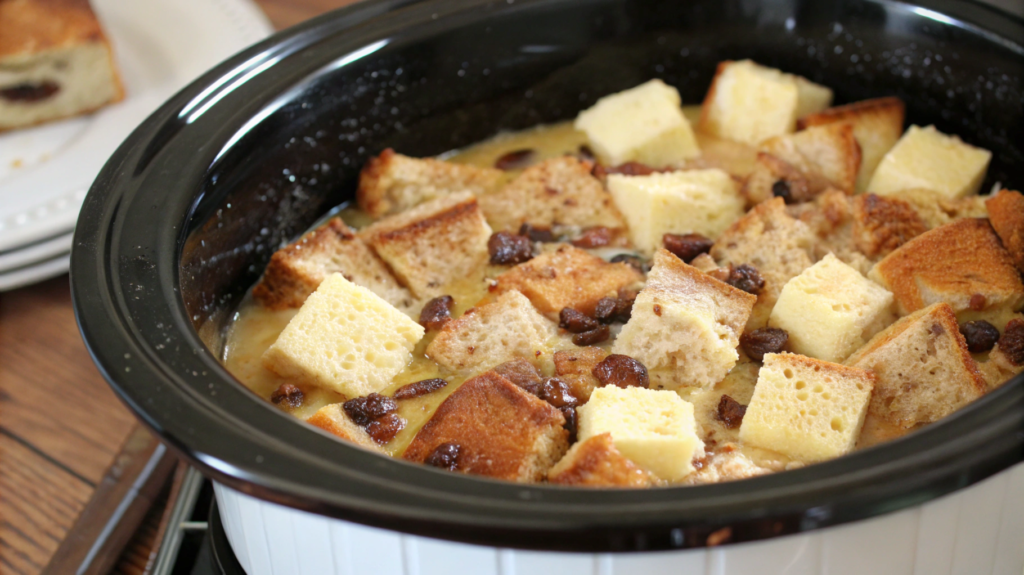
When Easter falls on a particularly busy Sunday (and we’ve had many in our family), I don’t try to be a hero. I just pull out the сrockpot, throw in bread, eggs, spices and milk… and it’s done. A couple hours later – a flavorful, tender, golden French toast casserole ready to welcome guests.
And let anyone tell you that slow cooker is not about the holiday.
Ingredients:
- 1 brioche or challah loaf (about 6 cups, diced)
- 6 large eggs
- 1 ½ cups milk (you can mix cream and milk for creaminess)
- ¼ cup maple syrup (or honey)
- 1 tsp. cinnamon
- ½ tsp. vanilla extract
- A pinch of salt
- ¼ cup raisins or cranberries (optional)
- 2 tbsp. melted butter
The instructions are as easy as can be:
- Grease the bowl of a сrockpot with butter or melted butter.
- Lay out bread cubes, sprinkle with raisins, if using.
- In a separate bowl, whisk together eggs, milk, syrup, cinnamon, vanilla and salt.
- Pour the mixture into the сrockpot over the bread, drowning the bread slightly so it absorbs the liquid.
- Cook on LOW for 4 hours or on HIGH for 2 hours.
- If desired, cook the last 20 minutes without the lid to allow the top to brown slightly.
- Serve hot with fruit, nuts, powdered sugar or maple syrup.
This is very convenient because the dish cooks itself while you’re entertaining guests or catching a kid with candy in the yard. You can assemble all the ingredients the night before and turn it on in the morning.
I remembered how we once had a power outage for the whole evening, and I automatically gathered everything in the сrockpot and plugged it into the generator. In the morning we woke up to the smell of vanilla and warm bread. Lindy opened her eyes and simply said: “The holiday is here.”
9. Healthy Easter Smoothie Bowl That’s Almost Too Pretty to Eat
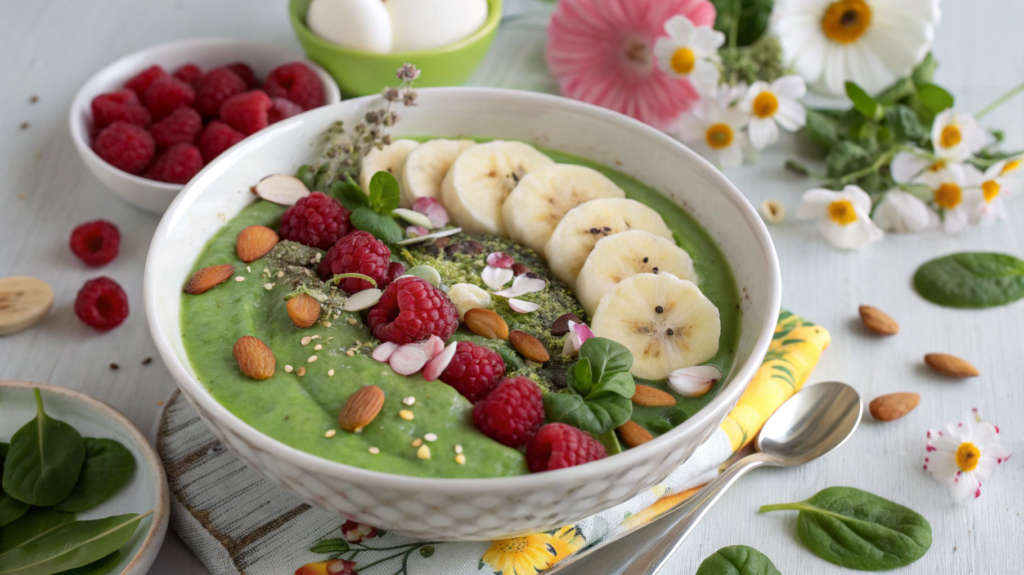
I started making smoothie bowls a couple years ago as a way to sneak more greens into the morning, but now it’s a tradition. Especially in the spring when you want lightness, vitamins, and… something just plain pretty.
So what is a smoothie bowl? It’s like a smoothie, but thicker so you can eat it with a spoon. The base is usually made of fruits, vegetables and yogurt or plant milk, and on top – whatever your heart desires: nuts, seeds, berries, cereals, flowers….. A perfect way to decorate the Easter table without baking.
Ingredients for the base (for 2 servings):
- 1 frozen banana
- ½ cup frozen raspberries or strawberries
- ½ avocado
- ½ cup Greek yogurt or coconut yogurt (for vegan version)
- ½ cup almond or oat milk
- 1 tsp. honey or topinambour syrup
- A pinch of vanilla
- Optional: 1 handful of fresh spinach – it won’t change the color, but it will add vitamins!
For decoration (whatever you have in the house!):
- Fresh berries
- Coconut shavings
- Chia or flax seeds
- Edible flowers (violets, daisies – especially pretty!)
- Almonds, walnuts, pomegranate seeds
- Flakes, granola or sugar-free granola like this one – super crunchy and minimal carbs!
How to cook:
- Just throw all the ingredients for the base into a blender.
- Whip until thick, smooth (should be like soft serve ice cream – if it’s liquid, add more frozen banana).
- Transfer to pretty bowls.
- Decorate with whatever you want – this is one time when you can let your imagination run wild.
Tip. Freeze bananas in advance – cut into circles and store in a bag. Convenient and quick. If you’re making for guests, put toppings into cups – everyone can decorate their own bowls. Add a little beet juice or powder – you will get a very beautiful natural pink color.
10. Make-Ahead Easter Brunch Muffins – Soft, Fluffy, and Irresistible
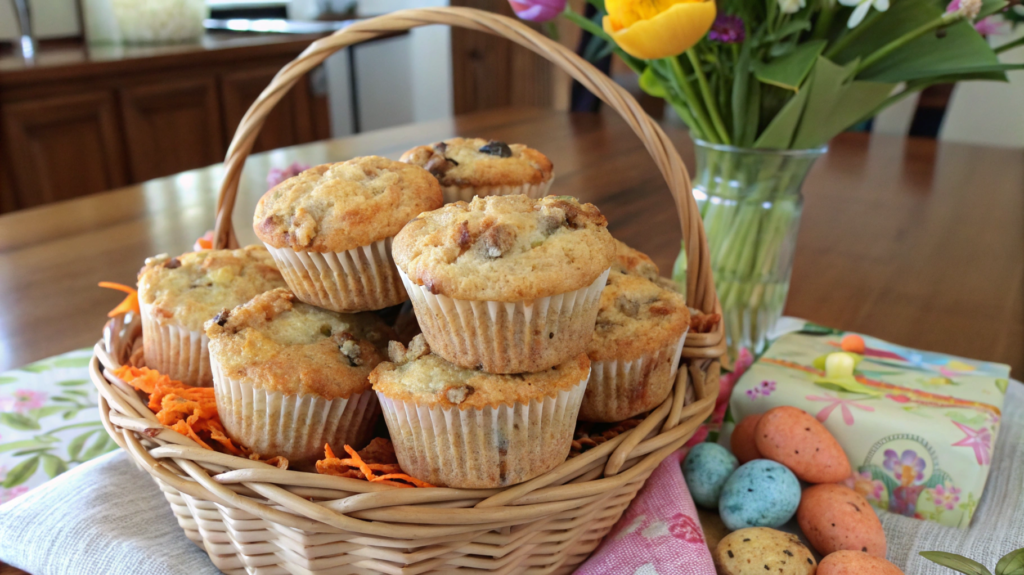
Now it’s time for Easter muffins, which can be baked in advance and eaten before the main course is served, because muffins are always a good idea.
Why are they perfect specifically for Easter?
- You can make a batch the night before – and just reheat in the morning.
- Store well (and even taste better the second day).
- Stack in a basket, take on a picnic, go in a container to the neighbor who brought dyed eggs.
- The kids love them. Even those who “don’t like carrots” or “don’t eat anything with raisins”.
Ingredients (for 12 muffins):
- 2 eggs
- ½ cup vegetable oil (or melted butter)
- ½ cup honey or coconut sugar
- 1 cup applesauce (can be substituted for banana)
- 1 tsp. vanilla extract
- 1 ½ cups whole wheat or gluten-free flour
- 1 tsp. baking powder
- ½ tsp. baking soda
- 1 tsp. cinnamon
- A pinch of salt
- ½ cup grated carrots
- ¼ cup chopped walnuts (walnuts, pecans)
- Optional: raisins, cranberries, coconut shavings
How to cook:
- Preheat the oven to 175°C / 350°F. Prepare a paper-toweled mold or grease with butter.
- In one bowl, whisk together the eggs, oil, honey, mashed potatoes and vanilla.
- In another, mix together the dry ingredients.
- Combine both mixtures, mixing gently. Stir in the carrots, nuts and toppings.
- Spread into molds and bake for 18-22 minutes, until a toothpick comes out dry.
- Cool on a rack, put away in a container with a lid and the muffins will be waiting for you until morning.
Decorate on top with cream cheese cream + honey + lemon zest. Or just sprinkle with coconut and you’re done!
And now it’s your turn!
Whatever you choose from these recipes, make it your own. Add a spice, decorate differently, change the shape – and let your Easter table become what you want it to be: cozy, delicious and truly yours.
If you bake anything with these recipes, be sure to let me know in the comments. We love seeing you turn ordinary ingredients into little family traditions.