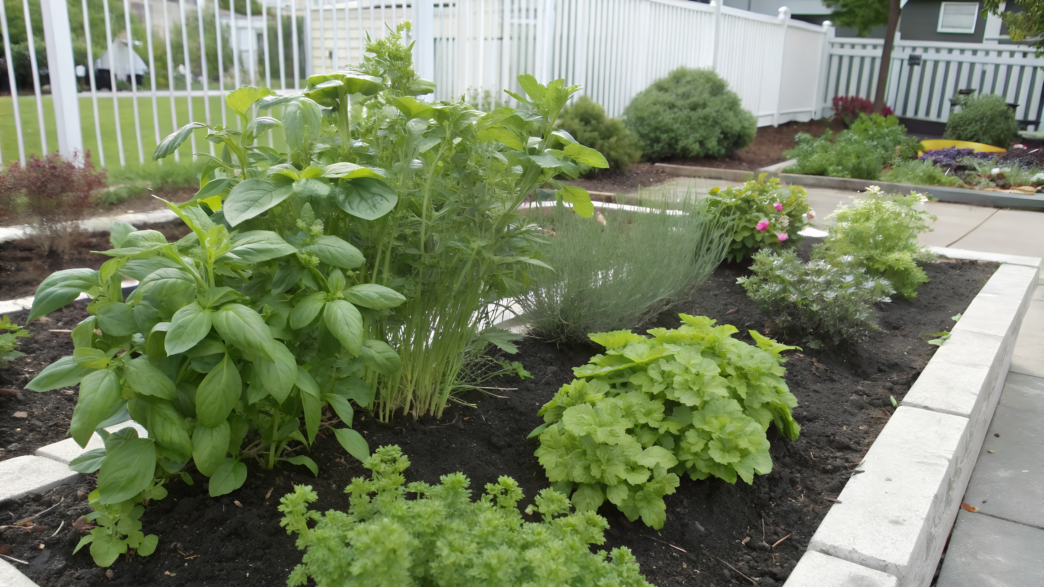
Some plants love the same moisture level, the same amount of sun, and roughly the same care routine. And when they are combined, the herbs start feeling better and grow more productively.
We had both successful and unsuccessful combinations. In this article, I collected the exact combinations that really performed well in containers. Some calmly handle heat and infrequent watering. Others grow better in spring and cooler weather. And many of these plants are constantly used in the kitchen because it’s easy to cut fresh herbs from them literally every day.
You just need to understand how to properly combine certain herbs with each other, and you’ll never go back to random plantings again.
1. Basil + Parsley + Chives for a Cut and Come Again Pot
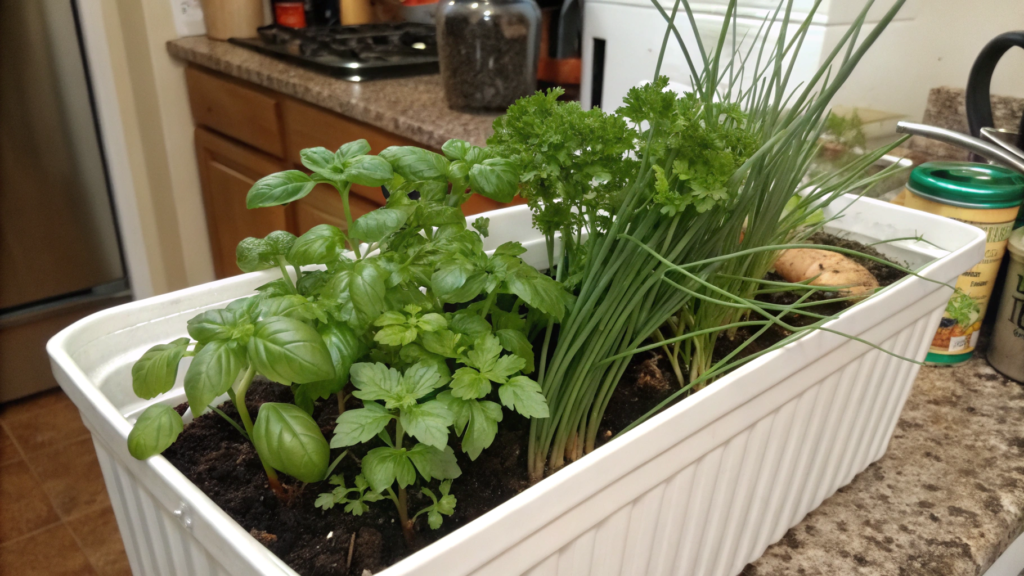
One container near the kitchen with basil, parsley, and chives — and fresh herbs are always within reach. This combination works perfectly for constant harvesting. Not once a season, but regularly. Pasta, omelets, salads, potatoes, homemade herb butter… in summer, all of this starts appearing on the table much more often.
We had a large empty pot left after transplanting tomatoes, so we planted these herbs there, and over time it became the most “hardworking” container in the entire yard.
What you’ll need
- A container at least 12 inches deep (30 cm)
- A container with drainage holes
- Ready-made potting soil for containers
- Compost
- Large leaf basil (Sweet Basil Seeds for Planting on Amazon)
- Parsley
- Chives
- A watering can
- Herb scissors
- Organic fertilizer for herbs
How to make a herb container you can harvest all summer long
- Take a container slightly bigger than you first want to buy. Small pots look neat only at the beginning of the season. Then summer heat arrives, and the soil starts drying out almost instantly. For this combination, a container around 14–18 inches wide (35–45 cm) works much better. In it, the roots overheat more slowly, and the herbs grow more steadily.
Basil in small pots looks much weaker and loses leaves faster. - Mix light soil instead of using garden soil from a bed. Garden soil in containers quickly becomes too dense after watering. The roots start getting less air, especially basil roots.
I usually make a simple mix: around 70% ready-made potting soil and about 30% compost.
That’s enough for active herb growth almost the entire season. Parsley, by the way, loves nutrients much more than you might expect. - Plant the herbs with future growth in mind. I usually place the plants like this:
- basil — closer to the center
- parsley — along the sides
- chives — around the edges
Chives grow upward and barely bother neighboring plants. Parsley gradually fills empty spaces. And basil becomes the main volume of the container. During the first weeks, the planting may look slightly empty, but that’s exactly how it should be.
- Place the container where it gets plenty of sun. Basil especially loves warmth. If there isn’t enough light, the stems start stretching, and the leaves become smaller. This combination grows best with 6–8 hours of direct sunlight.
- Water regularly, but avoid constant soggy soil. The most common mistake is overwatering. Interestingly, I personally used to worry more about drying containers out too much. Later I realized most of my problems actually came from overly wet soil.
Now I simply check the soil with my finger. If the top inch (2.5 cm) feels dry, it’s time to water. During hot summer weeks, the container sometimes needs water every day. - Don’t be afraid to harvest herbs often. You should try to cut herbs correctly, for example:
- basil is best cut above a leaf node
- parsley should be removed from the base of the outer stems
- chives can be trimmed almost like grass, leaving around 2 inches (5 cm)
The more often you harvest herbs, the fuller the container becomes later. Sometimes by mid-summer it gets so dense that you can barely see the soil anymore.
By the middle of summer, this type of container usually looks like one big green bush that constantly gets harvested for the kitchen. That’s exactly why I love container herbs. They don’t require a huge garden or greenhouse. Just a few well-matched plants, a bit of sun — and fresh herbs almost every day.
2. Rosemary + Thyme for Full Sun Container Success
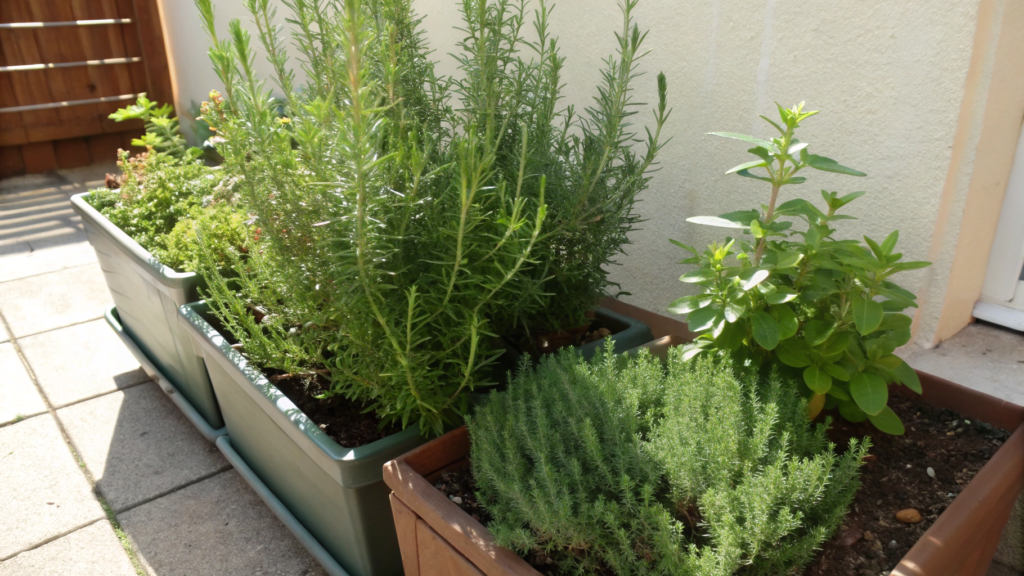
I love rosemary and thyme when they grow in containers near a patio, pathways, or sunny house walls. They handle heat well, rarely need constant attention, and smell incredible after watering and a hot day.
Rosemary adds height and volume, while thyme gradually starts covering the edges of the container and slightly trails downward. After a couple of months, it feels like these plants have always grown together.
What you’ll need
- A container at least 14 inches deep (35 cm)
- A container with good drainage
- Light potting soil for containers
- Compost
- Rosemary
- Thyme
- Small gravel or perlite
- A watering can
- Herb scissors
- Organic fertilizer for Mediterranean herbs
How to make a sunny rosemary and thyme container
- Choose a container that won’t overheat too quickly. For rosemary and thyme, good drainage matters more than the actual amount of soil. But very small containers still dry out quickly during summer.
I prefer containers around 16–20 inches wide (40–50 cm). Especially if they sit in direct sun near a patio or a house wall.
And keep in mind that dark metal planters can heat up so much in summer that the soil inside becomes almost hot. - Add something to loosen the soil. These herbs do not like heavy wet soil. Especially rosemary. I usually add a bit of perlite, small gravel, or coarse sand to the mix.
The soil should stay light and allow excess water to drain quickly. In overly wet soil, rosemary starts weakening much faster than from heat. - Plant rosemary and thyme with a little space between them. At first, the container may not look very full, but after a few months rosemary starts actively growing upward, while thyme gradually covers the soil surface.
I usually plant:
- rosemary — closer to the center or back of the container
- thyme — closer to the edges
Thyme looks especially beautiful when it slightly trails over the edges of the container.
- Place the container in the sunniest spot possible. For healthy growth, rosemary and thyme need at least 6–8 hours of direct sunlight. The more light they get, the more aromatic the leaves usually become.
I place this type of container near the south wall of the house, where the sun stays almost all day. - Water less often than most other herbs. Many people start watering rosemary as often as basil. Then they wonder why the plant starts darkening near the bottom.
I usually let the soil dry out more than I would for regular leafy herbs. The top few inches of soil (5–7 cm) can safely dry before the next watering. - Trim the herbs lightly but regularly. The more often you lightly trim thyme and rosemary, the neater and fuller they become.
For example, I usually:
- cut young rosemary tips
- slightly shorten long thyme stems
- remove dry twigs inside the plant
And the smell after trimming is always incredible, especially in the evening when the warmth still lingers on the patio after a hot day.
At the end of a hot day, when the air already starts cooling down, rosemary and thyme release a strong spicy aroma. You notice it even more after watering. You simply walk past the container, lightly brush the leaves with your hand — and the scent is immediately there.
3. Cilantro + Dill for Cool Weather Planter Boxes
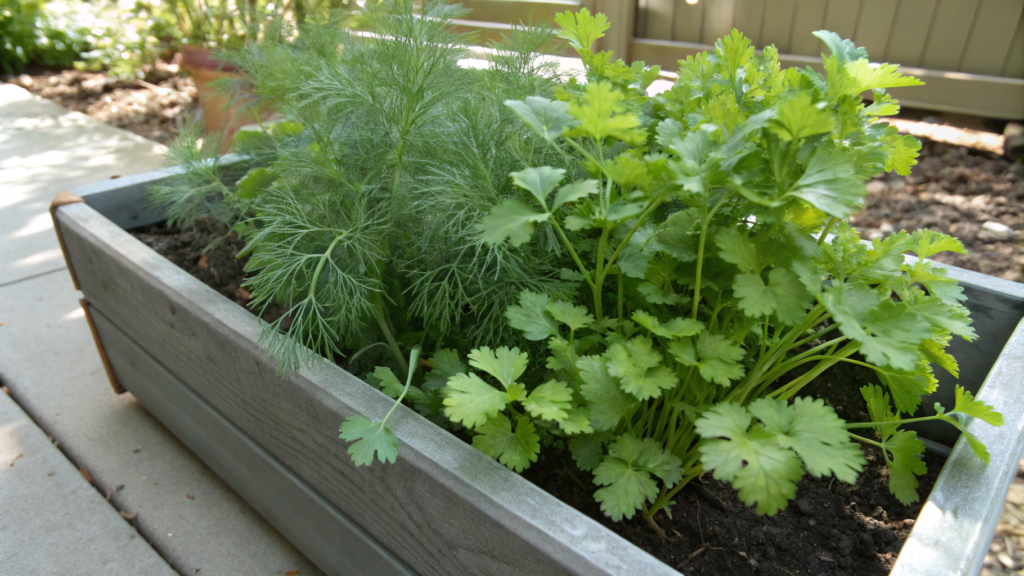
Cilantro and dill perform really well in cool weather. Dill adds height and lightness, while cilantro quickly fills the container with dense leaves. Everything looks very airy and feels like a small garden inside a planter box.
I kept trying to grow cilantro during summer and wondered why it immediately started bolting. Only later did I realize that it simply loves cooler weather.
Even some studies mention that cilantro develops better in moderate temperatures, while intense heat speeds up bolting and reduces leaf quality.
What you’ll need
- A container at least 10–12 inches deep (25–30 cm)
- A container with drainage holes
- Light potting soil for containers
- Compost
- Cilantro
- Dill
- A watering can
- Herb scissors
- Organic fertilizer for leafy herbs
How to make acCool season cilantro and dill container
- Choose a wide container instead of a very deep one. Cilantro and dill have a fairly compact root system during the early stages of growth, so an extremely deep container is not necessary here.
I prefer wide planter boxes or low containers where the herbs gradually fill the space and look fuller. - Add a little compost to the soil. Cilantro grows noticeably faster in loose and nutrient-rich soil. Dill also produces juicier greens if the soil is not too poor.
I usually mix around 80% ready-made potting soil and about 20% compost. But the soil should not become overly rich. Otherwise dill sometimes starts producing soft stems. - Don’t plant the herbs too densely. There’s no need to completely fill the container with herbs right away. If the planting becomes too dense, airflow inside gets worse, and the stems grow weaker.
I usually place:
- dill — closer to the back of the container
- cilantro — in front or along the sides
After a few weeks, dill starts creating a light green background above the denser cilantro.
- Place the container where it gets morning sun. In spring, cilantro and dill grow perfectly well even in places that become too hot for many herbs during summer. The best option is a spot with gentle morning sun and slight protection from intense afternoon heat.
- Water consistently, especially young seedlings. Young cilantro really dislikes completely dry soil. After strong dryness, the leaves quickly become tougher.
I try to keep the soil slightly moist, especially while the plants are actively producing greens. But constantly soggy soil is not good either. Dill doesn’t like that as well. - Harvest herbs gradually and regularly. Cilantro and dill react quickly to regular harvesting.
- cilantro is best harvested from the outer leaves
- dill is best cut from the young tops
- flower stalks should be removed earlier if you want more greens
The more often you harvest small amounts, the longer the herbs inside the container stay dense and fresh.
At first it feels like there is way too much cilantro and dill for one family. But then soups, young potatoes, salads, quick sauces, and spontaneous marinades start happening — and the greens begin disappearing almost overnight. That’s probably why containers like this always remind me of the very beginning of the active gardening season.
4. Sage + Oregano for a Drought Tough Herb Planter
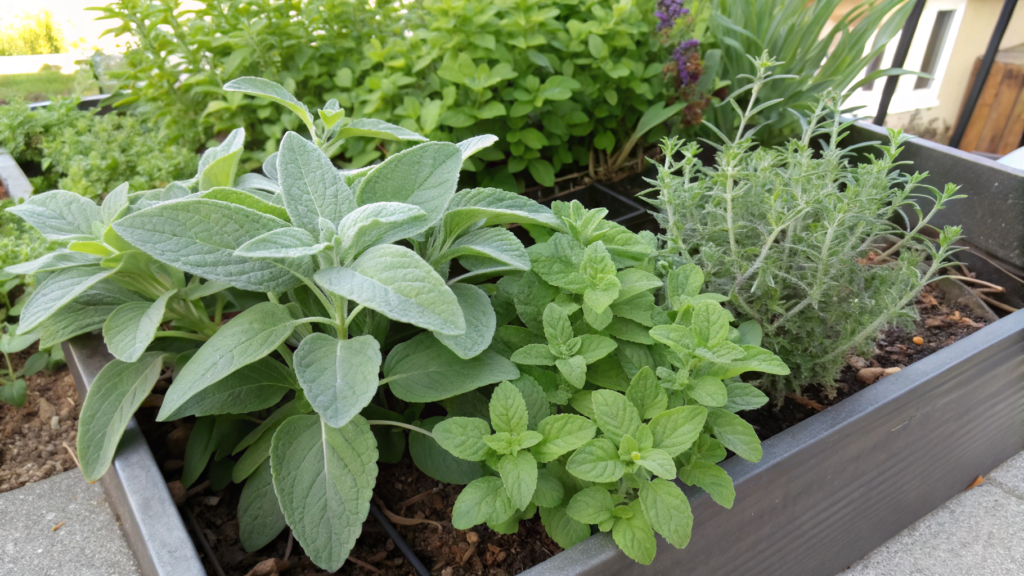
Sage and oregano handle summer heat completely спокойно compared to many soft leafy plants. In this combination, sage adds large matte leaves and a denser shape, while oregano gradually starts spreading along the edges of the container and filling empty space.
Research from Oregon State University Extension notes that Mediterranean herbs usually tolerate dry conditions better thanks to their leaf structure and ability to reduce moisture loss.
What you’ll need
- A container at least 12–14 inches deep (30–35 cm)
- A container with good drainage
- Light potting soil for containers
- Compost
- Sage
- Aromatic oregano (Greek Oregano Seeds for Planting on Amazon)
- Small gravel or perlite
- A watering can
- Herb scissors
- Organic fertilizer for Mediterranean plants
How to make a heat-tolerant herb container
- Choose a container with good drainage. For sage and oregano, this matters much more than extremely rich soil. If water stays at the bottom of the container, the roots begin suffering pretty quickly.
I like terracotta containers for herbs like these. They release excess moisture faster and hold less dampness after watering. - Make the soil looser and drier. Regular dense soil is not a very good option for this combination.
I usually add a bit of perlite, small gravel, or coarse sand. The soil should easily drain excess water. This is especially important for sage. - Plant sage and oregano with some space between them. At first the plants look fairly compact. But after a few months, oregano starts actively spreading outward.
I usually place:
- sage — closer to the center
- oregano — along the edges of the container
Over time, oregano starts slightly trailing over the sides, and everything looks much more lively.
- Place the container in the sunniest spot possible. The more sun sage and oregano receive, the denser the leaves usually become and the stronger the aroma gets. For healthy growth, it’s best to have at least 6–8 hours of direct sunlight per day.
- Water less often than regular container herbs. This is one of the most common mistakes. Many people start watering sage almost as often as basil or parsley. Then the leaves become softer, and the lower stems start darkening.
I usually let the soil dry more between waterings. The top few inches of soil (5–7 cm) can safely stay dry before the next watering. - Trim the plants lightly throughout the season. Regular light trimming helps the herbs stay fuller, so it’s best to:
- cut young oregano tips
- remove old tough sage leaves
- slightly shorten overly long stems
After this kind of trimming, the plants usually start producing fresh greens pretty quickly.
Containers with sage and oregano usually handle summer better than the rest. While more delicate herbs start struggling from the heat, sage and oregano continue growing calmly, releasing aroma, and gradually becoming fuller.
5. Mint in Its Own Pot with Nearby Basil
As we already figured out, some plants calmly share a container with neighbors. But then there’s mint. And if you give it even a little freedom, after a couple of months it starts acting like the entire container belongs only to it.
That’s why I almost always grow mint separately, but place a container of basil nearby. Together they look great, smell incredible, and constantly get used in the kitchen during summer.
Mint usually has brighter and more “fluffy” greens, while basil looks denser and darker. Side by side, they look very balanced together.
What you’ll need
- A separate container for mint at least 10–12 inches deep (25–30 cm)
- A container for basil
- Containers with drainage holes
- Ready-made potting soil for containers
- Compost
- Mint
- Basil
- A watering can
- Herb scissors
- Organic fertilizer for leafy herbs
How to grow mint separately while keeping basil nearby
- Give mint its own container right away. Even if it seems like there’s plenty of room at first, mint quickly starts taking over all available space. Especially in warm weather and with regular watering. So it’s better to avoid experiments here.
A separate pot is much easier than trying to rescue other herbs later. - Use slightly more moist soil for mint. Unlike many Mediterranean herbs, mint prefers more stable moisture. I usually add:
- a little compost
- slightly more moisture-retaining substrate
- sometimes a bit of coconut coir
Mint starts looking tough and tired much faster if the soil dries out completely.
- Place the containers close together, but not too close. When mint and basil sit near each other by the kitchen or seating area, they complement each other perfectly both visually and by scent.
But I still leave a little space between the pots. Mint sometimes manages to stretch long stems even beyond the edges of the container. - Give basil more sun than mint. Basil loves warmth much more strongly. The best setup usually looks like this:
- basil — in a spot with 6–8 hours of sunlight
- mint — where it gets light partial shade during the second half of the day
In extreme heat, mint in full sun sometimes starts looking slightly “cooked.”
- Trim mint regularly. If you don’t do this, the stems quickly stretch out, and the lower part of the plant becomes less full.
I usually remove long tops, cut old stems, and don’t let the plant flower too early. After trimming, mint almost always starts becoming even fuller. - Use the herbs constantly. Regular harvesting almost always helps plants look better.
- basil reacts very well to frequent trimming of the tops
- mint quickly produces new side shoots
- young leaves are usually the most aromatic
Sometimes it feels like there’s way too much mint. And then a few pitchers of homemade lemonade happen — and half the greens are already gone.
During summer, containers with mint and basil near the kitchen become some of the most used ones around the house. Basil constantly disappears into salads, pasta, and homemade sauces, while mint is perfect for drinks. Container herbs don’t just sit beautifully somewhere in the corner — they actually become part of everyday life.
6. Chives + Parsley for an Indoor Sunny Windowsill
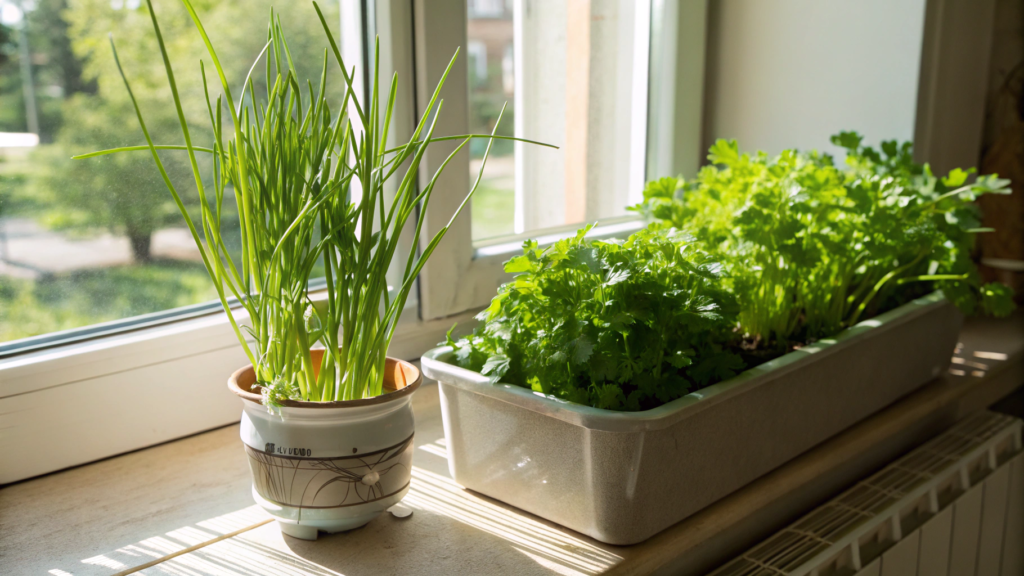
Even a regular sunny windowsill can provide fresh herbs almost year-round. For example, I really like the combination of chives and parsley. These herbs grow calmly indoors, don’t require huge containers, and feel perfectly fine on a windowsill.
Chives grow vertically and don’t take up much space, while parsley gradually becomes fuller and fills the container with soft greens.
At our house, Lindy and I use these windowsill containers almost every day. Omelets, soups, cottage cheese, salads, baked potatoes… the herbs disappear very quickly.
What you’ll need
- A container at least 8–10 inches deep (20–25 cm)
- A container with drainage holes
- Light potting soil for indoor plants and herbs
- Compost
- Parsley
- Chives
- A small watering can
- A water tray
- Herb scissors
- Organic fertilizer for leafy plants
How to grow herbs on a sunny windowsill
- Choose the window with the most stable light. South-facing or west-facing windows work best for this type of setup. Especially during winter, when natural light becomes noticeably weaker.
If there is too little sun, parsley starts growing more slowly, while chives stretch into thin long leaves. - Don’t use pots that are too small. I understand that on a windowsill you always want to save space. But in very small containers, the soil dries out extremely fast.
It’s better to choose one wider container or several medium-depth stable pots. This makes it easier for the plants to hold moisture, and the greens look much better. - Use light breathable soil. Indoors, soil dries more slowly than outside. That’s why overly heavy soil quickly starts holding excess moisture.
I usually add a little compost, some perlite, and light container soil. This becomes especially important during winter, when the air is cooler and water evaporates more slowly. - Water moderately. When the container sits in front of your eyes all the time, your hand automatically wants to water it again. But constantly wet soil is not very good for parsley and chives either.
I usually check the top layer of soil with my finger. If the top inch (2.5 cm) feels dry, it’s time to water. - Rotate the containers from time to time. Plants on a windowsill start leaning toward the light pretty quickly.
Sometimes it’s enough to simply rotate the container slightly every few days so the greens grow more evenly and look neater. - Harvest herbs regularly. This helps the plants inside the container stay fuller.
- chives are best trimmed gradually, leaving around 2 inches (5 cm)
- parsley is best harvested from the outer stems
- young greens are usually the softest and most aromatic
During winter, containers like these become especially appreciated. When everything outside looks gray and cold, but you still have fresh herbs in the kitchen, the whole space instantly feels more alive. And honestly, even a few freshly cut stems for breakfast can change the mood for the better. Haven’t you noticed that too?
7. Dill + Chives for a Quick Pickle Friendly Container
You especially start appreciating a container with dill and chives during summer, when the season of quick marinades, lightly pickled cucumbers, potatoes, and cold salads begins. Even without flowers or decorative plants, a container with dill and chives looks very lively.
What you’ll need
- A container at least 10–12 inches deep (25–30 cm)
- A container with drainage holes
- Light potting soil for containers
- Compost
- Chives
- Dill
- A watering can
- Herb scissors
- Organic fertilizer for leafy herbs
How to make a herb container for quick summer marinades
- Choose a wide container instead of a very deep one. Dill and chives care more about proper planting space than extremely deep soil. Personally, I like long planter boxes for this combination. Dill looks more airy in them, while chives gradually create dense green bunches along the edges.
- Add a little compost to the soil. Dill grows juicy greens faster in more nutritious soil.
I usually make a mix of around 75–80% ready-made potting soil and about 20–25% compost. That’s completely enough for active growth without constant fertilizing. - Plant dill and chives with a little space between them. Don’t worry if the container looks slightly empty at first. Dill starts stretching upward pretty quickly.
I usually place:
- dill — closer to the back of the container
- chives — along the edges
- Place the container where it gets plenty of morning sun. Dill loves good light, but during extreme heat it sometimes bolts faster.
This combination grows best where the sun is active during the first half of the day, while light partial shade appears after lunch. - Make sure the soil never dries out completely. This is especially important for young dill. If the soil stays dry for too long, the stems become tougher and the greens become less juicy.
But constantly soggy soil is not a good idea either. Chives also dislike standing water. - Harvest herbs regularly while they are still young. The most aromatic dill is usually the young one.
- dill is best cut from the tops
- chives can be trimmed gradually throughout the season
- flower stalks should be removed earlier if you mainly want greens
The more often you harvest dill, the longer the plant stays fresh and soft.
And suddenly you already have an endless source of fresh herbs right in your kitchen. One evening it’s lightly pickled cucumbers, the next one — young potatoes with butter and dill, then some quick salad with sour cream and chives… And suddenly you realize that half the container already needs reseeding again.
8. Thyme + Oregano for a Compact Patio Pot
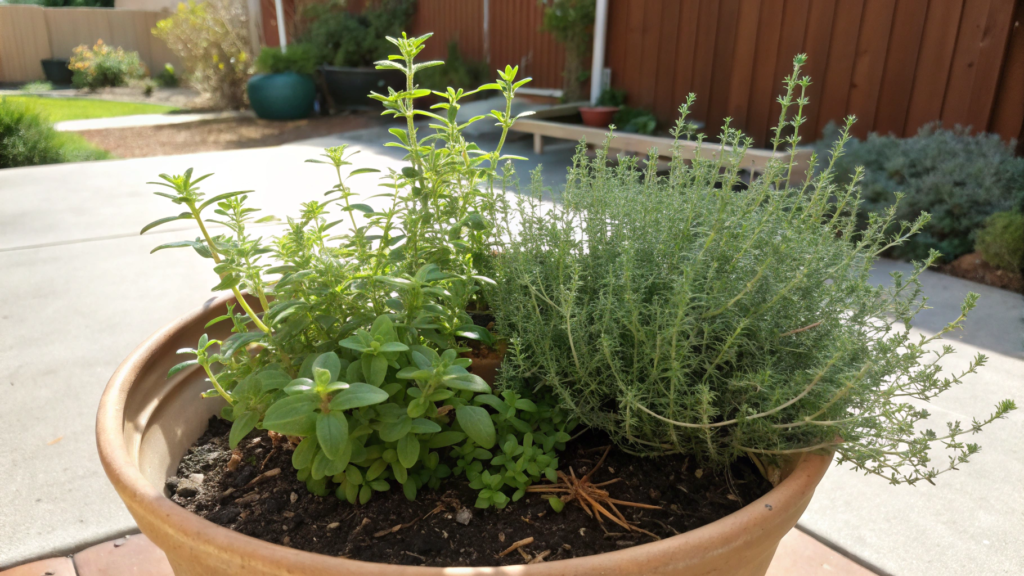
The combination of thyme and oregano works especially well for small spaces. Thyme stays low, dense, and slightly trails along the edges, while oregano adds more greenery in the center.
And this is also a very kitchen-friendly pairing. Roasted vegetables, chicken, tomato sauce, homemade pizza, potatoes — these two herbs constantly end up in something. Especially oregano. At our house, it gets used a lot.
What you’ll need
- A container at least 10–12 inches deep (25–30 cm)
- A container with drainage holes
- Light potting soil for containers
- Compost
- Thyme
- Oregano
- Small gravel or perlite
- A watering can with a narrow spout
- Herb scissors
- Organic fertilizer for Mediterranean herbs
How to make a compact thyme and oregano container
- Choose a shallow but wide container. This pair does not need a huge deep pot. What matters much more is giving the plants room to spread sideways. Thyme especially likes covering the soil surface, while oregano gradually produces new shoots around the main plant.
We use containers around 12–16 inches wide (30–40 cm). They don’t take up much space on the patio but still give the herbs enough room so they don’t grow too tightly together. - Keep the soil light and not overly wet. Thyme and oregano do not like heavy wet soil. In dense soil, the roots get less air, and the lower stems may start weakening.
I usually add a little perlite, small gravel, and a small handful of compost. You don’t need much compost here. These herbs grow better in moderately nutritious, well-drained soil, not in an overly rich mix. - Plant thyme closer to the edge and oregano slightly deeper inside. If everything is planted directly in the center, the shape becomes less practical after a few months. Oregano starts taking over the middle, while thyme has a harder time spreading nicely along the edge.
I usually place the plants like this:
- oregano — closer to the center or back of the container
- thyme — closer to the front edge
This way thyme gradually covers the soil surface, while oregano adds more greenery above it. The planting stays compact but still looks full and layered.
- Place the pot somewhere with strong sunlight. With good lighting, the leaves become more aromatic, and the stems do not stretch weakly. For healthy growth, the plants should get around 6–8 hours of direct sunlight a day.
On a small patio, this can be a spot near a wall, next to steps, or at the edge of a table where the sun reaches most of the day.
Just keep an eye on very small dark pots. In summer they heat up quickly, and the soil inside can dry faster than it seems. - Water after the top layer dries out. Thyme and oregano do not need watering as often as basil or parsley. They handle short dry periods much better than constant moisture.
I usually check the soil with my finger. If the top 1–2 inches (2.5–5 cm) already feel dry, it’s time to water. During hot weather this may happen more often, while in spring or fall much less frequently.
The worst thing for this pair is water sitting at the bottom of the container. That’s why drainage holes are absolutely necessary here. - Trim lightly so the plants don’t become coarse. If oregano is never trimmed, the stems gradually become longer and tougher. Thyme also keeps a denser shape if lightly pruned.
- I cut young oregano tops
- slightly shorten long thyme stems
- remove dry or overly tough stems right away
After trimming, the plants produce more side shoots, and the greens stay softer. And the smell on your hands after touching thyme… it’s something else.
This combination works especially well for a small patio where every pot should be useful. Thyme doesn’t spread chaotically, oregano provides plenty of herbs for the kitchen, and both plants handle sunny days very easily. And when you cook something simple like potatoes, tomatoes, or chicken, these two herbs suddenly become a source of unforgettable aromas.
9. Basil + Chives for a Fast Kitchen Container
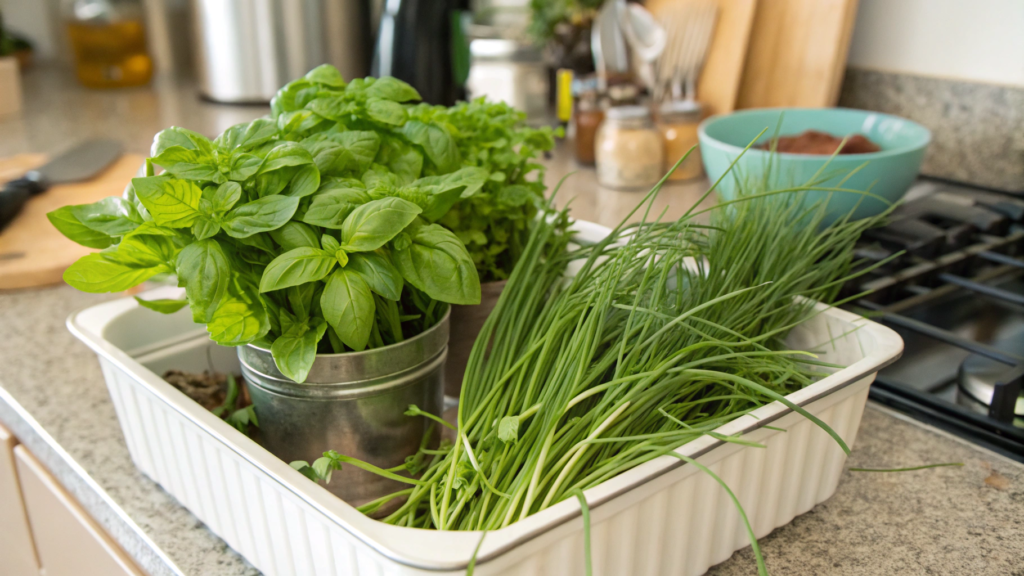
We use basil and chives very often in the kitchen. Basil constantly disappears into salads, pasta, and sauces, while chives almost automatically end up in eggs, potatoes, cottage cheese, or quick summer spreads. And what’s convenient is that both herbs recover pretty quickly after harvesting.
When we first placed a container like this near the kitchen, I didn’t think we would use it so actively. And we almost stopped buying herbs for regular everyday meals.
What you’ll need
- A container at least 12 inches deep (30 cm)
- A container with drainage holes
- Light potting soil for containers
- Compost
- Chives
- Large leaf basil
- A watering can
- Herb scissors
- Organic fertilizer for leafy herbs
How to make a kitchen herb container for everyday cooking
- Choose a container that is convenient to place near the kitchen. The location strongly affects how often you actually end up using the herbs.
If the container stands near the door, next to the steps, or by the patio, the herbs start getting used almost automatically. But when you need to walk across the whole yard for basil, somehow the thought “eh, it’s fine without it” appears immediately. - Make the soil nutritious but light. Basil likes richer soil than many Mediterranean herbs.
I usually mix around 70–75% ready-made potting soil and about 25–30% compost. In this mix, the leaves grow larger and softer, especially during the first half of summer. - Plant chives closer to the edges of the container. Basil quickly starts taking over the central part of the pot. If everything is planted too closely together, the herbs eventually begin interfering with each other.
I usually place:
- basil — closer to the center
- chives — along the edges
- Give the plants plenty of sunlight. For healthy growth, basil especially needs warmth and stable light.
These herbs need around 6–8 hours of sunlight a day. In partial shade, basil starts stretching, while the leaves become smaller and less aromatic. - Water regularly during hot weather. Basil does not like the soil drying out completely. After extreme heat, the leaves can wilt very quickly.
During summer, I usually check the container every day. Especially if it stands near a wall or under direct sun.
But constantly wet soil is not a good idea either. Chives handle moisture more easily, while basil weakens much faster in constant dampness. - Trim basil tops often. This is one of the most useful habits for a container like this.
- basil is best trimmed above a pair of leaves
- chives can be gradually trimmed throughout the season
- basil flower stalks are better removed early if you mainly want greens
The more often you harvest basil, the bushier it becomes. Sometimes after a good trimming, the plant already looks noticeably fuller just a week later.
Basil quickly starts disappearing into pasta and salads, chives into hot potatoes and morning eggs, and somehow the herb scissors keep ending up near the sink all the time. And honestly, that’s probably the best sign that the herb choice turned out well — when you start using them without waiting for any “special occasion.”
10. Rosemary + Sage for a Weekend Proof Planter Box
Rosemary and sage are very low-maintenance plants. They calmly survive hot days and a couple of missed waterings, which makes them convenient for people who do not want to constantly run around with a watering can. And together they look very confident even in a simple container.
I also really love the smell around a planter box like this after a hot day. During the daytime you barely notice the herbs, but by evening the air around them starts smelling much stronger. Especially if you accidentally brush the leaves with your hand.
What you’ll need
- A container at least 14–16 inches deep (35–40 cm)
- A container with good drainage
- Light potting soil for containers
- Compost
- Rosemary
- Sage
- Small gravel or perlite
- A watering can
- Herb scissors
- Organic fertilizer for Mediterranean plants
How to make a herb container that easily handles hot weekends
- Choose a large container with good drainage. The more soil volume the container has, the slower it dries out during summer. This is especially convenient for rosemary and sage because the plants get more stable moisture without constant watering.
I like planter boxes or large containers around 18–20 inches wide (45–50 cm). Especially for open sunny spots near patios or pathways.
And don’t forget about drainage. These herbs tolerate dryness much better than constant dampness at the bottom of the container. - Keep the soil loose and not overly rich. Rosemary and sage do not like heavy wet soil.
I usually add a little perlite, small gravel, and a small amount of compost. Overly rich soil sometimes produces lots of soft greens, but the plants themselves become less dense and hold their shape worse. - Plant rosemary and sage with extra space between them. When the plants are still young, the container may look slightly empty.
But after a few months, rosemary starts actively growing branches upward, while sage becomes wider and denser.
It’s much better to leave some free space between the plants right away than constantly trying to trim them later. - Place the planter box in the sunniest spot possible. For healthy growth, it’s best to give the plants at least 6–8 hours of direct sunlight. The more light they get, the stronger the leaf aroma usually becomes.
We had a container like this standing near a stone wall that heated up additionally during the day. Even during the hottest weeks, the plants felt perfectly fine there. - Water rarely, but soak the soil properly. The most common mistake with rosemary is watering too often.
I usually wait until the top few inches of soil (5–7 cm) dry out properly before watering again.
Short dry periods are much safer for these herbs than constantly wet soil. - Trim the plants lightly throughout the season. Regular light trimming helps the plants keep a denser shape.
I usually cut young rosemary tops, remove old sage leaves, and slightly shorten long branches. After that, the plants start looking neater and produce more new shoots.
While other plants in containers start looking tired after a couple of hot days, rosemary and sage continue smelling great, keeping their shape, and looking like they are perfectly happy with everything. And you really start appreciating that during summer, when you don’t want plant care turning into a full-time job.
Successful herb pairings
I’ve always liked containers like these — not overly perfect, but alive and constantly used. The kind where herb scissors spend almost the whole summer somewhere near the kitchen sink, while basil or dill disappear faster than expected.
Some of the combinations from this article stayed with us for years simply because they turned out to be convenient for everyday use, not just something nice to admire for a couple of weeks after planting.
If you also have favorite herb combinations for containers, definitely share them in the comments. I’d especially love to hear about combinations that handle heat well, regrow quickly after harvesting, or unexpectedly performed really well in smaller containers.