*Client Garden Tour* Check out my most recent garden installation: a beautiful drought tolerant garden in Southern California, full of pollinator plants and “farmtiques”!
Pssst: I’m gonna let you in on a little secret! I absolutely LOVE helping other people make their garden dreams come true! From veggie gardens to fairy gardens – I love them all!
Most of all, I love to watch the joy that a garden brings into a person’s life. When I say that a garden has the power to change lives, I truly mean it! Which is why I love helping people create their own beautiful garden spaces!
I am currently working towards my dream job of starting a garden design and coaching business. But first, I need to get a few things in order before I can feel confident helping a larger base of people. So, for now, I am having a lot of fun practicing on my friends and family as I get my systems in place! But, please know, that garden coaching and design services (in some shape and form) will be a reality in the near future!
** My garden coaching and design services are live – featuring both in person and virtual options! Details here!**
One of the practice installations that I did recently was a drought tolerant garden to showcase some fun “farmtiques” for my friends in SanDiego, California. I had so much fun doing this garden installation! It was such a change of pace from the gardening climates that I’m used! It really gave me a chance to stretch my design muscles and learn about some fun new plant species!
Ready for the tour? Here’s how we designed and installed my friend’s new drought tolerant garden in California!
Client Garden Tour: Drought tolerant garden in California full of fun “farmtiques”!
The garden space:

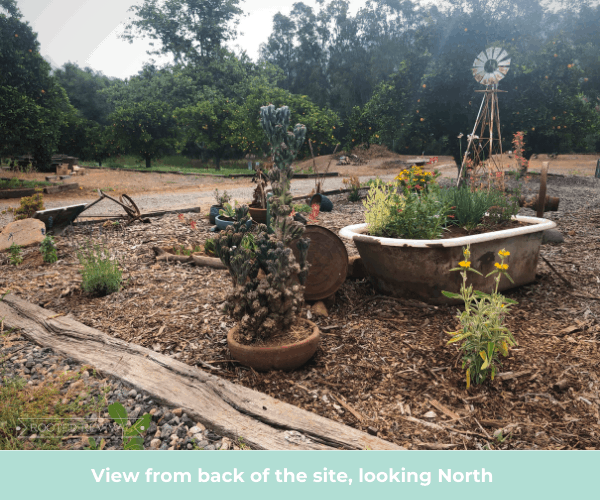
This garden is located in Southern California (San Diego County). The garden space is a decently large rectangular area that is approximately 22-feet by 16-feet. The area already had landscape fabric covered in a layer of bark to suppress the weeds. The garden is North-facing, bordered by the private dirt drive on the North and a fenced yard on the South. There are several orange trees that border the garden site.
The garden site is near the house and is a focal point as you drive up the private driveway to the home. Because of this, the client wanted to create a welcoming and beautiful area to greet visitors. She also wanted to include the vintage farm equipment that she inherited from her grandparents.
Garden goals:
The first step in the design process was to get out in the area and explore it a bit. My friend and I talked about what she envisioned for the site. After talking with her, we developed some goals for the site which directed all of our planting choices.
The goals for the garden were:
- Low Maintenance: The clients often travel and work abroad, so keeping the design as low-maintenance as possible was a must for both them and their house sitter!
- Drought tolerant, water-wise plantings: The plantings needed to be as water-wise as possible to tolerate the very dry, and often hot climate in SanDiego.
- Color and pollinator-attracting blooms: The client wanted to incorporate pops of color and have some blooming plants to attract and support pollinators.
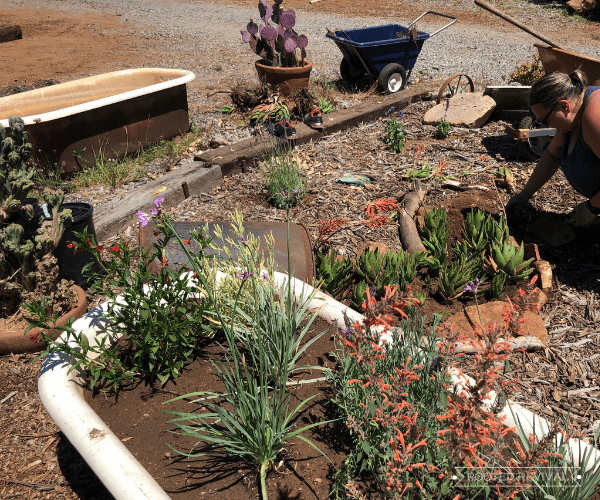
- Showcase the “farmtiques”: The client had collected a number of “farmtiques” including some antique farm equipment and an old cast iron bathtub. She wanted these to be showcased in the planting area, but she also wanted the garden to have a fun, modern feel to it.
- Beautify the area: The area is near the front of the house, in a very visual area as you enter the property. The client wanted to create an area that is welcoming and visually appealing as people drive up to the house.
Installation process:
Since the area was already prepped, the installation went quickly. The actual garden installation only took my friend and me about 2 days from start to finish!
We started by gathering any usable supplies, plants, pots and “farmtiques” that were already on the property. We moved everything into the area and began arranging them. This gave us a good idea of what the space would look like. We took some time to assess what kind of plants and elements we would need to add in order to finish the space. Then, we spent the rest of the day shopping at local nurseries for plants and some pots!
Day two consisted primarily of planting. For the potted plants, we used native soil mixed with a little potting soil mix. I wouldn’t always recommend this method, but since we were planting drought-hardy plants and natives, they should do well in the clay soil. This also helped to cut costs since we didn’t have to bring in soil for the area.
Results:
You all know how I love a good “Before and After” reveal, so here we go!


Video tour of the garden:
What I love about this drought tolerant garden site:
I absolutely LOVE how this garden space came together! There are so many little details in this garden! Unfortunately, you can’t enjoy them all through photos in the same way that you can in real life. But, here are some highlights of the design:
- The plants are spaced and arranged according to their mature size and heights. Taller plants are stacked towards the back of the site to draw your eyes up and through the site. Because it will take time for the plants to fill in and reach maturity, the real time to judge the design will be in 1-2 years once the area fills in. Hopefully I will be able to include some updated photos at that time!
- The design features a circular path through the garden elements so that you can walk through the space, enjoying it from all sides. The path also allows for easy access to tend to the plants when needed.
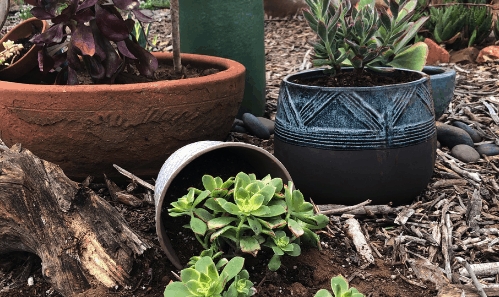
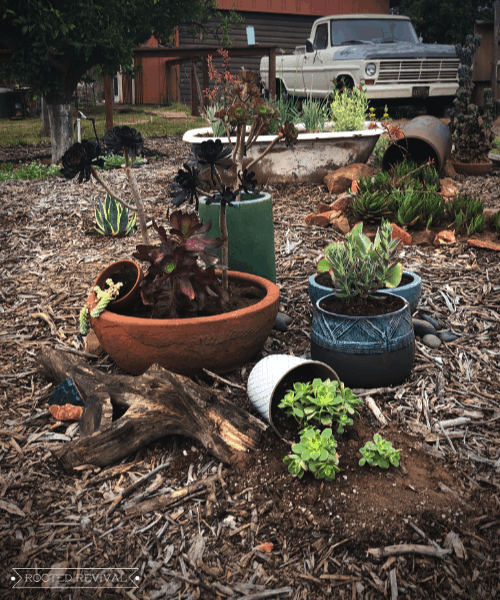
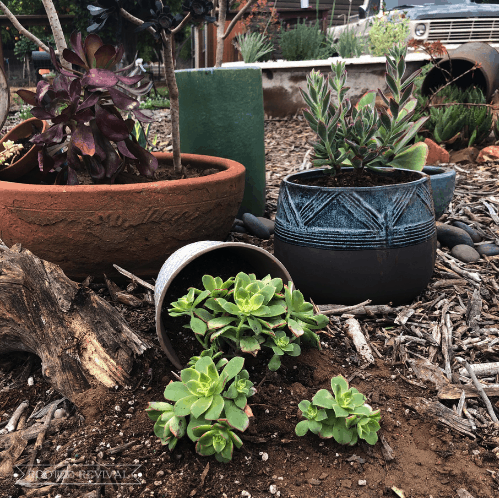
- The inclusion of the vintage farm equipment and farmtiques is countered with some colorful, modern pottery to give the area a touch of a modern vibe.

- There will eventually be a large welcome sign centered between the windmill and the large wagon wheel to complete the South side of the garden space and create a lovely backdrop for the space.
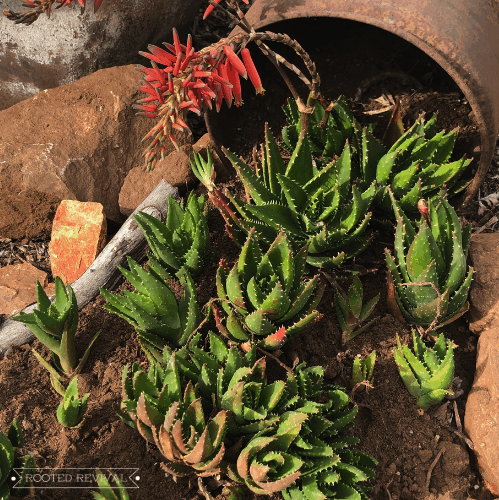
- My favorite element, which I call the “aloe trail”, features a bunch of aloe plants flowing out of a rusted metal barrel situated next to a cast iron bathtub. How adorbs, right?!

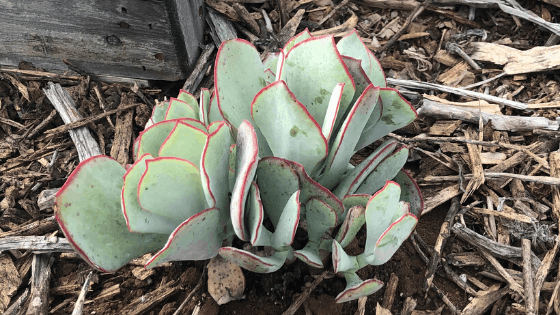
Plants used for this drought tolerant garden:

Got a question about this drought tolerant garden installation? Let me know in the comments!
Pin it so you don’t forget it!


Wow, your garden is stunning, very beautiful and I love your creative approach.