It’s incredibly easy to grow your own dry beans to use in soups, chilis and more! Here’s all about how to grow dry beans and harvest them!
Beans are among one of my favorite garden crops. And, while I enjoy a crisp garden-fresh green bean, the dry shelling beans are my favorite! Plus, there is no feeling quite as secure as pulling out a jar of your gleaming homegrown beans to make a soup or stew on a cold winter day.
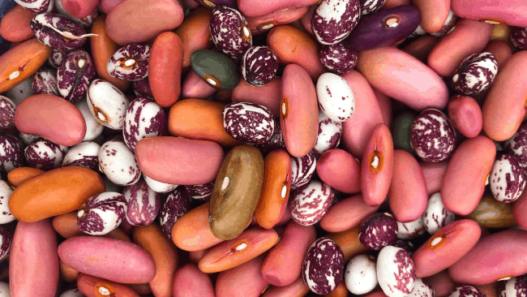
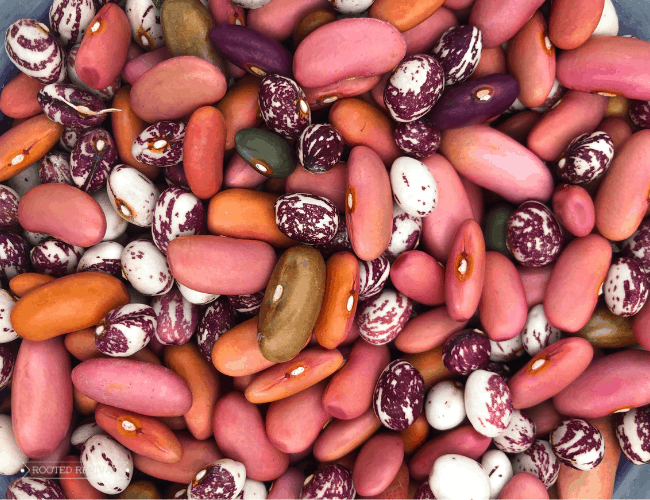
I know that dry beans don’t get a lot of love, but that’s only because the boring store-bought varieties seriously lack the splendor of home-grown varieties! I honestly feel like our dry beans could be jewels with amount of colors and beauty that they display!
But the best part is that dry beans are incredibly easy to grow! When I first started gardening, it blew my mind that I could grow my own beans just like the ones in the store – only prettier! And it further blew my mind when I realized how amazingly simple it was!
So let’s dive in and discuss how to grow dry beans along with how to harvest them.
All About Dry Beans:
Dry beans are also commonly called “shelling beans”. Both of these terms refer to the type of beans that are grown and harvested for the dried inner bean. This is in contrast to green beans, snap beans and garden beans which are eaten as a whole bean (shell included) when they are young and tender.
There are two main types of dry beans: pole beans and bush beans. These terms refer to their growing habits. Pole beans will need a support and will grow very tall. And watch out because they will grab on to anything, including nearby plants! Bush beans, on the other hand, stay fairly short (about 2 feet tall) and do not need a support structure.
Bush beans grow quickly and ripen their bean harvest all at once. This makes them ideal for successive sowing. I will often sow a second batch of bush beans a month after the first ones so that we can have a longer harvest window. Pole beans take longer to set and ripen their bean pods but will produce beans continuously for a longer time period than bush beans.
How to Grow Dry Beans:
**Scroll to the bottom of the post for a printable version of this growing guide!**
- Plant type: Frost-Sensitive Annual
- Growing Zones: Ideally zones 4 and warmer, but short day varieties may be grown in cooler zones. Days to harvest varies from 70-120 days depending on variety. Plan accordingly for your growing zone.
- Ideal temperature: Ideal temperature for growth is between 60-85OF. Soil should be warm, around 70OF ideally, for best germination.
- Sowing: Direct sow after frost danger. Plant seeds 3-4” apart. Allow 12-18” between rows for easier harvesting. Plant seeds at a depth of about 1-inch.
- Sun Requirements: Full sun
- Water Requirements: Keep moist, especially during heat. Avoid spraying or splashing leaves with water. Once bean plants start to die back at the end of summer, discontinue watering to allow them to dry for a few weeks before harvesting beans.
- Ideal Soil pH: 6.0-6.5
- Nutrient Requirements: Beans are not heavy feeders so they do not need a lot of fertilizer or compost. Too much nitrogen can actually slow bean development.
- Ideal Companions: Beans are a good nitrogen-fixing companion for most garden plants and were part of the original “Three Sisters” polyculture. Plant beans near corn, cucumber, squash, strawberries, peas, potatoes, and greens. Avoid planting beans near allium family plants (garlic, onion, chives, etc.) which can slow the growth of the beans. Brassica family plants can also slow the growth of beans. More about that here!
How to Harvest Dry Beans:
Remember how I said that dry beans are incredibly easy to grow? Well, I wasn’t kidding! You plant them, water them, and then just wait!
Towards the end of summer, the plants will naturally start dying back and the green leaves will yellow. This is a sign that the plant is using its energy to develop and ripen the bean as the plant’s short lifespan comes to a close.
Once the plant starts to die back, you can cut down or stop watering it all together. This will help the bean pods further dry out.
If you live in a dry climate, you can just let the plant dry naturally in the garden. However, if you are in a super damp or humid climate, you may want to pull the plants (cut the entire plant at ground level) and hang it upside down in a sheltered space to dry (a garage works great). We sometimes have to do this with our beans here in the Pacific Northwest if the wet season starts early.
You will know that the beans are ready to harvest once the pods are dry and brittle. If you shake the pod, you may even hear the beans rattle inside! At this point, you can harvest the dry beans!
There are a few different methods to harvest the dry beans. I prefer to just gather the pods and crack them open one-by-one and drop the beans into a jar or bowl. Threshing is another popular method where you bang the entire plant against something (like a wall) until the pods split open and the beans spill out into a large container. Either way, be sure to add the old plant material to your compost when you’re done!
Once you have harvested your dry beans, leave them in an open container or bowl and allow them to dry for another week in a cool dry place. The beans should be very hard. You can actually test them by biting one. It shouldn’t have any give when bitten.
Once the beans have been thoroughly dried, store them in an airtight container, like a mason jar. You can use them exactly like you would use dry beans from the store! And, don’t forget to plant some of them in the garden the following year!
Pin this post for later!


Thank you for sharing this!! I’ve been wanting to grow my own beans but can’t seem to figure out where to get variety like kidney and navy for chili and baked beans? And thoughts?? Or your favorite varieties and where I can find them
Some of my favorite are from High Mowing Organics (I get both my black beans and kidney beans from them) along with Mary’s Heirloom Seeds and Baker Creek. Beans are something I’ll never tire of growing because there are so many amazing varieties to try! Enjoy!