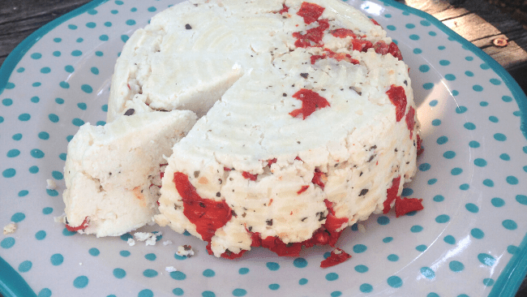
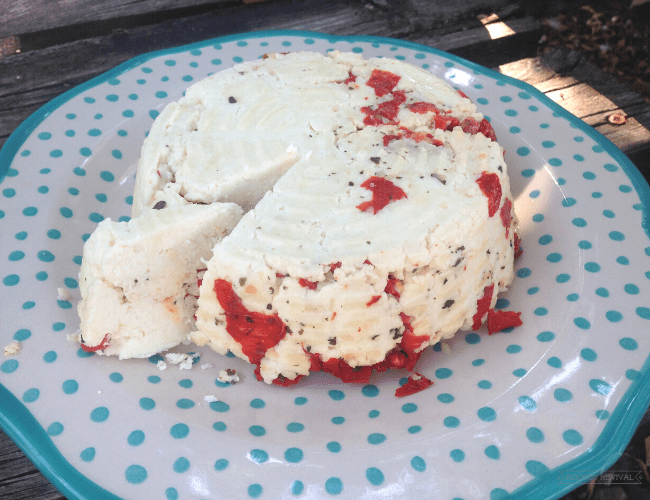
Farmer’s cheese is one of the fastest and easiest homemade cheeses to make! And, it only requires 3 simple ingredients: milk, vinegar and salt!
When we bought our first dairy goats, I was extremely hesitant to dive into the cheesemaking world! It all seemed so overwhelming!
It’s strange to think about now, as I create a variety of milk based cheeses, yogurts and concoctions on a regular basis!
Cheesemaking really isn’t as scary as it seems!
But, if you are intimidated, I have the perfect cheese for you: farmer’s cheese!
Let me tell you why you’re going to love farmer’s cheese:
It’s soooo simple to make and it gives you a great yield! Honestly, I don’t think anyone can mess up this cheese!
You don’t need any cultures or fancy cheesemaking equipment.
Its fast!! When I’m in a hurry, it’s still my go-to cheese!
While it isn’t as flavorful as some other cheeses, it is super versatile! You can easily season it with a variety of herbs and spices.
It’s a great accompaniment for pastas, salads and egg dishes. Farmer’s cheese doesn’t melt like other cheeses, so you can toss it in hot dishes or fry it without it loosing its shape. Plus, you can freeze it and it tastes just as good!
So, what is farmer’s cheese?
The most basic explanation of farmer’s cheese is that it’s an “acid cheese”, meaning that an acidic addition is used to curdle the milk. No culture and no rennet needed. That also makes this cheese vegetarian!
And, because it’s a vegetarian cheese, farmer’s cheese is very popular in India, where it goes by another name: Paneer.
But that isn’t the only name it goes by! Farmer’s cheese is also known as Queso Fresco in Latin American countries! There are slight differences in the creation of this cheese depending on traditions and regions but, overall, the process is exactly the same.
Call it what you like! I will always call it farmer’s cheese because, to me, it’s the epitome of scraping together a delicious cheese with the very basics. And that seems like a very farmer-esque thing to do if you ask me!
The chemistry of farmer’s cheese
Farmer’s cheese is made from just two simple ingredients: whole milk and an acidic product (most often lemon juice or vinegar).
The acid and some heat is what creates the magic that turns plain old milk into cheese!
Heat:
Most cheeses are made with rennet which act upon the casein protein in milk. But, farmer’s cheese is an over-achiever! Not only does it capture the casein proteins but also a second protein: albumin. Albumin becomes solid when it’s heated up to a high enough temperature. Because of this, farmer’s cheese requires the milk to be heated to temperatures that are higher than those typically used in cheesemaking.
Since farmer’s cheese denatures/curdles the albumin protein, the cheese won’t melt! That means you can’t turn it into an ooey-gooey cheese no matter how hard you try! But, you can add it to hot dishes or fry it without it loosing any flavor or shape. In fact, it’s absolutely delicious fried in some balsamic!
Milk:
Since farmer’s cheese is made through the process of heating the milk, you don’t need to use the freshest, highest quality milk like you do with other cheeses (like chèvre). Now, obviously, you want to use high quality milk from healthy animals that eat a healthy diet. But, if your milk is a few days (or a few weeks!) old, it won’t effect this versatile cheese like it would other cheeses!
Acid:
You can actually influence the flavor of your cheese to a certain degree simply based on the acid you use! Vinegar, which I use most often, imparts a good firmness and flavor to the cheese. I usually just use white distilled vinegar. But, if you want to get fancy, you can actually use balsamic vinegar or red wine vinegar! The balsamic vinegar is one of my favorites to use if I’m adding the cheese to a pasta! You can also use lemon juice (fresh is best) to impart a slight citrus flavor to your cheese. Try out some different acids to find your favorite!
How to Make Farmer’s Cheese
[mv_create key=”11″ thumbnail=”https://staging7.rootedrevival.com/wp-content/uploads/2021/07/farmers-cheese2.png” title=”How to Make Farmer’s Cheese: The Easiest Homemade Cheese! ” type=”recipe”]



Does it have to be unpasteurized milk? Can I use organic whole milk from the store?
Absolutely! The wonderful thing about this cheese is that you can really use any type of milk! I’ve even heard of people using camel milk! Pretty cool!