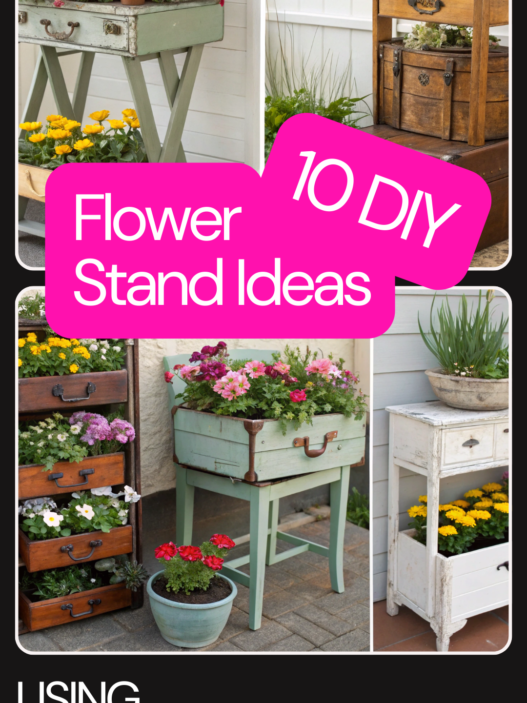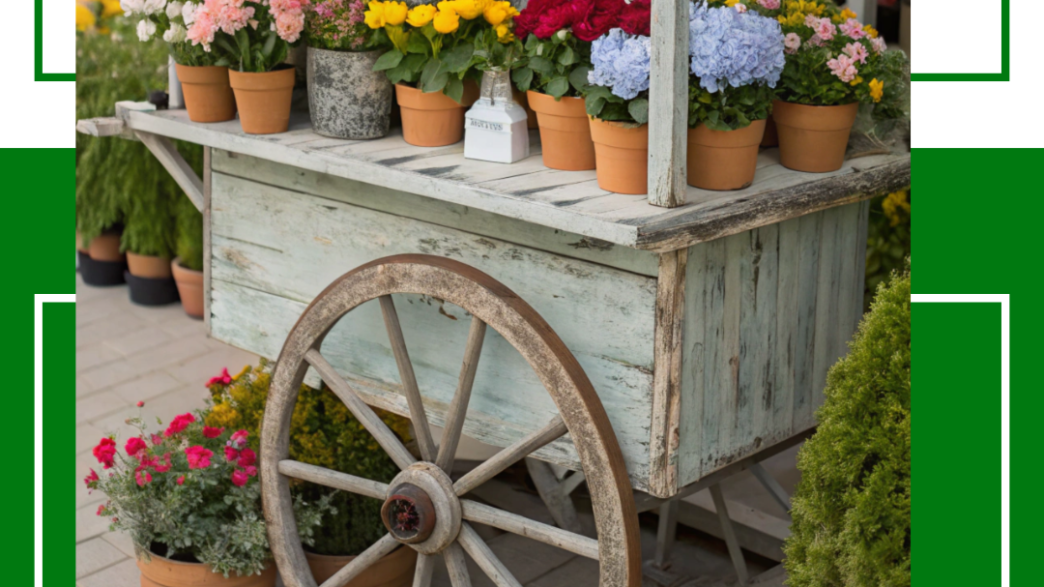
Creating a vintage-inspired flower cart is a charming and versatile way to showcase flowers for special occasions or to enhance your home and garden decor. This step-by-step guide will help you build your very own flower cart with a vintage twist, perfect for weddings, garden parties, or even a small business display.
Why Build a Vintage-Inspired Flower Cart?
- Timeless Charm: The vintage look adds elegance and nostalgia to any setting.
- Multi-Purpose Use: Use it as a decor centerpiece, a mobile flower shop, or even a gift station.
- Budget-Friendly: Crafting your own cart saves money while letting you customize the design.
- Eco-Friendly: Upcycle old materials to create a sustainable masterpiece.
Materials You’ll Need
- Wood Planks: For the cart’s base and sides.
- Wagon Wheels: Add a rustic and mobile touch.
- Paint or Stain: Choose soft pastel tones for a vintage feel.
- Hardware: Nails, screws, and hinges.
- Tools: Hammer, screwdriver, saw, and measuring tape.
- Decorative Elements: Lace, chalkboard signs, and floral arrangements.
Step-by-Step DIY Tutorial
1. Design Your Cart
- Sketch out your desired cart size and style.
- Include compartments or shelves for flowers and accessories.
2. Build the Base
- Assemble a sturdy rectangular base using wood planks.
- Attach legs for stability or install wagon wheels for mobility.
3. Create the Frame
- Use additional planks to construct side panels and a canopy frame.
- Ensure the structure is secure and balanced.
4. Add Vintage Details
- Sand the wood for a smooth finish.
- Paint or stain the cart in soft hues like ivory, mint green, or pale blue.
- Distress the edges lightly for a weathered, vintage effect.
5. Decorate Your Cart
- Line the shelves with lace fabric or burlap.
- Attach a small chalkboard for personalized messages.
- Fill the cart with seasonal blooms, vases, or potted plants.
Styling Ideas for Your Vintage Flower Cart
- Wedding Display: Adorn with white roses, peonies, and soft lighting for a romantic touch.
- Garden Party: Incorporate sunflowers, daisies, and rustic accessories like mason jars.
- Seasonal Themes: Use autumn leaves, pumpkins, and warm colors for fall or holly and poinsettias for Christmas.
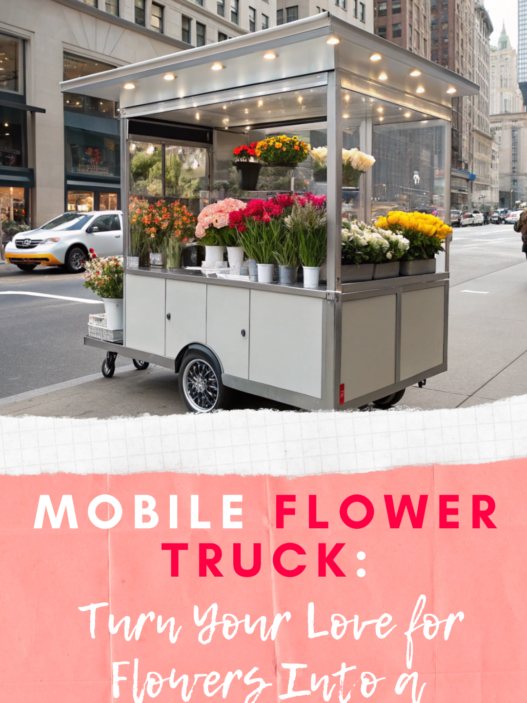
- Mobile Business: Display fresh-cut flowers and bouquets for an Instagram-worthy flower truck.
- Photo Backdrop: Decorate with lush greenery and vintage props for memorable photos.
Maintenance Tips
- Weatherproofing: Apply a protective sealant if you plan to use the cart outdoors.
- Mobility: Ensure the wheels function smoothly for easy transport.
- Refresh Decor: Update flowers and seasonal accents regularly for a fresh look.
Why a DIY Flower Cart is Worth the Effort
Building a vintage-inspired flower cart is not just a creative project—it’s an opportunity to express your style and bring a touch of timeless beauty to any event or space. With its endless versatility and personal charm, this DIY project will be a showstopper wherever you use it.
Ready to start crafting? Gather your tools, channel your inner designer, and let your flower cart bloom into life!