In winter, the habit of drinking tea quickly becomes a matter of convenience. You want it to be easy to make, not rely on rare ingredients, and give a clear, predictable result. Not “a mood,” not an experiment, but a solid everyday drink you can fit into your day — in the morning, after meals, or in the evening.
Here you’ll find 10 herbal tea recipes that we use in exactly this way. They don’t replace food and they don’t solve everything at once, but they do support different needs in winter: breathing, digestion, focus, and evening wind-down. All recipes are designed for a regular kitchen and a real-life rhythm. No complicated blends, no exotic ingredients, and no need to reinvent anything every time.
This is not a list of the “best” teas. It’s a set of options people usually try, choose from over time, and then keep using long-term.
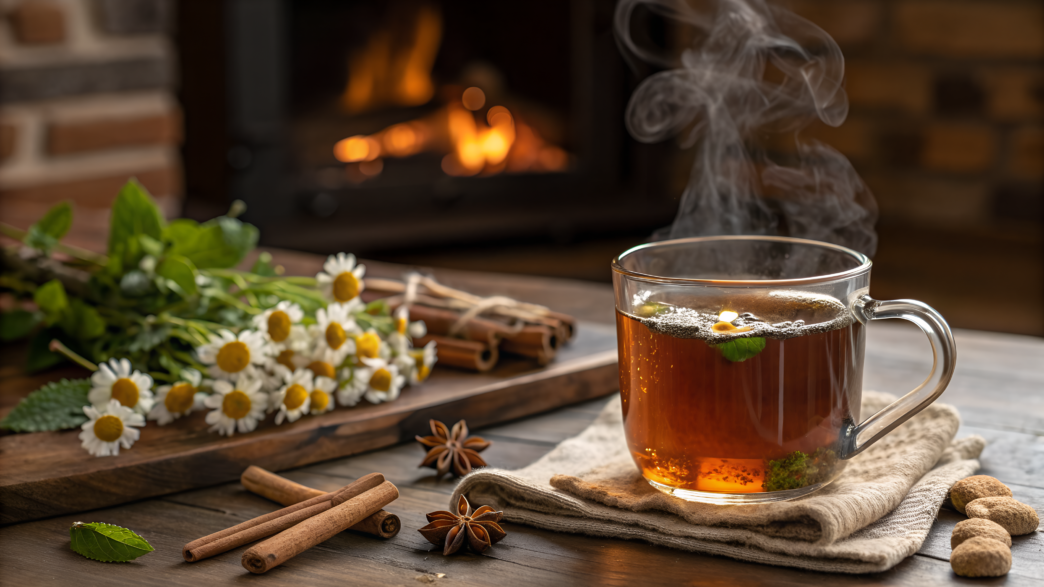
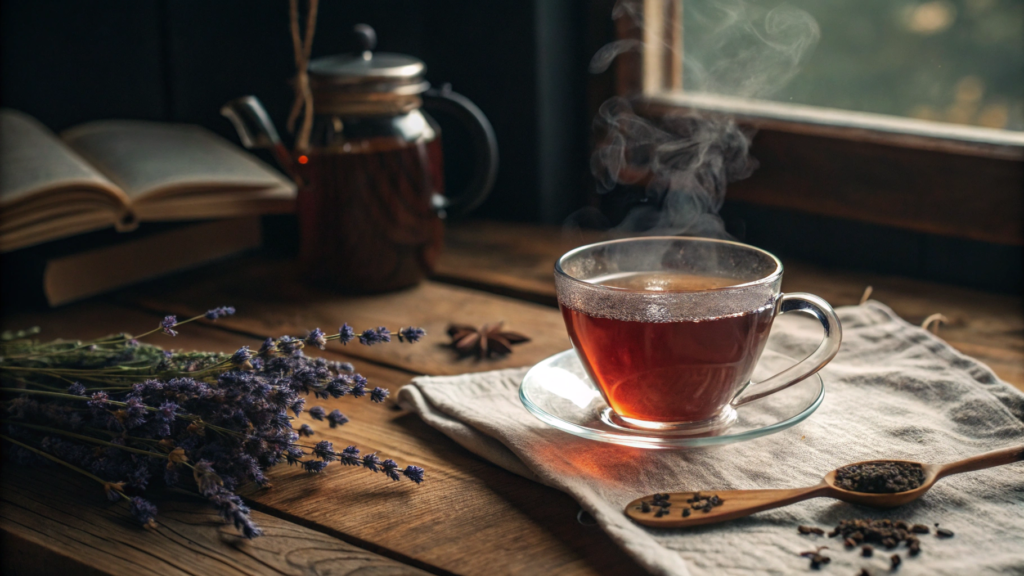
1. Spiced Chamomile & Clove Tea
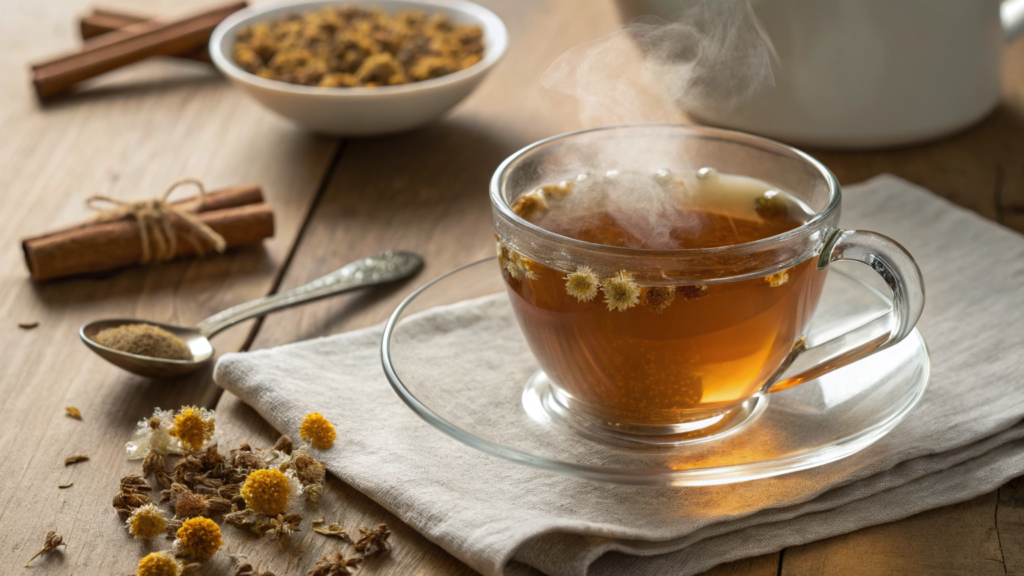
I use this tea as a basic evening infusion during the cold season. The ingredients are simple, the flavor is stable, and the effect is easy to understand. Chamomile creates a soft base, while clove adds warmth and a light spice without sharpness. This infusion fits naturally into a daily routine, not as a “special occasion” drink.
So, what do you actually need for this tea?
Ingredients
- Dried chamomile — 1 tbsp (≈ 1 tablespoon)
- Whole cloves — 3–4 buds
- Water — 2 cups (≈ 480 ml)
- Honey — 1–2 tsp to taste (≈ 1–2 teaspoons, optional)
- Ground cinnamon — 1 pinch (optional)
If you’re using store-bought chamomile, it’s important that it’s whole flowers, not powder. Ground chamomile turns bitter very quickly. I’ve used Frontier Co-op Organic Chamomile Flowers several times — consistent quality, no off smells, no debris. That matters, especially if you drink this tea often.
How to Make
- Prepare the water. Bring the water to a boil, then remove it from heat and let it sit for about one minute. Water that’s too hot pulls excess bitterness from chamomile.
- Add the ingredients. Add the chamomile and cloves to a teapot, insulated mug, or glass jar. It’s better not to crush the cloves — this keeps the flavor more controlled.
- Pour and cover. Pour in the prepared water and immediately cover with a lid. This matters because chamomile’s aromatic compounds are volatile — without a lid, some of the aroma simply escapes.
- Steep. Let it steep for 7–10 minutes.
- 7 minutes gives a soft, neutral flavor.
- 10 minutes gives a more pronounced taste with a clear spicy note.
I usually keep it at 8–9 minutes.
.
- Strain. Strain completely. If the cloves stay in the drink too long, they start to dominate the flavor.
- Add-ins. Add honey only after the tea cools slightly (not hotter than about 40–45°C / 104–113°F). Cinnamon is optional and should be used sparingly — just the tip of a spoon, otherwise it overpowers the chamomile.
Chamomile is often used in evening infusions because it gently supports the nervous system and helps the body shift into a calmer mode without sharp effects. Clove is added in small amounts not just for flavor — it pairs well with herbal infusions and supports digestion, especially after a heavier dinner.
This recipe scales well. If you’re making it for two, simply double the water and chamomile. Don’t double the cloves — just add two extra buds, no more.
2. Rosemary Citrus Steam Tea
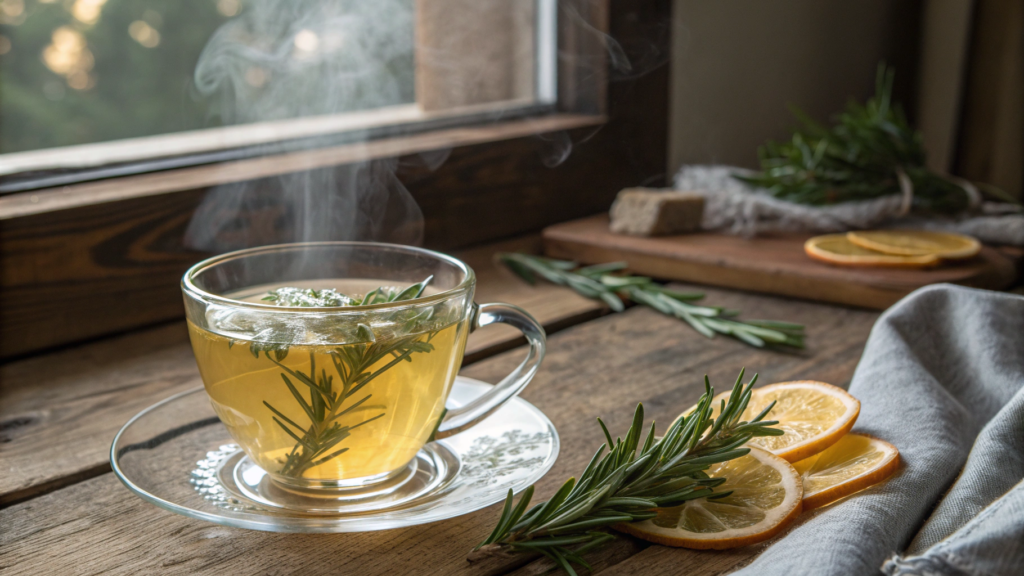
Rosemary here is not a decorative sprig. It gives a clear, focused aroma. Citrus adds acidity and helps the steam work more actively. This is not an “automatic” drink, but a functional herbal infusion that I use intentionally.
This recipe didn’t start as tea in the usual sense. It came up as an answer to one simple issue: in winter, it’s hard to breathe comfortably indoors, especially if you work inside a lot, rarely get fresh air, and keep the heating on all the time.
At the time, rosemary was growing right by our porch — sturdy, tough, not very “tea-like” in appearance. Lemons were in the kitchen. We combined them not for flavor, but for steam — and the result worked so well that this infusion became a separate format. Something you make when you need to clear your breathing and reset a bit.
Ingredients
- Fresh rosemary — 1–2 sprigs (or 1 tsp dried, ≈ 1 teaspoon)
- Lemon — 2–3 thin slices
- Orange peel — 2–3 strips (no white pith)
- Water — 3 cups (≈ 720 ml)
- Honey — optional, 1 tsp (≈ 1 teaspoon)
Tip. If you’re using store-bought rosemary, it’s better to choose whole leaves rather than powder. This way the aroma stays dense, without a “dusty” aftertaste, which matters for steam infusions.
How to Make
- Prepare the citrus. Wash the lemon thoroughly. Cut the orange peel thinly — only the colored part. The white pith turns bitter when heated.
- Prepare the rosemary. If using fresh rosemary, gently crush the sprig with your fingers. Don’t tear or chop it — this is enough to release the essential compounds.
- Heat the water. Bring the water to a boil and remove it from heat immediately. For this infusion, boiling isn’t the goal — hot steam is.
- Combine the ingredients. Place the rosemary, lemon, and orange peel into a large heat-safe mug or bowl. Pour over the hot water.
- Steam phase. Let the infusion sit for 30–60 seconds after pouring, so the steam softens.
Then cover your head with a towel and breathe in the steam for 3–5 minutes. Deeply and calmly, without forcing it.
If you feel any burning, move back. This step should be comfortable. - Infusion. After the steam phase, cover the container and let it steep for another 5–7 minutes. Then strain.
- Serving. Drink warm. Add honey only after the infusion has cooled slightly.
Rosemary is often used in infusions and inhalations because it supports the sensation of freer breathing and focus. Its aroma opens up especially well in hot steam.
Citrus peel increases evaporation and makes the steam more active, while also adding a light acidity that balances the rosemary.
This tea is convenient to make midday, especially if you work from home or spend a lot of time indoors.
3. Mint & Lemon Balm Comfort Blend
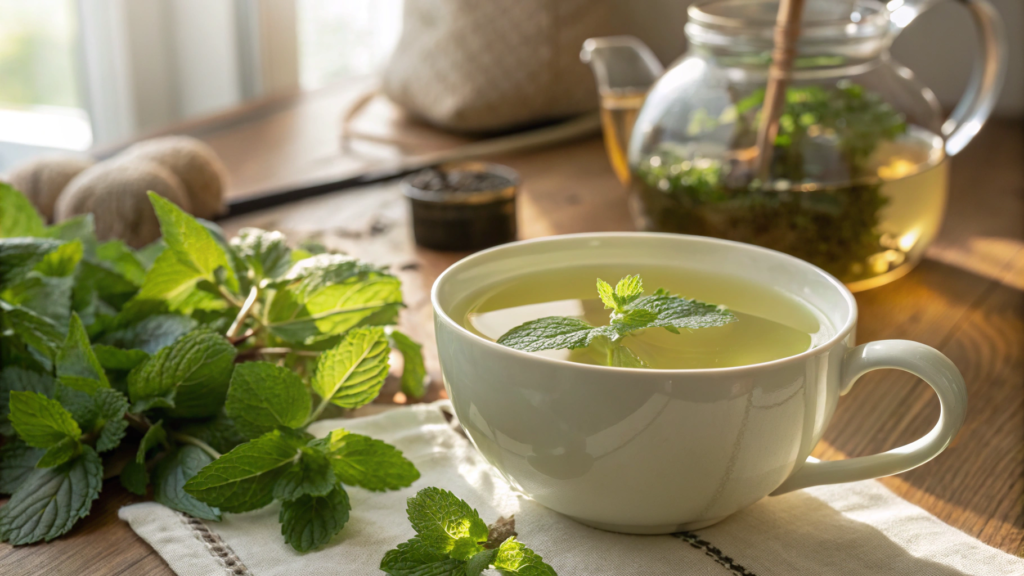
Lindy didn’t like mint infusions for a long time because of their sharpness. Only when we started combining peppermint with lemon balm did the tea turn into something you can drink regularly, without the feeling that it “presses” or pulls all the attention to itself.
At first glance, this may seem like just another mint tea. But in reality, there are two different mints here, and they work very differently. One brings freshness and clarity, the other gives a softer, more balanced taste.
Ingredients
- Dried peppermint — 1 tsp (≈ 1 teaspoon)
- Dried lemon balm — 1 tbsp (≈ 1 tablespoon)
- Water — 2 cups (≈ 480 ml)
- Honey — 1 tsp to taste (≈ 1 teaspoon, optional)
Important. There should always be more lemon balm than mint. If you reverse the ratio, the mint will dominate and the flavor becomes sharp.
How to Make
- Prepare the water. Bring the water to a boil, then let it sit for about one minute. This tea doesn’t need an aggressive temperature.
- Combine the herbs. Add the lemon balm and mint to a teapot or mug at the same time. Don’t brew them separately — it’s important that they open up together.
- Pour and cover. Pour the hot water over the herbs and cover immediately. Mint loses aroma quickly if left uncovered.
- Steep. 6–8 minutes is optimal.
Less time results in a flat taste.
More time brings out herbal sharpness. - Strain. Strain completely. Leaving the leaves in the mug will continue to change the flavor.
- Add-ins. Add honey if desired, but keep it minimal. This tea works well even without sweeteners.
Lemon balm is often used in evening infusions because it supports a calm state without a strong sedative effect. It’s mild and neutral in action. Peppermint adds freshness and helps make the flavor more focused, especially when the tea is drunk after a meal.
This blend is easy to brew on a regular basis, without tying it to feeling “bad” or “good.” It’s simply pleasant to drink — and sometimes that’s more than enough.
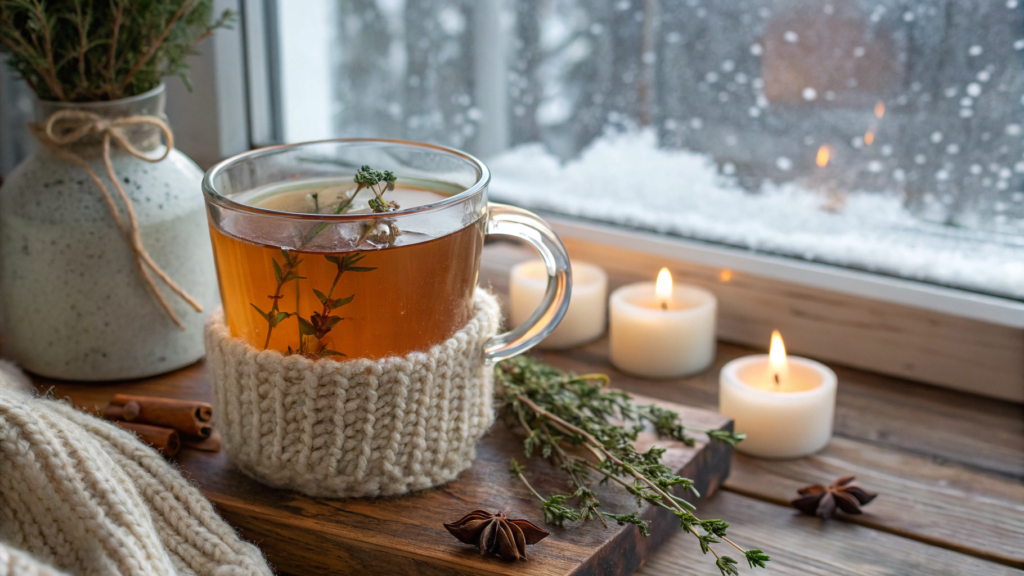
4. Thyme Honey Winter Warmer
For a long time, I used thyme exclusively for cooking — for potatoes, legumes, and winter stews.
But in winter, when dry air appeared in the house and there was a constant feeling that the throat was under strain, thyme unexpectedly helped us. This infusion turns out dense, warm, and aromatic. It is not neutral. It has a clear taste, and that is exactly why it is valued.
Ingredients
- Dried thyme — 1 tablespoon
(if fresh — 2–3 small sprigs) - Water — 2½ cups (about 600 milliliters)
- Honey — 1–2 tablespoons
- Lemon juice — 1 teaspoon (optional)
Thyme should be whole and aromatic, without dust. For example, Frontier Co-op Organic Thyme Leaf works well here, as it has a good balance between herbal bitterness and essential oil warmth.
How to Make
- Prepare the thyme. If using dried thyme, gently rub the leaves between your fingers before brewing. Do not grind it into powder, just enough to activate the aroma.
Fresh thyme does not need to be chopped. It is enough to slightly break the sprig. - Heat the water. Bring the water to a boil and remove it from heat. Thyme tolerates a higher temperature than softer herbs and opens up better in hot water.
- Steeping. Place the thyme into a teapot or heat-resistant mug, pour over the water, and cover with a lid.
Steep for 10–12 minutes. Less time results in a watery taste. More time leads to excessive astringency. - Strain. Strain completely. Thyme leaves are firm, and if left in the drink, the flavor becomes rough very quickly.
- Add-ins. Add honey only after the infusion cools slightly. Thyme holds its flavor well even with honey and does not get lost.
Lemon juice is optional and should be added in just a few drops, to highlight the taste rather than turn the tea into a citrus drink.
Thyme is traditionally used in herbal infusions during the cold season. It gives a dense, warming flavor and works well for drinks that are consumed slowly, in small sips. Honey is used not just as a sweetener. It softens the sharpness of thyme and makes the drink smoother, especially when it is drunk warm rather than hot.
This tea is rarely something you want to drink by the mugful. One cup is usually enough. That is exactly why it works — as a concentrated, clear infusion, not a background drink.
5. Sage & Apple Peel Infusion
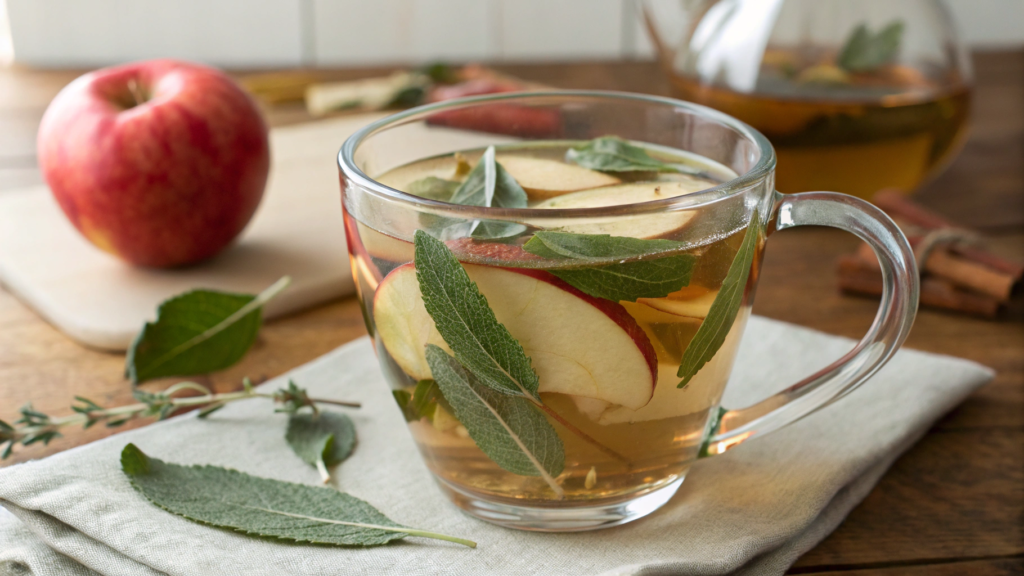
Apple peels almost never go straight to the compost here — in winter they are simply too useful. And sage… it has long been underestimated as a tea herb. Too “serious,” too kitchen-focused. But paired with apple peel, it behaves very differently: softer, calmer, and easier to understand.
This is a clear, functional infusion that is used after meals and in moments when a neutral, predictable drink is needed.
Ingredients
- Dried sage — 1 teaspoon
(or 4–5 fresh leaves) - Apple peel — from 1 medium apple
(fresh or dried) - Water — 2½ cups (about 600 milliliters)
- Honey — 1 teaspoon, optional
- Cinnamon stick — 1 small piece (optional)
How to Make
- Prepare the apple peel. If using fresh peel, wash the apple thoroughly and remove the peel in a thin layer, without any flesh.
If using dried peel, make sure it contains no added sugar or spices. - Prepare the sage. Lightly rub dried sage between your fingers. Fresh leaves can simply be torn. Do not chop or grind — the flavor becomes rough.
- Heat the water. Bring the water to a boil and remove it from heat immediately. Sage does not tolerate long boiling.
- Steeping. Place the apple peel, sage, and cinnamon if using, into a teapot or heat-resistant mug.
Pour over the hot water and cover with a lid. - Infusion time. Eight to ten minutes is optimal.
During this time, the apple peel releases its aroma, while the sage does not have time to turn bitter. - Strain and serve. Strain completely. Add honey only to a warm, not hot infusion.
This tea is best consumed slowly, in small sips.
Sage is often added to herbal infusions because it provides a clear taste and works well in small amounts. Apple peel softens the sage and adds a light fruit note without sugar. In addition, the peel retains many natural compounds that transfer well into a hot infusion.
This recipe is especially convenient because it does not require anything special. Everything is usually already in the kitchen. And it is exactly these kinds of infusions that tend to stay in use for a long time.
6. Oregano Ginger Cold-Relief Brew
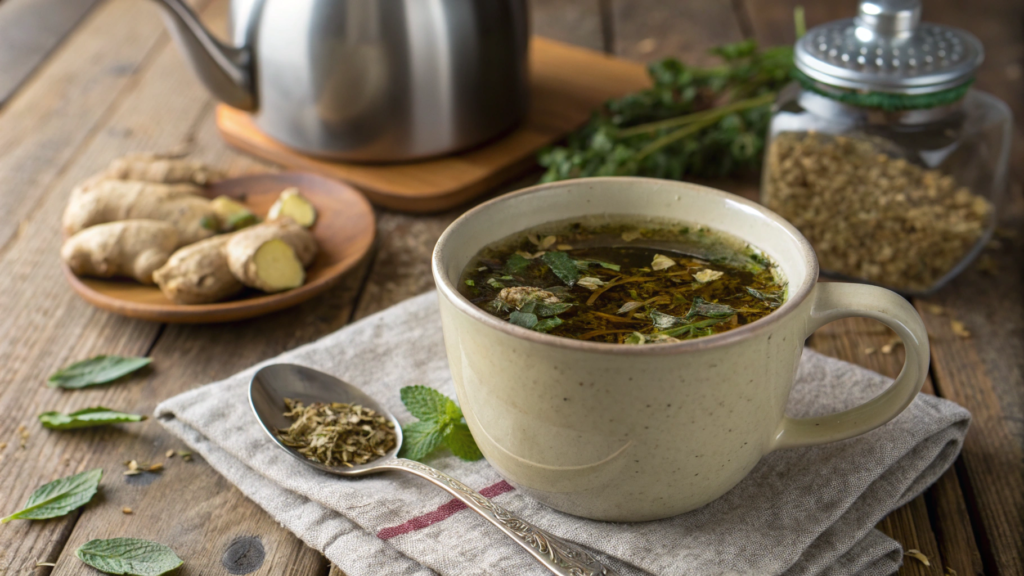
This infusion is not prepared for flavor and not as an everyday tea, but for specific situations — when a dense herbal drink with a clear composition is needed. Oregano and ginger are often used for exactly these kinds of infusions, which is why this combination turned out logical and predictable.
This recipe is not universal. It is not brewed by the mugful and not drunk between tasks. Usually, one portion is enough, prepared with intention and without extras.
Ingredients
- Dried oregano — 1 teaspoon
(or 1 tablespoon of fresh leaves) - Fresh ginger — 1 inch, sliced thinly (about 2.5 centimeters)
- Water — 3 cups (about 720 milliliters)
- Honey — 1 tablespoon to taste
- Lemon juice — 1 teaspoon (optional)
How to Make
- Prepare the ginger. Peel the root and slice it thinly. Do not use a grater — it creates excessive sharpness and makes the infusion cloudy.
- Heat the water. Bring the water to a boil, then reduce the heat to low.
- Short simmer. Add the ginger to the water and simmer for 5 minutes. This step matters — ginger needs a bit of time to release warmth and flavor.
- Add the oregano. Remove the pot from heat, add the oregano, and cover with a lid.
Steep for 8–10 minutes. Do not exceed this time — oregano turns bitter quickly. - Strain. Strain completely, especially if fresh oregano was used.
- Add-ins. Add honey and lemon only to a warm infusion, not a hot one. Here they play a supporting role, not the main one.
Oregano is known for its rich content of essential compounds. In hot infusions, it provides a dense flavor and a warming effect. Ginger adds sharpness and helps the drink work more quickly. It pairs well with oregano, not competing with it, but reinforcing its effect.
This infusion is prepared for one use — one mug is usually enough.
7. Fennel & Star Anise Chill-Out Tea
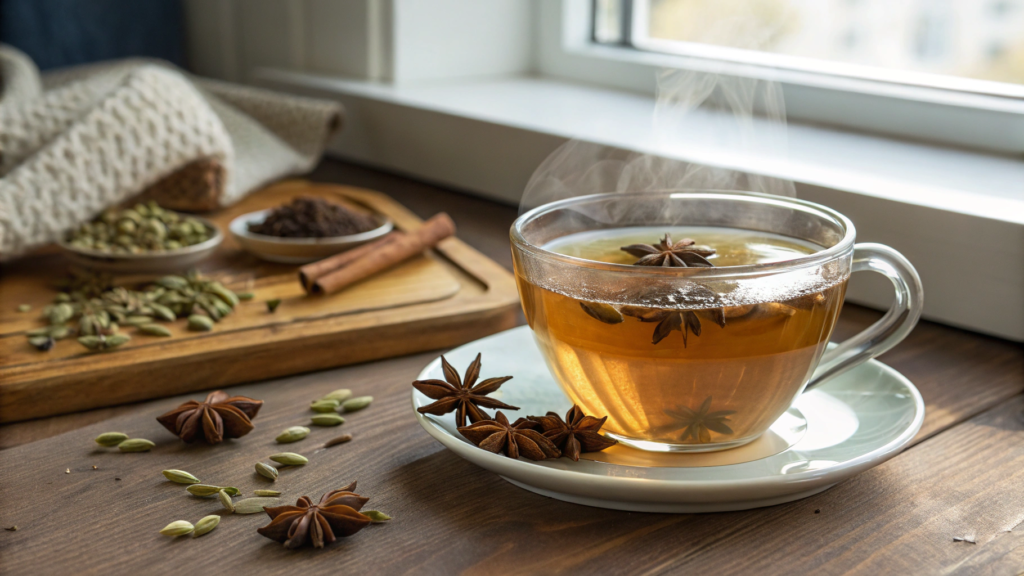
This infusion almost always shows up after a heavy dinner, especially in winter, when food becomes richer and the body reacts to it faster than expected.
Fennel and star anise are often seen as something purely “spice-based,” almost dessert-like. In practice, this is a very practical combination if you keep the proportions right and do not try to turn it into a sweet tea.
Ingredients
- Fennel seeds — 1 teaspoon
- Star anise — 1 whole star
- Water — 2½ cups (about 600 milliliters)
- Honey — 1 teaspoon, optional
- A pinch of dried orange peel — optional
Important! Star anise should always be used in a smaller amount. If you add more than one star, it will start to dominate and make the infusion feel heavy.
How to Make
- Prepare the fennel seeds. Before brewing, lightly crush the seeds using the back of a spoon or a mortar. Do not grind them into powder — a light crack is enough. This helps the fennel release flavor without making the infusion cloudy.
- Heat the water. Bring the water to a boil and remove it from heat. This infusion does not require active boiling.
- Combine the ingredients. Place the fennel, star anise, and orange peel if using, into a teapot or heat-resistant mug. Pour over the hot water and cover with a lid.
- Steeping. Ten to twelve minutes is optimal.
Eight minutes gives a soft, almost neutral taste.
Twelve minutes gives a more pronounced, spiced flavor that is still balanced. - Strain. Strain completely. Star anise should not remain in the drink longer than recommended.
- Add-ins. Add honey only after the infusion becomes warm, not hot. Here it should be used minimally, if at all.
Fennel is often used in herbal infusions after meals. It provides a light natural sweetness and softens the overall taste of the drink. Star anise adds depth and a warm spice note. In small amounts, it supports the fennel without weighing the flavor down.
This infusion is rarely drunk in large mugs. One cup is usually enough, and it is best consumed without rushing, without add-ins or snacks.
8. Lavender Rooibos Nightcap
This tea can be used as a replacement for a regular evening tea with caffeine. Rooibos works well in this role because it does not stimulate and does not require timing adjustments. Lavender is added not for aroma, but for a specific purpose — to make the drink suitable for late evening, when herbal blends with a strong taste no longer feel appropriate.
Ingredients
- Rooibos (loose leaf) — 1½ teaspoons
- Dried lavender — ½ teaspoon
- Water — 2 cups (about 480 milliliters)
- Honey — ½–1 teaspoon, optional
- Vanilla (powder or a small piece of a pod) — optional, very small amount
Important. Lavender should always be used in a smaller amount than it seems necessary. If overused, the flavor becomes soapy and intrusive.
How to Make
- Prepare the water. Bring the water to a boil. Rooibos tolerates high temperatures well, unlike green tea.
- Combine the ingredients. Place the rooibos and lavender into a teapot or mug. If using vanilla, add it at this stage.
- Pour and cover. Pour the boiling water over the herbs and cover immediately. This is important for lavender — its aroma evaporates quickly.
- Steep. Seven to nine minutes is optimal.
Less time results in a flat taste.
More time causes the lavender to dominate.
- Strain. Strain completely. Lavender should not remain in the drink.
- Add-ins. Add honey only to warm tea and in a minimal amount. Here it is used more for smoothing the taste than for sweetness.
Rooibos contains no caffeine and is suitable for evening use. It provides the base of the drink without stimulation. Lavender is used in small amounts to soften the flavor and make the tea appropriate for the end of the day, without overloading it.
This tea is convenient to brew when regular black or green tea is no longer an option, and other herbal infusions feel too active.
9. Parsley Green Tea Detox Sip
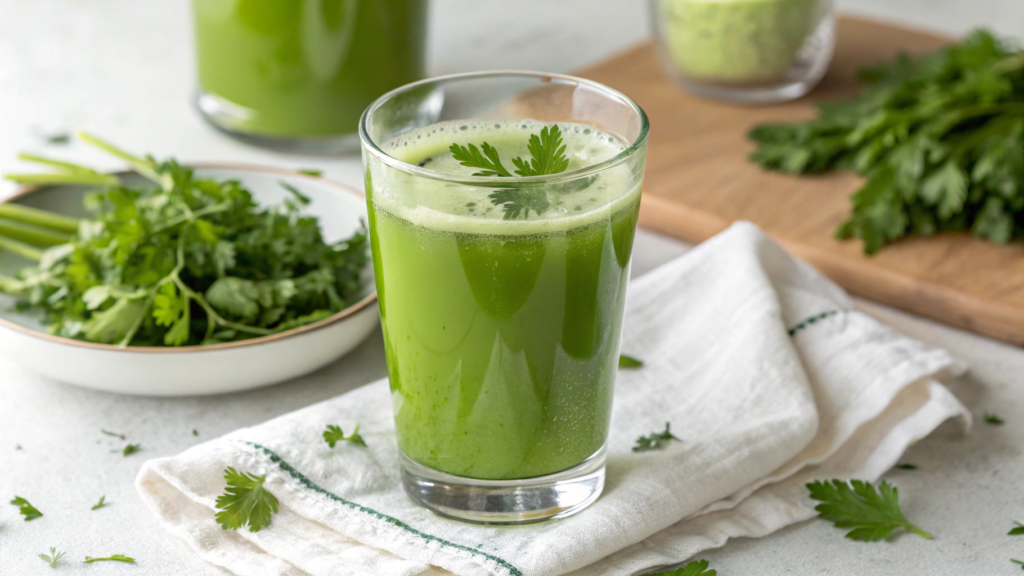
Parsley has always been close at hand for us — bunches from the garden, stems left after cooking, leaves that feel wasteful to throw away. At some point, it became obvious that it works well not only in food.
Paired with green tea, parsley gives a very clean, specific taste. No sweetness. This is a drink meant for daytime, between tasks, when you do not want coffee and you do not want a straight herbal infusion either.
Ingredients
- Fresh parsley — ¼ cup, roughly chopped (about 10–15 grams)
- Green tea (loose leaf) — 1 teaspoon
- Water — 2 cups (about 480 milliliters)
- Lemon juice — 1 teaspoon (optional)
- Honey — optional, ½–1 teaspoon
Tip. Parsley should be fresh, bright green, with no limp stems. Green tea must be loose leaf. Tea bags give a weak flavor here.
How to Make
- Prepare the parsley. Rinse thoroughly, especially if it comes straight from the garden. The stems can be used — they contain a lot of flavor. Chop coarsely. Fine chopping is not needed.
- Prepare the water. Bring the water to a boil and let it cool for 2–3 minutes. Green tea does not tolerate boiling water, otherwise bitterness appears.
- Brewing. Place the parsley and green tea into a teapot or mug at the same time. Pour over hot, but not boiling, water and cover with a lid.
- Steeping. Five to six minutes is optimal.
Less time makes the flavor too weak.
More time causes the green tea to dominate and turn astringent. - Strain. Strain completely. Leaving parsley in the drink is not recommended — the flavor continues to intensify.
- Add-ins. Add lemon to taste, just a few drops. Honey is optional and should be minimal. This tea works better without sweetness.
Parsley is used in drinks because of its fresh herbal taste and its high content of natural compounds that transfer well into an infusion. Green tea adds structure and light alertness without overwhelming the flavor or turning the drink into a stimulant.
This tea is not meant for the evening. The best time is morning or the first half of the day, especially when you want something light but substantial.
10. Bay Leaf & Cinnamon Steeped Tea
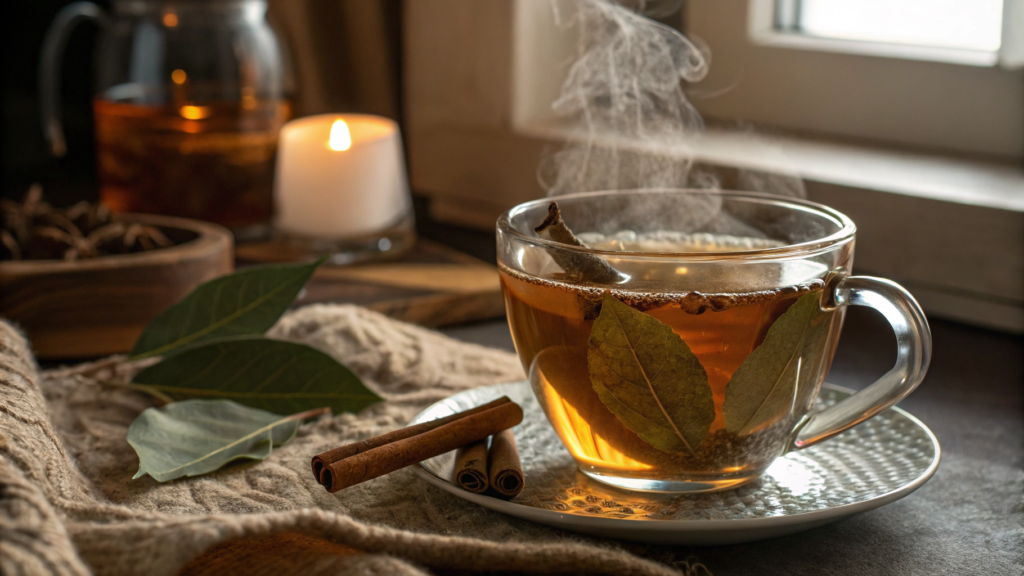
In an infusion, bay leaf behaves very differently than it does in cooking. It becomes softer, warmer, and much calmer in taste. Paired with cinnamon, it turns into a drink that works well in the cold season, especially in the evening, after a heavier meal.
Ingredients
- Dried bay leaf — 2 leaves
- Cinnamon stick — 1 small stick (about 5–7 centimeters)
- Water — 3 cups (about 720 milliliters)
- Honey — 1 teaspoon, optional
- Orange peel — 1–2 thin strips (optional)
How to Make
- Prepare the spices. Lightly break the bay leaves by hand. Do not crumble them into pieces. The goal is to release aroma, not bitterness.
Leave the cinnamon stick whole. Ground cinnamon should not be used for this tea. It makes the infusion cloudy and overly aggressive. - Heat the water. Bring the water to a boil and remove it from heat immediately. This infusion does not require active boiling.
- Steeping. Place the bay leaves, cinnamon, and orange peel if using, into a pot, teapot, or heat-resistant mug.
Pour over the hot water and cover with a lid. - Infusion time. Twelve to fifteen minutes is optimal.
Less time results in a flat taste.
More time causes the bay leaf to dominate and become astringent. - Strain. Strain completely. Bay leaf should not remain in the drink for long, as the flavor continues to intensify.
- Add-ins. Add honey only to a warm infusion and in a very small amount. This tea reads well even without sweeteners.
Bay leaf in hot infusions provides a dense, dry structure to the flavor and is often used in drinks after meals. Cinnamon adds warmth and softens the bay leaf, preventing it from becoming too harsh.
This tea is not meant to be drunk by the mugful. One cup is usually enough, and it is best consumed on its own so the flavor does not get lost.
Your Herbal Tea
These teas do not require changing your lifestyle and do not assume that everyone will drink them. Each one serves a specific purpose — after meals, in the evening, during the day, or in the cold season. That is why it makes sense not to try everything at once, but to choose one or two and see how they fit into your usual routine.
Over time, most people keep a few reliable options, while the rest naturally fall away. That is normal. This is how a personal selection takes shape.If you already use certain herbs in winter, write in the comments which ones you use and in what form.
And if you are just deciding where to start, it is also interesting to see which teas people choose first.