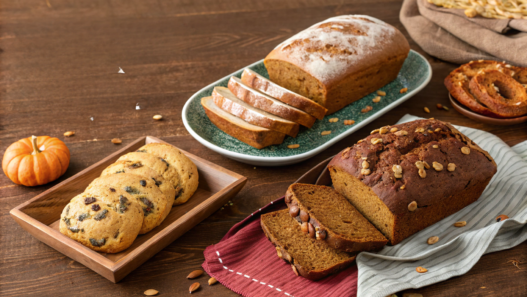

Fall bread recipes start appearing in our kitchen every year as soon as the weather begins to change. That’s when ingredients perfect for baking show up everywhere: pumpkin, apples, pears, nuts, zucchini, bananas. All of them work beautifully in homemade bread.
These recipes are convenient for another reason too. They help use seasonal ingredients without complicated techniques. Mix the ingredients, put the pan in the oven — and within an hour the kitchen already smells like cinnamon, nuts, or caramel.
In this article, you’ll find recipes that work well in a normal home kitchen. Some of them lean toward classic flavors, while others introduce new flavor combinations.
But they all share one thing — this is bread you’ll want to bake again.
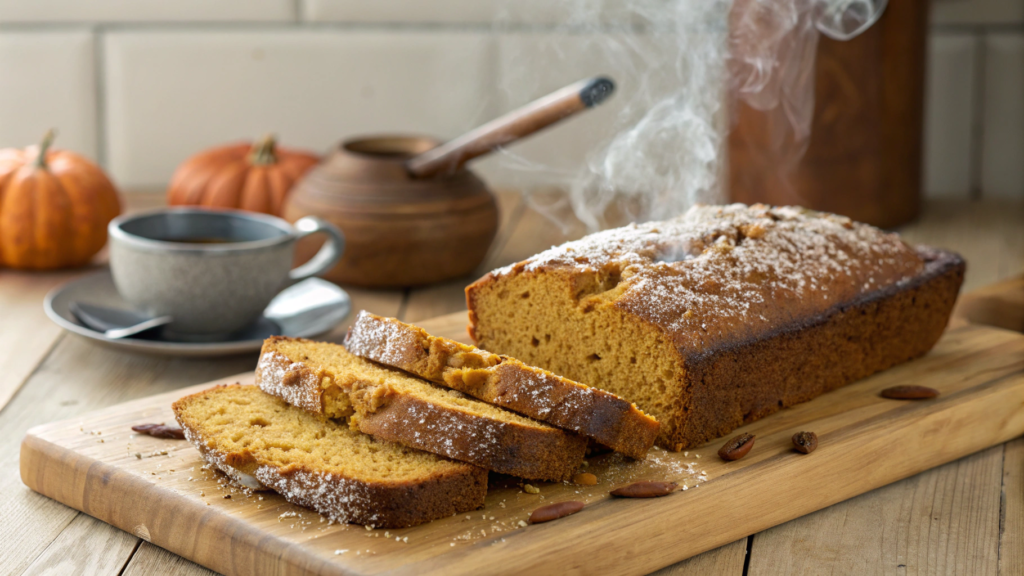
1. Classic Pumpkin Spice Bread
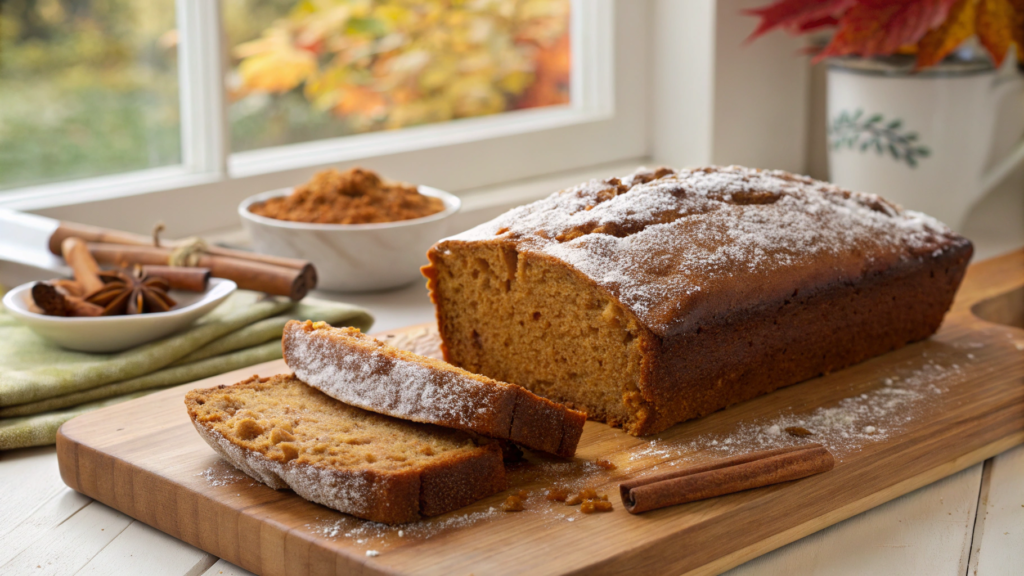
Classic Pumpkin Spice Bread is the kind of loaf that’s easy to bake a few days ahead — for morning coffee, afternoon tea, or even a quick snack after working in the garden.
Pumpkin also has some very practical benefits for baking. Pumpkin puree contains a lot of moisture and natural fiber, which helps the batter stay soft and keeps the loaf moist after baking. Food science research often notes that vegetable purees are commonly used to improve the texture of baked goods.
Spices in recipes like this do more than add aroma. Cinnamon and nutmeg contain natural compounds with antioxidant properties — something mentioned, for example, in publications of the Journal of Agricultural and Food Chemistry.
Because of this, the combination of pumpkin and warm spices has remained one of the most reliable pairings in home baking for many years.
Ingredients
For one 9×5 inch loaf pan:
- 1 ¾ cups pumpkin puree (about 420 g pumpkin puree)
- 2 cups all-purpose flour (240 g flour)
- ¾ cup sugar (150 g sugar)
- ¼ cup brown sugar (50 g brown sugar)
- ½ cup vegetable oil (120 ml vegetable oil)
- 2 large eggs
- 1 tsp vanilla extract
- 1 tsp baking soda
- ½ tsp baking powder
- 1 tsp ground cinnamon
- ½ tsp ground nutmeg
- ¼ tsp ground cloves
- ½ tsp salt
Optional additions:
- ½ cup chopped walnuts (60 g walnuts)
- ½ cup chocolate chips (90 g chocolate chips)
Pumpkins show up on our property every year in pretty generous amounts. The easiest way to handle them is to roast them and turn them into puree. For several years we’ve been using the KitchenAid Variable Speed Corded Hand Blender — a simple immersion blender that quickly turns roasted pumpkin into a smooth puree without lumps.
Pumpkin bread is convenient because the batter comes together fairly quickly. No yeast proofing, no complicated steps. Everything depends on mixing the ingredients correctly. Wet ingredients come together first, then the dry ones. After that, the batter goes straight into the pan.
Before starting, it helps to preheat the oven and prepare the loaf pan so the batter doesn’t sit too long and the structure of the bread stays even.
Preparation
- Preheat the oven to 350°F (175°C) and prepare a 9×5 inch loaf pan. Lightly grease it with oil or line it with parchment paper so the baked loaf releases easily.
- In a large bowl combine pumpkin puree, eggs, vegetable oil, white sugar, and brown sugar. Mix with a whisk or spatula until the mixture becomes thick and smooth.
- Add the vanilla extract and stir again. Vanilla helps round out the flavor and strengthens the aroma of the spices.
- In a separate bowl mix flour, baking soda, baking powder, salt, cinnamon, nutmeg, and cloves. Combining the dry ingredients first helps distribute the spices evenly through the batter.
- Gradually add the dry mixture into the wet ingredients while stirring gently with a spatula. Stop mixing as soon as the flour disappears. Overmixing can make the bread dense.
- If you’re using walnuts or chocolate chips, fold them in at this stage. They add texture and make each piece a little more interesting.
- Pour the batter into the prepared loaf pan and smooth the top. The batter should fill about two-thirds of the pan, leaving room for the loaf to rise.
- Bake for 50–60 minutes until the top turns golden brown. Check the center with a wooden skewer. If it comes out almost dry, the bread is ready. Let the loaf rest in the pan for 10 minutes, then move it to a rack to cool completely.
Freshly baked pumpkin bread tends to disappear quickly. Because of that, two loaves usually go into the oven now.
One loaf lasts a couple of days. The second one gets sliced and frozen. Pumpkin bread freezes very well — a quick run through the toaster brings the slice back warm, soft, and aromatic.
How to Serve Pumpkin Spice Bread
Pumpkin bread works perfectly on its own, but there are a few ways to make it even more interesting, especially for breakfast or tea time.
Here are a few serving ideas that show up in our kitchen most often:
- Warm piece with salted butter. The butter melts slightly and highlights the spices.
- With cream cheese. It almost turns into a seasonal dessert.
- With honey or maple syrup, especially if the batter contains less sugar.
- Lightly toasted for a gentle crisp crust.
- With Greek yogurt and nuts for a more filling breakfast.
Sometimes the loaf simply lands on the table with a jar of homemade apple preserves and a kettle of tea nearby. A few minutes later there are only crumbs left. That tends to be the most reliable sign of a good recipe.
2. New Apple Cider Glazed Loaf
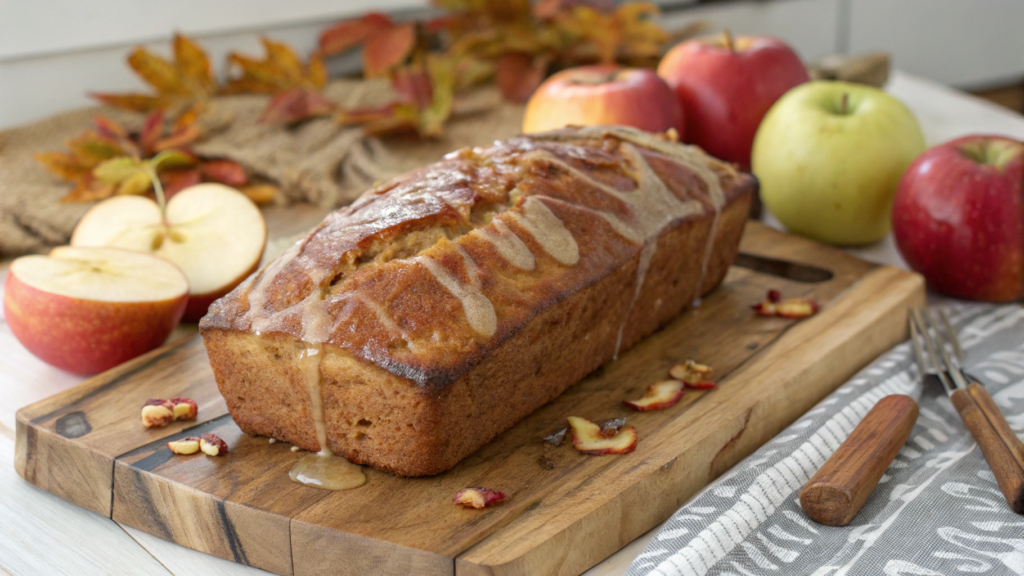
New Apple Cider Glazed Loaf uses cider twice in the recipe: first in the batter, and then again in a fragrant glaze. The result is a soft loaf with a rich apple flavor and a light caramel note on top.
Apples have long attracted attention from nutrition researchers. Scientific publications note that they contain polyphenols — natural compounds with antioxidant properties. Interestingly, some of these compounds remain in apple juice and cider, even after heating.
There is also a more practical reason why cider works so well in baking. It contains plenty of natural sugars, and during baking they help the batter brown more evenly. Because of this, the crust develops a deeper color and the flavor becomes slightly richer and more caramel-like.
So using cider is not just a cooking trick. It really changes the structure and aroma of the bread.
Ingredients
For a 9×5 inch loaf pan:
- 2 cups all-purpose flour (240 g flour)
- ¾ cup sugar (150 g sugar)
- ¼ cup brown sugar (50 g brown sugar)
- ½ cup unsalted butter, melted (115 g butter)
- 2 large eggs
- ¾ cup apple cider (180 ml apple cider)
- 1 tsp vanilla extract
- 1 tsp baking powder
- ½ tsp baking soda
- ½ tsp salt
- 1 tsp ground cinnamon
- ¼ tsp ground nutmeg
For the glaze:
- 1 cup powdered sugar (120 g powdered sugar)
- 2–3 tbsp apple cider (30–45 ml cider)
- ½ tsp cinnamon
One small detail is worth considering ahead of time. The apple cider should be at room temperature. If it’s too cold, the melted butter in the batter can start forming small clumps.
Once the ingredients are ready, the batter comes together fairly quickly.
Preparation
- Preheat the oven to 350°F (175°C) and prepare a 9×5 inch loaf pan. Grease it lightly with butter or line it with parchment paper so the loaf releases easily after baking.
- In a large bowl combine the melted butter, white sugar, and brown sugar. Whisk for about a minute until the mixture becomes slightly creamy.
- Add the eggs one at a time, mixing well after each addition. Then pour in the apple cider and vanilla extract. The mixture will become thinner and noticeably aromatic.
- In a separate bowl combine flour, baking powder, baking soda, salt, cinnamon, and nutmeg. Stir with a spoon so the spices distribute evenly.
- Gradually add the dry ingredients to the liquid mixture. Stir gently with a spatula just until combined. Once the flour disappears, stop mixing. The batter should remain soft and slightly thick.
- Pour the batter into the prepared pan and smooth the surface. Tapping the pan lightly on the counter can help remove large air bubbles.
- Bake for 50–55 minutes until the top turns golden. Check doneness with a wooden skewer — it should come out almost dry.
- Let the loaf cool in the pan for about 15 minutes, then transfer it carefully to a rack. While the bread is still slightly warm, prepare the glaze: mix powdered sugar, cinnamon, and apple cider until it forms a thick but pourable consistency, then drizzle it over the loaf.
I consider the apple cider glaze essential here. Without it, you get a good apple loaf. With the glaze, it becomes something halfway between bread and a light dessert.
The glaze should not be too thick. A thin layer works better — it lightly soaks into the warm crust and adds another layer of flavor.
How to Serve Apple Cider Loaf
Apple bread fits easily into different serving ideas, especially in cooler weather when something warm and simple feels right.
Here are a few options that work well in our kitchen:
- A warm piece with butter. The butter melts slightly and enhances the apple aroma.
- With thick yogurt or cream cheese. It almost feels like a seasonal dessert.
- Lightly toasted so the crust becomes crisp while the inside stays soft.
- With a spoon of apple jam or apple preserves.
- With a cup of strong black tea or coffee.
We often enjoy this loaf exactly as it is, with nothing added, just a mug of hot tea nearby. Half an hour later the plate usually holds only crumbs. A pretty good ending for any recipe, wouldn’t you say?
3. Whole Wheat Cranberry Walnut Bread
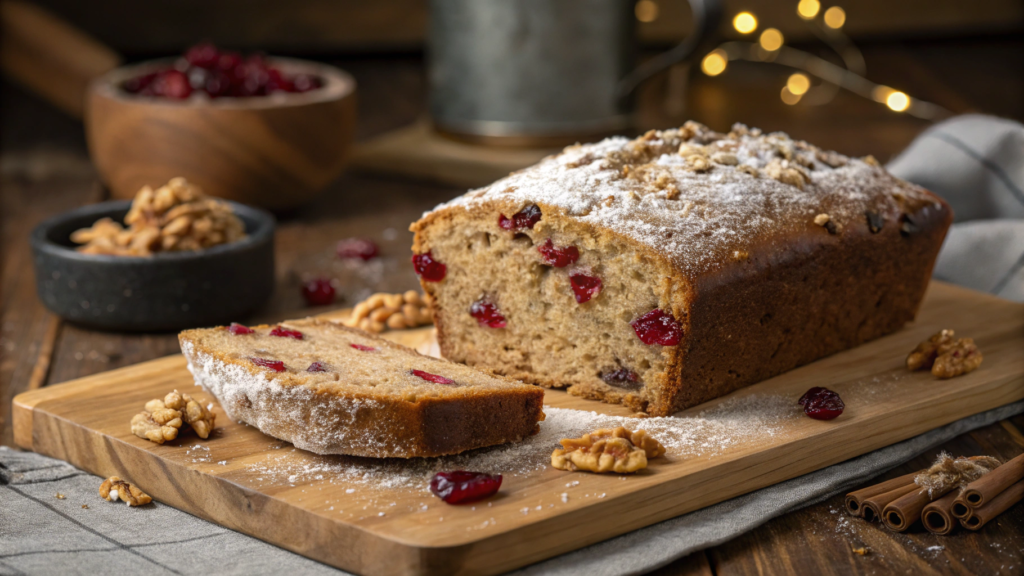
In this recipe you’ll find whole wheat flour, dried cranberries, and walnuts. The result is a dense, aromatic loaf with a gentle tartness from the berries and a pleasant nutty texture. This kind of cranberry walnut bread works well for breakfast, quick snacks, or even a light lunch.
Anyone who bakes regularly knows that white flour creates a soft texture, but whole wheat flour brings much more character to the flavor. It adds subtle nutty notes and gives the loaf a deeper taste. When berries and nuts enter the mix, the bread starts working almost like a small meal on its own.
Ingredients
For a 9×5 inch loaf pan:
- 1 ½ cups whole wheat flour (180 g whole wheat flour)
- ½ cup all-purpose flour (60 g regular flour)
- ¾ cup brown sugar (150 g brown sugar)
- ½ cup vegetable oil (120 ml vegetable oil)
- 2 large eggs
- ¾ cup buttermilk (180 ml buttermilk)
- 1 tsp vanilla extract
- 1 tsp baking soda
- ½ tsp baking powder
- ½ tsp salt
- 1 tsp cinnamon
Add-ins:
- ¾ cup dried cranberries (110 g dried cranberries)
- ½ cup chopped walnuts (60 g walnuts)
For recipes like this it helps to use a reliable whole wheat flour. We often reach for King Arthur Premium 100% Whole Wheat Flour, because the batter behaves predictably even in quick breads.
Whole wheat flour behaves a little differently than regular flour. It absorbs more liquid and tends to make the batter thicker. That’s why buttermilk or yogurt helps keep the loaf soft and balanced.
Before starting, it’s convenient to chop the walnuts and quickly check the cranberries. Sometimes the pieces in the bag are quite large, and cutting them in half helps distribute them more evenly through the batter.
Preparation
- Preheat the oven to 350°F (175°C) and prepare a 9×5 inch loaf pan. Lightly grease it with oil or line it with parchment paper so the loaf releases easily.
- In a large bowl combine the vegetable oil and brown sugar. Whisk for about a minute until the mixture becomes smooth and slightly thicker.
- Add the eggs one at a time, mixing well after each addition. Then pour in the buttermilk and vanilla extract. The mixture will loosen and take on a soft creamy color.
- In a separate bowl combine whole wheat flour, all-purpose flour, baking soda, baking powder, salt, and cinnamon. Stir the dry ingredients so everything distributes evenly.
- Gradually add the dry mixture into the wet ingredients while stirring gently with a spatula. The batter should become thick and slightly grainy — that’s normal for whole wheat flour.
- Fold in the dried cranberries and chopped walnuts. Try to distribute them evenly so each slice contains both berries and nuts.
- Pour the batter into the prepared pan and smooth the surface. Lightly tapping the pan on the counter can help the batter settle evenly.
- Bake for 55–60 minutes until the top turns golden and a wooden skewer inserted in the center comes out almost dry. Let the loaf rest in the pan for 10–15 minutes, then transfer it to a rack to cool completely.
How to Serve Cranberry Walnut Bread
This bread is quite versatile. It works for both sweet and savory serving ideas. The dense texture of whole wheat flour and the gentle tartness of cranberries pair well with a wide range of foods.
Here are a few serving ideas that work well:
- With salted butter while the bread is still warm. The butter softens and highlights the nutty flavor.
- With cream cheese, where the tart cranberries balance the creamy texture.
- Lightly toasted, which makes the walnuts slightly crunchier and the crust deeper in flavor.
- With honey or maple syrup if you prefer a sweeter version.
- With a slice of aged cheddar, where the sharp cheese pairs well with the berries.
Interestingly, the flavor often improves the next day. The cranberries soften slightly overnight, and the walnuts become more noticeable in the texture. Because of that, we sometimes bake this loaf in the evening and cut into it the next morning.
4. Sweet Potato Pecan Bread
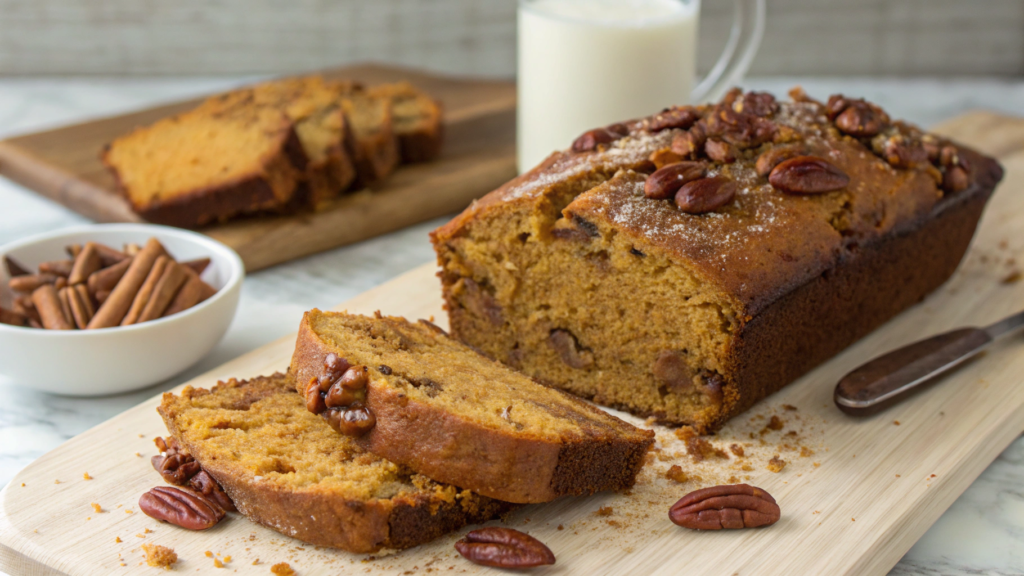
Sweet potatoes behave a little differently in baking compared to pumpkin. They are denser and naturally sweeter, which makes the batter richer and more flavorful. In some recipes, sweet potato puree can even replace part of the fat in the batter.
Sweet potatoes are valued not only for flavor. They contain beta-carotene, potassium, and dietary fiber, and even after roasting some of these nutrients remain. Because of that, sweet potatoes are often used in baking — they add softness to the crumb while also increasing the nutritional value of the bread.
Pecans make this loaf even more interesting. They bring a light richness and a pleasant crunch. Pecans also contain monounsaturated fats and natural phenolic compounds, which are known for their antioxidant properties.
The result is a loaf that feels aromatic, satisfying, and filling enough to work as a small snack.
Ingredients
For a 9×5 inch loaf pan:
- 1 cup mashed sweet potato (about 240 g sweet potato puree)
- 1 ¾ cups all-purpose flour (210 g flour)
- ¾ cup brown sugar (150 g brown sugar)
- ½ cup vegetable oil (120 ml vegetable oil)
- 2 large eggs
- ¼ cup milk (60 ml milk)
- 1 tsp vanilla extract
- 1 tsp baking soda
- ½ tsp baking powder
- ½ tsp salt
- 1 tsp cinnamon
- ¼ tsp nutmeg
Add-in:
- ¾ cup chopped pecans (90 g pecans)
Sweet potatoes work best in this recipe if they are roasted ahead of time. Roasting concentrates their flavor and sweetness more than boiling does. Simply cut the potatoes in half and roast them for about 40 minutes at 375°F (190°C) until the flesh becomes soft. After cooling, the sweet potato easily turns into puree with a regular fork.
Once the puree is ready, the batter comes together quickly.
Preparation
- Preheat the oven to 350°F (175°C) and prepare a 9×5 inch loaf pan. Lightly grease the pan with oil or line it with parchment paper so the baked loaf releases easily.
- In a large bowl combine the sweet potato puree, vegetable oil, and brown sugar. Whisk for about a minute until the mixture becomes thick and smooth.
- Add the eggs one at a time, mixing well after each addition. Then pour in the milk and vanilla extract. The batter will loosen slightly and become smoother.
- In a separate bowl combine flour, baking soda, baking powder, salt, cinnamon, and nutmeg. Stir the dry mixture so the spices distribute evenly.
- Gradually add the dry ingredients into the wet mixture. Stir gently with a spatula until the flour disappears. The batter should look thick and slightly creamy.
- Fold in the chopped pecans. Leaving a few slightly larger pieces can add a pleasant crunch in the finished bread.
- Pour the batter into the prepared pan and smooth the top with a spatula. If you like, sprinkle a few extra pecan pieces over the surface.
- Bake for 50–60 minutes until the top turns a deep golden color. Check doneness with a wooden skewer — it should come out almost dry. Let the loaf rest in the pan for about 10 minutes, then transfer it to a rack to cool completely.
How to Serve Sweet Potato Pecan Bread
This bread has a naturally mild sweetness, which makes it easy to pair with both simple and richer toppings.
Here are a few serving ideas that work well:
- With salted butter, which softens slightly and highlights the nutty flavor.
- With cream cheese for a smooth, creamy contrast.
- Lightly toasted so the pecans become more fragrant and slightly crisp.
- With maple syrup if you want to deepen the warm flavor notes.
- With thick yogurt and extra nuts for a filling breakfast option.
This loaf also holds its structure well and stays soft the next day. Sweet potato helps retain moisture, while the pecans add texture, so the slices feel dense without becoming heavy.
5. Cinnamon Swirl Maple Bread
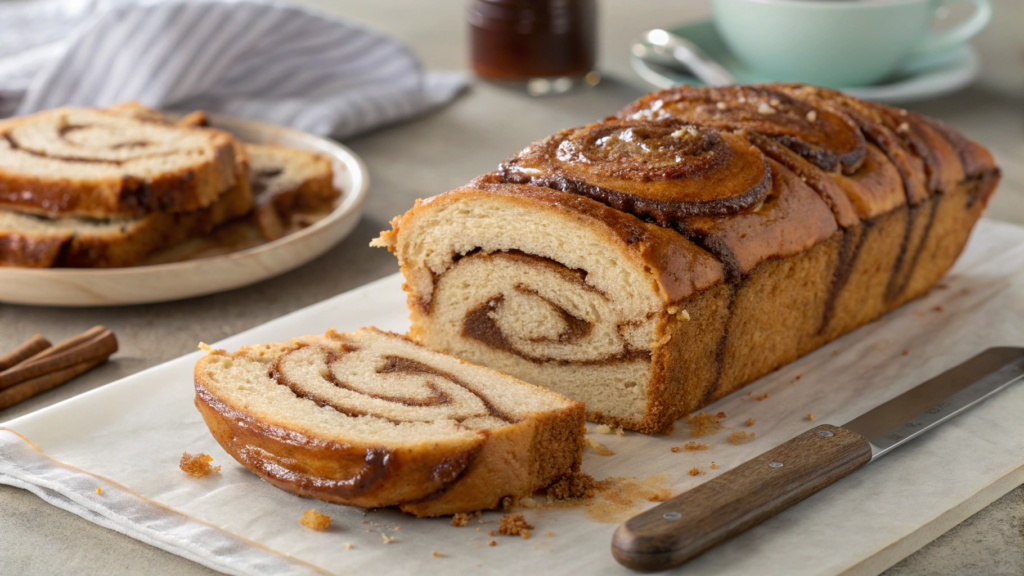
Cinnamon Swirl Maple Bread uses maple syrup in the batter, which adds a gentle caramel sweetness and enhances the aroma of the cinnamon swirl inside the loaf. When sliced, the bread reveals a beautiful spiral pattern, and the flavor lands somewhere between a spiced breakfast pastry and a warm homemade weekend treat.
Maple syrup behaves a little differently than regular sugar in baking. It brings light caramel and woody notes, and it still contains small amounts of minerals such as manganese and zinc. Because of this, batters made with maple syrup often taste deeper and more aromatic.
Cinnamon is responsible for the warm, familiar spice aroma in this bread. The spice contains natural compounds that create its recognizable fragrance and give the loaf that classic bakery scent.
Ingredients
For a 9×5 inch loaf pan:
- 2 cups all-purpose flour (240 g flour)
- ½ cup maple syrup (120 ml maple syrup)
- ¼ cup brown sugar (50 g brown sugar)
- ½ cup melted butter (115 g butter)
- 2 large eggs
- ½ cup milk (120 ml milk)
- 1 tsp vanilla extract
- 1 tsp baking powder
- ½ tsp baking soda
- ½ tsp salt
For the cinnamon layer:
- ⅓ cup brown sugar (65 g brown sugar)
- 1 tbsp cinnamon
- 1 tbsp melted butter
What makes this loaf different from many quick breads is the cinnamon swirl inside the crumb. The batter is layered in the pan, and a mixture of sugar and cinnamon is spread between the layers. As the bread bakes, this filling turns into a fragrant spiral.
Preparation
- Preheat the oven to 350°F (175°C) and prepare a 9×5 inch loaf pan. Lightly grease it with butter or line it with parchment paper so the loaf releases easily after baking.
- In a large bowl combine the melted butter, maple syrup, and brown sugar. Whisk for about a minute until the mixture becomes smooth and slightly thick.
- Add the eggs one at a time, mixing well after each addition. Then pour in the milk and vanilla extract. The batter will loosen slightly and take on a light caramel color.
- In another bowl combine flour, baking powder, baking soda, and salt. Stir the dry ingredients so the leavening agents distribute evenly.
- Gradually add the dry mixture into the wet ingredients. Stir gently with a spatula until the flour disappears. The batter should be thick but still pourable.
- Prepare the cinnamon layer by mixing brown sugar, cinnamon, and melted butter until the mixture resembles slightly damp sand.
- Pour half of the batter into the prepared pan. Spread the cinnamon mixture evenly over the surface. Then carefully pour the remaining batter on top and smooth the surface lightly.
- Bake for 50–55 minutes until the top turns golden. Test doneness with a wooden skewer — it should come out almost dry. Let the loaf sit in the pan for 10–15 minutes, then transfer it to a rack to cool completely.
How to Serve Cinnamon Swirl Maple Bread
This loaf works especially well for breakfast. The cinnamon spiral makes the flavor rich enough that the toppings can stay simple.
Here are a few serving ideas:
- Lightly toasted with a small amount of butter. The butter melts into the crumb and brings out the cinnamon aroma.
- With soft cream cheese, which adds a creamy contrast to the sweetness.
- With fresh pear or apple slices, where the fruit’s brightness pairs well with the maple notes.
- With a spoon of thick yogurt for a more filling breakfast.
- With a cup of strong coffee or spiced tea, where the cinnamon aroma becomes even more noticeable.
Once the loaf cools, the cinnamon swirl inside the bread becomes more defined. Each slice reveals the spiral pattern, giving the loaf its recognizable look and warm spiced flavor.
6. Rustic Sourdough with Autumn Herbs
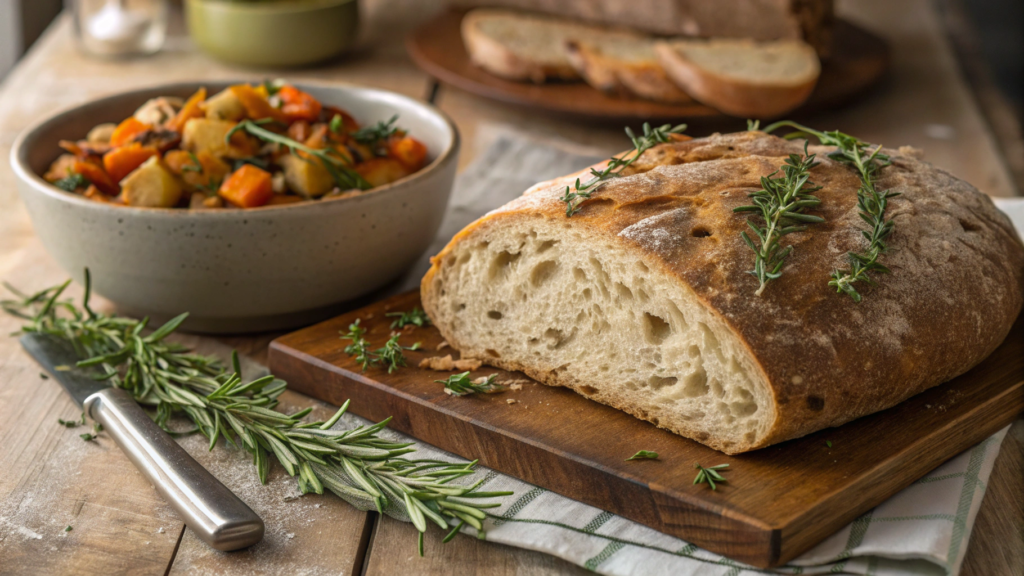
This recipe skips sugar, glaze, and sweet spices. The base relies on natural sourdough starter, flour, and fresh herbs. Bread like this usually shows up on the table next to soups, stewed vegetables, or cheese boards.
Sourdough bread differs from quick breads not only in flavor. When dough ferments with a starter, lactic acid bacteria begin to work inside it. They slowly break down some of the sugars and proteins in the flour, which gives the bread a deeper taste and a mild tang.
There is another interesting detail. During long fermentation, the dough also reduces part of the phytic acid naturally present in grains. This compound can interfere with the absorption of certain minerals, so fermentation helps make those minerals more available.
Ingredients
For one round loaf:
- 3 cups bread flour (360 g bread flour)
- 1 ¼ cups water (300 ml water)
- ½ cup active sourdough starter (120 g starter)
- 1 ½ tsp salt
- 1 tbsp olive oil
Autumn herbs:
- 1 tbsp chopped fresh rosemary
- 1 tbsp chopped thyme
- 1 tsp chopped sage
For bread like this, flour with a higher protein content works best. It helps create a strong dough structure. We often use King Arthur Unbleached Bread Flour, because it performs consistently when working with sourdough.
Before starting, make sure the sourdough starter is active. Usually fresh flour and water are added to the starter about 4–6 hours before baking. Once it begins bubbling actively and increases in volume, it’s ready to use in the dough.
The herbs should be chopped fairly small. This helps them distribute evenly through the dough without tearing its structure.
Preparation
- In a large bowl combine the water and active sourdough starter. Stir with a spoon until the starter dissolves and the liquid becomes slightly cloudy.
- Add the bread flour and mix until a rough dough forms. At this stage there is no need to knead. The goal is simply to hydrate all the flour. Cover the bowl and let the dough rest for 30 minutes. This stage is called autolyse, and it helps the flour begin developing gluten.
- After the rest, add the salt and olive oil. Start gently kneading the dough with your hands directly in the bowl. Usually 3–4 minutes is enough for the dough to become smoother and more elastic.
- Fold in the chopped rosemary, thyme, and sage. Try to distribute the herbs evenly by stretching the dough slightly and folding it over itself several times.
- Cover the bowl and let the dough go through its first fermentation for 3–4 hours at room temperature. Every 30–40 minutes, perform one fold: gently stretch the dough and fold it toward the center. This strengthens the structure.
- Once the dough has increased by roughly one and a half times, transfer it to a lightly floured surface and shape it into a round loaf. Work gently to keep the air bubbles inside the dough.
- Place the shaped dough into a proofing basket or a bowl lined with a towel. Cover and allow the dough to proof for 1–2 hours, until it expands slightly again.
- Preheat the oven to 475°F (245°C). Transfer the loaf to a baking sheet or cast iron pot, score the surface with a shallow cut, and bake for 35–40 minutes until the crust becomes deep golden and crisp.
After baking, the bread needs time to stabilize. Moisture continues redistributing inside the loaf, so it’s best to wait 30–40 minutes before cutting.
Once fully cooled, the crust becomes firm and slightly crisp, while the interior stays soft and aromatic thanks to the herbs.
How to Serve Rustic Herb Sourdough
This bread often works best as the base for simple savory meals. The flavor pairs well with rich and salty foods.
Here are a few combinations that work particularly well:
- With thick vegetable soup, especially pumpkin or lentil soup.
- With olive oil and a pinch of sea salt to highlight the herbal flavor.
- With soft cheeses such as brie or camembert.
- With roasted vegetables, like squash or eggplant.
- With white bean spread or hummus, where the rosemary aroma stands out clearly.
Bread like this also makes a great base for open-faced toasts. A thick piece, a drizzle of olive oil, a slice of cheese, and a few fresh thyme leaves can turn into a simple but satisfying savory bite.
7. Pear and Cardamom Quick Bread
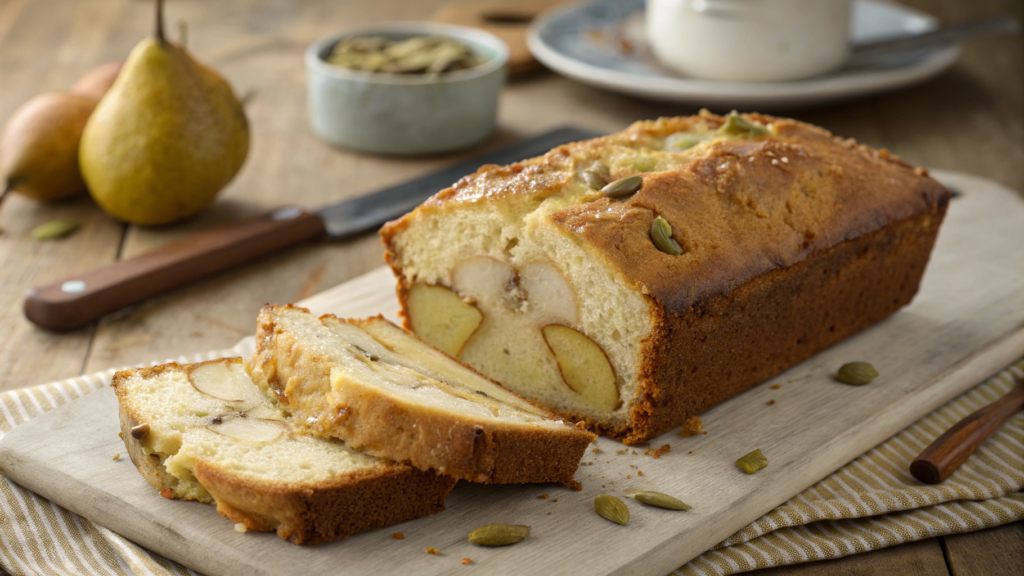
Pear and Cardamom Quick Bread combines juicy pears with the warm aroma of cardamom. The pears bring moisture and softness to the crumb, while the spice adds a fragrant note that doesn’t often appear in classic fruit breads. The result is a tender loaf with gentle fruit sweetness and a warm spice character.
Pears behave a little differently in batter than apples. They contain more moisture, so during baking they soften and become almost creamy. Because of that, the loaf stays especially moist and soft. Pears also contain soluble fiber and natural polyphenols, which remain present even after baking.
Cardamom plays a key role in this recipe. The spice is widely used in Scandinavian and Middle Eastern baking because of its strong aroma. That fragrance comes from essential oils and natural aromatic compounds found in the spice.
Together with pears, the flavor becomes soft, warm, and noticeably more complex than in many typical fruit breads.
Ingredients
For a 9×5 inch loaf pan:
- 2 cups all-purpose flour (240 g flour)
- ¾ cup sugar (150 g sugar)
- ½ cup brown sugar (100 g brown sugar)
- ½ cup vegetable oil (120 ml vegetable oil)
- 2 large eggs
- ½ cup milk (120 ml milk)
- 1 tsp vanilla extract
- 1 tsp baking powder
- ½ tsp baking soda
- ½ tsp salt
- 1 tsp ground cardamom
- ½ tsp cinnamon
Fruit portion:
- 2 medium ripe pears, diced (about 250–300 g pears)
Before starting, the pears should be peeled and diced into small cubes. Larger chunks may sink toward the bottom of the loaf during baking.
For the best flavor, it helps to use freshly ground cardamom or a high-quality ground version. The spice is quite aromatic, so increasing the amount is usually unnecessary. It should complement the pears rather than overpower them.
Preparation
- Preheat the oven to 350°F (175°C) and prepare a 9×5 inch loaf pan. Lightly grease it with oil or line it with parchment paper so the loaf releases easily after baking.
- In a large bowl combine the vegetable oil, white sugar, and brown sugar. Whisk for about a minute until the mixture becomes smooth and slightly lighter.
- Add the eggs one at a time, mixing well after each addition. Then pour in the milk and vanilla extract so the batter becomes smoother and slightly thinner.
- In another bowl combine flour, baking powder, baking soda, salt, cardamom, and cinnamon. Stir the dry ingredients so the spices distribute evenly.
- Gradually add the dry mixture into the wet ingredients. Stir gently with a spatula until the flour disappears. The batter should be thick and creamy.
- Add the diced pears and fold them carefully into the batter. Try to distribute the fruit evenly so each slice contains a few pieces.
- Pour the batter into the prepared pan and smooth the surface. For a slightly deeper crust, you can sprinkle a small amount of brown sugar over the top.
- Bake for 50–55 minutes until the top becomes golden. Test doneness with a wooden skewer — it should come out almost dry. Let the loaf rest in the pan for about 10 minutes, then transfer it to a rack to cool completely.
How to Serve Pear and Cardamom Bread
This loaf works well for light breakfasts or afternoon tea. The pears keep the flavor gentle, while cardamom adds a subtle spiced depth.
A few combinations work especially well:
- With soft butter, which melts slightly into the warm crumb.
- With cream cheese, where the creamy texture balances the fruit sweetness.
- With thick Greek yogurt and honey for a more filling breakfast.
- With thin slices of fresh pear to highlight the fruit flavor.
- With a cup of black tea or coffee, where the cardamom aroma becomes more noticeable.
As the bread cools, the pear pieces become especially soft and juicy. The cardamom aroma grows slightly stronger, and the loaf develops a warm bakery fragrance.
The crumb remains tender and lightly moist thanks to the fruit, making the bread suitable both for breakfast and as a simple dessert later in the day.
8. Chocolate Chip Zucchini Bread
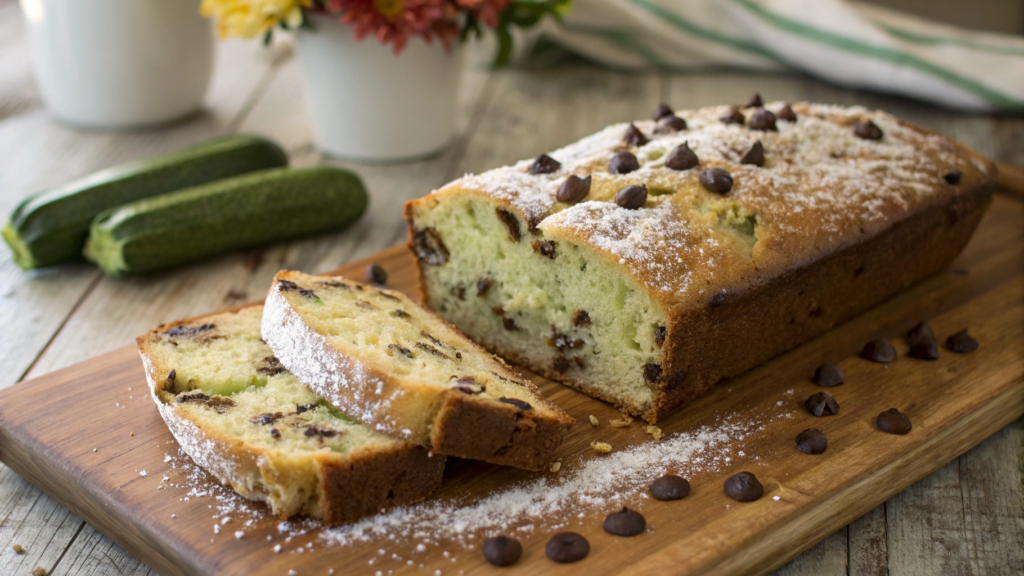
Chocolate Chip Zucchini Bread combines grated zucchini with chocolate chips. The zucchini keeps the crumb soft and moist, while the chocolate adds sweetness and depth. The result is a loaf that easily works both as a light dessert and as a quick snack.
Zucchini contains a lot of water, which helps the batter stay soft during baking and prevents the bread from drying out too quickly. It also contains vitamin C, potassium, and dietary fiber, making it a useful ingredient in many baked goods.
Chocolate adds contrast to the flavor. It gives the bread a richer taste and a slightly dessert-like character. Cocoa is also known for containing flavanols — natural compounds with antioxidant properties.
The final combination feels interesting and balanced: a soft vegetable-based bread with noticeable chocolate notes.
Ingredients
For a 9×5 inch loaf pan:
- 2 cups all-purpose flour (240 g flour)
- ¾ cup sugar (150 g sugar)
- ¼ cup brown sugar (50 g brown sugar)
- ½ cup vegetable oil (120 ml vegetable oil)
- 2 large eggs
- ½ cup milk (120 ml milk)
- 1 tsp vanilla extract
- 1 tsp baking soda
- ½ tsp baking powder
- ½ tsp salt
- 1 tsp cinnamon
Main additions:
- 1 ½ cups grated zucchini (about 180–200 g zucchini)
- ¾ cup chocolate chips (130 g chocolate chips)
Before mixing the batter, the zucchini should be grated on a coarse grater. The peel usually stays on — it is soft and barely noticeable in the finished loaf. If the zucchini releases a lot of liquid, it can be lightly squeezed, but removing all the moisture is not necessary. That moisture is exactly what helps keep the bread soft.
Preparation
- Preheat the oven to 350°F (175°C) and prepare a 9×5 inch loaf pan. Lightly grease the pan with oil or line it with parchment paper so the loaf releases easily after baking.
- In a large bowl combine the vegetable oil, white sugar, and brown sugar. Whisk for about a minute until the mixture becomes smooth.
- Add the eggs one at a time, mixing well after each addition. Then pour in the milk and vanilla extract so the batter becomes smoother and slightly thinner.
- In another bowl combine flour, baking soda, baking powder, salt, and cinnamon. Stir the dry ingredients so the leavening agents distribute evenly through the flour.
- Gradually add the dry mixture into the wet ingredients while stirring gently with a spatula. The batter should become thick and smooth.
- Add the grated zucchini and mix it into the batter. The vegetable blends in quickly and softens the texture of the dough.
- Fold in the chocolate chips, distributing them evenly throughout the batter so most slices contain small pockets of chocolate.
- Pour the batter into the prepared pan and smooth the surface. Bake for 50–55 minutes until the top becomes deep golden. Test the center with a wooden skewer — it should come out almost dry. Let the loaf rest in the pan for about 10 minutes, then transfer it to a rack to cool completely.
How to Serve Chocolate Chip Zucchini Bread
This loaf works well for quick desserts and simple snacks. Because the chocolate already gives it a rich flavor, the additions can stay fairly minimal.
A few serving ideas:
- With a small amount of butter, which highlights the chocolate flavor.
- With peanut butter or almond butter, where the nutty texture pairs well with chocolate.
- Lightly toasted, allowing the chocolate chips to soften slightly inside the bread.
- With thick yogurt for a more filling breakfast option.
- With a cup of coffee or hot cocoa, where the chocolate flavor becomes even more noticeable.
This loaf also slices neatly and works well alongside tea or coffee. The chocolate chips give each piece a rich bite, so even a small serving feels satisfying enough for a quick dessert.
9. Brown Butter Banana Nut Bread
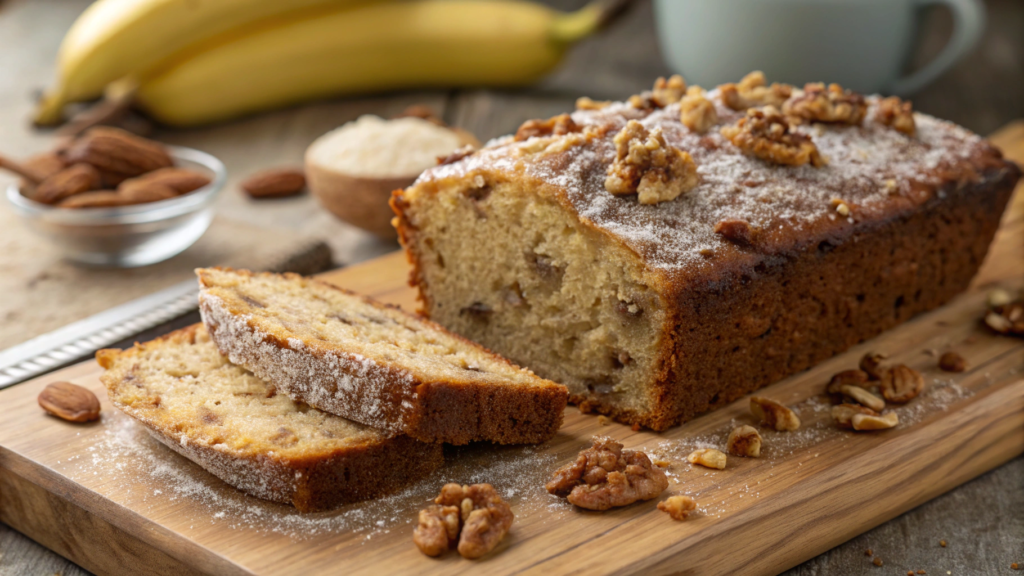
Brown Butter Banana Nut Bread is a variation of classic banana bread that uses browned butter. It gives the batter a deeper nutty and caramel-like aroma, making the flavor noticeably richer than in a standard banana loaf.
Very ripe bananas work especially well for baking. As bananas darken, part of their starch converts into natural sugars, which makes the bread sweeter and more aromatic. Bananas also contain potassium, vitamin B6, and dietary fiber, which is why they often appear in baked recipes.
Browned butter adds another layer of flavor. When butter is heated, it develops a nutty and lightly caramelized aroma. That fragrance deepens the flavor of the batter and gives the bread a more complex character.
Ingredients
For a 9×5 inch loaf pan:
- 2 cups all-purpose flour (240 g flour)
- ¾ cup brown sugar (150 g brown sugar)
- ½ cup unsalted butter (115 g butter)
- 2 large eggs
- 3 ripe bananas, mashed (about 300 g banana puree)
- ¼ cup milk (60 ml milk)
- 1 tsp vanilla extract
- 1 tsp baking soda
- ½ tsp baking powder
- ½ tsp salt
- 1 tsp cinnamon
Add-in:
- ¾ cup chopped walnuts (90 g walnuts)
Before mixing the batter, it helps to prepare two key ingredients: banana puree and browned butter. The bananas can simply be mashed with a fork until they form a smooth, creamy mixture. The butter should be heated in a small saucepan until it turns golden and develops a light nutty aroma.
Once the butter is ready, the batter comes together quickly.
Preparation
- Preheat the oven to 350°F (175°C) and prepare a 9×5 inch loaf pan. Lightly grease it with butter or line it with parchment paper so the loaf releases easily.
- In a small saucepan melt the butter over medium heat. Continue heating it for a few minutes until the butter becomes golden and develops a subtle nutty aroma. Remove it from the heat and allow it to cool slightly.
- In a large bowl combine the browned butter and brown sugar. Whisk for about a minute until the mixture becomes smooth.
- Add the eggs one at a time, mixing well after each addition. Then stir in the mashed bananas, milk, and vanilla extract. The mixture will become thick and fragrant.
- In a separate bowl combine flour, baking soda, baking powder, salt, and cinnamon. Stir the dry ingredients so the leavening agents distribute evenly.
- Gradually add the dry mixture into the wet ingredients. Stir gently with a spatula until the flour disappears and the batter becomes thick and creamy.
- Fold in the chopped walnuts, distributing them evenly through the batter to add texture.
- Pour the batter into the prepared pan and smooth the surface. Bake for 55–60 minutes until the top turns golden brown. Check doneness with a wooden skewer — it should come out almost dry. Let the loaf rest in the pan for 10–15 minutes, then transfer it to a rack to cool completely.
How to Serve Brown Butter Banana Nut Bread
The banana base and walnuts already create a rich flavor, so additional toppings can stay simple.
A few combinations work especially well:
- With soft butter, which highlights the caramel notes from the browned butter.
- With almond butter or peanut butter for a more filling breakfast.
- With thick Greek yogurt, where the yogurt’s tang balances the banana sweetness.
- With a drizzle of honey or maple syrup.
- With a cup of strong coffee, where the banana aroma becomes more noticeable.
This bread often appears on the table next to morning coffee or evening tea. Browned butter and ripe bananas create a deep aroma that stands out even without additional toppings. The flavor becomes rich, warm, and slightly caramel-like.
10. Chai Tea Infused Pumpkin Loaf
Chai is not a single spice but a blend of black tea and warming spices. It usually includes cinnamon, cardamom, ginger, and cloves. These ingredients give chai its deep aroma, which also works beautifully in baking.
Pumpkin plays a different role in this recipe. Pumpkin puree contains plenty of moisture and natural fiber, which helps the batter stay soft and keeps the loaf tender even after baking. Also provides beta-carotene, fiber, and potassium.
The result is a fragrant loaf with a soft texture and warm spiced chai notes throughout.
Ingredients
For a 9×5 inch loaf pan:
- 2 cups all-purpose flour (240 g flour)
- ¾ cup sugar (150 g sugar)
- ¼ cup brown sugar (50 g brown sugar)
- ½ cup vegetable oil (120 ml vegetable oil)
- 2 large eggs
- 1 cup brewed chai tea (240 ml strong chai tea)
- 1 cup pumpkin puree (240 g pumpkin puree)
- 1 tsp vanilla extract
- 1 tsp baking soda
- ½ tsp baking powder
- ½ tsp salt
Additional spices:
- 1 tsp cinnamon
- ½ tsp ground cardamom
- ¼ tsp ground ginger
- ¼ tsp ground cloves
Before preparing the batter, brew a strong cup of chai tea. A tea bag is usually steeped for about five minutes, but for baking it works better to let it steep slightly longer — around 7–8 minutes. After that, allow the tea to cool to room temperature.
Preparation
- Preheat the oven to 350°F (175°C) and prepare a 9×5 inch loaf pan. Lightly grease the pan with oil or line it with parchment paper.
- In a large bowl combine the vegetable oil, white sugar, and brown sugar. Whisk for about a minute until the mixture becomes smooth.
- Add the eggs one at a time, mixing well after each addition. Then stir in the pumpkin puree and vanilla extract until the batter becomes thick and even.
- Pour in the cooled chai tea and mix gently. The batter will loosen slightly and develop a subtle spiced aroma.
- In another bowl combine flour, baking soda, baking powder, salt, cinnamon, cardamom, ginger, and cloves. Stir the dry mixture so the spices distribute evenly.
- Gradually add the dry ingredients into the wet mixture. Stir gently with a spatula until the flour disappears and the batter becomes thick and creamy.
- Pour the batter into the prepared pan and smooth the surface. If you want a slightly stronger spice aroma, you can lightly sprinkle a little cinnamon over the top.
- Bake for 55–60 minutes until the top becomes golden brown. Check doneness with a wooden skewer — it should come out almost dry. Let the loaf sit in the pan for about 10 minutes, then transfer it to a rack to cool completely.
This bread holds its structure well and stays aromatic even on the next day.
How to Serve Chai Pumpkin Loaf
The warm chai spice flavor pairs well with simple toppings that do not overpower the spices.
Some combinations work particularly well:
- With a small amount of butter, which softens the spice flavor slightly.
- With cream cheese, adding a smooth and creamy texture.
- With a drizzle of honey, which enhances the warm spices.
- With thick yogurt for a more filling breakfast option.
- With a cup of hot chai or black tea, where the spice aroma becomes even more noticeable.
Thanks to the chai spice blend and pumpkin, this loaf carries a deep aroma. Even without extra toppings it feels like a complete baked treat that fits well for breakfast or an evening tea.
Bread Worth Baking Again
Homemade bread is often more than a dessert. It easily becomes breakfast, a quick snack, or a small addition to an evening cup of tea. Recipes also evolve naturally — different nuts, new spices, or seasonal fruit can change the flavor of the next loaf.
Over time every kitchen develops its own favorite combinations. Sometimes they are simple classics, sometimes they appear almost by accident during an experiment.If you have a favorite fall bread recipe or an interesting twist on one of these loaves, share it in the comments. It’s always interesting to see which combinations work in other kitchens and which ideas might inspire the next loaf.