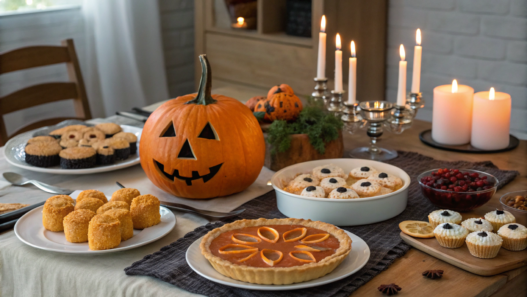

Every October, the internet is filled with ideas for Halloween cookies, cupcakes, and candy, but for some reason, dinner doesn’t get nearly as much attention. So I wanted to put together some Halloween dinner ideas that are just as fun to eat as they are to look at.
I think you can get a little more creative than usual with a holiday dinner. Especially when you have kids at home who are happy to help with decorations, come up with spooky faces, and eagerly wait to see what will appear on the table.
All these dishes are made with familiar ingredients. I just added a little Halloween mischief to them. Sometimes, one unusual dish is enough to make an ordinary October evening memorable. And you definitely don’t need to throw a big party for that!
1. Pumpkin Stuffed Pasta Shells with Creamy Sage Sauce
Large pasta shells stuffed with pumpkin and ricotta take on a beautiful golden-orange color after baking, while the creamy sage sauce gives the dish a lovely aroma. And no artificial food coloring!
Pumpkin isn’t just a decoration in this dish, like in so many Halloween recipes. It’s a main ingredient. Its slightly sweet flavor goes wonderfully with salty Parmesan and creamy cheese.
Ingredients
Makes 4–5 servings (about 20 stuffed shells).
For the pasta shells and filling
- 20–24 large jumbo pasta shells for stuffing
- 1 cup pumpkin puree (about 240 g)
- 1 cup ricotta cheese (about 250 g)
- ½ cup grated Parmesan cheese (about 50 g)
- 1 garlic clove
- ¼ tsp ground nutmeg
- ½ tsp salt
- ¼ tsp black pepper
For the creamy sauce
- 1 cup heavy cream (240 ml)
- 2 tbsp butter (28 g)
- 6–8 fresh sage leaves
- ¼ cup grated Parmesan cheese (25 g)
- Salt and black pepper to taste
How to make pumpkin stuffed pasta shells
- Prepare the pasta. Bring a large pot of salted water to a boil and cook the shells for 2–3 minutes less than the package instructions say. They should still be slightly firm since they’ll continue cooking in the oven. Drain the water and spread the shells out on a plate so they don’t stick together.
- Mix the pumpkin filling. Combine the pumpkin puree, ricotta, Parmesan, minced garlic, and nutmeg in a bowl. Add salt and pepper. The filling should be thick enough to scoop easily with a spoon. If you’re using homemade pumpkin puree, drain off any excess liquid first.
- Make the sage sauce. Melt the butter in a small skillet over medium heat. Add the sage leaves and cook for about a minute, until fragrant. Pour in the cream, reduce the heat, and add the Parmesan. I stir it for 3–4 minutes, until the sauce thickens slightly. Don’t let it come to a hard boil.
- Stuff the shells. Preheat the oven to 375°F (190°C). Pour about a third of the sauce into the bottom of a baking dish to keep the shells from sticking and help them stay soft underneath. Use a teaspoon to fill each shell with the pumpkin mixture and arrange them open-side up. Try not to overstuff the shells, or the filling may spill out during baking.
- Bake until done. Pour the remaining sauce over the shells, cover the baking dish with foil, and bake for 20 minutes. Then remove the foil and cook for another 5–10 minutes, until the edges of the pasta are lightly browned and the filling is heated all the way through.
Tip. For this recipe, it’s better to use roasted pumpkin puree rather than puree made from boiled pumpkin. It contains less water, so the filling turns out thicker and the pumpkin flavor is more pronounced. You can also use canned pumpkin puree, but make sure it’s unsweetened and unspiced.
Before serving, I always add a few more fried sage leaves and a little Parmesan on top. The orange filling peeks out beautifully from the shells, especially on a dark plate. We often use seasonal ingredients in our fall meals, and I find dishes like this much more interesting than typical Halloween snacks. It looks festive, but it’s also a proper dinner that can feed the whole family.
2. Bloody Beet Risotto with Parmesan Shards
Blood-red risotto with sharp cheese shards looks like it was made especially for dinner in a haunted house! Regular beets give the dish its rich color, and we’ll make the crispy shards from baked Parmesan.
For risotto, I prefer using roasted beets. They’re sweeter and less watery than boiled ones. We’ll also need a special type of rice with a high starch content, which gives risotto its creamy texture without adding any cream.
Ingredients
Makes 4 servings.
For the risotto
- 1 cup Arborio rice (about 200 g)
- 2 medium red beets (about 300 g)
- 3–3½ cups vegetable broth (720–840 ml)
- 1 small onion
- 2 garlic cloves
- 2 tbsp olive oil
- 2 tbsp butter (28 g)
- ¼ cup dry white wine (60 ml)
- 1 tsp fresh lemon juice
- ½ tsp salt, or to taste
- ¼ tsp black pepper
For the Parmesan shards
- ¾ cup freshly grated Parmesan cheese (about 75 g)
How to make bloody beet risotto
- Roast the beets. Preheat the oven to 400°F (200°C). Wash the beets, wrap each one in foil, and roast for 45–60 minutes, until a knife slides easily into the flesh. Let the beets cool slightly, peel them, and blend until smooth. I add 1–2 tbsp of water if needed.
- Make the Parmesan shards. Line a baking sheet with parchment paper and spread the grated Parmesan in a thin layer. Bake at 400°F (200°C) for about 5–7 minutes, until the cheese is completely melted and lightly golden. Let it cool right on the baking sheet. Once the cheese hardens, break it into long, uneven pieces that look like shards of glass.
- Prepare the risotto base. Heat the olive oil and 1 tbsp of butter in a deep skillet. Add the finely chopped onion and cook for 4–5 minutes, until softened. Then add the minced garlic and cook for another 30 seconds. Add the dry Arborio rice and toast it for about 2 minutes, stirring constantly so the grains get coated in oil. For risotto, don’t rinse the rice beforehand, since the starch on its surface helps create that soft, creamy texture.
- Gradually add the broth. Pour in the white wine and wait until most of the liquid has evaporated. Now add the hot vegetable broth in small portions, about ½ cup (120 ml) at a time.
Stir the rice after each addition and wait until the liquid is almost absorbed. Continue for about 18–22 minutes, until the rice is tender with a slight firmness in the center. If it’s still too firm and you’ve run out of broth, add a little hot water. - Give the risotto its bloody color. When the rice is almost done, stir in the beet puree and cook everything together for another 2–3 minutes. Add the remaining tablespoon of butter, lemon juice, salt, and pepper.
The risotto should be creamy and loose enough to slowly spread across the plate. If it’s too thick, I add a little hot broth or water. - Decorate with cheese shards. Spoon the hot risotto into deep plates. Stick the large Parmesan shards upright right before serving so they don’t have time to soften from the heat of the risotto. You can scatter smaller pieces over the top. The pale cheese shards look unusual against the dark-red risotto.
To make the beet puree, I use an Immersion Hand Blender especially when I’m making a small batch and don’t want to pull out the big food processor.
Tip. Don’t add the beets at the very beginning of cooking the rice. If you stir in the puree toward the end, the color will stay more vibrant, and it’ll be easier to keep an eye on the rice as it cooks.
For Halloween, I serve this risotto on black plates. The red color of the beets looks striking against them, and the crispy Parmesan shards give the dish an unusual look even without any extra decorations. By the way, I really like the idea of using beets for holiday decorations. After all, this vegetable isn’t usually associated with Halloween, even though it’s perfect for recipes like this!
3. Monster Eyeball Meatballs in Spicy Marinara
These meatballs with eyes made from mozzarella and black olives look a little creepy, especially when they’re sitting in thick red sauce. Just what you need for Halloween! Under the melted cheese are juicy beef meatballs with garlic and Italian herbs, while the spicy tomato sauce adds a little kick.
We’ll make the eyes using small rounds of mozzarella and black olives. The cheese needs to go on at the very end of cooking, though, or it’ll melt all over the place and ruin the whole idea. And if you serve the meatballs with spaghetti, you’ve got a complete dinner for the whole family.
Ingredients
Makes 4 servings (about 16–18 meatballs).
Meatballs
- 1 lb ground beef (450 g)
- ⅓ cup breadcrumbs (about 35 g)
- 1 large egg
- 2 tbsp milk
- 2 garlic cloves
- 2 tbsp finely chopped parsley
- ½ tsp dried oregano
- ½ tsp salt
- ¼ tsp black pepper
For the spicy sauce
- 1 can crushed tomatoes, 28 oz (about 800 g)
- 1 small onion
- 2 garlic cloves
- 1 tbsp olive oil
- ½ tsp red pepper flakes
- 1 tsp dried basil
- ½ tsp salt, or to taste
For decorating
- 8–9 small mozzarella balls (about 100–125 g)
- 8–9 large pitted black olives
- A few teaspoons of tomato sauce for the red veins
How to make monster eyeball meatballs
- Prepare the meat mixture. In a large bowl, combine the breadcrumbs with the milk and let them sit for 2 minutes. Add the ground beef, egg, minced garlic, parsley, oregano, salt, and pepper. Mix everything together with your hands until combined. I try not to overmix the meat, or the meatballs turn out too dense after baking.
- Shape the meatballs. Divide the mixture into 16–18 portions and roll them into balls about 1½ inches (4 cm) in diameter. To keep the meat from sticking to your palms, lightly wet your hands with cold water. Arrange the meatballs on a baking sheet lined with parchment paper, leaving a little space between them.
- Bake the meatballs. Preheat the oven to 400°F (200°C) and bake the meatballs for 15–20 minutes. The time depends on their size. The ground beef needs to reach an internal temperature of at least 160°F (71°C). It’s better to check one of the meatballs with a kitchen thermometer rather than relying only on the color of the meat.
- Make the spicy tomato sauce. While the meatballs are baking, heat the olive oil in a deep skillet. Add the finely chopped onion and cook for 4–5 minutes, until softened. Then add the garlic and red pepper flakes, stir, and after 30 seconds, pour in the crushed tomatoes. Add the basil and salt. Lower the heat a little and let the sauce gently simmer for 12–15 minutes, stirring occasionally. If you like spicy food, you can add a little more chili.
- Make the monster eyes. Cut the small mozzarella balls in half and slice the olives into thick rounds. Place one mozzarella half, cut-side down, on each hot, cooked meatball, then add an olive slice on top. Return the baking sheet to the oven for about 1–2 minutes, just until the cheese softens slightly and holds the olive in place. Keep a close eye on it! The mozzarella should keep its rounded shape instead of melting completely.
- Put the dish together. Pour the hot tomato sauce into a wide, deep serving dish and carefully arrange the meatballs in it, eyes facing up. Use a toothpick to draw a few thin red veins on the white mozzarella with tomato sauce. Lindy is usually more careful with decorations than I am, so I can happily leave little details like these to her. Just don’t cover the eyes completely with sauce, or they won’t be easy to see.
Tip. For the eyes, it’s better to use small mozzarella balls rather than regular shredded mozzarella. Be sure to pat the cheese dry with a paper towel before using it so it doesn’t release too much moisture. And don’t leave the decorated meatballs in the hot oven for too long, or the eyes will lose their shape.
I serve these meatballs in a wide, dark bowl, leaving enough space between them so every eye is clearly visible. I think a plate of spaghetti or a few slices of toasted bread for soaking up the tomato sauce wouldn’t hurt either. That way, we get both a complete meat dinner and a fun dish for the Halloween table. Just imagine your guests fishing those huge eyeballs out of the sauce!
4. Black Squid Ink Spaghetti with Garlic Shrimp
Imagine a plate of jet-black spaghetti with pink shrimp scattered throughout, sautéed with garlic and butter. You’ve got to admit, this pasta looks a little creepy, like it came straight out of a sea monster’s kitchen! And it’s completely edible, with no artificial food coloring.
The secret behind the unusual color is cuttlefish ink, which is added to the pasta dough. It gives the spaghetti not only its black color but also a subtle seafood flavor. I suggest using ready-made squid ink spaghetti so you don’t have to make the dough from scratch. For the sauce, we’ll use garlic, olive oil, butter, a little lemon, and fresh parsley.
Ingredients
Makes 4 servings.
- 12 oz black squid ink spaghetti (340 g)
- 1 lb large raw shrimp, peeled (450 g)
- 4 garlic cloves
- 3 tbsp olive oil
- 2 tbsp butter (28 g)
- ¼ cup dry white wine (60 ml)
- 2 tbsp fresh lemon juice
- ¼ tsp red pepper flakes
- 2 tbsp chopped fresh parsley
- ½ tsp salt, or to taste
- ¼ tsp black pepper
- 1 lemon for serving
How to make black squid ink spaghetti with garlic shrimp
- Prepare the shrimp. If you’re using frozen shrimp, thaw them in the refrigerator ahead of time. Remove the shells and devein the shrimp, then pat them dry with paper towels. This is important because excess moisture keeps them from browning nicely. Sprinkle the shrimp with a little salt and black pepper.
- Cook the black spaghetti. Bring a large pot of salted water to a boil. Add the spaghetti and cook according to the package instructions until al dente. Before draining, be sure to save about ½ cup (120 ml) of the cooking water. We’ll need it for the sauce. There’s no need to rinse the pasta after cooking.
- Sauté the shrimp. While the spaghetti is cooking, heat 2 tbsp of olive oil in a wide skillet over medium heat. Arrange the shrimp in a single layer and cook for about 1–2 minutes per side, depending on their size. They should turn pink on the outside and become opaque and firm on the inside.
I try not to leave them on the heat any longer than necessary because overcooked shrimp quickly turn rubbery. Transfer the cooked shrimp to a plate. - Make the garlic sauce. Lower the heat a little more and add the remaining tablespoon of olive oil and the butter to the same skillet. Add the thinly sliced garlic and red pepper flakes. Cook for about 30–60 seconds, stirring constantly, until the garlic becomes fragrant but doesn’t burn.
Pour in the white wine and let it simmer for 1–2 minutes. Then add the lemon juice and ¼ cup (60 ml) of the reserved pasta water. - Toss the pasta with the sauce. Add the cooked spaghetti to the skillet and gently toss with tongs for about a minute over low heat. The butter and starchy pasta water should create a light sauce that coats the spaghetti.
If the pasta seems a little dry, add some more of the reserved water.
I use tongs to toss it, so the long spaghetti strands are less likely to break and the garlic gets distributed more evenly. - Finish and serve. Return the cooked shrimp to the skillet, add the parsley, and gently toss everything together to warm the shrimp through. Divide the spaghetti among the plates, arranging it into tall nests, and place a few shrimp on top of each serving. Garnish with lemon slices and a little fresh parsley.
For this recipe, you’ll need Squid Ink Spaghetti Pasta. Be sure to check the ingredients before buying, since some brands use regular food coloring instead.
Tip. Don’t add too much creamy sauce or grated cheese to the pasta. They can hide the beautiful black color of the spaghetti. A little garlic butter with lemon is enough to bring out the flavor of the shrimp and keep the dish looking unusual.
Black pasta looks even more striking on white ceramic plates, and the pink shrimp really stand out against it. I think this is a great opportunity to add some seafood to our holiday menu, since it rarely gets much attention among all the meat dishes and pumpkin appetizers.
I think you’ve already noticed that, thanks to its unusual black color, this spaghetti fits perfectly into the Halloween theme without any extra decorations.
5. Jack-O-Lantern Stuffed Bell Peppers
Orange bell peppers with carved faces look just like the famous jack-o’-lantern pumpkins. Inside each pepper, there’s a filling of ground beef, rice, tomatoes, and melted cheese. You can carve triangular eyes, a nose, and a scary mouth into each pepper, and the kids will love coming up with different faces for our little lanterns.
For this recipe, I choose large orange bell peppers with wide, relatively flat bottoms. They need to stand upright in the baking dish, and their sides should be wide enough to carve the faces easily.
Ingredients
Makes 4 servings.
- 4 large orange bell peppers
- 1 lb ground beef (450 g)
- 1 cup cooked rice (about 160–180 g)
- 1 small onion
- 2 garlic cloves
- 1 cup tomato sauce (240 ml)
- 1 cup shredded cheddar cheese (about 115 g)
- 1 tbsp olive oil
- 1 tsp sweet paprika
- ½ tsp dried oregano
- ½ tsp salt, or to taste
- ¼ tsp black pepper
- ¼ cup water (60 ml) for baking
How to make jack-o’-lantern stuffed peppers
- Prepare the peppers. Wash the peppers and cut off the tops about ½ inch (1–1.5 cm) below the stems. Don’t throw them away, they’ll become the lids for our lanterns. Remove the seeds and white membranes, being careful not to damage the sides. If a pepper doesn’t stand up well, you can trim its bottom just a little without cutting all the way through.
- Carve the Halloween faces. Using a small, sharp knife, cut two triangular eyes, a nose, and a mouth with teeth into the side of each pepper. I prefer to draw the outlines with a food-safe marker first, then carefully cut along the lines. Don’t make the openings too large, or the filling might fall out. Kids can come up with the faces, but adults should do the carving.
- Cook the meat filling. Heat the olive oil in a skillet over medium heat. Sauté the finely chopped onion for about 4 minutes, then add the ground beef. Break it into small pieces with a spatula and cook for about 7–9 minutes, until the meat is fully cooked.
At the end, add the minced garlic, paprika, oregano, salt, and pepper. The ground beef should reach an internal temperature of 160°F (71°C). - Mix the filling with the rice. Pour the tomato sauce into the skillet with the meat, add the cooked rice, and stir. Let the mixture cook over low heat for 3–4 minutes to reduce some of the excess liquid. Then remove the skillet from the heat and stir in half of the shredded cheddar.
The filling should stay moist but not too runny. Otherwise, it will start leaking through the carved faces. - Stuff the peppers. Preheat the oven to 375°F (190°C). Place the peppers upright in a baking dish and fill them with the meat mixture almost to the top.
Don’t pack the filling too tightly. Sprinkle the remaining cheddar on top, then cover each pepper with its own lid. Pour ¼ cup of water into the bottom of the baking dish to keep the peppers from drying out while baking. - Bake the jack-o’-lanterns. Cover the baking dish with foil, trying not to press it against the pepper lids, and bake for about 25 minutes. Then remove the foil and cook for another 10–15 minutes.
The peppers should become tender but still hold their shape, and the cheese inside should be completely melted.
I check if they’re done with a knife from the back of each pepper so I don’t damage the carved faces.
Tip. Don’t bake the peppers for too long. If you leave them in the oven too long, the sides will become very soft, and the faces might lose their shape. Orange peppers also darken a little after baking. That’s why I choose fairly firm peppers and leave the skins on.
You can arrange these edible jack-o’-lanterns on a large serving platter, with their faces turned toward your guests. The tops with their green stems complete the look, making our stuffed peppers look just like little pumpkin lanterns.
And what I really appreciate is that, as always, we’re using vegetables from our own harvest and making a complete Halloween dinner.
6. Creepy Cauliflower Brain Dip
Have you ever noticed how the tightly packed, wrinkled florets of cauliflower almost seem made for Halloween experiments in the kitchen? Today, we’re going to turn an ordinary cauliflower into an edible “brain” with a creamy cheese dip inside and red veins made from tomato sauce on the outside.
For this recipe, we’ll need a whole head of cauliflower, which we’ll boil briefly before carefully removing part of the center to make room for the filling. Inside, there’ll be a thick dip made with cream cheese, cheddar, and sun-dried tomatoes. You can enjoy it with pieces of the cauliflower itself, crackers, or fresh vegetables.
Ingredients
Makes 4–6 servings.
For the base
- 1 medium head of cauliflower (about 2 lb / 900 g)
- 1 tsp salt for the water
Cheese dip
- 8 oz cream cheese (225 g)
- ½ cup shredded sharp cheddar (about 55 g)
- ⅓ cup sour cream (80 g)
- 3 tbsp finely chopped oil-packed sun-dried tomatoes
- 1 small garlic clove
- 1 tsp lemon juice
- ¼ tsp smoked paprika
- Salt and black pepper to taste
Decorating and serving
- 2–3 tbsp thick tomato sauce
- Crackers, carrot sticks, or cucumber slices
How to make a cauliflower brain with cheese dip
- Prepare the cauliflower. Remove the green leaves and trim the bottom of the stem a little, trying to keep all the florets attached. I choose a head with tightly packed florets and no large gaps between them. That way, our brain will look more like one solid piece.
- Boil the cauliflower. Bring a large pot of salted water to a boil and carefully lower the whole head of cauliflower into it. Cook for about 8–11 minutes, until the florets are tender enough to pierce with a fork but still hold their shape.
Lift the cauliflower out with a slotted spoon, let the water drain off, and allow it to cool completely. Don’t overcook it, or the florets will start falling apart when you cut out the center. - Make an edible bowl. Place the cooled cauliflower stem-side down. Using a small knife, carefully cut out some of the florets from the center to make a bowl for the cheese dip. Leave fairly thick sides and a bottom, about 1½–2 inches (4–5 cm), so the cauliflower doesn’t fall apart.
Set the pieces you cut out aside for serving, and place the cauliflower in a small bowl to keep it from tipping over. - Make the cheese dip. Take the cream cheese out of the refrigerator ahead of time so it can soften. Combine it with the sour cream, shredded cheddar, minced garlic, lemon juice, and smoked paprika.
Add the finely chopped sun-dried tomatoes, salt, and black pepper. Mix until well combined. I prefer leaving little pieces of tomato in the dip because they add a nice tanginess and make the flavor richer. - Fill the cauliflower with dip. Spoon the cheese mixture into the hollowed-out center of the cauliflower and smooth it with a spoon. If all the dip doesn’t fit, you can serve the rest in a small bowl on the side. Since cauliflower itself has a pretty mild flavor, it goes nicely with such a rich, cheesy filling.
- Draw the bloody veins. Transfer the thick tomato sauce to a small piping bag with a narrow opening and draw a few uneven red lines between the florets. There’s no need to cover the whole cauliflower! A few branching veins are enough to make the surface look like a brain from an old horror movie. Arrange the crackers, fresh vegetables, and reserved cauliflower pieces around it.
Tip. Be sure to dry the boiled cauliflower well before filling it. Water trapped between the florets can run onto the plate and thin out the cheese dip. You can also make the filling ahead of time and keep it in the refrigerator for up to 24 hours. Then all that’s left to do before serving is fill the cauliflower and draw the veins.
This dish looks pretty creepy on the table, even though there’s just a regular cheese dip with vegetables inside. For me, it’s another reason to use cauliflower for something other than casseroles and side dishes.
I can usually trust Lindy to draw the bloody veins while I arrange the vegetables and crackers around the cauliflower. It’s always interesting to see which guest will be the first to break off a piece of this “brain” and try what’s inside.
7. Witch’s Cauldron Chili with Jalapeño Skulls
What usually bubbles away in a witch’s cauldron? This time, we’re making thick, meaty chili with beans, tomatoes, and spicy seasonings, with little green skulls made from jalapeño peppers sitting on top. You’ve got to admit, it looks a lot more interesting than regular chili.
It’s a classic combination of ground beef, kidney beans, tomatoes, and spices. The chili turns out thick, with a rich, meaty flavor and a little heat. For the decorations, we’ll take halves of fresh jalapeños, fill them with cream cheese, and make eyes, noses, and mouths from small pieces of cherry tomatoes.
Ingredients
Makes 6 servings.
For the meat chili
- 1 lb ground beef (450 g)
- 2 cans red kidney beans, 15 oz each (425 g each)
- 1 can crushed tomatoes, 28 oz (about 800 g)
- 1 small onion
- 1 red bell pepper
- 3 garlic cloves
- 2 tbsp tomato paste
- 1 tbsp olive oil
- 1 cup beef broth (240 ml)
- 1 tbsp chili powder
- 1 tsp ground cumin
- 1 tsp smoked paprika
- ½ tsp dried oregano
- ½ tsp salt, or to taste
- ¼ tsp black pepper
For the jalapeño “skulls”
- 3 large fresh jalapeño peppers
- 3 oz cream cheese (about 85 g)
- 1 tbsp sour cream
- 4–6 cherry tomatoes
How to make witch’s cauldron chili with jalapeño skulls
- Prepare the vegetables. Peel the onion and garlic, then finely chop them. Remove the seeds from the bell pepper and cut it into small cubes. Drain the beans in a colander and rinse them under running water.
For chili, I use canned beans since they’re already cooked and don’t need soaking or hours of cooking. - Brown the meat and vegetables. Heat the olive oil in a large, heavy-bottomed pot. Add the onion and bell pepper and sauté for about 5 minutes, until softened. Then add the ground beef and cook for 7–9 minutes, breaking it into small pieces with a wooden spatula.
Once the meat is browned and fully cooked, add the garlic and stir. The safe internal temperature for ground beef is 160°F (71°C). - Add the spices and tomatoes. Add the chili powder, cumin, smoked paprika, oregano, salt, and black pepper. Stir and let the spices heat through for about 30 seconds. Then add the tomato paste and cook for another minute. Pour in the crushed tomatoes and beef broth, add the beans, and mix everything well.
- Let the chili simmer. Bring the contents of the pot to a gentle boil, then reduce the heat and cook uncovered for about 30–40 minutes. Stir occasionally, especially toward the end as the sauce thickens.
I don’t like chili that’s too watery, so I let some of the liquid cook off. The finished dish should be like a thick stew, with the pieces of meat and beans clearly visible. - Prepare the jalapeños. While the chili is cooking, wash the peppers and cut each one in half lengthwise. Remove the seeds and white membranes. It’s best to wear gloves when handling jalapeños so the spicy juices don’t accidentally get on your skin or in your eyes.
- Make the skulls. Mix the softened cream cheese with the sour cream until smooth. Fill the jalapeño halves with the cheese mixture and smooth the surface with a spoon. Cut the cherry tomatoes into small pieces and use them to make eyes, triangular noses, and mouths on the white cheese filling. Get creative here, it’s the perfect time for it!
- Decorate the witch’s cauldron. Leave the hot chili in the cast-iron pot or transfer it to a large, deep bowl. Right before serving, carefully arrange the finished jalapeño “skulls” on top, with the cheese filling and faces pointing up.
Tip. Jalapeños can be pretty spicy, so be sure to warn your guests that the skulls are edible but hot. If there are kids at the table, you can make some of the decorations using small halves of green bell peppers. You can also make the chili itself less spicy by reducing the amount of chili powder.
I always serve Witch’s Cauldron Chili with corn chips or freshly baked cornbread. They’re perfect for scooping up the thick tomato sauce. And I happily make this chili after Halloween too, just without the “skulls.” The combination of meat, beans, and spices is just so good!
8. Mummy Wrapped Chicken Tenders
Everyone knows those little mummies wrapped in golden bandages! But underneath these bandages are juicy pieces of chicken breast, and the wraps themselves are made from thin strips of dough. We’ll add two little eyes made from black olives, and our “mummies” will be peeking out from their edible bandages right from the plate.
For this recipe, we’ll use refrigerated crescent roll dough. It’s soft and stretchy enough to easily cut into long strips and wrap around the chicken. And we’ll serve the finished mummies with red tomato sauce, which adds a little more Halloween color.
Ingredients
Makes 4 servings (about 12 chicken mummies).
- 1½ lb boneless chicken breast (about 680 g)
- 2 packages of refrigerated crescent roll dough, 8 oz each (225 g each)
- 1 tbsp olive oil
- 1 tsp sweet paprika
- ½ tsp garlic powder
- ½ tsp dried oregano
- ¾ tsp salt
- ¼ tsp black pepper
- 1 egg
- 6–8 pitted black olives
- ½ cup tomato sauce for serving (120 ml)
How to make mummy wrapped chicken tenders
- Prepare the chicken. Preheat the oven to 375°F (190°C). Cut the chicken breasts lengthwise into 12 long strips about ¾ inch (2 cm) thick. Try to make the pieces roughly the same size so they cook evenly. Pat the chicken dry with paper towels.
- Season the chicken. In a bowl, mix the olive oil, paprika, garlic powder, oregano, salt, and black pepper. Add the chicken strips and toss until the spices are evenly distributed. I use sweet paprika because it gives the meat a nice color without making the dish spicy. It’s a good option for kids.
- Put the chicken in the oven. Arrange the chicken strips on a baking sheet lined with parchment paper and bake in the preheated 375°F (190°C) oven for 15 minutes. The chicken will finish cooking during the second round of baking.
- Prepare the mummy bandages. While the chicken is baking, unroll the refrigerated dough and cut it into long strips about ¼–⅜ inch (6–10 mm) wide. The easiest way to do this is with a pizza cutter, but a regular knife will work too.
- Wrap the chicken in bandages. Take the chicken out of the oven and let it cool just enough to handle with your hands. Wrap each still-warm piece with 2–3 strips of dough in a spiral, leaving small gaps between them. Near one end, leave an open space about ½ inch (1–1.5 cm) wide for the eyes. Don’t pull the dough too tightly, or it might tear during baking.
- Bake the mummies until done. Place the dough-wrapped chicken pieces on a clean baking sheet lined with parchment paper. Beat the egg with 1 tsp of water and brush the mixture over the strips of dough.
Return the baking sheet to the oven for 15 minutes, until the dough turns golden brown.
Check the temperature in the center of the thickest piece of chicken with a kitchen thermometer. It should reach 165°F (74°C).
If the dough has already browned but the chicken isn’t fully cooked, loosely cover the baking sheet with foil and continue baking until it reaches the right temperature. - Give the mummies their eyes. While the chicken is baking, cut the black olives into small pieces. Take the finished mummies out of the oven and let them rest for 2–3 minutes.
Then add two small drops of thick tomato sauce to the exposed chicken between the strips of dough and attach the olive pieces. Arrange the mummies on a large serving platter and serve with the remaining tomato sauce.
Tip. Don’t wrap the chicken in too much dough. A few thin strips are enough to make the mummy look bandaged. A thick layer of dough will take longer to bake, especially where the strips overlap, and it might stay undercooked inside. It’s also better to add the olive eyes after baking so they don’t shift while the dough rises.
You can serve these chicken mummies with roasted potatoes, vegetables, or just a few different sauces. I put two small bowls on the table, one with tomato sauce and one with garlic sauce, so everyone can choose what they like.
In October, we often cook something in the oven, and here, ordinary chicken turns into a fun Halloween dish too. And it’s nice that you can eat it with your hands, simply breaking off pieces of crispy dough along with the meat.
9. Graveyard Mashed Potato Bowls
The base of our unusual dinner is creamy mashed potatoes, with a juicy filling of ground beef, mushrooms, and thick meat gravy hiding underneath.
For decorating, we’ll use pieces of toasted pita bread cut into tombstone shapes, and make little trees out of broccoli. We’ll leave a little of the meat filling on top to look like freshly dug dirt. The result is a whole miniature “graveyard,” and you can happily eat every part of it!
Ingredients
Makes 4 servings.
Mashed potatoes
- 1½ lb potatoes (about 680 g)
- 3 tbsp butter (42 g)
- ½ cup warm milk (120 ml)
- ½ tsp salt, or to taste
Meat filling
- ¾ lb ground beef (about 340 g)
- 4 oz button mushrooms (115 g)
- 1 small onion
- 2 garlic cloves
- 1 tbsp olive oil
- 1 tbsp all-purpose flour
- 1 tbsp tomato paste
- 1 cup beef broth (240 ml)
- ½ tsp dried thyme
- ½ tsp salt, or to taste
- ¼ tsp black pepper
Decorating the graveyard
- 1–2 small pita breads
- 1 tsp olive oil
- 1 cup small broccoli florets (about 90 g)
- 2 tbsp finely chopped fresh parsley
How to make graveyard mashed potato bowls
- Boil the potatoes. Peel the potatoes and cut them into even-sized pieces. Put them in a pot, cover with cold salted water, and bring to a boil. Cook for about 15–20 minutes, until the potatoes are tender. Drain the water and leave them in the hot pot for a minute to let any excess moisture evaporate.
- Make the creamy mashed potatoes. Mash the hot potatoes with a potato masher, then add the butter and gradually pour in the warm milk. Add salt and mix until smooth.
I don’t use a blender for mashed potatoes because overmixing makes them gluey. We need a thick but creamy mixture that will hold its shape in the bowl. - Brown the meat with the mushrooms. Heat the olive oil in a deep skillet. Add the finely chopped onion and cook for 3–4 minutes. Then add the chopped mushrooms and sauté for another 5 minutes or so, until most of the liquid has evaporated.
Add the ground beef, break it into small pieces with a spatula, and cook for 7–9 minutes. Toward the end, add the garlic, thyme, salt, and pepper. The ground beef should be fully cooked to an internal temperature of 160°F (71°C). - Make the thick meat gravy. Add the tomato paste to the meat and stir. Sprinkle the flour over the filling, cook for about a minute, then gradually pour in the beef broth, stirring constantly. Let the mixture simmer over low heat for another 5–7 minutes, until the gravy thickens.
- Prepare the edible tombstones. Preheat the oven to 375°F (190°C). Cut the pita bread into small rectangles about 3 inches (7–8 cm) tall, rounding off the two upper corners. These will become little tombstones. Lightly brush them with olive oil and bake for 5–7 minutes, until golden brown.
Once they’ve cooled, you can carefully scratch little crosses onto the surface with the tip of a knife. Don’t cut all the way through the pita, or the pieces might break. - Make the broccoli trees. Separate the broccoli into small florets, leaving a short stem on each one. Steam the broccoli for 4–5 minutes, until it softens a little but keeps its bright green color and shape. Then let it cool.
We need little “trees” that can stand upright in the mashed potatoes. - Assemble the “graveyard” bowls. Divide the meat filling among four deep bowls, saving a few tablespoons for decorating. Spread the mashed potatoes on top, completely covering the meat.
Add 2–3 pita tombstones to each bowl, gently pressing their bottom edges into the mashed potatoes. Place the broccoli trees nearby. Arrange the remaining ground beef in small piles in front of the tombstones, like freshly dug dirt on graves. You can use parsley to make grass.
Tip. Add the pita “tombstones” right before serving so they don’t get soggy from the hot mashed potatoes. And to make the “dirt,” use small portions of the thick ground beef and mushroom mixture, without adding too much runny gravy.
I serve this dish in wide, shallow bowls, leaving enough room for both the “tombstones” and the broccoli “trees.” You can mash the potatoes ahead of time and leave the decorating until the last few minutes before serving. I think kids will enjoy helping decorate such an unusual dinner, arranging the tombstones and coming up with different details for our edible graveyard.
Who will try it first?
I love that moment when a dish appears on the table and someone is the first to notice a funny little detail. Then everyone starts looking at their plates, laughing, and discussing who’s brave enough to take the first bite.
What do you usually cook for Halloween? Maybe you already have a favorite dish that you use to surprise your family?
Tell me in the comments! I’d love to read your ideas and find out which recipe from this collection you’d like to try.