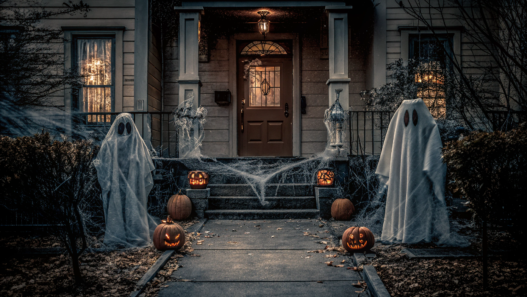
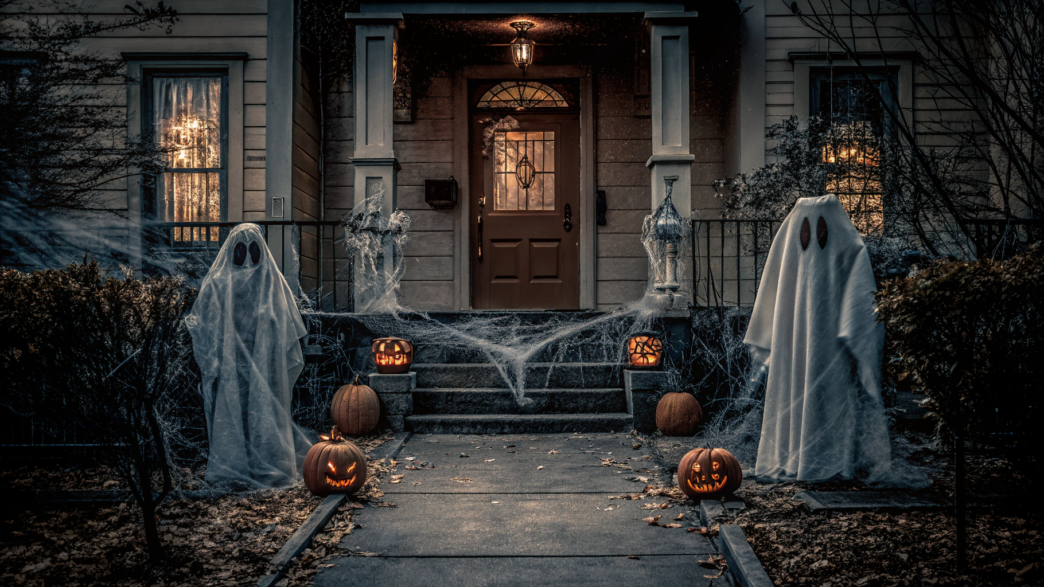
A couple of pumpkins on the steps, a wreath on the door — and it seems like everything is ready. But for Halloween, you want a little more. You want kids to notice your yard from the street, stop by the skeleton on the railing, look at the spiders in the lantern, or watch the ghosts move in the wind.
In this article, I tried to put together 10 Fall Halloween Outdoor Decor Ideas that you can make yourself. Some of these decorations can be made in one evening, and some can later stay outside as regular fall decor.
Halloween always starts outside. A spider web appears in an ordinary corner, a skeleton climbs onto the railing, and pumpkins light up along the pathway. And by evening, everything is ready for the main event — welcoming the kids who come for candy.
1. Spooky front porch lanterns
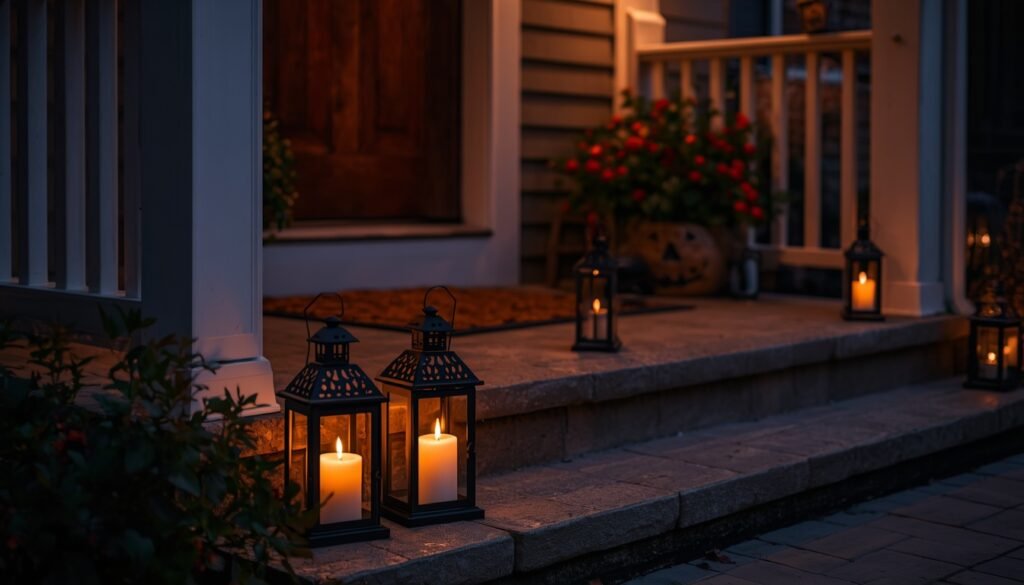
Front porch lanterns are one of the easiest ways to add some Halloween atmosphere around the entrance. You can place them along the edges of the steps, near the door, or beside the railing, and put safe battery-powered candles inside.
It’s better to mix lanterns of different heights. You can place one tall lantern near a wall or column, with two smaller ones slightly in front, closer to the edge of the porch. This looks more interesting than lining up several identical lanterns in a row.
What you’ll need
- 2–4 outdoor lanterns in different sizes.
- Battery-powered LED candles. You can use Outdoor LED Flameless Candles on Amazon.
- Thick black paper or thin cardstock.
- Scissors.
- Small templates of bats, spiders, or ghosts.
- Clear removable tape or small adhesive dots.
- A little artificial spider web, if you want.
How to decorate the lanterns
- Cut out the silhouettes. Draw a few small bats, spiders, or ghosts on black paper and carefully cut them out with scissors. Simple, larger shapes without tiny details are better — they’ll be much easier to see in the evening.
- Attach the silhouettes to the glass. Place them on the inside of the glass panels and secure them with small pieces of clear tape or adhesive dots. One or two silhouettes on each side are enough.
- Add some decor inside. You can place a small fake skull or a large plastic spider on the bottom of the lantern. Don’t fill the entire space — there still needs to be room for the candle, and the light shouldn’t be completely blocked.
- Put an LED candle inside. Place it closer to the center of the lantern. This way, the light will shine through the glass and the cut-out silhouettes will be easy to see in the evening.
- Add a little spider web outside. Stretch a small piece from the handle to one of the upper corners of the lantern, or hook it onto the side of the frame. It’s better to leave most of the glass panels uncovered so the silhouettes inside are still clearly visible.
- Arrange the finished lanterns by the entrance. You can put one near the door and a few more beside the steps or railing. Lanterns of different heights look better slightly grouped together rather than spaced evenly apart.
- Check the walkway. Make sure the lanterns aren’t sitting on the edge of the steps where someone could accidentally kick them. Lighter lanterns are better placed closer to a wall or railing.
In the evening, these lanterns really live up to their name. At first, you only see the soft glow, and then the silhouettes of bats and spiders appear on the glass. It looks a little spooky, but not overdone — just right for a Halloween atmosphere. Kids usually notice the light by the door first, and then start looking at the spiders, skulls, and everything else inside.
2. Pumpkin pathway markers
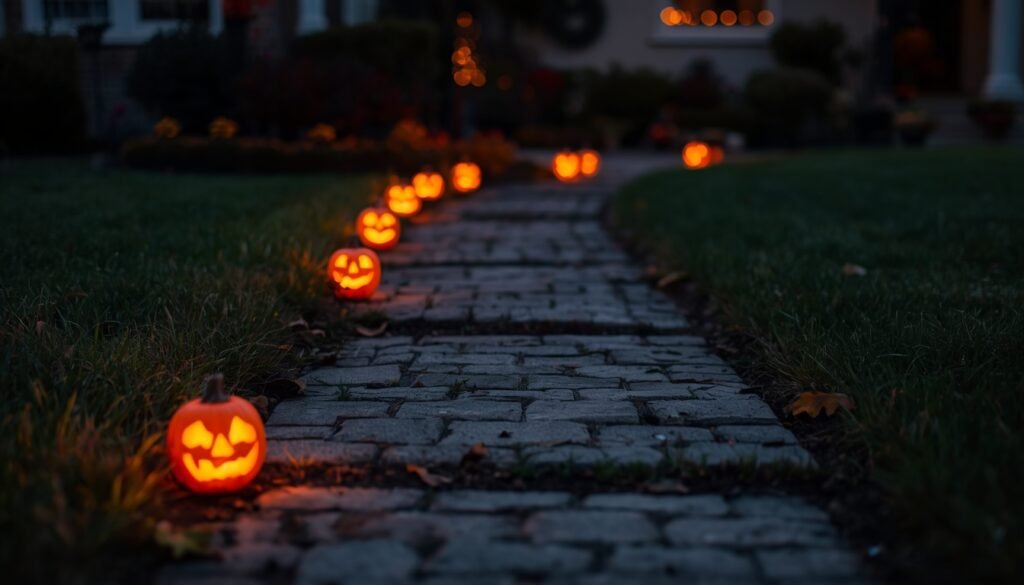
If you have a walkway leading to the house, it’s easy to turn it into part of your Halloween decor. Small glowing pumpkins along the path can be seen from the street and also show kids where to go to reach the porch. It looks great in the evening when it’s already dark and a line of orange faces stretches from the gate to the house.
You don’t need to place pumpkins every few inches. Five or seven is more than enough. What matters more is that they’re easy to see from the street and aren’t sitting where kids will be walking.
What you’ll need
- 5–9 small or medium real pumpkins around 8–12 inches in diameter (20–30 cm). Or you can use ready-made artificial jack-o’-lanterns. They’re easy to use and can last for several years.
- Battery-powered LED candles for real pumpkins. We definitely don’t need an open flame near dry leaves and kids’ costumes. Outdoor LED candles work well.
- A sharp knife and a large spoon for cleaning out and carving real pumpkins.
- A few small rocks or some sand if lightweight artificial pumpkins need extra weight.
How to make pathway markers
- Decide where the pumpkins will go. First, place them whole along the walkway so you can see the layout before you start cleaning and carving them. Space the pumpkins about 3–5 feet (90–150 cm) apart and look at the walkway from the street. If there are gaps that feel too large, just move them a little closer together.
If you’re using artificial pumpkins, some models are very lightweight, so in an open area it’s better to weigh them down with a few rocks or a little sand inside.
- Clean out the pumpkins. Cut off the top or make an opening in the bottom, then use a spoon to remove the seeds and soft pulp from the inside. After that, cut out large openings for the eyes and mouth, or make a few simple cutouts. In this case, larger openings are better because they let more light through and are easier to see from a distance.
Artificial pumpkins are much easier. If they’re already made as lanterns, all you need to do is check the batteries and place them outside. You can even mix real and artificial pumpkins — in the evening, the difference is barely noticeable.
- Put a candle inside. Place a battery-powered LED candle inside each real pumpkin. Models with timers are the easiest option because they can turn on automatically in the evening.
- Leave enough room to walk. Keep the pumpkins at least 18–24 inches (46–61 cm) away from the part of the walkway people will actually use. On Halloween, kids rarely walk up to the house in a neat little line. Someone is running, someone is fixing a costume, and someone is already checking how much candy they’ve collected. So it’s better to keep the path as clear as possible.
If the walkway is long, you can alternate glowing pumpkins with small unlit pumpkins. That way, you won’t have to carve a dozen lanterns, but the line will still be easy to see.
Then evening comes. The bowl of candy is already waiting inside, the pumpkins light up along the walkway, and we wait for the first kids in costumes. I really love this moment. First you hear voices somewhere near the neighbors’ houses, then little witches, dinosaurs, and ghosts start appearing by the gate — and you’re already looking forward to the whole evening.
3. DIY hanging ghosts for the yard
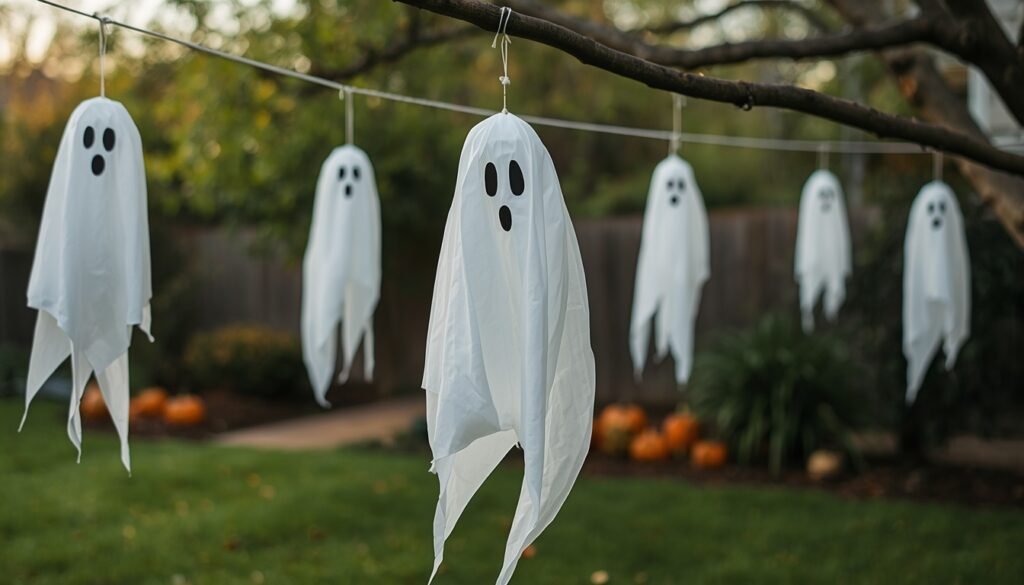
Hanging ghosts can go on tree branches, near the porch, or around the edges of the yard. They look better in a small group at different heights instead of hanging alone. During the day, they’re just fun decor, but in the evening, once the fabric starts moving in the wind, the whole scene feels completely different.
They’re pretty simple to make too. For a few ghosts, you’ll need white fabric, a lightweight base for the head, and fishing line. Nothing complicated. And once Halloween is over, you can take them down, fold them up, and use them again next year.
What you’ll need
- White fabric or cheesecloth. For one ghost, you’ll need a piece around 36 × 36 inches (91 × 91 cm). For larger figures, use fabric around 48 × 48 inches (122 × 122 cm).
- Foam balls 4–6 inches in diameter (10–15 cm) for the heads. Foam craft balls work well.
- A black waterproof marker or black paint for the face.
- Clear fishing line or strong white thread for hanging.
- Scissors.
- Small rubber bands, twine, or thin wire to secure the fabric under the head.
How to make hanging ghosts
- Shape the head. Cover the ball with fabric, gather it directly underneath, and secure it with a rubber band or twine. You don’t need to pull it too tight — just enough to keep the head in shape.
If you’re using thin cheesecloth, you can use two layers of fabric. The ball underneath will show through less, and the ghost will be easier to see.
- Draw the face. The simplest option is two large dark eyes and a mouth. There’s no need to add tiny teeth, eyebrows, or other details. From 15–20 feet away (4.5–6 m), they’ll barely be visible anyway.
We usually make the expressions a little different. One ghost gets a round mouth, another gets a long one, and a third might have just the eyes. When several similar figures are hanging together, those small differences make them more interesting and easier to notice.
- Trim the bottom of the fabric. Make a few long, uneven cuts along the bottom so the edges hang freely. Don’t make them all the same — the ghost will move better in the wind that way.
- Attach the fishing line. Wrap the line around the foam ball over the fabric and tie a secure knot. Leave the loose end long enough to tie the ghost to a branch later.
- Hang the ghosts at different heights. Some can hang lower and others higher, depending on the branches or attachment points you have. Don’t line them up evenly. Space them at different distances so they look more natural and can move freely in the wind.
Choose strong branches, and don’t run fishing line across a walkway or anywhere someone could catch it with their face. After strong wind, it’s also worth checking the knots so your ghosts don’t decide to take a trip to the neighbors.
And when Halloween comes and kids are walking toward the house while those white figures sway above the yard, the reaction is usually immediate. Some stop to look, some point them out to friends, and the bravest ones keep running straight toward the candy.
Those little moments are exactly why we bother with outdoor decor every October.
4. Skeletons climbing the porch rail
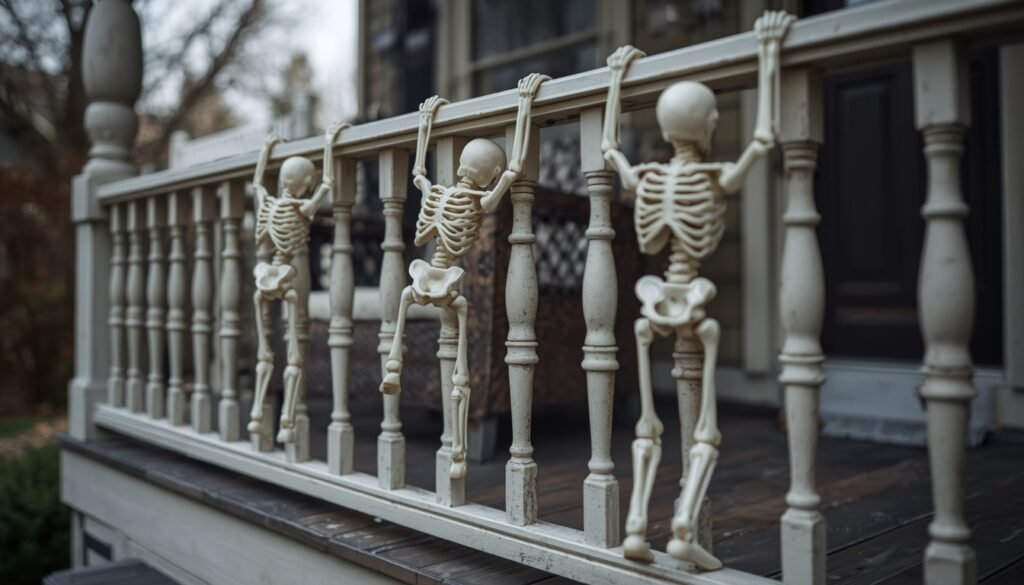
If your porch has a railing, you can attach plastic skeletons so they look like they’re trying to climb up. One can hang onto the top rail with both hands, another can already have one leg over the railing, and a third can be almost at the steps. It looks much more fun than simply sitting a skeleton on a chair by the door.
Two or three figures are usually enough, especially if the porch is small. The main thing is to give each one a slightly different pose.
What you’ll need
- 2–4 full-size plastic skeletons with movable arms and legs. Models with bendable shoulders, elbows, hips, and knees are easier to position. You can use a Posable Life Size Skeleton on Amazon.
- Black plastic zip ties for attaching them to the railing.
- Strong twine or thin rope for extra support.
- Scissors or cutters for the zip ties.
- A few small pumpkins or some dry leaves near the steps, if you want.
How to attach the skeletons to the railing
- Start by choosing a pose for each skeleton. Place the figures on the outside of the railing and bend their arms and legs so they really look like they’re climbing up. One skeleton can hold onto the top rail with both hands, while another can have one foot on a step and reach higher.
Don’t make them all look the same. It’s much more fun when each one seems to be stuck at a different stage of the climb.
- Secure the body first. Press the skeleton against the railing and fasten it with a zip tie around the chest or hips. The tie should support the weight of the figure, but don’t tighten it so much that it damages the plastic.
If the skeleton is heavy, add another attachment point a little lower down. This will help keep it from slipping after wind or rain.
- Secure the arms and legs. Once the body is fixed in place, attach one or two limbs where they touch the railing. For example, you can secure a hand to the top rail and a leg to a lower rail.
You don’t need to fasten every arm and leg. A little movement can actually look better, especially when the wind moves the figure slightly.
- Check the attachments from the walkway. Step back from the porch and see whether any of the zip ties are easy to notice. If one stands out too much, turn the skeleton slightly or move the attachment behind the railing. Black zip ties are usually almost invisible in the shadows at night.
And make sure the skeleton’s arms and legs don’t stick out over the steps. Keep the decor off to the side so kids can walk up to the door safely without tripping.
It looks best when the skeletons feel like one little scene instead of separate decorations. On Halloween, kids usually understand the joke right away, stop to see how the skeletons are “climbing” the railing, hang around for a moment, and then run off for candy.
5. Glowing jack-o’-lantern towers
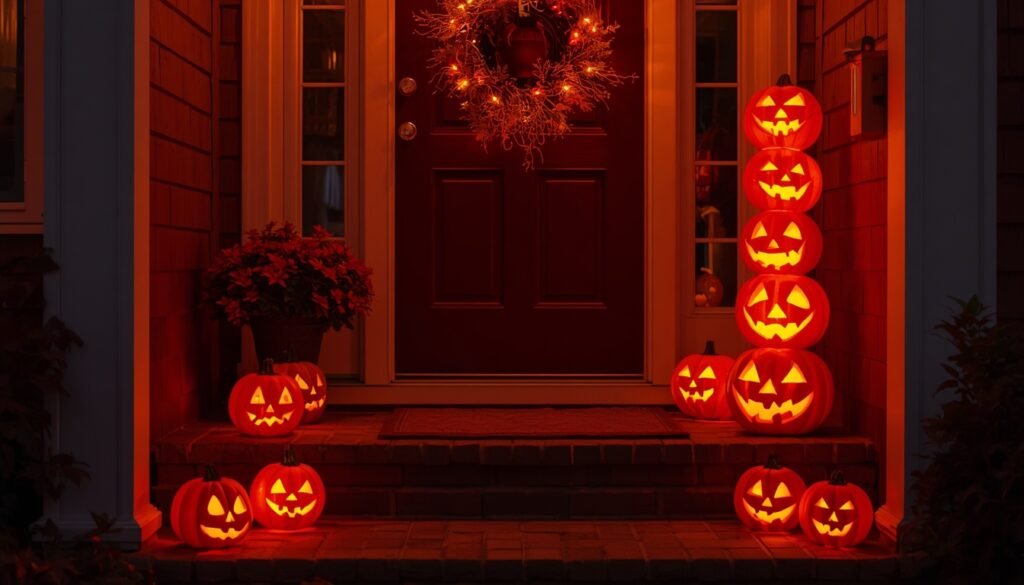
A tower of glowing jack-o’-lanterns works well on either side of the front door or near the bottom of the steps. Instead of having several pumpkins spread around the porch, they’re stacked vertically, so the tower is easy to notice even from a distance.
For this kind of setup, it’s better to use artificial pumpkins instead of real ones. Carved pumpkins soften over time, which can make the tower less stable. Plastic pumpkins keep their shape throughout the season, are easier to secure together, and can be used again next Halloween.
What you’ll need
- 3 plastic jack-o’-lanterns in different sizes for one tower. You can use Lighted Artificial Jack O Lanterns on Amazon.
- Strong outdoor plastic adhesive.
- A knife or small craft cutter for making openings around the stems.
- A marker for marking the size of each opening first.
- Rocks or sand for the bottom pumpkin if it’s very light and has enough room inside for extra weight.
How to make a glowing tower
- Stack the pumpkins without glue first. Put the largest one on the bottom, then the medium one, then the smallest. This will show you right away how much the stem of the lower pumpkin gets in the way of the pumpkin above it.
- Make openings for the stems. Place the middle pumpkin on top of the bottom one and mark the spot underneath where the stem touches it. Cut a small opening so the stem can fit inside and the pumpkin can sit more evenly. Do the same with the top pumpkin. It’s better to start with a slightly smaller opening and make it larger if needed.
- Add weight to the bottom pumpkin. If it’s very light, put a few rocks or some sand inside. This is especially important if the tower will stand near the edge of the porch or somewhere that gets windy. Just make sure you don’t block the battery compartment or switch.
- Glue the pumpkins together. Once everything fits properly, apply adhesive where the pumpkins touch and stack the tower again. Secure the middle pumpkin to the bottom one first, then add the top pumpkin. Before the glue sets, look at the tower from all sides and straighten it if needed.
- Let the glue dry completely. Leave the tower on a flat surface for the amount of time listed on the adhesive packaging. Don’t move it too early, or the pumpkins may shift.
- Check the lights. Turn on all three lanterns and make sure the switches and battery compartments are still easy to reach from the back.
The finished tower is best placed near a wall, column, or in a sheltered part of the porch where it won’t catch as much wind. If you make two towers, you can place one on each side of the front door.
Once it gets dark, three glowing pumpkins stacked one above another immediately change the whole look of the entrance. Kids usually react to something like this right away, especially if each pumpkin has a different expression. It’s exactly the kind of Halloween decor that adds a little extra fun before they even ring the doorbell.
6. Hay bale and cornstalk entryway
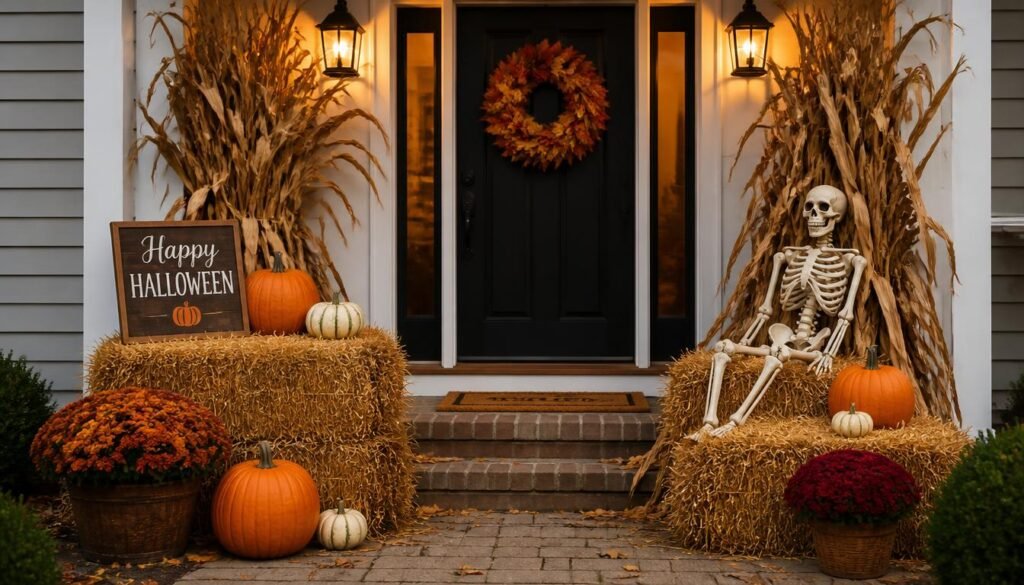
Hay bales and dried cornstalks look great near the entrance if you want the decor to feel more fall-inspired than outright scary. Then you can add a couple of Halloween details on top — pumpkins, a small sign, or one skeleton near the door.
This kind of setup already takes up a good amount of space on its own. One bale, a few tied cornstalks, and several pumpkins are enough, I think, to make the entrance look ready for the holiday.
What you’ll need
- 1–2 small hay or straw bales. For a regular porch, one is usually enough.
- 2–4 bundles of dried cornstalks.
- Several pumpkins in different sizes. You can use regular whole pumpkins without carving them.
- Strong garden twine for attaching the stalks to posts or railings. Jute twine works well.
- A small wooden sign or another Halloween decoration, if you want.
How to decorate the entrance
- Start with the bale. Place it to one side of the front door or near the bottom of the steps, but make sure it doesn’t narrow the walkway. If the porch is wide, you can place a second bale on the opposite side, a little farther from the door.
- Secure the cornstalks. Gather several stalks together and tie them with twine to a column, porch post, or the outside of the railing. It’s better to secure them in a few places along the height because dried stalks can quickly start spreading apart and leaning in different directions.
Leave the tops loose. They’ll move nicely in the wind.
- Arrange the pumpkins. Place one large pumpkin near the bale and two or three smaller ones beside it. You can also put some directly on top of the bale if the surface is flat and the pumpkin sits securely. You can arrange them pretty casually — they look more natural that way than when everything is lined up too carefully.
- Add one Halloween detail. I think one noticeable element is enough here. It could be a small skeleton, a black sign, or a pair of artificial crows.
The porch is ready for the holiday. After Halloween, you can remove the skeleton, sign, or other spooky details and leave the pumpkins, hay, and cornstalks for a few more weeks. They’ll still fit right in with regular fall decor.
7. Spider web front porch corner
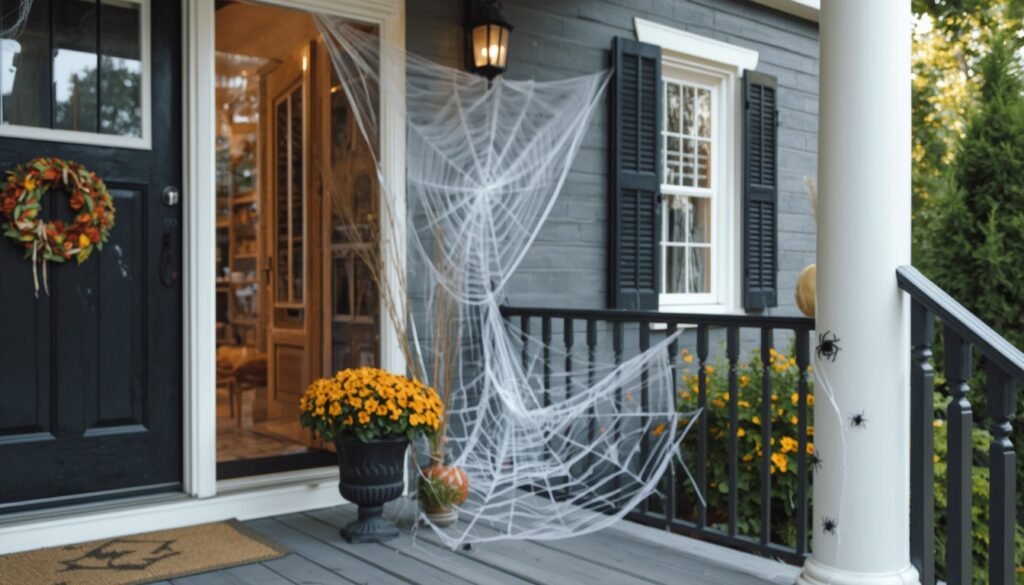
If there’s a free corner on the porch between the wall, a column, and the railing, you can decorate it with artificial spider web and add a few spiders. There’s no need to stretch it across the whole front of the house — one small section is more than enough, especially if you make the web a little thicker.
What you’ll need
- Artificial spider web for outdoor use. It’s better to use the kind you can stretch into thin layers.
- 2–4 fake spiders in different sizes.
- Small clear hooks, plastic zip ties, or thin fishing line for attaching everything.
- Scissors.
- If you want, one large spider that will become the main part of the display.
How to decorate the corner with spider web
- Choose the right corner. The best spot is between a wall, a column, and a railing, where you can secure the web in several places at once. That way, you can stretch it in different directions and fill the whole corner.
- Stretch the web between the attachment points. Pull off small pieces of material and stretch them from the wall to the column, then to the railing. Add the web gradually until the corner is filled. Try to stretch the material well — sections that are too dense will look more like clumps than a spider web.
- Secure the edges. Hook the material onto the railing, the column, or the hooks. If it gets windy, add a few small attachment points around the edges so the web doesn’t bunch up into one clump after the first gusts.
- Attach the spiders. You can place one large spider closer to the center or near the top of the web, and a few smaller ones around the edges. Don’t place them at equal distances from each other. Let some of the spiders be visible right away, and let others show up only when someone gets closer.
- Check the walkway. The web shouldn’t hang over the steps, the path, or the area where people walk to the door. It’s better to keep all the edges inside the corner you chose.
In the evening, this kind of corner looks very mysterious and a little eerie in the regular porch light. You don’t see the spider web all at once, and the spiders only come into view when you get closer. The kids who come for candy will definitely notice it.
8. DIY wooden pumpkin cutouts
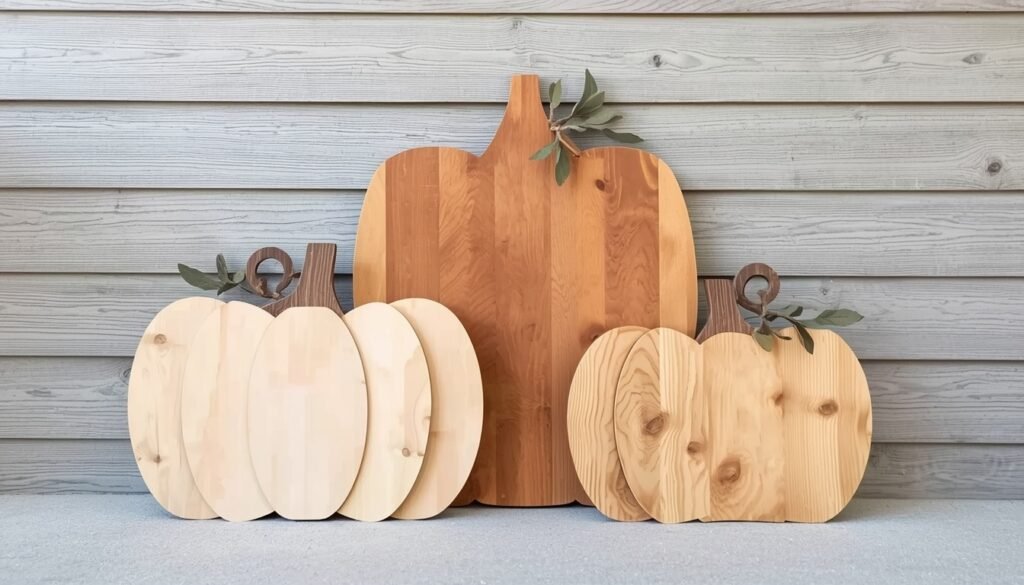
After a renovation, we almost always have scraps of boards or plywood left over, and they’re perfect for making a few wooden pumpkins for the porch. You can paint them and use them for more than one season.
It’s better to make the pumpkins different in size and shape. Make one taller, another wider, and a third much smaller. They’ll look more natural on the steps or against the wall near the entrance than three identical cutouts.
What you’ll need
- Plywood around ½ inch thick (1.3 cm) or flat wooden boards.
- A pencil and a large sheet of paper for the template.
- A jigsaw for cutting out the shape.
- Medium- and fine-grit sandpaper.
- Outdoor paint — orange, white, or any other color you want to use.
- A paintbrush or small roller.
- Small pieces of wood or short pieces of dry branches for the stems.
- Screws or outdoor wood glue.
How to make wooden pumpkins
- Draw the pumpkin outline. Draw a pumpkin in the size you want on a large sheet of paper and cut it out along the outline. Place the paper template on the plywood and trace around it with a pencil. If you’re making several pumpkins, change the shape and size a little for each one.
- Cut the pumpkin out of plywood. Secure the piece of plywood firmly to a workbench or table with clamps and cut along the outline with a jigsaw. Take your time around the curves — that’s where it’s easiest to drift away from the line.
- Sand the edges. After cutting, go around the entire outline with sandpaper and remove any sharp splinters. Then lightly sand the front of the plywood so the paint goes on more evenly.
- Paint the pumpkins. Cover the whole surface with the main color and let the paint dry. If the plywood absorbs a lot of paint, add a second coat. Once it’s dry, use a thin brush to paint a few darker curved lines from top to bottom to show the pumpkin sections.
- Make the stem. Take a short piece of dry branch. Drill a small hole in the top of the wooden pumpkin about the same diameter as the branch, add a little wood glue, and insert the stem. It will hold much better this way than if you simply glue it to the edge.
- Arrange the pumpkins by the entrance. Place them on the steps or lean them against the wall near the door. If the area gets a lot of wind, secure the larger wooden pumpkins from behind so they don’t tip over.
For Halloween, you can decorate these pumpkins with a little spider web and a small spider, or place a skeleton next to them. Then you can remove those details and leave the wooden pumpkins out for the rest of fall. And yes, kids usually notice pretty quickly when the decor looks a little different from the usual pumpkins they see at every other house.
9. Scarecrow with a twist
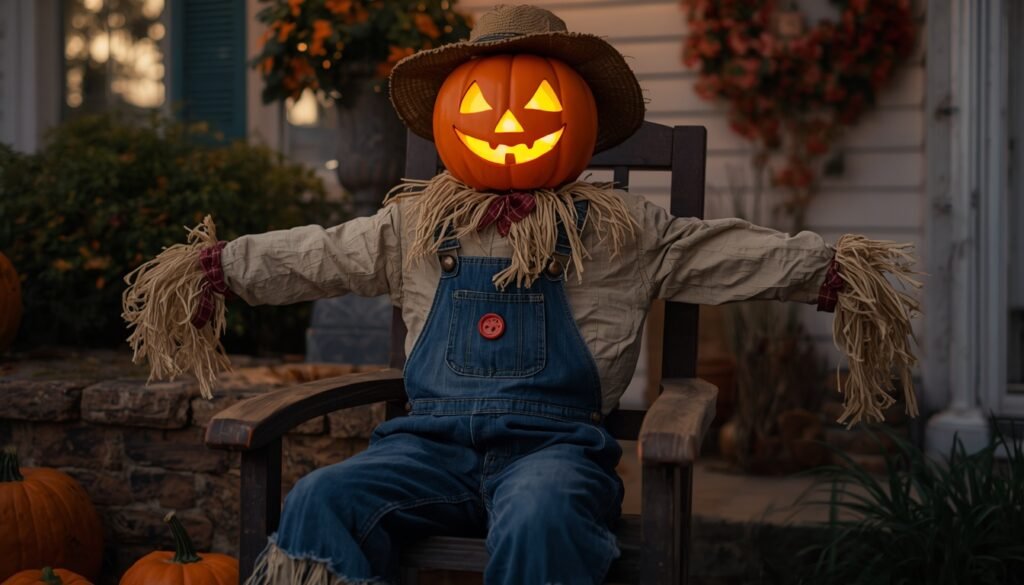
A regular garden scarecrow can easily become Halloween decor if you replace the head with a jack-o’-lantern. It’s still the familiar figure in old clothes, but in the evening it looks completely different.
I like the seated scarecrow version. It’s easier to put together because you don’t need to build a tall frame or set anything into the ground. You can sit the figure on an old chair near the porch and use a plastic jack-o’-lantern for the head.
What you’ll need
- An old shirt and jeans. Loose-fitting clothes work well because they’re easier to stuff.
- Straw, raffia, or bubble wrap for filling the clothes. For an open porch, bubble wrap is more practical than paper because it won’t get soggy in damp weather.
- A plastic jack-o’-lantern for the head.
- Twine for the sleeves and pant legs.
- An old chair or small bench.
- A hat, gloves, or old boots, if you want.
How to make a Halloween scarecrow
- Stuff the clothes first. Button up the shirt and fill the sleeves and body with straw, raffia, or bubble wrap. Stuff the jeans separately. Don’t pack them too tightly — the arms and legs should stay soft enough for the figure to sit naturally.
- Connect the shirt and jeans. Tuck the bottom of the shirt into the pants and tighten the waist with a belt or twine. Then sit the scarecrow on the chair and adjust the stuffing so the body doesn’t lean to one side.
- Finish the hands and feet. Leave a little straw sticking out from the sleeves and pant legs, then tie the ends with twine. This helps keep the stuffing inside and makes the scarecrow look more realistic.
- Attach the head. Place the plastic jack-o’-lantern on the shirt collar. To keep it from falling off, insert a short wooden stick into the body so the top of it fits into the opening at the bottom of the pumpkin. This kind of support helps hold the pumpkin head in place.
- Give the figure a pose. Rest one arm on the chair arm or on the scarecrow’s knee, and let the other hang loosely at the side. Place the boots directly under the pant legs. A little unevenness works well here — a scarecrow sitting too perfectly starts to look more like a mannequin.
- Secure the scarecrow to the chair. Tie the body to the back of the chair with twine or plastic zip ties in two places, around the chest and waist. You can hide the attachments under the shirt. If the legs keep sliding, lightly secure them near the chair legs.
You can leave this scarecrow near the porch for several days before Halloween, and turn on the light inside the pumpkin in the evening if it has one. During the day, it works as part of the fall yard decor, and at night the glowing pumpkin makes it feel much more Halloween-ready. Kids walking up for candy will definitely notice it before they reach the door.
10. Outdoor Halloween garland
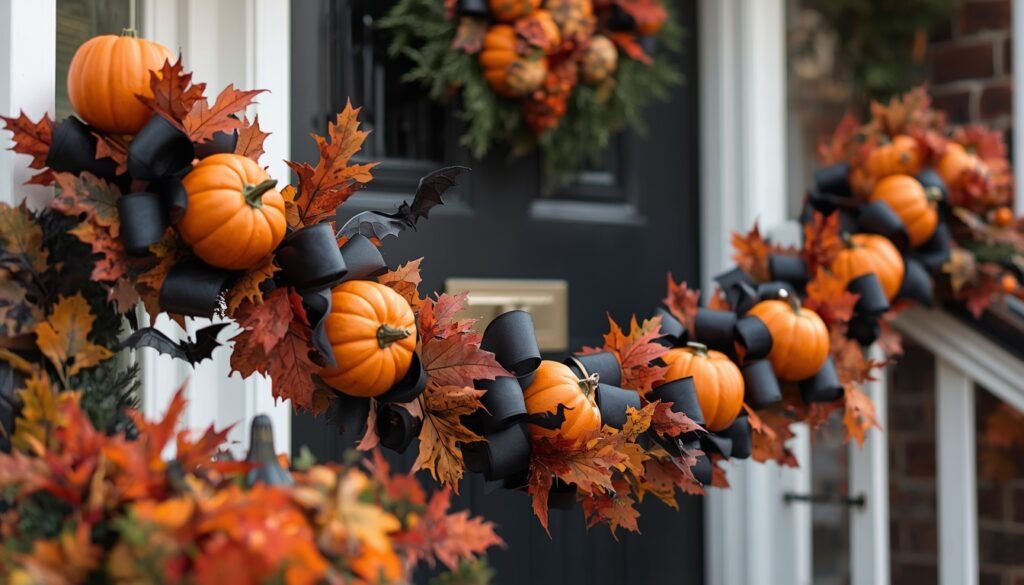
An outdoor Halloween garland is a good option for the door, railing, or upper part of the porch. It doesn’t take up any floor space and helps tie together the rest of the decor around the entrance.
You only need a few simple elements, like small pumpkins, black ribbons, artificial leaves, and bats. That’s already enough to create the right effect. You can alternate them along the whole garland so the fall details mix with the Halloween ones.
What you’ll need
- A base for the garland — thick twine, a strong cord, or a ready-made undecorated outdoor garland.
- Artificial fall leaves or small branches.
- Small plastic pumpkins.
- A few black bats, spiders, or other small Halloween figures.
- Black or orange ribbon.
- Thin wire or plastic zip ties for attaching the decorations.
- Scissors.
How to make an outdoor garland
- Start by deciding on the length. Measure the area where the garland will hang — for example, above the door, along the railing, or between two posts. Add a little extra length at the ends so it’s easier to secure.
- Lay out the decorations before attaching them. Place the base on a table or on the floor and first arrange the pumpkins, leaves, and black decorations along it. Don’t attach everything at equal intervals. It looks better when some areas have a few more details and others have a little more open space.
- Attach the larger pieces first. It’s better to secure the small pumpkins with thin wire or zip ties. Then add the leaves and lighter decorations. This will help keep the garland from twisting because one side is heavier than the other.
- Add the ribbons. Tie short pieces of black or orange ribbon between the main decorations. Don’t make them too long, especially if the garland will be hanging somewhere windy.
- Hang the garland outside. For a door or wall, you can use outdoor hooks, and for a railing, twine or zip ties work well. It’s better to secure the garland not only at the ends but also in one or two places in the middle so it doesn’t sag or hit the wall in the wind.
If the garland hangs near the entrance, make sure none of it hangs too low or catches on people walking by. This is especially important on Halloween, when kids are constantly running up to the door.
In the evening, this garland doesn’t need separate lighting if there’s already a light near the door. It complements the other decorations around the entrance and makes everything feel more connected. Kids usually notice the smaller details once they get closer — especially the bats and spiders tucked between the leaves.
The yard is ready for Halloween!
It’s great when Halloween decorations are fun to look at, instead of being something people simply walk past. Someone will notice the spider inside a lantern, someone will stop by the scarecrow, and someone else will want to take a closer look at the wooden pumpkins.
If you try one of these ideas at home, tell me in the comments which one you chose and what the kids liked most. And if you have your own Halloween decoration that gets the biggest reaction every year, tell me about that too — I love ideas like these!