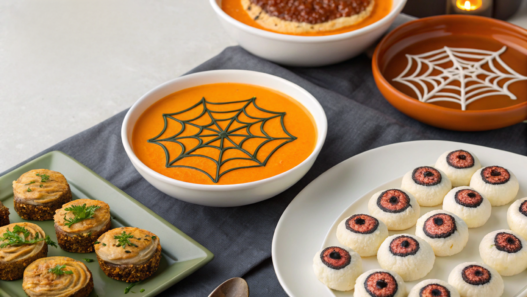

Halloween is a great excuse to have a little fun in the kitchen. And our 10 easy Halloween dinner ideas are perfect for just that. There will be edible ghosts, vampire fangs, and other creepy little details. But behind all of that are real homemade meals that can feed the whole family, not just decorate the holiday table.
As I’ve mentioned more than once, we love cooking with what we grow ourselves, so fall vegetables will have their place on this menu too. I’ve picked recipes that don’t require any complicated cooking techniques.
I’ll show you how to prepare each dish and give it a Halloween look using everyday ingredients. And, of course, some of the work can go to the kids, especially when it’s time to make funny faces and edible decorations.
1. Pumpkin mac and cheese with toasted breadcrumbs
For Halloween, regular mac and cheese can turn into a fun, slightly creepy dish. Bright orange pumpkin sauce, golden breadcrumbs, and little black olive spiders look like a miniature graveyard right on your plate. The spiders hiding among the macaroni are especially fascinating.
Pumpkin makes the cheese sauce thick and creamy, adding a little sweetness. And we’ll sprinkle toasted breadcrumbs over the macaroni for a nice crunchy topping. I use regular sharp cheddar for this recipe because its flavor is strong enough not to get lost behind the pumpkin.
Ingredients
Makes 4–6 servings.
- 12 oz (340 g) elbow macaroni
- 1 cup (240 g) unsweetened pumpkin puree
- 2 cups (480 ml) milk
- 2 cups (about 225 g) shredded sharp cheddar cheese
- 2 tbsp butter for the sauce
- 2 tbsp all-purpose flour
- ½ tsp smoked paprika
- ½ tsp garlic powder
- Salt and black pepper to taste
- ¾ cup (about 45 g) breadcrumbs
- 1 tbsp butter for toasting the breadcrumbs
- 5–6 large pitted black olives
How to make pumpkin mac and cheese
- First, cook the macaroni. Bring a large pot of salted water to a boil and cook the elbow macaroni for one minute less than the package instructions say. I usually save about ½ cup (120 ml) of the pasta water before draining the macaroni in a colander. It’ll come in handy if the cheese sauce turns out too thick.
- Make the sauce base. Melt the butter in a deep skillet over medium heat, add the flour, and stir for about a minute. Then gradually pour in the milk, whisking constantly. After 3–5 minutes, the mixture will start to thicken. Don’t add the milk too quickly, or you might end up with lumps.
- Add the pumpkin and cheese. Turn the heat down to low and stir in the pumpkin puree, paprika, and garlic powder. Remove the skillet from the heat and gradually add the shredded cheddar, stirring until it’s completely melted. I add the cheese in small handfuls instead of all at once. This helps it blend into the sauce more evenly. Taste and season with salt and pepper.
- Toast the breadcrumbs. Melt a tablespoon of butter in a separate skillet, add the breadcrumbs, and toast for 2–3 minutes until golden brown. Keep stirring, especially toward the end. I take the skillet off the heat as soon as the crumbs turn golden and immediately transfer them to a bowl so they don’t keep toasting in the hot pan.
- Make the Halloween decorations. Cut a few olives in half lengthwise. These will be the spiders’ bodies. Slice the remaining olives into thin strips for the legs. Mix the macaroni with the hot sauce, transfer it to a wide baking dish, and sprinkle with breadcrumbs. Arrange the olive halves on top, adding four thin legs on each side.
Tip. Use only unsweetened pumpkin puree for this recipe. Prepared pumpkin pie filling contains sugar and spices that will ruin the flavor of the cheese sauce. If you have homemade roasted pumpkin, blend it until smooth using an Immersion Hand Blender.
When we cook fall pumpkin dishes at home, we try to use the whole pumpkin and freeze any extra puree in small portions. So we usually already have the base ready for a recipe like this. All that’s left is to cook the macaroni, make the cheese sauce, and spend a little time on the spiders.
By the way, you can make them with the kids while the macaroni cools down a little. Just don’t wait too long to serve it, or the breadcrumbs will get soggy and lose their crunch.
2. Sloppy Joe sliders with eyeball olives
For Halloween, these little burgers look like someone is watching your guests right from the plate. Eyes made from green olives, red tomato sauce, and meaty filling spilling slightly out of the buns make them look like funny little monsters. Inside, though, everything is pretty familiar — juicy ground beef with onions in a thick, sweet and tangy sauce.
In the US, this dish is known as a Sloppy Joe. What makes it different is that the ground beef isn’t shaped into patties. Instead, it’s simmered in sauce and spooned directly onto a bun. The filling is pretty juicy, so I always choose small but sturdy buns that won’t fall apart after the first bite.
Ingredients
Makes 12 mini burgers.
- 1 lb (450 g) ground beef
- 12 small slider buns
- 1 small onion, finely chopped
- ½ green bell pepper, finely chopped
- ¾ cup (180 ml) tomato sauce
- 2 tbsp ketchup
- 1 tbsp Worcestershire sauce
- 1 tbsp brown sugar
- 1 tsp yellow mustard
- ½ tsp garlic powder
- 1 tbsp vegetable oil
- Salt and black pepper to taste
- 12 green olives stuffed with red peppers
How to make Sloppy Joe sliders with eyeball olives
- Sauté the vegetables. Heat the vegetable oil in a large skillet over medium heat. Add the finely chopped onion and bell pepper. Cook for about 4–5 minutes, stirring occasionally, until the vegetables soften. I chop them pretty finely so there aren’t any big pieces of pepper in the small buns.
- Add the ground beef. Add the meat to the vegetables and break it into small pieces with a spatula. Cook for about 6–8 minutes, until the beef is no longer pink and starts to brown slightly. If there’s a lot of grease in the skillet, drain off the excess.
- Make the tomato sauce. Add the tomato sauce, ketchup, Worcestershire sauce, brown sugar, mustard, and garlic powder. Season with salt and pepper and mix everything well. Reduce the heat and simmer uncovered for 8–10 minutes. The sauce should thicken enough that the meat stays on the spoon instead of sliding off.
- Prepare the buns. Cut each bun in half and lightly toast the cut sides in a dry skillet or in the oven at 350°F (175°C) for 3–5 minutes. Lindy usually toasts the buns right before serving. Even a few minutes in a hot skillet helps keep them from getting soggy from the meat sauce.
- Assemble the sliders. Spoon about 2 tablespoons of the hot meat filling onto the bottom half of each bun. Cover with the top half, but don’t press down too hard. Let a little red sauce and meat peek out around the edges — that actually adds to the Halloween look.
- Decorate the burgers with little eyes. Slice the green olives crosswise to make round pieces with red centers. Add two small dots of thick cream cheese to the slightly cooled tops of the buns and gently press an olive slice into each one. The white cream cheese will look like the whites of the eyes, while the green olives with red centers will make creepy little pupils! It’s best to add the eyes right before serving so the cream cheese doesn’t soften from the hot buns.
Tip. I prefer making the meat filling the day before Halloween, especially when there are several dishes on the menu. Once it cools, I put it in the fridge, then reheat it in a skillet with a couple of tablespoons of water the next day. I assemble the burgers just a few minutes before serving and attach the olive eyes at the very end.
This time, Lindy and I decided to serve the mini burgers on a large wooden board, mixed in with lettuce leaves and small tomatoes. We ended up with a whole bunch of edible monsters! I think for our next Halloween, we’ll try giving each one some teeth made from pieces of cheese, too. The kids will probably love that idea.
3. Spiderweb pizza with string cheese designs
Everyone loves pizza, and it’s a great option for Halloween dinner. Add a cheese spiderweb on top, and regular homemade pizza instantly gets that Halloween look. It looks impressive, and the flavors are familiar, with no surprises — tomato sauce, melted cheese, and your favorite toppings.
In this version, the spiderweb is made with thin strips of cheese instead of sauce. This makes it more visible, so it doesn’t get lost among the toppings after baking. Lindy usually buys mozzarella string cheese sticks for this, or just a piece of mozzarella that can be pulled apart into thin strands by hand. It’s best to arrange the design at the very end of cooking. If you put the thin spiderweb in the oven for the entire baking time, the cheese will melt and the lines will simply blend together.
Ingredients
Makes 1 round pizza, about 12 inches (30 cm) in diameter.
- 1 pizza crust, 12 inches (30 cm) in diameter, or about 1 lb (450 g) of homemade dough
- ½ cup (120 ml) pizza sauce
- 2 cups (about 225 g) shredded mozzarella
- 1 mozzarella string cheese stick or about 2 oz (55–60 g) mozzarella for the spiderweb
- 20–24 slices of pepperoni, optional
- 6–8 black olives for little spiders, optional
- 1 tsp olive oil
- A pinch of dried oregano
How to make spiderweb pizza
- Prepare the crust. Preheat the oven to 425°F (220°C). If you’re using homemade dough, roll it into a circle about ¼ inch (6 mm) thick. Transfer it to a baking sheet or pizza pan. I lightly brush the edges with olive oil so they turn golden brown after baking.
- Add the sauce. Spread the tomato sauce over the surface, leaving about ½ inch (1.5 cm) around the edge without sauce. Don’t make the layer too thick. If there’s too much sauce, the center of the pizza may stay soggy even after baking.
- Add the cheese and toppings. Sprinkle the pizza with shredded mozzarella, then arrange the pepperoni on top if you want a heartier version. You can add a pinch of oregano too. I try to distribute the toppings evenly so everyone gets roughly the same amount of cheese and pepperoni when the pizza is sliced.
- Bake the pizza. Place it in the preheated oven for 12–15 minutes. The cheese should be completely melted, the edges golden brown, and the bottom of the crust fully baked. I usually check the bottom with a spatula toward the end of baking. If it’s still too pale, I give the pizza another 1–2 minutes.
- Make the cheese spiderweb. While the pizza is baking, pull the string cheese apart into long, thin strands. Take the finished pizza out of the oven, let it sit for about a minute, and arrange 6–8 lines radiating from the center toward the edges.
Then connect them with several rows of shorter cheese strips to form a spiderweb. The heat will soften the cheese a little, but it will keep its shape. For a clearer design, I prefer leaving it just like that without baking it again. - Add the little spiders. Cut a few black olives in half lengthwise. Use the halves for the bodies and thinly sliced strips for the legs. Arrange the spiders between the cheese strands. You can put one right in the center of the web and another on the edge of the pizza.
When I make this pizza for a holiday dinner, I cut the cheese strips first and arrange them on a separate plate. After baking, all I have to do is transfer them onto the pizza. This is especially handy if you’re making two or three spiderwebs at once. And Lindy never buys mozzarella that’s too fresh and wet for this — firm string cheese sticks make the design much more defined.
Lindy and I love having a small homemade Halloween dinner with several themed dishes. And we usually save the pizza for last so it comes straight from the oven to the table.
4. Ghostly mashed potatoes with Parmesan sheets
For Halloween, even mashed potatoes can look a little creepy. Imagine small servings of fluffy mashed potatoes with white ghosts with little black eyes peeking out of them. And our ghosts will be edible, too. We’ll make them from grated Parmesan and bake them in the oven until crispy.
For this recipe, I use regular starchy potatoes, like Russets, which we know well from our days living in Idaho. They cook down easily and make fluffy mashed potatoes. And Parmesan develops a rich, salty flavor when baked, so there’s no need to add extra salt to the cheese figures themselves.
Ingredients
Makes 4–6 servings.
- 2 lbs (900 g) potatoes
- ½ cup (120 ml) whole milk
- 4 tbsp (55 g) butter
- 2 tbsp sour cream
- 1 cup (about 100 g) finely grated Parmesan cheese
- 1 tsp black sesame seeds for the ghosts’ eyes
- ½ tsp garlic powder
- Salt and white pepper to taste
How to make ghostly mashed potatoes
- Boil the potatoes. Peel the potatoes and cut them into even pieces about 1½ inches (4 cm) in size. Put them in a pot, cover with cold water, add a little salt, and bring to a boil. Reduce the heat and cook for 15–20 minutes, until the potatoes are soft enough to pierce easily with a fork.
- Make the creamy mashed potatoes. Drain the water and return the potatoes to the hot pot for about a minute to let any extra moisture evaporate. Mash them with a potato masher.
Warm the milk and butter separately, then gradually mix them into the potatoes. Add the sour cream, garlic powder, salt, and white pepper. I prefer white pepper so there aren’t any noticeable black specks in the mashed potatoes. And don’t use a blender! Overmixing potatoes can make them gluey. - Prepare the Parmesan ghosts. Preheat the oven to 400°F (200°C) and line a baking sheet with parchment paper. Shape the finely grated Parmesan into 6 small ghost figures. Each one should have a rounded head, a wider bottom, and slightly wavy edges. I make the figures about 3 inches (7–8 cm) tall, spreading the cheese in a thin, even layer. Leave at least 1 inch (2.5 cm) between them, since the cheese will spread a little as it melts.
- Add the eyes and bake. Place two black sesame seeds on each ghost for the eyes. Put the baking sheet in the oven for 5–7 minutes. The Parmesan should melt completely and brown slightly around the edges, but it shouldn’t turn dark brown. After baking, leave the figures on the baking sheet for 3–5 minutes. As the cheese cools, it will harden and become crispy.
- Decorate the dish. Spoon the hot mashed potatoes into small, deep bowls, making little mounds with a spoon. Carefully lift the cooled Parmesan ghosts with a thin spatula and insert the bottom edge of each figure into the potatoes at a slight angle. Don’t push them in too deep, or the cheese will soften quickly. It’s best to add the decorations right before serving.
When Lindy and I make cheese decorations, I always make a couple of extra figures. Thin Parmesan is pretty fragile and sometimes breaks when you lift it off the parchment paper. And I don’t recommend using the ready-made powdered cheese from a can. Freshly grated Parmesan usually melts more evenly and makes stronger, crispy cheese sheets.
We eat mashed potatoes at home all year round, especially in the fall when it gets cooler and we make something hot for dinner more often. For Halloween, we just change the presentation a little. I make the Parmesan ghosts ahead of time, but try to prepare the mashed potatoes closer to dinner. That way, the figures stay crispy, and we can serve the potatoes hot, straight from the pot.
5. Bloody hot dog fingers
Now, these hot dogs can really surprise your Halloween guests. You have to admit, severed fingers with almond fingernails, skin creases, and red ketchup instead of blood look pretty creepy. Especially if you arrange them on a large plate like someone left behind evidence of a crime. But they’re just regular juicy hot dogs that you can serve in buns or with a potato side dish.
The little details matter here. A few shallow cuts turn an ordinary hot dog into a finger, and a sliced almond looks like a fingernail. We use these kinds of simple decorations for our Halloween dishes, made from ingredients we already have in the kitchen.
Ingredients
Makes 8 servings.
- 8 hot dogs, about 6 inches (15 cm) long
- 8 hot dog buns
- 8 whole blanched almonds or large sliced almonds
- ½ cup (120 ml) tomato ketchup
- 1 tbsp tomato paste
- 1 tsp water, if needed
- 1 tsp vegetable oil
How to make bloody hot dog fingers
- Prepare the hot dogs. Take the hot dogs out of the package and pat them dry with a paper towel. Using a sharp knife, cut a shallow oval indentation about ½ inch (1.5 cm) long at one end of each hot dog. This is where the fingernail will go later. I try to remove only a thin layer from the surface so the hot dog keeps its shape when heated.
- Make the finger creases. Around the middle of each hot dog, make 2–3 shallow cuts across it, then a few more closer to the bottom end. These will look like creases around the knuckles. Don’t cut all the way through the hot dogs! A depth of about ⅛ inch (3 mm) is enough, otherwise they might fall apart while cooking.
- Cook the hot dogs. Heat a skillet with a little oil over medium heat. Add the hot dogs and cook for about 5–7 minutes, turning occasionally, until they’re heated through and lightly browned. Follow the package instructions, especially if you’re using hot dogs that need to be fully cooked. The cuts will open up a little, making the finger creases more noticeable.
- Attach the fingernails. Transfer the cooked hot dogs to a plate and let them cool slightly. Put a small dab of thick ketchup into the indentation at the tip of each one, then gently press a blanched almond or a large almond slice into place. I prefer sliced almonds because they’re thin and look more like real fingernails. If you’re using whole almonds, it’s better to cut them in half lengthwise.
- Make the bloody sauce. Mix the ketchup with tomato paste to get a thicker, darker red sauce. If the mixture is too thick, add a little water. Lindy sometimes keeps regular ketchup for the hot dogs themselves and uses the thicker version just to decorate the plate.
- Assemble the creepy hot dogs. Lightly warm the buns and place one hot dog inside each, with the almond fingernail sticking out slightly. Add the red sauce near the opposite end of the hot dog and a little around the edges of the bun. You can also arrange a few hot dogs separately on a plate, leaving red ketchup marks around them.
For these fingers, I choose hot dogs with a smooth casing, without big pieces of cheese or other fillings inside. They’re much easier to make neat cuts in. And one more thing from experience — don’t try to brown the hot dogs too much. If the surface gets dark and wrinkled, the finger shape will be harder to recognize.
Of all our Halloween dishes, hot dog fingers are probably some of the easiest to make. Lindy and I can make the cuts ahead of time, then just cook the hot dogs, attach the almond fingernails, and add a little ketchup before dinner.
By the way, I wouldn’t go overboard with the ketchup. If you cover the whole plate with it, it’ll be hard to see the fingernails and creases we worked so carefully on!
6. Vampire tacos with beet salsa
Vampires need fangs on Halloween, and our tacos also have blood-red salsa. For the filling, we’ll use seared beef, fresh lettuce, and beets with lime and hot pepper. And two small triangles of white cheese peeking out of each tortilla will look like vampire fangs.
For the salsa, I use roasted red beets, some fresh herbs, lime, and hot pepper. The beets add a little sweetness to the filling, the lime adds tanginess, and the pepper gives it a stronger flavor. And the salsa turns out a rich, dark burgundy color. Just what we need for Halloween vampire tacos!
Ingredients
Makes 8 tacos (4 servings).
For the meat filling
- 1 lb (450 g) skirt steak
- 8 small corn tortillas, 6 inches (15 cm) in diameter
- 2 tbsp Sriracha hot sauce
- 2 tbsp fresh oregano, finely chopped
- 2 tbsp lime juice
- ¼ tsp black pepper
- 2 cups (about 95 g) shredded romaine lettuce
- 2 oz (55 g) firm white cheese for the fangs
For the beet salsa
- 1 large red beet, about 10 oz (280 g)
- 3 green onions
- 1 small red hot pepper
- 2 tbsp freshly squeezed orange juice
- 1 tbsp lime juice
- 1 tsp olive oil
- ¼ tsp salt
How to make vampire tacos
- Roast the beet. Preheat the oven to 400°F (200°C). Wash the beet, wrap it in foil, and place it on a baking sheet. Roast for about 45–60 minutes, until a knife easily slides into the center. Once it cools, peel off the skin and cut the beet into small cubes. I prefer roasting beets whole rather than boiling them in pieces. This way, they keep a richer flavor and don’t get watery.
- Make the bloody salsa. Finely chop the green onions and hot pepper, removing the seeds from the pepper first. Mix them with the beet, then add the orange juice, lime juice, olive oil, and salt. Stir and let it sit for 10–15 minutes. You’ll get a bright, chunky beet salsa. If there’s too much dressing at the bottom of the bowl, drain a little before assembling the tacos so the tortillas don’t get soggy.
- Marinate the beef. Mix the Sriracha, oregano, lime juice, and black pepper. Rub the mixture over the meat, cover, and refrigerate for 30 minutes. Meanwhile, you can prepare the lettuce and cheese. We usually chop all the cold ingredients before we start cooking the meat, since steak is best served right after cooking.
- Sear the steak. Heat a grill pan or a regular heavy skillet until hot. Add the meat and sear on both sides to your preferred doneness. A thin steak usually needs just a few minutes per side, but the exact time depends on its thickness.
For the recommended safe minimum internal temperature, aim for 145°F (63°C), followed by at least 3 minutes of resting time. Then slice the beef into thin strips against the grain. - Make the vampire fangs. Cut the white cheese into thin slices, then cut out small, elongated triangles about ¾ inch (2 cm) long. You’ll need two fangs for each taco. I use a firm cheese like white cheddar so the triangles don’t break and hold their shape well.
- Assemble the tacos. Warm the corn tortillas in a dry skillet for about 20–30 seconds on each side until they’re soft and easy to fold. Place some lettuce, a few strips of beef, and 1–2 tablespoons of beet salsa in the center of each tortilla. Lift the edges of the tortilla on both sides so the filling sits between them, just like a regular taco.
Now place two cheese triangles on the meat near the top opening of the taco, with their wide sides facing up and the pointed tips facing down toward the filling. Position them next to each other with a small gap between them. The white fangs will stand out against the dark red salsa.
I usually roast the beet for the salsa the day before. Once it cools, I put it in the fridge, then chop it and mix it with the other ingredients before dinner. I always taste the finished salsa. Beets can vary in sweetness, so sometimes I add a little more lime juice to balance the flavor.
Lindy and I grow beets on our property and use them in soups, salads, and homemade preserves. Now we’ve found another use for them, and I like the whole idea of using our garden harvest for Halloween dinner. The rich red salsa and white cheese fangs make these tacos look like little vampires. I think we should plant a few more beets next year — we’ve got new plans for our harvest.
7. Cemetery shepherd’s pie
Now let’s try making an entire edible graveyard for Halloween. Instead of dirt, we’ll have baked mashed potatoes, with little tombstones made from crackers standing above them. We’ll add some greenery, dark bread crumbs, and a few crooked paths between the graves. It looks pretty gloomy, but we know there’s a juicy filling of lamb, carrots, peas, and aromatic herbs hiding under that potato crust.
The dish is based on traditional British shepherd’s pie. It’s a casserole made with ground meat and vegetables, covered with mashed potatoes and baked in the oven. Lindy and I use vegetables from our own garden for dishes like this. Carrots, onions, and potatoes are especially handy here, particularly in the fall when most of the harvest has already been collected.
Ingredients
Makes 6 servings.
The meat filling
- 1 lb (450 g) ground lamb
- 1 medium onion, finely chopped
- 2 medium carrots, diced
- ¾ cup (110 g) green peas
- 2 tbsp tomato paste
- 1 cup (240 ml) beef or lamb broth
- 1 tbsp Worcestershire sauce
- 1 tbsp vegetable oil
- 1 tsp dried thyme
- Salt and black pepper to taste
The mashed potato topping
- 2 lbs (900 g) potatoes
- 4 tbsp (55 g) butter
- ¼ cup (60 ml) warm milk
- Salt to taste
The graveyard decorations
- 6–8 rectangular unsalted crackers
- 2 tbsp dark rye bread crumbs
- A few sprigs of fresh parsley
- 1 tsp thick balsamic glaze for writing
How to make cemetery shepherd’s pie
- Prepare the vegetables. Finely chop the onion and cut the carrots into small cubes about ¼ inch (6 mm) in size. Heat the vegetable oil in a deep skillet and sauté the vegetables for 5–7 minutes over medium heat. The carrots should soften a little, and the onion should become translucent.
I try to cut the carrots pretty small so they have enough time to cook with the meat and don’t stay hard inside the pie. - Make the meat filling. Add the ground lamb and cook for 6–8 minutes, breaking up any large chunks with a spatula. Once the meat is browned, stir in the tomato paste, thyme, and Worcestershire sauce. Pour in the broth and season with a little salt and pepper. Reduce the heat and simmer uncovered for about 15–20 minutes.
Add the green peas during the last 5 minutes. The filling should be juicy but without too much loose liquid. - Make the mashed potatoes. Peel the potatoes, cut them into even pieces, and boil in salted water for about 15–20 minutes until tender. Drain the water, add the butter, and mash the potatoes with a potato masher. Gradually pour in the warm milk. For this pie, Lindy makes fairly thick mashed potatoes that hold their shape well and don’t spread over the meat filling.
- Assemble the pie. Preheat the oven to 400°F (200°C). Transfer the meat filling to an approximately 8 × 8-inch (20 × 20 cm) baking dish. Spoon the mashed potatoes over the top in small portions and gently smooth them out.
Then use a fork to make a few shallow grooves across the surface. As the pie bakes, the raised parts will brown slightly, making the surface look like uneven ground. - Bake until golden brown. Place the baking dish in the oven for 20–25 minutes, until the potatoes are golden brown and the meat filling starts bubbling slightly around the edges.
Remove the pie and let it rest for 15 minutes. This gives the filling a little time to thicken, making it easier to serve on plates. - Prepare the tombstones. Take the rectangular crackers and draw a small cross or a few short lines on each one using balsamic glaze. The tip of a wooden skewer works well for making thin lines.
- Turn the pie into a graveyard. Insert the crackers into the mashed potatoes about ½ inch (1.5 cm) deep, leaving a little space between them. Sprinkle the dark bread crumbs between the tombstones to look like freshly dug dirt. Arrange small sprigs of parsley near a few graves, as if grass is growing there. Now we have a real miniature graveyard.
I insert the crackers right before putting the finished pie on the table. If you put them into the hot mashed potatoes too early, the bottoms will get soggy and the tombstones may start to lean. And there’s no need to cover the entire surface with crumbs. A few small dark patches near the graves look much more interesting, while the mashed potatoes remain the main flavor.
In our house, shepherd’s pie has long been associated with fall dinners and the last vegetables harvested from our garden beds. So for Halloween, we can turn it into a little graveyard without changing the recipe itself. Under all those fake graves is a complete dinner with meat, potatoes, and vegetables.
8. Screaming stuffed zucchini boats
For Halloween, our zucchini will be screaming in horror… or at least that’s what they’ll look like. Imagine zucchini halves filled with juicy meat and topped with melted mozzarella, with wide-open eyes and mouths frozen in a silent scream made from black olives. It looks pretty creepy, especially when there are eight of those faces on one plate.
These are regular stuffed zucchini boats with ground beef, tomato sauce, and cheese. But this time, we’re using olives for Halloween decorations instead of adding them to the filling.
Ingredients
Makes 4 servings (8 zucchini halves).
- 4 medium zucchini, about 7–8 inches (18–20 cm) long
- 1 lb (450 g) ground beef
- 1 small onion, finely chopped
- 2 garlic cloves, minced
- ¾ cup (180 ml) tomato sauce
- 1 cup (about 110 g) shredded mozzarella
- 2 tbsp grated Parmesan
- 1 tbsp olive oil
- 1 tsp dried oregano
- Salt and black pepper to taste
- 12–16 large pitted black olives for decorating
How to make screaming stuffed zucchini boats
- Prepare the zucchini. Preheat the oven to 375°F (190°C). Wash the zucchini, cut each one in half lengthwise, and carefully scoop out the centers with a teaspoon, leaving walls about ¼–½ inch (0.6–1.2 cm) thick. You’ll have eight little boats.
Don’t throw away the flesh, we’ll use it for the filling. I usually chop it up right away while I’m working on the zucchini. - Make the meat filling. Heat the olive oil in a skillet and sauté the onion for about 3 minutes. Add the garlic, then 30 seconds later add the ground beef. Break it up with a spatula and cook for 6–8 minutes until the meat is browned.
Drain off any excess grease. Then add the chopped zucchini flesh, tomato sauce, oregano, salt, and pepper. Simmer uncovered for another 5–7 minutes to let the extra liquid evaporate. - Fill the zucchini boats. Arrange the zucchini halves in a baking dish, cut sides facing up. Fill each one with the meat mixture, pressing it down gently with a spoon. Don’t pile the filling too high, since we’ll still need room for the cheese and funny faces.
We usually divide the filling evenly among all the halves right away so the last few zucchini boats don’t end up almost empty. - Bake the zucchini. Cover the baking dish with foil and place it in the oven for 15 minutes. Then remove the foil, sprinkle each boat with mozzarella and a little Parmesan, and return to the oven for another 10–15 minutes, until the zucchini is tender and the cheese is completely melted. Check with a fork — it should slide easily into the flesh, but the boats should still hold their shape.
- Make the screaming faces. While the zucchini is baking, prepare the olives. For the eyes, cut them into small round slices. For the wide-open mouths, cut a few large olives in half lengthwise to make dark ovals.
Arrange two round eyes and one oval mouth on each finished zucchini boat. Gently press them into the soft melted cheese. Place the eyes close together and the mouth a little lower, in the center. You’ll get faces that look terrified, as if they’ve just seen something scary. - Serve the zucchini boats. Let the zucchini rest for about 5 minutes after taking them out of the oven. During this time, the cheese will firm up a little, and the filling won’t be quite so hot. Transfer the boats to a large serving platter and check that the olives are still in place. Now we can take a look at all eight terrified little faces!
For stuffing, I choose zucchini that are roughly the same size. That way, they bake evenly, and I don’t have to take some out of the oven before the others. If the zucchini are large and the skin has already become tough, it’s better to use younger ones. And don’t throw away any extra zucchini flesh that didn’t fit into the meat filling. We add it to vegetable stew or soup the next day.
We grow a lot of zucchini on our property, and by the end of the season, we have to figure out what to do with the next harvest. We’ve been using them for casseroles, vegetable dishes, and stuffing for years, but for Halloween, we can have a little fun with how they look. Those screaming faces definitely won’t go unnoticed at dinner.
9. Monster face burgers
Sharp cheese teeth, long tongues made from pickles, and huge eyes. For Halloween, our burgers turn into hungry, toothy monsters that look like they’re ready to bite first.
Unlike the mini burgers with meat filling we made earlier, these will have real beef patties. I use ground beef with a little fat to keep the meat juicy. I usually cook the patties in a skillet or on the grill, and slice all the vegetables and cheese ahead of time. That way, I can assemble the burgers while the meat is still hot.
Ingredients
Makes 4 large burgers.
- 1½ lbs (680 g) ground beef with about 20% fat
- 4 burger buns
- 4 slices of white cheddar cheese
- 4 long pickle slices
- 4 romaine lettuce leaves
- 8 green olives stuffed with red peppers
- 2 tbsp mayonnaise
- 2 tbsp ketchup
- 1 tbsp vegetable oil
- 1 tsp salt
- ½ tsp black pepper
How to make monster face burgers
- Shape the beef patties. Divide the ground beef into four equal portions and shape them into round patties about ¾ inch (2 cm) thick. Make them slightly wider than the buns, since the meat will shrink during cooking.
I gently press down the center of each patty with my thumb so it doesn’t puff up too much in the skillet. We’ll add the salt and pepper right before cooking. - Cook the patties. Heat a heavy skillet with a little oil over medium to medium-high heat. Season the meat with salt and pepper, then cook the patties for about 4–6 minutes per side, depending on their thickness.
The internal temperature of the ground beef should reach 160°F (71°C). After cooking, transfer the patties to a plate for a couple of minutes. Try not to press down on them with a spatula while cooking, or some of the meat juices will escape. - Prepare the cheese teeth. Take the white cheddar slices and use a sharp knife to cut several triangular teeth along one edge. Leave most of each cheese slice whole so it can rest on the patty, with the pointed edge sticking out. Lindy usually makes the teeth different lengths, and those uneven teeth really do look funnier.
- Make the tongues and eyes. Slice the pickles lengthwise into long, thin strips if they’re not already sliced. These will be our monsters’ tongues. For the eyes, cut the green olives crosswise to make round slices with red centers. We’ll need two slices for each burger.
- Toast the buns. Cut the buns in half and place them cut-side down in a hot, dry skillet for about 1–2 minutes. Once the surface turns slightly golden, remove them from the heat. We try not to overtoast the buns, or these tall burgers will be harder to bite into.
- Assemble the toothy monsters. Mix the mayonnaise with the ketchup and spread it on the bottom halves of the buns. Add the lettuce, then the hot beef patties. Place a long pickle slice on each patty so one end sticks out about 1–1½ inches (2.5–4 cm) beyond the front edge of the bun.
Lay a slice of cheddar on top with the teeth pointing outward, right above the pickle tongue. Cover with the top half of the bun. The cheese teeth and tongue should remain clearly visible between the two halves. - Make the eyes. Use the tip of a knife to make two small indentations in the top bun and place the olive slices inside, with the red centers facing up. They should sit almost flush with the surface of the soft bun. If the olives don’t stay in place, you can spread a little mayonnaise inside the indentations.
I take the cheese for the teeth out of the refrigerator right before assembling the burgers. Cheddar softens quickly on a hot patty, and the pointed edges can lose their shape. So I prepare the meat and buns first and add the cheese teeth at the very end. Cheese slices that are too thin won’t work well for this decoration either.
For Halloween, we can spend a few extra minutes making these toothy monster faces. Each monster gets its own expression, especially if you change the shape of the teeth a little.
The pickle tongues add a nice tanginess to the familiar burger. I serve them with potato wedges and leave some extra sauce on the side for anyone who likes adding more while eating.
10. Witch hat calzones
And here are the witch hats with pointed tops, folded brims, and little pepperoni decorations… Except they’re not made of fabric, but of golden-brown dough filled with mozzarella, Parmesan, and pepperoni. Break one of these hats in half, and you’ll find hot, melted cheese inside. Even that sounds delicious!
These are small calzones, Italian folded pizzas that we’ll make using refrigerated crescent roll dough. It’s already divided into triangles, so it’ll be easier to shape the dough into hats. For the filling, we’ll use three kinds of cheese and some pepperoni. And we’ll serve the tomato sauce separately so the dough cooks through properly and doesn’t get soggy inside.
Ingredients
Makes 8 small calzones.
- 2 packages (8 oz / 225 g each) refrigerated crescent roll dough
- ½ cup (about 55 g) shredded mozzarella
- ¼ cup (25 g) grated Parmesan
- 4 oz (115 g) cream cheese, at room temperature
- ½ cup (about 60 g) finely chopped pepperoni
- 8–10 additional pepperoni slices for decorating
- 1 large egg
- 1 tbsp water
- ½ tsp dried Italian seasoning
- ¼ tsp black pepper
- ½ cup (120 ml) marinara sauce for serving
How to make witch hat calzones
- Prepare the oven and filling. Preheat the oven to 425°F (220°C) and line two baking sheets with parchment paper. In a bowl, mix the cream cheese, mozzarella, Parmesan, finely chopped pepperoni, Italian seasoning, and black pepper.
I first mash the cream cheese a little with a fork, then add the other ingredients. This makes them easier to mix and keeps the filling fairly thick. - Divide the dough into triangles. Open the packages and carefully unroll the dough. Each package usually contains eight triangles, so you’ll have 16 in total. Arrange half of them on the baking sheets and save the rest for the tops of the hats.
Try to match triangles that are roughly the same size so you can seal the edges without stretching the dough too much. - Add the cheese filling. Beat the egg with the water and lightly brush the edges of eight triangles. Place about 1½ tablespoons of the cheese mixture in the center of each one, spreading it across the wider part and middle of the triangle. Leave about ½ inch (1.5 cm) of dough free around the edges.
Lindy and I try not to overfill pastries like these, since the cheese melts during baking and can leak through the seams. - Shape the witch hats. Cover each filled triangle with another triangle of dough, lining up all three corners. Press the edges firmly together with your fingers to keep the filling inside.
Now fold the wide bottom edge of each triangle upward by about ½ inch (1.5 cm). This will create a narrow strip of dough that looks like the brim of a hat. Bend the pointed top corner slightly to one side. The hat will lie flat on the baking sheet, but its shape will already be recognizable. - Add the pepperoni decorations. Cut small diamonds or triangles from the remaining pepperoni slices. Arrange them along the folded bottom strip of dough, like buckles and patterns on the witch hats. Brush the exposed dough with the remaining egg wash. Lindy usually keeps the decorations small so they don’t cover up the shape of the hats after baking.
- Bake the calzones. Put the baking sheets in the oven for about 10–13 minutes, until the dough puffs up and turns golden brown. If you’re baking on two racks at once, switch the baking sheets halfway through.
Make sure the dough is fully baked, especially along the sealed edges. Leave the finished hats on the baking sheets for 3–5 minutes, since the cheese filling inside will be very hot. - Serve with tomato sauce. Transfer the calzones to a large serving platter and place a small bowl of warm marinara sauce next to them. It’s great for dipping pieces of the pastry. It’s best to serve the hats whole so you can see their folded brims and pointed tops.
I take the refrigerated dough out of the fridge right before preparing it. If it sits on the counter for too long, it gets too soft, sticks to your fingers, and stretches more easily. This is especially annoying when you’re trying to seal the thin edges of the triangles. So I prepare the filling and pepperoni decorations ahead of time and open the dough at the very end.
These witch hats will wrap up our collection of ten Halloween dinners. A few folds of dough, a little pepperoni, and there are already tiny witch hats sitting on the baking sheet. Lindy and I serve these pastries hot, while the cheese inside is still stretchy. And after dinner, we can decide which of the ten dishes looked the creepiest and which one we’d like to make again.
Got an idea?
I hope you found something for your dinner among these 10 Easy Halloween Dinner Ideas. Lindy and I especially love the part of holiday preparations when everyone gathers in the kitchen and starts coming up with funny little details for the holiday dishes.
Sometimes things turn out completely different from what we planned, but that just makes it even more fun.
Does your family have a favorite recipe or an unusual way of decorating food? Tell us in the comments. We’d love to read your ideas and maybe try something new for the next holiday.