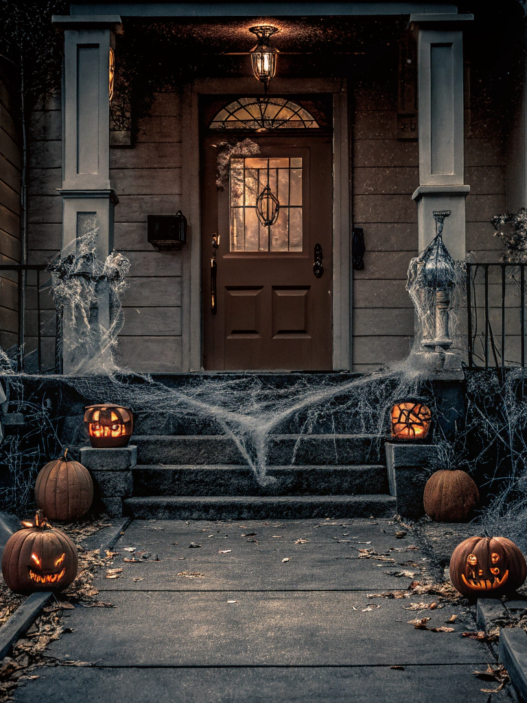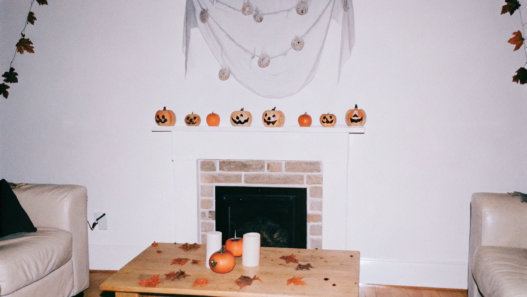
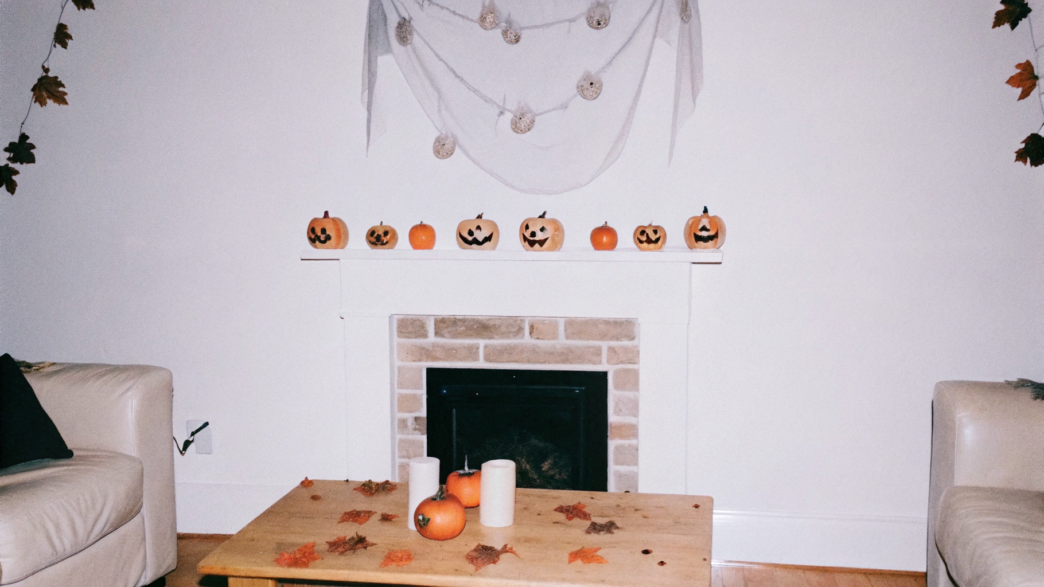
Halloween decor at home doesn’t have to mean boxes of plastic skeletons, orange garlands on every window, and dozens of decorations covering every free surface.
At our house, for example, pumpkins start showing up here and there, decorative spiderwebs appear on the shelves, the pillow covers on the sofa get changed, and within a couple of days, almost every room has something Halloween-themed in it.
For these 10 Indoor Fall Halloween Decor Ideas, I’ve gathered options you can make at home yourself without a huge shopping list. Some take just a few minutes, while others can turn into an evening with yarn, candles, and a whole bunch of little pumpkins.
And, by the way, some of the decor can easily be made from things you already have at home or growing in your yard. That fits our way of life perfectly.
1. Moody candle arrangements
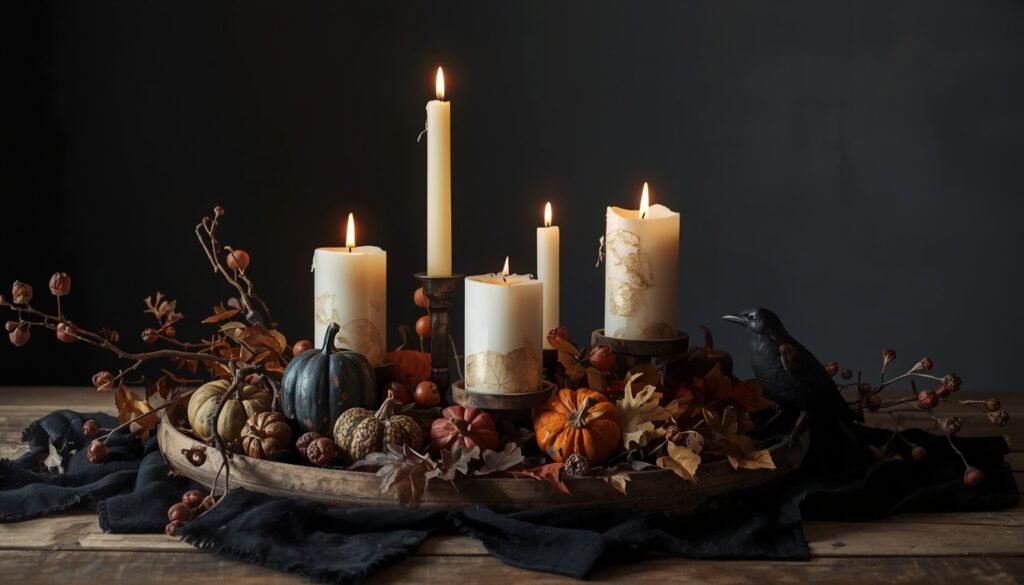
We have a lot of candles in our house. Some sit in the kitchen, a couple are on the dresser, and there’s almost always one next to the books in the living room… And as Halloween gets closer, Lindy and I turn them into small arrangements with pumpkins, branches, and old candle holders.
You don’t need to buy a whole set of decorations for this. Take 3–5 candles of different heights, place them in candle holders, and arrange a few small pumpkins, dried leaves, or acorns between them. To make the arrangement feel more Halloween-like, one dark detail is enough, such as a small raven figurine or a piece of black fabric underneath.
What you’ll need
- 3–5 candles of different heights. Cream, burgundy, dark orange, or black all work.
- A few candle holders made of metal, glass, or ceramic. Some of ours were picked up at flea markets at completely different times.
- A small wooden tray or board if the arrangement will sit on a table or dresser.
- 2–4 mini pumpkins, a few dried leaves, acorns, or small branches.
- One Halloween detail. For example, a raven figurine, a small skull, or a piece of black fabric.
Anywhere there are dried leaves, books, or fabric nearby, I prefer using battery-operated candles. Homemory Flameless Taper Candles on Amazon work well for an arrangement like this.
How to put the arrangement together
- Start with the candles and candle holders. Take 3–5 candles, place them in the holders, and arrange them in one small group. Keep the taller candles toward the back and the shorter ones closer to the front. That makes it easier to arrange the other details around them.
- Place mini pumpkins between the candles. Put one in front of a tall candle holder, another off to the side, and the smallest one a little farther back between the candles. We often use pumpkins in different sizes, which makes the arrangement look more natural.
- Lay out the natural details. Leave a few acorns directly on the tray, place a small branch along one edge, and tuck two or three nice dried leaves partly underneath the pumpkins. You don’t need much. Lindy regularly brings little things like this in from the property, and in fall, some of them inevitably make their way from the porch into the house.
- Add one Halloween detail. For example, a black raven figurine can sit behind the candles as if it’s peeking out from the arrangement, while a small skull can go near the pumpkins. If you’re using black fabric, place it underneath some of the items and let the edges lie loosely on the surface. But don’t put a raven, a skull, spiderwebs, and five more decorations all in the same spot.
- Look at the arrangement from a few feet away. Step back a little and check whether one side looks empty or, on the other hand, whether the items are packed too tightly together. Sometimes moving one pumpkin just 2–3 inches (5–8 cm) is enough to make everything look better.
- Check candle safety. If you’re using real flames, keep dried leaves, branches, and fabric well away from them, and don’t place a tall candle directly underneath a shelf. We usually use battery-operated candles. You can leave them glowing in the evening while we’re making dinner or doing something in another room. I’m always in favor of safety!
Our arrangements rarely look exactly the same two years in a row. Some decorative pieces can carry over from one season to the next, but the pumpkins, branches, and whatever Lindy brings in from the garden or finds while walking around the property change a little every October. We put the arrangement together from scratch using seasonal things and whatever we already have on hand.
2. DIY Spider Web Wall Art
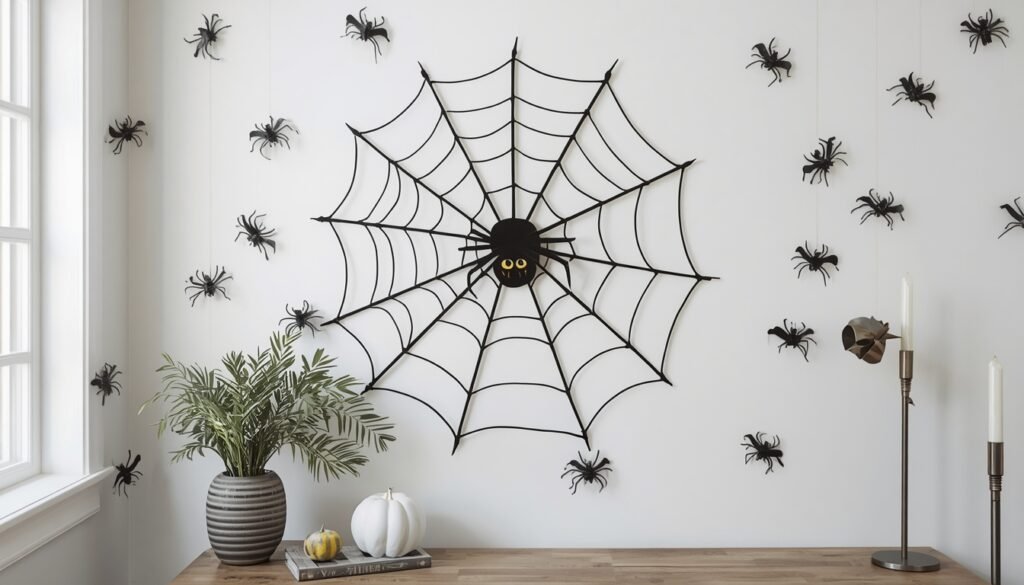
For Halloween, I really value decor you can make yourself in one evening. Wall spider web art is exactly that kind of thing. It catches the eye right away, and you don’t need complicated materials or a whole set of tools to make it.
Lindy and I made similar decor for a blank wall where regular small decorations just got lost. A big spider web solved the problem, and it looked more interesting than a dozen little plastic decorations around it.
What you’ll need
- Black or dark gray yarn in a medium thickness.
- Small clear hooks or removable wall fasteners.
- Scissors.
- A measuring tape, if you want to figure out the size of the web ahead of time.
- 1–3 decorative spiders in different sizes.
If you don’t want to drill holes in the wall, you can use clear removable hooks. Just check first that they work with your paint or wall finish.
How to make a wall spider web
- Start by deciding on the size. For an open wall area about 4–5 feet wide (1.2–1.5 m), a web around 3–4 feet (90–120 cm) across will already be clearly visible. Mark the center point and a few spots around the edges where the main strands will be attached.
- Stretch the main strands. Attach long pieces of yarn so they cross in the center and spread out in different directions, like the spokes of a wheel. Usually 6–8 lines are enough. They don’t have to be spaced perfectly evenly. Real spider webs aren’t that neat either.
- Make the cross lines. Take a long piece of yarn and start connecting the main strands in circles, moving from the center outward. At each intersection, just tie a small knot. Leave about 3–6 inches (8–15 cm) between each round, increasing the spacing gradually as you move outward.
- Loosen a few sections a little. Don’t pull every line tight like a string. Let a few strands sag slightly. That makes the web look less geometric and more like something a very hardworking spider might actually have made.
- Place the decorative spiders. One larger spider can go closer to the center, and another can sit near the edge. If the spiders are lightweight, it’s enough to thread their legs through the yarn. Heavier ones are better attached separately so they don’t pull the yarn downward.
- Check the fasteners. Go around the edges and make sure none of the hooks are pulling away from the wall. If one strand is pulling too hard on a fastener, loosen it a little. After that, trim the long ends of yarn and leave only short tails near the knots.
The first time Lindy and I made a spider web like this, we started completely without marking anything out, and after about ten minutes it looked more like a map of some unknown railroad. We had to take half the strands down and start over from the center. Since then, we always make a few main lines first and only then weave the rest. It’s much faster, and we waste a lot less нервов.
3. Pumpkin Centerpieces for the Kitchen

Our kitchen is already busy enough without seasonal decor. Jars, cutting boards, bowls of vegetables… finding free counter space can be a challenge! So in fall, Lindy and I don’t cover the counters with dozens of little decorations. Instead, we put together one compact pumpkin centerpiece that can easily be moved when needed.
I think real mini pumpkins work best. They can sit out for several weeks, and afterward you don’t have to pack them away in a box until next fall. If you use edible varieties, some of the pumpkins can simply be cooked later.
What you’ll need
- 3–5 small pumpkins in different sizes and shapes.
- A low wooden tray or wide board about 16–20 inches (40–50 cm) long and around 8–12 inches (20–30 cm) wide.
- A few sprigs of rosemary, sage, or other greenery you already have on hand.
- 1–2 small apples or pears.
- One low battery-operated candle, if you want one.
If you don’t have a suitable base at home, you can look for a wooden tray with low sides, so the pumpkins stay visible and the tray is easy to carry.
How to put together a pumpkin centerpiece
- Choose a spot in the kitchen. A kitchen island, dining table, or an open section of the counter will work. It’s better to place the tray somewhere it won’t get in the way while you cook or force you to keep working around it with a cutting board in your hands.
- Start with the two largest pumpkins. Place them closer to the middle of the tray, slightly offset from each other. One can sit a little farther back and the other closer to the front edge. That gives you the base of the whole arrangement.
- Arrange the remaining pumpkins and fruit. Place the smaller pumpkins between the larger ones or closer to the edges. You can set one or two apples or pears beside them. Don’t fill every inch of the tray — a little open space between the pieces makes everything look better.
- Lay in a few sprigs of greenery. Tuck rosemary or sage between the pumpkins and let the ends extend slightly over the edge of the tray. We often use whatever is already growing here or left over from cooking, so there’s usually no need to buy greenery just for the decor.
- Add a candle if you’ll use the centerpiece in the evening. A low battery-operated candle can sit between the pumpkins or closer to one edge. In the kitchen, I prefer this option because there are always towels, paper, and other things around that really shouldn’t be anywhere near an open flame.
The whole arrangement stays together on one tray, so it’s easy to move all at once. Before a big cooking session or family dinner, you can simply pick it up, move it somewhere else, and put it back afterward.
Lindy brings in a few of the prettiest little pumpkins, we arrange them on the tray with herbs, and a couple of weeks later it may already look a little different. One pumpkin gets cooked, the apples get eaten, and something new takes their place. That kind of decor works perfectly in our kitchen — it slowly changes along with what we grow and cook.
4. Halloween Throw Pillows for the Living Room
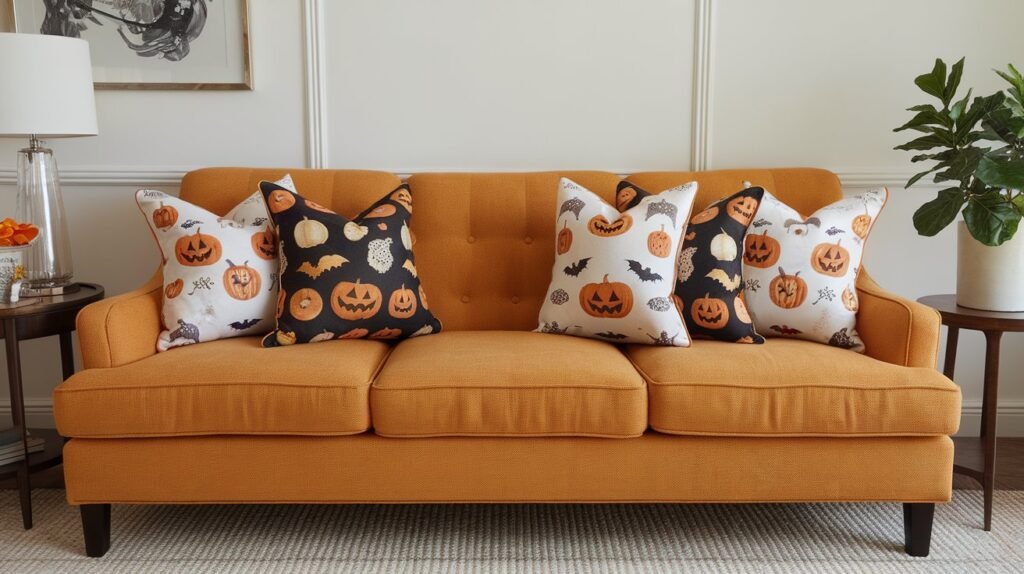
For Halloween, I don’t like completely redoing the whole living room. It’s much easier to swap the regular covers on our decorative pillows for seasonal ones with pumpkins, bats, or other Halloween prints. It only takes a few minutes, and the sofa — and the whole living room — immediately looks different.
Covers are also easier to store. They take up much less space than five large pillows sitting somewhere in a closet for almost the entire year.
What you’ll need
- 2–4 decorative pillows around 18 × 18 inches (46 × 46 cm).
- Removable covers with fall or Halloween prints.
- 1–2 solid-color covers in dark orange, burgundy, cream, or black.
- One more noticeable print, such as bats, pumpkins, ghosts, or an old house.
- A throw blanket in a neutral or fall shade, if you already have one in the living room.
You can buy Halloween Throw Pillow Covers 18×18 on Amazon and simply swap them out for Halloween instead of buying new pillows every year.
How to style the sofa
- Start with the pillows already on your sofa. If they’re a standard size, just replace the regular covers with Halloween ones. Pillows around 18 × 18 inches (46 × 46 cm) work well for most sofas. They’re noticeable without taking up the whole seat.
- Keep some of the pillows solid. For example, two can stay plain, while the others can have covers with pumpkins, bats, or the silhouette of an old house. That keeps the sofa from looking too busy.
- Mix larger and smaller prints. One pillow can have a cover with a large pumpkin, while another has small bats or a simple geometric pattern. That way, the different prints don’t all compete for attention.
- Look at the colors already in your living room. If you have a lot of wood, beige, and cream tones, burgundy, dark green, brown, or black covers will fit in easily. Bright orange definitely isn’t required.
- Keep a throw blanket nearby. A simple wool or knitted throw looks good over the arm or edge of the sofa. And on a cool October evening, it will probably end up over someone’s knees pretty quickly.
- Don’t cover the entire sofa with pillows. We once got so carried away that we had to move half of them onto the floor before watching a movie. Since then, I’ve stuck to one very practical rule — after decorating, there should still be room for people to sit.
In fall, we don’t change much in our living room — just a few pillow covers, a throw blanket, and a couple of small pumpkins on the coffee table or a shelf near the sofa.
After Halloween, the covers go into one small box until next year, while our usual pillows stay right where they are.
5. Gothic Mirror Mantel Display
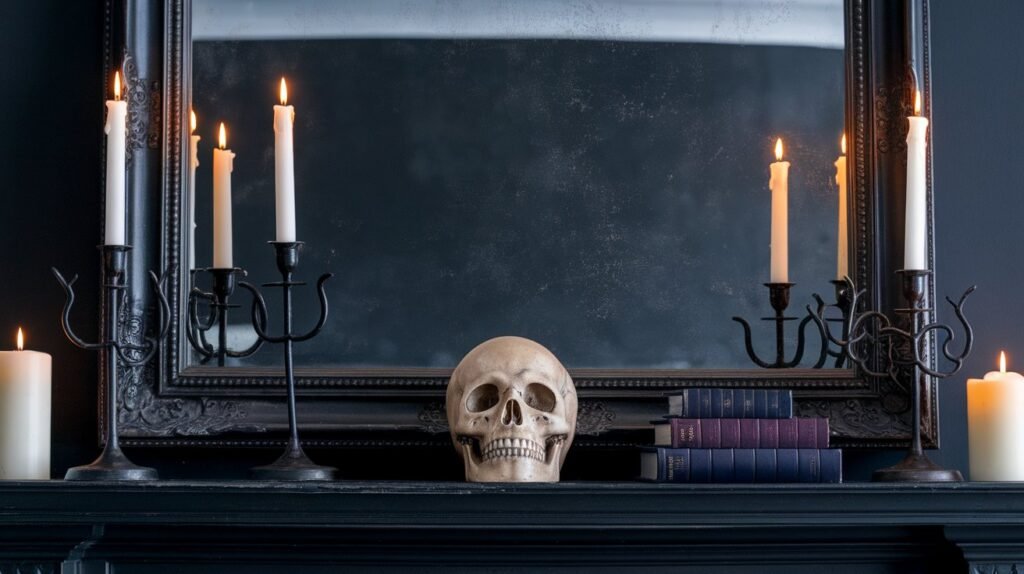
The mantel is one of the easiest places to decorate for Halloween. You can put together a small gothic display with a mirror, candles, and a few dark details without filling the whole room with decorations.
You probably already have most of what you need at home. An old mirror, a couple of candle holders, a few books with dark covers — and then you can see what’s still missing.
What you’ll need
- A mirror with a dark frame about 18–30 inches (45–75 cm) tall.
- 2–3 candle holders in different heights.
- Battery-operated candles or regular candles if there’s no fabric or dry decor nearby.
- 2–4 old books with dark covers.
- A small black vase or dark glass bottle.
- A few dry branches.
- One small Halloween detail, such as a raven, skull, or mini pumpkin.
For a mantel, it’s better not to use a mirror that’s too large or heavy, especially if it will simply lean against the wall.
How to decorate the mantel
- Place the mirror. Set it in the center or slightly off to one side. If the mirror isn’t attached to the wall, make sure it’s stable and can’t slide off the narrow mantel.
- Place the candles on both sides. You can put two candle holders of different heights on one side and a third on the other. There’s no need for perfect symmetry. A little difference in height makes the display more interesting.
- Use books as a stand. Stack two or three books and place a small candle, vase, or figurine on top. It’s an easy way to change the height of different pieces without buying special stands.
- Add a vase with dry branches. Use a few long, bare branches and position them so part of them is reflected in the mirror. The reflection makes it look like there are almost twice as many branches.
- Add one Halloween detail. A small raven can sit on top of the books, a little skull can go near a candle holder, and a pumpkin can sit closer to the edge of the mantel. One detail like this is usually enough, especially when the mirror and candles already stand out.
- Leave part of the mantel empty. You don’t need to fill the whole space from one end to the other. We usually stop while there are still small gaps between the objects, so the mirror, candles, and books don’t all blend together.
- Check candle safety. If you’re using real flames, keep branches, books, and other flammable items well away from them. Like I mentioned before, we usually choose battery-operated candles because they’re much easier to move around.
One year, Lindy brought in a few almost black dry branches after fall pruning, and we put them in an old dark bottle next to the mirror. Their reflection made them look much fuller. That random little find ended up becoming the most noticeable part of the whole display, and we didn’t have to buy anything for it.
6. Shelf styling with mini pumpkins
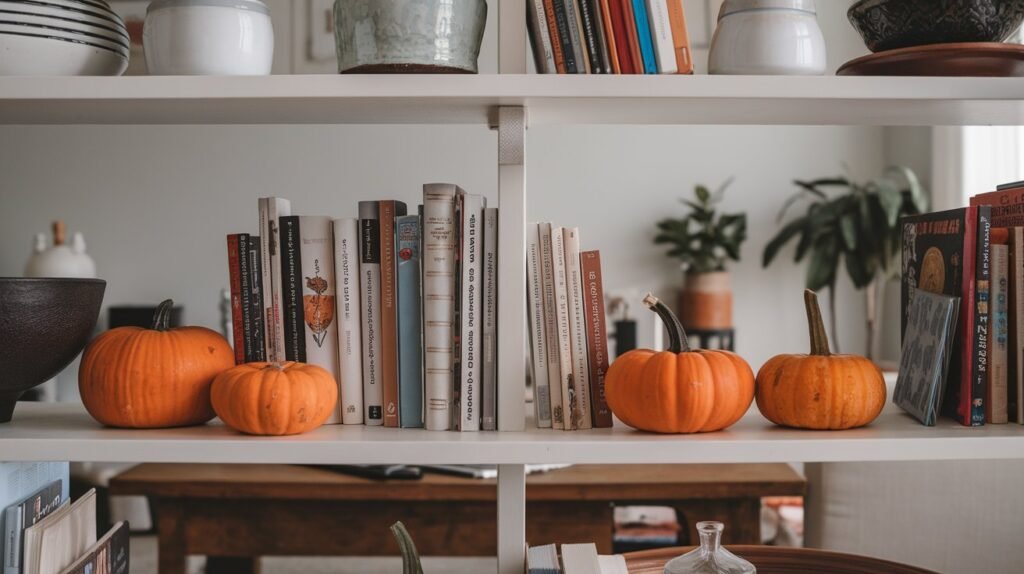
You can arrange mini pumpkins in just a few minutes. In fall, we often put them on open shelves in the living room or kitchen, where we already have books, jars, pottery, and other everyday things. No need to rearrange everything.
The pumpkins become part of what’s already on the shelves instead of taking over the whole space. A couple between the books, another next to a ceramic bowl — and you can already see a little Halloween in the room, while the books, dishes, and other things on the shelves are still easy to reach.
What you’ll need
- 5–8 mini pumpkins in different sizes and shapes.
- A few books that are already on the shelves.
- Small bowls, jars, or ceramic containers.
- A couple of dry twigs or fall leaves, if you want.
- One small Halloween figurine for a more noticeable decoration.
If you can’t find real mini pumpkins, you can use artificial ones and store them with the rest of your seasonal decor afterward.
How to decorate the shelves
- Clear a little space. You don’t need to take everything off the shelves. Just remove a couple of small items so the pumpkins don’t get lost among the books, jars, frames, and dishes.
- Start with the largest pumpkins. Put one next to a stack of books and another near a bowl or vase. If the shelf is long, spread them out toward opposite ends instead of putting them all in one spot.
- Use different heights. You can place one small pumpkin on top of two or three books and leave another directly on the shelf. That way, they’re not all sitting at the same level, and you won’t need any extra stands.
- Keep the everyday things around them. In the kitchen, a pumpkin can sit next to a wooden bowl or a jar of grains, while in the living room, it can go beside books or a photo frame. There’s no need to clear the whole shelf just for decorations.
- Add one Halloween detail. You can attach a small spider near the books or place a raven figurine next to a pumpkin. That’s enough to make the shelves look more Halloween-themed rather than just decorated for fall.
And yes, our examples aren’t strict instructions. You have different shelves, books, dishes, and little things at home anyway, so try your own combinations. Sometimes the best arrangement happens completely by accident — you move a pumpkin, put an old bowl next to it, and suddenly everything looks just right.
At our house in October, for example, a few pumpkins might be on the kitchen shelf today, a week later Lindy moves one over to the books in the living room, and another ends up next to a basket by the entrance. And I like that approach much more than having a fixed arrangement that you’re not supposed to touch all season.
7. Fall garland over the TV stand
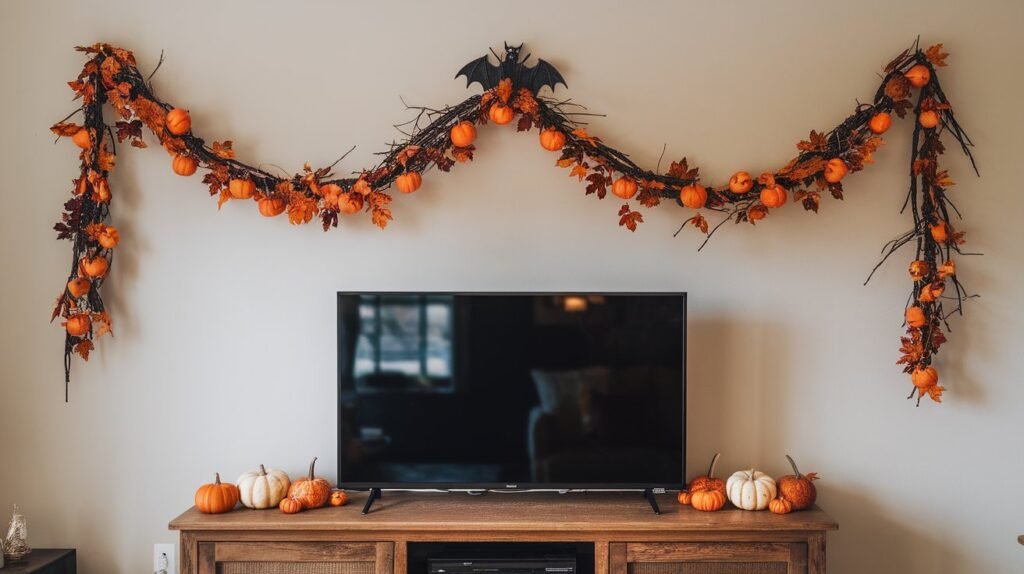
The area around the TV often ends up with almost no seasonal decor. And that makes sense — the screen already takes up a lot of space, so another ten decorations around it just get in the way. Lindy usually handles this with one fall garland that can run above the TV stand or be attached to the wall just above the screen.
For Halloween, you can weave in small pumpkins, dried leaves, a few dark twigs, and a couple of bats. It looks really nice without getting too busy.
What you’ll need
- A fall garland about 5–6 feet (1.5–1.8 m) long.
- Mini pumpkins or small decorative pumpkins.
- Artificial or well-dried leaves.
- A few thin twigs.
- Small bats or other Halloween decor.
- Clear removable hooks for hanging.
How to decorate the garland
- Start by choosing the length. It works best if the garland runs almost the full length of the TV stand and extends slightly past the edges. If you’re hanging it above the TV, leave at least a few inches of open space between the screen and the garland.
- Attach the base. Two or three clear hooks are usually enough. Hang the garland first without any extra decorations and see how it falls. You can let it dip slightly in the middle or keep it almost straight.
- Arrange the leaves and twigs. If the garland looks too even, weave in a few dry twigs or extra leaves. Both sides don’t need to match. Let one twig stick out a little farther in one spot, while the leaves sit more densely somewhere else.
- Add the mini pumpkins. You can attach a few small pumpkins along the garland, leaving about 10–14 inches (25–35 cm) between them. If they’re heavy, don’t hang them directly above the screen. Use lightweight artificial ones instead.
- Add a couple of Halloween details. Two or three bats can go on the wall next to the garland or right between the leaves. That’s already enough to make the whole setup feel Halloween-themed.
- Check that the decor doesn’t get in the way of the TV. Sit on the sofa and look at the screen the way you normally would. If leaves or twigs end up in your line of sight, move the garland a little higher. We always check it from the sofa because up close, it’s easy to miss a branch sticking out right above the screen.
Our garland usually stays up for most of the fall. Around Halloween, Lindy adds a few darker details, and after the holiday, we take them off and leave just the leaves for another couple of weeks. That way, the same base works both for Halloween and for regular fall decor.
8. Haunted house-inspired bookshelf
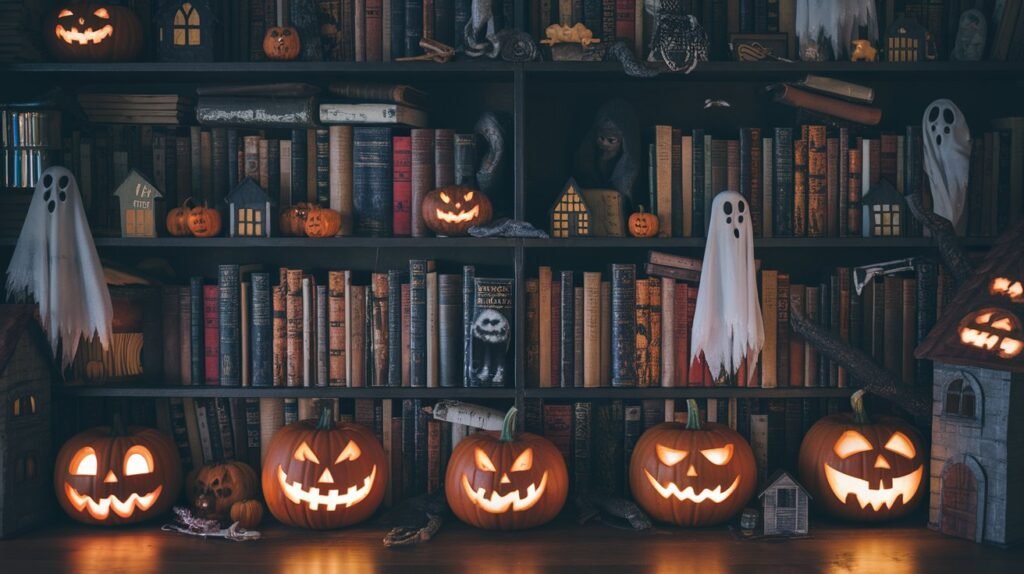
A bookshelf already gives you a great base for Halloween. Books, dark little corners between the shelves, old frames, candles — half the atmosphere is already there. It just needs a little help.
Lindy and I usually don’t touch the whole bookshelf. We pick one or two shelves and turn them into a little corner of an old haunted house. You can use more than just pumpkins and spiderwebs here — ghost figurines, old photos, little houses, and other strange things that somehow make perfect sense in October.
What you’ll need
- A few books with dark, brown, or neutral covers.
- A small decorative haunted house.
- 1–2 ghost figurines.
- 2–3 battery-operated candles.
- A small frame with a black-and-white photo or an old illustration.
- A small skull, raven, or old key.
- A few dry branches.
- A little artificial spiderweb.
- 1–2 mini pumpkins.
If you’re missing the main piece, you can use a FESTGLOX Halloween Haunted House Decorations on Amazon.
How to decorate the bookshelf
- Choose one or two shelves. Remove a few small things, but leave the books in place. It works better when the Halloween decor fits in with the everyday items instead of replacing everything on the shelf.
- Add the haunted house. If it’s small, place it on top of a stack of two or three books. That makes it easier to notice. Leave a little open space around it so it doesn’t disappear among the other details.
- Place the ghost figurines. Put one next to the house, and hide another between the books or a little farther back on the shelf. It’s more fun when the ghost doesn’t stand out right away and looks like it’s secretly peeking out from behind the books.
- Add battery-operated candles. One can go next to the house and another near the photo frame. In the evening, that light makes the shelf feel more mysterious, and around books it’s much safer than regular candles.
- Add an old photo. A black-and-white photo or an old illustration immediately gives the shelf the right mood. Lean the frame against the back of the shelf and partly cover it with a branch or decorative spiderweb.
- Add a few mysterious details. A small skull, old key, raven figurine, or little dark glass bottle all fit the haunted-house theme. Two or three pieces like this are plenty.
- Add spiderwebs and dry branches. Stretch a little web between the books and the frame, and lay the branches along the back of the shelf or place them off to one side. Just don’t cover the whole display with them.
- Leave one or two pumpkins. They tie the whole display back to fall and Halloween. Put one small pumpkin near the books and another beside a candle or ghost.
- Look at the shelf in the evening. That’s when it’s easier to notice where you need a little more light or which figurine gets lost between the books. Experiment a bit, move a ghost or candle slightly, and you may find the whole scene looks much better.
Everything looks especially good in the evening. In low light, the haunted house, old photos, spiderwebs, candles, and little figurines start to feel less like a decorated shelf and more like a real corner of an old haunted house. And there’s plenty of room here to use your imagination, experiment, and come up with your own version.
9. Bedroom bat wall decals
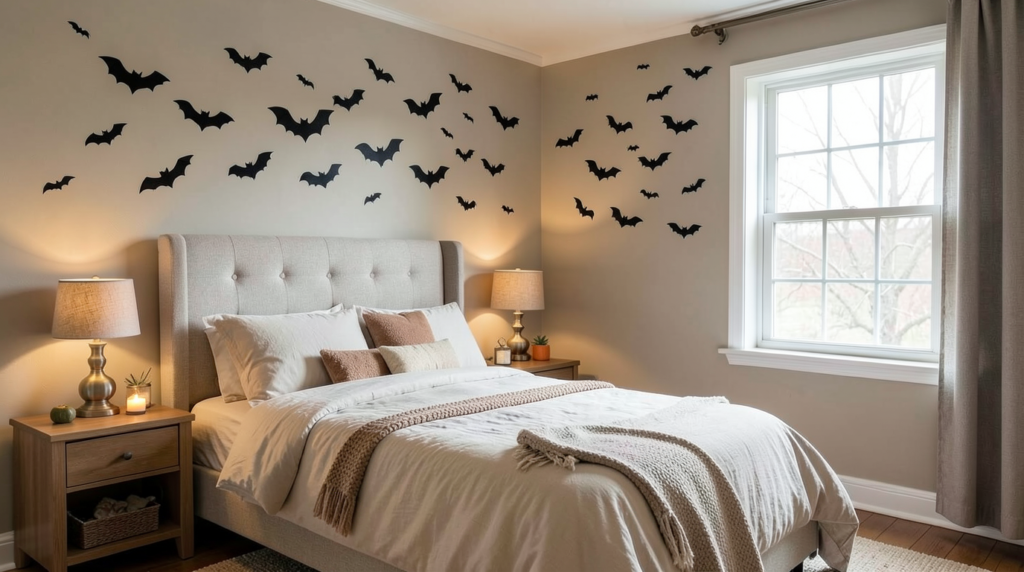
For Halloween, one wall decoration is usually enough in the bedroom. For example, bat wall decals can go above the headboard, near a window, or run diagonally from the corner of the wall toward the ceiling. Even a small group of decals can quickly change the look of the room, and after the holiday, they’re easy to remove.
What you’ll need
- A set of bat wall decals in different sizes.
- Removable adhesive dots or fasteners if they’re not included.
- Painter’s tape for laying out the design first.
- A small step ladder if the decor will go high above the bed.
It’s better to choose bat wall decals that come in several sizes, so the bats don’t all look the same.
How to arrange the bats
- Choose a section of the wall. Above the headboard, you can spread the bat decals across an area about 3–5 feet (90–150 cm) wide. Another option is to start near the corner of the wall and arrange the decals diagonally upward toward the ceiling.
- Lay the decals out on the floor first. Before attaching them to the wall, try out a rough layout. Keep the larger decals lower down, then gradually move the smaller ones higher and off to the side to create the look of a flying flock.
- Attach them one at a time. Start with the largest bat and gradually work your way upward. Leave about 4–10 inches (10–25 cm) between the shapes, but adjust the spacing however you like.
- Turn a few of the shapes at different angles. One bat can fly almost horizontally, another slightly upward, and a third off to the side. The whole arrangement looks much more lively than when every shape faces the same direction.
- Don’t cover the entire wall with decals. For most bedrooms, around 12–20 decals in different sizes is enough. Leave some open space around them so the design doesn’t feel too crowded.
- Check the fasteners after a few hours. This is especially important if the walls are painted with a matte finish or have a little texture. If one of the decals starts peeling away, replace the fastener before it ends up on your pillow in the middle of the night.
Lindy and I quickly learned that it’s better to lay these decals out first and look at them from a distance before putting them on the wall. It makes it easier to avoid an overly straight line and see right away where you need a larger shape and where a few smaller ones work better.
After that, you can improvise. Run the decals from the window toward the ceiling, group them above the headboard, or create a small flock in the corner of the room. There’s no single right layout — the main thing is that you like how they look in your own bedroom.
10. Dining table skeleton runner
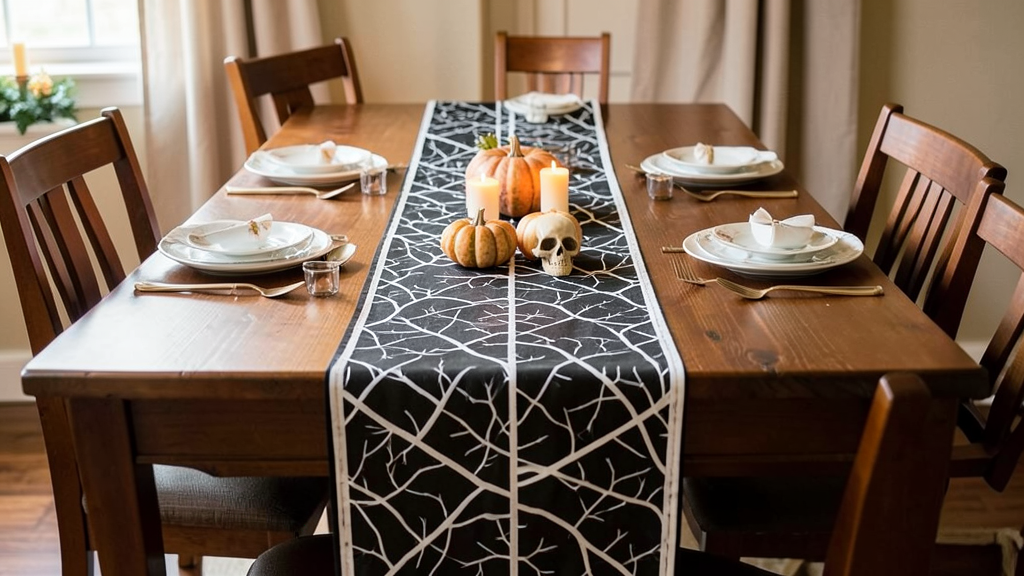
A skeleton table runner takes up the center of the table, so even without much extra decor, it’s immediately clear which holiday you’re getting ready for. We try not to overcrowd the table with decorations, so around the runner there are usually just a few small details — candles, a couple of pumpkins, and maybe a small skull.
What you’ll need
- A table runner with skeletons.
- 2–4 small pumpkins.
- 2–3 battery-operated candles.
- One small skull or skeleton figurine, if you want.
- A few dry leaves or twigs.
How to decorate the table
- Lay the runner down the center of the table. It can hang slightly over the two short ends or sit completely on the tabletop. If the runner has a large skeleton design, make sure the other decorations don’t cover it.
- Add a few small pumpkins. Place one closer to the center and one or two nearer the ends. Don’t put them directly opposite each other. A slight offset looks more natural.
- Arrange the candles. Place two or three battery-operated candles between the pumpkins. Lower candles work better here so they don’t block the people sitting across from each other or get in the way of conversation.
- Add one skeleton detail. If the design on the runner doesn’t feel like enough, place a small skull or skeleton figurine next to one of the pumpkins. Just don’t overdo it — the runner already sets the main theme.
- Check that there’s enough room for the table setting. Put out the plates, glasses, and a few serving dishes the way they’ll sit during dinner. If you keep having to move the decor, remove one or two pieces or shift them closer to the center of the table.
For Halloween, the runner can stay as the main decoration, and everything else can match whatever mood you want. Some people will add more candles and dark details, while others will keep it to just a couple of pumpkins. You can absolutely move away from our setup and do your own thing. As always, I’m all for a little creativity!!!
Are you ready for Halloween?
I have just one piece of advice — don’t try to recreate every idea at once. I think one spiderweb on the wall or a few bats above the bed can change a room more than twenty decorations scattered everywhere.
Lindy and I usually start with a couple of spots around the house and then see what we feel like doing next.
And as always, I’m curious which idea you would choose for decorating your home for Halloween. Tell me in the comments. And if you have your own weird, funny, or really successful Halloween decor idea, definitely share that too. I love reading those.