Seed starting indoors sounds nice until you get to the practical side. The windowsill is occupied. The table is needed for daily life. There is a lamp, but there is nowhere to place it properly. And at some point it feels like seedlings need a separate house.
Over the years of experiments with our seedlings, we realized that most seed germination problems are solved not with expensive equipment, but with convenient organization of space.
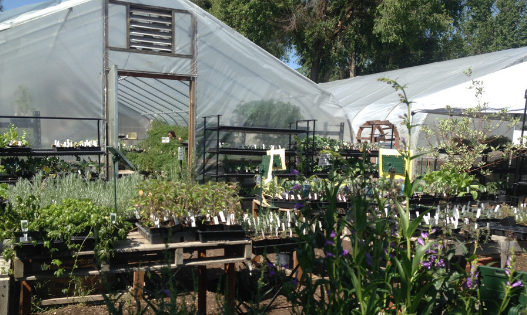
Here you will find 10 practical ideas for seed starting setup indoors that help make seed germination much more stable. Some of them work perfectly for small apartments. Others work for homes where you can place a full seed starting rack.
And almost all of them are assembled from fairly simple things: kitchen containers, shelves, carts, or even ordinary plastic crates.
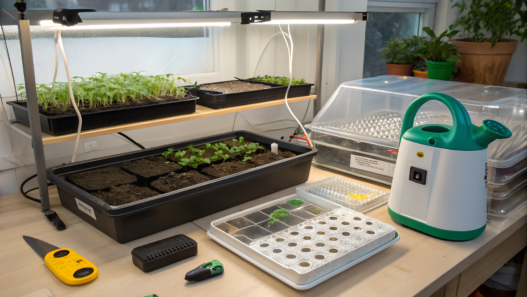
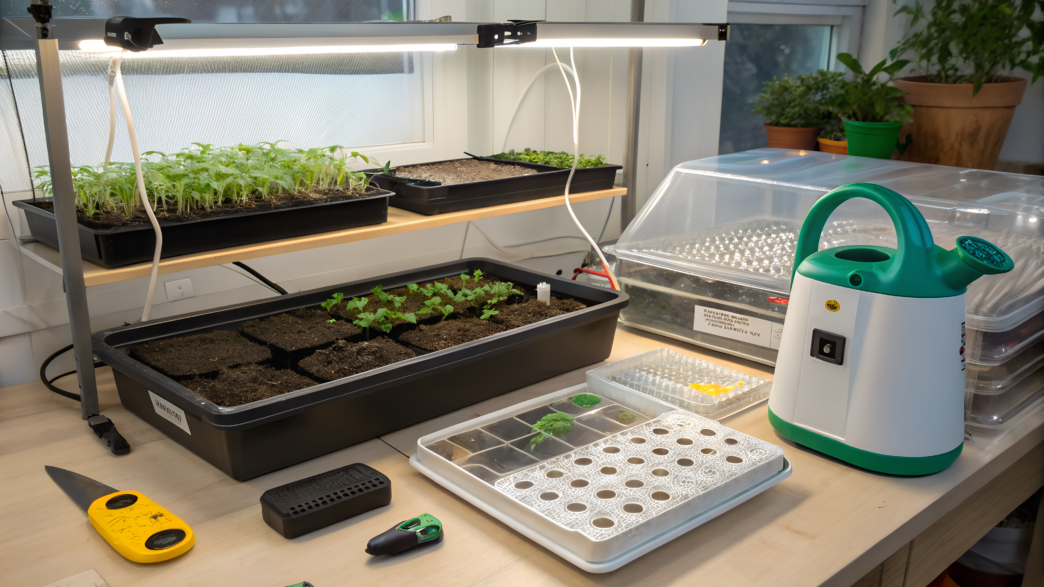
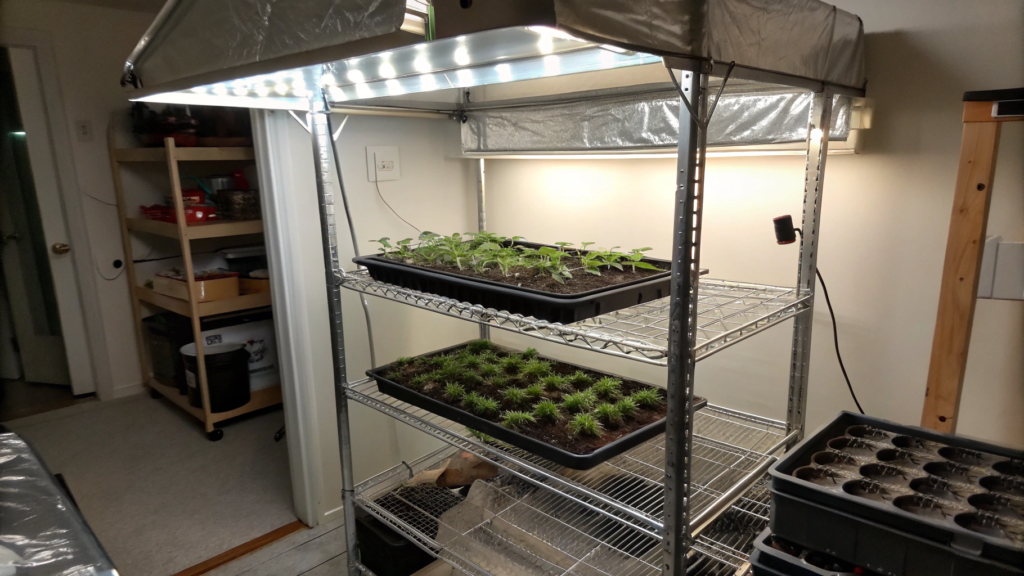
1. Two Shelf Seed Starting Rack With Built In Timer Lights
A seed starting setup indoors often turns into chaos. Especially in February. Or in March. When you suddenly realize — there are more seed packets than free windowsills.
That happened to us too. Until we realized that seedlings need stable light and controlled lighting time. A regular windowsill rarely provides that.
That is why one of the most reliable options is a two-tier seed starting rack with timer lights. It takes up minimal space, provides predictable lighting, and makes seed germination much more stable.
Why A Two-Shelf Rack Works Better Than A Windowsill
Light is the main factor when growing seedlings. Most vegetable crops, including tomatoes, peppers, cabbage, broccoli, and lettuce, require about 12–16 hours of light per day for normal seedling development. These recommendations appear in seedling growing guides from University of Minnesota Extension and Iowa State University Extension.
A window rarely provides that regime:
- day length constantly changes
- clouds reduce light intensity
- light falls at an angle
As a result, plants begin to stretch and weaken. When a rack with lights is used, the situation completely changes.
Light comes strictly from above, and the timer provides the same schedule every day. Seedlings become compact and strong, and the root system develops evenly.
What The Ideal Two-Shelf System Looks Like
In reality, the design is very simple. It is one of the most accessible systems for starting seeds at home. Usually a small shelving rack is used that fits into almost any corner of a room or kitchen.
Typical dimensions:
- width — 24 in (≈60 cm)
- depth — 14–16 in (≈35–40 cm)
- distance between shelves — 16–18 in (≈40–46 cm)
This structure works perfectly with standard 10×20 in seed trays (25 × 50 cm). Each shelf usually holds 2–3 trays, so even a small rack can hold dozens of plants.
If you want the simplest option without selecting parts, you can use a ready system like Monios-L T5 LED Grow Light 4FT with Timer — this is one of the common seed starting kits where the lights easily attach under the shelf.
How To Assemble This System Step By Step
- Attach the lights under the top shelf
The lights are usually suspended using small chains or plastic ties. Place them in the center of the shelf so the light evenly covers the trays. - Leave 2–3 in (5–7 cm) distance from the plant tops
This helps seedlings stay compact. If the lights are too high, plants start stretching upward. As the plants grow, the lights can be raised slightly. - Connect the lights through a timer
A timer automatically turns the light on and off. Most growers use 14–16 hours of light per day, which works for most vegetable seedlings. - Place seed trays on both shelves
The upper shelf is usually slightly warmer because of the lights. It works well for peppers, tomatoes, and eggplants.
The lower shelf works well for lettuce, broccoli, cabbage, and greens.
When the system is configured, daily seedling care becomes much easier.
Lighting Boost
There is one detail that can noticeably increase the efficiency of this rack.
Light from lamps spreads to the sides, and part of it simply gets lost. That is why many gardeners add simple reflective surfaces. For example:
- white cardboard sheets
- reflective insulation
- mylar
Even a simple white surface can noticeably increase the amount of reflected light, sending it back to the plants.
What You Can Grow On This Rack
Two shelves usually hold 6–8 standard seed trays.
This allows you to grow enough seedlings for a large garden.
For example: tomatoes, peppers, eggplants, cabbage, broccoli, cauliflower, leeks, lettuce, basil, cilantro.
Such a compact system easily grows 120–200 plants at the same time, while using less than 3 sq ft (about 0.28 m²) of space.
These were exactly the small solutions we actively used when we created our first garden plot.
A Few Mistakes That Are Easy To Avoid
Even a simple system sometimes works worse than it could. Usually the reason lies in small details. Here are three things worth paying attention to.
Lights Placed Too High.Seedlings start stretching within just a few days.
No Timer. When the light is turned on manually, the schedule almost always becomes unstable.
Too Many Trays On One Shelf. Plants begin shading each other.
Such small things are easy to fix, and after that the rack works consistently all season.
Practical Benefits Of This Rack
The most important advantage of this system is control of growing conditions.
One small two-shelf rack allows you to:
- grow seedlings for 6–8 garden beds
- keep 120–200 plants at the same time
- use less than 3 square feet of space
It also completely solves the problem of weak seedlings at the beginning of the season. And if you are just starting to grow plants at home, a two-tier rack with timer lights is one of the simplest ways to make seed germination truly predictable.
2. No Drill Window Seed Starting Setup Using Tension Rods

A familiar situation — the windowsill is already occupied, shelves cannot be drilled into the wall, and seedlings still need a place, especially when it comes to early crops like leeks, celery, lettuce, or cabbage.
A simple solution is ordinary tension rods — the same ones most often used for shower curtains. No holes in the walls, no screws, and no tools required.
Why This System Actually Works
Many crops start very well on a window. Especially those that do not require extremely strong lighting in the earliest growth stages.
These plants include lettuce, cabbage, broccoli, kale, leeks, spinach, herbs (dill, cilantro)
That is why a window can become a great place to start seedlings, especially if you use not only the windowsill but the entire vertical space of the window frame.
How This Window System Is Structured
The design principle is very simple. Tension rods are installed inside the window frame, and light trays or small shelves are placed on them.
In practice this creates a vertical mini rack directly inside the window opening.
Most often this setup uses:
- 2–3 tension rods
- light plastic trays or wire shelves
- standard 10×20 in seed trays (25 × 50 cm)
Adjustable tension rods work especially well. They can hold the weight of several trays with soil and easily adjust to the width of the window.
When the system is assembled, the window becomes a compact multi-level seed starting space.
How To Assemble The System Without Drilling
Before installation, it is useful to carefully examine the window opening. Most windows have a depth of 4–6 in (10–15 cm) — enough for shallow trays and seedling cells.
It is also worth checking the width of the window to select the right tension rods. After that, the entire system comes together quite quickly.
- Install The First Pair Of Tension Rods In The Lower Part Of The Window
For one level you will need two rods placed parallel to each other. They will act as supports for a small shelf.
Place the first pair about 6–8 in (15–20 cm) above the windowsill. The distance between the rods is usually 3–5 in (7–12 cm) so that a tray or grid shelf can sit on top.
Before fixing them in place, it helps to wipe the window frame surfaces. This allows the rods to hold more securely and prevents slipping.
- Add Another Pair Of Rods Higher Up
The next level is installed the same way — another pair of rods placed above the first level.
Usually this level sits 10–12 in (25–30 cm) higher. That leaves enough room for plant growth and makes it easier to water seedlings.
If the window is tall, you can add a third level.
- Place Light Trays Or Grid Shelves On The Rods
Once the rods are installed, place a surface that works as a small shelf.
This can be:
- plastic trays
- metal kitchen grids
- narrow wire shelves
The main goal is to distribute the weight of the trays evenly so they do not tilt.
- Place The Seed Trays
The best option is standard 1020 trays (10×20 in). They are lightweight and distribute weight evenly across the shelf.
After placing them, gently move the trays slightly to make sure the structure is stable.
Once assembled, the result is a clean vertical system that uses window light very efficiently.
Small Details That Improve The System
Once the rack starts working, a few small details quickly become noticeable — and they make the system much more convenient.
For example:
- drip trays protect the windowsill from moisture
- rotating trays every few days helps plants grow straight
- shallow cell trays reduce the total weight of the structure
These habits may seem small, but they help keep the system tidy and stable.
Which Crops Grow Best On This Window Rack
This structure works especially well for crops with a short seedling period. They germinate quickly, do not need extremely strong light, and are ready for transplanting within a few weeks.
For example:
- romaine lettuce
- kale
- leaf mustard
- leeks
- broccoli
- cauliflower
- basil
On average, these plants stay on the window rack for 3–5 weeks, after which they move to garden beds or a greenhouse.
When This System Is Especially Useful
A window seed starting rack becomes especially helpful when space is extremely limited. For example, in a small kitchen, a rented apartment, or a home where drilling into walls is not allowed.
Instead of occupying tables and windowsills, the seedlings move upward into the vertical window space. At the same time the system uses natural sunlight, and the entire setup can be assembled easily and removed just as easily after the season.
Sometimes one medium-sized window is enough to grow dozens of cool-season plants without taking up extra space inside the house.
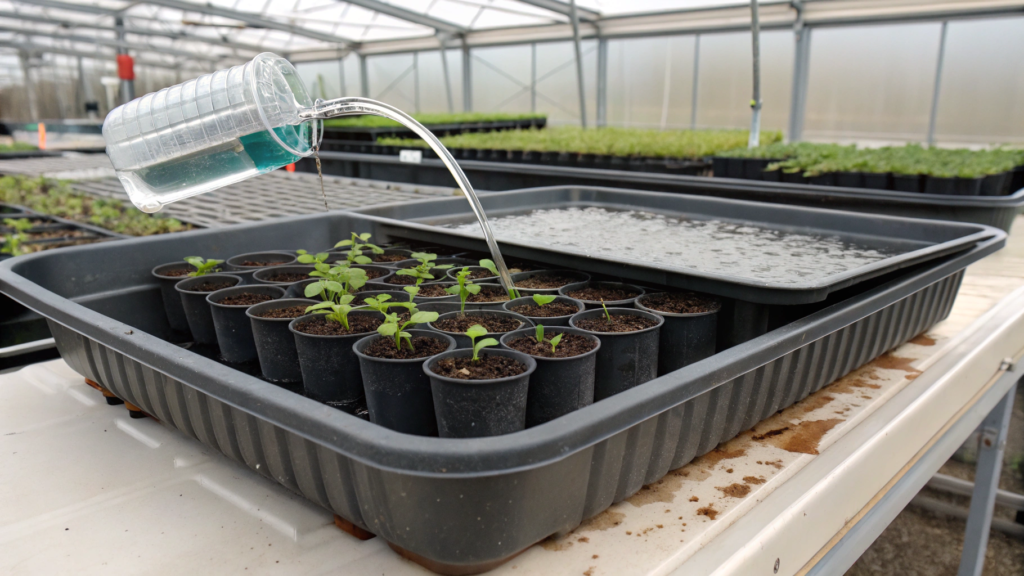
3. Hotel Pan Bottom Watering Tray System That Never Overflows
Seed starting indoors often suffers from incorrect watering. You water a little too much from the top… and a few hours later the trays are standing in water. Or the opposite happens — the top of the soil is moist, but the roots below begin to dry out.
That is why many gardeners switch to bottom watering. And one of the cleanest ways to do it is to use hotel pans.
Why Hotel Pans Work So Well
Hotel pans are food service containers used in professional kitchens. They are designed for constant contact with water, easy cleaning, and holding significant weight.
When you begin using them for seedlings, it becomes clear that they are almost perfect for this job.
Here are a few reasons why they work so well:
- the size closely matches standard seed trays
- rigid walls — the tray does not bend under wet soil
- a flat bottom — water distributes evenly
- different depth options help control the water level
One common option is the Winco Full Size Polycarbonate Food Pan 20.75 × 12.75 Inch, which gardeners often use for seed starting trays.
After several watering cycles, it becomes noticeable how much cleaner and more controlled this system feels.
How The Bottom Watering System Works
The idea of bottom watering is very simple: water is supplied from below, and the soil pulls in the moisture it needs through the drainage holes. This works because of capillary movement of water in the growing medium.
First, the tray is filled with a small amount of water. Then the seed trays or cell trays are placed inside. The soil gradually absorbs moisture from the bottom upward.
After 10–20 minutes, excess water can simply be poured out. The plants receive moisture exactly where they need it — at the root zone.
How To Assemble The System
- Choose a hotel pan about 2–4 in (5–10 cm) deep
Shallow pans are more convenient for seedlings. They hold enough water while still remaining lightweight. Before the first use, place the pan on a flat surface and make sure it does not wobble. - Place standard 1020 trays inside
Most full-size hotel pans fit two 10×20 in trays (25 × 50 cm). The trays should sit flat and level so water is absorbed evenly across the entire cell tray. - Add water about ½–1 in (1–2.5 cm) deep
Pour the water gradually. Start with a small amount, wait a minute, and watch how quickly it begins entering through the drainage holes. - Allow the soil to absorb moisture for 10–20 minutes
During this time the growing medium pulls up the water it needs. After that, the trays can be slightly lifted. If water remains in the pan, it is better to pour it out.
After several watering cycles it becomes easy to understand how much water your seedlings actually need.
Small Details That Make The System Easier To Use
Once you start using a hotel pan watering tray regularly, a few simple habits appear that make the system even easier.
For example:
- use a separate container for watering instead of pouring directly from a watering can
- water in the morning so the soil can dry slightly by evening
- do not leave trays standing in water
These small habits help maintain more stable moisture levels.
Why This System Almost Never Overflows
The main advantage of a hotel pan watering tray is water level control.
Regular plastic trays often have uneven bottoms, and water collects in one corner. Hotel pans are manufactured with flat geometry, so water spreads evenly.
In addition, the depth of the pan allows water to be added carefully without the risk of spilling over the edges.
The result is a system where seedlings receive moisture from below, while the soil surface stays relatively dry. It is clean, controlled, and noticeably simplifies caring for a large number of seed trays.
4. Stackable Bakery Crate Seed Starting Setup For Small Apartments

When we once helped friends organize a seed starting corner in a small city kitchen, it quickly became obvious — there was almost no horizontal space. But there was plenty of vertical space. That is exactly when the idea of stackable bakery crates worked perfectly.
These are simple plastic crates used in bakeries and markets. They are strong, well ventilated, and — most importantly — easy to stack on top of each other, creating a vertical rack.
In a small apartment, that can turn out to be an ideal seed starting solution.
Why Bakery Crates Work Well For Seedlings
Bakery crates were originally designed for food storage and transport, so they are built to handle weight and daily use. For a seed starting station, that becomes a major advantage.
Here are a few reasons why this system works so well:
- crates stack easily, forming a vertical structure
- rigid plastic walls support the weight of wet soil
- ventilated sides provide good air circulation
- each level can function as its own shelf
Most people use crates around 19 × 13 in (≈48 × 33 cm). They almost perfectly fit small seed trays.
When several crates are stacked together, the result is a compact rack that fits even in a small kitchen.
How To Set Up This Vertical Rack
The construction principle is very simple. Several crates are stacked vertically, and seed trays are placed inside each level.There are also a few small details that make this system much easier to use every day.
First choose the location. The best spots are near a window or under seed starting lights. After that, the entire setup can be assembled in just a few minutes.
- Place the first crate on a stable surface
The base should be flat and steady — for example a table, shelf, or wide windowsill. If the surface is slippery, placing a thin rubber mat underneath helps keep the crate from moving. - Add the second crate on top
Most bakery crates have molded edges that help them lock into place when stacked. This keeps the structure stable even with two or three levels. - Place trays or seed cells inside the crates
Small seed trays or cell trays fit well inside the crates. The ventilated walls allow air to circulate, which helps reduce excess moisture around plants. - Place a light above the structure
If the rack is not next to a bright window, a small LED grow light placed above the crates helps ensure even lighting across all levels.
Once assembled, the setup becomes a compact vertical seed starting station.
Which Crops Work Best In This Setup
This system works especially well for plants with a short seedling period. They germinate quickly, use small containers, and do not stay indoors very long.
For example:
- lettuce
- kale
- basil
- leeks
- cabbage
- broccoli
These crops usually stay in the crates for about 3–5 weeks, after which they are transplanted into the garden or larger containers.
Small Improvements
Once a bakery crate rack starts being used regularly, small improvements quickly appear. Nothing complicated — just a few adjustments that save time and effort.
For example, you can try the following:
- Place a shallow tray under each level. This protects the table or shelf from water during watering. Standard 10×20 seed trays work well for this.
- Add a reflective surface behind the crates. If the rack stands near a window, placing white cardboard or a reflective panel behind the crates helps bounce light back toward the plants.
- Use one crate as a germination zone. The lower level can hold trays with freshly planted seeds, where it is easier to monitor moisture and temperature.
- Attach a small light above the top crate. If window light is limited, a compact LED grow light can significantly improve seedling growth.
After these small adjustments, a stackable bakery crate system stops being just a temporary setup and becomes a fully functional mini seed starting station for an apartment.
This type of rack is especially useful in small apartments where every free corner matters. Instead of spreading trays across the kitchen, everything gathers into one vertical column. Another advantage is mobility. The crates are easy to disassemble, move, or store after the season.
Sometimes just three stacked bakery crates are enough to grow seedlings for several beds of greens, while using less than 2 sq ft of space (about 0.18 m²).
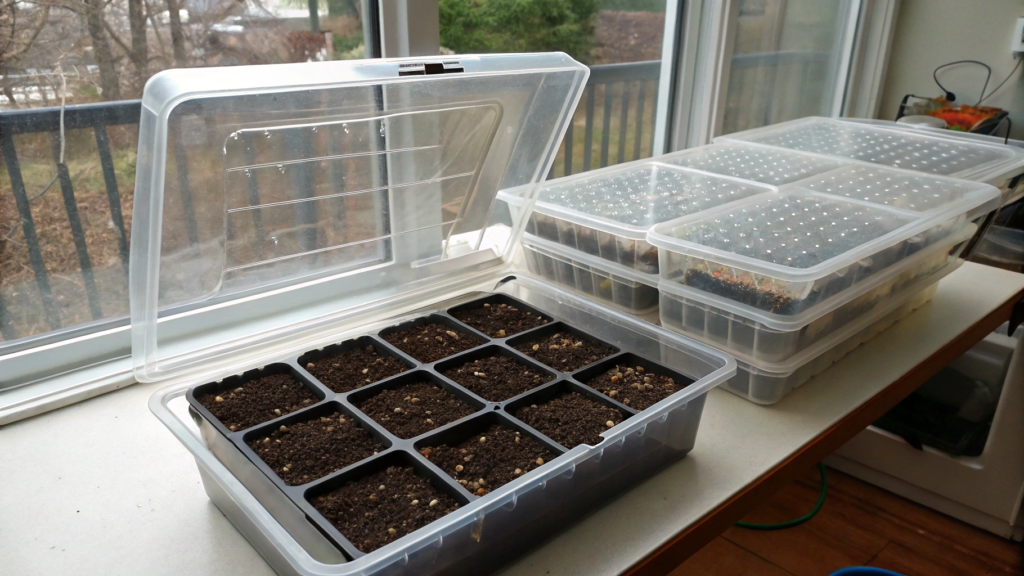
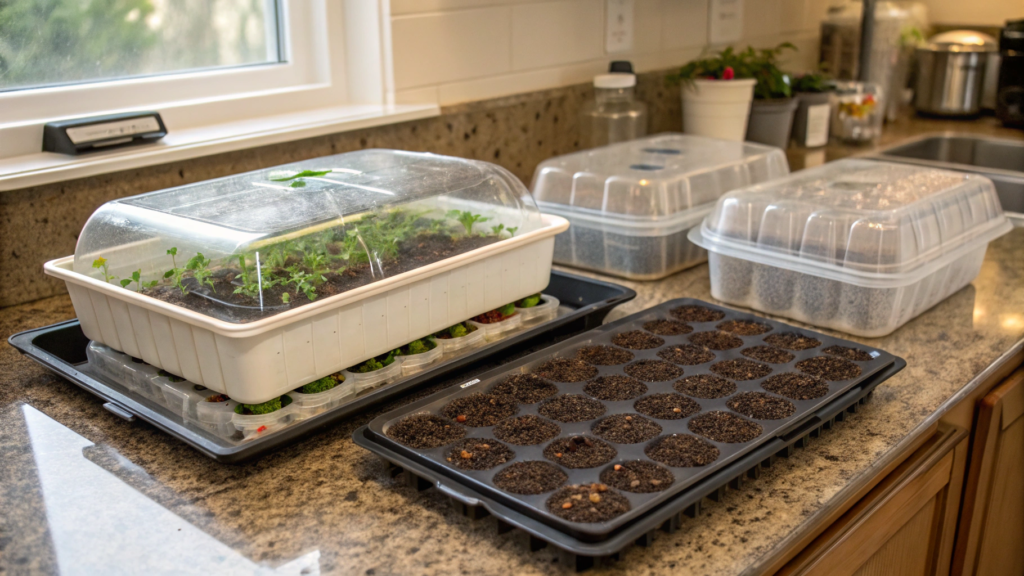
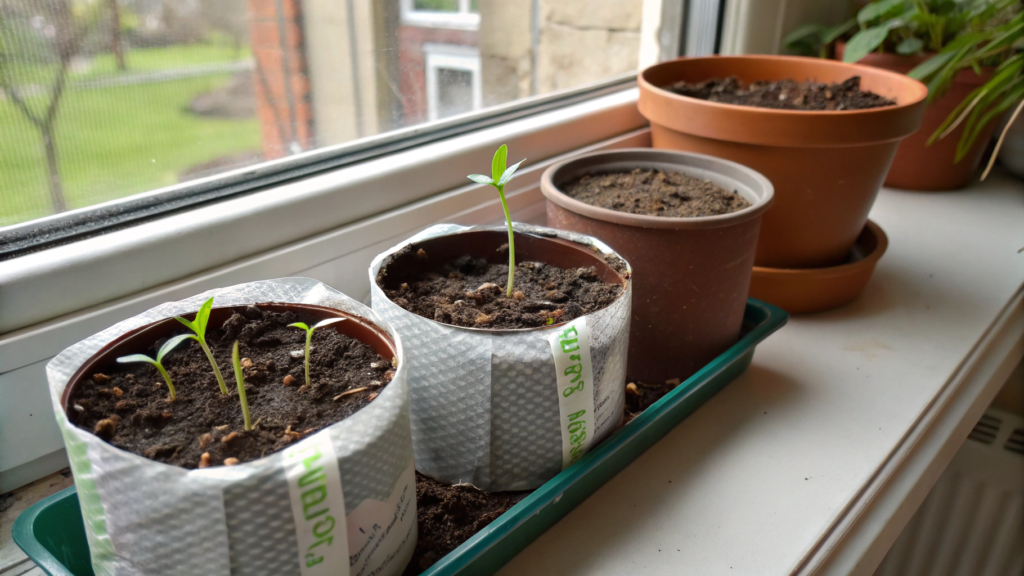
5. Mini Seed Starting Greenhouse Made From Clear Storage Totes
At the beginning of seed germination indoors, stable air humidity is very important. Without it, the top layer of soil can dry out within just a few hours.
One simple solution is a mini greenhouse made from a clear plastic container. These containers are usually sold as storage totes. They are often used to store things in a garage or closet, but because of their transparent walls, they work very well for seed starting.
The container becomes a small greenhouse where it is easy to maintain humidity and warmth, and seeds begin to germinate more consistently.
Why A Clear Container Works Well For Seedlings
A clear plastic tote performs several useful functions at once. It retains moisture, protects young seedlings from drafts, and helps maintain a more stable temperature.
Containers around 24 × 16 in (≈61 × 41 cm) are often used because they comfortably fit standard seed trays.
This setup provides several practical advantages:
- humidity stays much longer than in an open tray
- the temperature inside is more stable
- the soil does not dry out as quickly
- seed germination becomes more even
Clear containers such as IRIS USA Clear Storage Tote 32 Quart work well because they have straight walls and a lid that allows light to pass through.
How To Make A Mini Greenhouse From A Storage Tote
This system can be assembled in just a few minutes. If you consider a few small details, it becomes much easier to use later.
First prepare the container and seed trays. It is better to choose fully clear containers without colored walls, so plants receive more light.
Then the process looks like this.
- Place a shallow tray inside the container
The tray prevents excess water from collecting on the bottom of the container. Standard 10×20 trays (25 × 50 cm) or any shallow plastic trays work well. - Place seed cell trays or small pots inside
The trays should sit with a little space between them so air can circulate. This helps reduce excess humidity around the seedlings. - Close the container with the lid
The lid acts like a greenhouse dome. It holds moisture and creates a gentle microclimate that helps seeds germinate more reliably. - Place the container in a bright location
A bright window or an area under a seed starting light works best. Once seedlings appear, the lid can be slightly opened for ventilation.
After that the container begins to function as a compact greenhouse for the earliest growth stages.
Which Crops Germinate Well In This Mini Greenhouse
This system works especially well for crops that require stable humidity during germination.
For example:
- tomatoes
- peppers
- eggplants
- basil
- celery
- parsley
These seeds often germinate slowly, and the humid environment inside the container helps maintain stable conditions.
Small Improvements
After several sowing cycles, small improvements usually appear that make the mini greenhouse even more practical.
For example:
- drill 2–3 small ventilation holes in the lid
- place a thin mat or cloth at the bottom so the tray does not slide
- label seed trays directly on the container with a marker
These small adjustments make seedling care easier and help keep the system organized.
When This Mini Greenhouse Is Especially Useful
This type of setup is especially helpful during the first 7–14 days after sowing, when seeds need stable humidity. The container closes easily, retains moisture, and remains transparent, allowing seedlings to receive sufficient light.
Sometimes one container is enough to germinate several dozen plants at once, while taking up less than 2 sq ft (about 0.18 m²) on a table or shelf.
6. One Outlet Seed Starting Setup With Power Strip Safety Loop
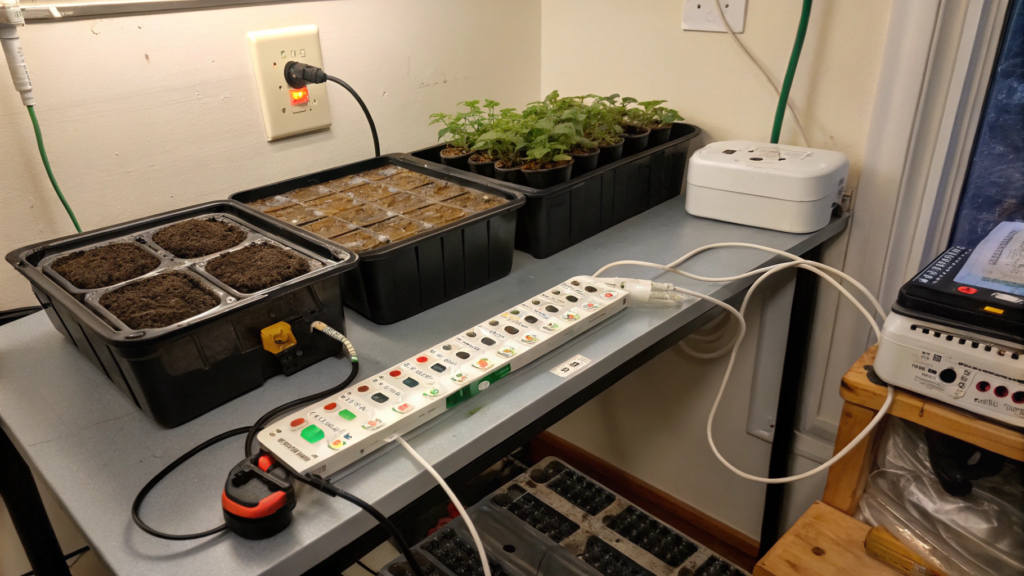
For seed starting indoors, you almost always need grow lights, timers, heat mats, and other equipment… but often there is only one wall outlet nearby. Even with a single power source, it is still possible to create a fully functional seed starting station.
The key is to organize the power strip correctly and create a safety loop on the cable. It is a small detail, but it helps prevent a very unpleasant situation — when water accidentally reaches an electrical outlet.
Why Proper Power Organization Matters
In a seed starting area, moisture is almost always present. Watering, trays, condensation — all of this exists close to electricity.
One of the basic principles of electrical safety is to prevent water from running down cables into outlets or power strips.
That is why many indoor growing setups use what is called a drip loop — a protective loop in the cable.
It works very simply: if water runs along the cord, it will drip off at the lowest point of the loop and never reach the outlet.
What You Need For This Setup
The whole system is very simple. It does not require complicated equipment, but it is better to use reliable components.
Usually the setup includes:
- a power strip with surge protection
- a timer for grow lights
- seed starting lights
- hooks or clips for organizing cables
Once these elements are in place, it becomes easy to power the entire seed rack from one outlet safely.
How To Organize Power From One Outlet
The wiring layout is quite simple, but there are a few details worth doing correctly from the beginning.
Before setting everything up, it helps to look at where the lights, trays, and seed trays will be located, so that cables do not run above water trays.
Then the process looks like this.
- Plug the power strip into the outlet
It is better to mount the power strip slightly above the floor or behind the rack frame. This reduces the chance that water will reach it during watering. - Create a drip loop on the cable
The cable should dip downward first, forming a small loop, and only then go up toward the outlet. If water runs along the cord, it will drip from the lowest point of the loop. - Connect the timer to the power strip
The timer automatically switches the lights on and off. This helps maintain a stable lighting schedule for seedlings. - Connect the lights and secure the cables
The wires should be attached to the rack frame using small clips or cable holders. This keeps them from hanging near the trays or interfering during watering.
After this setup, the entire seed starting system runs from one outlet while remaining organized and safe.
Small Details That Make The System Safer
Once the seed starting station runs daily, a few small habits make the system even safer and easier to manage.
For example:
- keep the power strip above the level of water trays
- avoid overloading the power strip with too many devices
- use a timer instead of leaving lights on continuously
These small rules help prevent overheating cables and accidental contact between water and electricity.
When This Setup Is Especially Useful
This type of power setup is especially helpful when a seed rack stands near a window with only one outlet, or in a small room where additional wiring is not possible.
A single power strip, a properly made drip loop, and neatly secured cables make it possible to safely power grow lights, timers, and other devices, without creating clutter around the seedlings.
7. Chef Style Seed Starting Station Using Cambro Lids As Humidity Domes
Seed starting indoors requires fairly stable humidity, especially during the first stages of germination. In most seed starting kits this is achieved with plastic humidity domes. But there is one problem — they are often fragile and crack quickly. After a couple of seasons the covers become cloudy or break.
Cambro lids are durable clear covers for food service containers. They are used in restaurants and bakeries every day, so they are designed for constant washing, heat, and moisture. Because of that, they work almost perfectly as humidity domes for seedlings.
Why Cambro Lids Work So Well
They solve several problems that standard plastic domes often have.
The advantages are quite simple:
- durable clear plastic that does not crack over time
- a flat transparent surface that allows plenty of light through
- easy to wash and sanitize between growing seasons
- the lid usually sits slightly loose, allowing gentle air circulation
Most commonly people use lids designed for 1/2 size food pans, which measure about 12 × 10 in (≈30 × 25 cm). These lids can easily last for years, making them a practical alternative to standard seed domes.
How To Set Up This Germination Station
The system itself is very simple. Essentially it is a seed tray covered with a clear lid. However, a few small details make it much easier to use.
First choose a location for the station. The best places are near grow lights or a bright window, where the temperature stays relatively stable.
Then the setup comes together quickly.
- Prepare a seed tray or cell tray
The tray is filled with a moist seed starting mix, and the surface is gently leveled. The soil should be moist but not wet, which helps seeds begin germination more easily. - Sow the seeds and lightly press the surface
After sowing, the soil can be gently pressed with your hand or a small board. This improves seed-to-soil contact. - Cover the tray with a Cambro lid
The lid acts as a clear humidity dome. It holds moisture and creates a soft microclimate inside the container, where the soil dries much more slowly. - Ventilate once seedlings appear
As soon as the first sprouts emerge, the lid should be slightly opened from time to time. This helps reduce humidity and prevents fungal problems.
After several days it becomes noticeable that the soil stays moist much longer.
Which Crops Germinate Well Under This Dome
Some plants are especially sensitive to drying soil during the first days after sowing.
For these crops, the humid environment under the lid is very helpful.
For example:
- basil
- celery
- parsley
- peppers
- tomatoes
These seeds often take 7–14 days to germinate, and stable humidity helps the process happen more evenly.
Small Improvements
There are a few small adjustments that make this germination station even more practical.
For example:
- leave a small gap between the lid and tray to improve ventilation
- label the crops directly on the lid with a marker to avoid confusion
- use shallow trays to make watering easier to control
These small details help keep the seed starting station organized and easy to manage.
This method works especially well during the first 5–10 days after sowing, when seeds require stable humidity. The clear lid retains moisture while still allowing light to reach the seedlings. As a result, seeds develop in a gentle greenhouse-like microclimate, which often leads to more reliable germination.
8. IKEA Cart Seed Starting Indoors Setup That Rolls Into Sunlight
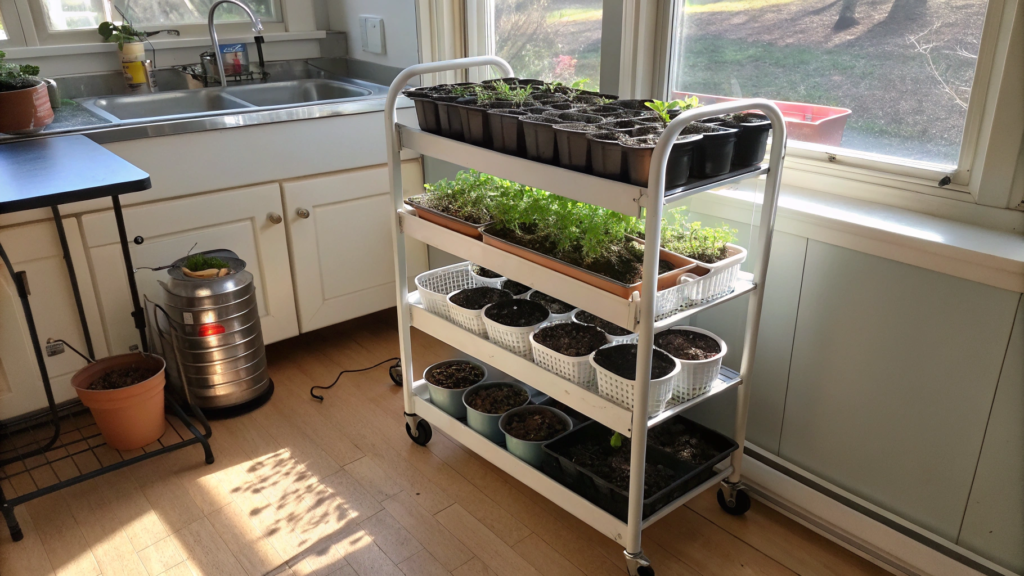
A familiar situation — in the morning the sun shines through one window, and by the afternoon it has moved to another. Sometimes the only sunny window is already occupied by the kitchen counter, table, or sink.
A practical solution for a mobile seed starting station is a kitchen cart on wheels, like the ones sold at IKEA. It becomes a compact rolling rack for seedlings that you can move closer to the sunniest window throughout the day.
Why A Rolling Cart Works Well For Seedlings
Kitchen carts have several features that make them very practical for a seed starting station.
First, they are compact. Second, they usually have 2–3 levels, which immediately increases the available space for trays. And the most useful feature — wheels.
Here are several reasons why this system quickly becomes a favorite:
- the cart can easily move closer to sunlight
- each shelf works as a separate seedling level
- the entire station stays organized in one place
- the cart can be stored away after the season
A popular example is the IKEA RÅSKOG Utility Cart. Its size is about 17.75 × 13.75 in (≈45 × 35 cm), and the three levels hold several seed trays.
This type of structure takes very little space, while still providing a surprisingly useful growing area.
How To Build A Mobile Seed Starting Station
Before assembling the cart, it helps to choose where it will stand most of the time. Usually this is near the brightest window in the home.
After that, the cart can be turned into a seed starting station in just a few minutes.
- Assemble the cart and secure the wheels
Most carts arrive unassembled. After putting it together, check that the wheels rotate smoothly. If there are wheel locks, use them so the cart does not move during watering. - Place trays on each shelf
Trays help protect the cart shelves from water. Shallow trays such as 10×20 seed trays (25 × 50 cm) or compact seedling trays work well. - Place the seed trays with plants
The top shelf works well for crops that need more light, such as tomatoes or peppers. Lower shelves can hold greens and cool-season crops. - Make sure the cart moves easily
During the day you can turn or roll the cart closer to the window. Even a small change in position can give plants more natural light.
After this setup, the cart becomes a compact and convenient mobile seed starting station.
Which Crops Work Well On This Type Of Station
Rolling carts usually hold plants that grow quickly and do not require deep containers.
For example:
- lettuce
- basil
- kale
- cabbage
- broccoli
- tomatoes
- peppers
Depending on the tray size, the cart can usually hold 20–40 plants at the same time.
Small Improvements
For more efficient use of the cart, a few small adjustments can make the system even more practical.
For example:
- add a small grow light above the top shelf if window light is limited
- place a watering tray on the lower shelf
- occasionally rotate the cart so plants do not lean toward the light
These small details make the seed starting station easier to manage in daily use.
A mobile seed starting station is especially useful in homes where sunlight moves across different rooms during the day. Instead of leaving seedlings in one spot, the cart can simply be rolled toward the brightest window, and moved back later.
In small homes or apartments, this often becomes the simplest way to use natural sunlight more efficiently.
9. Seed Starting Indoors DIY Heat Mat Alternative Using Reptile Tape
Soil on a windowsill can be colder than it seems, especially in late winter. Seeds sit in the soil, there is moisture, there is light… but seedlings still do not appear.
In many cases the reason is simple: the growing medium is too cold.
Many warm-season crops germinate faster when the soil temperature is slightly warmer than room air. For example, tomatoes, peppers, and eggplants are commonly recommended to germinate at soil temperatures around 75–85°F (24–29°C).
Usually gardeners use seed starting heat mats for this. But there is another working alternative — reptile heat tape.
This is a heating strip used in reptile terrariums. It is designed to provide steady, gentle warmth, which makes it useful as a DIY heating source for seedlings.
Why Reptile Heat Tape Works For Seedlings
Reptile heating tape was originally designed to maintain stable temperatures inside reptile enclosures. Because of that, it provides consistent low-level heat without sudden spikes.
For a seed starting station, this turns out to be very useful.
The tape has several practical advantages:
- even surface heating
- very thin profile, easy to place under trays
- low energy consumption
- the tape can be cut to the required length
A common size is 3–4 in wide (7–10 cm). That width usually provides enough heat for small seed starting stations. When installed correctly, this type of heating works very similarly to commercial seed heating mats.
How To Build A Heating System
The setup itself is fairly simple, but the tape should be installed carefully so the heat spreads evenly and does not overheat the soil.
First prepare the surface where the seedlings will stand. Wooden shelves or tables work well because they allow heat to spread gradually.
After that the system can be assembled.
- Attach the reptile heat tape under the shelf surface
The tape is usually secured using aluminum tape or small staples. It should lie flat and untwisted, which allows the heat to spread evenly. - Place a heat-distributing surface above it
Between the heating tape and the trays, gardeners often place a thin board or plastic sheet. This helps spread the heat more evenly and protects trays from direct contact with the heater. - Place the seed trays on top
The trays or cell trays are placed on the prepared surface. The soil gradually warms from below, creating better conditions for germination. - Connect the system through a thermostat or timer
It is best to use a simple temperature controller so the soil temperature does not rise too high.
After several hours of operation, it usually becomes noticeable that the soil remains warm and stable.
Which Crops Benefit Most From Soil Heating
Some plants are especially sensitive to soil temperature during germination.
Under these conditions, gentle heating can noticeably speed up sprouting.
For example:
- peppers
- tomatoes
- eggplants
- basil
- cucumbers
These crops often germinate much faster when soil stays within the 75–85°F (24–29°C) range.
Useful Small Improvements
Once this type of heating system starts being used regularly, several useful small adjustments usually appear.
For example:
- use a simple soil thermometer to monitor temperature
- place the tape only under the germination zone, not the entire shelf
- use a timer so heating does not run continuously
These small adjustments help make the system more stable and predictable.
Soil heating is especially helpful in homes where windowsills stay cold or where night temperatures drop slightly indoors.
In those situations, even a small heat source under the trays helps keep the soil warm and stable, which significantly improves the germination of warm-season crops.
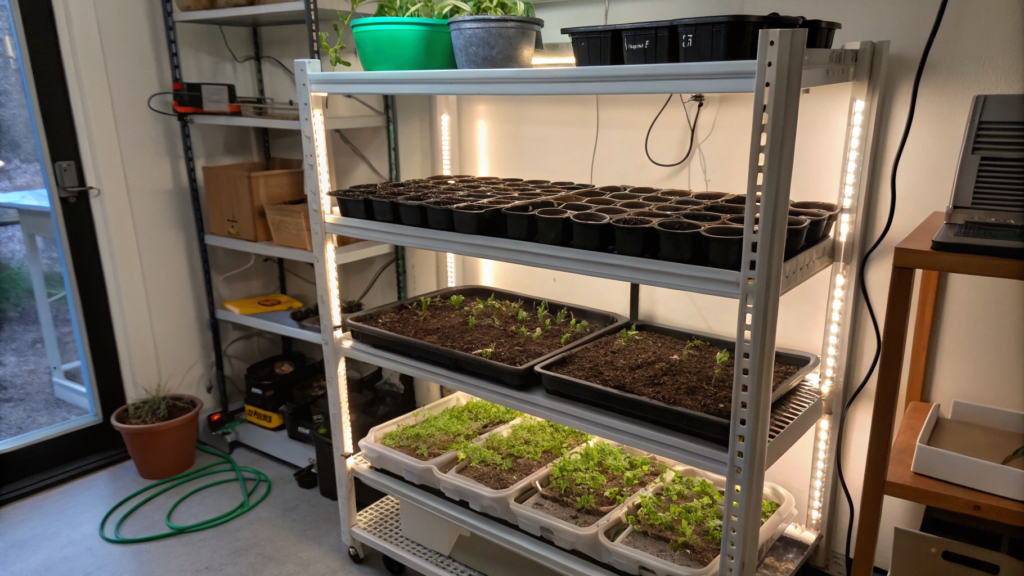
10. Seed Starting Setup Indoors Using Wire Shelving And Reflective Mylar
A common situation with indoor seed starting is when the seedling rack stands in open space. Even if the grow light is powerful, a large portion of the light spreads into the room instead of reaching the plants. The light is on, but part of the energy is lost to the sides and above the plants.
That is why many home seed starting setups use wire shelving together with reflective Mylar. This combination turns a simple rack into a compact mini grow station where light works much more efficiently.
Why Wire Shelving Works Well For Seed Starting
Wire shelving units are metal racks commonly used in pantries, garages, and kitchens. For seedlings, they turn out to be almost ideal.
First, they are easy to assemble. Second, the shelf height can be adjusted. And most importantly, the open frame makes it easy to attach grow lights and reflective panels.
A setup like this offers several advantages:
- adjustable shelf height for different growth stages
- strong construction that supports heavy trays with wet soil
- open structure that makes mounting lights easy
- efficient vertical use of space
A common size is around 36 × 18 in (≈91 × 46 cm). This area easily fits several 10×20 seed trays (25 × 50 cm).
Why Add Reflective Mylar
When grow lights shine on seedlings, a lot of the light spreads outward. Plants receive only part of the available light. Reflective material helps redirect that light back toward the plants.
Many growers use reflective Mylar, a thin reflective film widely used for indoor growing systems.
It helps:
- bounce light back toward plants
- reduce light loss on the sides
- create more even lighting around seedlings
Mylar is very lightweight, so it can easily be attached to the sides of the shelving unit. Once installed, plants receive light from above and reflected light from the sides.
How To Assemble The System
The setup itself is simple, but a few details make it much more practical.
Usually the rack is assembled first, then the lights are installed, and finally the reflective material is added.
- Assemble the wire shelving and adjust shelf height
Keep the lowest shelf about 12–16 in (30–40 cm) above the floor. This protects plants from cold air near the floor and makes watering easier. - Attach grow lights under the upper shelves
Lights are usually hung using chains or zip ties. Position them so the light covers the entire tray area evenly. - Attach Mylar sheets to the sides of the rack
The film can be secured using clips, clamps, or tape. Leave a small gap at the top for air circulation. - Place seed trays on the shelves
Each shelf usually holds 2–3 standard 1020 trays. It is best to place trays inside watering trays so water does not drip onto lower shelves.
After this setup, the rack becomes a multi-level indoor seed starting station.
What Crops Grow Well In This Setup
This system is especially useful when you want to grow many seedlings at once.
For example:
- tomatoes
- peppers
- eggplants
- cabbage
- broccoli
- lettuce
- basil
A typical four-shelf rack can hold 8–12 trays, which allows you to grow hundreds of seedlings in less than 6 sq ft (≈0.55 m²).
Small Practical Improvements
Several small adjustments can make the system even more convenient.
For example:
- fully cover the back side with Mylar so light does not escape
- keep the front side open for easy plant care
- use bottom-watering trays for easier watering
These small improvements help make lighting more even and simplify daily plant care.
Before You Start Your Next Batch Of Seeds
When seedlings have a well-organized growing station, everything becomes easier. Watering is simpler, lighting is more consistent, and plants tend to grow stronger.
Suddenly growing dozens of plants indoors becomes realistic, even in a limited space.
Every home eventually develops its own perfect seed starting setup.What does your indoor seed starting setup look like? Share it in the comments — some of the best ideas in many gardens start from simple conversations like this.