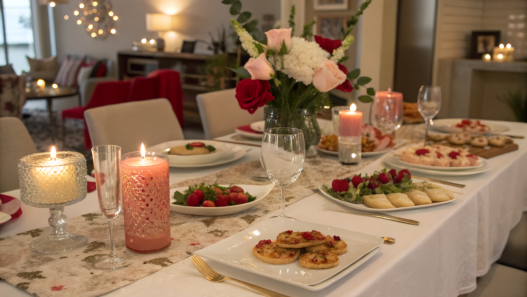
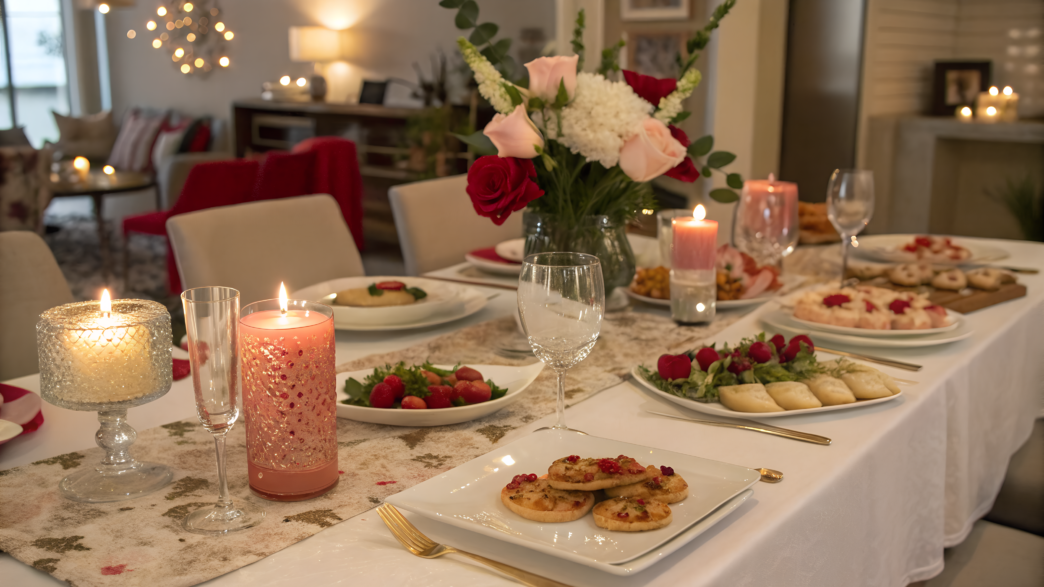
Brunch details, including Valentine’s Day, do not depend on shopping, but on how you look at regular things at home. Maybe you put a candle in an old glass or make one seat at the table feel a little more personal. It all depends on you and how you see ordinary things.
And you do not need to have a perfect home interior. The table can be simple, the chairs can be different. That is okay. If there is a little favorite food, cozy light, flowers, and care for the guests on the table, they will feel it.
And the budget is totally fine here. Instead of ten new decorations, you choose a couple of simple details and work with them carefully. For a homemade Valentine’s Day brunch, that is usually enough.
1. Thrifted Champagne Coupes Turned Into Floating Candle Centerpieces
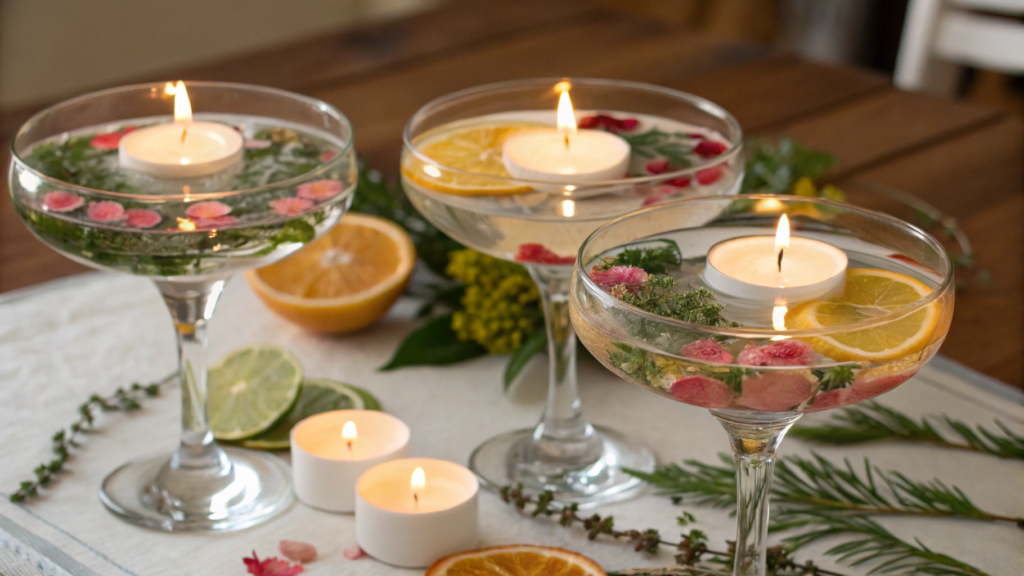
Here you only need a few details: wide glasses, water, small candles, petals, citrus, or greenery.
In a regular thrift store, I found several old wide champagne coupes. They were not the same, which was actually very good. One was a little heavier, the second had a different bowl shape, and the third had clearly served for a long time in someone’s kitchen. On the table, things like that look more alive than a new set from a box.
What you’ll need
- low wide thrifted champagne coupes, about 4–5 inches across the top (10–13 cm)
- small floating candles, about 1.5–2 inches wide (4–5 cm);
- water;
- rose petals, small buds, or a little greenery;
- thin slices of orange, lemon, or grapefruit;
- small saucers or cloth napkins under the glasses.
Tip. Before buying, run your finger along the rim of the glass and look at the glass against the light. Old glass can be very beautiful, but a small chip on the rim is not the best story for a holiday table, because someone could get hurt.
If there are no floating candles in the nearest store, you can get floating candles → Floating Candles for Centerpieces on Amazon. I like white ones. It feels like a safe decor choice.
How to put the centerpieces together
- Wash the glasses and wipe the outside. Fingerprints show up quickly on glass, especially when morning light falls on the table.
- Pour in water, but not all the way to the top. I usually leave about ½ inch. This way, the water will not spill if someone bumps the table or reaches for a plate of pastries.
- Put the candle into the water first. Then add petals, greenery, or citrus. If you do it the other way around, petals often gather in the center, and the candle sits right on top of them.
- Add only a couple of details. You do not need to create a flower firework in a small glass. One petal, a thin slice of citrus, and a small sprig of greenery already give enough color.
For Valentine’s Day, I often use these combinations:
- rose petals + a small sprig of rosemary;
- a thin slice of blood orange + a white candle;
- one pink petal + a little baby’s breath;
- mint + a thin slice of lemon, if there will be fruit, tea, or lemon pastry on the table.
With citrus, the main thing is to cut it thin. A slice about ⅛ inch (3 mm) looks neat and does not take over the whole glass. A thick piece of orange in a small glass quickly looks heavy.
To make the centerpiece look more expensive
The easiest thing here is to repeat one idea several times, but not make all the glasses identical.
For example, each glass gets water and one candle. Then the details change a little. One glass has rosemary and a petal. Another has only citrus. The third has mint and a small bud. The materials are the same, but the compositions do not fully copy each other.
I would place these glasses in a loose line down the center of the table, about 10–14 inches apart (25–35 cm). If the table is small, three glasses are enough. It is better to leave room for pastries and fruit than to fill the whole table with decor.
Small upgrades
- The glass already looks pretty on its own, but try placing it on a small saucer, a vintage bread plate, or a folded cloth napkin. If the table is wooden, this little base will save it from drops and wet rings.
- You can tie a thin cotton string or narrow ribbon around the stem. Just no huge bows. A big bow quickly makes the decor look like a kids’ party, not a beautiful homemade brunch.
- Kitchen herbs look very pretty if you add them right into the glasses: a small sprig of rosemary, mint, thyme, or a piece of lavender, if you have it. Just do not add too much. One tiny sprig near the candle already gives the right look. Or you can place a sprig next to the glass on the saucer, or tie it to the stem with thin string.
Candle safety
The candles are small, but it is still a real flame. Place them away from paper menus, napkins, dried flowers, and bakery boxes.
The National Candle Association recommends keeping at least 12 inches of space from anything that can catch fire. This is a required part of the setup, and it is very necessary. Especially if there are children, animals, or guests at the table who actively “talk” with their hands.
After the event, you can use these glasses to serve berries, cream, ice cream, or a small dessert. I love it when something first decorates the table and then quietly returns to normal kitchen life.
2. Five Minute Napkin Hearts Using Only Fork and String
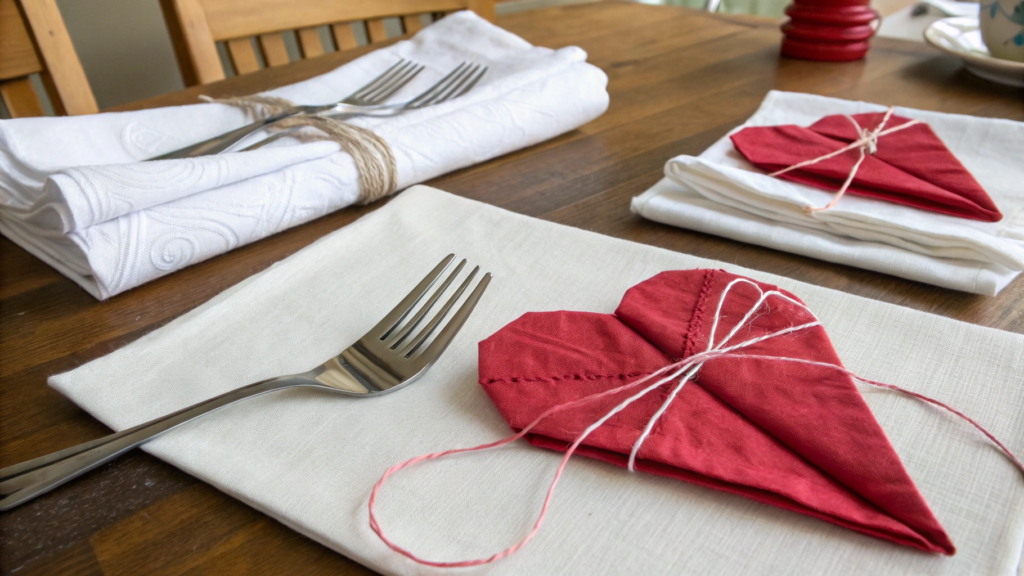
Five Minute Napkin Hearts Using Only Fork and String look very cute and do not require any origami talent. You need cloth napkins, a regular fork, and a piece of string or thin ribbon.
Before a holiday brunch, there is always plenty to do. So decor that you can make almost on autopilot works for me.
What you’ll need
For this idea, it is better to use cloth napkins, not paper ones. You can also fold paper napkins into a heart shape, but they do not hold volume as well and wrinkle faster, especially if guests immediately put them on their laps.
- square cloth napkins about 18 × 18 inches, or about 46 × 46 cm;
- a regular table fork;
- cotton string, thin twine, or narrow ribbon;
- scissors;
- plates where you will place the hearts.
Tip. If the napkins are very wrinkled, quickly go over them with an iron or steamer. Do not be lazy. A wrinkled heart for Valentine’s Day is not really the best fit.
How to fold the heart
- Lay the napkin on the table like a diamond. One corner should point toward you, and the other should point away from you. This makes the shape easier to put together.
- Fold the bottom corner up to the top corner. You will get a triangle. Run your hand along the fold so the fabric lies flatter.
- Place the fork in the center of the fold. Put it horizontally on the bottom edge of the triangle, right in the middle. The handle can point left or right. It does not matter. The fork is not used as an eating tool here, but as a small holder that makes it easier to gather the fabric evenly.
- Gather the fabric around the fork like an accordion. Use your fingers to lift the fabric from both sides toward the center, as if you are slightly bunching it. The top corners will start to spread out to the sides, and the middle will start to look like the dip of a heart.
- Tie the string under the fork. Wrap the string around the gathered middle and tie a knot. Then carefully pull the fork out. It was only helping hold the shape while you tied the fabric.
- Shape the top of the heart. Spread the two top edges to the sides and gently round them with your fingers. The bottom part will already be tied with string, and the top will turn into a soft fabric heart.
If the first heart comes out a little strange, do not worry. For me, things like this almost always look better on the second try.
Color
For Valentine’s Day table decor, you do not have to use only red. Sometimes red napkins next to red flowers, pink plates, and strawberries can look a little tasteless.
I like these options more:
- white napkins + red string;
- cream napkins + pink ribbon;
- dusty pink napkins + twine;
- linen napkins + a small sprig of rosemary under the string.
If the rest of the table decor is already bright, it is better to keep the napkins in calmer tones. If the dishes are simple, you can add color through the string or ribbon. This makes it easier to control the overall look of the table and not overload it with bright decor.
Hearts on plates
The best option is to place one heart in the center of each plate. If the plates are vintage or have a pattern, it is better to move the napkin slightly down so the design does not disappear completely.
You can slip a small guest name card under the string. Then the napkin becomes both a decoration and a simple place card. It feels very homey: fewer things on the table, but more meaning in each detail.
You can also slip a thin sprig of rosemary, thyme, or a small dried flower under the string. Just do not use greenery that is too large, so it does not overshadow the whole setup.
Helpful notes
- Do not make the string too short. It is better to cut a piece about 10–12 inches (25–30 cm), tie it calmly, and then trim the extra ends with scissors.
- If the fabric is slippery, practice on one napkin first and see if it holds the shape. Linen and cotton usually behave better. Satin can look beautiful in photos, but in your hands, it often behaves unpredictably.
- Fabric hearts do not need to be perfectly identical. A little difference between them looks natural, especially if there are vintage plates, different glasses, and a regular homemade brunch on the table, not a catalog photoshoot.
These hearts do not take up space in the center of the table, do not get in the way of dishes, and do not require buying separate decor. You use napkins that you already need anyway, and just fold them in a slightly unusual way. For a budget Valentine’s Day brunch, this is very cute and fitting: quick, inexpensive, and it immediately shows that everything was made with love.
3. Grocery Store Flower Runner With Citrus and Herbs
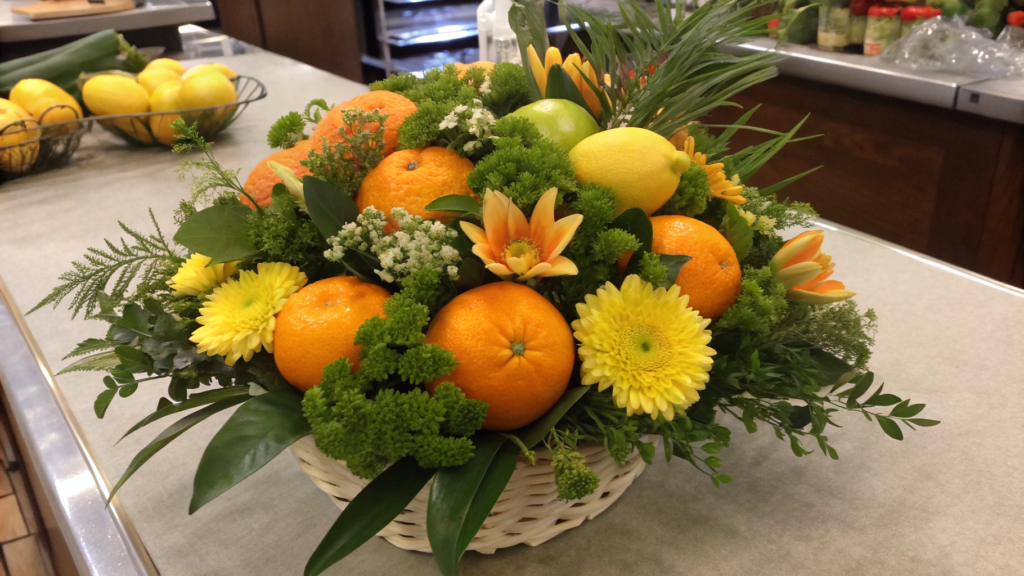
You take a regular bouquet from the grocery store, break it into smaller pieces, and lay it down the center of the table with oranges, lemons, and greenery. You did not put the whole bouquet into one vase, but the table looks alive, interesting, and simply beautiful for brunch.
What you’ll need
For this kind of runner, it is better to use not one expensive bouquet, but 2–3 simple bunches of grocery store flowers. One can have larger flowers, the second can have smaller flowers, and the third can have greenery. This way, the arrangement will look fuller, even if each bunch is simple on its own.
- 2–3 bouquets from the grocery store;
- oranges, lemons, grapefruits, or blood oranges;
- sprigs of rosemary, thyme, mint, or basil;
- small glasses, jars, or low vases;
- pruning shears or sturdy kitchen scissors;
- a narrow fabric runner, parchment, or just the clean center of the table.
Tip. At the store, pay attention not only to the flowers that have already opened. It is better to choose a bouquet where some of the buds are still closed. Those flowers often last much longer.
How to make the flower runner
- Take the bouquets apart right after buying them. Remove the wrapping, take off the rubber bands, and sort the flowers by type. Large flowers separately, small flowers separately, greenery separately. This makes it easier to see what you actually have.
- Cut the stems short. For a runner, you do not need tall flowers. I usually leave the stems about 5–8 inches long. Low arrangements do not block guests’ faces, and that matters.
- Put the flowers into small vessels. Instead of one large vase, use several small glasses, jars, or low vases. Place them down the center of the table in a loose line. Do not measure too strictly. A little unevenness actually looks better. A good distance between the small vases is about 8–12 inches.
- Add citrus between the small vases. You can place whole lemons, orange halves, or thin grapefruit slices. If you cut the citrus, put it on a small saucer, a piece of parchment, or directly on a fabric runner you do not mind washing.
- Tuck herbs into the gaps. Rosemary, thyme, and mint quickly make the table decor feel more natural. A few sprigs can go right between the fruits, and a couple can go into the small vases with the flowers.
- Check the height while sitting. Sit in a guest’s seat and see if the flowers block the person across from you. If they do, cut them lower. Pretty decor should not get in the way of conversation.
Choosing flowers at the grocery store
You do not need rare flowers for this kind of runner. Simple ones often look better when you give them the right surroundings.
I like these options:
- tulips — they fall softly along the table line and do not look too formal;
- spray roses — they give you lots of small buds from one stem;
- carnations — they last a long time and fill empty spots well;
- daisies or feverfew — they add lightness;
- eucalyptus — if you want more greenery and a calm scent;
- alstroemeria — it is often inexpensive and gives a lot of color.
I usually remove some of the greenery from the packaging and add kitchen herbs instead. Store-bought greenery can sometimes look a little rough, while rosemary or thyme immediately makes the arrangement look neater.
Citrus
For this kind of brunch, I like citrus with warm color: oranges, mandarins, blood oranges, and pink grapefruits. Lemons are good too, especially if there are white plates and light napkins on the table.
You can use citrus in different ways:
- place whole lemons or mandarins between the small vases;
- set orange halves with the cut side facing up;
- place thin slices on parchment or small saucers;
- peel the zest into long strips and place it near the herbs.
It is better not to overdo it with cut fruit. One or two cut pieces look fresh. Ten wet slices on the table start getting in the way of plates and napkins.
Tips from experience
Before putting flowers on the table, remove the leaves from the lower part of the stems. Leaves spoil quickly in water, and the smell can become less pleasant. This is especially important if you are making the arrangements ahead of time.
Pour a little water into the small vases, but not all the way to the top. If the vessels are low, 1–2 inches is enough. This way, the water will not splash when you move plates or carry the vases.
Even the most ordinary grocery store flowers start to look more special when you divide them into small groups and combine them with fruit and herbs. For a budget brunch, this is one of the most rewarding tricks: the table looks festive right away, but still stays simple, alive, and homey.
4. Valentines Brunch Decor Using Bakery Boxes as Risers
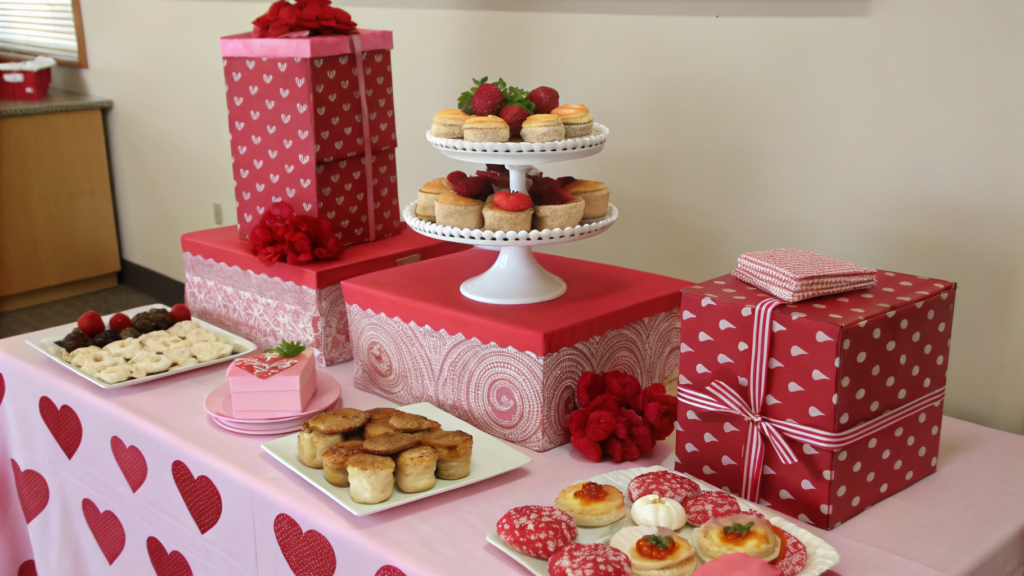
This trick helps lift part of the food display higher when the table needs a little height, but you do not want to buy separate cake stands. Take pretty bakery boxes, wrap them or leave them as they are, place plates with rolls, fruit, or small desserts on top, and the table immediately looks more interesting.
I like it when a holiday table is not flat. If everything sits on one level, even good food can look a little boring. And when some dishes are slightly higher, your eye naturally moves across the table. Just do not build a tower. This is brunch, not a bakery window.
What you’ll need
Sturdy bakery boxes work best. Not thin ones that cave in from one croissant, but proper cardboard boxes with a lid. If the box is white, kraft, or has a neat logo, you do not have to hide it at all.
- 2–3 bakery boxes in different sizes;
- parchment, a cloth napkin, or a piece of simple wrapping paper;
- a wide plate, tray, or serving board;
- pastries, berries, fruit, or small desserts;
- ribbon, string, or a sprig of greenery for a small accent.
Tip. The box should be wider than the plate that sits on top. If the plate hangs over the edges, the whole setup looks a little off.
How to use boxes as risers
- Choose the sturdiest boxes. Press your palm on the lid. If it caves in right away, do not put a heavy plate on top. That kind of box is only good for a light napkin, menu cards, or a small bowl of candy.
- Use the boxes empty and closed. There should be no pastries, cream, or crumbs inside.
- Cover the top with a napkin or parchment. This is especially helpful if the box has a bright logo. Parchment looks natural next to pastries, and a cloth napkin makes the display look more polished.
- Place a light plate or tray on top. It is better not to use heavy ceramic. A plate with croissants, muffins, berries, or small pastries is enough for a box. But a heavy cake, a large glass vase, or a juice pitcher is a no. The box may be sturdy, but it is still cardboard. I would not test its strength right in front of guests.
- Add one small detail. A rosemary sprig, a thin ribbon, or a small card with the name of the pastry already makes the riser feel like part of the decor.
I usually place the largest box closer to the center and the smaller one off to the side. This way, the table does not look like a staircase. You only need a little height, just enough to lift the food above the plates without blocking people from each other.
If there is already a flower runner on the table, it is better to place the boxes not right in the center, but closer to the pastry area. Then the decor does not compete with itself, and the table feels like one brunch, not ten separate ideas.
How to make the boxes look prettier
If the box already looks nice, leave it alone. A white box with thin string or a kraft box with a simple ribbon often looks better than trying to wrap everything in ten layers of decor.
If the logo is too bright, cover the top and one side with a cloth napkin. You can let one edge of the napkin fall loosely down. This hides the packaging and adds a little fabric to the table, which always helps when there are lots of plates and glass around.
You can also place a sheet of parchment on top of the box and then put the pastry plate over it. The parchment connects the box to the bakery idea right away, so it no longer feels like you just hid packaging on the table.
Small details
Do not place the box right next to candles. Cardboard and fire are a bad pair, even if the candle is small and “it is far enough.” It is better to keep these risers away from an open flame.
And do not overload the top. A little empty space around the pastries can look better than a plate where everything is piled up. Croissants, berries, and a couple of sprigs of greenery already give you enough beauty.
Bakery boxes simply help lift some dishes higher and add volume to the table. For a budget Valentine’s Day brunch, this is exactly the kind of trick that looks thoughtful but does not require extra shopping.
5. Valentines Brunch Ideas Table Settings With Mismatched Vintage Plates
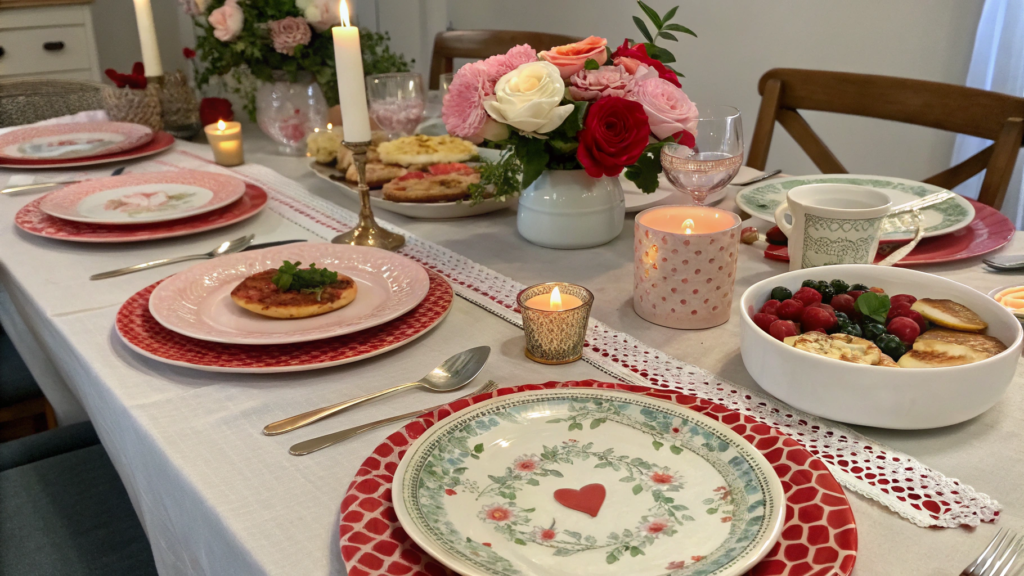
Table settings with mismatched vintage plates give you a way to avoid buying a new dish set for a holiday brunch. The plates do not need to match here. On the contrary, a small difference in patterns, edges, and shades makes the table feel warmer and more interesting. And that is much nicer than a perfect set for twelve people that you are scared to touch.
What you’ll need
Even this kind of table setting needs one common thread so the different plates do not start competing with each other. It can be color, shape, material, or the mood of the pattern.
- different vintage plates from a thrift store, flea market, or family cabinet;
- simple cloth or paper napkins;
- flatware;
- wine glasses or drinking glasses;
- small menu cards or place cards;
- one repeating detail: ribbon, a flower, a sprig of greenery, or a small fruit.
If you do not have many vintage plates yet, you can buy small dessert plates in a vintage style → Vintage Dessert Plates on Amazon. I would not choose a set that is too bright. It is better to choose plates that will mix calmly with what you already have at home.
Tip. Before buying vintage dishes, check not only for chips, but also the surface. If the plate has a lot of crazing under the glaze, it is better not to use it for food. For decor, yes. For brunch, I would not risk it.
How to set the table
- First, choose the main plate for each place. This can be a large dinner plate or a medium-sized plate. It is okay if they are different. The main thing is that they are close in size: about 9–11 inches (23–28 cm).
- Place a smaller plate on top. A dessert plate, about 6–8 inches (15–20 cm), works well for a roll, fruit, or a napkin. The top plate is usually the first thing people see, so let it be the prettiest one.
- Repeat one color at every place. For example, if one plate has a pink flower, add a pink napkin or a small ribbon to each place. If the plates are cream and blue, do not suddenly add bright red decor.
- Keep the flatware simple. Different plates already give enough detail. Regular forks, knives, and spoons will look better than trying to add fancy flatware, patterned glasses, and lots of ribbons too.
- Place one small detail on each plate. It can be a napkin heart, a name card, a small sprig of rosemary, or one mandarin. Repeating this detail helps bring the different plates together.
How to mix plates
The easiest way is to choose plates that are different, but still have something in common. I usually look at the color and the edge. If several plates have a thin border, they can already work together, even if the patterns are different.
Good combinations:
- white and cream plates with small flowers;
- plates with a gold or pink border;
- small floral patterns without a background that is too bright;
- simple white plates + 2–3 vintage accent plates;
- plates in the same size, even if the patterns are different.
It is harder to mix plates with very different moods. For example, heavy brown ceramic, a bright modern print, and delicate porcelain with roses can look random. Sometimes that is not bad, but still, for a holiday brunch, it is better to give the table setting one shared thread.
Table decor
When the plates are different, it is better to keep the rest of the decor more restrained. A simple tablecloth, solid napkins, clear glasses, small flowers. This way, the vintage dishes stay the main detail and do not get lost in the overall noise.
If the plates have a lot of pattern, do not put too many things on top. One napkin or card is enough. If the plates are almost solid, you can add a flower, ribbon, or small citrus.
Preparing for guests
Before brunch, lay all the plates on the table without food. This makes it easy to see which plate stands out. Sometimes one thing looks beautiful on its own, but next to the others it looks too dark or too bright.
If you do not have enough plates for everyone, do not rush to buy similar ones. It is better to make your own kind of mix: for example, each guest has a large white plate, and different vintage dessert plates on top. Or the other way around: different large plates, but matching napkins and glasses.
I do not put very old plates with a gold edge in the microwave or the dishwasher. I do not want to accidentally ruin dishes I just bought with so much love.
6. Printed Menu Cards That Also Work as Place Cards
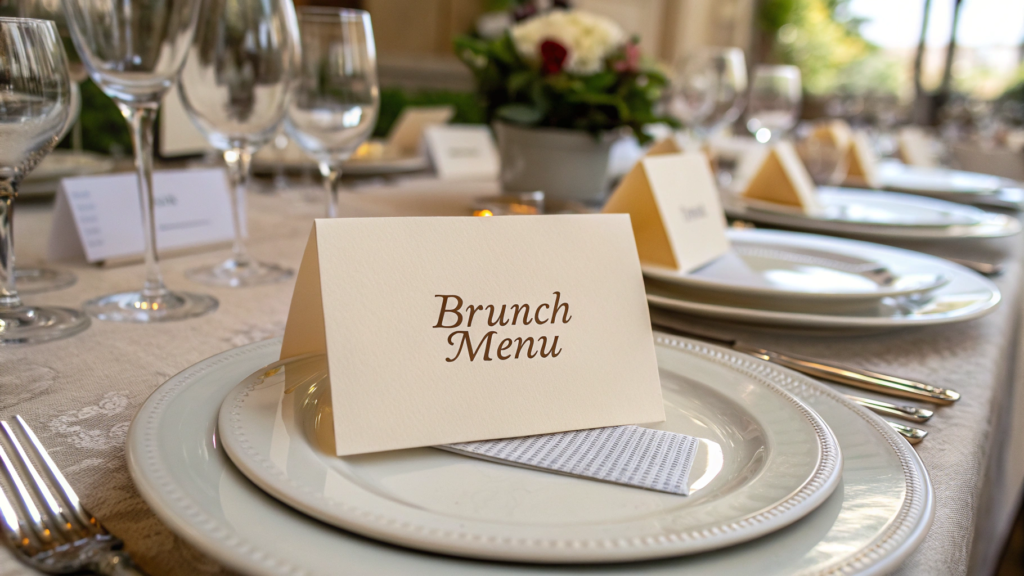
Printed menu cards can have the guest’s name on them, and below that, the brunch menu. Simple, useful, and pretty on the plate. One little card does two jobs at once.
What you’ll need
For these cards, it is better to use cardstock, not a regular thin printer sheet. Thin paper quickly bends at the edges and looks too office-like. A weight of about 80–110 lb works well, which is about 216–300 g/m².
- cardstock in white, milky, pink, or cream;
- printer;
- scissors or a paper cutter;
- a pen, if you want to write the names by hand;
- hole punch, ribbon, or string, if the card needs to be tied to the napkin;
- a small sprig of greenery or a dried flower for an accent.
Tip. Before printing all the cards, print one test card. Put it on a plate and check the size. On screen, the card may look small, but on the table it can suddenly take up half the plate.
How to make the cards
- Choose a small size. I like a format around 3 × 5 inches (7.5 × 13 cm). The card is large enough to read the menu, but it does not cover the whole plate. Simple cards look best: white or cream paper, black or dark gray text, one small heart, a thin line, or a small flower in the corner.
- Write the name at the top. The guest’s name should be the most visible part. You can print it larger or write it by hand after printing. Handwritten names look warmer, even if the handwriting is not perfect.
- Add a short menu below. You do not need to describe every detail. Three to five lines are enough: for example, baked eggs, croissants, berries, citrus salad, coffee and tea. For mood, you can write a small line at the top, like “Valentine’s Day brunch.”
- Leave space around the edges. Do not fill the card with text all the way to the corners. Margins of about ½ inch instantly make the card look neater.
- Print and cut. If you have a paper cutter, it will be easier. Scissors will also work, but it is better to draw light guide lines with a pencil on the back first.
- Place the card on the plate or tie it to the napkin. If there is already a napkin heart on the plate, you can tuck the card slightly under the string. It looks neat and does not require another holder.
If the plates are vintage and patterned, it is better to keep the card simple, without extra details. If the dishes are simple, you can add a pink ribbon, red string, or a small colored element in the heading.
Where to place the cards
The simplest option is in the center of the top plate. If there is already a napkin on the plate, place the card on top or slightly under the string. If the napkin is lying next to it, the card can sit directly on the plate, with a small sprig of rosemary on top.
You can also make a hole in the upper corner of the card and tie it to the napkin with a thin ribbon. Just do not tie it too tightly. The guest should be able to remove the card easily, not untie a knot before the first sip of coffee.
Small tips
Do not print too small. The minimum comfortable text size for the menu is about 11–12 pt, and the name is better larger. In pretty light and candlelight, tiny text quickly becomes a test for the eyes.
If you use colored paper, first check whether the text is easy to read. On dusty pink paper, gray text may look soft, but guests will squint while reading it. Black, dark brown, or dark burgundy usually read better.
7. Valentines Brunch Board Setup With Paper Doilies and Parchment Layers
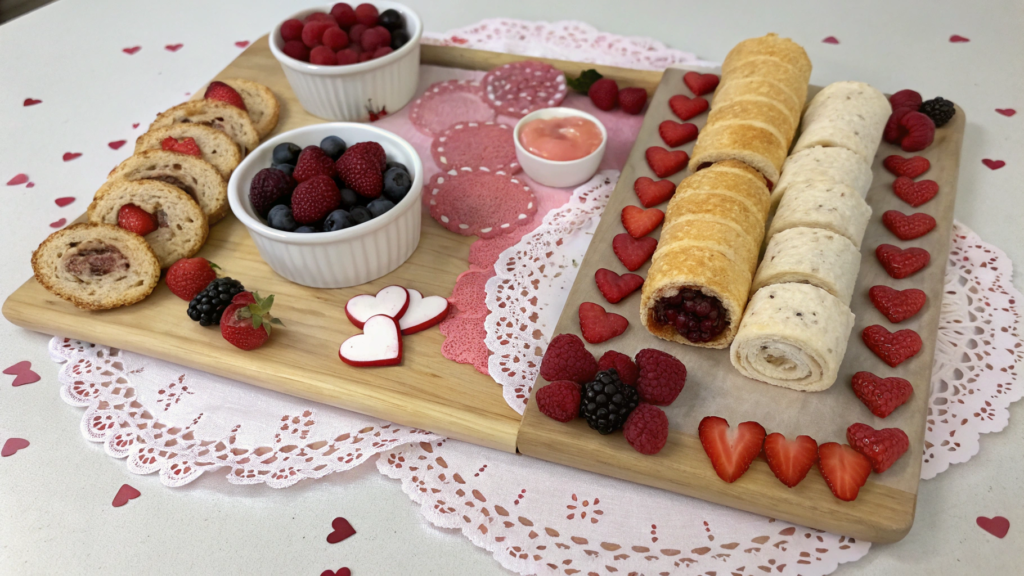
This method helps make even a regular setup of rolls, berries, and small sweets look prettier. The point here is in the layers: first the board, then parchment, then paper doilies on top, and only then the food. Because of that, even simple grocery store pastries look much more appealing.
What you’ll need
For this kind of setup, it is better to use a wooden board, a flat platter, or a tray. You do not need anything rare. A serving board about 16–24 inches long (40–60 cm) will work. That is enough for a small group.
- wooden board, tray, or large flat platter;
- parchment;
- paper doilies;
- rolls, croissants, mini muffins, berries, cookies, or sliced fruit;
- small bowls for jam, butter, honey, or soft cheese;
- tongs, a small spoon, or a spreading knife.
You can get paper doilies → Paper Doilies on Amazon. White ones are best.
Tip. If the board is very dark or worn, parchment helps especially well. It separates the food from the surface and makes the setup look fresher.
How to put the board together
- Place a sheet of parchment on the board. You do not need to cut it perfectly to shape. Actually, a slightly uneven edge can look even better. The main thing is that the parchment covers the part of the board where the food will sit.
- Layer paper doilies on top. Do not place one under every single roll. Lay them slightly overlapping, like a soft layer. Let part of the lace edge show around the sides. That is already enough to make the board look more festive.
- Place the small bowls first. Jam, honey, butter, soft cheese, or yogurt dip is better to place first, and then arrange the rest of the food around it. This makes the setup easier to build, and you will not have to move berries later with your elbow.
- Add pastries and fruit in groups. Do not alternate everything one by one. It is better to make small zones: croissants in one spot, strawberries in another, grapes or mandarins nearby, and cookies in another part.
- Leave a little empty space. You do not need to cover every inch with food. If the board is overloaded, guests do not know what to grab, and the doilies and parchment simply disappear.
- Add a couple of tiny details at the end. This can be a sprig of rosemary, a few rose petals, thin strips of zest, or small strawberry hearts.
This kind of setup is especially good for food that people can take with their hands or tongs. It is not for a hot casserole or anything that immediately spreads all over the parchment.
If you use very juicy fruit, like oranges or grapefruits, it is better to put them in a separate small bowl, or at least on an extra piece of parchment. Otherwise, the juice will quickly reach the paper doilies.
Small details
- If there is not much food, it is better to use a smaller board. On a surface that is too large, rolls, berries, and cookies will look lost, even if they are pretty on their own.
- It is better to place paper doilies so the edges peek out from under the food in a few spots. That way, you can actually see them. If you cover them completely with rolls, the whole point of the layer disappears.
- And do not forget about tongs or a small spoon. A beautiful table stops feeling beautiful pretty quickly when guests start pulling berries out of the middle of a shared board with their fingers.
This board makes the serving look more festive without expensive dishes. Parchment gives you a background, paper doilies add pattern, but the food stays the main thing. For a Valentine’s Day brunch, this is a very easy option: quick to put together, easy to serve, and no need to overcomplicate anything.
8. Casual Valentines Brunch Outfit Formula With Denim and a Statement Lip
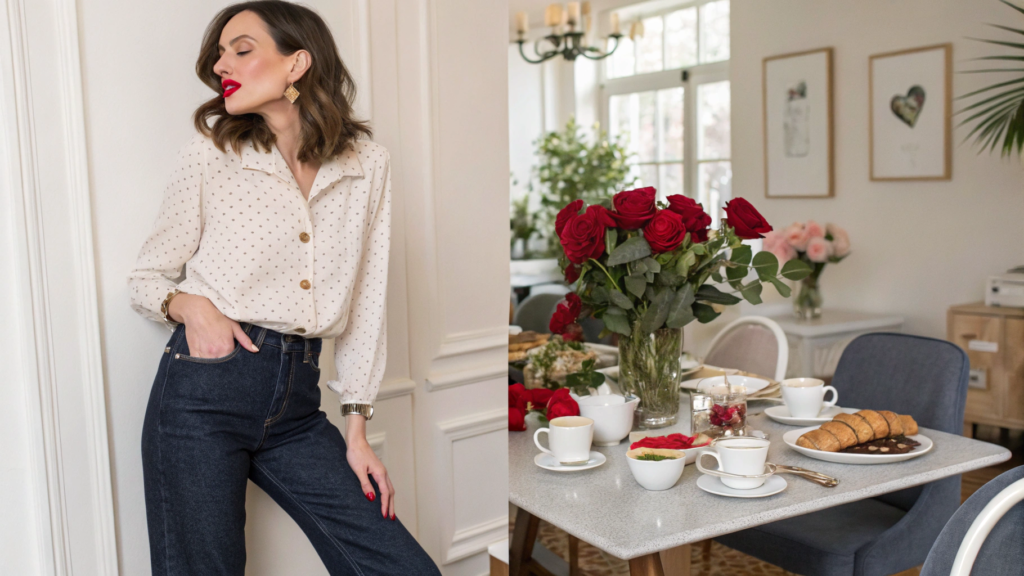
On this day, of course, you want to look dressed up, but without a dress, heels, or that stiff feeling. You are making coffee, taking out plates, fixing the flowers on the table, and at the same time, you really do not want to wear clothes that make you scared to bend down to the oven. If brunch is happening at home, jeans are perfect for this.
What you’ll need
The main thing here is not to put together the “perfect” outfit, but to choose pieces you can move in, sit at the table in, and still look a little more dressed up than on a regular weekday.
- favorite jeans without heavy distressing;
- a soft sweater, shirt, blouse, or simple top;
- a bold lipstick or lip tint;
- small earrings, a chain, or a thin bracelet;
- comfortable shoes, if guests will not be only in the kitchen, and the whole gathering will include photos and a walk in the yard.
Tip. Test a new lipstick ahead of time: whether it dries out your lips, leaves too much on the cup, or smudges after coffee.
How to put the outfit together
- Start with jeans. Straight, slightly relaxed, or classic jeans work best. Jeans that are too tight can look pretty in photos, but brunch means food, a chair, coffee, conversations, and a second piece of pastry. Comfort is not a small thing here.
- Add a soft top. For a brunch at home, a cream sweater, white shirt, thin cardigan, or simple blouse looks good. If the jeans are dark, the top can be lighter. If the jeans are light, cream, pink, burgundy, or warm brown looks pretty.
- Make one bold accent on the lips. Red, berry, wine, or pink lipstick immediately makes the outfit feel more festive. And you do not need to add ten more details. Sometimes lipstick is enough.
- Keep the jewelry small. Small earrings, a thin chain, or one bracelet looks better than everything at once. Especially if the table is already decorated with flowers, candles, napkins, and menu cards.
- Check the outfit while moving. Bend down, sit, reach for a cup. If the sleeve gets into the food, the waistband feels tight, or the lipstick leaves marks on everything around, it is better to fix that before guests arrive.
Combinations that look simple and pretty
Personally, I prefer outfits where there is one festive detail, and everything else stays calm. You do not need to dress like you are going to an evening dinner if there are waffles, eggs, and homemade coffee on the table.
You can put it together like this:
- blue jeans + white shirt + red lipstick;
- light jeans + cream sweater + berry lipstick;
- dark jeans + pink blouse + small gold-toned earrings;
- denim shirt + white top + wine lipstick;
- jeans + soft cardigan + pink lip tint.
If you want more of a “Valentine’s” mood, it is better to add it through lipstick, a ribbon in your hair, or a small accessory. A fully red outfit for a brunch at home can look out of place.
Tips from experience
- If the lipstick is bold, let the rest of the makeup be subtle. A little base, mascara, soft brows, and that is it. Bold lips already do enough.
- If your hair gets in the way while cooking or setting out food, it is better to put it up ahead of time: a low ponytail, soft bun, or hair clip. It is not only comfortable, but also looks neat in photos at the table.
- And I would suggest keeping a napkin or cotton swab nearby, so you can quickly fix the lipstick after coffee.
This outfit does not try to turn a homemade brunch into an official event. Denim keeps everything simple, lipstick adds the mood, and you can calmly cook, sit at the table, laugh, eat pastry, and not think every five minutes about whether everything looks too dressed up.
9. Photo Corner Backdrop Made From Tissue Paper and Tape
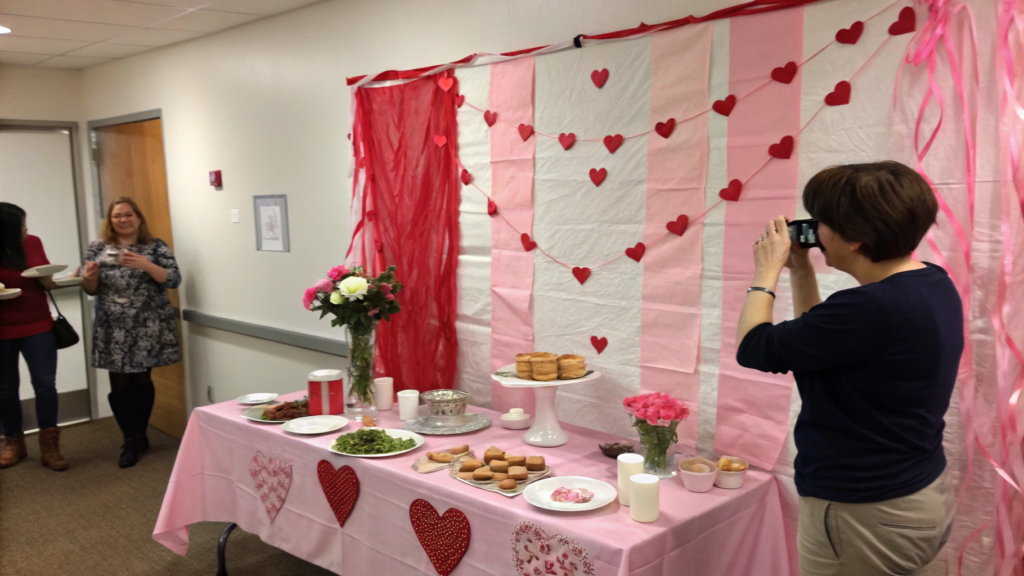
A Valentine’s Day brunch backdrop can be made on an empty wall without expensive decorations. You need tissue paper and painter’s tape.
All the food, candles, plates, and flowers stay where they belong, and at the photo corner, guests can take a couple of pictures with coffee, with a friend, or with a plate of rolls — and nobody has to move little vases just to get the shot.
What you’ll need
For this kind of backdrop, it is better to use tissue paper, not thick colored paper. It is lighter, falls into softer folds, and does not pull the tape off the wall with its weight.
- tissue paper in 2–3 colors;
- painter’s tape or removable adhesive strips;
- scissors;
- measuring tape or ruler;
- pencil;
- a small stool, if the backdrop will be higher than eye level.
Tip. First, test the tape on a small part of the wall. Especially if the wall is painted with matte paint. Some tapes come off easily, and some can pull off a little piece of your wall, and that can spoil the holiday mood.
How to make the backdrop
- Choose a spot with good light. The best option is a wall near a window, but not in direct sun. In soft daylight, the backdrop looks neater, and faces in photos do not fall into harsh shadows.
- Mark the size of the backdrop. For a couple of people, an area about 3–4 feet wide and 5–6 feet tall is enough. If there is not much space, you can make a narrow vertical backdrop just for portraits.
- Cut the paper into strips. Strips about 4–6 inches wide (10–15 cm) are easy to tape and layer. You can leave the edges straight, or lightly cut them into fringe.
- Tape from top to bottom. Start with the top row and move downward. Let each next layer slightly overlap the one before it. This way, the tape will be less visible, and the backdrop will look fuller.
- Mix the colors, but not too evenly. You do not need a strict order: pink, white, red, then pink again. It is better to create soft patches of color. For example, more light paper at the top, a little more pink in the middle, and a bit of red closer to the edge.
- Leave space on the side for a person. Do not cover the whole wall from corner to corner. In photos, it looks prettier when the backdrop is slightly visible behind the shoulder, not surrounding the person from every side like a school stage.
You can slightly crumple the paper with your hands before taping it. Not into a ball, just lightly crumple it and smooth it back out. This creates soft folds in the paper, and the backdrop looks more alive.
What colors to choose
For a Valentine’s Day brunch, two or three colors are enough. Otherwise, the backdrop starts competing with the table setting, outfits, and flowers.
Good combinations:
- milky + dusty pink + red;
- white + peach + light pink;
- cream + burgundy + pink;
- white + red, if you want something simpler and more contrasting.
If the table is already bright, keep the backdrop calmer. If the table is almost neutral, you can add more red or burgundy. The main thing is that the person in the photo does not get lost against the background.
What to pay attention to
Before taping anything, remove extra things from the frame: cords, light switches, bags, chairs, boxes. They will be more noticeable in photos than in real life. It is really annoying to make a pretty backdrop and then see a phone charger in the corner.
If you want to add a sign, it is better to keep it small. For example, a paper card, a ribbon, or a short phrase in one corner.
And do not make the backdrop too close to the table with candles. Tissue paper and fire are a bad pair. It is better to set up the photo corner on a separate wall and leave the candles on the table.
10. Last Minute Brunch Party Playlist and Timing Plan
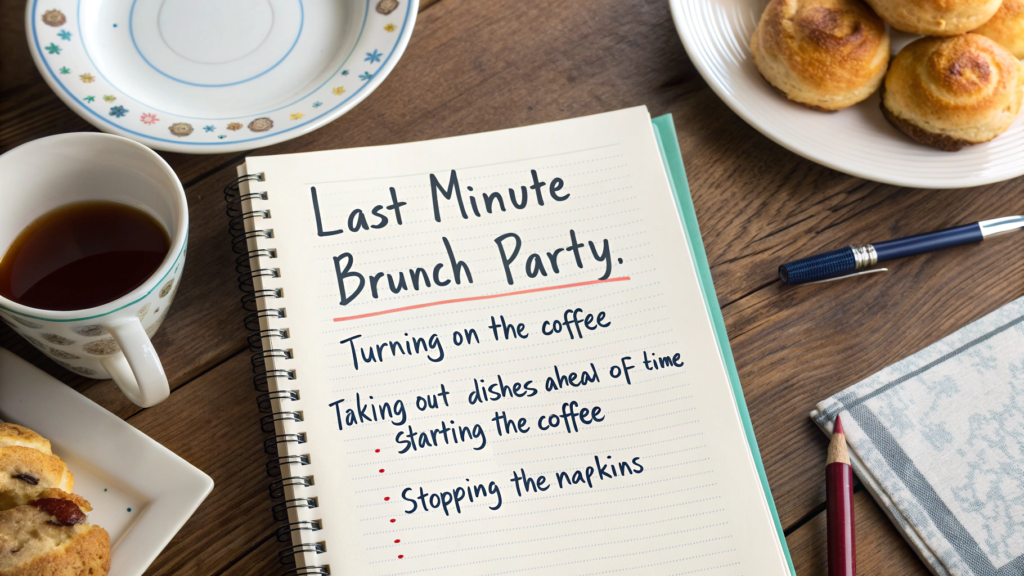
Even for a homemade breakfast, you need a small plan. Not a strict minute-by-minute schedule, but just an order of actions so you are not running between the kitchen, the door, and the coffee maker in the last ten minutes.
Just a clear order: what to turn on, what to take out ahead of time, when to start the coffee, and at what point to stop fixing the napkins.
What you’ll need
You do not need anything complicated here. The main thing is to prepare the music and a rough order of tasks before the guests arrive.
- a ready playlist for 2–3 hours;
- a speaker or phone with decent volume;
- phone charger;
- a list of dishes and drinks;
- timer on your phone;
- 10 free minutes before the guests arrive, if possible…
Tip. Check the playlist ahead of time, at least the first three songs. Sometimes services suggest a track that seems to fit by the title, and then suddenly something starts that is absolutely not for breakfast with coffee and rolls.
How to build the playlist
For a Valentine’s Day brunch, I would not play overly dramatic ballads, loud pop, or songs that make everyone want to sit quietly and listen to the lyrics.
Good options:
- soft soul;
- light jazz;
- acoustic covers;
- calm indie pop;
- old romantic songs, but without heavy drama;
- French or Italian music, if you want a slightly more dressed-up mood.
It is better to make the playlist longer than you think you need. For a 2-hour breakfast, I would make at least 3 hours of music. Then you will not have to think about why the same song started for the second time while you are slicing oranges.
Simple timing before guests arrive
- 90 minutes before guests: start with food. Put everything that needs baking into the oven, take butter, cheese, or fruit out of the fridge, wash berries, and slice whatever can be prepared ahead of time. Decor can wait. Food cannot.
- 60 minutes before: set the table. Put out plates, napkins, glasses, menu cards, unlit candles, and the main part of the decor. If something is missing, now you can still calmly replace the idea instead of panicking.
- 45 minutes before: prepare drinks. Water, juice, coffee, tea, cream, sugar, cups. Drinks somehow always create chaos if you remember them at the last minute.
- 30 minutes before: set out the cold dishes. Fruit, berries, cheese, pastries, the board with parchment and paper doilies. Do not touch the hot food yet if it cools quickly.
- 15 minutes before: turn on the music. Not when the doorbell is already ringing, but a little earlier. The house immediately feels ready for guests, even if you are still clearing a knife from the kitchen table.
- 10 minutes before: light the candles and check the bathroom. Towel, soap, light, extra things around the sink. Guests will definitely go there.
- 5 minutes before: stop. Do not keep fixing every plate. Turn on the kettle, pour yourself some water, wipe your hands, fix your makeup, and just welcome people. The table does not need to be perfect. It needs to be ready for breakfast.
Timing during brunch
When the guests arrive, give the gathering a little breathing room. People take off coats, hug, look at the table, get a drink. If you start quickly explaining all the dishes at that moment, nobody hears anything.
I would do it like this:
- the first 10 minutes — drinks, music, light snacks or fruit;
- after 15–20 minutes — the main hot food;
- after 45–60 minutes — more coffee, pastries, dessert part;
- after an hour — photos, if you want, while the table is still pretty, but people are already relaxed.
You do not have to tell guests that you have a plan. Let it just help you on the inside. This is not a restaurant where everything has to come out minute by minute.
What to prepare the night before
If you have the energy, it is better to do some things the day before. Not everything. Only what really cuts down the morning rush.
In the evening, you can:
- choose the playlist;
- put the speaker on charge;
- lay out plates and napkins;
- print the menu cards;
- wash fruit;
- put flowers in water;
- check if you have enough coffee, tea, and milk.
I almost always forget some little thing if I leave everything for the morning. So evening prep helps avoid searching for scissors, tape, or a clean tablecloth when the oven is already beeping.
Try to keep in mind
The music volume should be low enough that people do not have to raise their voices. If guests start talking louder, turn it down. Music for breakfast is a background, not the main guest at the gathering.
It is better to start with mellow songs. When people are just arriving, loud or too upbeat music can feel strange. Later, you can add a little more rhythm when everyone is already eating and talking.
And keep the phone with the music off the table, where someone can spill coffee on it or cover it with napkins. It is better to place it next to the speaker and forget about it for a while.
This kind of plan does not turn a homemade brunch into an event with a strict schedule. It just gently supports you before the guests arrive. The music is already playing, the coffee is almost ready, the candles are lit, the table is set — that is it, you can breathe out. This little moment is what it was all for.
Your brunch
In breakfasts like this, I love the moment when everyone finally sits down at the table. The guests are here, someone has already poured coffee, someone is reaching for pastries…
You do not need to repeat every detail from the article. Choose the one that you liked most and that fits your home, your way of feeling the world, and your taste. Sometimes one good idea looks better than ten attempts to make it “like the picture.”
Write in the comments how you organized your Valentine’s Day brunch. How did everything go, and did you manage to bring your idea to life? I am really interested in which budget details turned out beautiful for you, which ones were not worth the effort, and what you would repeat again.