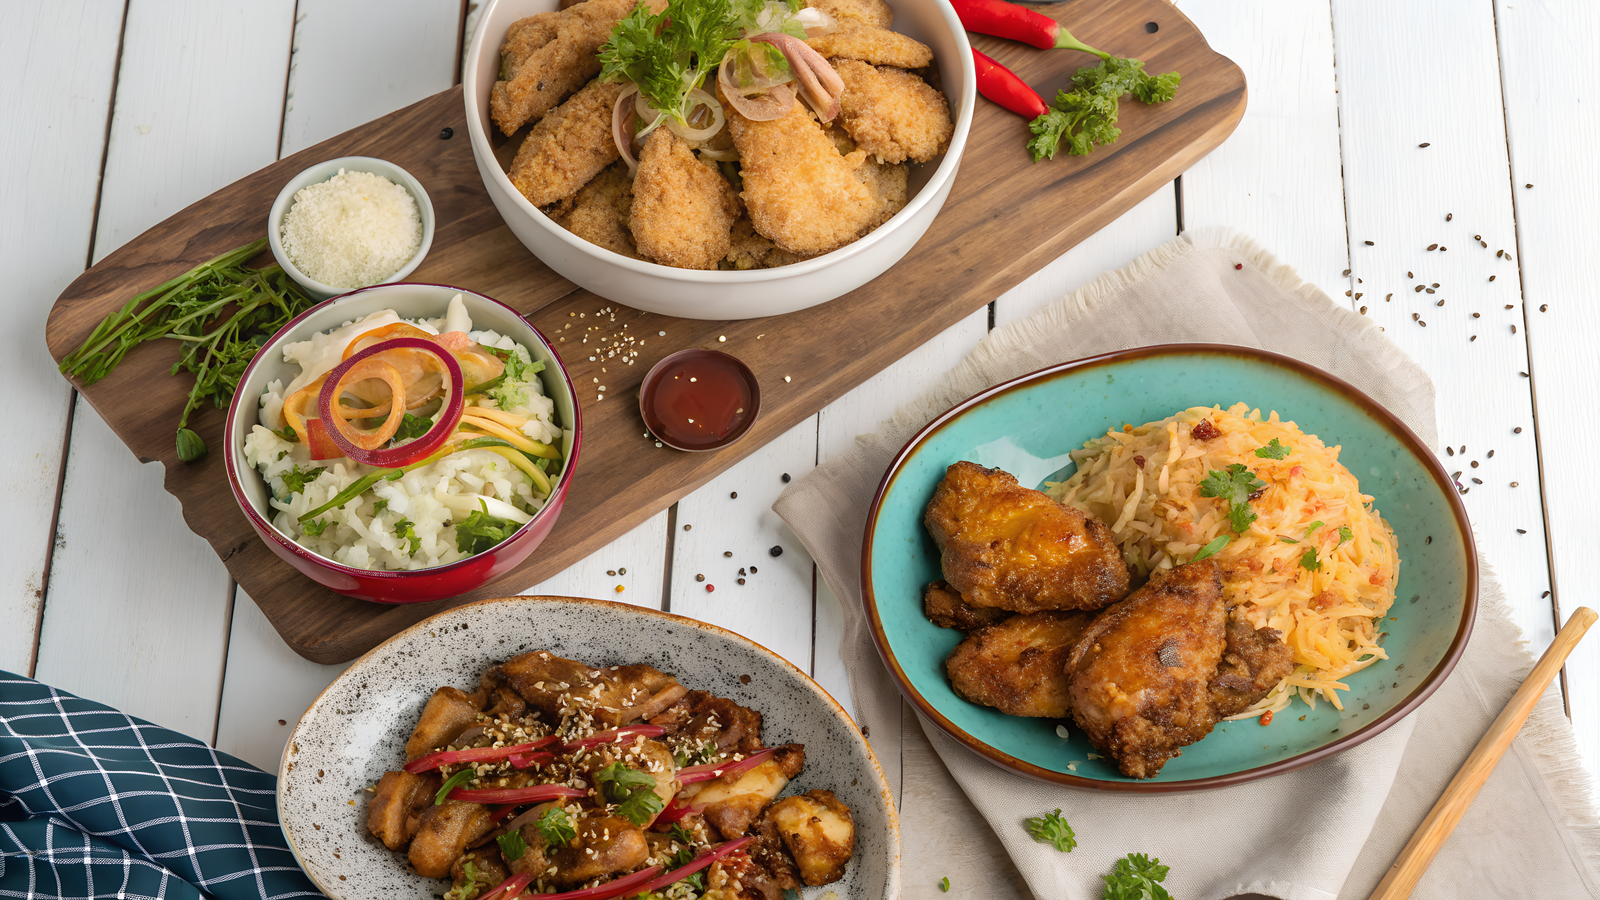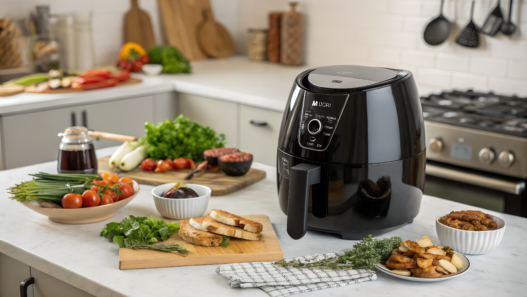
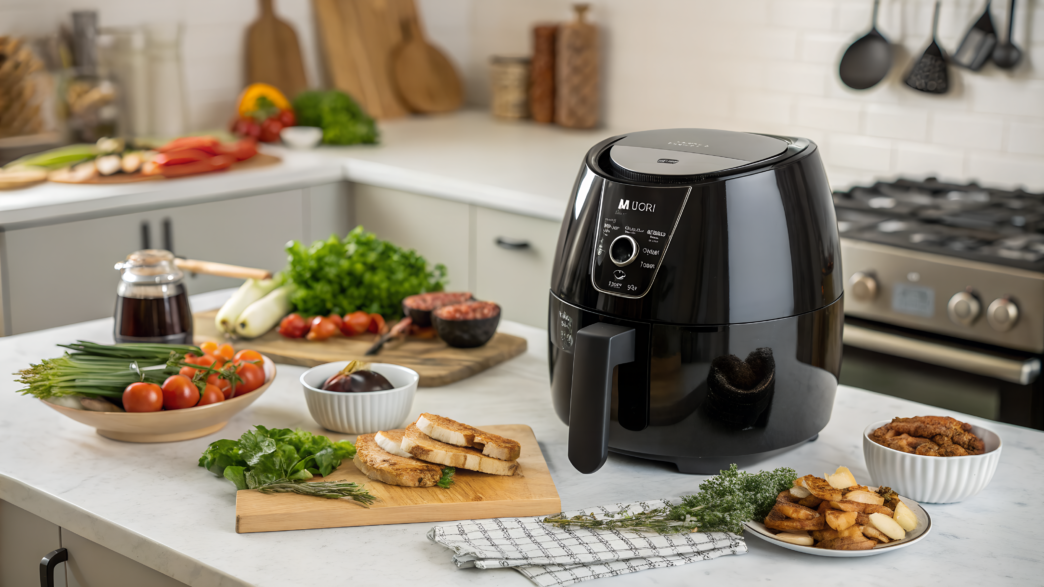
The air fryer is no longer just an appliance for French fries and frozen snacks. Anyone can use it to make a complete dinner, but a good result depends less on the power of the appliance and more on a few precise decisions, such as when to add the sauce, how to prepare the breading, and which ingredient to save until the very end.
Here, I tried to bring together 10 air fryer recipes with techniques and ingredients used by chefs. There are no complicated restaurant techniques or rare products here. Everything is built around simple combinations, the right order of steps, and small tricks that noticeably change the flavor and texture.
I invite you to take a look at these little chef tricks too.
1. Thomas Keller Style Air Fryer Chicken Breast With Pan Sauce Hack
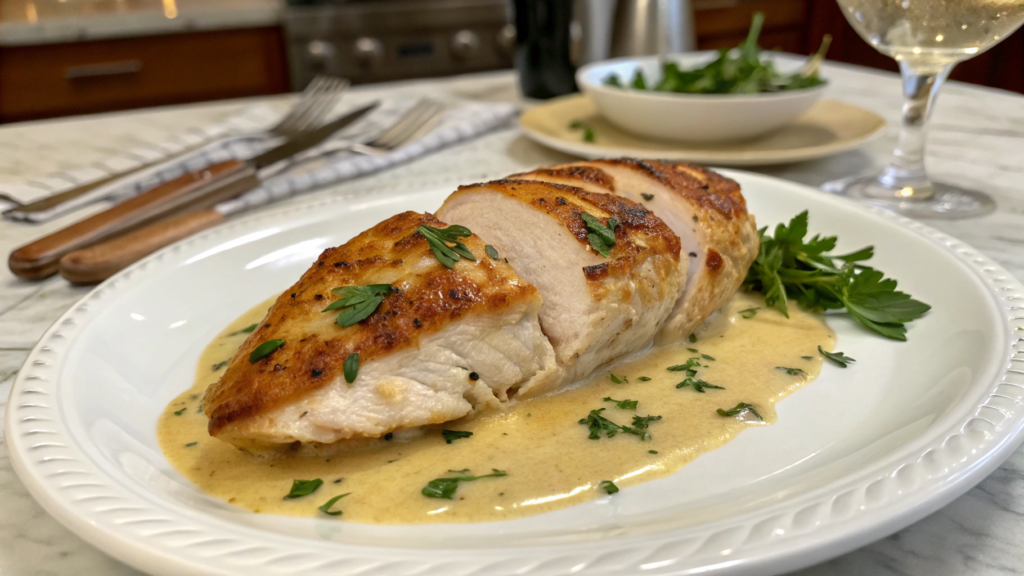
When cooking chicken breast, you have to pay close attention because getting distracted for just a few minutes can leave you with dry white pieces of meat instead of juicy chicken. You may even have to cover them with a double serving of mashed potatoes.
I like Thomas Keller’s approach to simple ingredients. You do not need a long list of seasonings or complicated restaurant techniques for this. The chicken breast stays juicy inside, and the juices left after cooking become the base for a quick creamy sauce. This is a home-style version you can make on a regular weeknight.
Ingredients
For 2–3 servings:
- 2 boneless, skinless chicken breasts, about 8 ounces each (225 g each);
- 1 teaspoon kosher salt;
- ½ teaspoon freshly ground black pepper;
- 1 tablespoon olive oil;
- 2 tablespoons unsalted butter;
- 1 small garlic clove;
- 2 sprigs thyme;
- ¼ cup chicken broth (60 ml);
- ¼ cup heavy cream (60 ml);
- 1 teaspoon Dijon mustard;
- 1 teaspoon lemon juice.
How to make chicken breast with sauce
- Make the chicken breasts an even thickness. Place the meat between two sheets of parchment paper and gently pound the thickest part. You do not need to turn them into thin cutlets. Just even out the breast slightly so the narrow end does not dry out before the center is ready.
- Salt the chicken. Sprinkle the breasts with salt on all sides and leave them in the refrigerator for at least 1 hour. If you are short on time, leave them at room temperature for 20–30 minutes. Pat the surface dry with a paper towel before cooking.
- Prepare the air fryer. Preheat it to 375°F (190°C). Rub the chicken breasts with olive oil and season them with black pepper. Place them in the basket, leaving some space between the pieces.
- Cook the first side. Cook the breasts for 7 minutes, then flip them. Mix 1 tablespoon of softened butter with the crushed garlic and thyme leaves. Spread the mixture over the top of the chicken.
- Finish cooking the chicken. Cook for another 5–7 minutes. Check the temperature in the thickest part. You can remove the chicken breast at 160°F (71°C) because the temperature will continue to rise slightly while it rests. The meat should ultimately reach a safe internal temperature of 165°F (74°C). I use a ThermoPro TP19H
Digital Meat Thermometer. - Let the meat rest. Transfer the chicken breasts to a plate and loosely cover them with foil for 5–8 minutes. Do not slice them right away. During this time, juices will collect on the plate, and you will need them for the sauce.
- Start making the sauce. Pour the chicken broth into a small skillet. Add the juices from the plate and any remaining garlic butter from the air fryer basket. Cook over medium heat for 2–3 minutes, until the liquid reduces slightly.
- Add the cream and mustard. Stir in the cream and Dijon mustard. Cook for about 2 more minutes. The sauce should thicken slightly but still run easily off a spoon.
- Remove the skillet from the heat, then add the lemon juice and the remaining tablespoon of cold butter. Stir until smooth. Slice the chicken breast against the grain and spoon the sauce over it.
Slice the chicken breast against the grain and pour the warm pan sauce over it. I usually serve it with mashed potatoes or rice because leaving that sauce on the plate would be a shame. Lindy usually picks up what is left with a piece of bread. That means there is no need to bring out a separate gravy boat.
Thomas Keller often shows how much precise technique can do for a simple ingredient. Do not overcook the chicken breast, keep the juices, and turn them into a sauce. Nothing complicated, right? But the difference is noticeable right away. The chicken stays juicy and tender, and this time the mashed potatoes are there purely for enjoyment, not to hide dry pieces of meat.
2. Nashville Hot Air Fryer Chicken Wings With Pickle Brine Shortcut
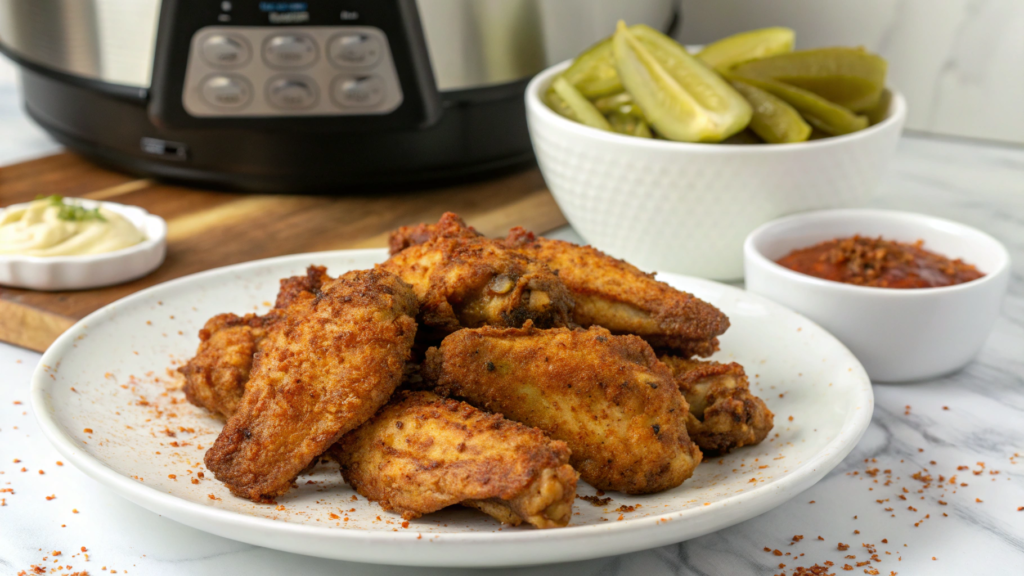
I used to pour out the brine as soon as the pickle jar was empty. Then Lindy once suggested marinating chicken in it. It sounded a little strange to me, but I kept the jar anyway.
The brine seasons the meat ahead of time and helps the wings stay juicy inside while the skin browns in the air fryer. The tanginess is especially useful here. Without it, the mixture of cayenne pepper, butter, and sugar would feel much heavier.
Nashville hot chicken is usually fried in a large amount of oil and then coated in a very spicy seasoning mixture. This version does not need a deep fryer. The air fryer gives the wings crispy skin, and the hot spiced butter is added after cooking.
Ingredients
For 4 servings:
- 2 pounds chicken wings, separated at the joints (about 900 g);
- 1 cup pickle brine (240 ml);
- 1 tablespoon hot sauce;
- 1 teaspoon baking powder;
- 1 teaspoon garlic powder;
- 1 teaspoon onion powder;
- 1 teaspoon smoked paprika;
- ½ teaspoon freshly ground black pepper;
- up to ½ teaspoon kosher salt;
- a little cooking spray.
The Hot Coating
- 3 tablespoons unsalted butter;
- 1 tablespoon avocado oil or another neutral oil;
- 1–2 tablespoons cayenne pepper;
- 1 teaspoon light brown sugar;
- ½ teaspoon smoked paprika;
- ½ teaspoon garlic powder;
- ¼ teaspoon kosher salt.
For Serving
- slices of white bread;
- pickles;
- ranch dressing or blue cheese dressing.
How to make nashville hot wings
- Marinate the wings. Mix the pickle brine with the hot sauce, add the chicken, and refrigerate for 2–4 hours. Do not leave it overnight because the brine can make the meat too salty and the pickle flavor too strong.
- Dry the skin thoroughly. Remove the wings from the marinade and pat them several times with paper towels. The surface should be almost dry. Any remaining water will turn into steam and make it harder to get crispy air fryer wings.
- Add the dry seasoning. Combine the baking powder, garlic powder, onion powder, smoked paprika, and black pepper. Coat the wings evenly with the mixture. Taste a drop of the brine first, then decide whether the wings need any extra salt.
The recipe uses baking powder, not baking soda. It dries the surface of the skin and helps it brown more effectively without leaving an unpleasant aftertaste.
- Preheat the air fryer. Set it to 380°F (193°C) and preheat for about 3 minutes. Lightly spray the basket with oil.
- Give the wings some space. Arrange them in a single layer with gaps between each piece. Do not try to cook them all at once if they are packed tightly together. Two crispy batches are better than one large, soggy batch.
- Cook until crispy. Cook the wings for 12 minutes, then flip them and cook for another 10 minutes. Increase the temperature to 400°F (204°C) and cook for another 3–5 minutes. The skin should become deep golden brown, especially around the edges.
- Mix the hot butter. Melt the butter with the neutral oil. Remove it from the heat and add the cayenne pepper, brown sugar, paprika, garlic powder, and salt. One tablespoon of cayenne will make the coating hot. Two tablespoons will make it very hot. I once made the hottest version and then spent a long time pretending my eyes were watering because of the steam.
- Coat the wings with the spices. Immediately transfer the hot chicken to a large bowl, pour over the spiced butter, and toss quickly. The coating should form a thin layer. If you add too much butter, the crispy skin will soften quickly.
How to serve the wings
In Nashville, hot chicken is traditionally served on white bread with pickle slices on top. The bread absorbs the spicy butter, while the pickles provide the right amount of tang after a few hot bites.
When we made these wings for friends, I also put ranch dressing and a bowl of pickles on the table. Ten minutes later, the bread was the first thing to disappear, even though I had thought of it as nothing more than a base for the wings. Now I buy a whole loaf and cut the slices a little thicker.
Ranch dressing or blue cheese dressing is best served separately. This keeps the skin crispy for longer and lets everyone adjust the heat for themselves.
The pickle brine does not cover up the flavor of the chicken. It seasons the meat from the inside and adds acidity that balances the hot butter. This secret ingredient usually gets poured down the drain, but it can make a noticeable difference to dinner.
3. Air Fryer Salmon With Miso Maple Glaze From a Tokyo Alley Idea
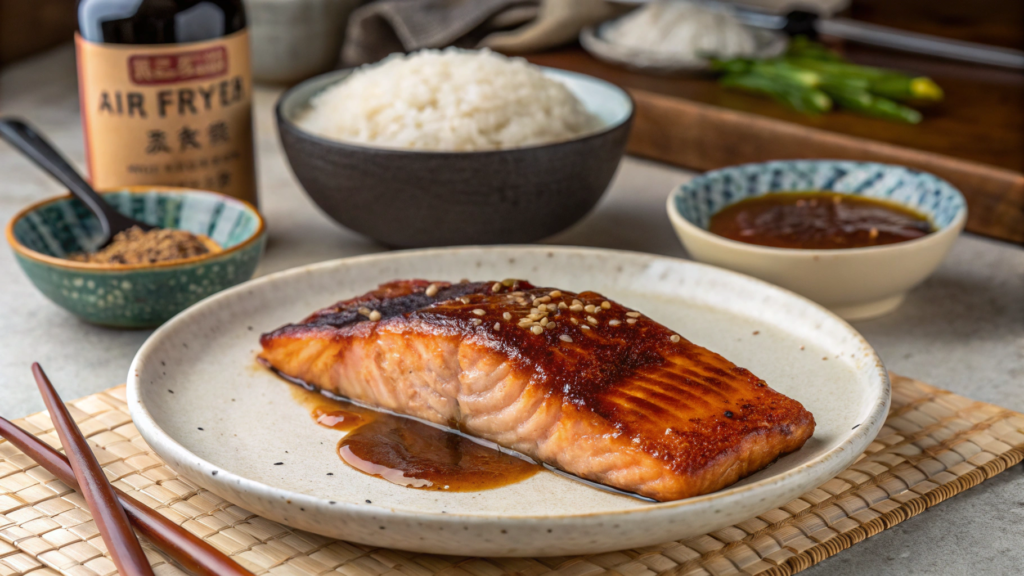
The idea for this air fryer salmon with miso maple glaze came after dinner in one of Tokyo’s narrow alleys. I cannot remember the name of the place anymore. There were only a few seats at the counter, hot air coming from the grill, and the smell of fish, soy sauce, and something slightly sweet.
What stayed with me was not the complexity of the dish, but how few ingredients were needed to create such a deep, rich flavor. Later, at home, I mixed white miso paste, maple syrup, and rice vinegar, then used the air fryer instead of a grill.
The miso brings saltiness and depth, while the maple syrup helps the surface caramelize quickly. The main thing is to apply the miso maple glaze in a thin layer. Sugar darkens quickly under the hot air. Sometimes a little too quickly!
Ingredients
For 4 servings:
- 4 skin-on salmon fillets, about 6 ounces each (170 g each);
- 2 tablespoons white miso paste;
- 2 tablespoons pure maple syrup;
- 1 tablespoon soy sauce;
- 2 teaspoons rice vinegar;
- 1 teaspoon sesame oil;
- 1 teaspoon finely grated fresh ginger;
- 1 small garlic clove, finely grated;
- ½ teaspoon red pepper flakes, optional;
- a little oil for the basket.
For Serving
- cooked rice;
- green onions;
- sesame seeds;
- cucumber;
- lime wedges.
How to make salmon with miso maple glaze
- Check the fillets. Run your fingers over the surface of the fish and remove any remaining pin bones with tweezers. Then pat the salmon dry with a paper towel. Dry the skin especially well so it does not stick to the basket.
- Mix the glaze. In a small bowl, combine the miso paste, maple syrup, soy sauce, rice vinegar, sesame oil, ginger, and garlic. Stir with a spoon until smooth. If the miso paste is very thick, add 1 teaspoon of water.
- Set aside part of the sauce. Transfer about one-third of the glaze to a clean small bowl and set it aside. This portion should not come into contact with the raw fish because it will be used to brush the salmon near the end of cooking.
- Coat the fish with the first layer of glaze. Apply a thin layer of the miso mixture to the top and sides of the fillets. Do not put the glaze on the skin. Leave the salmon for 15–20 minutes, but do not marinate it for several hours because the salty miso will noticeably change the texture of the surface.
- Preheat the air fryer. Set the temperature to 375°F (190°C) and preheat for about 3 minutes. Lightly grease the basket with oil.
- Place the fillets in the basket, skin-side down. Arrange them so the pieces do not touch. Cook for 6 minutes. There is no need to flip the salmon. The circulating hot air will cook the top, while the skin helps the fish stay juicy.
- Add a fresh layer of glaze. Open the basket and brush the fillets with the reserved mixture using a silicone pastry brush. The brush helps spread the glaze in a thin layer without moving the delicate fish.
- Finish cooking the salmon. Cook for another 2–4 minutes at 400°F (204°C). The surface should look glossy, and the edges should become slightly dark. The fish should separate easily into large flakes in the center while still remaining juicy. For fully cooked salmon, aim for an internal temperature of 145°F (63°C).
How to How to serve the salmon
Place the fillets over hot rice and add thinly sliced cucumber on the side. It brings freshness and crunch, especially when the glaze has a rich flavor. Sprinkle green onions and sesame seeds over the top, then squeeze over a little lime before eating.
Leftover salmon can be broken into large pieces and added to a bowl with rice, cucumber, and avocado the next day. Do not reheat it for too long. I usually leave the fish on the counter for about twenty minutes, then add it to warm rice. This keeps it from drying out a second time.
The interesting part here is not the maple syrup on its own, but the way it works with the white miso paste. The sweetness helps the glaze brown, the miso adds saltiness, and the vinegar keeps the sauce from becoming too sweet. The result is an ordinary salmon fillet with that same dark, sticky surface whose smell once made me stop beside a small counter in a Tokyo alley.
4. Air Fryer Potatoes With Garlic Toum and Za’atar Crunch
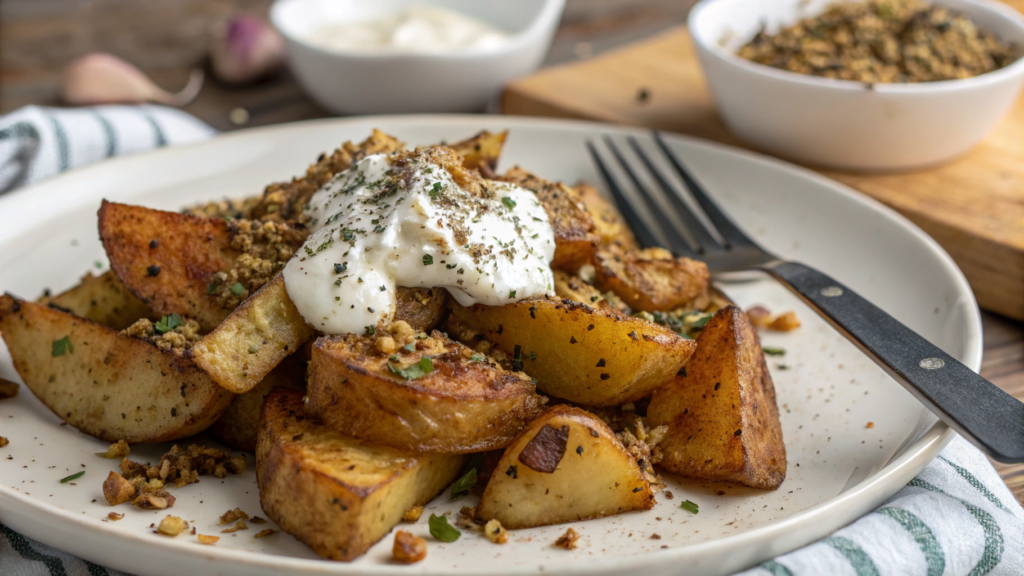
My aunt always believed that potatoes only needed salt, oil, and good heat. Overall, she was right. But one day I served the hot wedges with garlic toum and sprinkled them with za’atar. After that, plain salt did not interest anyone very much.
I now make these air fryer potatoes with garlic toum and za’atar when the usual roasted wedges have started to feel a little boring. There is a lot of garlic here. A lot. So this recipe may not be the best choice for a first date. But for dinner at home, yes.
Ingredients
For 4 servings:
- 1½ pounds small yellow or red potatoes (about 680 g);
- 1½ tablespoons olive oil;
- 1 teaspoon kosher salt;
- ½ teaspoon garlic powder;
- ½ teaspoon freshly ground black pepper;
- 1 tablespoon za’atar;
- 1 teaspoon sesame seeds;
- 1 teaspoon finely grated lemon zest.
For quick garlic toum
- 4 large garlic cloves;
- ½ teaspoon kosher salt;
- 1 tablespoon fresh lemon juice;
- ½ cup neutral oil (120 ml);
- 2 tablespoons ice water.
Za’atar blends vary noticeably between brands. Look for a mixture that contains thyme, sumac, and sesame seeds. If the blend contains a lot of salt, reduce the amount of salt used for the potatoes.
How to make potatoes with garlic toum and za’atar
- Cut the potatoes. Cut small potatoes in half and larger ones into quarters. The pieces should be about the same size, or the smaller ones will dry out before the larger ones become tender.
- Rinse and dry them. Hold the cut potatoes under cold water to wash away some of the starch from the surface. Then dry them thoroughly with a kitchen towel. The less moisture left on the outside, the easier it will be to get crispy edges.
- Add the oil and seasonings. Toss the potatoes with olive oil, salt, garlic powder, and black pepper. Do not add the za’atar yet because the herbs and sesame seeds may burn before the potatoes are cooked.
- Preheat the air fryer. Set the temperature to 390°F (199°C) and preheat for 3 minutes. Place the potatoes in the basket in a single layer or with a slight overlap. It is better to divide a tightly packed pile into two batches.
- Cook until the edges are golden. Cook the potatoes for 16–20 minutes, shaking the basket about every 6 minutes. Pierce the largest piece with a knife. It should be soft inside, while the cut sides should be well browned.
- Make the quick toum. Blend the garlic and salt into a paste. Add the lemon juice and blend again. With the food processor still running, pour in the oil very slowly in a thin stream, alternating it with the ice water. The mixture will gradually turn white and thicken.
Do not pour in all the oil at once. The garlic and liquid will not have time to come together, and instead of a thick garlic toum sauce, you will get an oily mixture.
- Add the za’atar crunch. Mix the za’atar, sesame seeds, and lemon zest. When the potatoes are almost ready, sprinkle them with half of the mixture, shake the basket, and return them to the air fryer for another 1–2 minutes.
- Transfer the hot potatoes to a plate and add the remaining za’atar. Spoon small amounts of toum over the top or serve it on the side. Do not toss all the potatoes with the sauce ahead of time, or the browned surface will quickly soften.
How to serve the potatoes
Arrange the garlic za’atar potatoes on a large platter and add the toum in several wide swipes between the wedges. This way, some of the potatoes will stay dry and crispy, while others will be coated with garlic sauce right away.
These potatoes work well with roasted chicken, lamb, or fish, but they can also make a complete dinner on their own. Add tomatoes, cucumbers, olives, and warm pita, and you will not need to cook anything else.
The next day, the toum tastes even more garlicky. Just keep it in a sealed jar in the refrigerator and use it within a few days.
Za’atar may be the unusual ingredient here, but choosing the right moment to add it matters more. If you sprinkle it over the potatoes at the beginning, the herbs will darken quickly and their aroma will become weaker. It is better to add the mixture 2–3 minutes before the end of cooking. That gives the sesame seeds enough time to toast lightly while the thyme and sumac keep their fragrance.
My aunt still seasons her potatoes with nothing but salt. But she always keeps the bowl of garlic toum close to her.
5. Air Fryer Chicken Thighs With Harissa Honey and Crispy Edges
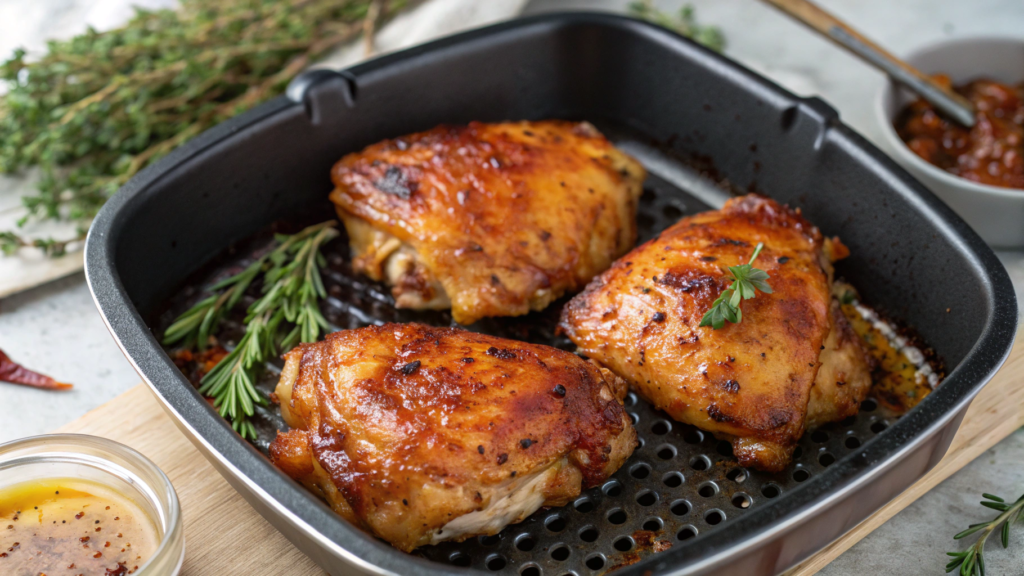
I often run into the same problem with chicken thighs: the meat is already cooked, but the skin is still soft. This happens especially often with a sweet marinade. Honey darkens quickly, the spices stick to the surface, and it seems like the chicken only needs a little more browning. Then two minutes pass, and the edges are already burned.
In this recipe, the harissa and honey glaze is added only near the end. By that point, the skin has had time to dry out, and some of the fat has rendered. The glaze goes on in a thin layer and becomes sticky, spicy, and nicely browned around the edges in just a few minutes.
Ingredients
For 4 servings:
- 2 pounds skin-on, bone-in chicken thighs (about 900 g);
- 1 teaspoon kosher salt;
- ½ teaspoon freshly ground black pepper;
- 1 teaspoon garlic powder;
- ½ teaspoon ground cumin;
- 1 teaspoon baking powder;
- 1 tablespoon olive oil.
The glaze
- 2 tablespoons harissa paste;
- 1½ tablespoons honey;
- 1 tablespoon fresh lemon juice;
- 1 teaspoon olive oil;
- ½ teaspoon ground cumin;
- 1 small garlic clove, finely grated.
For serving
- thick plain yogurt;
- fresh mint or parsley;
- lemon wedges.
How to make chicken thighs with harissa and honey
- Dry the chicken. Pat the thighs dry with paper towels, especially on the skin side. Moisture prevents the fat from rendering properly and keeps the edges from browning well.
- Add the dry seasonings. Mix the salt, black pepper, garlic powder, cumin, and baking powder. Rub the mixture over the chicken on all sides. There should not be any thick clumps left on the skin.
A small amount of baking powder helps dry the skin. Do not replace it with baking soda because it can leave an unpleasant alkaline taste.
- Prepare the glaze. Combine the harissa, honey, lemon juice, olive oil, cumin, and garlic. Set the mixture aside until the end of cooking. If you apply it right away, the honey will start to burn before the meat has time to cook.
- Preheat the air fryer. Set the temperature to 380°F (193°C) and preheat for about 3 minutes. Lightly grease the basket with oil if its coating tends to stick.
- Start with the thighs skin-side down. Arrange them in the basket so the pieces do not touch, and cook for 10 minutes. During this time, the fat will begin to render, and the surface will brown slightly.
- Turn the thighs skin-side up and cook for another 10–12 minutes. The skin should become golden and develop small bubbles in a few places.
- Apply the glaze. Brush each thigh with a thin layer of the harissa and honey mixture. Do not pour on all the glaze at once because a thick layer will darken quickly and become sticky too soon.
- Brown the edges. Increase the temperature to 400°F (204°C) and cook for another 3–5 minutes. Watch the surface closely during the final minutes. The honey should caramelize, not turn into a black crust.
- Check the meat and let it rest. The internal temperature in the thickest part should reach at least 165°F (74°C). For chicken thighs, I prefer a range of around 175–185°F (79–85°C) because the connective tissue has time to soften, and the meat pulls away from the bone more easily. Let the chicken rest for 5 minutes before serving.
How to serve the chicken thighs
These harissa honey chicken thighs go well with thick plain yogurt mixed with lemon juice and chopped mint. It cools the heat of the harissa slightly, while the meat juices mix with it right on the plate. The result is a sauce that does not need to be prepared separately.
You can make couscous or rice as a side, but I prefer warm flatbread. Tear off a piece, pick up some yogurt and a little of the sweet and spicy glaze, and there is no need to come up with anything else.
The important thing in this dish is not to coat the chicken with harissa and honey too early. The skin needs to dry out and brown first, while the glaze only needs the last few minutes. This gives the honey time to caramelize, keeps the edges crispy, and prevents bitterness from developing on the surface.
6. Air Fryer Pork Chops With Dijon Cream and Crispy Parmesan Rim
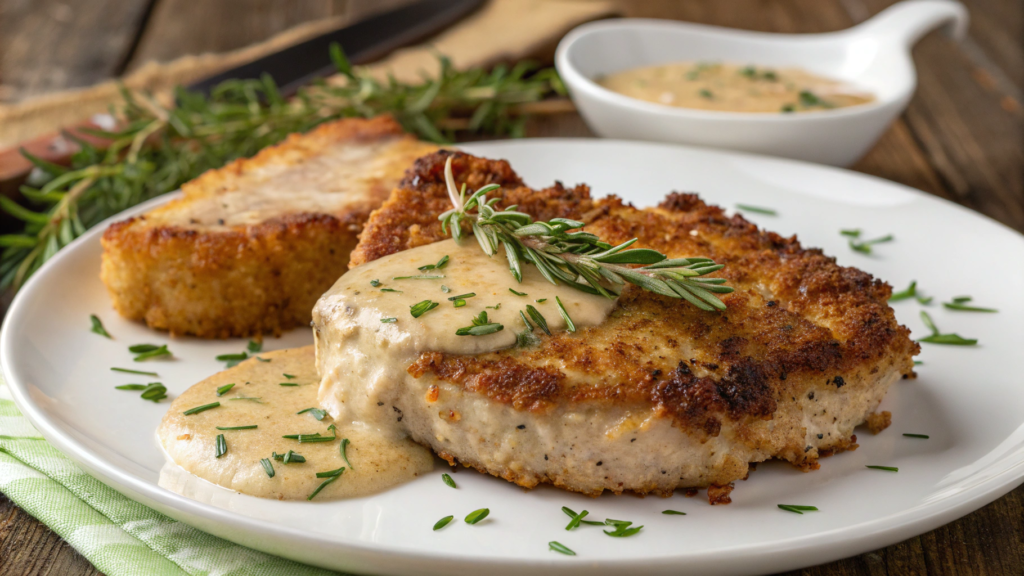
When cooking pork chops, it is better to rely not only on the timer but also on the thickness of the meat and its internal temperature. The outside may already be nicely browned while the center still needs a few more minutes. The opposite can happen too: the chop looks ready, but by that point it has already lost its juiciness.
That is why I use chops that are not too thick and check them with a thermometer near the end of cooking. Parmesan helps the surface brown quickly without forcing the meat to stay in the air fryer longer than necessary.
Ingredients
For 4 servings:
- 4 boneless pork chops, about 1 inch thick (2.5 cm), around 6 ounces each (170 g each);
- 1 teaspoon kosher salt;
- ½ teaspoon freshly ground black pepper;
- ½ teaspoon garlic powder;
- 1 tablespoon olive oil;
- ½ cup finely grated Parmesan (about 45 g);
- 2 tablespoons breadcrumbs;
- 1 teaspoon dried thyme;
- 1 tablespoon Dijon mustard.
For the sauce
- ½ cup heavy cream (120 ml);
- 1 tablespoon Dijon mustard;
- ¼ cup chicken broth (60 ml);
- 1 teaspoon lemon juice;
- 1 teaspoon unsalted butter;
- black pepper to taste.
How to make pork chops with dijon sauce
- Dry the meat. Pat the pork chops dry with a paper towel. If there is a thick strip of fat around the edge, make two or three shallow cuts in it. This will keep the meat from curling during cooking.
- Add the seasonings. Mix the salt, black pepper, and garlic powder. Rub the mixture over both sides of the chops, then coat them with a thin layer of olive oil.
- Prepare the cheese mixture. Combine the finely grated Parmesan, breadcrumbs, and thyme. Brush the edges of each chop with a small amount of Dijon mustard and press them into the cheese mixture. There is no need to cover the entire surface with Parmesan. A thin crispy Parmesan rim will not prevent the meat from cooking evenly.
- Preheat the air fryer. Set the temperature to 390°F (199°C) and preheat for about 3 minutes. You can lightly grease the basket with oil, especially if the coating is no longer new.
- Cook the first side. Place the chops in the basket, leaving space between them. Cook for 6 minutes without moving the meat. During this time, the bottom will brown, and the Parmesan will begin to melt around the edges.
- Flip the chops. Do this carefully, lifting the meat with a wide spatula. Cook for another 4–6 minutes. The internal temperature should reach 145°F (63°C). Then transfer the chops to a plate and let them rest for 5 minutes.
- Make the Dijon sauce. While the meat rests, pour the broth and cream into a small skillet. Add the Dijon mustard and cook over medium heat for 3–4 minutes, stirring occasionally. The sauce should thicken slightly but remain pourable.
- Remove the skillet from the heat and stir in the lemon juice and butter. Taste the sauce before adding salt because the mustard, broth, and Parmesan already provide enough saltiness.
How to serve the pork chops
Mashed potatoes, green beans, or cabbage quickly sautéed with garlic all work well with the chops. It is better to pour the creamy Dijon sauce under the meat or only over the center, without touching the Parmesan edges. Otherwise, the crust will quickly lose its crunch.
I always try to leave some of the sauce in a small sauce boat on the table. Some people add another spoonful to the meat, while others pour almost all of it over the potatoes. Both choices make perfect sense.
In this recipe, Parmesan is not used for a thick breading. A small amount of cheese is pressed around the edges of the chop, where it melts and browns into a thin, salty crust. The center is left uncovered, so the Parmesan does not overpower the flavor of the meat. Dijon mustard is also used twice. First, it helps the Parmesan stick to the chop, and then it goes into the cream sauce and gives it a more pronounced flavor.
7. Air Fryer Meals Greek Chicken Bowls With Lemon Potatoes
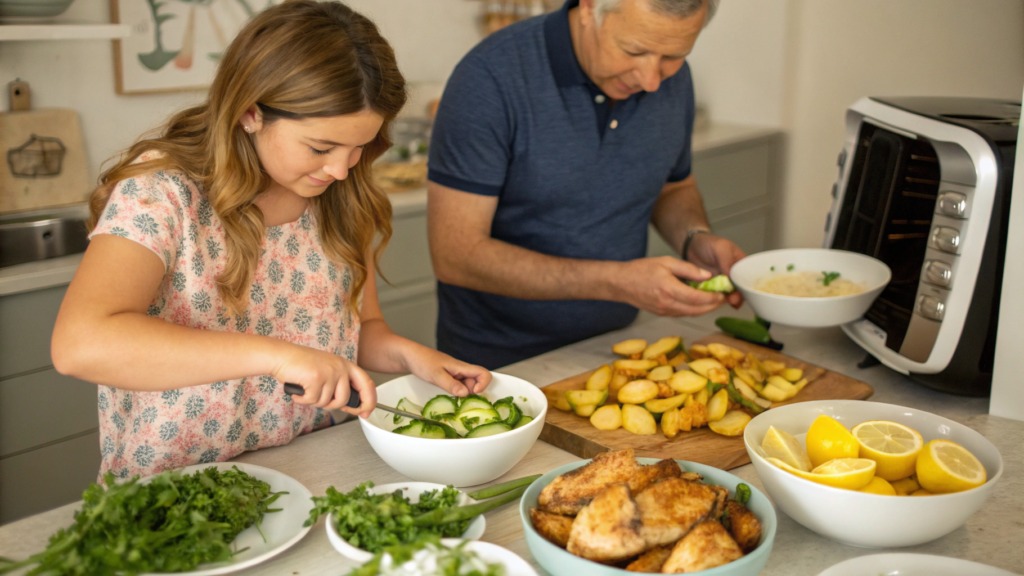
For these Greek chicken bowls, I brown the potatoes in the air fryer first, then add the lemon juice and zest after cooking. This way, the wedges keep their golden edges but still absorb plenty of bright citrus flavor.
Lindy usually takes care of the cucumbers, herbs, and sauce while I handle the chicken and lemon potatoes in the air fryer. It is not some formal family tradition. It is simply that when we cook together, everything gets to the table faster, and the kitchen does not look like we have cooked for twenty people after dinner.
Ingredients
For 4 servings:
The chicken
- 1½ pounds boneless, skinless chicken thighs (about 680 g);
- 2 tablespoons olive oil;
- 2 tablespoons fresh lemon juice;
- 2 garlic cloves, finely grated;
- 1½ teaspoons dried oregano;
- ½ teaspoon ground cumin;
- 1 teaspoon kosher salt;
- ½ teaspoon freshly ground black pepper.
For the lemon potatoes
- 1½ pounds small yellow potatoes (about 680 g);
- 1½ tablespoons olive oil;
- 1 tablespoon fresh lemon juice;
- 1 teaspoon dried oregano;
- ¾ teaspoon kosher salt;
- ½ teaspoon garlic powder;
- ¼ teaspoon black pepper;
- 1 teaspoon finely grated lemon zest.
The sauce
- ¾ cup thick Greek yogurt (180 ml);
- ½ small cucumber;
- 1 tablespoon lemon juice;
- 1 small garlic clove;
- 1 tablespoon chopped dill;
- ¼ teaspoon kosher salt.
For assembling
- 2 cups cooked rice or bulgur;
- 1 cup cherry tomatoes;
- ½ cucumber;
- ¼ red onion;
- ½ cup crumbled feta;
- Kalamata olives;
- fresh parsley;
- lemon wedges.
How to make Greek chicken bowls with lemon potatoes
- Marinate the chicken. Mix the olive oil, lemon juice, garlic, oregano, cumin, salt, and pepper. Add the chicken thighs and coat the meat well with the marinade. Leave for 30 minutes. Several hours are not needed here because the lemon affects the surface of the chicken fairly quickly.
- Prepare the potatoes. Cut small potatoes in half and larger ones into quarters. Toss them with the olive oil, oregano, salt, garlic powder, and pepper. Do not add the lemon juice or zest yet. The acidity makes it harder for the potatoes to brown.
- Cook the potatoes first. Preheat the air fryer to 390°F (199°C). Place the potatoes in the basket and cook for 16–20 minutes. Shake them two or three times so the cut sides brown from different angles.
- Add the lemon after cooking. Transfer the hot potatoes to a bowl, pour over the lemon juice, and add the zest. Toss and cover with a plate for a few minutes. The potatoes will absorb some of the juice while keeping their golden edges.
- Cook the chicken. Shake off the excess marinade and place the thighs in the empty air fryer basket. Cook at 380°F (193°C) for about 9 minutes, then flip and cook for another 6–8 minutes.
- Check the temperature. The chicken should reach at least 165°F (74°C) in the thickest part. Transfer the meat to a cutting board and leave it for 5 minutes. Then cut it into thick strips, keeping any juices that have collected.
- Mix the yogurt sauce. Grate the cucumber and squeeze it well with your hands or through a clean towel. Combine it with the Greek yogurt, lemon juice, garlic, dill, and salt. If the cucumber is left watery, the sauce will quickly become thin.
- Prepare everything for the bowls. Cut the tomatoes, cucumber, and red onion. Crumble the feta into large pieces. It is better to keep the rice or bulgur warm and the vegetables and sauce cool. The dish depends on this contrast in temperature.
How to assemble the Greek bowls
The base can be rice, bulgur, or just the lemon potatoes if you do not need another side. Next come the sliced chicken, cucumber, tomatoes, red onion, feta, and a few olives. The yogurt sauce can be spooned over the top or left on the table in a shared bowl.
Lindy likes adding more dill to the sauce, while I usually squeeze an extra lemon wedge directly over the potatoes. There is no need to make every portion identical. One bowl can have more vegetables, while another can have more chicken and feta. That is the idea.
The most important thing is that I add the lemon juice after air frying the potatoes. If you add it earlier, the surface stays wet and browns less effectively. The hot wedges quickly absorb the juice, while the zest stays on the surface and strengthens the lemon aroma. At the same time, the edges keep their golden crust. Enjoy!
8. Air Fryer Chicken Katsu With Panko Shortcut and Tonkatsu Drizzle
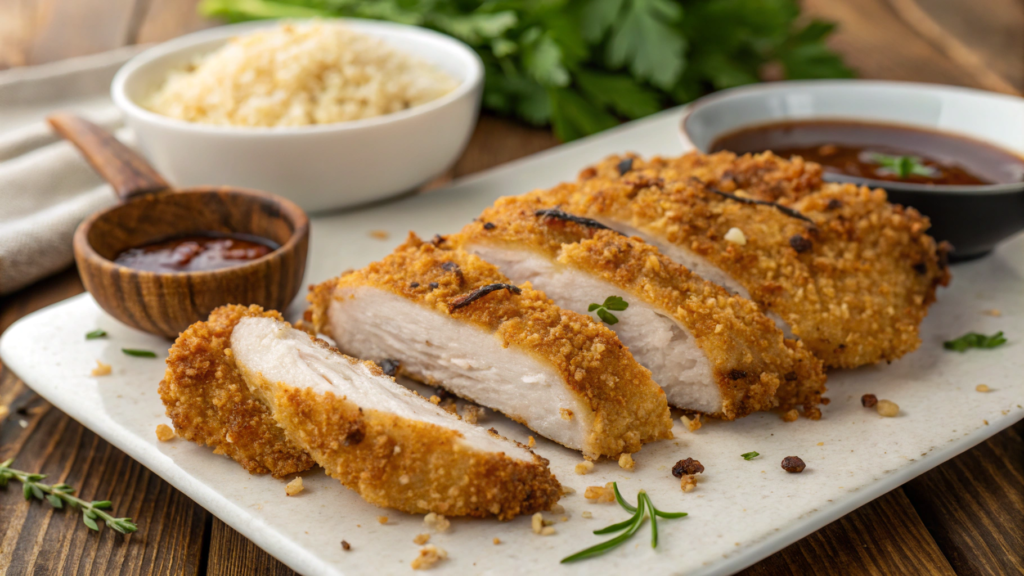
A good chicken katsu crust should be more than just golden. It should be properly crispy. That is harder to achieve in an air fryer because panko often stays pale even when the chicken is almost done.
That is why I lightly toast the breadcrumbs in a skillet first. They only need a few minutes to take on color and develop a nutty aroma. After that, the chicken does not need to spend extra time in the air fryer, while the coating still turns golden and crisp.
Ingredients
For 4 servings:
- 2 large boneless, skinless chicken breasts, about 1½ pounds total (around 680 g);
- 1 teaspoon kosher salt;
- ½ teaspoon freshly ground black pepper;
- ½ cup all-purpose flour (about 65 g);
- 2 large eggs;
- 1 tablespoon water;
- 1½ cups panko breadcrumbs. Look specifically for Japanese-style panko, such as Kikkoman Japanese Style Panko Bread Crumbs. Their large flakes create a lighter and crispier crust than regular fine breadcrumbs. (About 90 g);
- 1 tablespoon neutral oil;
- cooking spray.
For the sauce
- ¼ cup ketchup (60 ml);
- 2 tablespoons Worcestershire sauce;
- 1 tablespoon soy sauce;
- 1 tablespoon light brown sugar;
- 1 teaspoon Dijon mustard;
- ½ teaspoon rice vinegar.
Serving
- finely shredded white cabbage;
- cooked rice;
- green onions;
- lemon.
How to make air fryer chicken katsu
- Prepare the chicken. Slice each breast horizontally into two thinner pieces. Cover them with parchment paper and gently pound the thicker areas so all the pieces are about the same thickness, around ½ inch (1.3 cm).
- Toast the panko. Heat the neutral oil in a wide skillet over medium heat. Add the breadcrumbs and cook for 3–5 minutes, stirring constantly. The panko should become light golden. Do not wait for a dark crust because the breadcrumbs will brown a little more in the air fryer.
- Prepare the breading station. Put the flour in one shallow plate. In a second plate, whisk the eggs with the water. Pour the cooled panko into a third plate. Season the chicken with salt and pepper on both sides.
- Bread the chicken. Coat each piece in flour first and shake off the excess. Then dip it into the egg and press it into the panko on both sides. There is no need to pack the breadcrumbs down firmly, but there should not be any bare spots on the surface.
- Preheat the air fryer. Set the temperature to 390°F (199°C) and preheat for about 3 minutes. Lightly spray the basket with oil.
- Cook the first side. Arrange the chicken in a single layer. Spray a little oil over the top as well. Cook for 6 minutes without moving the pieces so the coating has time to set.
- Flip the chicken. Carefully lift each piece with a wide spatula and cook for another 4–6 minutes. The internal temperature should reach 165°F (74°C). If the pieces are thin, start checking earlier because chicken breast dries out quickly.
- Mix the sauce. Combine the ketchup, Worcestershire sauce, soy sauce, brown sugar, mustard, and rice vinegar. Stir until the sugar dissolves. The sauce should taste sweet, salty, and slightly tangy.
How to serve chicken katsu
Chicken katsu tastes best right after it comes out of the air fryer, while the panko is still dry and crisp under the knife. I let the chicken rest for only a few minutes, then slice it into wide strips and transfer it to a plate with rice and finely shredded cabbage. Sometimes I lightly squeeze lemon over the cabbage, but I do not add a heavy dressing.
It is better to drizzle the tonkatsu sauce over the chicken gradually in thin lines. This way, part of the breading stays dry, while every bite still gets some of the sweet and savory sauce. The rest can go into a small bowl on the table so anyone who wants more can add it themselves.
Pre-toasted panko solves the main problem with air fryer katsu. By the time the chicken reaches a safe temperature, the coating is already golden. There is no need to leave the meat in the air fryer for a few extra minutes just to get a darker crust. As a result, the panko stays crisp, while the chicken remains juicy inside.
9. Air Fryer Cajun Salmon Bites With Cornichon Aioli
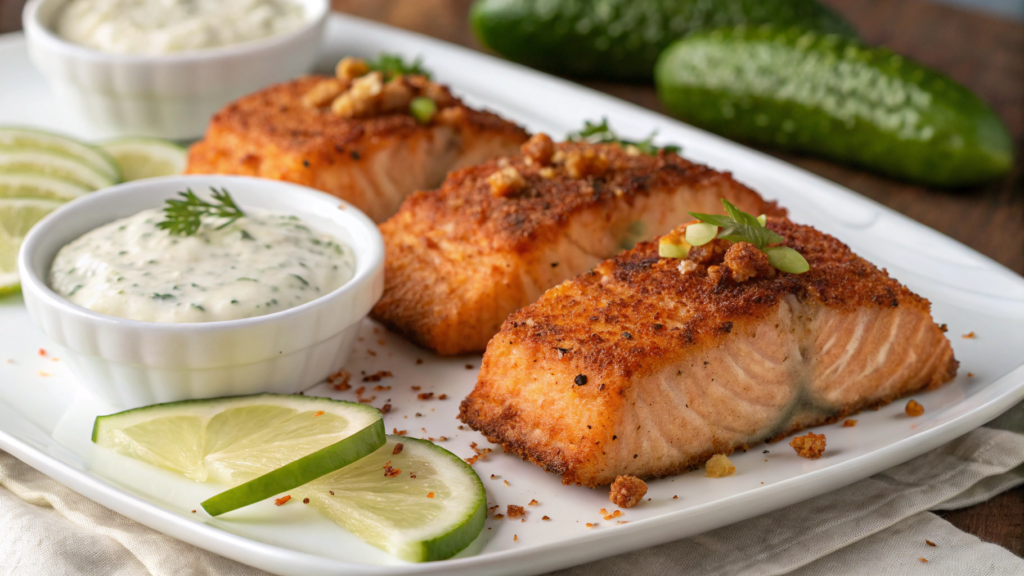
Salmon is rarely cut into small pieces before cooking, which is a shame. In the air fryer, these cubes brown quickly on all sides. Thanks to the larger surface area, a homemade Cajun seasoning made with paprika, thyme, oregano, garlic, and cayenne pepper coats the fish more evenly than it would on a whole fillet. You just cannot get distracted because another couple of minutes and the salmon will start losing its juiciness.
But the most interesting flavor here does not come from the paprika, thyme, and cayenne mixture alone. The hot salmon is served with cornichon aioli, a thick sauce with small crunchy pieces of pickled cucumber. Its acidity balances the richness of the fish, while the cucumber crunch does not disappear under the mayonnaise base.
Ingredients
For 4 servings:
- 1½ pounds skinless salmon fillet (about 680 g);
- 1 tablespoon olive oil;
- 1½ teaspoons smoked paprika;
- 1 teaspoon garlic powder;
- ½ teaspoon onion powder;
- ½ teaspoon dried oregano;
- ½ teaspoon dried thyme;
- ¼–½ teaspoon cayenne pepper;
- ¾ teaspoon kosher salt;
- ¼ teaspoon freshly ground black pepper;
- 1 teaspoon light brown sugar;
- cooking spray.
Cornichon sauce
- ½ cup mayonnaise (120 ml);
- 3 small cornichons;
- 1 tablespoon brine from the jar;
- 1 teaspoon Dijon mustard;
- 1 teaspoon fresh lemon juice;
- 1 tablespoon finely chopped green onion;
- ¼ teaspoon garlic powder;
- black pepper to taste.
For serving
- cooked rice or couscous;
- salad leaves;
- cucumber;
- tomatoes;
- lemon wedges.
How to make Cajun salmon bites
- Cut the salmon. Pat the fillet dry with a paper towel and cut it into pieces about 1½ inches (4 cm) wide. Very small cubes will dry out quickly, so try to keep the pieces about the same size.
- Mix the spices. Combine the smoked paprika, garlic powder, onion powder, oregano, thyme, cayenne pepper, salt, black pepper, and brown sugar. Start with ¼ teaspoon of cayenne if you are not sure how spicy you want it.
- Season the fish. Drizzle the salmon with olive oil, add the spice mixture, and toss gently. Try not to break the pieces. A thin layer of seasoning is enough because a thick, wet paste will prevent proper browning.
- Mix the sauce. Finely chop the cornichons and combine them with the mayonnaise, brine, Dijon mustard, lemon juice, green onion, and garlic powder. Refrigerate the sauce while the fish cooks. During this time, the cornichon flavor will become more noticeable.
- Preheat the air fryer. Set the temperature to 400°F (204°C) and preheat for about 3 minutes. Lightly spray the basket with oil.
- Arrange the salmon in a single layer. Leave small gaps between the pieces. If they are packed too tightly, moisture will collect at the bottom, and the Cajun crust will stay soft.
- Cook the fish. Air fry the salmon for 5 minutes, then gently shake the basket or turn the pieces with tongs. Cook for another 2–4 minutes. The edges should brown, while the center should separate easily into large flakes.
- Check the largest pieces. For fully cooked fish, aim for an internal temperature of 145°F (63°C). Smaller pieces can be removed earlier so they do not dry out while the larger ones finish cooking.
How to serve the salmon bites
Hot Cajun salmon goes well with rice, couscous, or a large bowl of fresh salad. I usually choose rice because it absorbs the spiced juices and holds up well against the rich cornichon sauce.
Spoon the cornichon sauce over the fish in a few small dollops. Do not toss the salmon completely with the sauce because the browned surface will soften quickly. The remaining sauce works well with cucumber, salad, or a second serving of fish.
Lindy was doubtful about this sauce at first because mayonnaise and cornichons seemed like too simple a combination. But with the hot, spicy salmon, it turned out to be exactly what was missing. The pickles add acidity and a light crunch, so the sauce does not feel heavy. Now I almost always make extra because it disappears quickly not only with the fish but with the rice too.
10. Air Fryer Breakfast Dinner Egg and Potato Hash With Feta
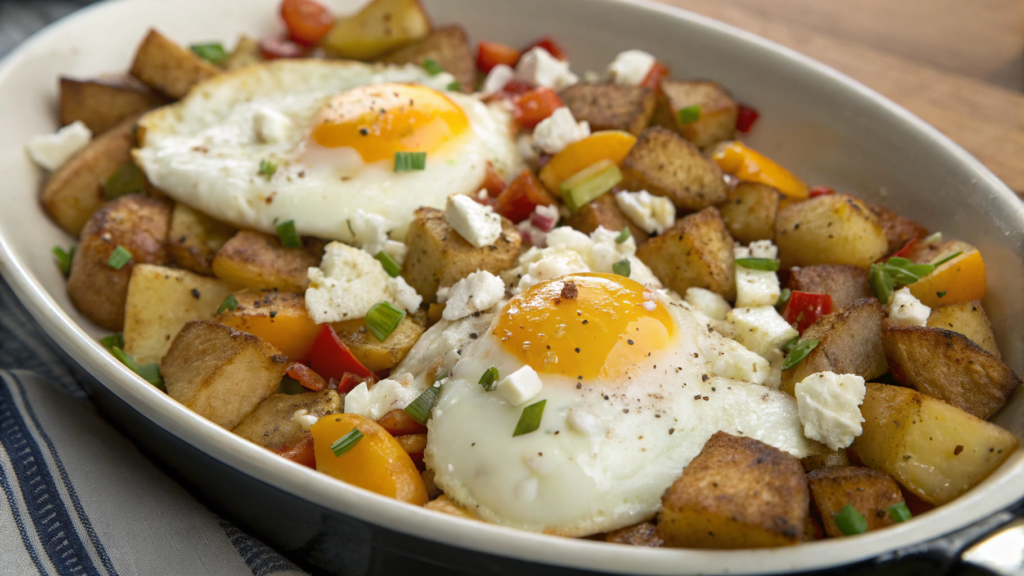
Potato hash with eggs is usually considered a breakfast dish, but it works just as well for dinner. Potatoes, eggs, bell pepper, and feta come together in a hearty hot meal that does not require cooking several separate components.
The potatoes brown well in the air fryer, and the eggs are added closer to the end. The feta has time to warm through without drying out, the bell pepper keeps its shape, and the soft egg yolk becomes a sauce for the potatoes.
Ingredients
For 4 servings:
- 1½ pounds yellow potatoes (about 680 g);
- 1 small red bell pepper;
- ½ small red onion;
- 2 tablespoons olive oil;
- 1 teaspoon smoked paprika;
- ½ teaspoon garlic powder;
- ¾ teaspoon kosher salt;
- ¼ teaspoon freshly ground black pepper;
- 4 large eggs;
- ½ cup crumbled feta (about 75 g);
- 2 tablespoons sliced green onions;
- 2 tablespoons chopped parsley;
- red pepper flakes, optional.
For serving
- thick plain yogurt;
- avocado;
- hot sauce;
- warm pita or bread;
- lemon wedges.
You will need a small, shallow metal baking pan that fits inside the air fryer basket. A round or square pan will work as long as it has no plastic or wooden parts. Measure the basket before buying one and make sure there will be some open space around the pan for the hot air to circulate.
How to make potato hash with eggs and feta
- Cut the potatoes. Make cubes about ½ inch (1.3 cm) wide. Larger pieces will take too long to cook, while very small ones may dry out before the vegetables have time to brown.
- Prepare the vegetables. Cut the bell pepper and red onion into pieces about the same size. Toss the potatoes with the olive oil, paprika, garlic powder, salt, and black pepper. Keep the pepper and onion separate for now.
- Start with the potatoes. Preheat the air fryer to 390°F (199°C). Place the potatoes in the basket and cook for 12 minutes, shaking it once around the halfway point. During this time, the cubes will begin to soften and brown.
- Add the pepper and onion. Toss the vegetables with the potatoes and cook for another 7–9 minutes. Shake the basket a couple of times so the edges brown evenly. The potatoes should be easy to pierce with a knife.
- Prepare the pan. Lightly grease a metal pan with oil. Transfer the potatoes and vegetables into it and spread them into an even layer. If the pan is small and the entire hash will not fit without forming a tall pile, leave some of the potatoes in the basket and add them when serving.
- Add the eggs. Use a spoon to make four wells in the potatoes. Carefully crack one egg into each well. The whites may spread slightly between the cubes, but they should not run over the edges of the pan.
- Cook the eggs. Reduce the temperature to 350°F (177°C). Place the pan in the basket and cook for 4–7 minutes. Start checking after 4 minutes. The whites should be set, while the yolks can remain soft.
- Add some of the feta. Divide the cheese in half. Crumble one portion finely and sprinkle it over the potatoes one minute before the eggs are ready, trying not to cover the yolks.
- Carefully remove the hot pan. Add the remaining feta in larger pieces, along with the green onions, parsley, and red pepper flakes.
How to serve the hash
This potato, egg, and feta hash is best eaten right away, while the potatoes are still crisp and the yolk runs over the hot cubes. It creates an almost ready-made sauce, salty from the feta and rich from the egg.
I put yogurt, hot sauce, sliced avocado, and lemon wedges on the table so everyone can add what they like. Lindy and I usually start with a spoonful of cool yogurt, then add the hot sauce a little at a time. Warm bread also comes in handy for picking up the soft yolk and pieces of feta from the bottom of the plate.
I add the feta in two stages. The fine crumbs warm slightly and stay on the potatoes, while the larger pieces added after air frying remain soft and keep their fresh, salty flavor. This way, the cheese does not disappear among the potatoes and eggs and brings two different textures to the dish.
Important ingredients
These 10 recipes show that a good result in the air fryer depends on more than temperature and cooking time. Sometimes one ingredient added at the right moment, or one small technique that is easy to repeat at home, can change the whole result.
I hope at least one of these recipes becomes part of your regular menu. Let me know in the comments which one you liked the most, and share your own successful air fryer tricks. Your tip may be exactly what another reader needs.