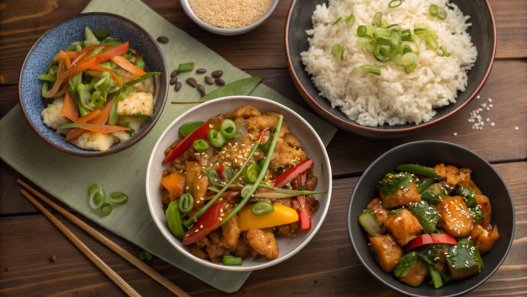
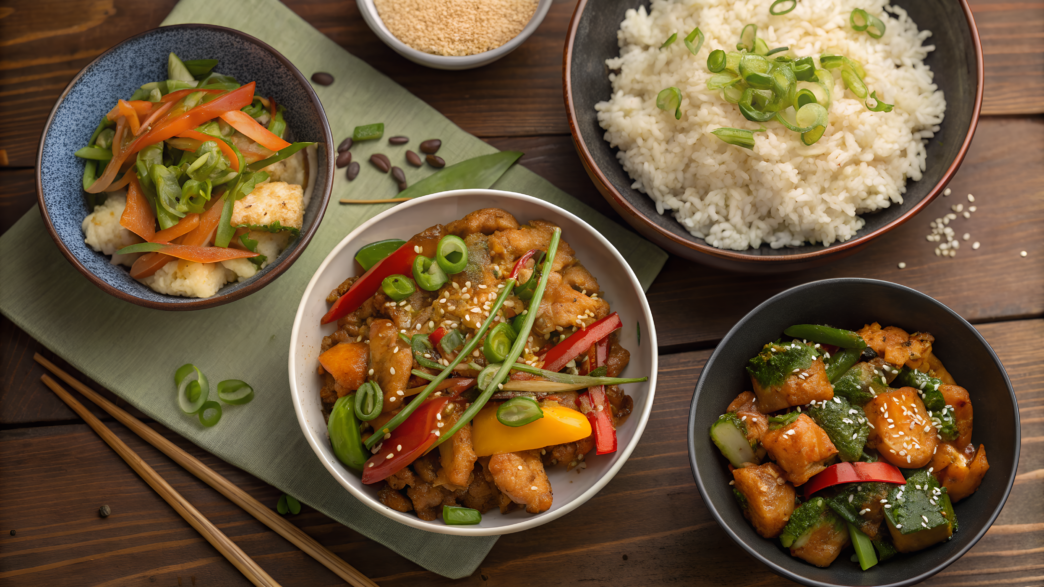
Asian rice dishes often seem more complicated than they really are. A recipe may include an unfamiliar sauce or an unusual name, even though everything in the kitchen comes down to simple ingredients, the right temperature, and one important technique that makes a noticeable difference.
Lindy and I always keep several types of rice at home. It comes in handy when there is a little chicken left in the fridge, a couple of eggs, some vegetables, or a jar of kimchi that someone has already eaten half of. Those leftovers often become the start of a great dinner.
In this article, I have collected 10 recipes that do not require a restaurant-style stove or special cookware for every situation. At the same time, each dish has its own small secret.
Do not skip these details. They take only a few seconds, but they are what keep the rice from sticking together, the eggs soft, and the garlic crispy.
1. Hainanese Chicken Rice With Ginger Scallion Sauce Shortcut
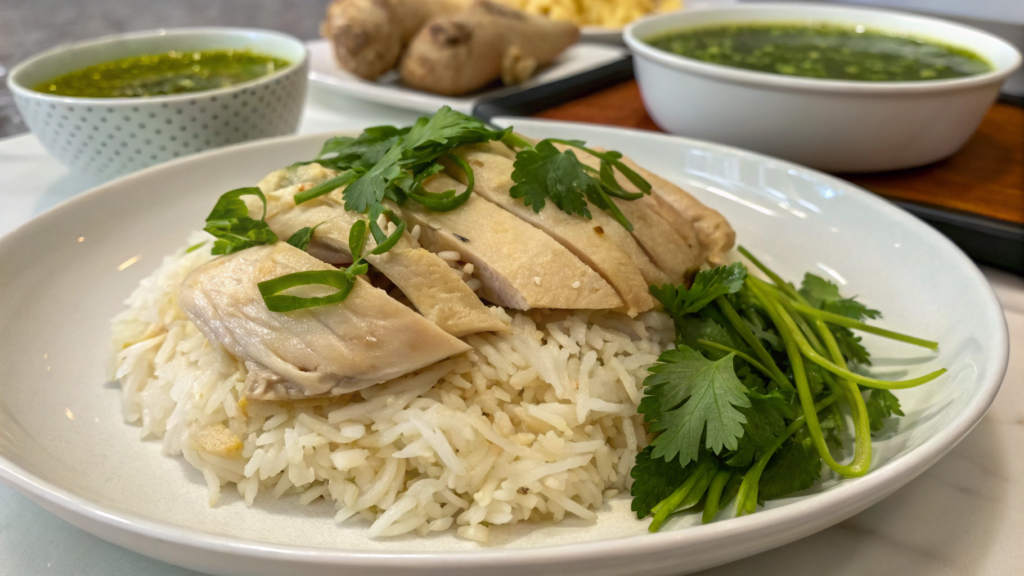
In this dish, the rice cooks in chicken broth with garlic and ginger, so it turns out flavorful even without any extra additions.
The main secret is a quick ginger scallion sauce. You do not need to cook it or blend it. Fresh ginger and scallions are simply covered with hot oil. Within a few seconds, they soften and release their flavor into the oil.
I like that the chicken and rice cook almost at the same time. You get a simple homemade dinner with plenty of flavor without using lots of dishes or spending a long time at the stove.
What you will need
For 4 servings:
- 2 pounds bone-in, skin-on chicken thighs, about 900 g;
- 1 ½ cups jasmine rice, about 280 g;
- 2 cups chicken broth, about 475 ml;
- 1 tablespoon vegetable oil;
- 4 garlic cloves;
- a piece of fresh ginger about 2 inches long, 5 cm;
- 3 scallions;
- 1 teaspoon salt;
- ½ teaspoon white or black pepper;
- 1 small cucumber;
- fresh cilantro for serving, optional.
For the quick sauce:
- 3 tablespoons finely chopped scallions;
- 1 ½ tablespoons grated fresh ginger;
- ¼ teaspoon salt;
- 3 tablespoons vegetable oil;
- 1 teaspoon sesame oil.
It is best to grate the ginger finely so you do not end up with large, fibrous pieces in the finished sauce.
How to make it
- Prepare the chicken. Pat the thighs dry with a paper towel and rub them with ½ teaspoon salt. Let them sit for 15 minutes while you rinse the rice and chop the remaining ingredients.
- Rinse the rice. Add it to a bowl, cover it with cold water, and stir it with your hand. Drain the cloudy water and repeat two or three more times. Then drain the rice well.
- Brown the chicken. Heat a deep skillet or wide pot over medium heat. Place the thighs skin-side down and cook for 5–7 minutes, until the skin is lightly browned and some chicken fat collects on the bottom. Flip the thighs, cook for another minute, and transfer them to a plate.
You do not need to brown the chicken heavily at this stage. It will continue cooking with the rice under the lid.
- Add the garlic and ginger. If the chicken released very little fat, pour in 1 tablespoon vegetable oil. Add two minced garlic cloves and about half of the grated ginger. Cook for about 30 seconds, stirring constantly.
- Toast the rice. Add the rinsed rice to the pot and stir for about a minute. The grains will become coated in chicken fat and absorb the flavor of the garlic and ginger.
- Pour in the broth. Add the chicken broth, the remaining salt, and the pepper. Stir the rice and spread it into an even layer. Place the chicken thighs on top, skin-side up.
- Cook covered. Bring the broth to a gentle simmer, reduce the heat to low, and cover the pot with a lid. Cook for 18–22 minutes. Then turn off the heat and leave everything covered for another 10 minutes.
The internal temperature of the cooked chicken should reach 165°F (74°C). Check it in the thickest part of the meat without touching the bone.
- Make the quick ginger scallion sauce. Mix the scallions, remaining ginger, and salt in a small heatproof bowl. Heat the vegetable oil well and carefully pour it over the mixture. It will sizzle immediately. Add the sesame oil and stir.
The hot oil takes away some of the sharpness of the fresh ginger and scallions. At the same time, the sauce stays fresh and fragrant. It is what makes this fairly simple rice much more flavorful.
How to serve the dish
Transfer the chicken thighs to a cutting board and let them rest for about 5 minutes. Then remove the meat from the bones and cut it into wide pieces. Gently fluff the rice with a fork or spatula.
Divide the chicken broth rice, sliced chicken, and fresh cucumber among plates. Spoon the ginger scallion sauce over the meat or serve it on the side so everyone can add as much as they like. I usually sprinkle some cilantro on top.
When we do not finish everything, I store the chicken and rice together in one container and pour the sauce into a small jar. The oil may thicken in the fridge. Just take the sauce out ahead of time or place the jar in warm water for a short while.
2. Kimchi Fried Rice With Bacon and a Sesame Oil Finish
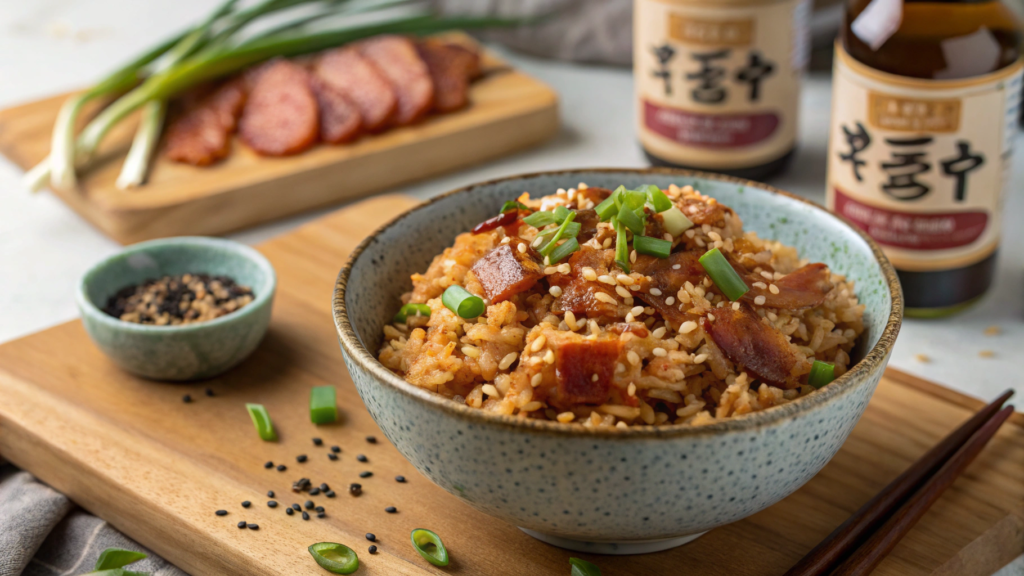
For kimchi fried rice with bacon, it is best to use rice that has spent the night in the fridge. It has already lost some of its moisture, so the grains do not stick together and brown more easily. Freshly cooked rice will also work, but you will need to cool it completely first.
Lindy likes to add extra kimchi, while I always save the juice from the jar for the sauce. Once, we poured it down the sink and then tried to bring the right level of heat back to the rice using only chili paste. It was edible, but nowhere near as flavorful.
The main technique here is simple. Sesame oil is added after the heat is turned off. Its aroma weakens when it is heated for too long. Just a few drops in the finished hot rice are enough to give the whole dish a noticeable sesame flavor.
What you will need
For 4 servings:
- 4 cups cold cooked rice, about 650 g;
- 6 strips bacon;
- 1 ½ cups chopped kimchi, about 250 g;
- ¼ cup juice from the kimchi jar, about 60 ml;
- 1 small onion;
- 2 garlic cloves;
- 2 tablespoons soy sauce;
- 1 teaspoon sugar;
- 1–2 teaspoons chili paste, optional;
- 1 teaspoon sesame oil;
- 2 scallions;
- 4 eggs;
- 1 teaspoon vegetable oil, if needed;
- sesame seeds for serving, optional.
A wide carbon steel skillet is convenient for this dish. On a wide surface, the rice loses extra moisture faster and browns more evenly.
How to make it
- Prepare the rice. Take the cold rice out of the fridge and break up any large clumps with your fingers or a fork. Do not press down on the grains. Just gently separate them.
- Cook the bacon. Cut it into small pieces and place it in a cold wide skillet. Turn the heat to medium and cook for 6–8 minutes, until the bacon is browned. Transfer it to a plate and leave the fat in the skillet.
- Add the onion and garlic. Finely chop the onion and cook it in the bacon fat for 3–4 minutes. Add the minced garlic and cook for about 30 seconds more. If there is not enough fat, pour in 1 teaspoon vegetable oil.
- Cook the kimchi. Gently squeeze the kimchi, saving the juice from the jar, and cut any large pieces into smaller ones. Add the kimchi to the skillet and cook for about 3 minutes, until the extra liquid evaporates and the edges brown slightly.
- Add the rice. Increase the heat to medium-high and add the cold rice. Mix it with the kimchi, then spread it across the bottom of the skillet and leave it for about a minute. Stir again and let the rice brown a little more.
- Add the sauce. Mix the kimchi juice, soy sauce, sugar, and chili paste. Pour the mixture into the skillet and stir well. Return the bacon and cook for another 1–2 minutes. Taste the rice before adding any salt, since the bacon, kimchi, and soy sauce are already salty.
- Fry the eggs. Cook the eggs in a separate skillet until the whites are fully set but the yolks are still soft. You can place one egg on each serving.
- Add the sesame oil. Turn off the heat, pour in the sesame oil, and quickly stir the rice. This is the secret. The oil goes into the finished dish, so its sesame aroma does not have time to disappear from strong heat.
How to serve the dish
Divide the kimchi fried rice among deep bowls and place an egg on top. Add sliced scallions and a little sesame seed.
If the kimchi is very spicy, you can serve some fresh cucumber on the side. It will soften the heat slightly without changing the flavor of the rice itself.
Leftovers will keep in the fridge for up to three days. It is best to reheat them in a skillet with 1 tablespoon water. Add another small drizzle of sesame oil only after reheating. The same little secret works the next day too.
3. Japanese Omurice With Ketchup Rice and Soft Egg Method
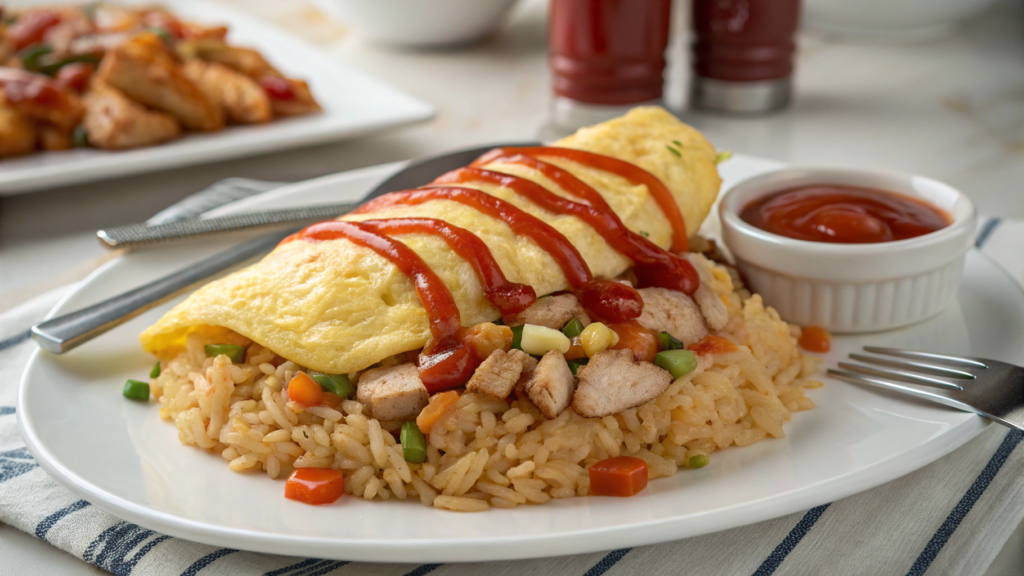
Japanese omurice is fried rice with chicken, vegetables, and ketchup, covered with a thin omelet. The main secret is in the eggs. The omelet is removed from the skillet when it already holds its shape on the bottom but has not fully set on top. After it is placed over the hot rice, it warms through a little more and stays soft.
Lindy and I tried several times to wrap the rice neatly inside the omelet. One tore, and another stuck to the skillet. Now I simply shape the rice on the plate and cover it with a soft layer of egg. It is much easier, and there is no difference in taste.
What you will need
For 4 servings:
- 4 cups cold cooked rice, about 650 g;
- 1 pound skinless, boneless chicken fillet, about 450 g;
- 1 small onion;
- ½ cup frozen green peas, about 75 g;
- 1 tablespoon vegetable oil;
- ½ cup ketchup, about 120 ml;
- 1 tablespoon soy sauce;
- 1 teaspoon sugar;
- ½ teaspoon salt;
- ¼ teaspoon black pepper;
- 8 large eggs;
- 4 tablespoons milk, about 60 ml;
- 2 tablespoons butter;
- a little extra ketchup for serving.
A small 8-inch nonstick skillet is convenient for the eggs. In a wide skillet, the egg mixture spreads too thinly and quickly dries out around the edges.
How to make it
- Prepare the rice and chicken. Break up the cold rice with a fork or your hands so there are no large clumps. Cut the chicken into small pieces of roughly the same size. This will help it cook quickly and evenly.
- Cook the chicken. Heat the vegetable oil in a large skillet over medium heat. Add the chicken, salt, and pepper. Cook for 5–6 minutes, stirring occasionally, until the pieces are white inside and lightly browned on the outside.
- Add the onion and peas. Finely chop the onion and add it to the chicken. Cook for another 3–4 minutes. Then add the frozen peas and heat them for about a minute.
- Make the ketchup base. Push the chicken and vegetables toward the edges of the skillet. Add the ketchup, soy sauce, and sugar to the center. Heat the mixture for about 30 seconds, until it begins to bubble slightly.
Briefly heating the ketchup removes its sharp raw taste and makes the sauce a little thicker. Do not leave it for too long, since the sugar can start to burn quickly.
- Add the rice. Add the cold rice to the skillet and mix it with the chicken, vegetables, and ketchup base. Cook for 3–4 minutes, breaking up any remaining clumps with a spatula. Every grain should be coated in the sauce, but the rice should not turn into a sticky mass.
- Shape the servings. Divide the rice among four plates. Use a spoon to shape each serving into an oval. Cover the plates so the rice does not cool down while you cook the eggs.
- Mix the eggs. For one serving, crack 2 eggs into a bowl, add 1 tablespoon milk and a small pinch of salt. Mix with a fork or whisk until the whites and yolks are combined, but do not whisk until foamy.
- Cook the soft egg layer. Melt ½ tablespoon butter in a small nonstick skillet over medium heat. Pour in the eggs and immediately begin stirring gently with a silicone spatula, pulling the set areas toward the center.
When the eggs hold their shape on the bottom but have not fully set on top, stop stirring. Tilt the skillet and carefully slide the omelet onto the hot rice. Repeat with the remaining servings. You can add a stripe of ketchup on top.
How to serve the dish
Serve the omurice with ketchup rice right away, while the eggs are still warm and tender. You can add a cucumber salad or finely shredded cabbage, as you like.
The rice filling can be made ahead and stored in the fridge for up to three days. Reheat it well in a skillet before serving, and cook the eggs fresh. A soft omelet quickly becomes firm after reheating, so it is better not to save it for the next day.
4. Thai Pineapple Fried Rice With Curry Powder Surprise
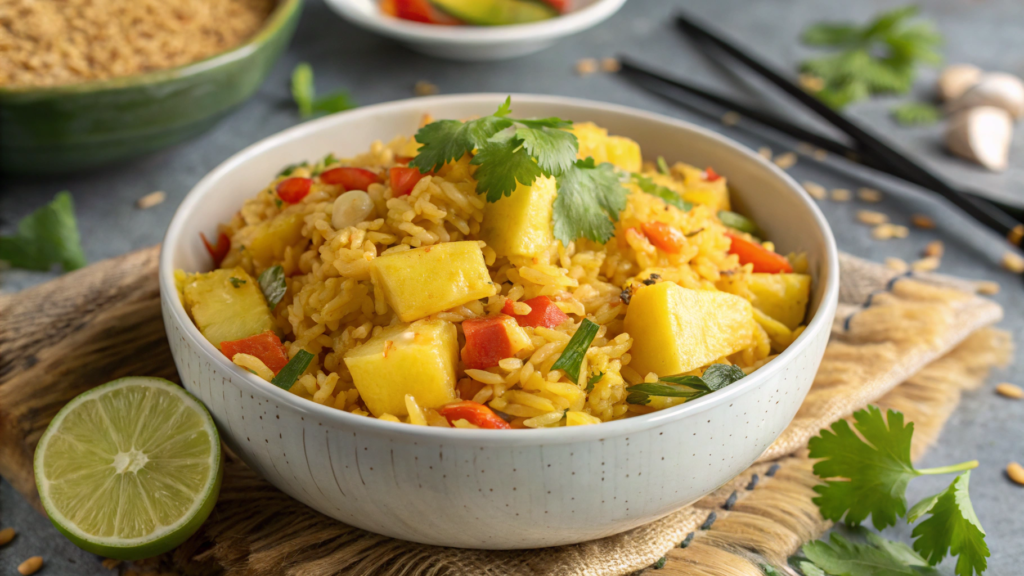
Thai pineapple fried rice combines sweet pieces of fruit, salty sauce, vegetables, and toasted grains of rice. The main secret here is curry powder. You only need a little, but it is what connects the sweetness of the pineapple with the salty and spicy additions.
Lindy once added a little more curry than she should have. The rice turned bright yellow, and the pineapple almost disappeared behind the spices. Since then, I start with ½ teaspoon. You can always add a little more, but no one has figured out how to take curry back out of the skillet.
For this dish, it is best to use cold rice. It has already lost some of its moisture, so the grains separate more easily and do not turn into a sticky mass.
What you will need
For 4 servings:
- 4 cups cold cooked jasmine rice, about 650 g;
- 1 ½ cups fresh or canned pineapple chunks, about 250 g;
- ½ pound peeled shrimp or chicken fillet, about 225 g;
- 2 large eggs;
- 1 small onion;
- 1 small carrot;
- ½ cup frozen green peas, about 75 g;
- 2 garlic cloves;
- 2 tablespoons vegetable oil;
- 1 tablespoon soy sauce;
- 1 tablespoon fish sauce;
- ½–1 teaspoon curry powder;
- ½ teaspoon sugar;
- ¼ teaspoon white or black pepper;
- 2 scallions;
- ¼ cup roasted cashews, about 35 g;
- 1 lime for serving.
If you are using canned pineapple, drain the syrup well and pat the pieces dry with a paper towel. Extra liquid will quickly soften the rice.
Ingredients brown faster on a wide surface, so a large carbon steel skillet, such as the Lodge Carbon Steel Skillet, works well here.
How to make it
- Prepare the rice and pineapple. Break up the cold rice with your fingers or a fork. It is better to separate large clumps ahead of time rather than press them with a spatula while frying. Cut the pineapple into small pieces and remove any extra moisture.
- Cook the shrimp or chicken. Heat half of the vegetable oil over medium heat. Cook the shrimp for 1–2 minutes per side, until they turn pink. Cook the chicken, cut into small pieces, for about 5–6 minutes. Transfer to a plate.
- Quickly cook the eggs. Add a little oil to the same skillet, pour in the lightly beaten eggs, and stir with a spatula for about a minute. Once the eggs have just set, transfer them to the plate with the meat or shrimp. They will warm through again with the rice.
- Cook the vegetables. Add the remaining oil, finely chopped onion, and carrot. Cook for 3–4 minutes. Add the garlic and peas, then stir for about another minute.
- Bring out the curry aroma. Push the vegetables toward the edges of the skillet and add the curry powder to the center. Heat it in the oil for about 15 seconds, until fragrant.
Do not leave the spice on a dry hot surface for too long. It can quickly turn bitter. You only need to heat it briefly in the oil.
- Add the rice. Add the cold rice and mix it well with the vegetables and curry. Spread it across the bottom of the skillet and leave it for about a minute. Then stir again.
- Add the sauces. Mix the soy sauce, fish sauce, sugar, and pepper. Pour the mixture around the edge of the hot skillet, then stir it into the rice. This helps the liquid evaporate faster instead of collecting on the bottom.
- Return the remaining ingredients. Add the shrimp or chicken, eggs, and pineapple. Cook for another 2–3 minutes, stirring gently.
The pineapple is added close to the end so it has time to warm through without releasing too much juice. This dish needs separate sweet pieces, not a fruit sauce around the rice.
How to serve the dish
Remove the skillet from the heat and add the sliced scallions and cashews. Divide the pineapple curry fried rice among plates and serve it with lime wedges.
It is best to squeeze the lime juice over the rice just before eating. A little acidity makes the pineapple taste less sweet and brings out the spices.
Lindy and I usually add the cashews directly to our plates. If we leave them on the table next to the skillet, we eat half of them before dinner.
5. Bibimbap Sheet Pan Style With Gochujang Drizzle
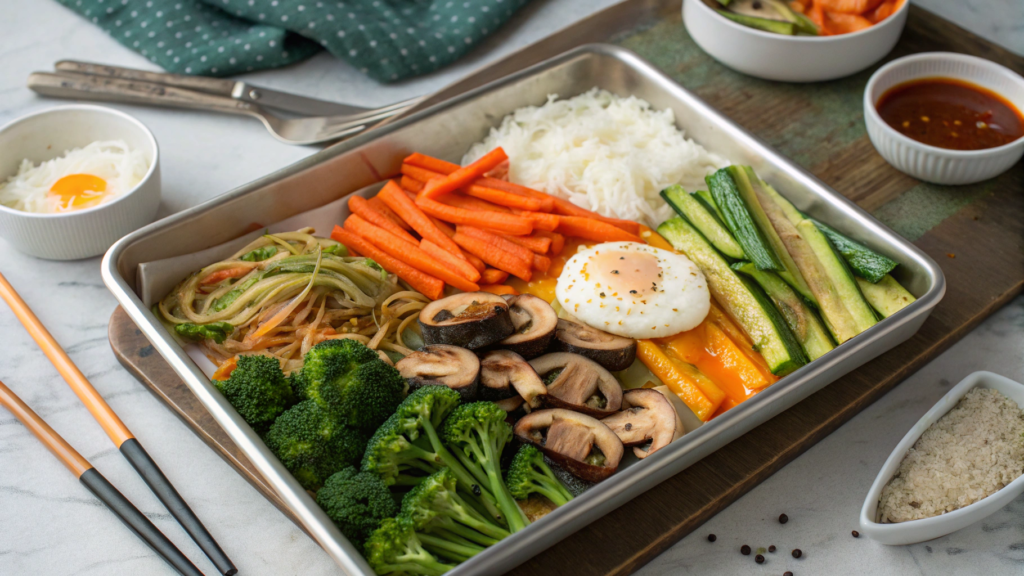
Sheet pan bibimbap lets you cook vegetables for several servings at once without frying each kind separately. Carrots, zucchini, mushrooms, and broccoli go onto one sheet pan, while the rice and eggs are cooked separately.
The main secret is not mixing the vegetables before roasting. They have different cooking times and different moisture levels. If you pile everything together, the mushrooms and zucchini will release liquid while the carrots stay firm. On the sheet pan, each vegetable has its own space, so the finished bowl keeps different flavors and textures.
I used to cook the vegetables for bibimbap one batch at a time in the same skillet. By the time I finished the last batch, the first one had already cooled down. The sheet pan makes things easier. I start with the carrots and broccoli, then add the mushrooms and zucchini a little later.
What you will need
For 4 servings:
- 4 cups cooked short-grain rice, about 650 g;
- 2 medium carrots;
- 1 medium zucchini;
- 8 ounces mushrooms, about 225 g;
- 2 cups small broccoli florets, about 180 g;
- 4 cups baby spinach, about 120 g;
- 4 large eggs;
- 3 tablespoons vegetable oil;
- 1 tablespoon soy sauce;
- 1 teaspoon sesame oil;
- ½ teaspoon salt;
- 2 scallions;
- 1 tablespoon sesame seeds.
For the sauce:
- 3 tablespoons gochujang;
- 1 ½ tablespoons rice vinegar;
- 1 tablespoon soy sauce;
- 1 tablespoon sesame oil;
- 2 teaspoons honey or brown sugar;
- 1–2 tablespoons warm water.
How to make it
- Preheat the oven. Set the temperature to 425°F (220°C). Line a large sheet pan with parchment paper or lightly grease it with oil.
- Prepare the firmer vegetables. Cut the carrots into thin matchsticks and divide the broccoli into small florets. Spread them over one half of the sheet pan, drizzle with 1 tablespoon oil, and season lightly with salt. Roast for 8 minutes.
- Cut the remaining vegetables. Slice the zucchini into thin strips or half-moons and the mushrooms into slices. Toss them separately with 1 tablespoon oil and the soy sauce.
- Add the zucchini and mushrooms. Take out the sheet pan and spread them next to the carrots and broccoli. Do not mix the vegetables together. Return the sheet pan to the oven for another 12–15 minutes.
Zucchini and mushrooms release more liquid, so they need a little extra space. If the sheet pan is overcrowded, it is better to use two.
- Prepare the spinach. Place the spinach in a large bowl and cover it with boiling water for 30 seconds. Drain it in a colander, rinse with cold water, and squeeze it out well. Add 1 teaspoon sesame oil and a pinch of salt.
- Mix the sauce. Combine the gochujang, rice vinegar, soy sauce, sesame oil, and honey. Add the warm water 1 tablespoon at a time until the sauce is thin enough to drizzle.
Do not spoon the thick paste directly onto the rice. In a thinned gochujang sauce, the heat and sweetness spread more evenly, and you do not have to mix a dense lump of gochujang into the bowl.
- Cook the eggs. Fry them in the remaining vegetable oil. The whites should be fully cooked, while the yolks can stay soft. Later, they will mix with the rice and sauce.
- Check the vegetables. The carrots should be softer but still keep a slight crunch. The broccoli should brown around the edges, and the mushrooms should shrink noticeably. Do not roast the zucchini until completely soft, or it will start falling apart when mixed.
How to serve the dish
Divide the warm rice among deep bowls. Arrange the carrots, broccoli, mushrooms, zucchini, and spinach in separate groups on top, then place an egg in the center.
Drizzle the bibimbap with the gochujang sauce and add the scallions and sesame seeds. Mix everything before eating so the yolk and spicy sauce coat the rice and vegetables.
We put the remaining sauce on the table separately. I usually add another spoonful, while Lindy tastes it first. Gochujang can vary in heat, and one jar may be noticeably spicier than another.
This version of bibimbap does not require standing at the stove and cooking each vegetable separately. The sheet pan does most of the work, while the dish still keeps its layered flavor from the rice, vegetables, egg, and gochujang sauce. It is exactly what you need for a regular weeknight dinner. Convenient, right?
6. Chinese Clay Pot Rice Made in a Dutch Oven
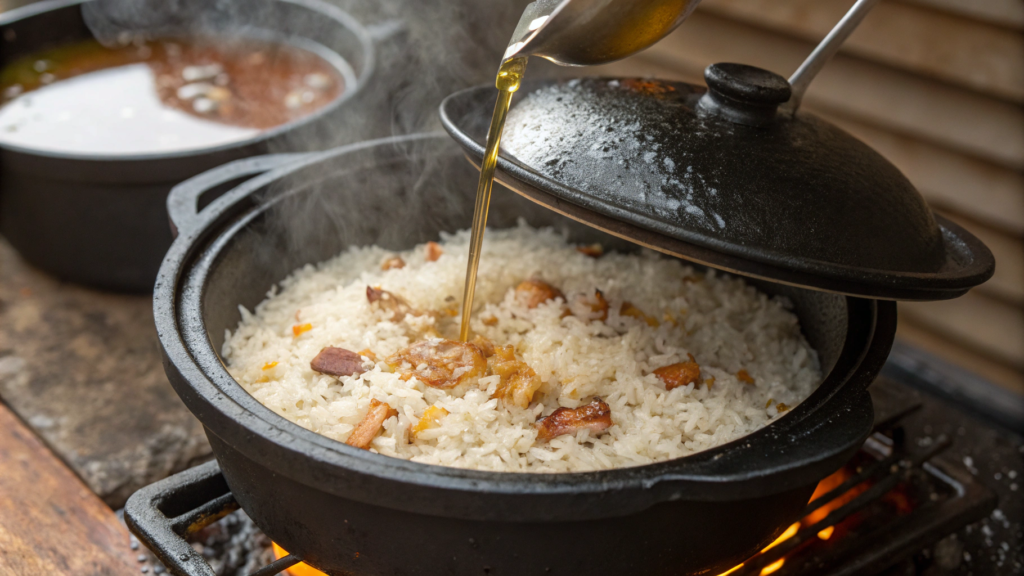
You do not need to buy a clay pot to make Chinese clay pot rice. A heavy cast-iron pot with a lid also holds heat well and helps create the most interesting part of this dish, the toasted layer of rice on the bottom.
The main secret here is a thin stream of oil poured around the edge of the pot near the end of cooking. The oil runs down between the rice and the hot sides, and the bottom layer starts to brown. You just need to give it a few minutes and avoid lifting the lid every thirty seconds.
Now I always try not to open the lid during those last few minutes. Then Lindy and I both try to get more of those crispy pieces of rice.
What you will need
For 4 servings:
- 1 ½ cups jasmine rice, about 280 g;
- 1 ¾ cups water, about 415 ml;
- 12 ounces boneless, skinless chicken thighs, about 340 g;
- 4 Chinese sausages;
- 4 dried shiitake mushrooms;
- 2 small bunches leafy greens or Chinese cabbage;
- 2 scallions;
- 1 tablespoon vegetable oil.
Marinade:
- 1 tablespoon soy sauce;
- 1 tablespoon oyster sauce;
- 1 teaspoon sesame oil;
- 1 teaspoon cornstarch;
- 1 teaspoon brown sugar;
- ½ teaspoon grated ginger;
- ¼ teaspoon white or black pepper.
For the sauce:
- 2 tablespoons soy sauce;
- 1 tablespoon oyster sauce;
- 1 teaspoon sesame oil;
- 1 teaspoon brown sugar;
- 1 tablespoon warm water.
How to make it
- Soak the mushrooms. Cover the dried shiitake mushrooms with hot water and leave them for 20–30 minutes. Once they are soft, squeeze out the excess water, remove the tough stems, and slice the caps into strips.
- Marinate the chicken. Cut the thighs into small pieces. Add the soy sauce, oyster sauce, sesame oil, cornstarch, sugar, ginger, and pepper. Stir and leave for 20 minutes.
The cornstarch is not used here to make a thick sauce. It coats the chicken in a thin layer and helps the meat stay juicy while cooking.
- Rinse the rice. Rinse it three or four times with cold water, then drain it well. Transfer the rice to a cast-iron pot and add 1 ¾ cups fresh water.
- Start cooking the rice. Bring the water to a gentle simmer over medium heat. Once most of the liquid has dropped below the surface of the rice, reduce the heat to low. This usually takes 6–8 minutes.
- Add the toppings. Slice the Chinese sausages diagonally. Arrange the chicken, shiitake mushrooms, and sausages over the rice. Do not mix them into the grains. Cover the pot and cook over low heat for another 15 minutes.
- Pour the oil around the edge. Remove the lid and pour the vegetable oil in a thin stream along the inside walls of the pot. Cover it again and cook for another 4–6 minutes.
The oil is what helps create the toasted bottom layer. Keep the heat low. High heat will not make the rice crispy any faster. It will simply start to burn.
- Let the rice rest. Turn off the heat and leave the lid on for another 10 minutes. During this time, the chicken will finish cooking and the remaining steam will spread evenly through the pot.
The chicken should reach 165°F (74°C). Check the largest piece if you are unsure.
- Prepare the greens and sauce. Quickly boil the leafy greens in salted water for 1–2 minutes, then drain them in a colander. For the sauce, mix the soy sauce, oyster sauce, sesame oil, sugar, and warm water.
How to serve the dish
First, divide the chicken, sausages, mushrooms, and soft rice among plates. Then run a wooden or silicone spatula across the bottom of the pot and lift off the toasted rice crust. Add it to each serving along with the greens.
Drizzle the rice with a small amount of sauce and sprinkle with scallions. Do not add all the sauce at once, since the Chinese sausages, chicken, and oyster sauce already provide plenty of salt.
A cast-iron pot is not a clay pot, of course, but it still gets the job done. The rice cooks together with the chicken and mushrooms, and that same crust forms on the bottom, making it worth scraping the pot a little. For one dish with minimal extra cookware, it is a great result.
7. Hong Kong Tomato Egg Rice With Silky Stovetop Technique
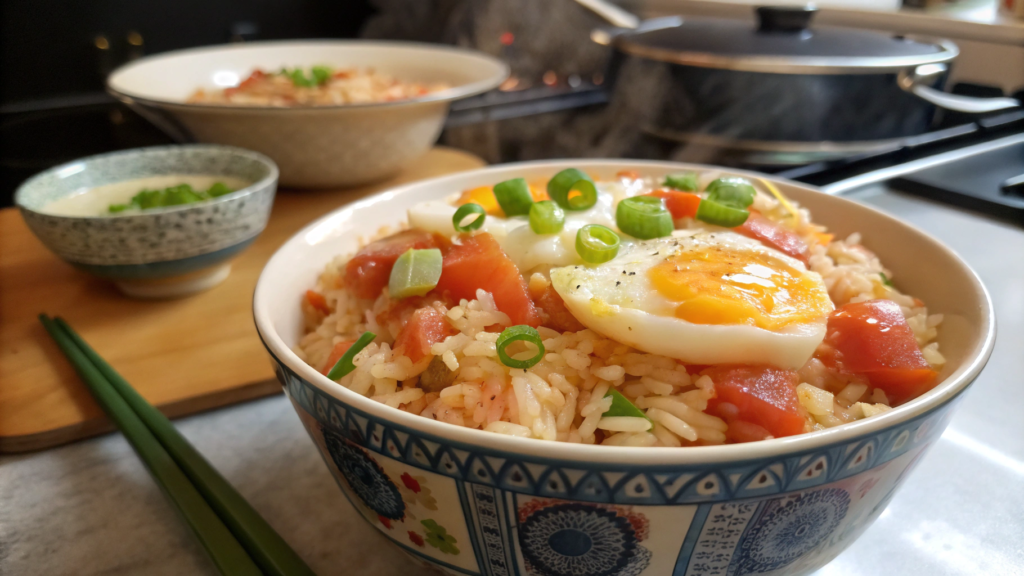
Hong Kong-style tomato egg rice is made with very simple ingredients, but it is easy to overcook the eggs. The key to this recipe is cooking the eggs separately from the tomatoes. They are removed from the skillet while they are still soft and slightly underdone, then returned to the tomato sauce for just a few seconds. This gives them enough time to warm through without becoming firm and dry.
What you will need
For 4 servings:
- 4 cups cooked jasmine rice, about 650 g;
- 6 large eggs;
- 4 medium ripe tomatoes;
- 2 scallions;
- 2 garlic cloves;
- 3 tablespoons vegetable oil;
- 3 tablespoons ketchup;
- 1 tablespoon soy sauce;
- 1 teaspoon sugar;
- ½ cup water or chicken broth, about 120 ml;
- ½ teaspoon salt;
- ¼ teaspoon white or black pepper.
For thickening:
- 1 teaspoon cornstarch;
- 1 tablespoon cold water.
How to make it
- Prepare the ingredients. Cut the tomatoes into large wedges. Finely chop the white parts of the scallions and save the green parts for serving. Crack the eggs into a bowl, add a pinch of salt, and gently mix them with a fork. There is no need to whisk them until foamy.
- Cook the soft eggs. Heat 2 tablespoons oil over medium heat. Pour in the eggs and immediately begin moving them slowly from the edges toward the center with a spatula. As soon as they form large, soft folds but are still slightly underdone, transfer them to a plate.
Do not wait until they are fully cooked. The eggs will return to the hot skillet later and cook a little more.
- Start the tomato sauce. Add the remaining oil, the white parts of the scallions, and the minced garlic to the same skillet. Cook for about 30 seconds without letting the garlic darken.
- Add the tomatoes. Place them in the skillet and cook for 3–4 minutes. The tomatoes should soften and release their juices, but some of the wedges can still hold their shape.
- Add the seasonings. Stir in the ketchup, soy sauce, sugar, and pepper. Pour in the water or chicken broth and cook for another 2 minutes.
The ketchup does not replace the fresh tomatoes here. It adds a little sweetness and acidity to the sauce and makes the color brighter.
- Lightly thicken the sauce. Mix the cornstarch with the cold water until smooth. Pour the mixture into the skillet in a thin stream, stirring constantly. The sauce will thicken within 20–30 seconds.
Do not add dry cornstarch directly to the tomatoes. It quickly forms white lumps that are difficult to stir out.
- Return the eggs to the sauce. Reduce the heat, add the eggs to the tomato sauce, and gently separate them into large pieces with a spatula. Stir once or twice, then immediately remove the skillet from the stove.
How to serve the dish
Divide the hot rice among bowls and spoon the tomatoes, eggs, and sauce over the top. Sprinkle with the green parts of the scallions. Add just enough sauce to lightly soak into the rice without turning it into soup
This dinner does not require rare ingredients or a long time cooking meat. The whole process takes less than half an hour. The main thing is removing the eggs from the skillet at the right moment. One extra minute really does make a difference here.
8. Vietnamese Broken Rice Bowls With Quick Pickled Carrots
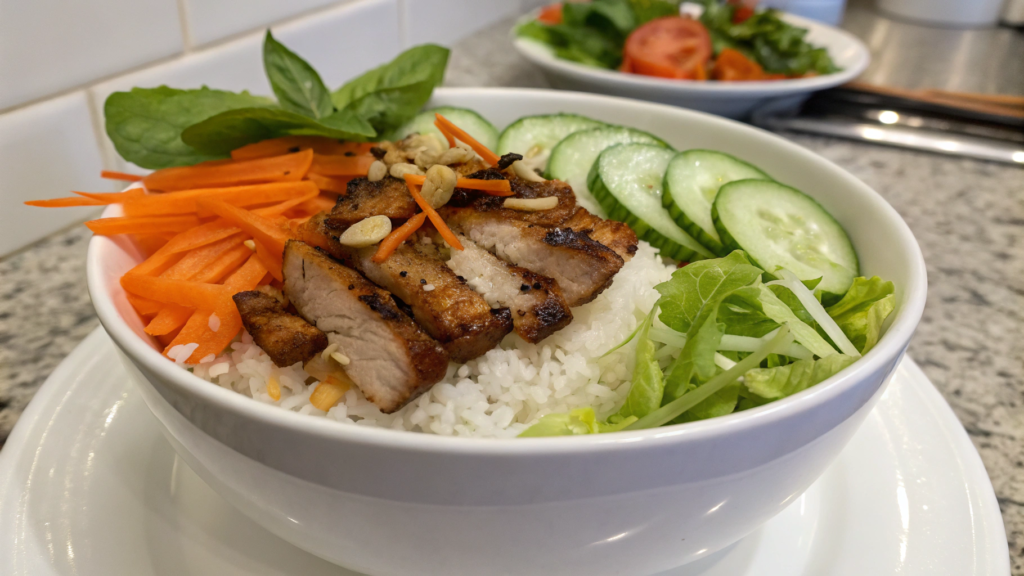
Vietnamese broken rice is easy to serve in one bowl with meat, fresh vegetables, and sweet-and-sour carrots. For this version, I prefer pork, but chicken thighs will also work. The individual additions are simple, but together they make a complete dinner.
The quick pickled carrots play the main role here. They do not need much time. Carrots cut into thin matchsticks absorb the vinegar, sugar, and salt in about 20 minutes while staying crisp. Their acidity pairs well with the rice and grilled meat.
Lindy often pickles a double batch. We serve some right away and put the rest in the fridge. The next day, the carrots go into sandwiches or alongside leftover rice.
What you will need
For 4 servings:
- 1 ½ cups broken jasmine rice, about 280 g;
- 1 ¾ cups water, about 415 ml;
- 1 pound boneless pork chops or chicken thighs, about 450 g;
- 1 tablespoon vegetable oil;
- 1 small cucumber;
- 2 scallions;
- fresh cilantro, optional.
Meat marinade:
- 2 tablespoons fish sauce;
- 1 tablespoon soy sauce;
- 1 tablespoon brown sugar;
- 1 tablespoon vegetable oil;
- 2 garlic cloves;
- 1 teaspoon lime juice;
- ½ teaspoon black pepper.
For the quick pickled carrots:
- 2 medium carrots;
- ¼ cup rice vinegar, about 60 ml;
- ¼ cup warm water, about 60 ml;
- 1 ½ tablespoons sugar;
- ½ teaspoon salt.
For the sauce:
- 3 tablespoons warm water;
- 2 tablespoons fish sauce;
- 2 tablespoons lime juice;
- 1 ½ tablespoons sugar;
- 1 small garlic clove;
- a little minced chili, optional.
It is easier to cut the carrots into thin, even matchsticks with an OXO Good Grips Julienne Prep Peeler. The thinner the pieces, the faster they will pickle.
How to make it
- Marinate the meat. Mix the fish sauce, soy sauce, sugar, oil, minced garlic, lime juice, and pepper. Add the thinly sliced pork or chicken and leave it for 20–30 minutes.
- Prepare the carrots. Cut them into thin matchsticks and place them in a small bowl or jar. Mix the rice vinegar, warm water, sugar, and salt. Stir until the sugar is almost completely dissolved.
- Pour the marinade over the carrots. Leave them on the counter for at least 20 minutes. Stir once or twice during this time so the pieces on top also sit in the liquid.
Quick pickling works because of the thin cut. Thick sticks would need several hours, so it is better to take your time with the knife and avoid leaving large pieces.
- Cook the rice. Rinse the broken rice two or three times and transfer it to a pot. Add the water, bring it to a boil, and reduce the heat. Cook covered for about 15 minutes, then turn off the stove and leave the rice for another 10 minutes.
Broken rice cooks a little faster than whole jasmine rice. If the package gives a different water ratio, it is better to follow the manufacturer’s instructions.
- Make the sauce. Mix the warm water with the sugar. Add the fish sauce, lime juice, minced garlic, and chili. Taste and add a little more water or lime if needed.
- Cook the meat. Heat a large skillet over medium-high heat and add the vegetable oil. Shake off the excess marinade and place the pieces in a single layer. Cook the pork for 3–4 minutes per side. The chicken may need a little more time.
Do not crowd all the meat into a tight pile. Cook it in two batches if needed. Otherwise, it will start steaming in the released liquid.
- Prepare the fresh additions. Thinly slice the cucumber and scallions. Drain most of the marinade from the carrots, but do not squeeze them.
How to serve the dish
Divide the Vietnamese broken rice among deep bowls. Add the meat, cucumber, and quick pickled carrots. Sprinkle with scallions and cilantro.
You can pour the sauce directly over the rice or serve it on the side. Start with a small amount, since fish sauce is already used in the meat marinade.
This dinner is easy to adjust to whatever you already have at home. You can replace the pork with chicken, add a fried egg, or use more fresh vegetables. I would still keep the carrots. After a short pickling time, their flavor becomes brighter and they pair well with the other ingredients.
9. Filipino Garlic Fried Rice With Crispy Bits Secret
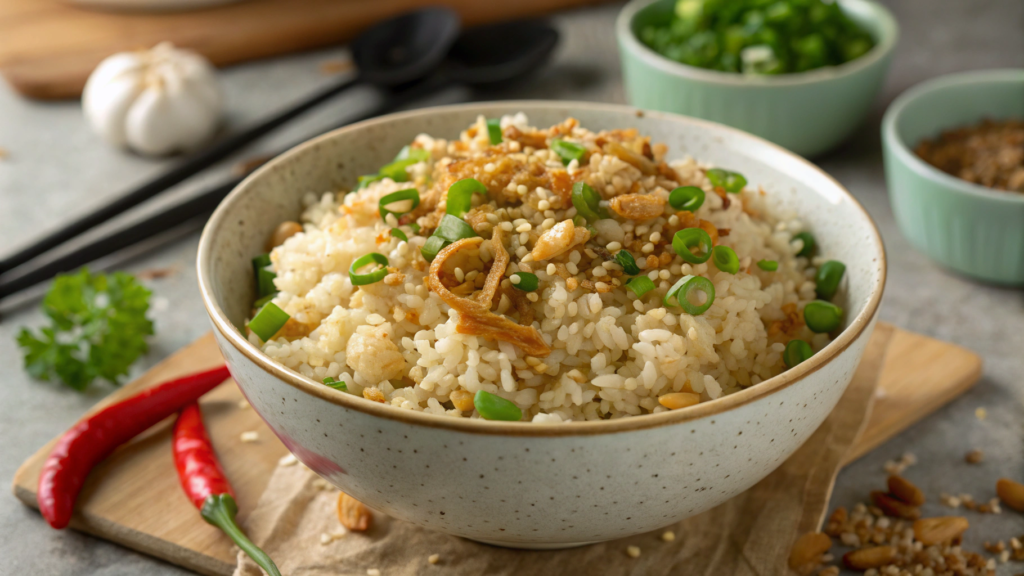
Filipino garlic fried rice is made with cold cooked rice, plenty of garlic, and a few spoonfuls of oil. There are only a few ingredients, so it is especially important not to overcook the garlic and to keep some of the pieces crispy.
One simple technique helps here. About one-third of the golden garlic should be removed from the oil early and added back only after the rice is cooked. It will not have time to soften from the steam and will stay crispy in the finished dish. The remaining garlic stays in the skillet and flavors the oil and rice.
What you will need
For 4 servings:
- 5 cups cold cooked jasmine rice, about 800 g;
- 10–12 garlic cloves;
- 3 tablespoons vegetable oil;
- ½ teaspoon salt;
- ¼ teaspoon black or white pepper;
- 2 scallions, optional.
For serving, you can add:
- 4 fried eggs;
- sliced tomatoes;
- cucumber;
- fried chicken, pork, or sausages.
How to make it
- Prepare the rice. Take it out of the fridge and break up any large clumps with your hands or a fork. If the rice was stored in a dense layer, it is better to do this ahead of time rather than trying to separate it in a hot skillet.
- Cut the garlic. Slice the cloves thinly or chop them into small pieces. Try to keep them roughly the same size so the smaller pieces do not burn before the larger ones.
- Start cooking the garlic. Pour the oil into a cold wide skillet and add the garlic. Place it over medium-low heat. Cook, stirring often, until the pieces turn light golden.
The garlic goes into cold oil on purpose. As the oil heats gradually, the garlic cooks more evenly and the oil has time to absorb its flavor.
- Remove some of the garlic. Use a slotted spoon to transfer about one-third of the golden pieces to a paper towel. This is the portion we will keep crispy and add only after frying the rice.
Do not wait for a dark brown color. Garlic continues to darken slightly from its own heat after it leaves the skillet and can quickly become bitter.
- Add the rice. Increase the heat to medium and add the cold rice to the fragrant oil with the remaining garlic. Stir for 2–3 minutes, breaking up any final clumps.
- Let the rice brown. Spread it across the bottom of the skillet and leave it untouched for about a minute. Then turn part of the rice with a spatula and let it sit briefly on the hot surface again.
- Add the seasonings. Sprinkle the rice with salt and pepper. Mix well and taste. If you are serving it with salty meat or sausages, you may need less salt.
- Return the crispy garlic. Turn off the heat and mix half of the reserved pieces into the rice. Sprinkle the rest over the servings. This way, some of the garlic is distributed through the dish while the rest does not have time to soften.
How to serve the dish
Divide the Filipino garlic fried rice among plates. Add the remaining crispy garlic and scallions on top. You can serve it with a fried egg, tomato, cucumber, or meat.
The rice itself cooks quickly, but the reserved garlic is what makes it different from ordinary rice fried in fragrant oil. Here, it is better to watch the color rather than the time. Light golden garlic is ready, while darker garlic can quickly start to taste bitter.
10. Cozy Rice Soup Congee With Rotisserie Chicken Hack
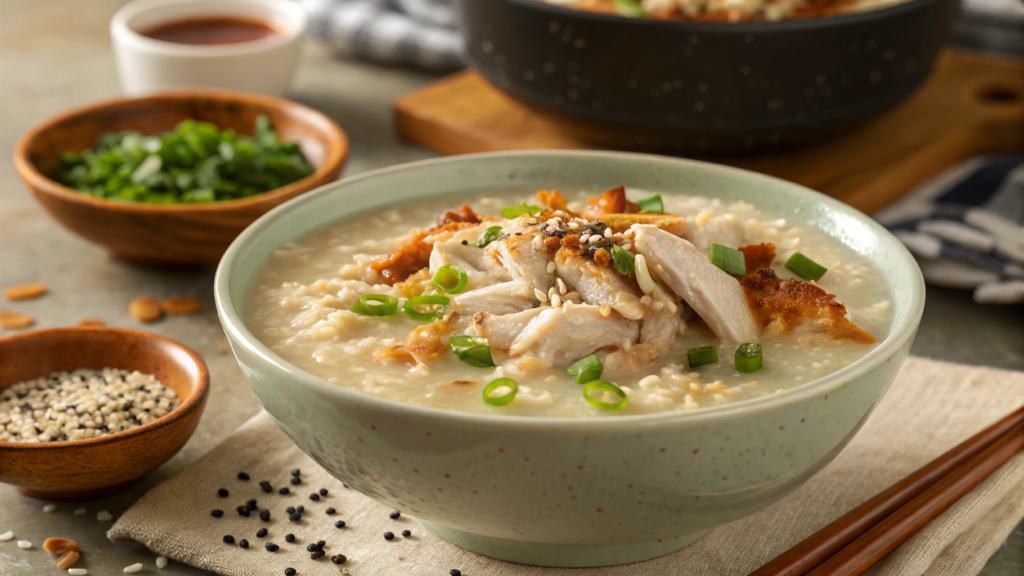
Congee rice soup cooks for a long time, until the grains almost completely break down and turn the water or broth into a thick base. But you do not have to cook the meat from scratch. Rotisserie chicken saves time here. The meat goes in near the end, while the bones and skin help make the broth richer more quickly.
We often buy this kind of chicken after a long day away from home. We eat part of it for dinner, and I pull apart the leftovers right away while they are still warm. The next day, they can become congee without cooking a whole chicken separately.
What you will need
For 4 large servings:
- 1 cup jasmine or short-grain rice, about 190 g;
- 8 cups chicken broth or water, about 1.9 l;
- 3 cups shredded cooked rotisserie chicken, about 420 g;
- chicken bones and skin, optional;
- a 2-inch piece of fresh ginger, about 5 cm;
- 3 garlic cloves;
- 1 teaspoon salt;
- ½ teaspoon white or black pepper;
- 1 tablespoon soy sauce;
- 1 teaspoon sesame oil.
For serving, you can use:
- 3 scallions;
- fried onions;
- boiled eggs;
- fresh cilantro;
- a little soy sauce;
- chili oil, optional.
How to make it
- Pull apart the chicken. Separate the meat from the bones and skin. Shred the larger pieces by hand. Put the meat in the fridge while the rice cooks.
- Quickly prepare the broth. Place the bones and skin in a pot, add prepared chicken broth or water, sliced ginger, and lightly crushed garlic cloves. Bring to a boil, reduce the heat, and simmer for about 20 minutes.
This is where the rotisserie chicken trick works. The leftovers that would usually go into the trash have enough time to add extra flavor to the liquid while you prepare the rice. If there are no bones left, use prepared chicken broth and move on to the next step.
- Strain the liquid. Remove the bones, skin, ginger, and garlic with a slotted spoon, or strain the broth through a sieve. Return it to the pot.
- Rinse the rice. Rinse it with cold water two or three times. The water does not need to become completely clear. Drain it well and add the rice to the hot broth.
- Cook over low heat. Bring everything to a gentle boil and reduce the heat. Cook without a tightly fitted lid for 50–70 minutes. Every 10–15 minutes, run a spoon across the bottom so the rice does not stick.
At first, the soup will look too thin. Gradually, the grains will open up and begin to break down. If the congee becomes too thick too early, add a little more hot water or broth.
- Help the rice break down. Once the grains are very soft, stir the soup vigorously several times with a whisk or wooden spoon. You do not need to turn it into a completely smooth purée. Breaking up part of the rice is enough to make the base thicker.
- Add the chicken. Transfer the meat to the pot and cook for another 5–7 minutes. It should heat through completely, but it does not need to boil for another half hour. Long simmering will make the already cooked chicken dry and stringy.
- Add the seasonings. Stir in the salt, pepper, and soy sauce. Remove the pot from the heat and add the sesame oil. Taste the congee only after adding the soy sauce so you do not accidentally make it too salty.
How to serve the dish
Ladle the hot chicken rice soup into deep bowls. Add scallions, half an egg, cilantro, or fried onions. It is better to serve the hot sauce on the side so everyone can choose how much they want.
Congee thickens as it cools, sometimes quite a lot. When reheating, add a little water or broth and stir well.
A small rotisserie chicken hack noticeably cuts down the cooking time. The meat does not need to simmer for long, while the bones and skin make the broth richer in 20 minutes. In the end, even a small amount of leftover chicken turns into a whole pot of congee.
Lindy and I often make this dinner closer to the end of the week, when the food in the fridge needs to be eaten instead of replaced.
Share Your Secrets
I like that the same rice can become the base for completely different dinners. Some days, you want something spicy and rich, while on another day, soft congee with leftover chicken is enough. Each version has its own small technique that makes cooking easier or the flavor more interesting.
Lindy and I will definitely keep trying new combinations. Rice never stays in our house for long, and I always write down useful kitchen discoveries so I do not have to remember them later while standing over a hot skillet.
Write in the comments which dish you would make first. And be sure to share your own secrets for fried rice, congee, or homemade rice dinners. I am always happy to hear new ideas!