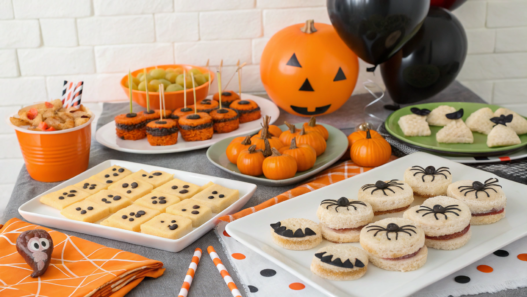
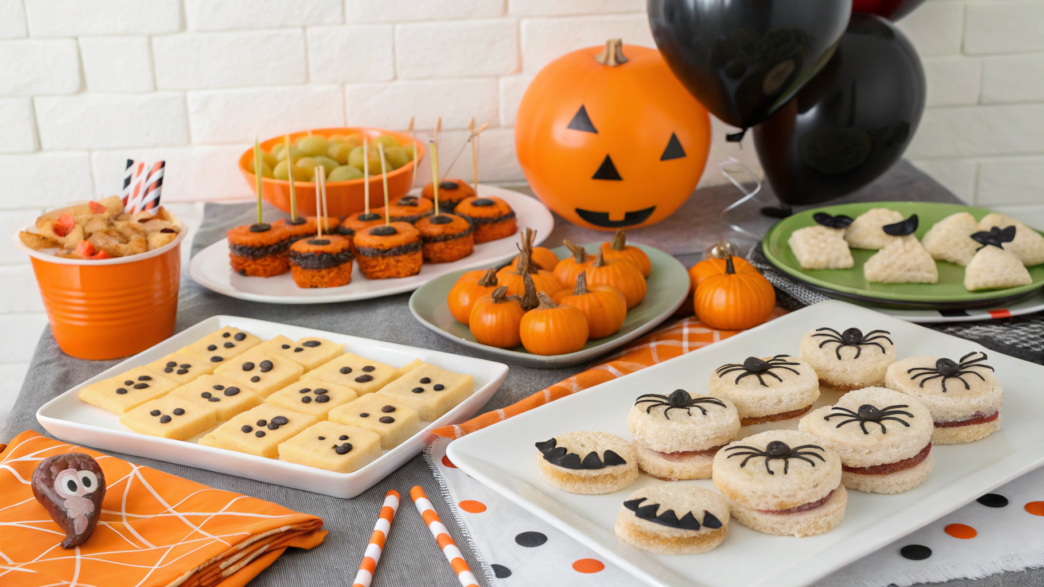
School Halloween parties are a great excuse to make something unusual for the kids. But when you need to feed an entire classroom, halloween party snacks should not only be tasty and cute but also easy to make. And preferably, something you can prepare ahead of time and bring to school without any trouble.
Like everyone else, we love Halloween and always enjoy making special treats for the occasion. Although I totally understand parents who don’t want to spend the whole evening in the kitchen, cutting out tiny faces and decorating dozens of cookies.
So here are 10 Halloween party snack ideas for kids that don’t require complicated ingredients or any special cooking skills. Hope you like them!
1. Apple Monster Sandwiches
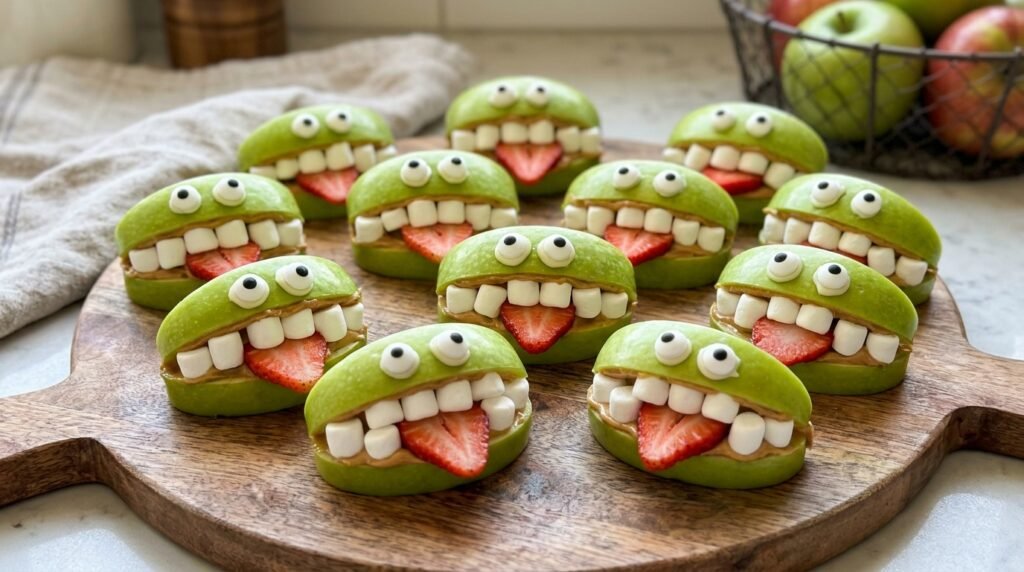
You can turn ordinary apples into funny little monsters with sharp teeth, strawberry tongues, and bulging eyes. And there’s no baking involved, plus making a whole plate of these treats takes about 20 minutes.
For this recipe, we usually use green Granny Smith apples. They have firm flesh that holds its shape well, and their bright green skin is perfect for our little Halloween monsters. Although I think red apples would work too.
Ingredients
Makes 12 monsters.
- 3 large apples
- 6 strawberries
- 2 tbsp peanut butter
- 1 tbsp shelled sunflower seeds
- 24 edible candy eyes for decorating, such as Wilton Candy Eyeballs
How to make them
- Prepare the apples. Wash them well, cut each apple into four quarters, and remove the core. Then carefully cut a small V-shaped notch into the skin side of each quarter. This will be our monster’s open mouth. Don’t cut all the way through the apple, or it will fall apart.
- Add the filling. Spread some peanut butter inside each cut-out mouth. It’s there not just for flavor but also to help hold the other decorations in place.
- Make the tongues and teeth. Cut the strawberries into thin slices. Insert one slice into each mouth so the tip sticks out a little. Press a few shelled sunflower seeds along the edges, with their pointed ends facing outward. These will be the little scary teeth!
- Attach the eyes. Add a little peanut butter to the top of each apple piece and attach two edible candy eyes.
Well, now let’s see how they turned out! Some monsters have teeth sticking out in different directions, others have longer tongues, and some have eyes looking all over the place… And that’s totally fine. It’s even more fun when they’re all a little different.
For a school party, it’s best to make these apple monsters on the day of the party so the cut surfaces don’t have time to turn brown. Keep them in the fridge until you leave home, and use a container for transporting them where they won’t press against each other or lose their decorations.
And by the way, don’t forget to check with the teacher whether peanuts and seeds are allowed in the classroom.
I’ll admit, we love these little kitchen projects where kids can get involved. Adults handle the knife work, while the kids take care of decorating. Let them decide how many teeth and eyes each monster should have. On Halloween, even the weirdest faces fit right in!
2. Pumpkin yogurt bark
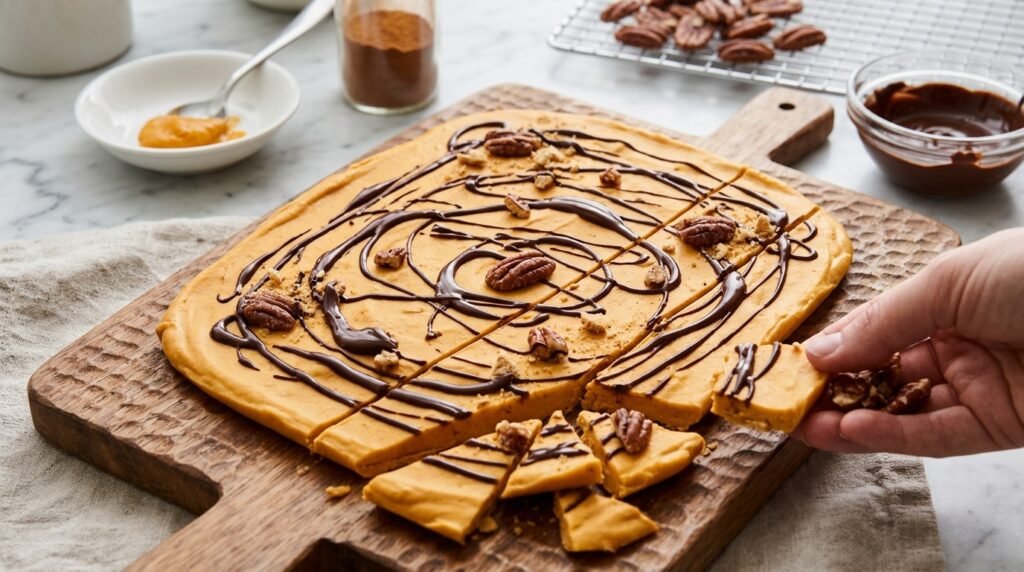
You can make an unusual frozen treat that tastes like pumpkin pie using pumpkin puree and Greek yogurt. It looks like a thin chocolate bar, only orange. And if you drizzle some melted chocolate over it and break it into small pieces, you’ll have a delicious dessert.
There’s no baking involved, and the prep takes just 5–10 minutes. The freezer will take care of the rest.
Ingredients
Makes 12 small servings.
- 2 cups (480 g) thick, full-fat plain Greek yogurt
- ⅓ cup (80 g) pumpkin puree with no added sugar or spices
- ¼ cup (60 ml) maple syrup
- 1 tsp pumpkin pie spice
- A little melted chocolate for decorating
How to make it
- Mix the base. Add the Greek yogurt, pumpkin puree, maple syrup, and spices to a large bowl. Whisk everything together until the mixture is smooth and has a beautiful light orange color.
- Prepare the baking sheet. Line a flat baking sheet with parchment paper. Spoon the yogurt mixture onto it and spread it with a spatula into a layer about ¼ inch (6 mm) thick. Try to keep the thickness even so the dessert freezes evenly.
- Add the chocolate. Melt a little chocolate in the microwave in short 15–20 second intervals, stirring after each one. Once it’s melted, drizzle it over the yogurt mixture in thin lines. You can also sprinkle a pinch of the same spice mix on top.
- Freeze it. Carefully place the baking sheet in the freezer for 3 hours or longer, until the yogurt layer is completely firm. Then take it out, peel it off the parchment paper, and break it into 12 small pieces with your hands.
I always keep the finished bark in a sealed container in the freezer, with parchment paper between the layers to prevent the pieces from sticking together.
Keep in mind that frozen yogurt softens pretty quickly at room temperature, so for a school party, you’ll need an insulated cooler bag with ice packs and a way to keep the dessert frozen until it’s time to serve. If that’s not possible, it’s better to choose another treat from our list.
Lindy always makes sure we preserve seasonal produce ahead of time. In the fall, pumpkin puree is one of the first things on our list, and we make a big batch of it.
Some of it goes into the freezer in small portions. That makes it much easier to prepare something with pumpkin later, even when the fresh pumpkins are all gone. And for this bark, you’ll only need a little puree.
3. Cheese and pretzel broomsticks
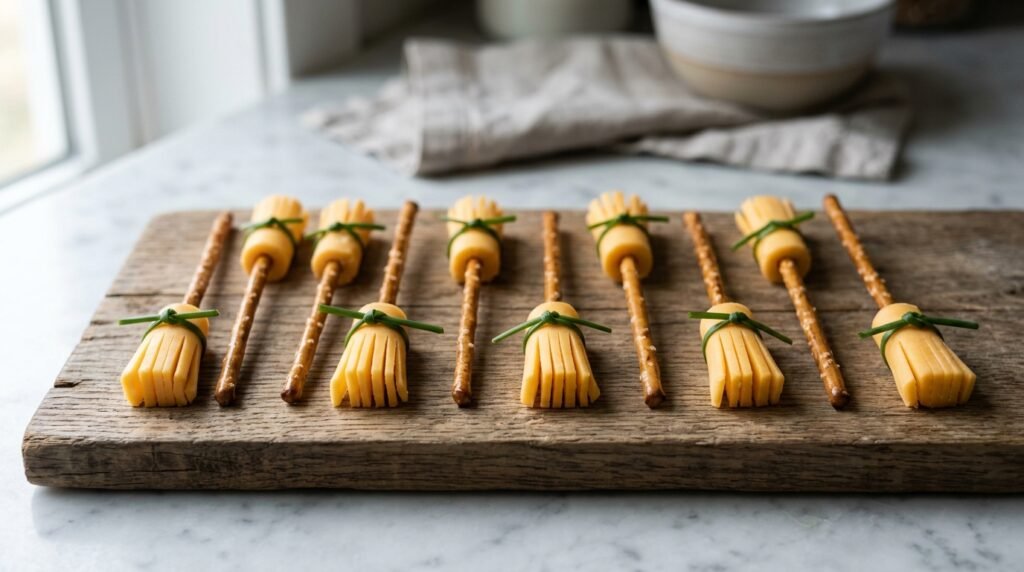
How about some little edible witch’s broomsticks? You’ll only need three ingredients — cheese, pretzel sticks, and fresh chives. No oven, no frying pan, no sauce, and making 12 of these little broomsticks won’t take much time at all.
They make a cute Halloween snack that adds something savory to the school party table among all the sweets.
Ingredients
Makes 12 broomsticks.
- 6 mozzarella string cheese sticks (about 6 oz / 170 g)
- 12 thin pretzel sticks
- 12 long fresh chive stems
How to make them
- Prepare the cheese. Take the mozzarella out of its packaging and cut each cheese stick in half crosswise. You’ll have 12 short cylinders — these will become our broomsticks. Make sure to use string cheese that can be pulled apart into thin strands.
- Make the bristles. Take half a cheese stick and make several lengthwise cuts, starting from the bottom. Stop about ¾ inch (2 cm) before reaching the top so the cheese doesn’t fall apart into separate strips. Then gently pull the cut part apart into thin strands with your fingers and spread them out a little to make the broom bristles.
- Attach the handles. Carefully insert a pretzel stick about ½ inch (1.3 cm) into the solid end of each cheese piece. Don’t push too hard, or the cheese might split.
- Tie the broomsticks. Rinse and dry the chives. Wrap one chive stem around the top of the cheese bristles, close to the pretzel stick, and gently tie a knot. Trim off the extra ends with kitchen scissors.
And that’s it, voilà! Stand the finished broomsticks on a large plate or tray with the cheese bristles facing down. You’ll have a whole collection of witch’s transportation!
It’s best to assemble the cheese broomsticks shortly before the party, since the pretzel sticks gradually absorb moisture from the cheese and lose their crunch. If you need to prepare ahead of time, cut the mozzarella and keep it in the fridge, then leave the final assembly for the morning. Keep the finished broomsticks in the fridge until serving, too.
By the way, we grow chives right in our garden. Their thin stems are great for a regular omelet and for little food decorations like these. Although you do need to pick the longest ones for the broomsticks — the short ones are pretty tricky to tie into a knot. I always grab a few extra stems because some of them inevitably break.
4. Banana ghost pops
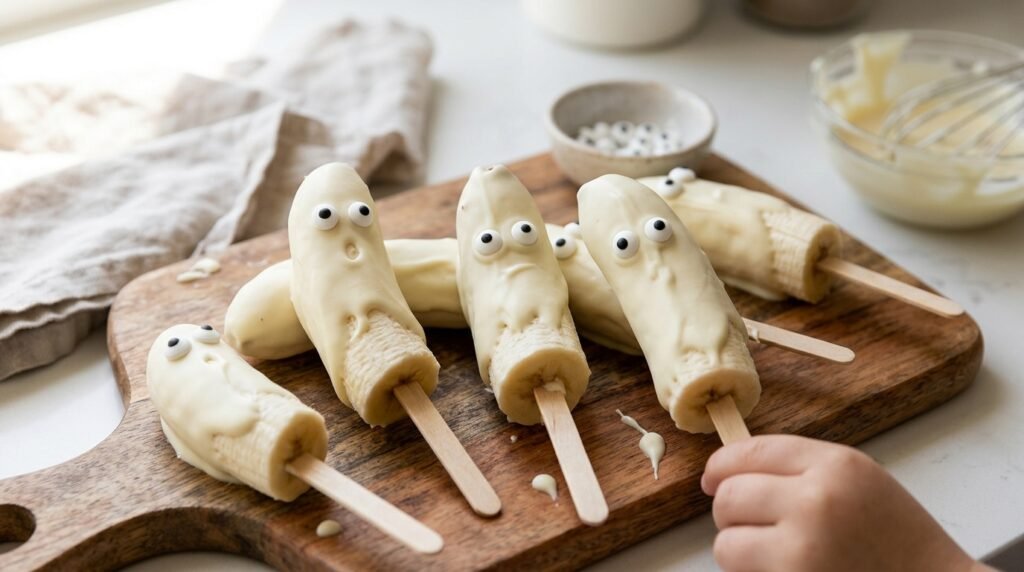
These little ghosts on sticks are made from bananas covered in white chocolate. Add two candy eyes, and an ordinary fruit turns into a fun Halloween treat. Kids love deciding where to place the eyes themselves, giving each ghost its own funny and slightly scary expression.
You’ll only need three edible ingredients, and the bananas will spend most of the time in the freezer. You can prepare them ahead of time, which is really convenient before a school party.
Ingredients
Makes 4 ghosts.
- 2 large bananas
- 3½ oz (100 g) white chocolate
- 8 edible candy eyes
- 4 wooden popsicle sticks
How to make them
- Prepare the bananas. Peel the bananas and cut each one in half crosswise. Place the halves on a plate lined with parchment paper and put them in the freezer for 30 minutes. During this time, the bananas will firm up, making them easier to coat with chocolate.
- Melt the chocolate. Break the white chocolate into small pieces and place them in a deep bowl. Microwave in short 15–20 second intervals, stirring each time. As soon as the chocolate becomes smooth and melted, stop heating it, since white chocolate is easy to overheat.
- Make the ghosts. Take the bananas out of the freezer and carefully insert a wooden stick into the flat cut end of each half. Holding the banana by the stick, dip the top part into the melted chocolate. Let the excess chocolate drip back into the bowl.
- Attach the eyes. While the chocolate is still soft, attach two candy eyes to each banana. Then stand the ghosts upright in a tall, sturdy glass so the chocolate can set without touching any other surfaces.
Done! We’ve made four little banana ghosts that you can hold by their sticks, just like popsicles.
And yes, for kids’ parties, it’s better to use wooden popsicle sticks rather than long, sharp skewers.
If you need to make treats for an entire classroom, simply increase the ingredients, and six bananas will give you 12 ghosts.
It’s best to keep the finished bananas in the fridge and take them out shortly before serving. If the party is in a warm room, the chocolate coating will gradually soften, so don’t leave the dessert sitting out on the table for too long.
This recipe is really simple, and you won’t even need a special dessert mold. And it’s great that you can get the kids involved in decorating the ghosts — just let the adults melt the chocolate and leave the eyes to the kids. This is usually the part of the process that gets everyone the most excited and having fun.
5. Cucumber mummy bites
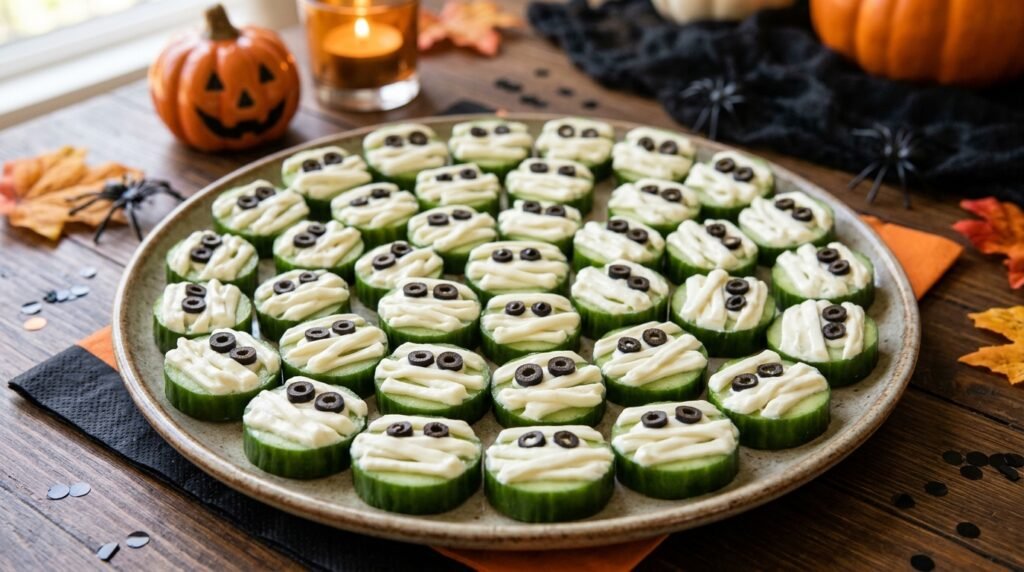
Let’s continue our collection of Halloween treats with little cucumber mummies with cream cheese and black olive eyes. They look pretty funny and cute, especially when you have a whole group of these mummies on one plate.
There’s no bread, dough, or sweet frosting here. Just fresh vegetables and cream cheese.
Ingredients
Makes 24 mini snacks.
- 2 long English cucumbers
- 4 oz (115 g) plain cream cheese
- 6–8 pitted black olives
How to make them
- Cut the cucumbers. Wash them well and dry them with a towel. Cut each cucumber in half lengthwise, then cut each half crosswise into 2–3 pieces, depending on the size of the cucumber. You’ll get long pieces for your mummies. Arrange them cut side up and pat them dry with a paper towel so the cheese sticks better.
- Prepare the cheese. Take the cream cheese out of the fridge about 15–20 minutes before making the snacks so it softens a little. Transfer it to a piping bag with a small round tip. If you don’t have one, you can use a regular sturdy food storage bag and snip off a tiny corner.
- Draw the bandages. Pipe several thin lines of cream cheese onto each cucumber piece, placing them diagonally and slightly crossing them to look like the bandages wrapped around a mummy. Leave a little space at the top for the eyes. Try not to make the lines too thick, or the pattern will be hard to see.
- Attach the eyes. Cut the olives into small pieces and place two on each cucumber, gently pressing them into the cream cheese. And that’s it, our mummies are ready!
Arrange the finished snacks on a large platter. Keep them in the fridge until the school party, and use a container with a tight-fitting lid for transporting them. Cucumbers gradually release moisture, so it’s best to make the mummies on the day of the party.
Get the kids involved in decorating these little mummies. Let them pipe the cheese bandages and attach the eyes while the adults cut the cucumbers. We’re always happy to share this kind of kitchen work with little helpers. And a whole group of mummies looks really funny on the party table.
6. Sunflower butter spider crackers
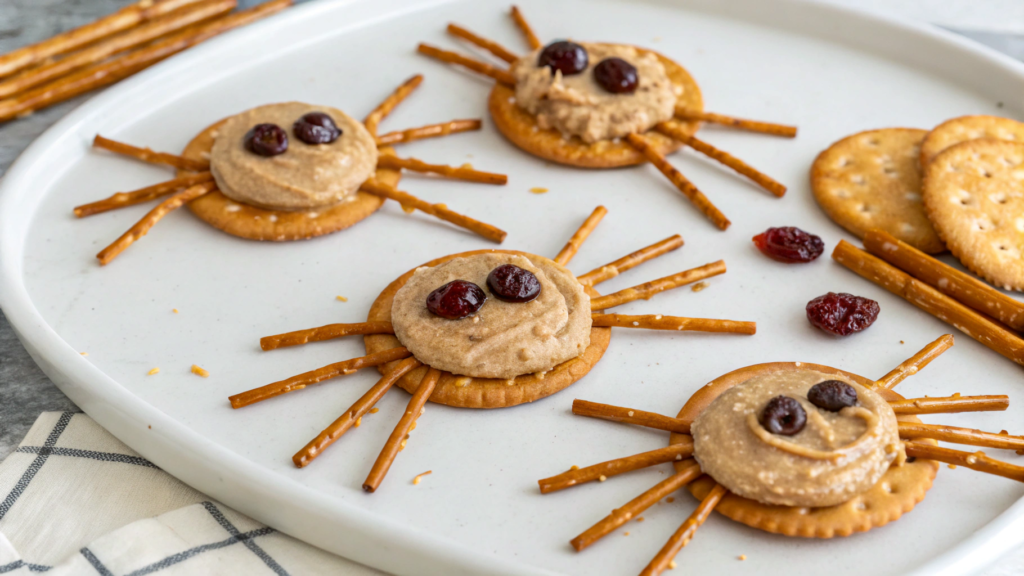
Crunchy crackers with sunflower butter, pretzel stick legs, and raisin eyes are a fun Halloween snack you can make with the kids.
Instead of the usual peanut butter, we’ll use sunflower seed butter. They’re similar in taste and texture, but sunflower butter doesn’t contain peanuts, which are a common food allergen. Still, before the school party, it’s worth checking with the teacher which foods are allowed in the classroom.
Ingredients
Makes 12 spiders.
- 24 round crackers
- 6 tbsp sunflower butter, such as SunButter Sunflower Butter
- 48 thin pretzel sticks
- 24 raisins for the eyes
How to make them
- Prepare the crackers. Arrange 12 crackers on a cutting board or large tray. Spread sunflower butter on each one, saving a little for attaching the eyes. The layer should be thick enough to hold the spider legs in place.
- Make the legs. Break each pretzel stick in half. You’ll need eight short pieces for each cracker. Arrange four on each side, gently pressing the ends into the sunflower butter. The loose ends should stick out, just like real spider legs.
- Assemble the spiders. Cover each one with a second cracker and gently press down. Don’t press too hard, or the fragile pretzel sticks might break.
- Attach the eyes. Add two small dots of sunflower butter to the top cracker and stick the raisins onto them. Repeat with the remaining spiders.
And we did it! We’ve made 12 little spiders that you can arrange on a plate or tray. Some of their legs will probably stick out in different directions, but that’s actually pretty funny for Halloween.
It’s best to make the spiders on the day of the party so the crackers stay crunchy. Transport them in a wide container in a single layer, or the legs might break. And be sure to check the ingredients in the crackers and sunflower butter, especially if you’re making these for kids with food allergies.
I think the kids will enjoy assembling these spiders the most. In situations like this, Lindy leaves the decorating to the little helpers while she lays out the ingredients and makes sure everything doesn’t disappear too soon. After all, it’s pretty hard to resist snacking on pretzel sticks while making spider legs!
7. Roasted chickpea snack mix
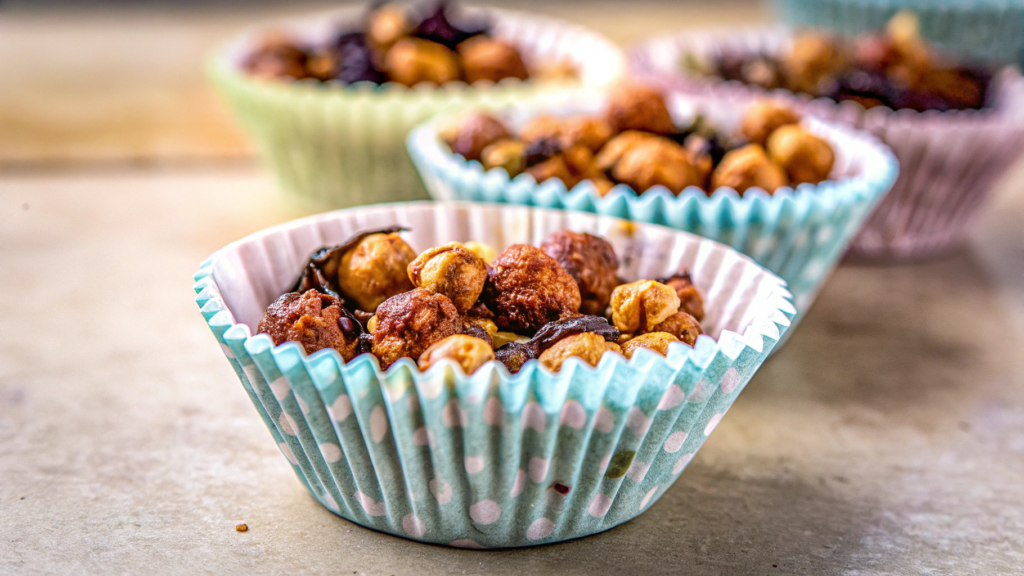
Roasted chickpeas, pumpkin seeds, nuts, dried cherries, and dark chocolate pieces — we’ll use these ingredients to make an unusual sweet and salty Halloween snack. The chickpeas will turn out crunchy, almost like nuts, while cinnamon and maple syrup will give them a nice spiced flavor.
You can easily divide this mix into small paper cups so each kid can grab their own portion. And, importantly for a school party, you can make it ahead of time.
Ingredients
Makes about 2 cups of snack mix (around 6 small servings).
- 1 can (15 oz / 425 g) chickpeas
- ½ tbsp melted coconut oil
- ½ tbsp maple syrup
- ½ tsp ground cinnamon
- ½ tsp salt
- ⅛ tsp smoked paprika, optional
- ¼ cup (35 g) shelled pumpkin seeds
- ¼ cup (35 g) raw almonds or pecan halves
- ⅓ cup (45 g) dried cherries
- ¼ cup (45 g) small dark chocolate pieces
How to make it
- Prepare the chickpeas. Preheat the oven to 375°F (190°C) and line a baking sheet with parchment paper. Drain the can, rinse the chickpeas under cold water, and dry them thoroughly with paper towels. If some of the thin skins come off, just remove them.
Spread the chickpeas on the baking sheet in a single layer and put them in the oven for 10 minutes without oil or spices. This helps remove excess moisture and makes them crunchier. - Add the spices. Take the baking sheet out of the oven and drizzle the chickpeas with melted coconut oil and maple syrup. Sprinkle with cinnamon, salt, and smoked paprika if you’re using it. Gently mix everything and return to the oven for another 10 minutes.
- Toast the nuts and seeds. Take the baking sheet out again and give it a gentle shake to turn the chickpeas. Add the pumpkin seeds and almonds, spreading them between the chickpeas.
Roast for another 8–10 minutes, until the nuts are lightly browned and the chickpeas are golden and crunchy. Then let everything cool completely. - Mix everything together. Transfer the cooled chickpeas, nuts, and seeds to a large bowl. Add the dried cherries and dark chocolate pieces. Gently stir until all the ingredients are evenly mixed.
And our crunchy snack mix is ready! Just make sure to add the chocolate only after the chickpeas have cooled completely, or it will start melting and make the other ingredients stick together.
For a school party, you can divide the mix into small paper snack cups so it’s easier for kids to grab their treats.
Just keep in mind that the mix contains almonds and pumpkin seeds, which may not be allowed in some schools because of allergies. And hard nuts, seeds, and crunchy chickpeas aren’t suitable for very young children because they can be a choking hazard.
So before making this snack, be sure to check with the teacher which foods are allowed at school and whether this snack is appropriate for the kids’ age.
I often make roasted chickpeas as a snack on their own, but adding dried fruit and chocolate makes them much more interesting and delicious. For Halloween, this mix can easily join all the sweet desserts on the table. I’d just suggest making a little extra if the treats are meant for both kids and adults!
8. Mini bell pepper jack-o’-lanterns with cheese filling
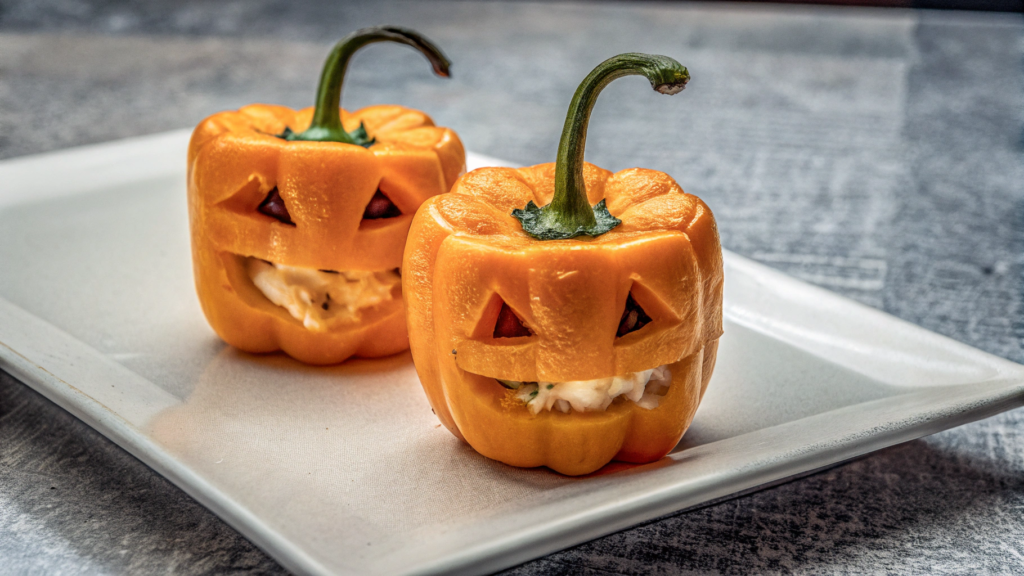
Small orange peppers look a lot like miniature pumpkins. And if you cut out triangle eyes, a nose, and a toothy smile, you’ll get real jack-o’-lanterns, only edible. We’ll fill them with creamy cream cheese, cheddar, and green onions.
For this recipe, choose mini sweet peppers, not hot ones. They’re crunchy enough to hold their shape and usually don’t need to be baked.
Ingredients
Makes 12 mini peppers.
- 12 small orange sweet peppers
- 8 oz (225 g) plain cream cheese
- ½ cup (55 g) shredded cheddar cheese
- ¼ tsp garlic powder
- 2 tbsp finely chopped green onions
How to make them
- Prepare the peppers. Wash them well and dry them with a towel. Carefully cut off the tops with the stems using a sharp knife, but don’t throw them away. Remove the seeds and inner membranes through the openings.
- Carve the faces. Take a small sharp knife and cut two triangular holes for the eyes and one for the nose on the side of each pepper. Below them, cut a wide smile with a few triangular teeth, just like a jack-o’-lantern. Don’t make the details too small, since the walls of mini peppers are pretty thin and can tear.
- Make the filling. In a bowl, combine the softened cream cheese, shredded cheddar, garlic powder, and finely chopped green onions. Mix well with a spoon until smooth.
- Fill the little pumpkins. Carefully spoon the cheese filling into the peppers. Don’t pack it too tightly, or you might damage the carved faces. Put the tops with the green stems back on.
- Chill them. Place the finished peppers in the fridge for at least 30 minutes so the filling becomes firmer. Before serving, arrange them on a large platter with their faces pointing forward.
Oh, I can already imagine how funny a whole plate of these little pumpkins will look!
For a school party, it’s convenient to prepare the peppers the day before. Carve the faces, make the filling, and keep everything separately in the fridge. The next day, all you’ll need to do is fill the little pumpkins with cheese and put their green hats back on.
Only adults should carve the faces with a sharp knife! But kids can help make the cheese filling and fill the peppers. Lindy and I always try to find something for our little helpers to do in the kitchen, especially when we’re preparing something for a holiday.
9. Chocolate covered strawberry ghosts
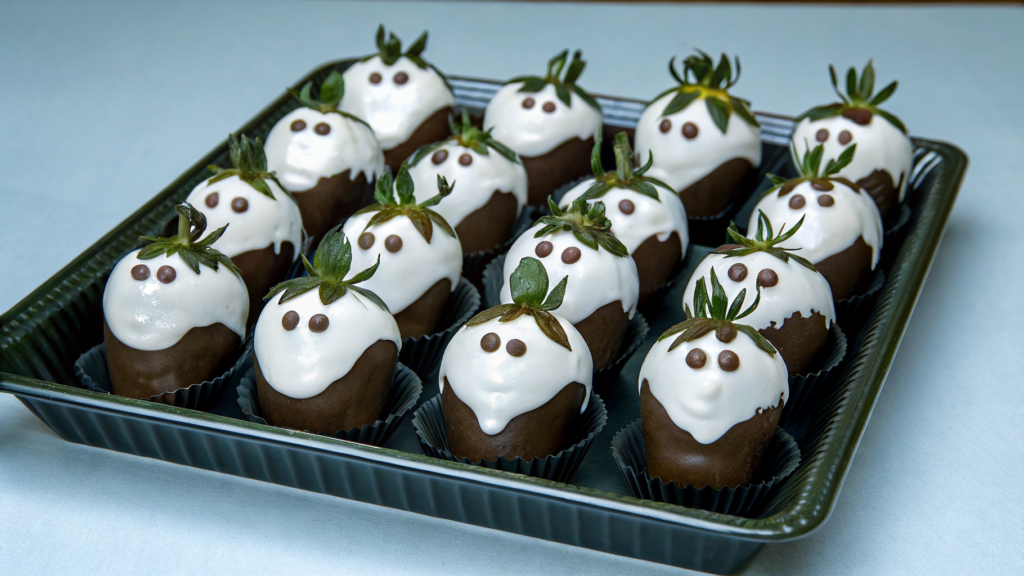
You won’t even need special molds to make this fun Halloween dessert. Strawberries, a little chocolate, a few minutes of decorating, and you’ll have a whole group of little ghosts.
I recommend choosing large, ripe strawberries with green stems. They’re easy to hold by the stems when dipping them in chocolate. And the stems also look nice on the finished ghosts.
Ingredients
Makes 18–20 ghosts.
- 1 pint (about 450 g) fresh strawberries with green stems
- 1½ cups (255 g) white chocolate chips
- ¼ cup (45 g) dark chocolate chips
How to make them
- Prepare the strawberries. Rinse the berries well and dry them thoroughly with paper towels. There shouldn’t be any water left on the surface, or the chocolate won’t stick well. Don’t remove the stems. Line a large baking sheet or tray with parchment paper.
- Melt the white chocolate. Put the chocolate chips in a deep bowl and microwave for 30 seconds. Take the bowl out, stir, and continue heating in short intervals, stirring each time, until the chocolate is completely melted.
- Make the ghosts. Hold a strawberry by its green stem and dip it into the white chocolate, leaving a little red flesh visible at the top. Place the berry on the parchment paper and gently drag it along the surface to create a little chocolate tail at the bottom, just like a ghost. Repeat with the remaining berries.
- Draw the faces. Melt the dark chocolate. Once the white coating has set, dip the tip of a toothpick into the dark chocolate and draw two round eyes and an oval open mouth on each berry. Dip the toothpick into the chocolate a few more times if needed. You’ll get funny, frightened little faces!
Leave the strawberries on the baking sheet until the chocolate has completely hardened. If needed, you can put them in the fridge for a little while to speed things up.
For a school party, it’s best to make the strawberry ghosts on the day of the party. Arrange them in a single layer in a container and keep them in the fridge until serving. Don’t stack the berries on top of each other, or you might damage the ghost shapes and their little faces.
We love fruit desserts where the flavor of fresh fruit doesn’t get lost behind sweet toppings. Here, white chocolate pairs perfectly with the slight tartness of strawberries, and you can decorate them in all kinds of ways.
Try giving some big round eyes and others small eyes with wide-open mouths. That way, every ghost will look a little different, and together they’ll look really funny on a party platter.
10. Popcorn balls with dried fruit
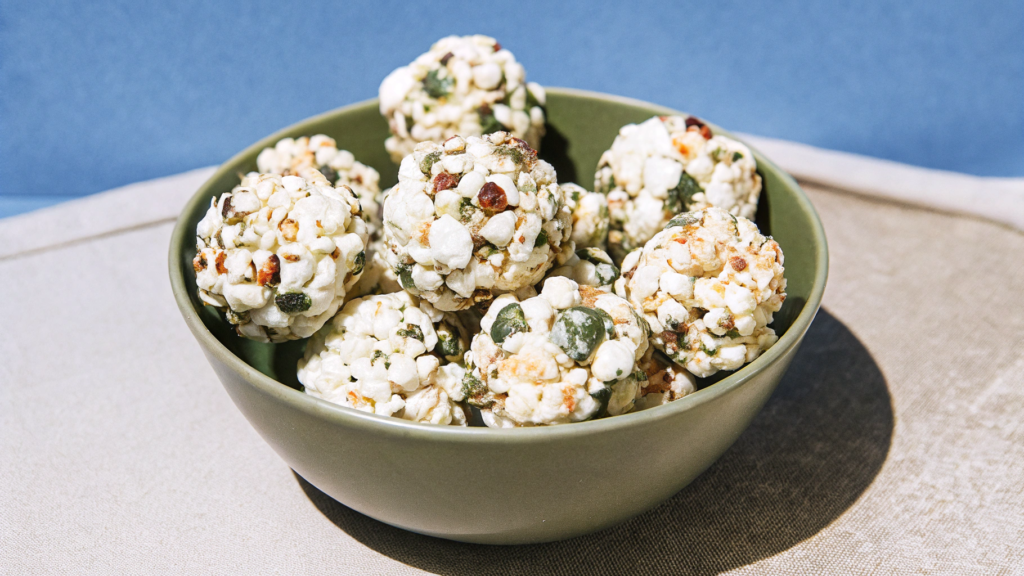
And finally, let’s make sweet popcorn balls with dried cranberries and maple syrup. They’re an interesting alternative to regular candy and cookies. The popcorn turns out sweet, while the cranberries add a nice tartness to the dessert.
We’ll only need five ingredients to make them. You can make the balls in the evening, leave them overnight, then pack them up in the morning and take them to the school party.
Ingredients
Makes 12 popcorn balls.
- 8 cups popped popcorn without salt or added flavorings
- 1 cup (about 120 g) dried cranberries
- ½ cup (100 g) brown sugar
- ½ cup (120 ml) maple syrup
- 3 tbsp (42 g) butter
How to make them
- Prepare the popcorn. Make the popcorn your usual way or use store-bought popcorn without salt or butter. Be sure to remove all unpopped kernels so they don’t accidentally end up in the balls. Transfer the popcorn to a large bowl and add the dried cranberries. Gently mix everything together.
- Make the sweet syrup. Combine the brown sugar, maple syrup, and butter in a small saucepan. Place over medium heat and warm the mixture, stirring constantly. Once the butter has melted and the mixture starts boiling, continue cooking for about 4 minutes, stirring frequently, until the syrup thickens slightly.
- Mix the ingredients. Remove the saucepan from the heat and carefully pour the hot syrup over the popcorn and cranberries. Quickly stir with a large spoon or silicone spatula so the syrup coats the popcorn evenly. Be careful, as the hot sugar mixture can cause burns.
- Shape the balls. Let the mixture cool slightly so it’s safe to handle, but don’t wait until the syrup has completely hardened. Wet your hands with cold water and shape 12 balls about 2 inches (5 cm) in diameter. Press each portion firmly so the popcorn sticks together and holds its shape. If the mixture sticks to your hands, wet them lightly again.
- Let them set. Arrange the balls on a sheet of wax paper and let them cool completely. Then leave them at room temperature overnight so the syrup can fully harden and the balls become firmer.
The next morning, you can wrap each portion in plastic wrap or place it in an individual bag. This makes it easier for kids to grab a treat, and the balls won’t stick together during transport.
Before making these for a school party, be sure to check with the teacher whether this snack is appropriate for the kids’ age and whether homemade sweets are allowed. Popcorn isn’t suitable for very young children because of the choking risk.
We generally like to prepare treats ahead of time, especially when we have a busy holiday coming up. Popcorn balls can be made the night before, so in the morning, all that’s left to do is pack them up and take them to the party.
Halloween party snacks
I think choosing two or three treats that kids can easily grab with their hands is more than enough for a school party. There’s no need to make lots of different dishes, especially if other parents are bringing something too.
We try to give kids a chance to help with the holiday preparations. Even if it means cleaning up crumbs, chocolate, and leftover decorations afterward. But there’s so much excitement when they get to show their friends a treat they made themselves!
What Halloween snacks do you make? Tell me in the comments! I’d love to read your ideas, especially if they help make preparing for a school party a little easier.